
The Process
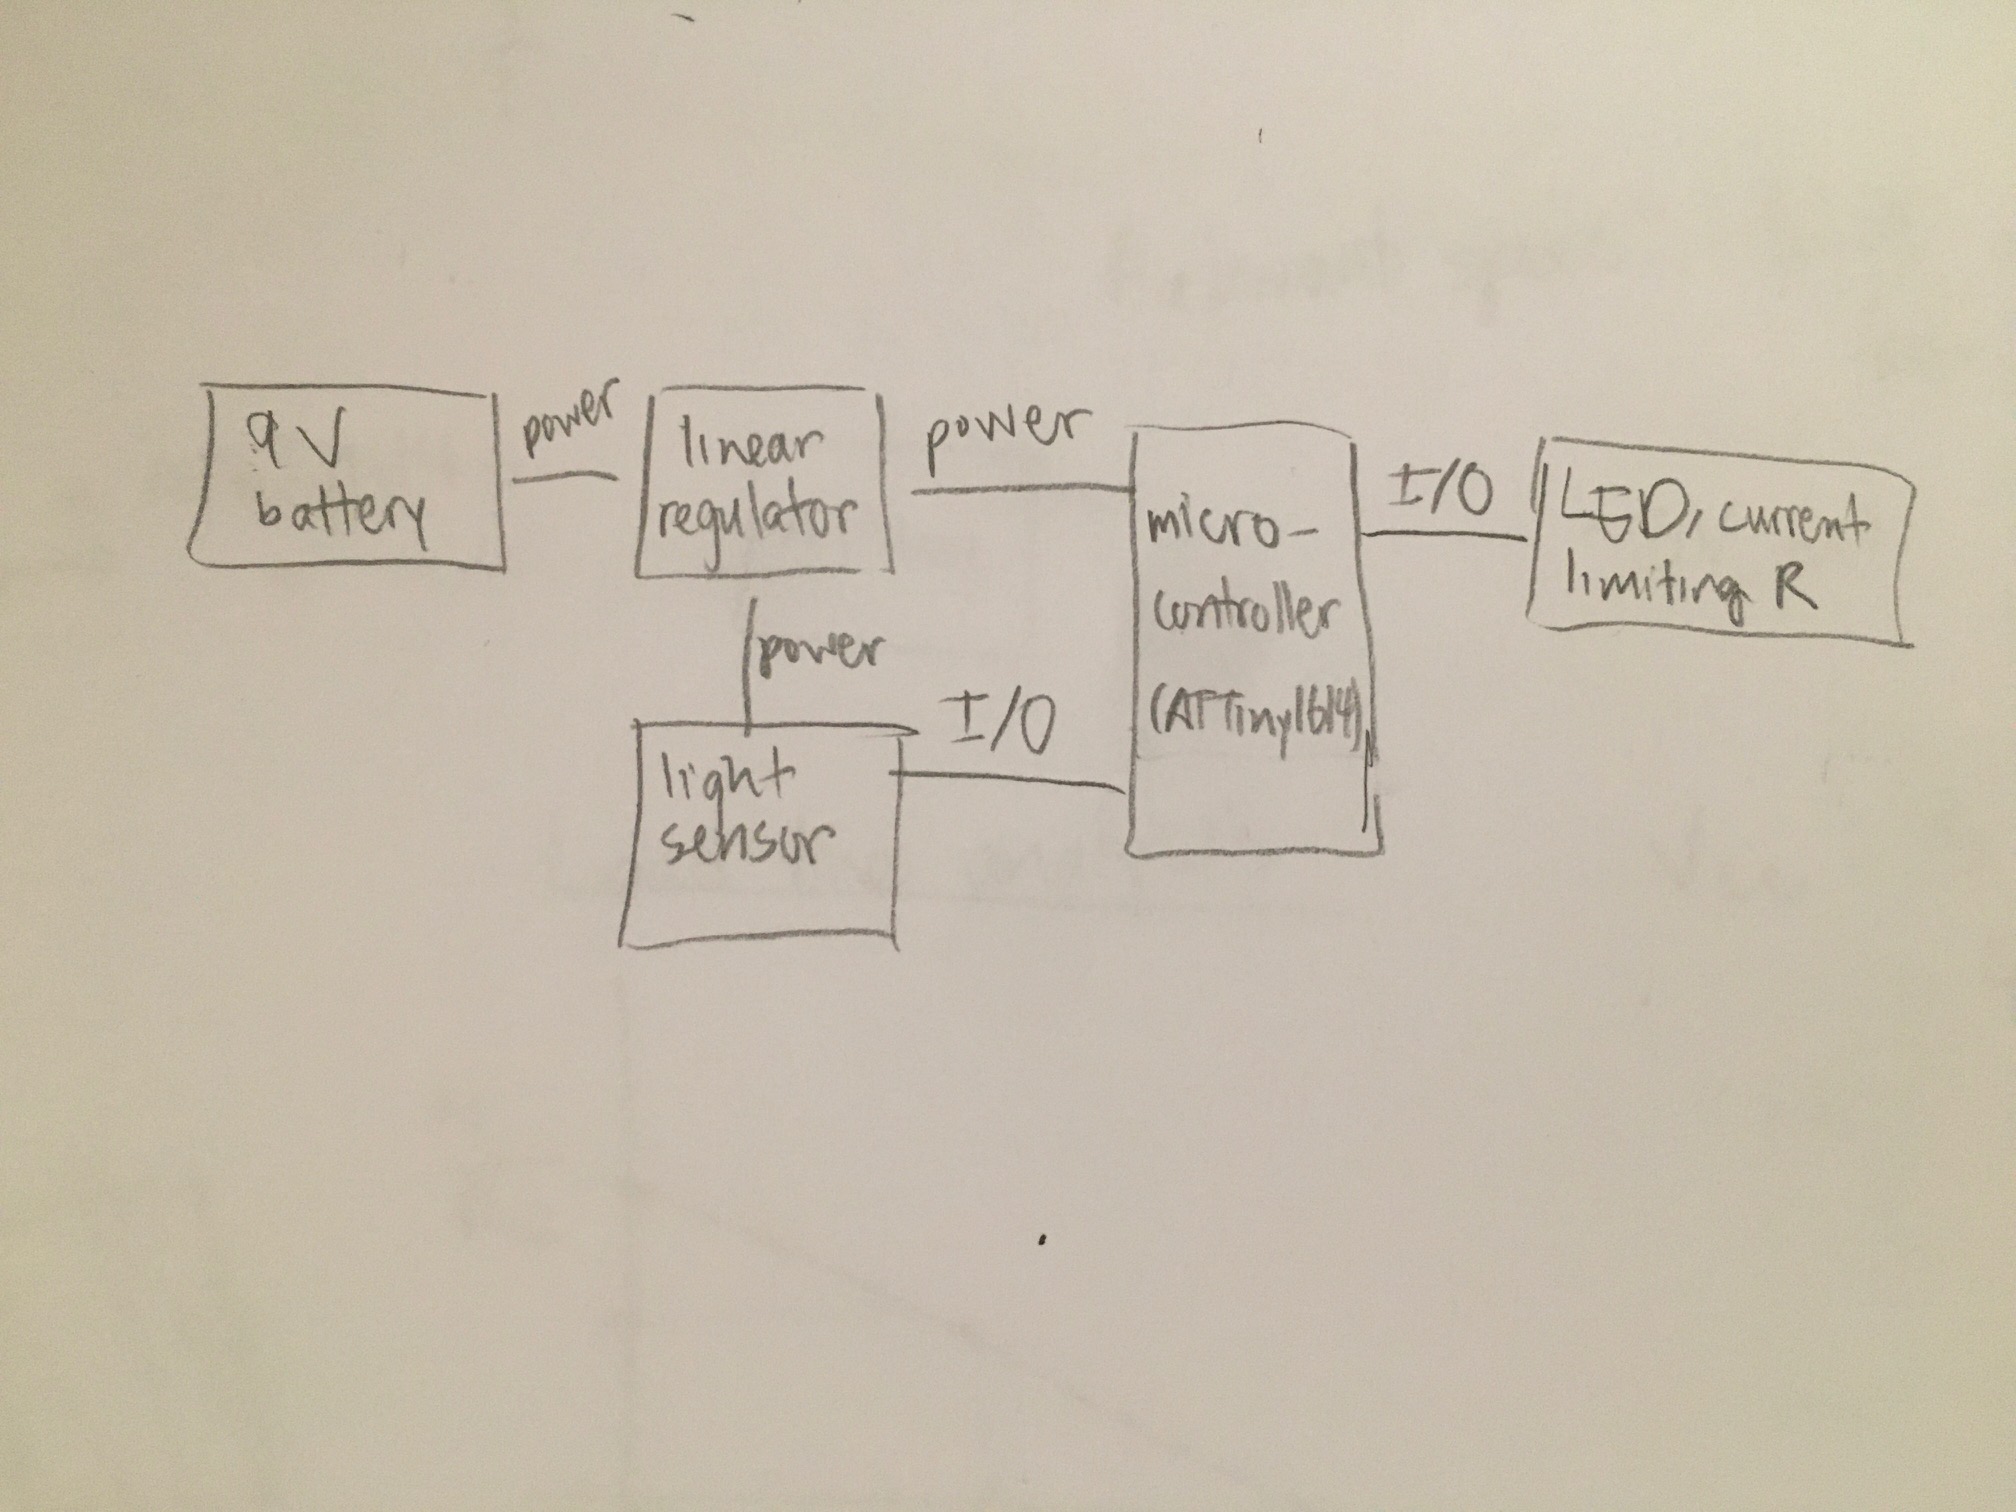
- Electronics I want to make a circuit that lights up LEDs when the light level in the room/area dims. To accomplish this, I thought it would make sense to make a light sensing circuit with a light-dependent resistor and a 555 timer to create a PWM signal with a varying duty cycle. However, after getting flamed in a review it seemed prudent to take a more digital approach. Instead, I'll use a phototransistor, an op-amp (maybe), and a microcontroller. For this system, my primary concern is power consumption and heat dissipation. I don't want to have to constantly be switching out batteries or have a really hot circuit on a piece of clothing that I'm wearing. Here is the initial design for the light level sensor. This design consists of a phototransistor and a resistor. The phototransistor will be in a common-collector configuration (shoutout to 6.321). In this configuration, when the voltage at the base increases, the voltage at the output also increases. For a phototransistor, the voltage at the base increases when the light level increases.
- Sewing the dress So apparently EDS has a sewing machine that never gets used, which is convenient for my purposes. I don't actually know how to sew..yet. So I hit up youtube. I found tutorials for the bodice here and the skirt here. I considered modeling the dress so I could use the laser cutter to cut it out, but that's overkill and will likely result in a stinky dress. Here is a first pass of the pattern for the dress:
- Clip le battery Inititall, I wanted to secure the cape to the dress with a pair of hooks and loops that will be sewn to the dress and the cape respectively. Here is what I designed:
- Sewing with Conductive Thread and Embedded Programming This is one of the trickiest part of my project, figuring out the connection between the PCB and the lights on the dress. One of the TAs in the class suggested connecting the conductive thread with clear nail polish. I will try this. Unfortunately, the sewing machine in EDS cannot sew with the single bobbin of conductive thread that I have, so I will have to sew the LEDs and conductive thread by hand. I sewed on two of the LEDs using the conductive threads. The material that I was sewing the conductive thread on was a very open weave so this was tricky: I didn't want to put too much strain on the fabric but couldn't have the thread so loose that something got shorted. I started off with one LED, then ran some tests, then added two, then while running more tests saw some smoke coming from near the board.
- Putting it all together With all of the individual components working, I needed to secure the board and battery to the dress. The right side of the board was already secured to the cape with the conductive thread, albeit somewhat loosely. I drilled another hole into the board and tied that on. I was going to add the battery onto the board, but decided it would be better to secure the battery clip to the dress, which was much more sturdy. The cape material (tulle) is not sturdy and even with just the board, got a lot of runs in it due to the securing of the board. :(
- Takeaways Things I got working: I got the dress to light based on the light level.
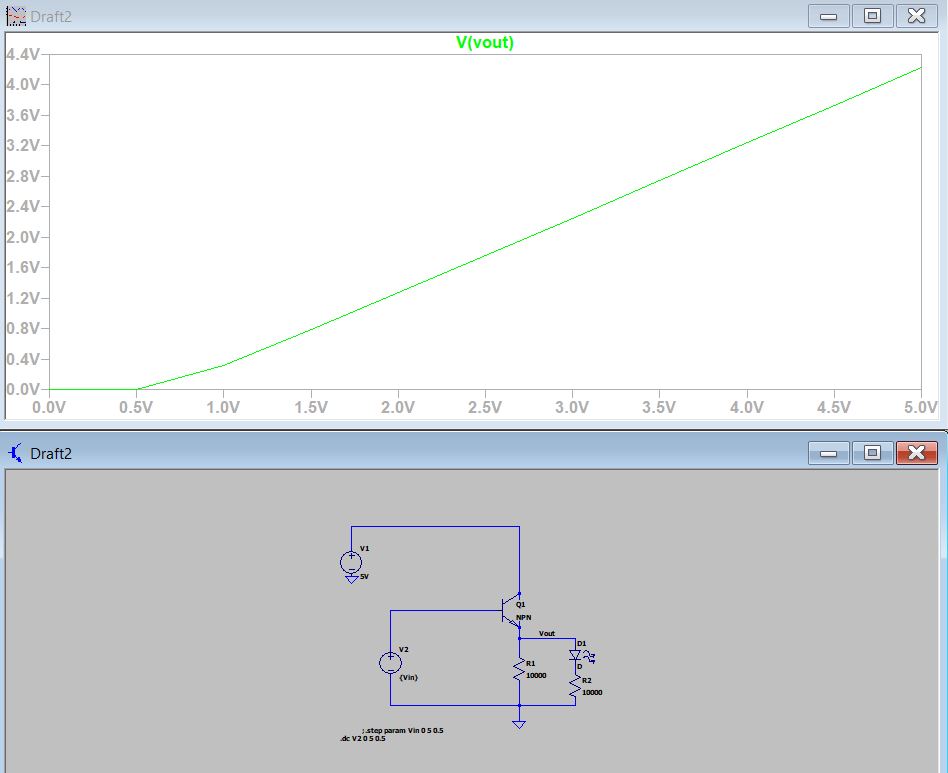 I tested this design with success! However, I could only generally correlate light level with the output voltage. I don't have a way to get quantitative data on this, I only have a qualitative understanding of how the voltage responds. After testing different values for the resistor in the inputs week, I learned that a value of about 5 kiloohms is a reasonable value. I then updated the design for the light sensor. The light sensor will be battery-powered. To get a more consistent and lowered voltage (since the circuit will be powered from a 9V battery) I'll be using a linear regulator. If I had infinite time, I would likely use a Buck Converter to lower the voltage. However, this would add more components and add design time and the power-saving benefits likely aren't worth it. This is a block diagram of the overall electronics system:
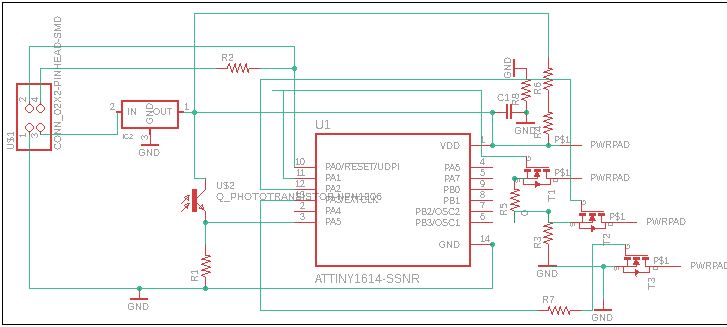
 For the output side, I'm thinking of driving 5 parallel channels of LEDs. In each of these channels, there will be 5 LEDs in series with a transistor to drive them and a current-limiting resistor. The ATtiny 1614 has enough pins to input the light sensor and drive each channel with it's own pin. I may try to do something clever with pins should I want more channels or effects, but for now that is fine. Here is an updated schematic:
 As I was finishing up the dress, I created a schematic for the final project. For the final project I'd need a battery connection, a linear regulator, the MOSFETs, and holes to tie the conductive thread to. To get this effect I used the 2x2 connector and another part in Eagle that had a hole circumscribed by a circular trace. I cut out the PCB, with several failed cuts. The first cut I used the wrong footprint for the MOSFETs (even after Anthony warned me to use the big one, whoops). The second had a problem with the tape. The middle of this one wasn't taped down properly, so it kept liftin up leading to super thin traces. The third one was very ugly, for unknown reasons, and I also forgot to add more offsets to prevent the different LED channels from shorting. The fourth time was the charm, and I quickly went to solder things up.
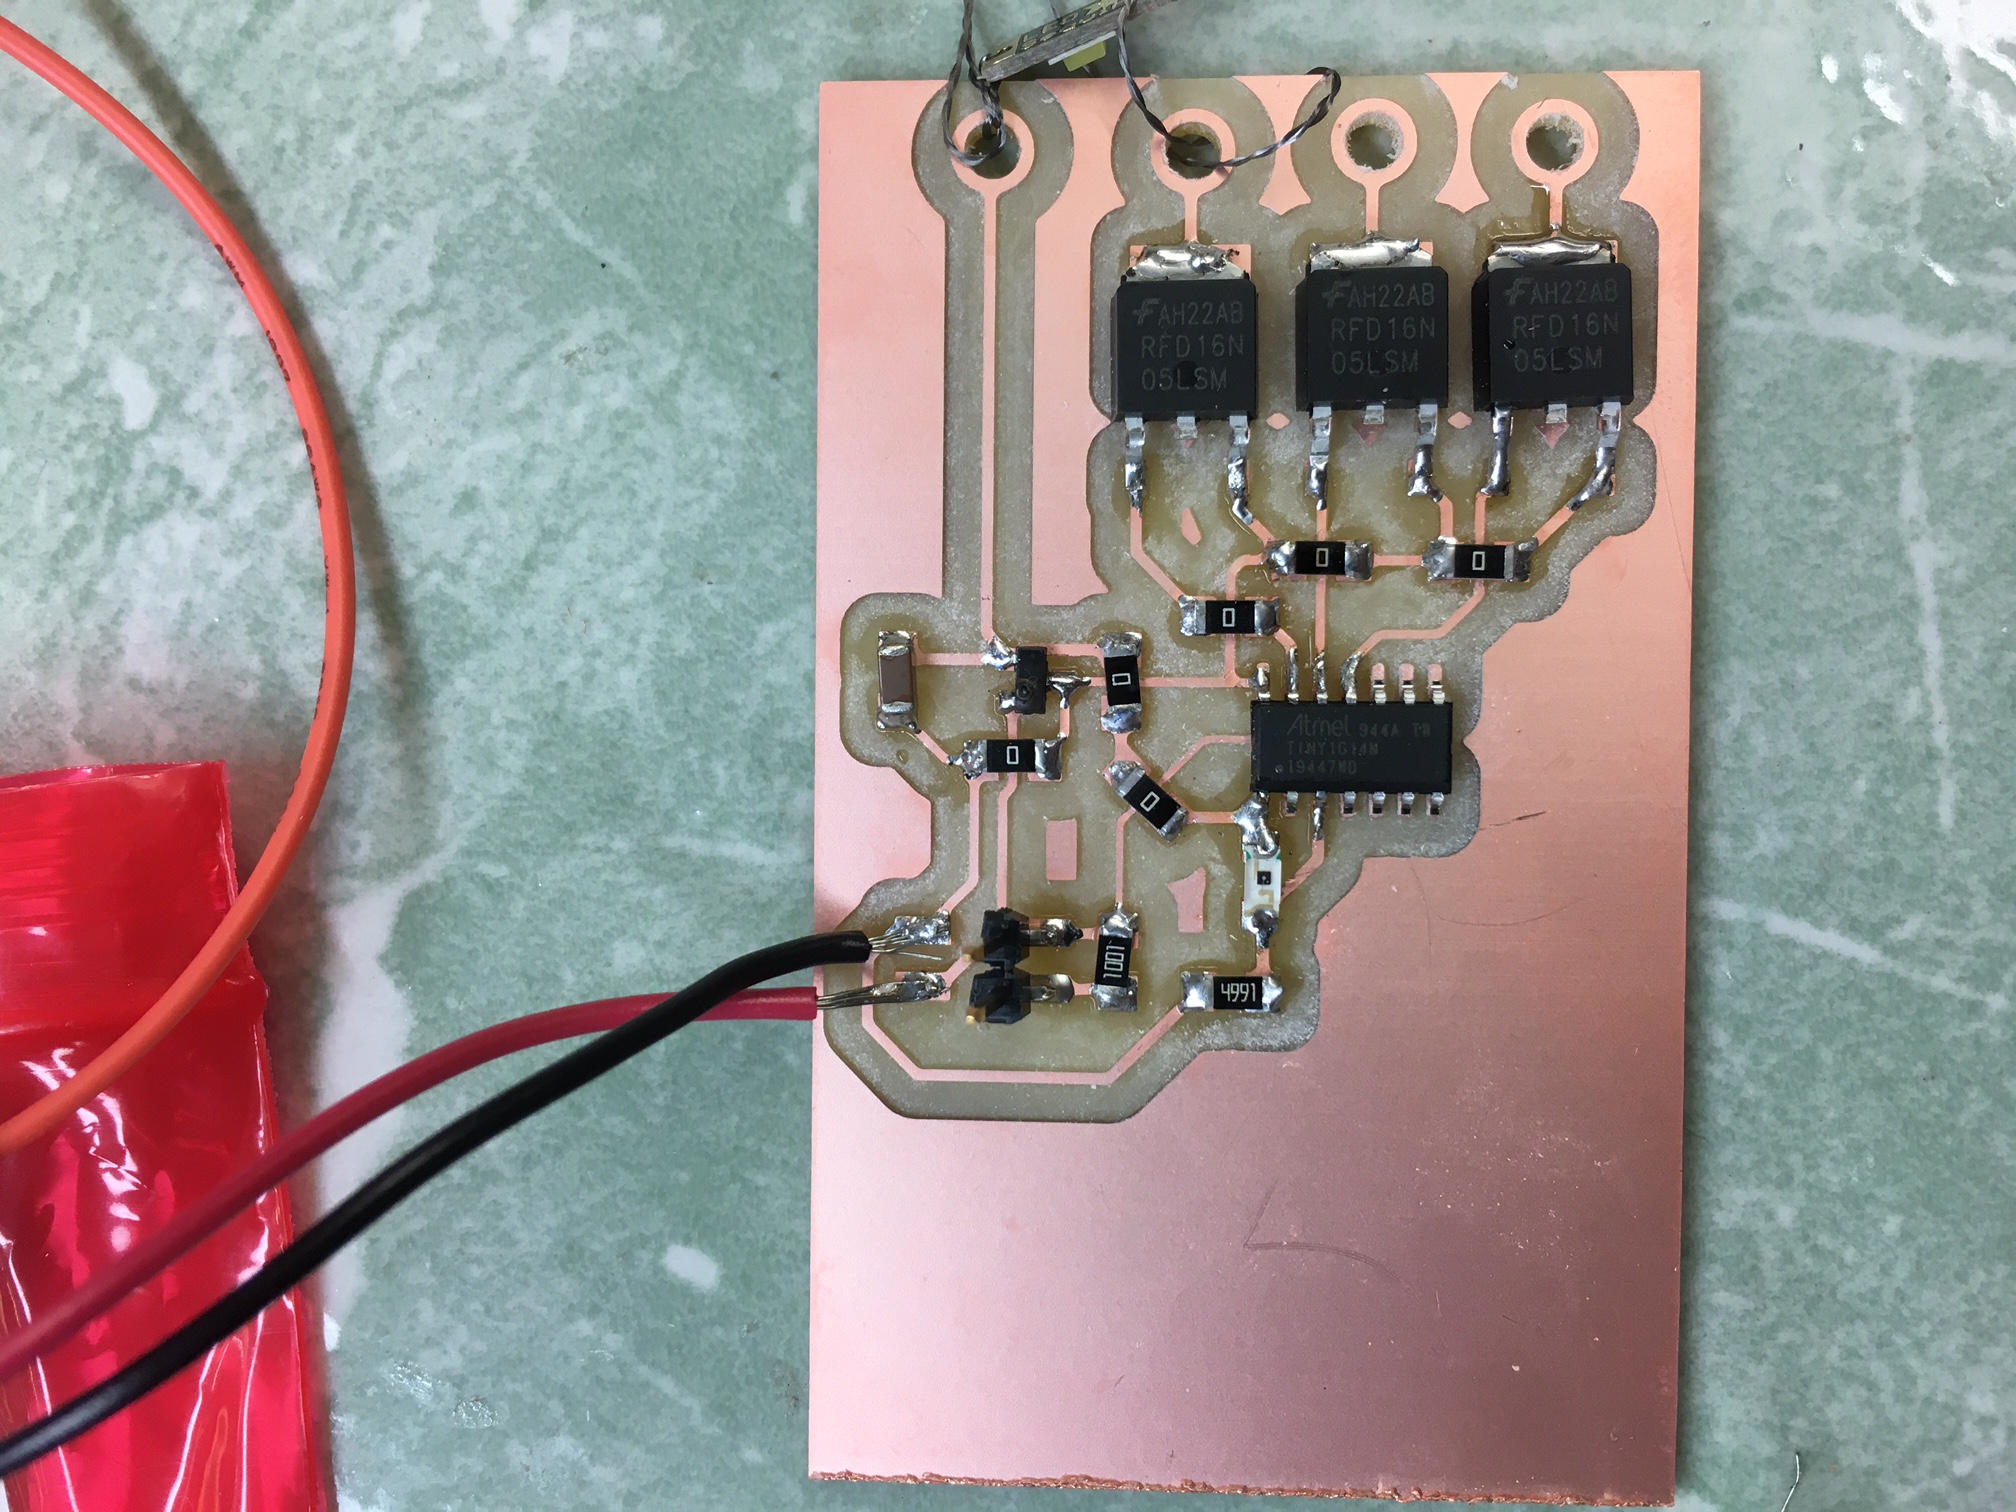 Once everything was soldering I tried to test the simple blink code with a single LED. But when trying to run the pyupdi script, the UPDI initialization failed. I looked over the schematic and the populated PCB and lo and behold my battery connector was backwards. The phototransistor was also backwards. I re-worked these things and tried again. The light sensor was working properly!
Alas, there was still a problem. I had forgotten to solder the UPDI pin on the ATTiny. Since the trace went through the microcontroller, I didn'y notice that I had to solder it. I fixed this, then ran into yet another failed initialization. I was worried that the battery was dead, so I checked that the microcontroller was getting power. It was, but it kept reading 4 V rather than 5 V that the linear regulator was supposed to output. Upon closer inspection, you could notice that there was a small bubble on the linear regulator. This might explain the smoke that I saw earlier when I first connected the battery backwards.
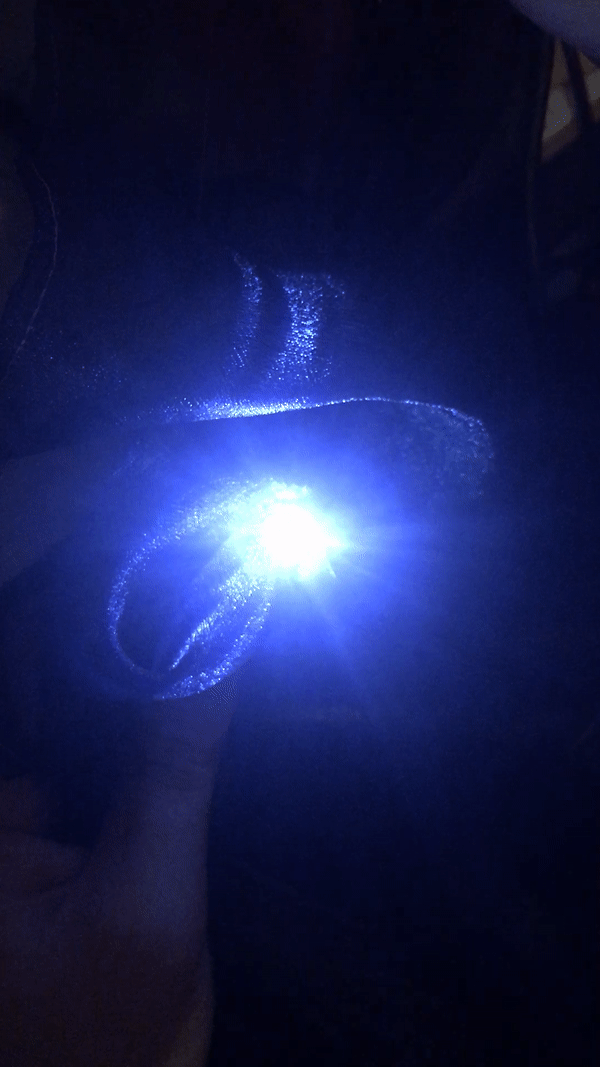
I replaced the regulator, and *still* got another error. I used the multimeter to check power, gnd, and UPDI. All of them were consistent with what I would expect, so I replaced the microcontroller. Success at last! I tested the conductive thread with the LEDs. In hindsight, I definitely could have made these sewable LEDs: all it was is a surface-mount LED matched with a 100 ohm resistor with little pads like the ones I made on the main board.
Once everything was soldering I tried to test the simple blink code with a single LED. But when trying to run the pyupdi script, the UPDI initialization failed. I looked over the schematic and the populated PCB and lo and behold my battery connector was backwards. The phototransistor was also backwards. I re-worked these things and tried again. The light sensor was working properly!
Alas, there was still a problem. I had forgotten to solder the UPDI pin on the ATTiny. Since the trace went through the microcontroller, I didn'y notice that I had to solder it. I fixed this, then ran into yet another failed initialization. I was worried that the battery was dead, so I checked that the microcontroller was getting power. It was, but it kept reading 4 V rather than 5 V that the linear regulator was supposed to output. Upon closer inspection, you could notice that there was a small bubble on the linear regulator. This might explain the smoke that I saw earlier when I first connected the battery backwards.
I replaced the regulator, and *still* got another error. I used the multimeter to check power, gnd, and UPDI. All of them were consistent with what I would expect, so I replaced the microcontroller. Success at last! I tested the conductive thread with the LEDs. In hindsight, I definitely could have made these sewable LEDs: all it was is a surface-mount LED matched with a 100 ohm resistor with little pads like the ones I made on the main board.
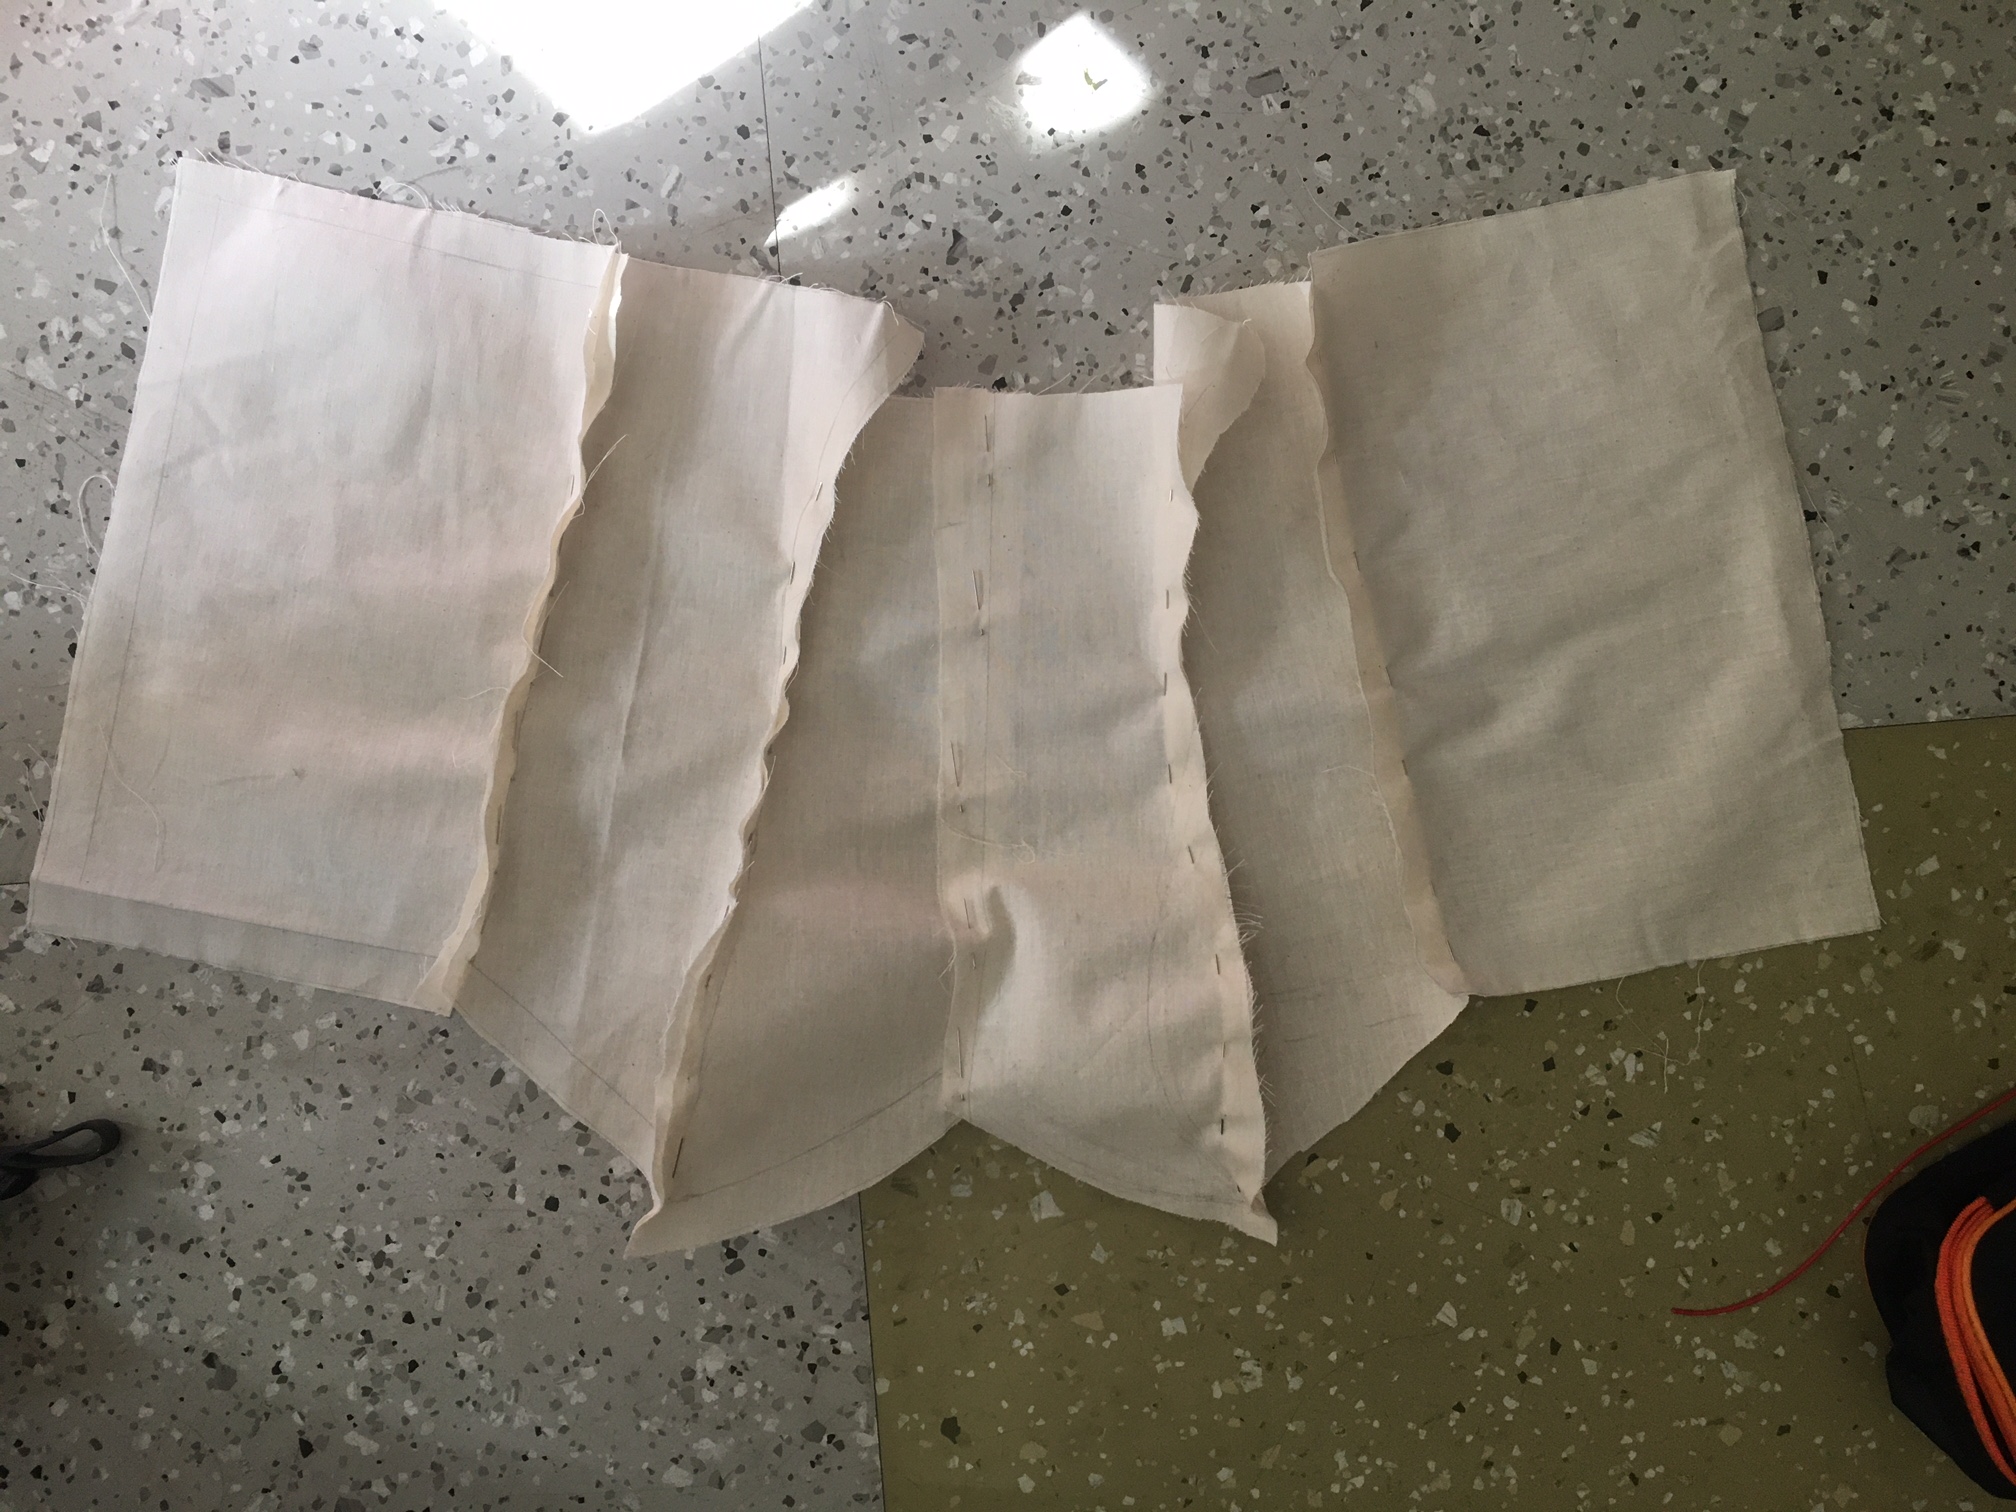
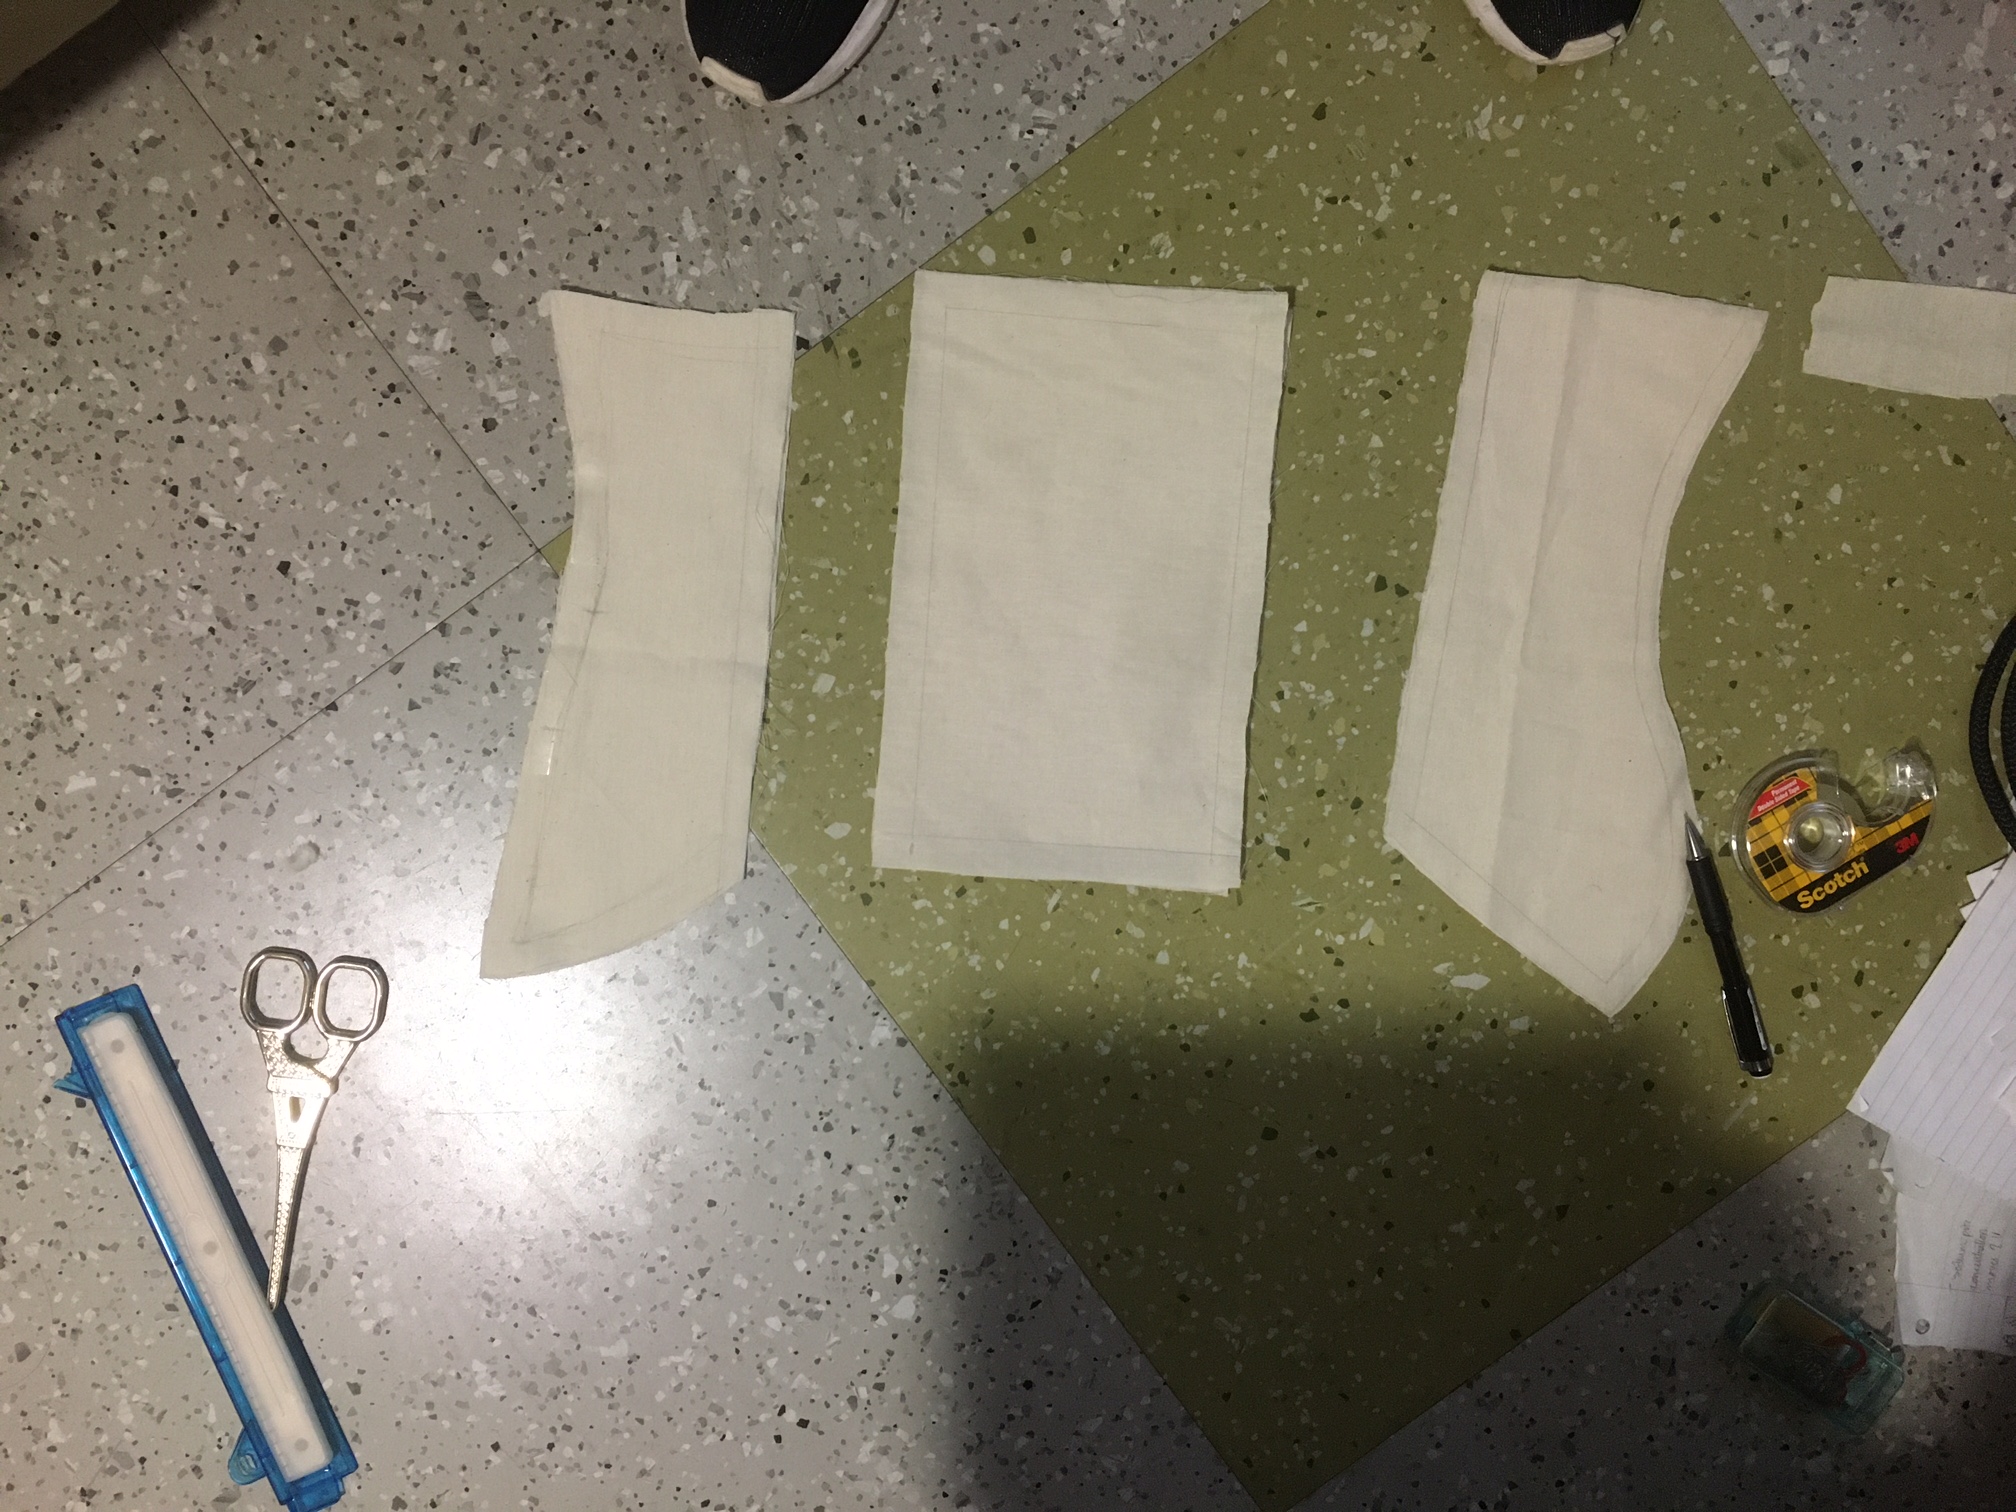 I tried finding a pattern online, but couldn't find one in my size for the particular silhouette I wanted. Instead, I took some muslin that I had ordered and cut out the different panels. There would be 3 types of panels: a front panel, a side one, and a back one. My first attempt was way too small, so I recut everything. After recutting everything I pinned it together and tried it on to see if I had to make any other adjustments. I pinned how the shape should be modifed while it was still on me, *very* carefully.
 Once the bodice was planned out, I began with creating the pattern for the skirt with muslin. To figure out the dimensions, I took my measurements and used them to draw out the shape. This did not work at all. The shape was very unnatural and the skirt was WAY too big. So instead I took a skirt that I already had that had a similar silhouette to the one I wanted and traced it out on the muslin. The skirt was still a bit big since the skirt I traced wouldn't lay down flat. But I just cut off the excess and all's well.
Now with the bodice and the skirt patterns completed, I cut out the different pieces in the outer shell fabric (a navy velvet) and in the lining fabric (navy cotton). These are the different pieces:
Once the bodice was planned out, I began with creating the pattern for the skirt with muslin. To figure out the dimensions, I took my measurements and used them to draw out the shape. This did not work at all. The shape was very unnatural and the skirt was WAY too big. So instead I took a skirt that I already had that had a similar silhouette to the one I wanted and traced it out on the muslin. The skirt was still a bit big since the skirt I traced wouldn't lay down flat. But I just cut off the excess and all's well.
Now with the bodice and the skirt patterns completed, I cut out the different pieces in the outer shell fabric (a navy velvet) and in the lining fabric (navy cotton). These are the different pieces:
Front panel x2
Side panel x2
Back panel x2
Skirt panel x2 Then it was off to EDS to learn how to sew. I was *very* intimidated but it was way easier to get started then I thought it would be. I read the manual for the sewing machine and it was well written and clear!
Plug in and turn on the machine
Ensure that the machine is threaded properly. If you look at the needle and the thread is through the eye of the needle, then this is ready to go (see later section for rethreading procedure)
Place your fabric under the pressor foot and align it properly. Put the thread through the foot so that it sticks out on the left of the foot (see picture).
Push down the gray lever to the right of the needle to lower the pressor foot. Double check that your fabric is aligned properly.
Select a stitch type on the LCD screen. For all of my stitches I used a simple straight stitch, but there are many available on this machine!
The arrow button should be green. Press this button to begin sewing. If this button is red, make sure you've selected a stitch and that the pressor foot is down.
Feed the fabric through the machine. And that's it, you're sewing! I first sewed some scrap fabric. It worked fairly well, but it was tricky to get perfectly straight stitches at first, that's harder than it looks!
Once the stitch is finished, press the arrow button again to stop the machine.
Then hit the scissors button to cut the thread.
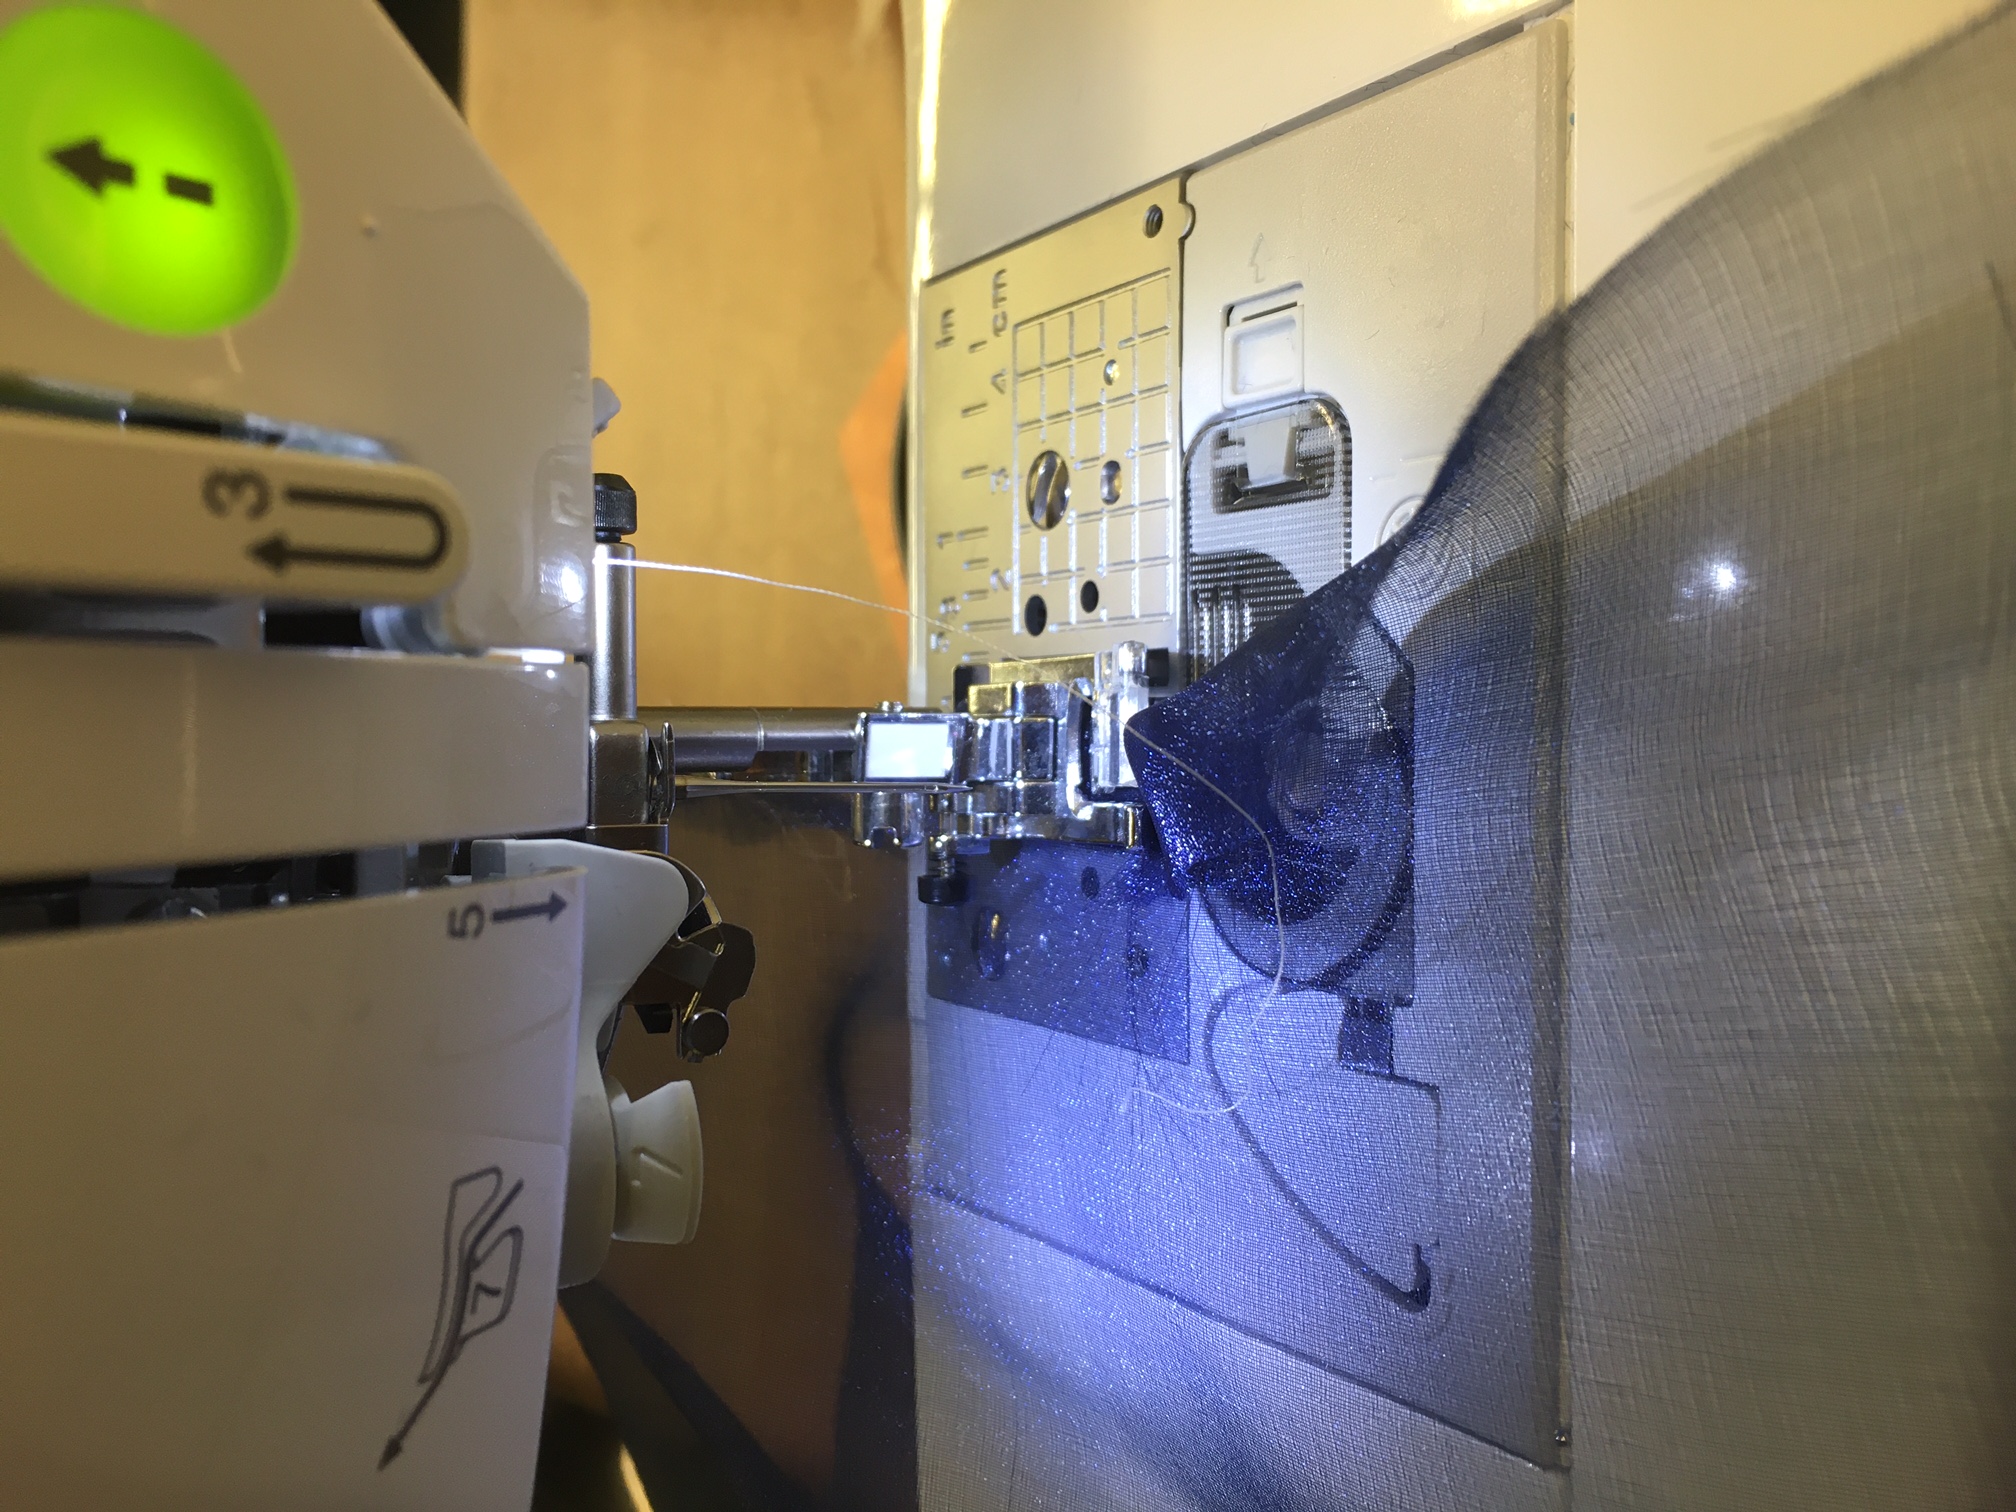
Tie off the two threads. I also added some liquid stitch because I'm not very confident in these knots and they're too short to do sailing knots easily. The first part of my project that I sewed was the cape. I figured this would be the simplest/lowest risk part of the dress to sew together. It's essentially just a giant rectangle that needed to be hemmed so that the edges wouldn't fray. This worked out mostly well, although I had to go over some stitches a couple of times because they were messed up. This fabric (tulle) was particularly tricky to work with, even when it was pinned down the seams wouldn't lay down quite flat. Something that would've helped would've been an iron to flatten down the seams. Unfortunately, being an undergrad I don't know anyone that has one. Darn steamers. Nonetheless, I hemmed the four edges of the cape.
 For a lined dress, the idea is to sew together the lining of the bodice, sew the shell of the bodice, then sew the lining and shell together. Then I would sew the lining of the skirt and the shell of the skirt, then sew those together. Finally, I would sew the completed bodice and the skirt together.
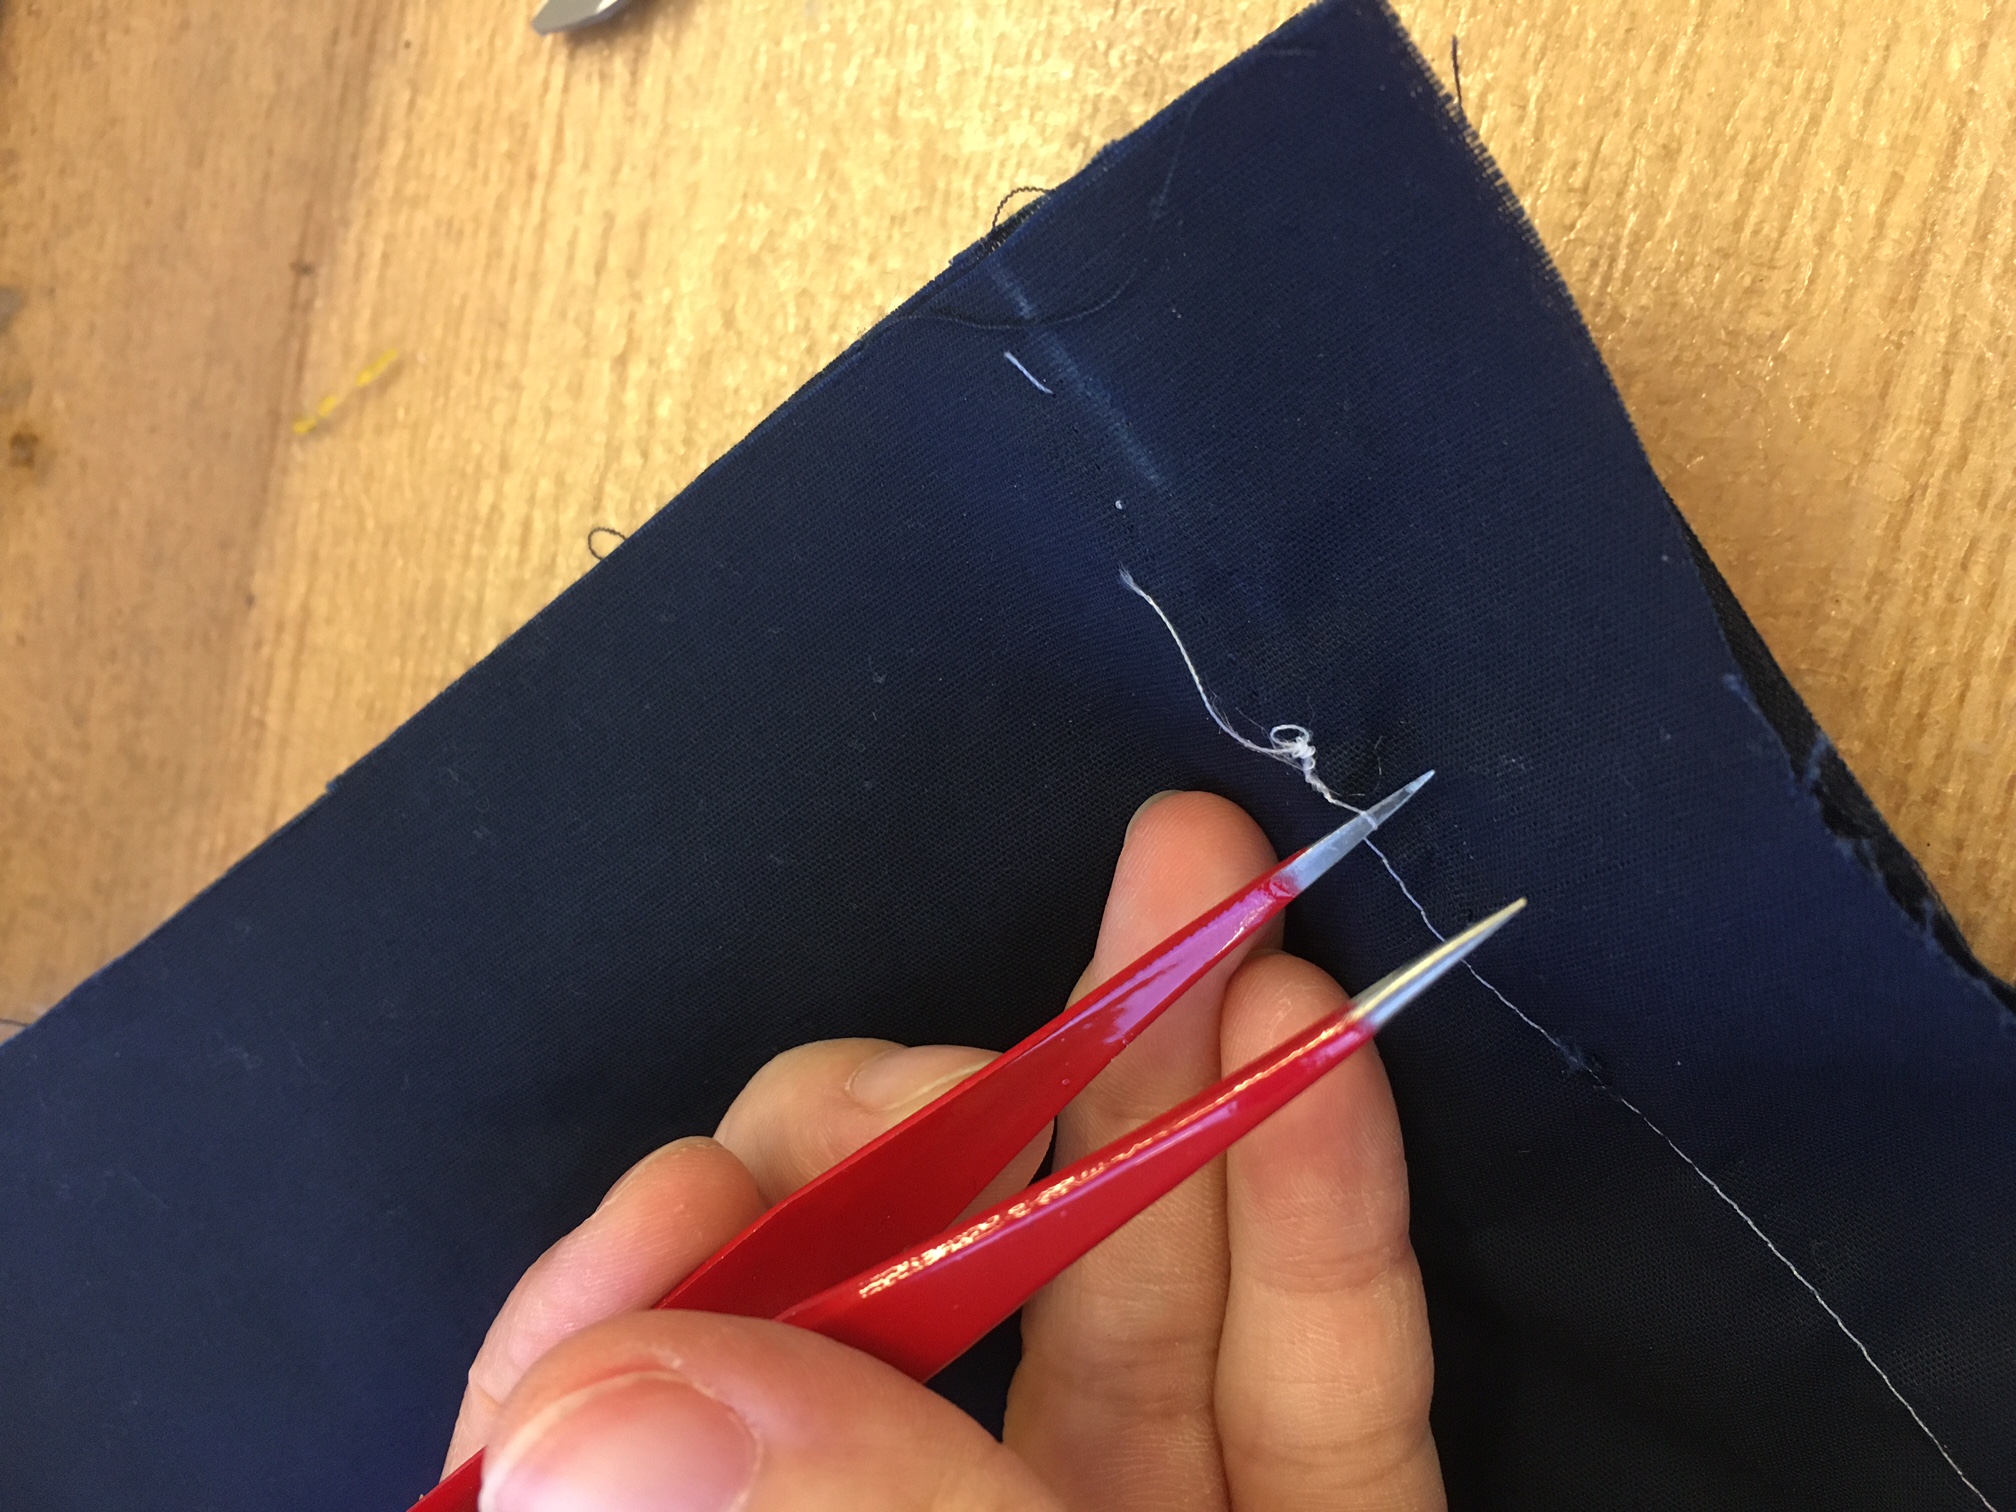
Once I had a decent grasp on sewing straight stitches, I decided to tackle the curved stitches of the bodice. The sewing machine has different speeds you can sew at, but for the curved stitches of the bodice I stayed on the slowest speed. Even so, I messed up one of the stitches. I didn't keep the fabric perfectly flat when feeding it through the machine, so it got bunched up and sewn together that way. I took some tweezers and a tiny pair of scissors and pulled out all of the stitches. A seam ripper would've done this job much more quickly, but I didn't have one.
For a lined dress, the idea is to sew together the lining of the bodice, sew the shell of the bodice, then sew the lining and shell together. Then I would sew the lining of the skirt and the shell of the skirt, then sew those together. Finally, I would sew the completed bodice and the skirt together.
Once I had a decent grasp on sewing straight stitches, I decided to tackle the curved stitches of the bodice. The sewing machine has different speeds you can sew at, but for the curved stitches of the bodice I stayed on the slowest speed. Even so, I messed up one of the stitches. I didn't keep the fabric perfectly flat when feeding it through the machine, so it got bunched up and sewn together that way. I took some tweezers and a tiny pair of scissors and pulled out all of the stitches. A seam ripper would've done this job much more quickly, but I didn't have one.
 I re-sewed the seam, then sewed together the shell of the bodice. I then lined up the shell and the lining to sew them together. However, some of the pieces weren't exactly the same which was a huge pain in the butt. Some of the seams weren't lining up. To fix this, I had to cut off some of the excess of the cotton lining and accept some imperfections. In hindsight, it might've been better to use a paper pattern to cut out all of the pieces and pin the pattern to the different fabric to ensure that everything was identical.
I sewed each of the different panels together, so the cotton left front to the velvet left front,etc. along the top edge. I pinned the nice sides to face each other so that the seam allowances of both the shell and the lining were on the outside.Once they were all sewn together, I turned the shell and lining inside out so that we had the hidden seams for both the shell and the lining:
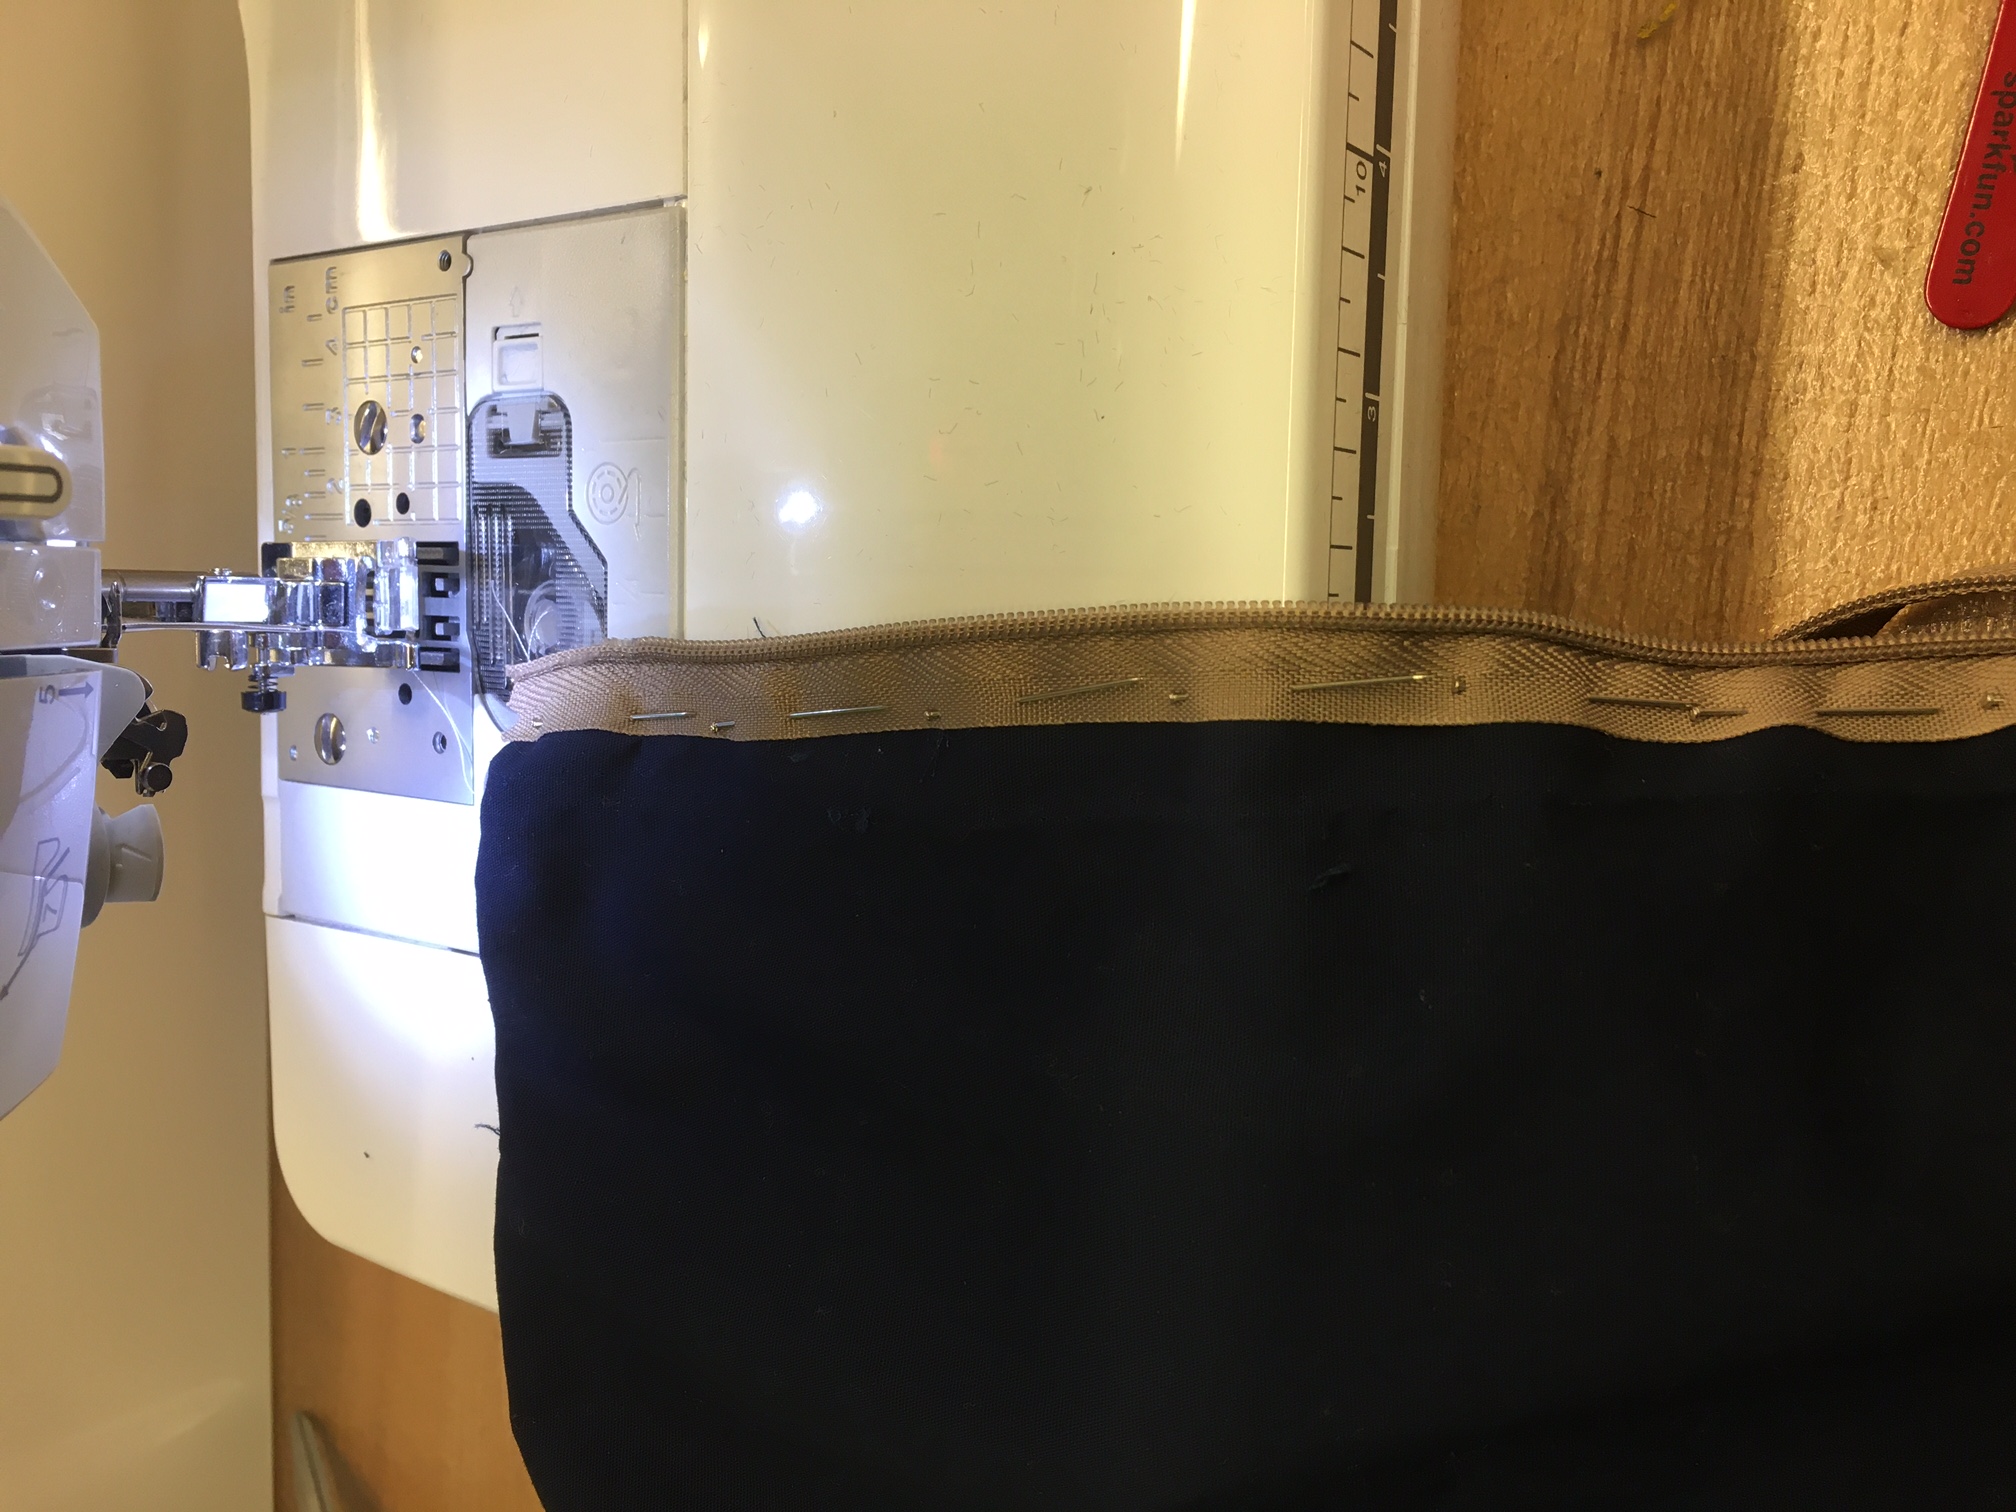
I then asked Premila to help determine where/how I should add the zipper. There was no excess, so I sewed the vertical edges of the back panels (shell to lining), then I got out the zipper. The zippers I ordered were way too ling, but I cut them short and that worked fine (except for some fraying). I then unzipped the zipper so they were two separate parts and sewed each half to each of the two back panels. Then I zipped together the two back panels. This was way harder than it should've been.
I re-sewed the seam, then sewed together the shell of the bodice. I then lined up the shell and the lining to sew them together. However, some of the pieces weren't exactly the same which was a huge pain in the butt. Some of the seams weren't lining up. To fix this, I had to cut off some of the excess of the cotton lining and accept some imperfections. In hindsight, it might've been better to use a paper pattern to cut out all of the pieces and pin the pattern to the different fabric to ensure that everything was identical.
I sewed each of the different panels together, so the cotton left front to the velvet left front,etc. along the top edge. I pinned the nice sides to face each other so that the seam allowances of both the shell and the lining were on the outside.Once they were all sewn together, I turned the shell and lining inside out so that we had the hidden seams for both the shell and the lining:
I then asked Premila to help determine where/how I should add the zipper. There was no excess, so I sewed the vertical edges of the back panels (shell to lining), then I got out the zipper. The zippers I ordered were way too ling, but I cut them short and that worked fine (except for some fraying). I then unzipped the zipper so they were two separate parts and sewed each half to each of the two back panels. Then I zipped together the two back panels. This was way harder than it should've been.
 Next, I tried on the bodice and determined where I had to hem the bottom of the bodice. There was, surprise, more asymmetries so I cut some of the bodice so that it was the same length all the way around.
Now (finally!) the bodice was finished!
The skirt was significantly simpler. All I had to do was sew the two hems for the lining (I left the bottem edge raw since no one would see it anyways), then the same for the lining, then sew the two together. I had to take in the lining because it was slightly too big, but other than that it was pretty simple.
Once the two were done, I attached the lined bodice to the lined skirt. I took extra care to make sure that the side stitches of the skirt were aligned properly. This alignment would've been simpler if the bodice had seams that were designed to be aligned with seams in the skirt, but this one wasn't designed that way. I had a lot of trouble with figuring out how to sew this together, but Maddie helped me do this (shoutout). The idea is to have the outer shells of both the skirt and the bodice facing each other, then sew the lining of the two together (this will be done cylindrically). Then you'll pull the bodice out of the skirt and the dress will be inside out. THen turn the dress right-side out and boom! all done.
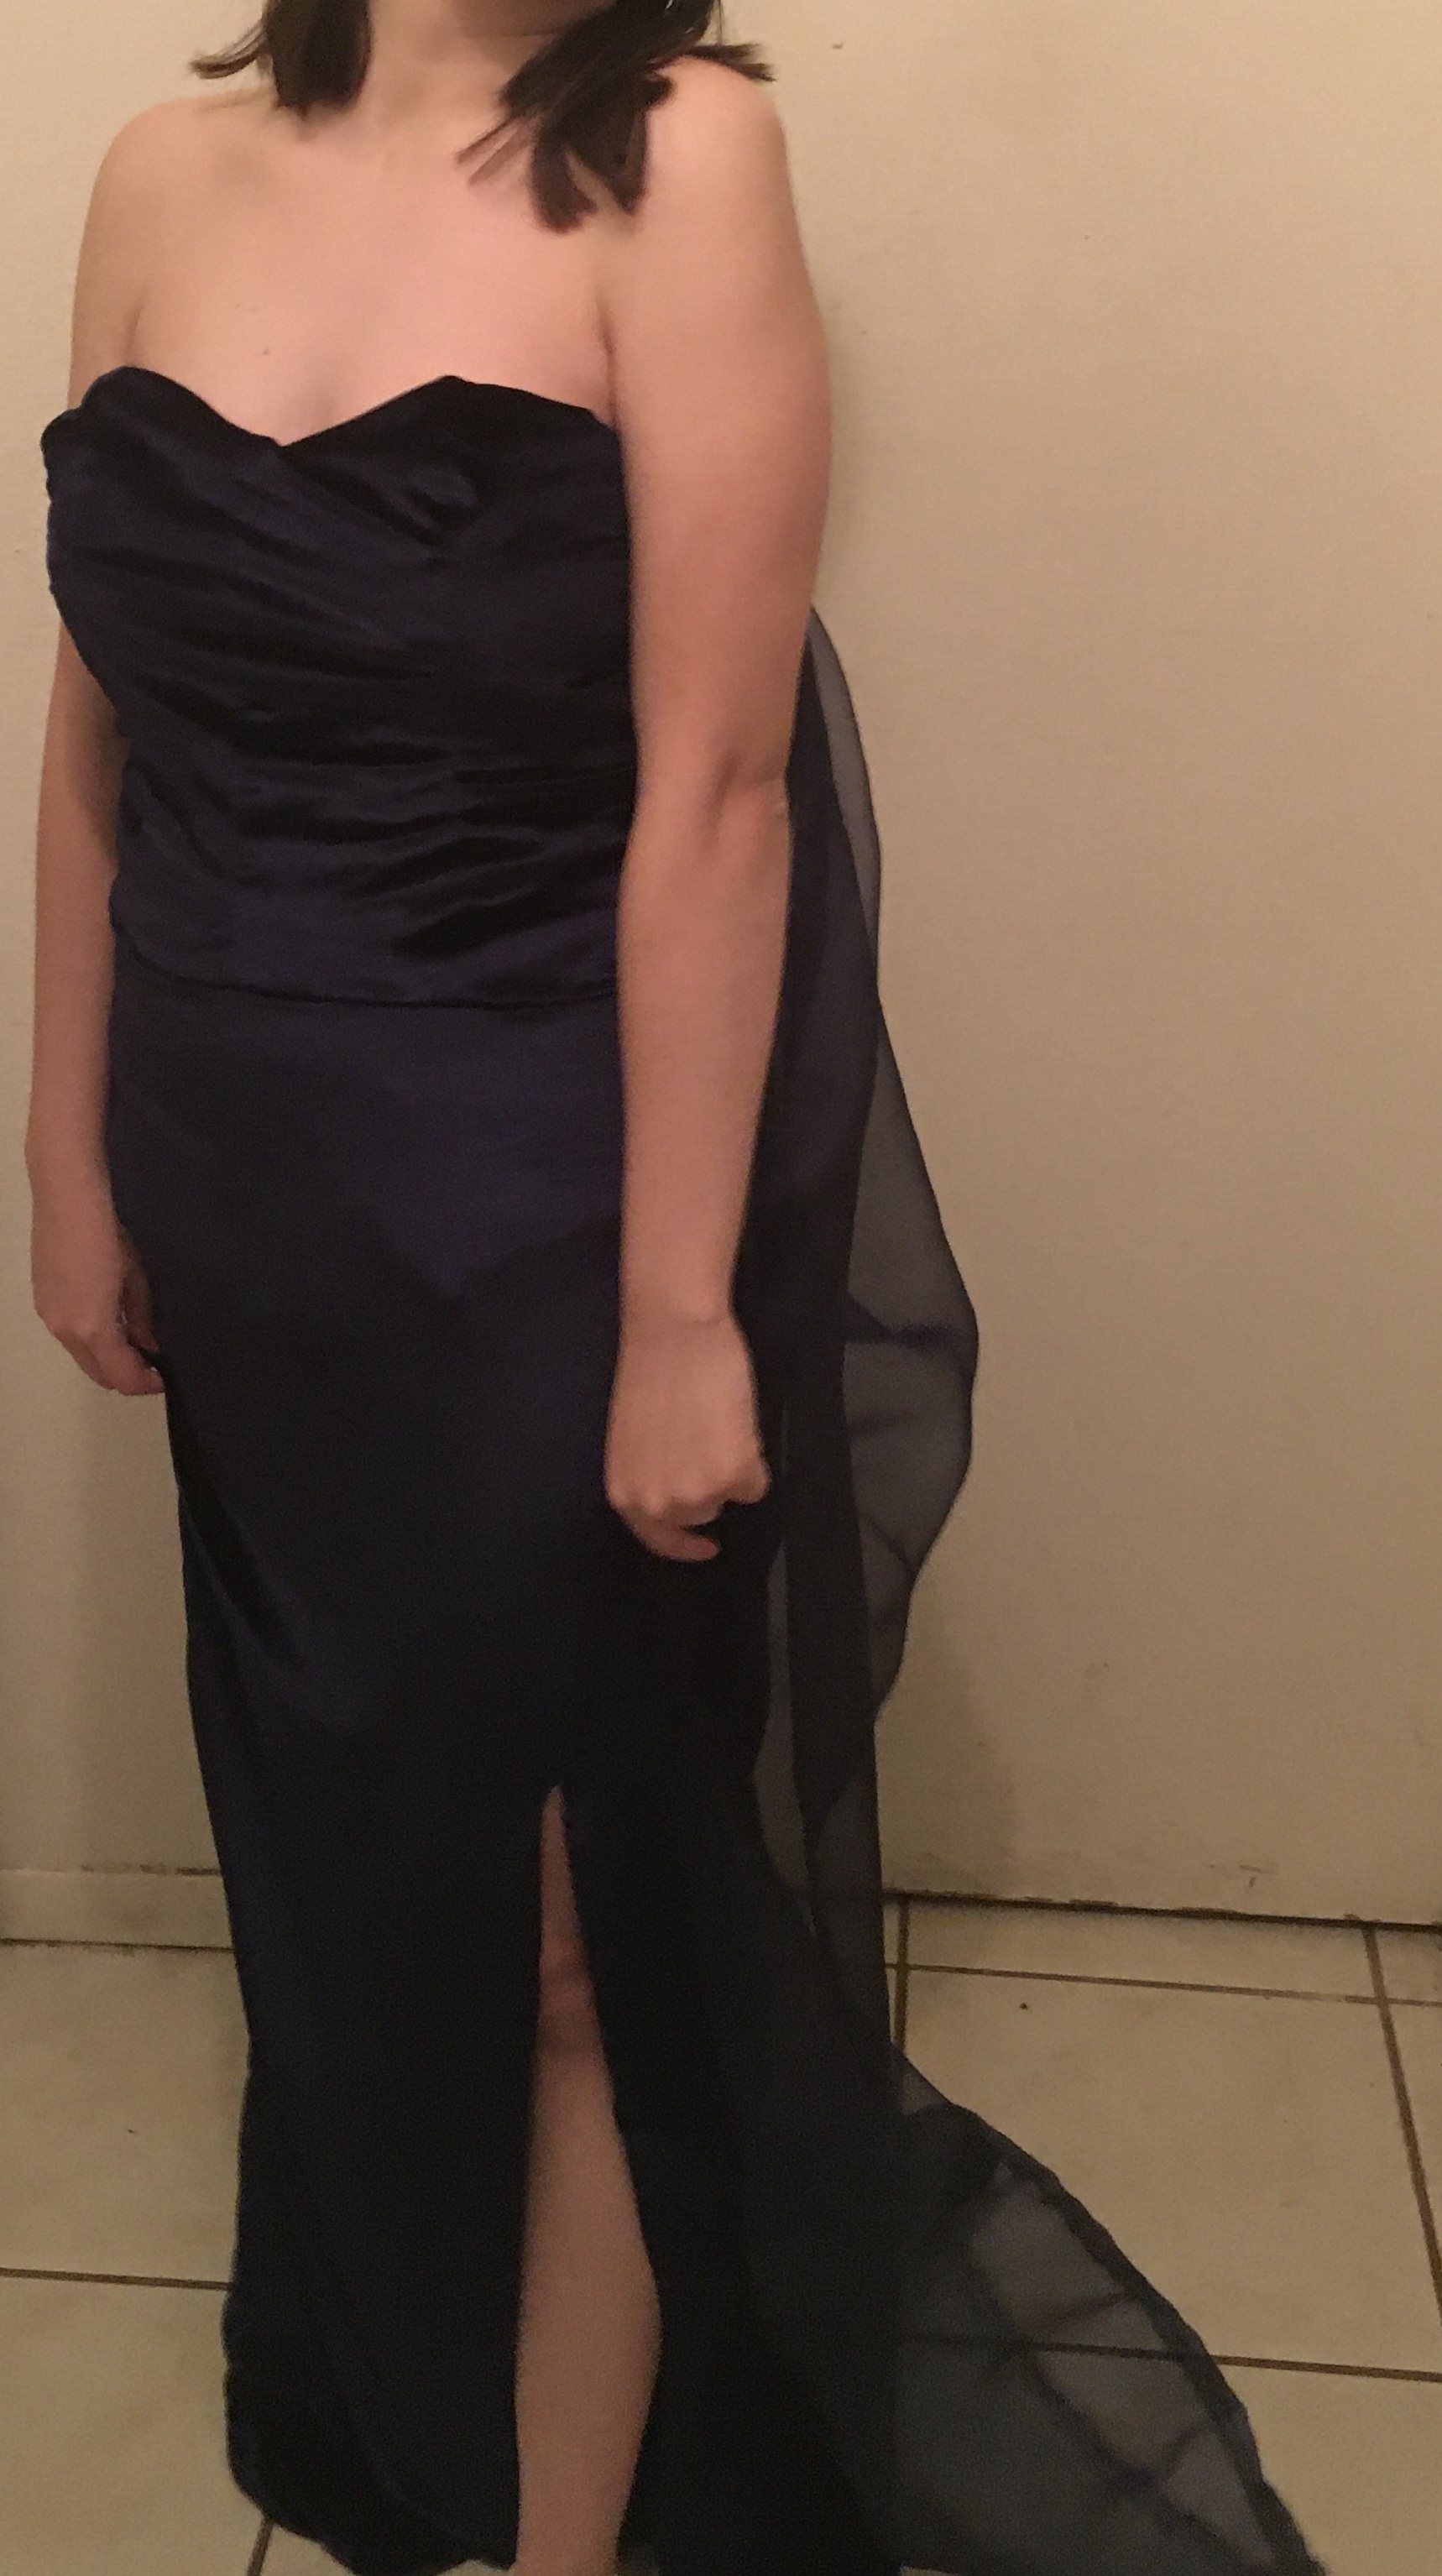
It worked! The dress was basically done. To finish off, I tried on the dress and figured out where I wanted a slit in the skirt to go and how far up. I cut this out, then hemmed the bottom of the skirt and the two edges of the slit.
After who knows how many hours, it was finished! Here is the final result:
Next, I tried on the bodice and determined where I had to hem the bottom of the bodice. There was, surprise, more asymmetries so I cut some of the bodice so that it was the same length all the way around.
Now (finally!) the bodice was finished!
The skirt was significantly simpler. All I had to do was sew the two hems for the lining (I left the bottem edge raw since no one would see it anyways), then the same for the lining, then sew the two together. I had to take in the lining because it was slightly too big, but other than that it was pretty simple.
Once the two were done, I attached the lined bodice to the lined skirt. I took extra care to make sure that the side stitches of the skirt were aligned properly. This alignment would've been simpler if the bodice had seams that were designed to be aligned with seams in the skirt, but this one wasn't designed that way. I had a lot of trouble with figuring out how to sew this together, but Maddie helped me do this (shoutout). The idea is to have the outer shells of both the skirt and the bodice facing each other, then sew the lining of the two together (this will be done cylindrically). Then you'll pull the bodice out of the skirt and the dress will be inside out. THen turn the dress right-side out and boom! all done.
It worked! The dress was basically done. To finish off, I tried on the dress and figured out where I wanted a slit in the skirt to go and how far up. I cut this out, then hemmed the bottom of the skirt and the two edges of the slit.
After who knows how many hours, it was finished! Here is the final result:
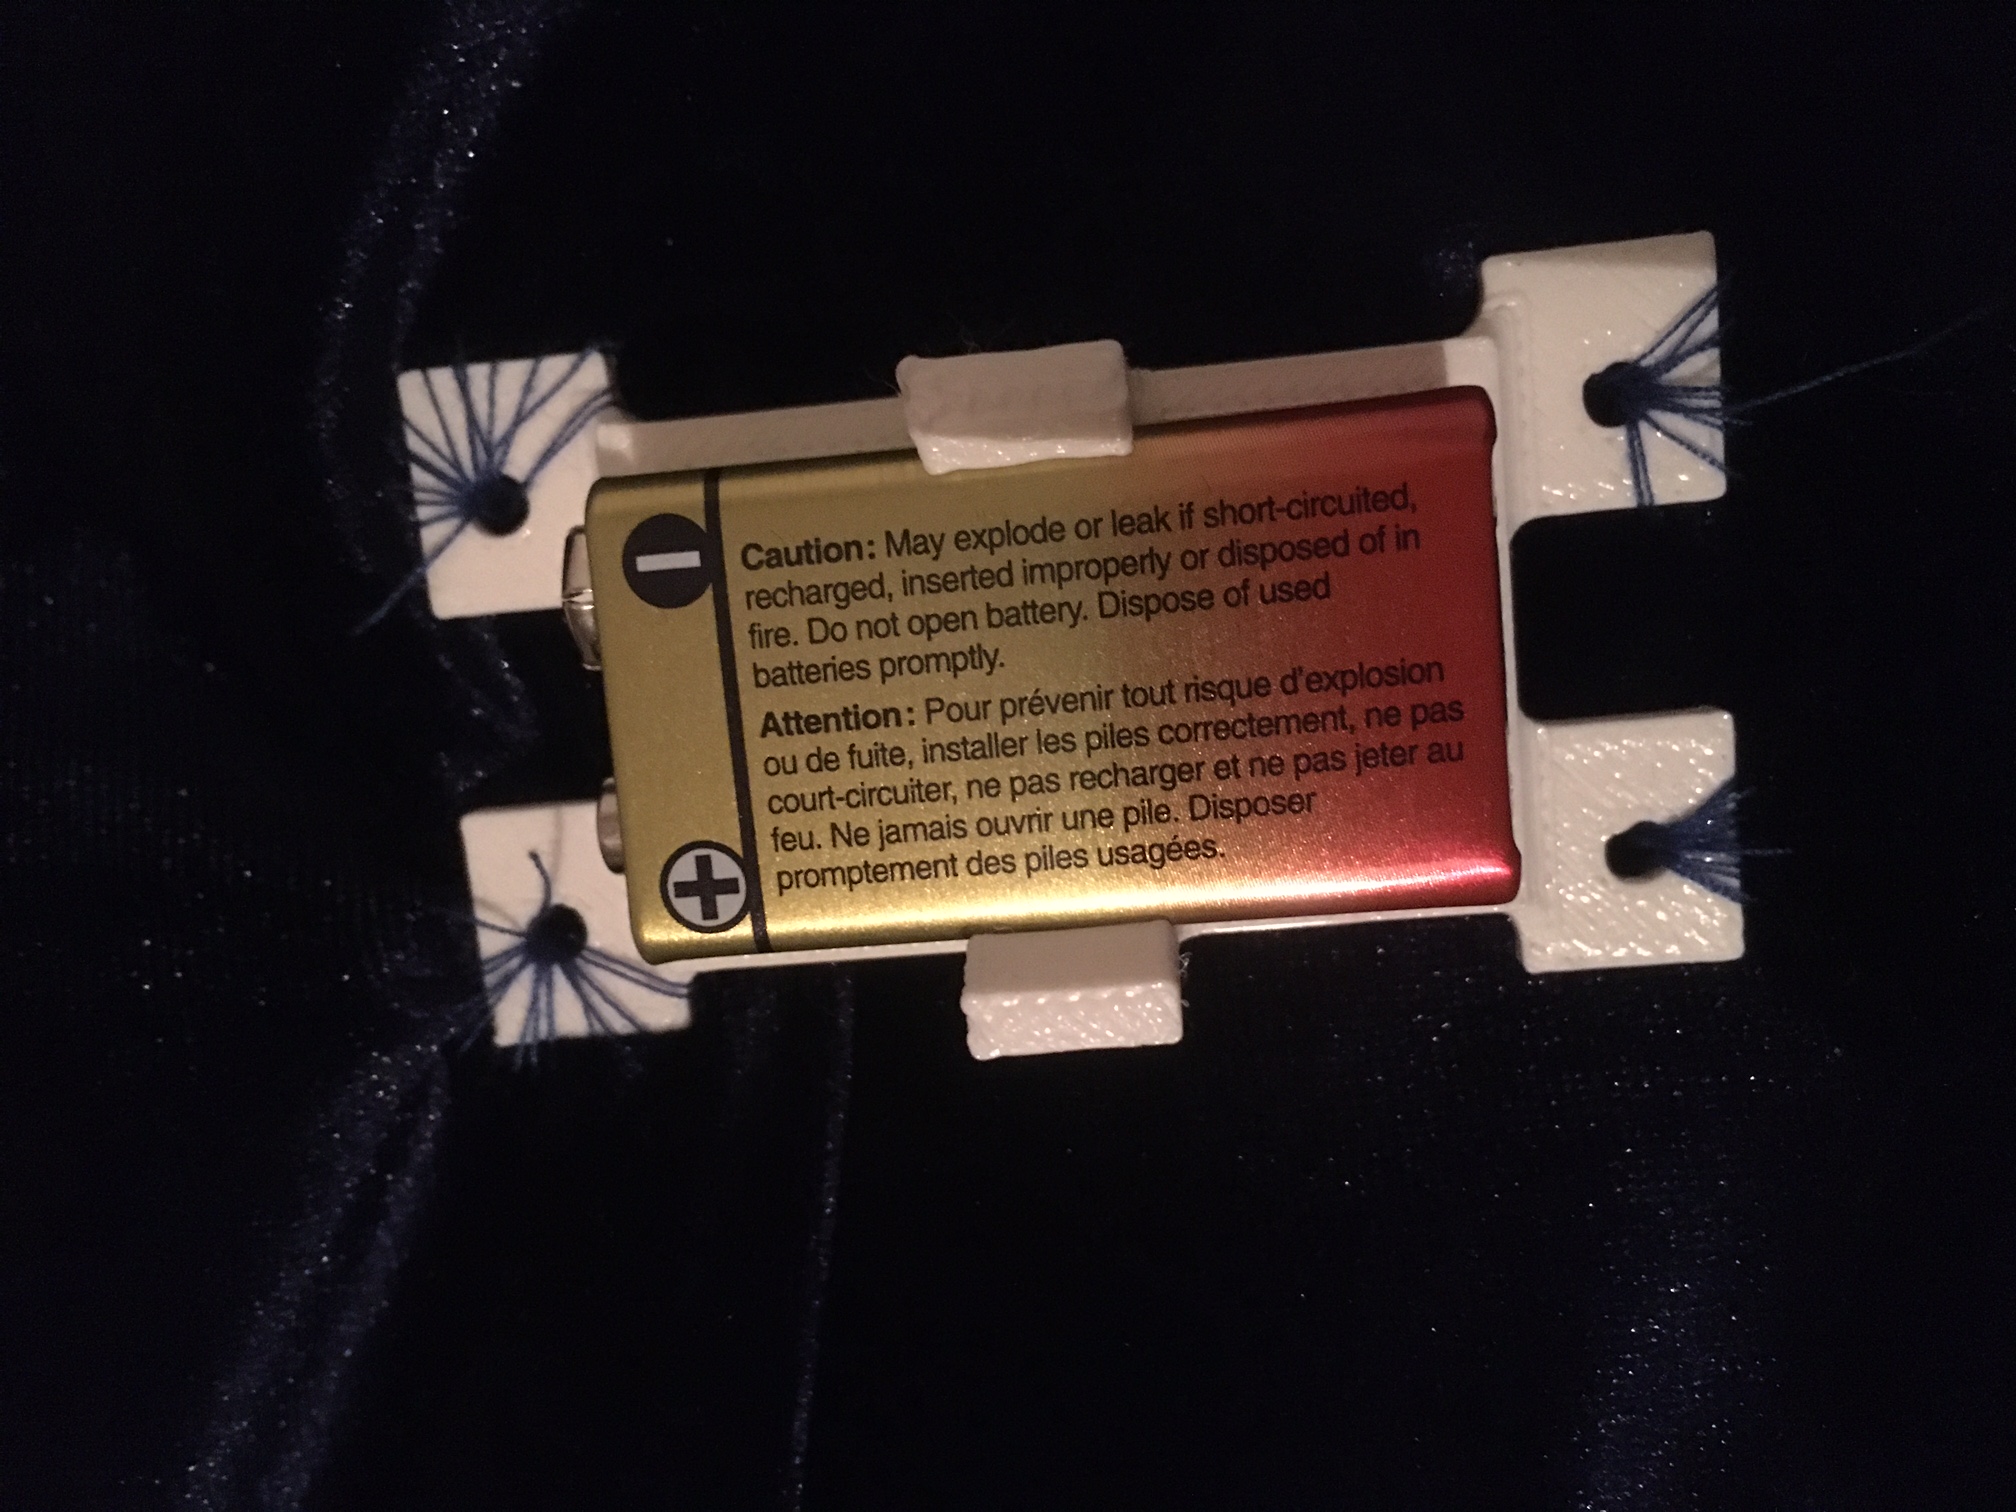
 Instead of doing this, I decided to print something to secure the battery to the PCB. This is more useful to me. I grabbed a battery clip model from grabCAD and modified it so I could more easily attach it to my PCB.

 The embedded programming will determine the behavior of the LEDs on the dress. Essentially, it'll just be a modified version of the blink code. The LEDs will flash based on the voltage input. The tricky part will be determining the factor by which to modify the frequency of flashing. Another feature that may be nice to have would be to change the brightness based on the voltage output from the light sensor. This way it would be easier to see the LEDs in the daytime and they won't be so harsh to look at in the nighttime.
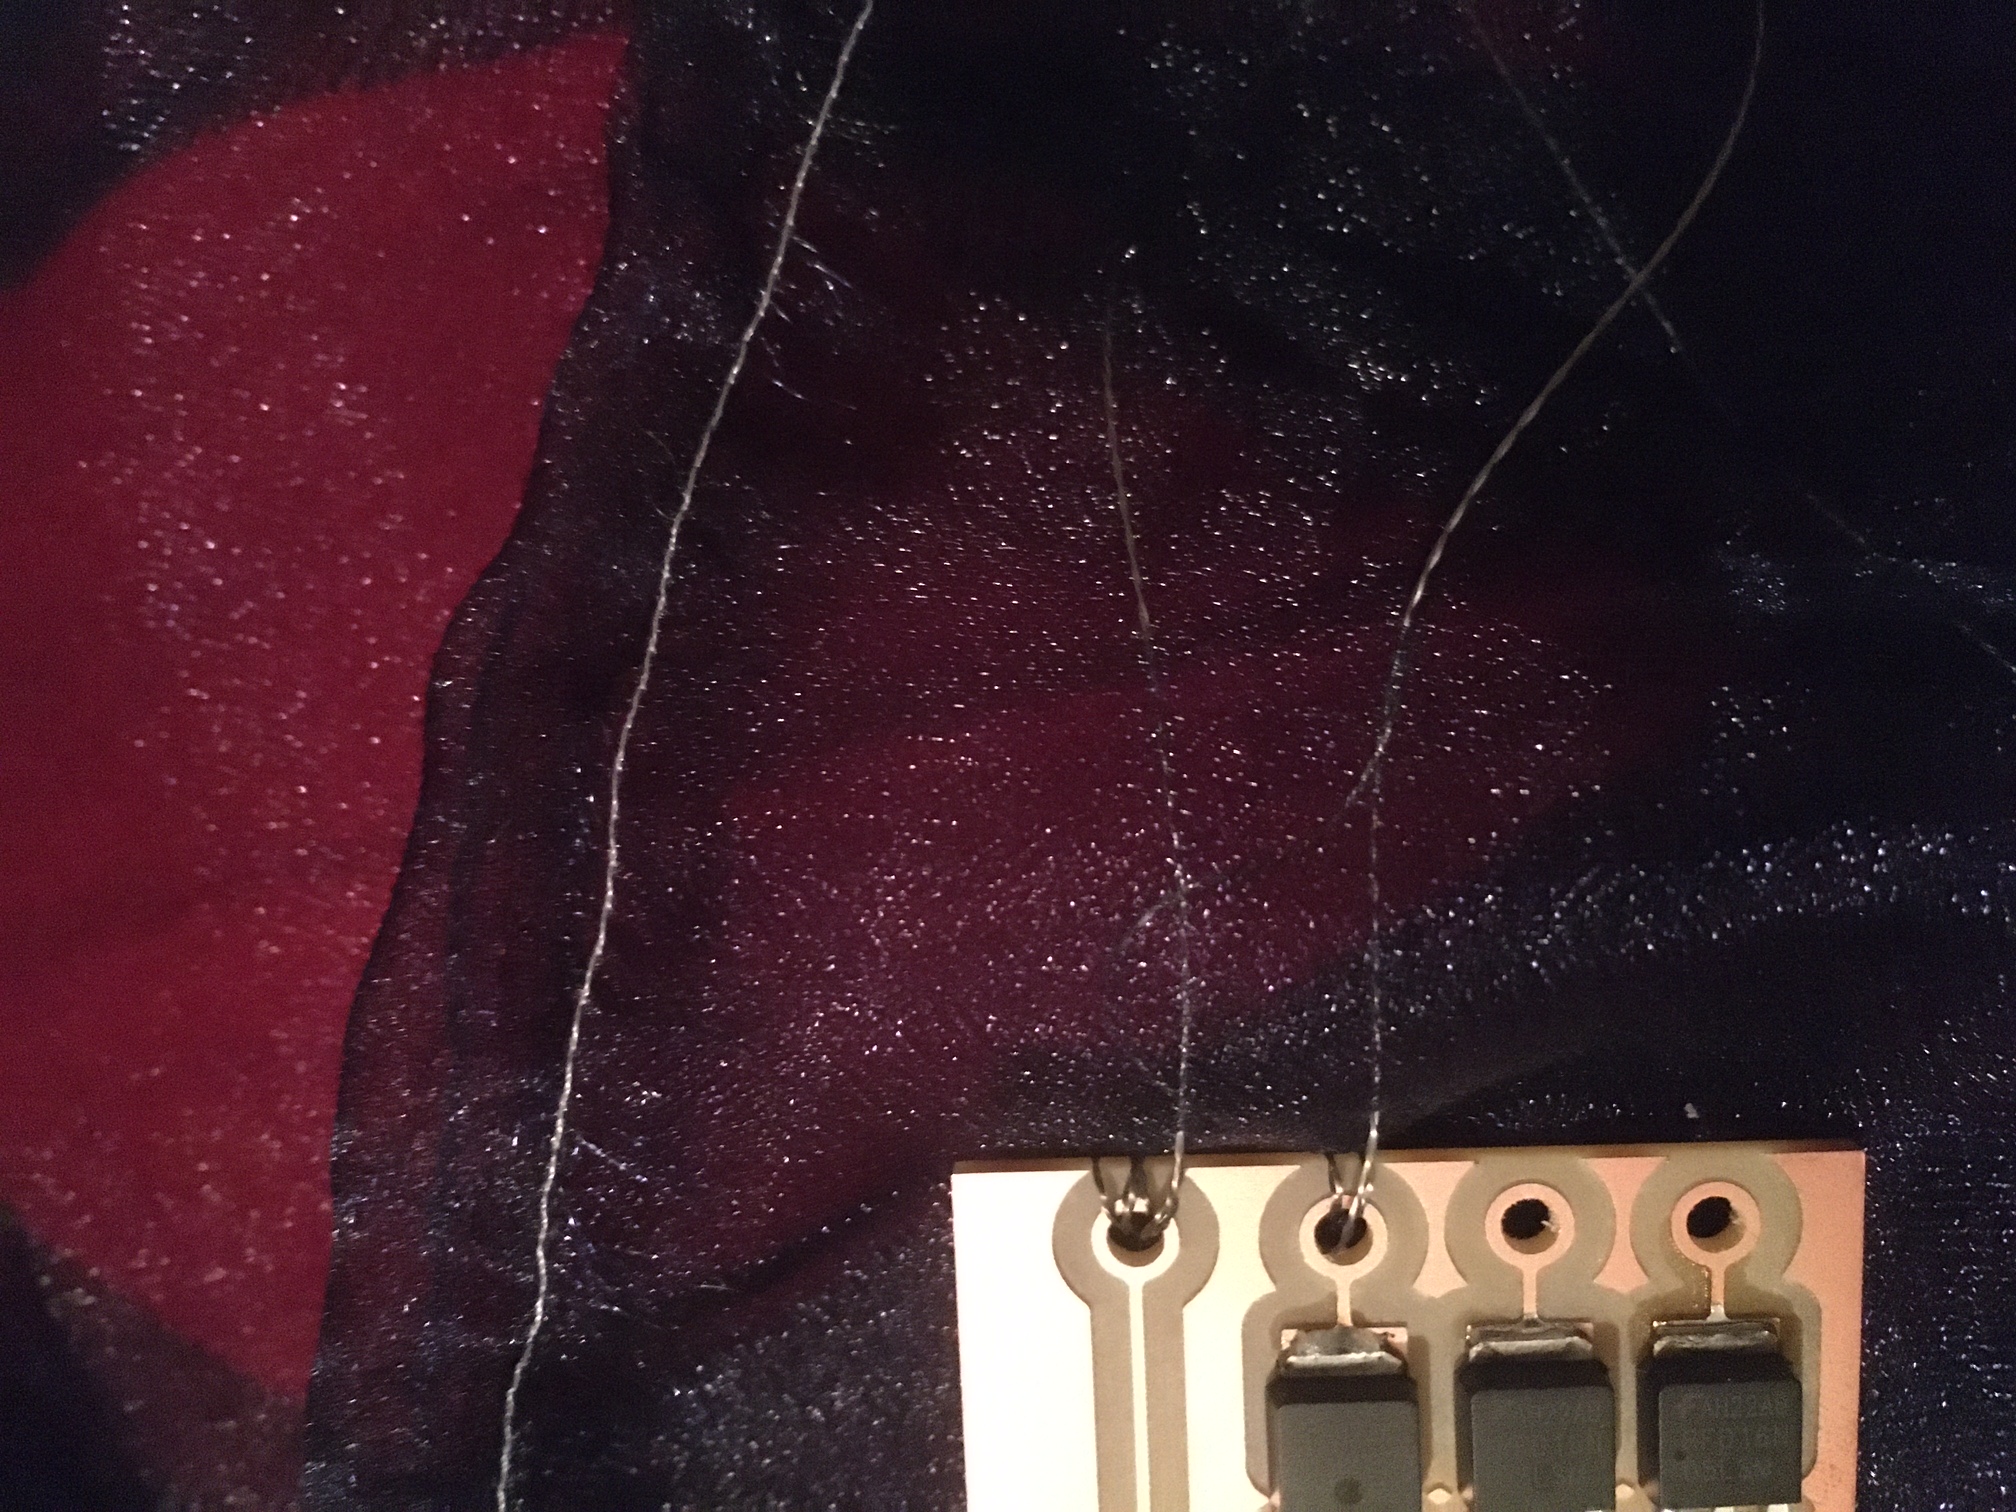
Once the cape was together and the LEDs sewn on, I wanted to test how effective the connection with the conductive thread was, as I was advised that conductive thread could be tricky. I flashed a simple blink code and tested it. It worked, but only if I held the cape at a certain angle. I pulled out the thread and redid it, this time the stitches closers together so there was less slack in the line. I made sure to tighten the connection on the sew pads and tried again. It worked!
The embedded programming will determine the behavior of the LEDs on the dress. Essentially, it'll just be a modified version of the blink code. The LEDs will flash based on the voltage input. The tricky part will be determining the factor by which to modify the frequency of flashing. Another feature that may be nice to have would be to change the brightness based on the voltage output from the light sensor. This way it would be easier to see the LEDs in the daytime and they won't be so harsh to look at in the nighttime.
Once the cape was together and the LEDs sewn on, I wanted to test how effective the connection with the conductive thread was, as I was advised that conductive thread could be tricky. I flashed a simple blink code and tested it. It worked, but only if I held the cape at a certain angle. I pulled out the thread and redid it, this time the stitches closers together so there was less slack in the line. I made sure to tighten the connection on the sew pads and tried again. It worked!
 One thing that was disappointing in the test: here I was using the analogWrite function, but it didn't quite twinkle as I had hoped it would.
I then tested a couple of different effects: a simple turning off and on once the light level passed a threshold, a varied brightness of the lights based on the light level, and a varied frequency of the on-off sequence based on the light level. Check out the final video for all three effects.
One thing that was disappointing in the test: here I was using the analogWrite function, but it didn't quite twinkle as I had hoped it would.
I then tested a couple of different effects: a simple turning off and on once the light level passed a threshold, a varied brightness of the lights based on the light level, and a varied frequency of the on-off sequence based on the light level. Check out the final video for all three effects.
 I probably could've gotten the same functionality by sewing a small pocket onto the back of the dress, but oh well.Once that was done, I added a little fabric to cover the PCB. Originally I had planned to do this with scrap velvet from the dress, but I honestly don't remember if I actually packed it (ya girl is still mad concussed and the last week on campus was crazy). Nonetheless, I grabbed some other scrap fabric (see: old sock) and covered up the PCB. I had to cut out a small hole for the phototransistor, here's what that looked like:
 I sewed the cape to the dress, and we were done. WOOO!
Here is a list of the materials I used for the final project as well as the cost for everything:
Materials used:
Fabric and sewing supplies (from Etsy):
Navy velvet (~3 yds) $39
Navy cotton for dress lining (~1 yd) $10
Navy organza for cape (~1 yd) $2
Invisible Zippers (pack of 5) $7.50
Muslin for creating the pattern (5 yds) $10
Electronics:
ATTiny1614 $0.71
phototransistor $0.26
Resistors (0 ohm, 4.7k)
1 Capacitor
linear regulator (5V) $1
Driving MOSFETs
9V battery and connector
Adafruit sequins (sewable LEDs) $3.95 for pack of 5
Conductive Thread $6.95 for a 23 meter spool
that didn't work: I didn't get as many LEDs working as I initially wanted to.
Next steps: Over the break I'll try to get more LEDs working, and will also need to run battery life tests (I went through more 9Vs than I thought I would).I'd like to see if I can miniaturize the electronics to make the dress lighter.
What I've learned: I've learned so much about the design process and what questions need to be asked and answered when creating a product. I messed up a lot, and struggled with many aspects of the project. I came in with little experience in several of these areas, but came out having learned so many new skills. Here is my final video:
Thank you to the staff (especially Anthony) for all of their help this semester. This semester was uniquely challenging and I wouldn't have been able to do it without them :)