week 11: interface and application programming
December 9, 2020
assignment
1. write an application that interfaces a user with an
input &/or output device that you made
In lecture this week, we learned about interfaces and were tasked to create an application that interfaces with a PCB. I planned on creating an interface that would allow me to activate my mechanisms from a button press on the web app I planned on building. I foresaw that my application would be pretty simple and run on both computers and mobile devices. I didn’t want to host a server, so I looked to find a way to host this on my local IP address.
After doing some searching online, I found this article to be extremely helpful. In this article, the article the author made a web application with HTML and CSS that would activate certain pins on the ESP32, which is very similar to what I was trying to do. Therefore this was a helpful resource and I based my code on the provided code.
Before I started programming in the Arduino IDE, I wanted to create my web application locally, so I created an html file.
I created a simple HTML file that would have one button which would activate the light on my ESP32CAM on a button press. Once I coded this up I successfully was able to activate the light on both my computer and phone.
Test HTML web server on computer
Test HTML web server on phone
I first laid out the HTML code which was fairly straightforward. I then added the title of my project as an h1 header and then added a section where the ASCII art of a dog would be displayed. I looked into ways to include a different image of my dog pop up on the web application, however, it was hard to transfer images over to the ESP32, so I stuck with ASCII art. I then added two empty paragraphs to provide additional space between the ASCII art and the button.
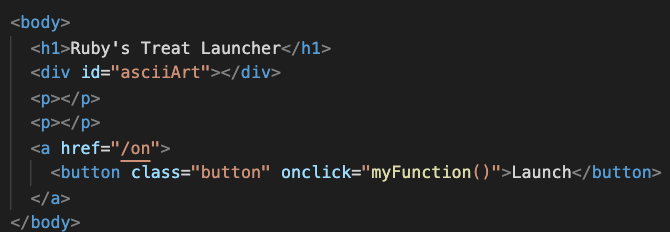
HTML Code
The next step was to style my web application. I picked two colors that complemented each other and picked one for the background of the app and the other as the button color. I had to create a parent class (html) so that I could center my text and button both vertically and horizontally. This was important because I wanted this button to be responsive to any screen size (mobile or PC).
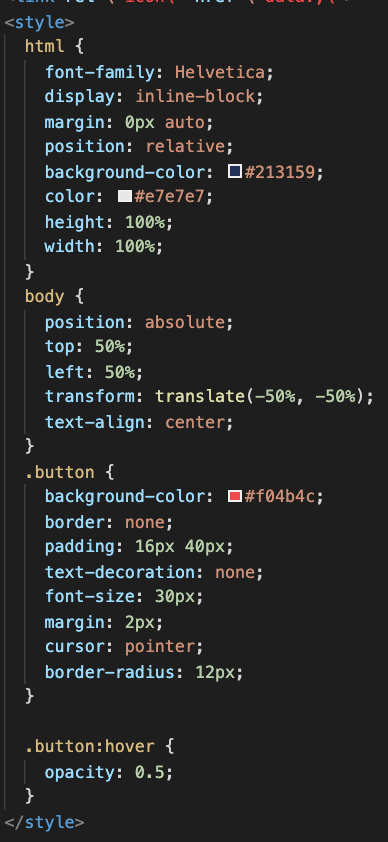
CSS Code
Lastly, I added the JavaScript to my code. The JavaScript code was not too complicated as I wanted to have a list of different ASCII art, and created a function that would grab a random ASCII art and place it into the section that would hold the ASCII art. Lastly, I made sure that this function was run every time the website was loaded.
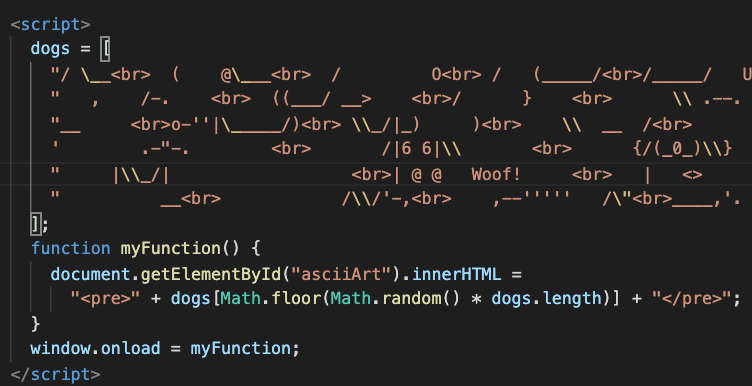
JavaScript Code
On that note, we can see the responsive web application working.
Interface with changing ASCII Art and responsive design
With the HTML, CSS, and JavaScript sorted away, it was time to start working on the Arduino code. The first step was to define the global variables and initialize the Wifi library. I initialized a server on port 80 and defined some variables that would either store if the button has been pressed or the HTML header for global use. I also had to assign a timeout for the Wifi connection. I then had to assign values that would store the name of the Wifi network and password I wanted to connect to in the ssid and password variables. Lastly, I transferred over the code from past weeks that would initialize the pins for my final project.
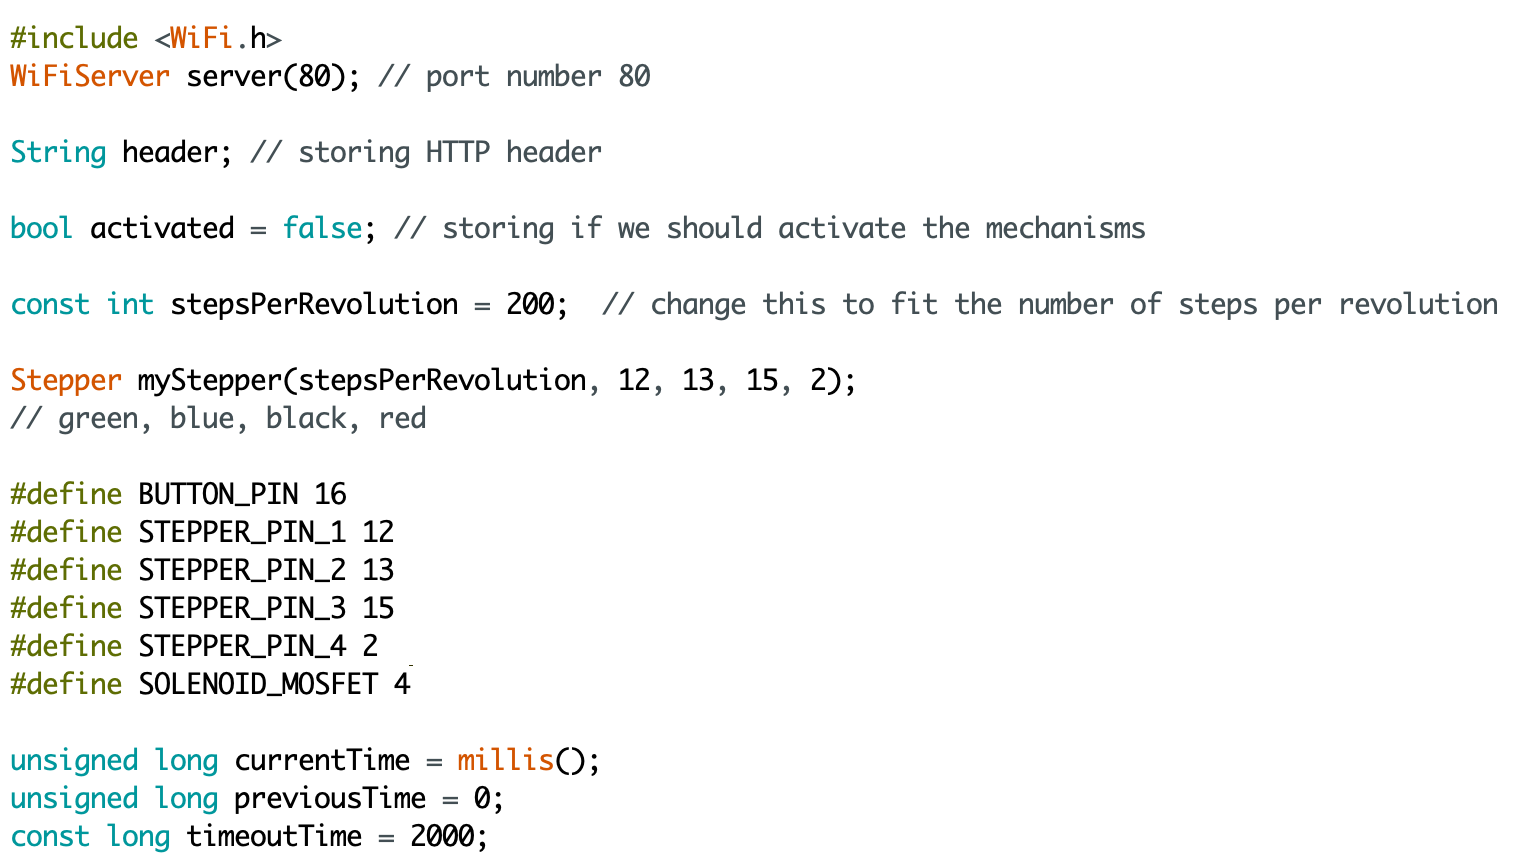
Arduino Library Set Up Code
The next step was to work on the setup() function. Again, I copied over the setup code for my mechanisms, but now I had to connect to my Wifi from my ESP32CAM. Once I was connected, I printed out the local IP address where my web application was hosted on, and the server started.
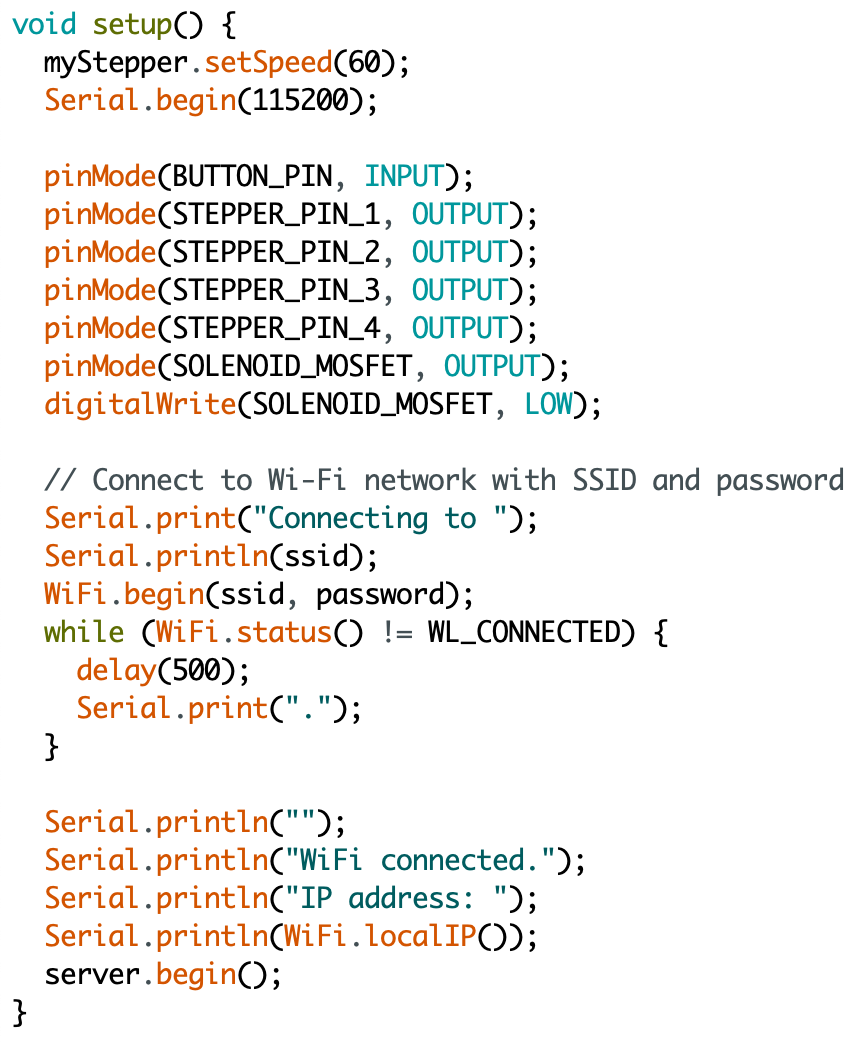
Arduino Set Up Code
For the code in the loop() function, I had to listen for a client connection, and if there was a client and I hadn’t timed out, I listened for messages from the client. If I did, I created a header with the 200 code (which means a successful connection) and checked the path the client was trying to reach. If it was the `/on` path, I set the variable denoting if I activated the button to be true. In hindsight, I could have put the activating of my mechanisms in this conditional and I wouldn’t have to use the activated variable.
Arduino Loop Code
Lastly, I had to send the client my HTML code regardless if the button was pressed. After I checked if the button was pressed and used the same code that would activate all of the mechanisms.
After putting all of the code together, I programmed my ESP32CAM and I was able to get all of the mechanisms activating in the right order from my computer, which wasn’t connected to the ESP32CAM in any way other than through the same Wifi network!
After putting all of the code together, I programmed my ESP32CAM and I was able to get all of the mechanisms activating in the right order from my computer, which wasn’t connected to the ESP32CAM in any way other than through the same Wifi network!
Interface that activates my mechanisms
This is a great step towards my final product, as anyone in my family could connect to the IP address and launch the treat at my dog which makes it much easier than having one physical remote that would launch my treat.
NEXT>