Communications and Application Programming
Tools: Arduino | Processing | Notability
Materials: USB-A to USB-C adapter | D11C servo board | 4 servo motors
Connecting Processing to Arduino
Once you have an open sketch in processing, the first step is importing a serial library.
The following line should appear at the top of the sketch: import processing.serial.*;
Underneath the import sketch, I defined my global variables using Serial myPort; to create an object from the serial class.
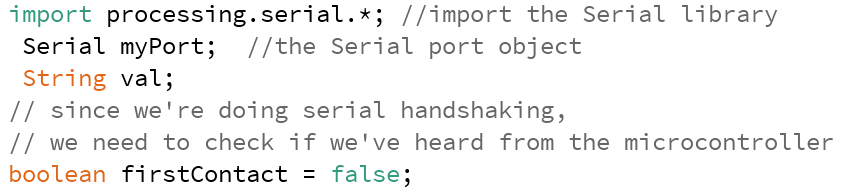
In the setup() method, I found the serial port my arduino is connected to, and used 9600 as the last argument in my serial object to ensure Arduino and Processing are communicating at the same rate.
Similarly, in the Arduino setup() method, I used command Serial.begin(9600); to begin serial communication.
One of the most important components of communicating over serial between a microcontroller, arduino, and processing is making sure no one is talking over each other.
In processing, you can pass the talking stick by creating a serial event function.

The above code is reading incoming data, checking if theres actually anything in it. Next, if it's the app's first time hearing the right thing, the code changes our firstContact boolean and lets Arduino know it's ready for more data.
Once the app is running and the firstContact boolean is changed, data is printed to the console and any mouse clicks in the triangles are send back. Finally, processing tells Arduino when it's ready for more data.
Connecting Arduino to Processing
At the very beginning of your script, define the global variable char val. This is how Arduino will store data recieved over serial. In the setup function, use command establishContact(); to send a byte to establish contact until your receiver responds.
My loop() function begins with the following code to communicate over serial:

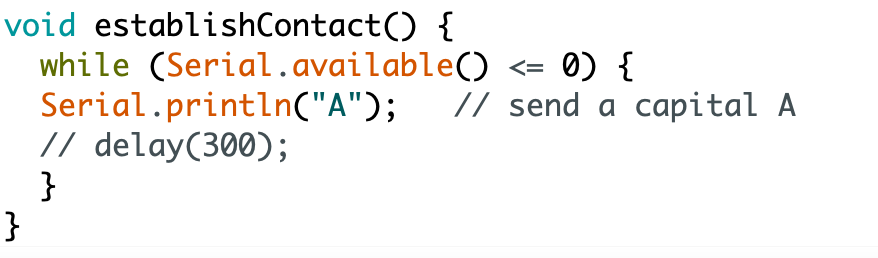
Next is the establish function I declared in the setup().
This function just sends out a string (the same one Processing is looking for) to see if it hears anything back - indicating that Processing is ready to receive data.
Coding in Processing
First, I defined my PShapes and Image before my setup() function.

In my setup, I used commands size(1300,700,P2D); to define my app window and img=loadImage("desktop/pleis.png"); to load my background, which I drew by hand in notability.

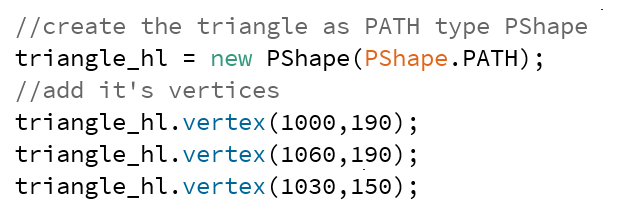
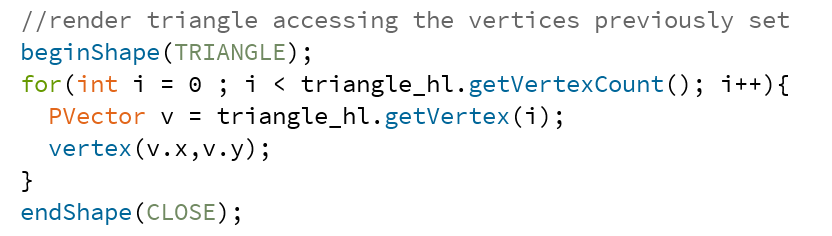
The next step was coding arrows to control the dinosaur. In my setup function, I used the PShape function to create the triangle and define the vertices. Here is an example triangle:
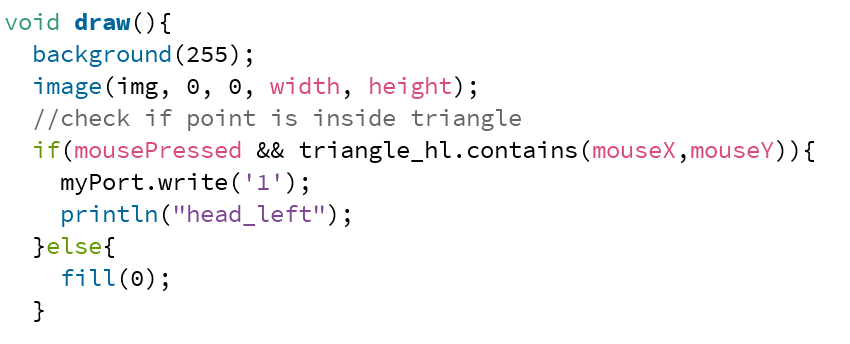
In my void draw() function, I wrote a script that detects if a triangle was clicked on, prints the body part and direction of movement in the console, and sends data over serial to Arduino.
Here is my final app through Processing, note the console updating when the arrows are clicked on:
Coding in Arduino
The first step was defining my servo pins, I used commands of the following format: #define servoAPin 15. The last definition before setup was defining the servo motor's starting position:

Servos are controlled with an electrical pulse of variable width, or PWM, through a control wire, for a range of up to 180 degrees of movement.
Servo's operate on a 50 hz wave, meaning they expect to see a pulse every 20 ms. The minimum pulse width is 1 ms, corresponding to 0 degrees, and the maximum pulse width is 2 ms, corresponding to 180 degrees.
The position pusle must be repeated to ensure the servo stays in the same position.

In the setup, I connected servo to pin using pinMode(15, OUTPUT); . In my loop, I wrote a script that takes in serial data from processing, changes the stored angle of the servo, and controls the servo angle using digitalWrite.