Week 7
Molding and Casting
Materials: Hydrostone | OOMOO Silicone | 3D Milling CNC | Rhino 3D | Fusion 360 Manufacturing | Clamps
Milling a Wax Positive
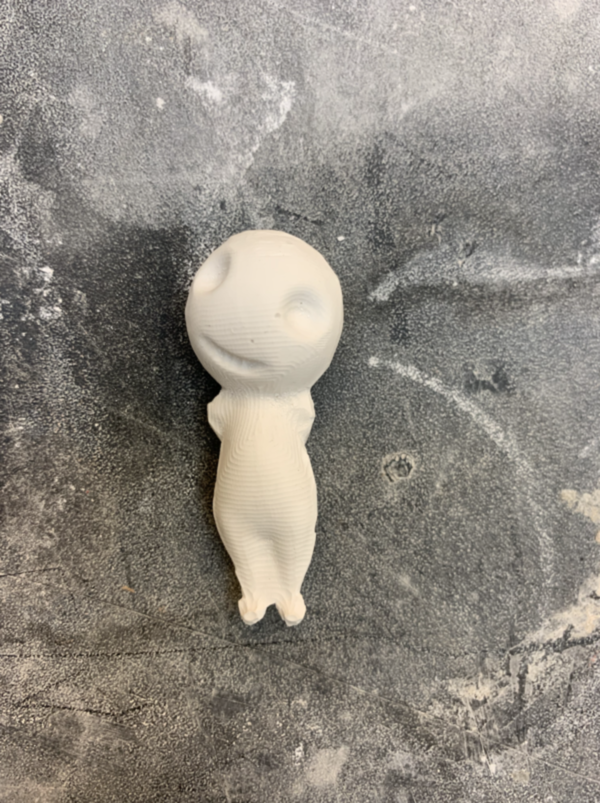
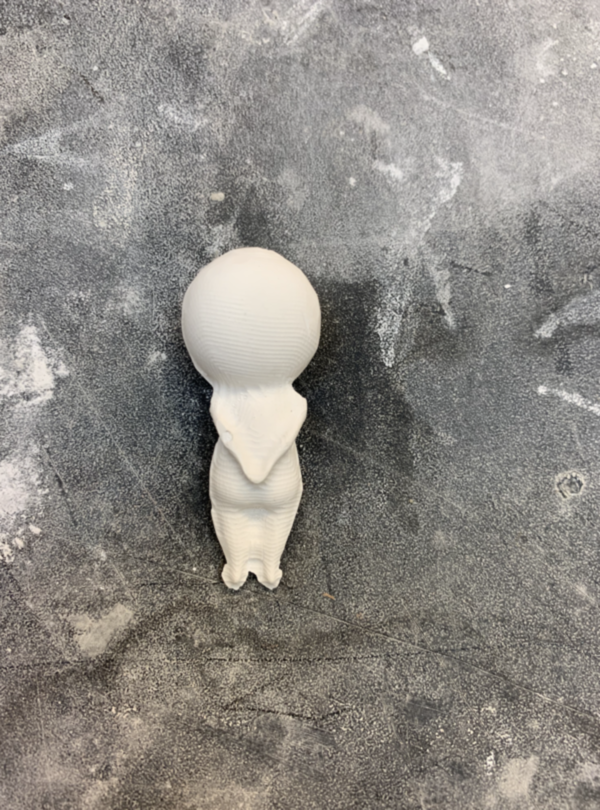
Design: this week, I will be molding and casting small Kodama models, from the movie Princess Mononoke.

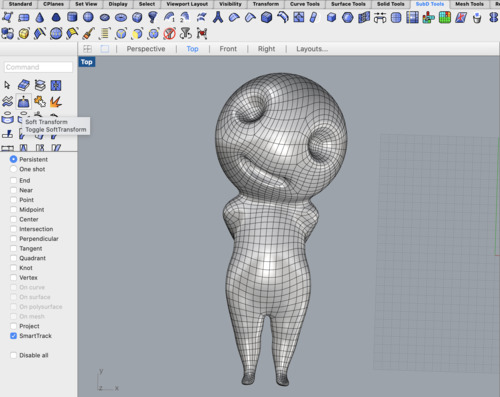
Building off of my experience from the 3D printing week, I now know Fusion 360 isn't the most convenient software for organic
curves and asymmetric 3D bodies. Rhino's SubD Geometric Modeling feature is perfect for flexible, easily editable surfaces.
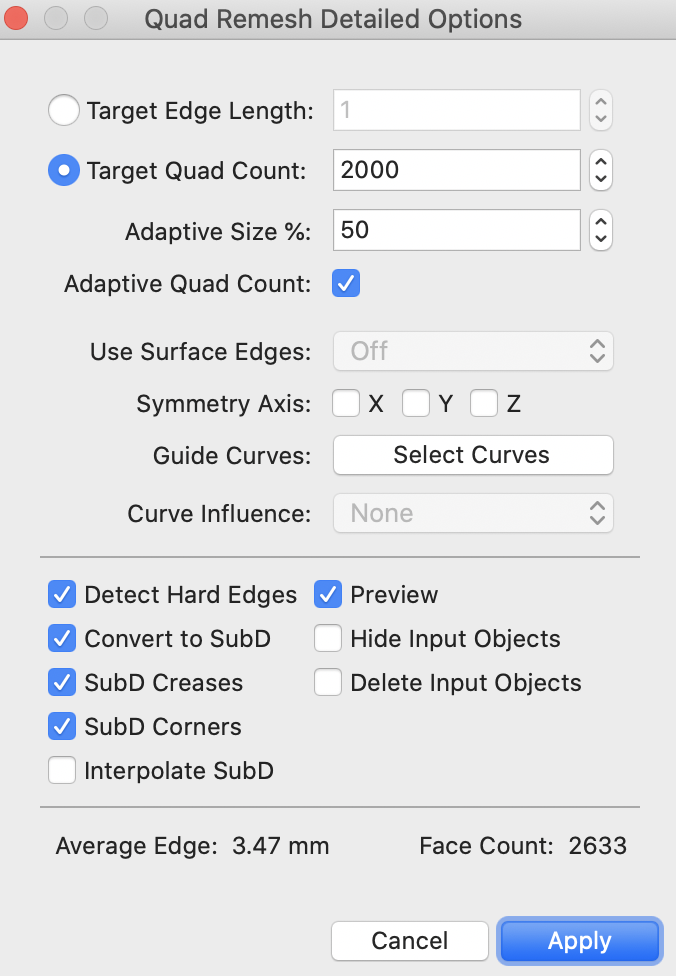
Useful commands include QuadRemesh (converts extrusions, solid bodies, meshes to SubD objects), PointsOn/PointsOff (view/hide control points), and SoftTransform
(manipulate surfaces by clicking and dragging). Starting with a base of spheres and cylinders, I then played with QuadRemesh to manipulate the SubD form. I found that a
higher quad count is more accurate, but more difficult to manipulate, so I started with large faces and worked my way up to the finer details.
I'm more comfortable with fusion for parametric editing and I needed to transfer my model to fusion anyways for machining, so I exported my model as a .step file.
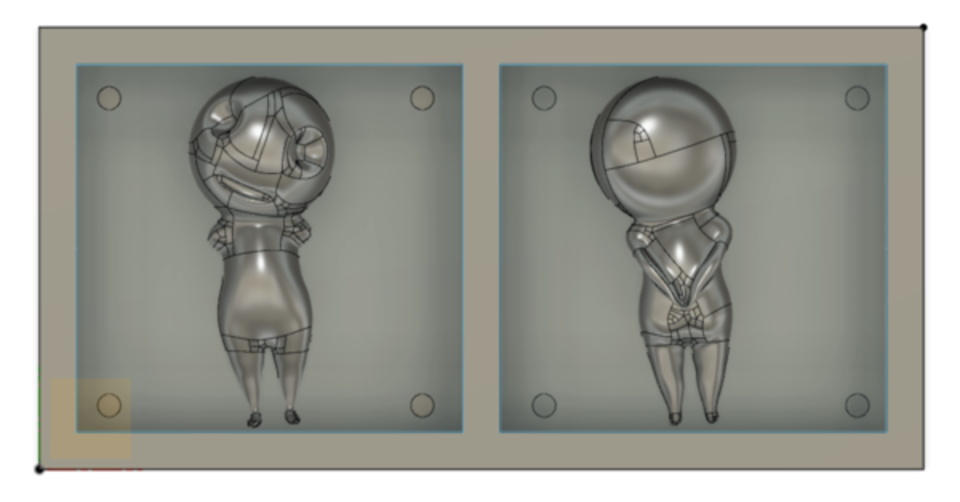
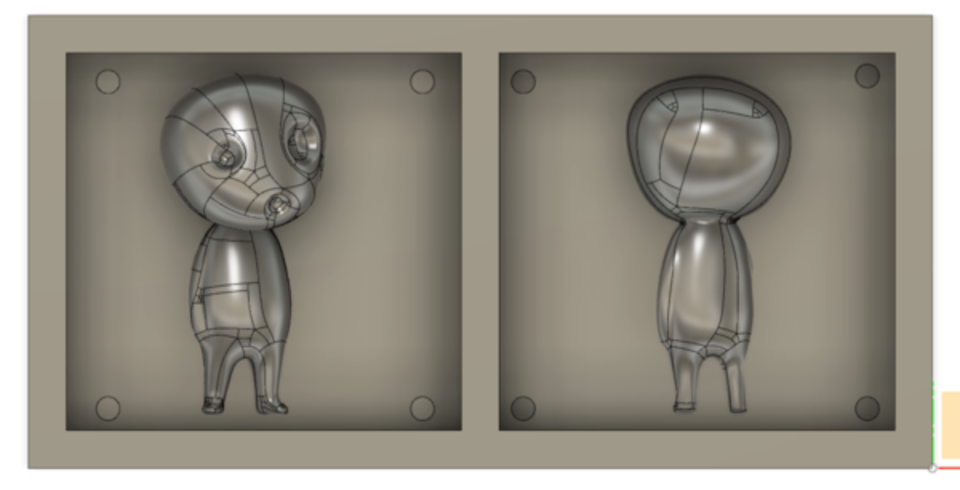
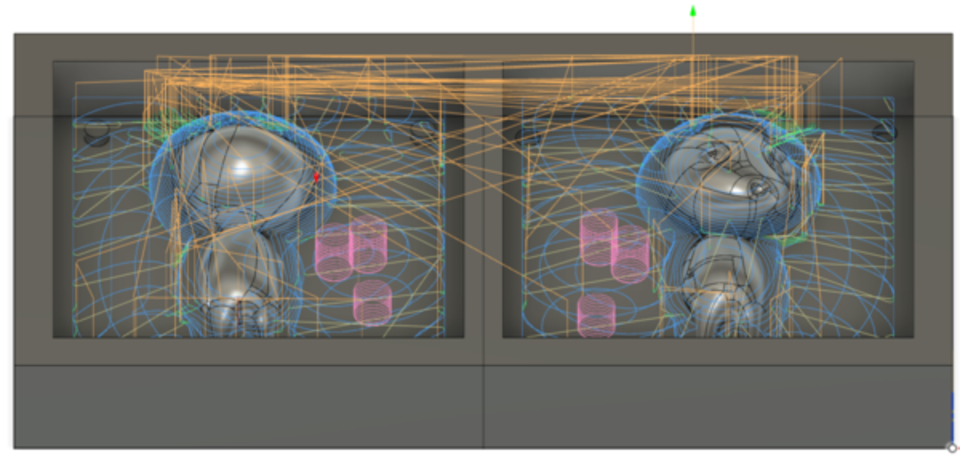
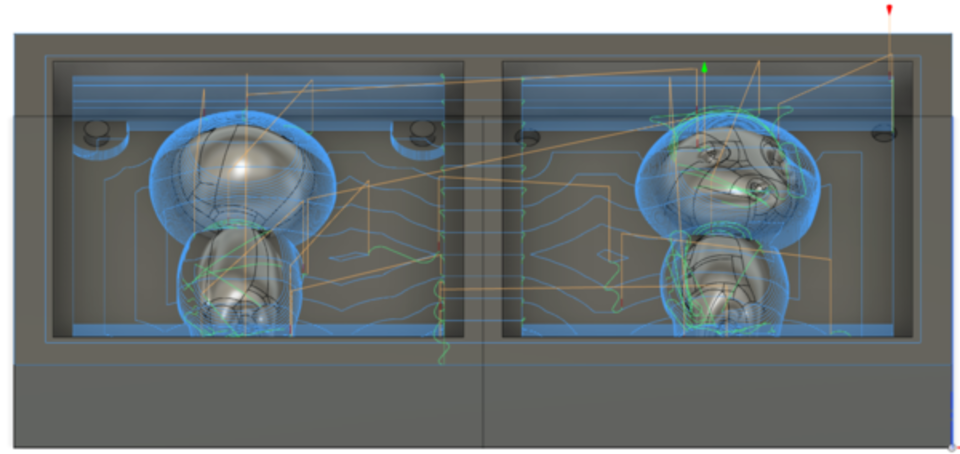
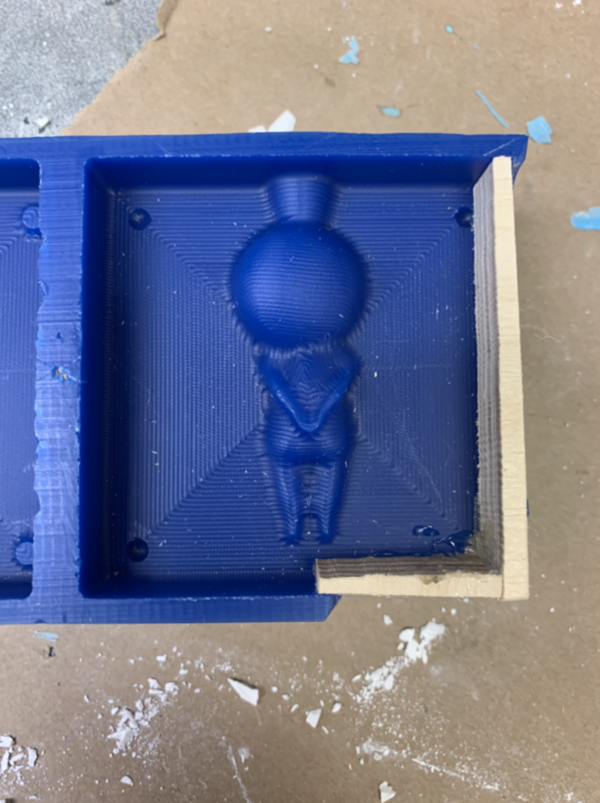
Noticing that my model is pretty shallow, I decided to fit 2 molds into my 3x6x1.5' wax block. To do so, I created 2 3x6x.75' rectangular extrudes. Next, I hollowed
the extrude so that the walls were .25' thick. Slicing my model along the x axis makes it the easiest to machine and eliminates undercuts. Hopefully my split features will align
when the mold gets put together, but I'm less confident with my registration features. Lastly, I incorportated press-fit joints located at the corners of my mold to join the two halves once cast.
Flexible Cast
Fusion Manufacturing
1) New Setup. Define Cast -> for wax, set all offsets to 0. Cast should be max mold geometry (6x3x.75 here). Align Axes and set origin to top left corner
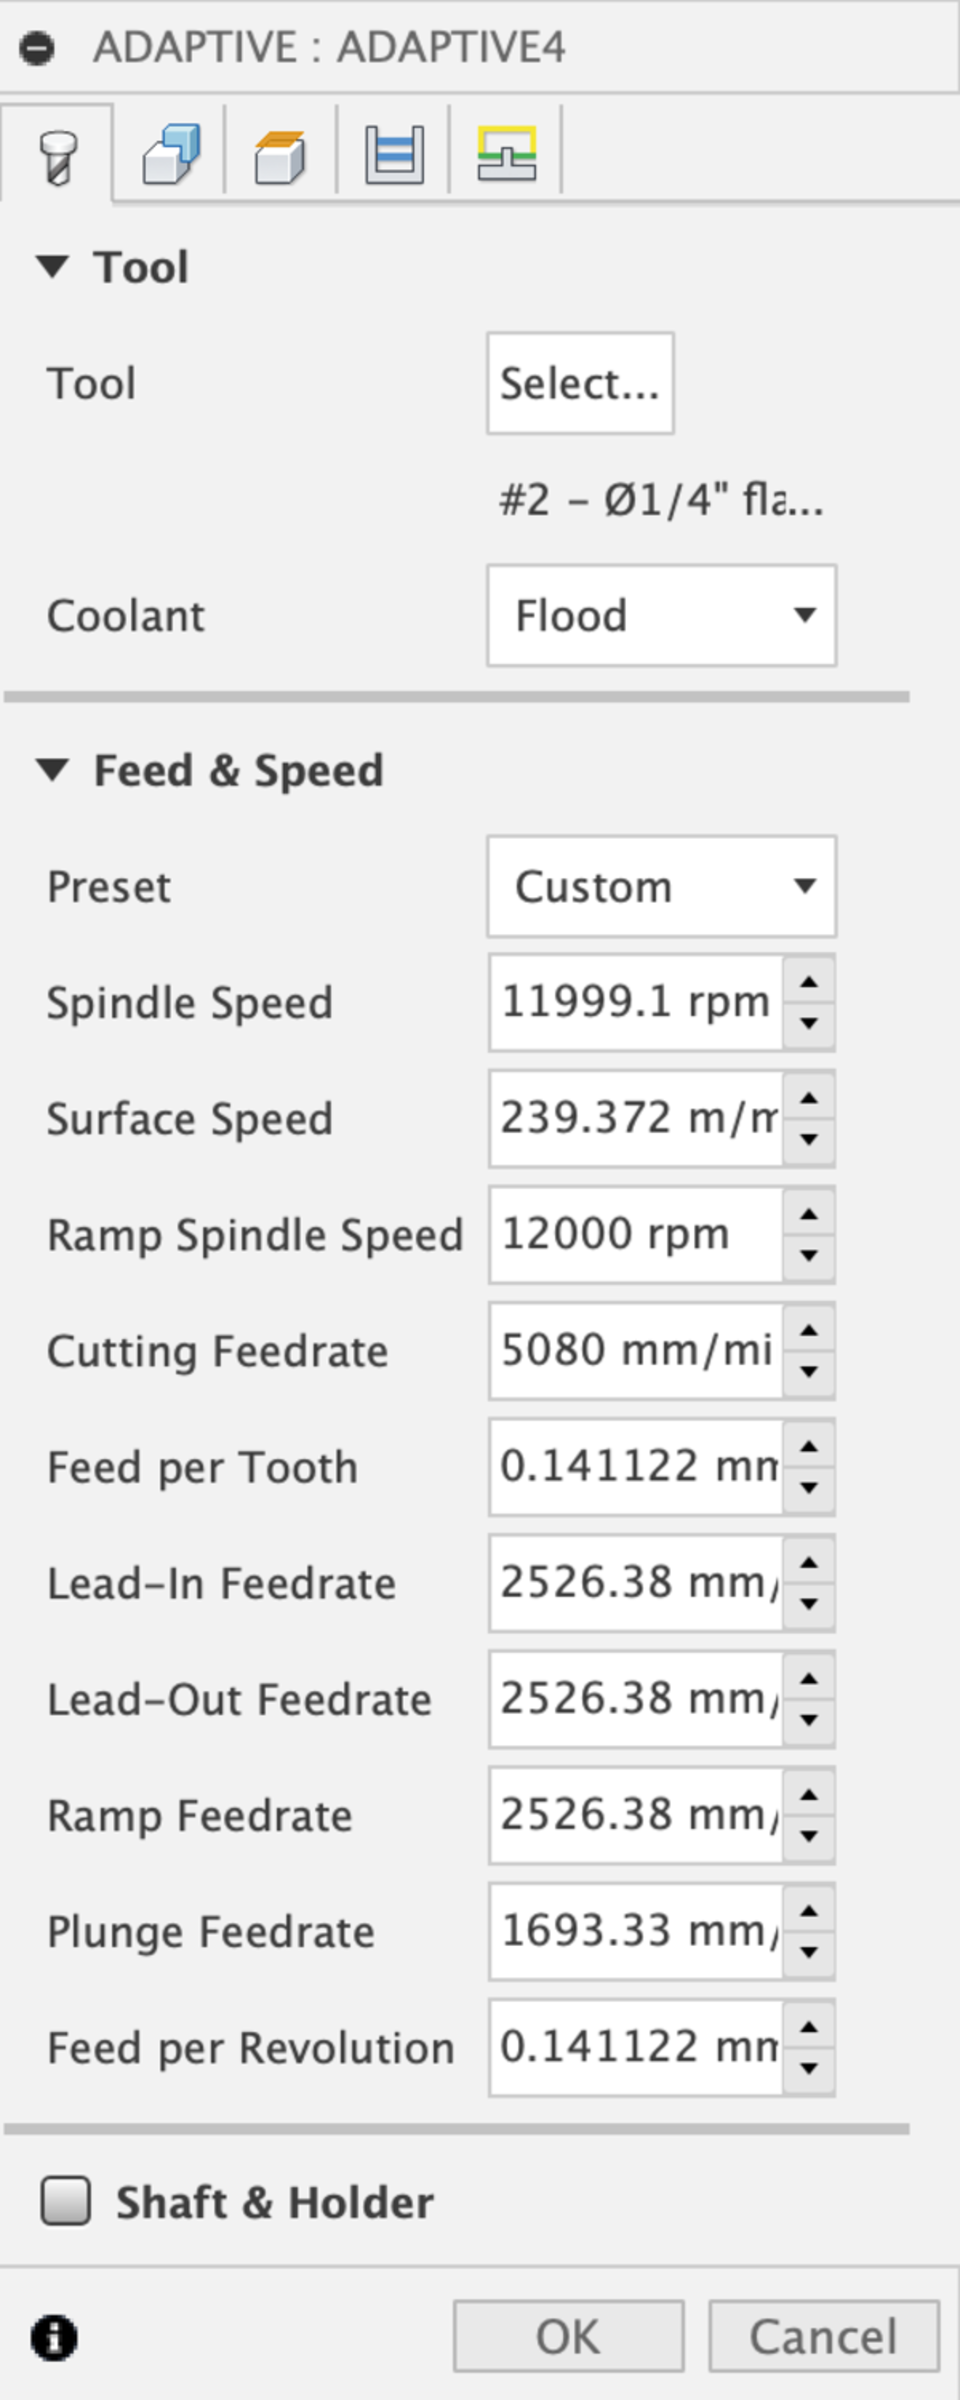
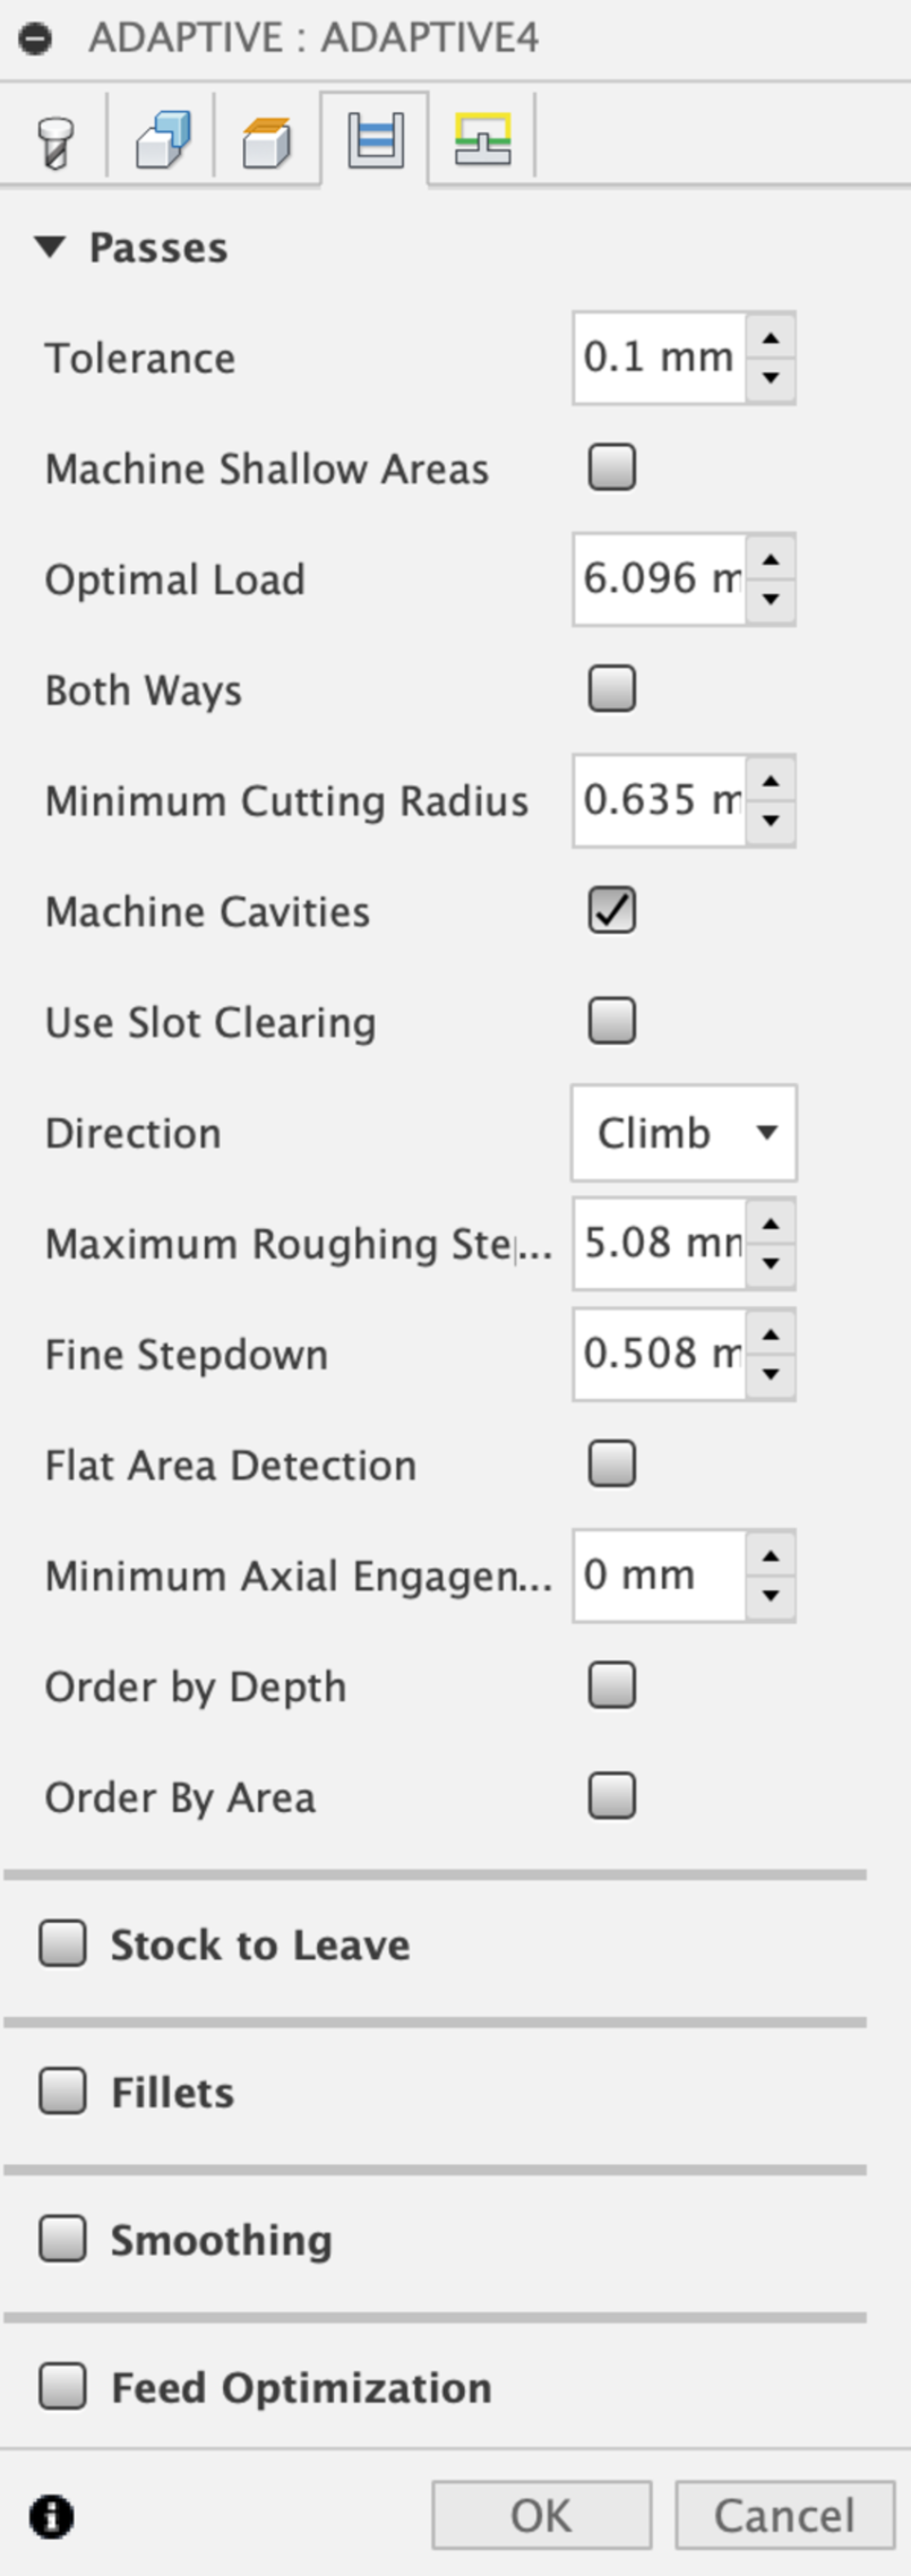
2) Adaptive clearing. Flat endmill -> sample tools (in). Select random tool. Cutting rate = 200 in/min. Max roughing step = .2 in. Uncheck stock to leave.
3) Steep and Shallow. Flat endmill -> sample tools (in). Select random tool. Cutting rate = 200 in/min. Max roughing step = .2 in. Uncheck stock to leave.
Milling the Wax Mold
Before being sent to the ProtoTrak, my .step file was converted into gcode for each toolpath.
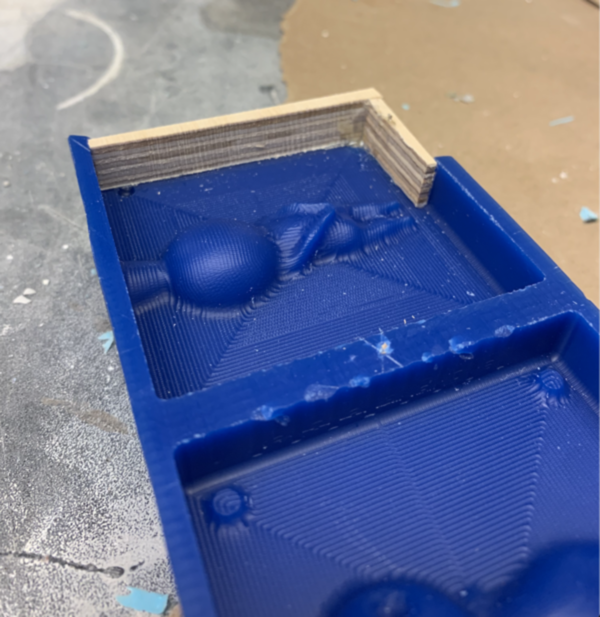
Shah set up file for me, but errors were made when setting the z origin and centering the piece.
As a result, the rightmost wall was crudely milled through and the small tool bit snapped. Other shop staff helped finish the job, but I did not have time to find someone else to help set up the flipmold.
I will complete the flipmold at a later date.
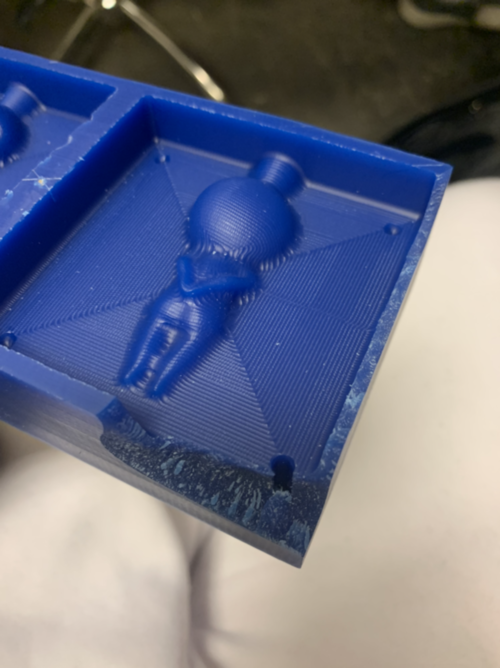
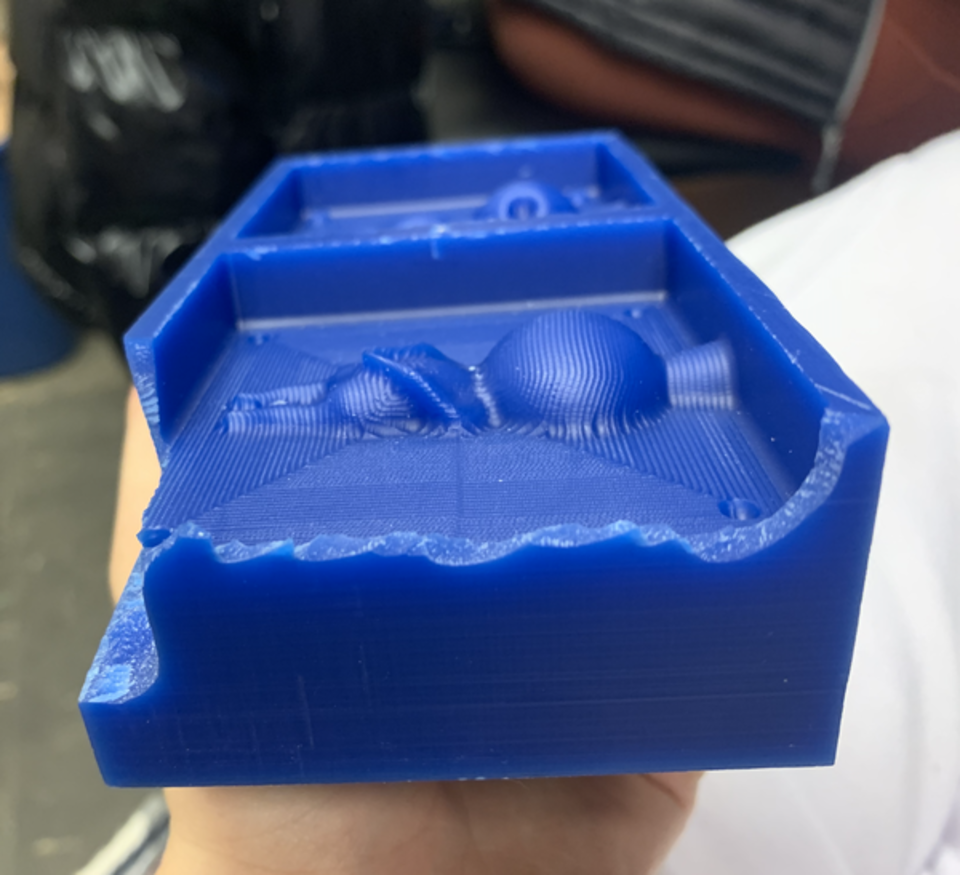
After a little surgery on my mold using a glue gun and band saw to cut scraps, my model was functional, albeit less pretty.
OOMOO and Hydrostone Casting
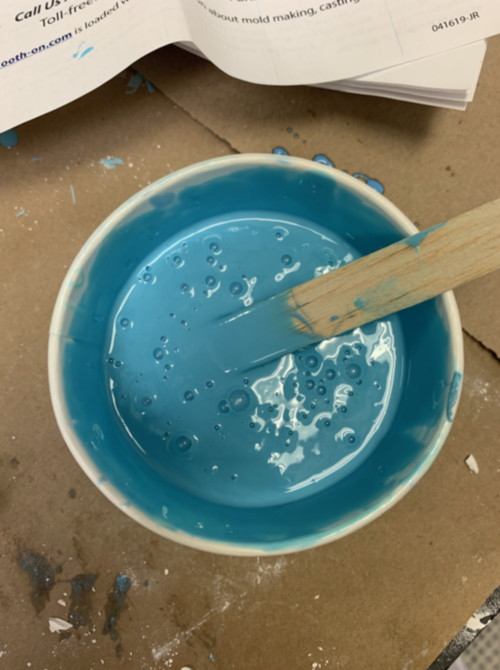
To prepare the OOMOO, prepare 2 cups of Part A and Part B at a 1:1 ratio, mixing thoroughely. Combine both parts and stir for at least 3 minutes and until there no color streaks remaining, using a stiff, flat tool with a flat bottom and corners.
Let the mixture sit to let any bubbles float to the top.
When pouring the OOMOO into the mold, start at the lowest points and work upwards to minimize air bubbles. OOMOO takes ~2 hours to cure, and I left it overnight.
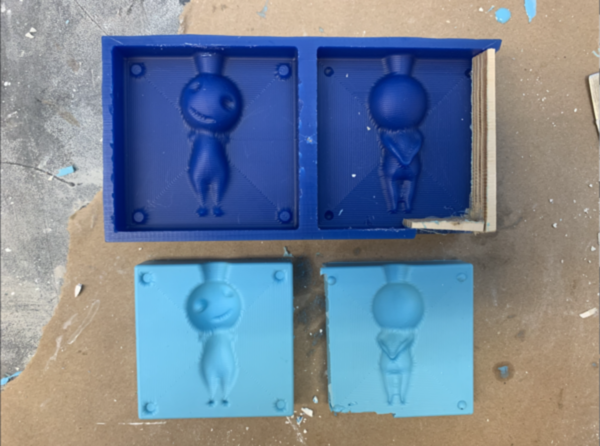
To prepare the Hydrostone, mix 3 parts dry Hydrostone powder with 1 part water in small increments, mixing thoroughely. Clamp the OOMOO mold and pour the Hydrostone mixture in.
Before letting it set, I poked around with a toothpick to bring trapped air to the surface. Hydrostone cure time is 20 minutes, I left it for 1 hour.
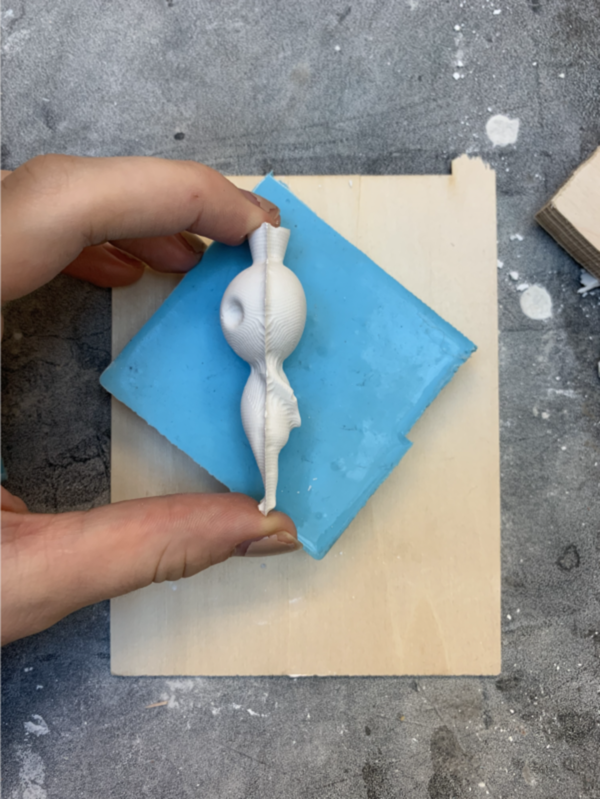
I don't think I clamped the silicone mold together hard enough, or my mixture had too much water, because the part was creased at the intersection of the 2 molds.
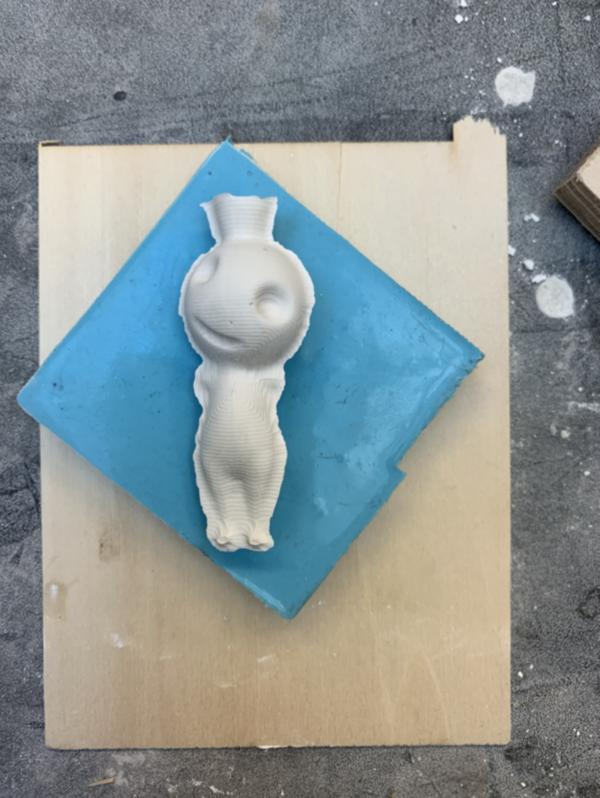
After a little post processing to sand the creases down and snap off the funnel, my Kodama was finished.
Final Product!