Add some information about the album below, the author, or any other background context. Make it a few sentences long so folks can pick up some informative tidbits. Then, link them off to some social networking sites or contact information.
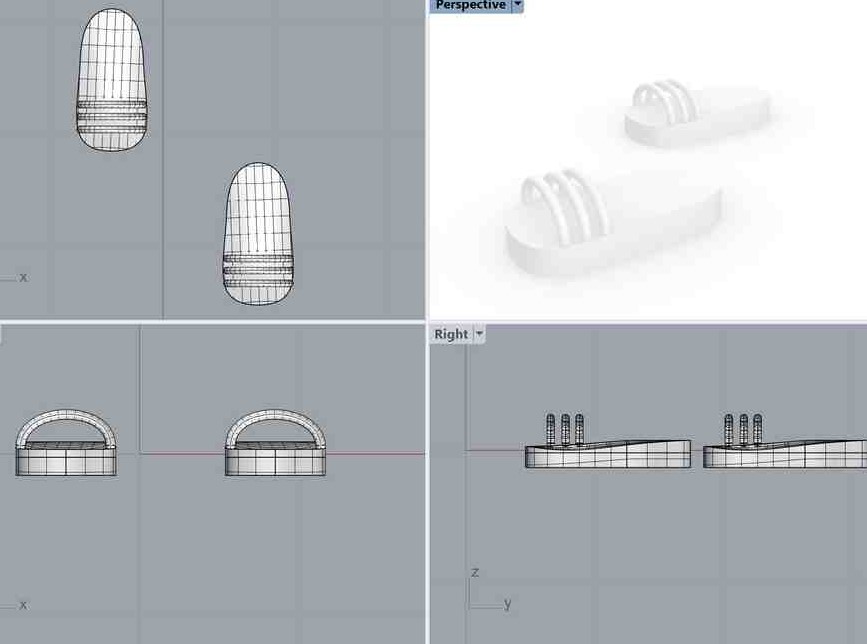
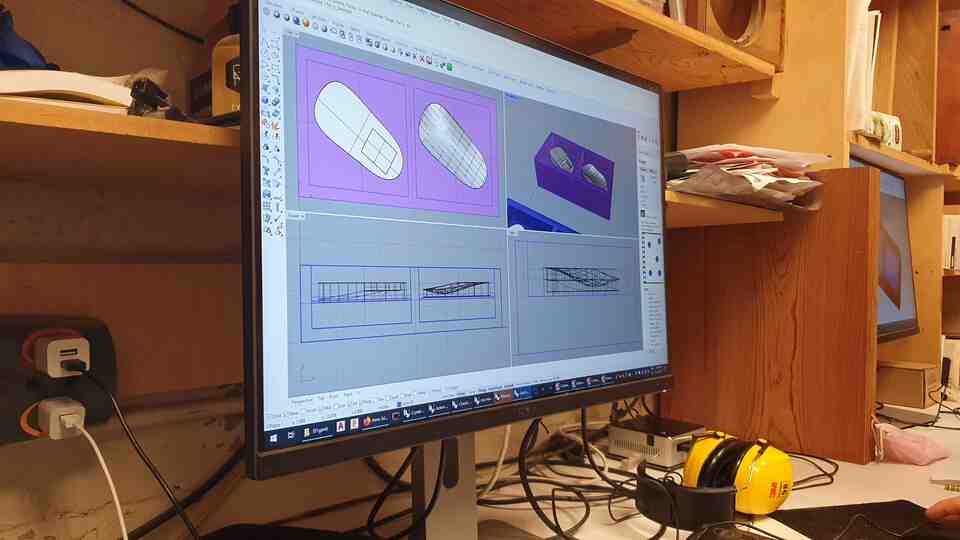
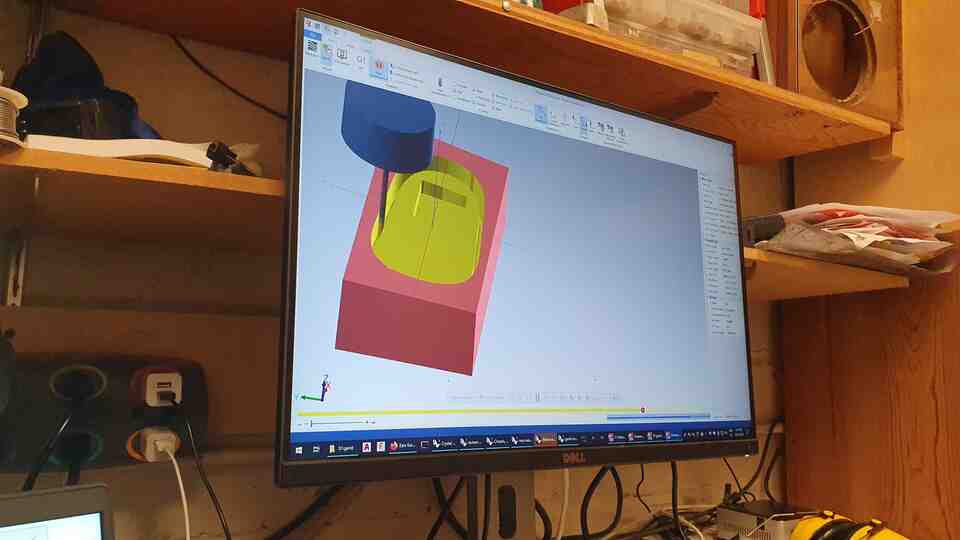
This week we worked on molding and casting techniques. I am working towards my final project bit by bit, so I designed the kids shoe sole in two parts for molding with flexible silicone. The upper sole part consist the curvature of the feet, and the under part consists of the PCB inner surface.
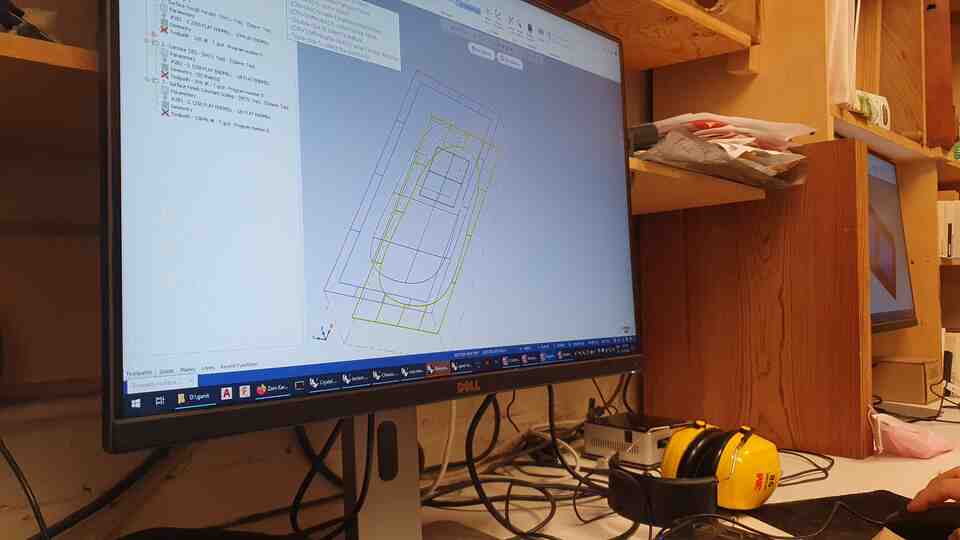
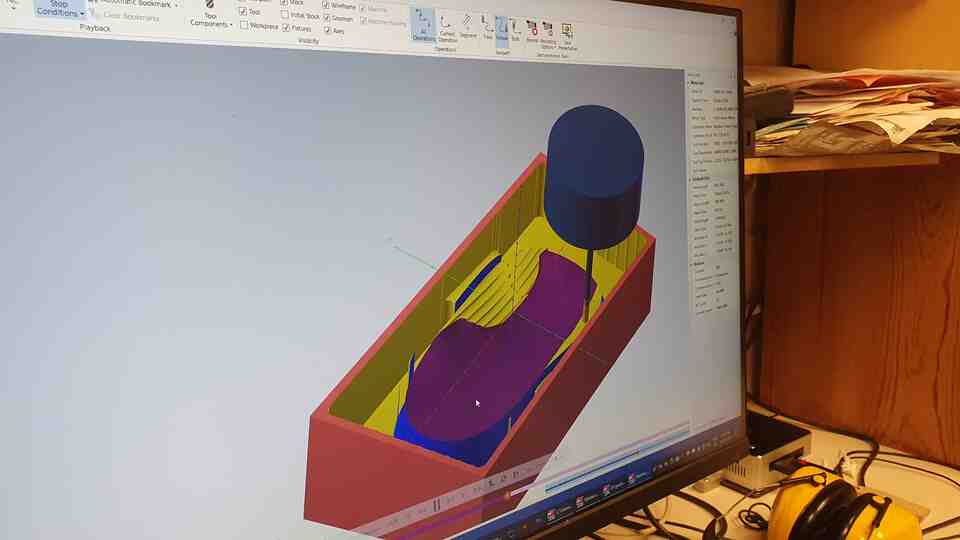
I used Rhino for cutting the model to two parts and modify the structure to two seprate parts. Thanks to Calvin (!) we spend our time together to arrange the milling file, and we worked on the CNC for two seprate wax blocks (thanks to Kim for giving me his unused part!!)
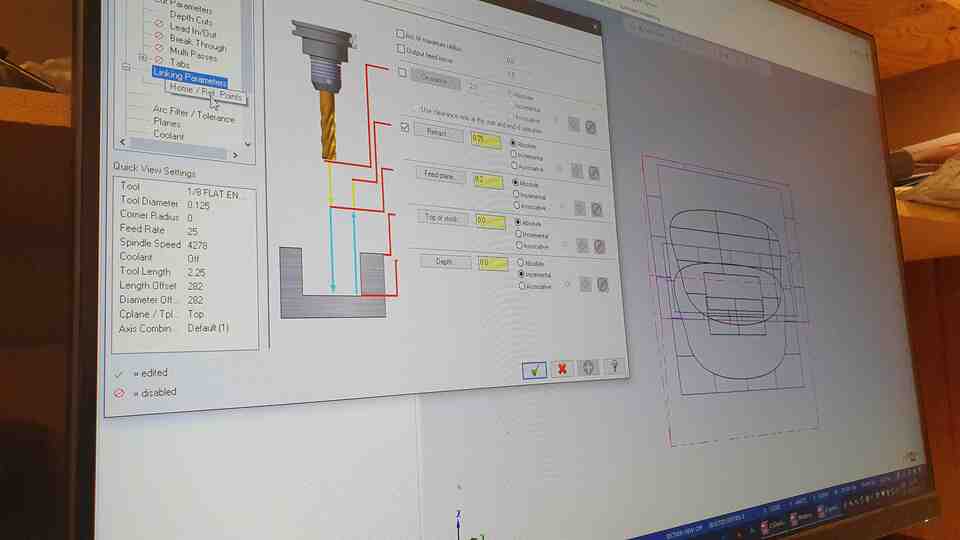
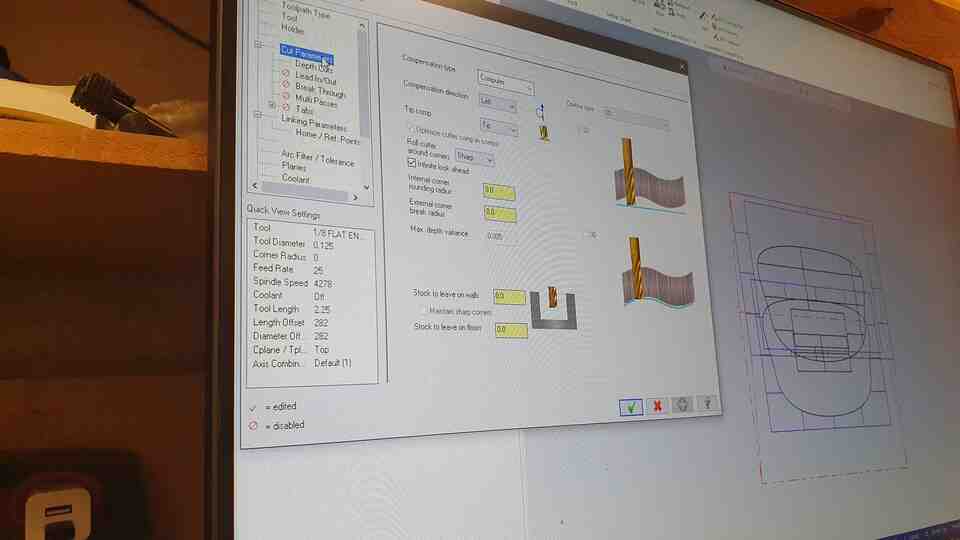
For prepering the gcode, We worked on three toolpaths, where we used two 1/8 inch inmill flat and 1/4 inch for the finishing part.