Week 3
Instrument used:Sindoh 30WOX 3D Printer and iPad Apps
FDM: fused deposition modelling; an object is built by depositing melted material in a path layer-by-layer.
additive manufacturing: a computer-controlled layering of materials to build 3D shapes
Photogrammetry: the science and technology of obtaining reliable, detailed information about physical objects through recording and measuring.
I'm learning in this class that there are really
people out there who have insanely creative thought
processes. Honestly it's a bit intimidating, but I also
am really learning a lot and enjoying it. I hope to someday
be able to see a process like those introduced in this
class and come up with things as amazing as my peers. FDM: fused deposition modelling; an object is built by depositing melted material in a path layer-by-layer.
additive manufacturing: a computer-controlled layering of materials to build 3D shapes
Photogrammetry: the science and technology of obtaining reliable, detailed information about physical objects through recording and measuring.
3D Printing
This week we learned about additive manufacturing and 3d-printing. I've sat in on a 3d-printing "tutorial" before, but it was more how to submit files to a department printer rather than learning how to use one. I've also had friends give me 3d-printed stuff. But I've never actually gotten to use one!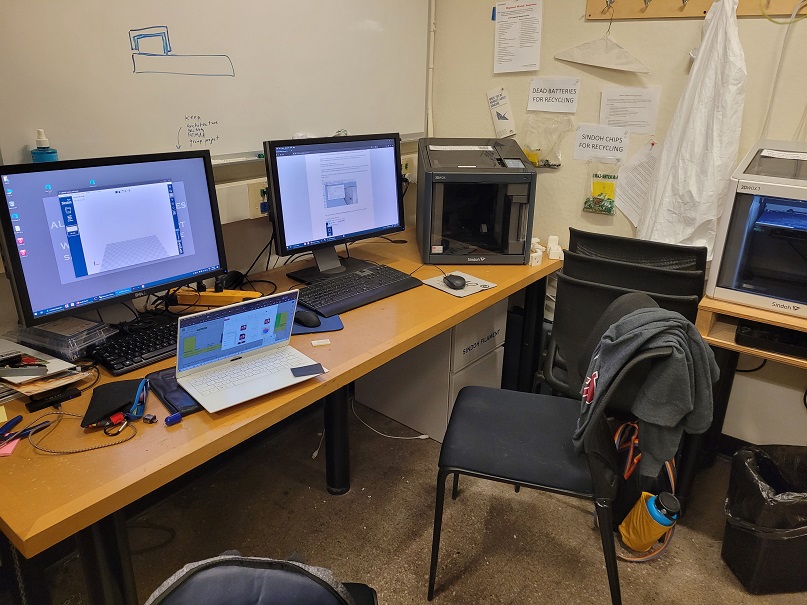
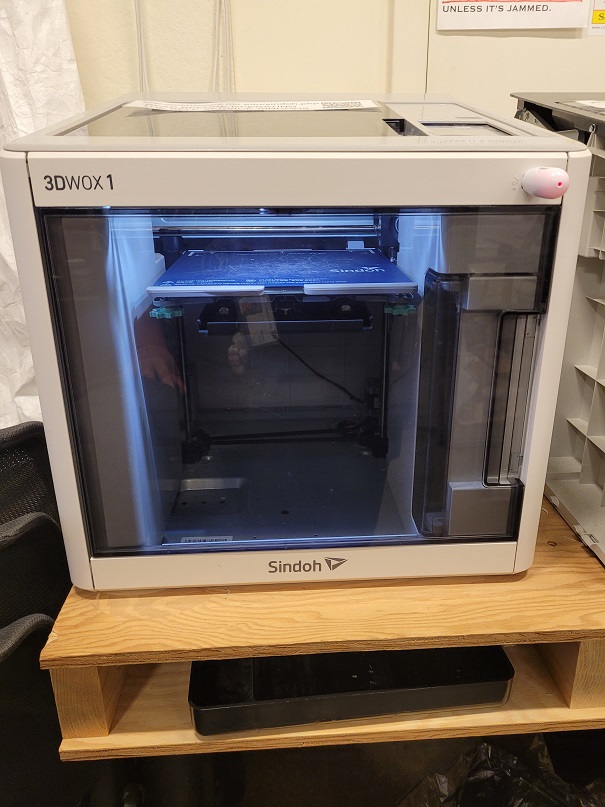
The architecture shop has four 3d printers. They have DP200 and 3DWOX1 models of the Sindoh printer. We use the associated 3DWOX software as well.
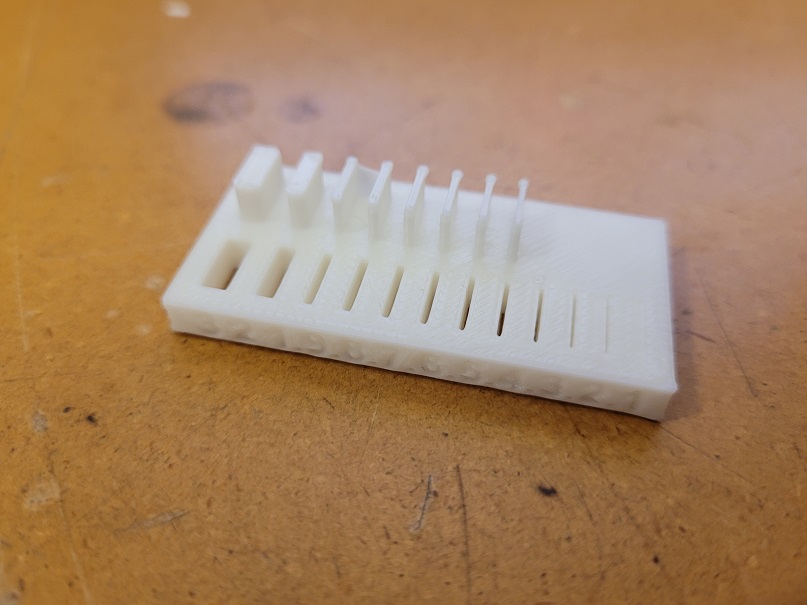
To get a better sense of the 3d printer's specs, the group project printed out a shape with various holes and ridges to see the limitations of what the 3d printer could do. It did very well at making gaps up until 0.1 mm, but unable to make ridges past 0.5 mm.
Afterwards, I tried to print my first design. While trying to understanding the concept of making something that could only be built additively--i.e., not able to be built subtractively--I thought about puzzles and chains. As long as there's no hole for the chains to loop into, it should be additive.
To use the Sindoh printers, there is a tutorial on the archsite website. In summary:
1. Your file must be saved as an STL file.
2. Either download the Sindoh software or use the computer in the archsite shop. Open your file in this software.
3. Modify your settings--what printer do you want to use? What sort of support (line, zigzag, etc?) do you wish to use? A special note is in the Archshops, to use the older Sindoh, you should select DP200 and for the newer Sindoh, select 3DWOX as your printer.
4. Make any scaling or size adjustments as needed.
5. Check the mesh and layers on your file.
6. Save the g-code to a usb.
7. Input the usb to your printer of choice, select "Print" and what file you want.
Here was my initial design.
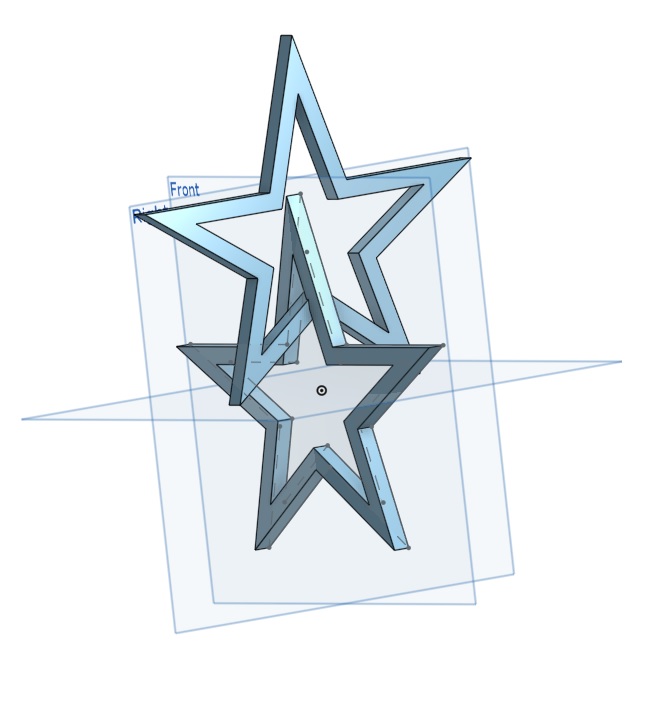
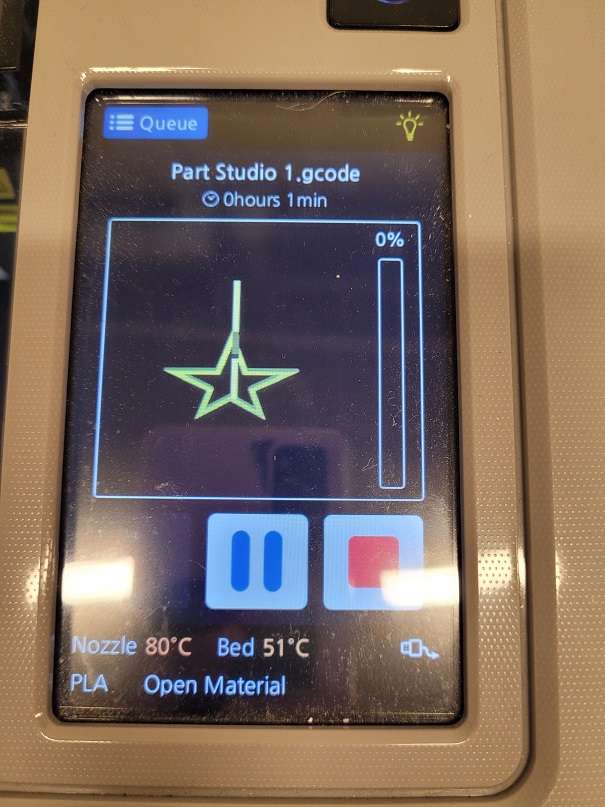
I was hoping this first chain wouldn't take too long so I could modify my design and build a loop of these stars in a sort of Maker-Star-bracelet. However, I immediately ran into an issue: upon opening my STL file in the Sindoh program, my design disappeared. I was rather mystified but I was able to save a g-code to my usb, which I then put into the 3d printer.
Anyway, despite having a g-code, the printer claimed my print would take 1 minute, which told me it wasn't real. And true to form... nothing was printed, not even an outline.
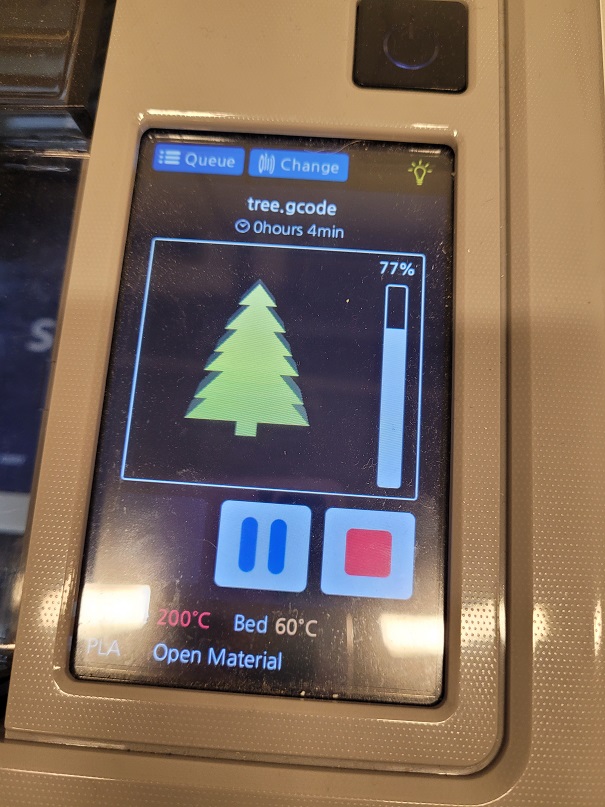
I decided to start over with a more basic shape and try to build from there. So I pulled out the tree I had made from week 1, and was able to print the tiniest of trees.
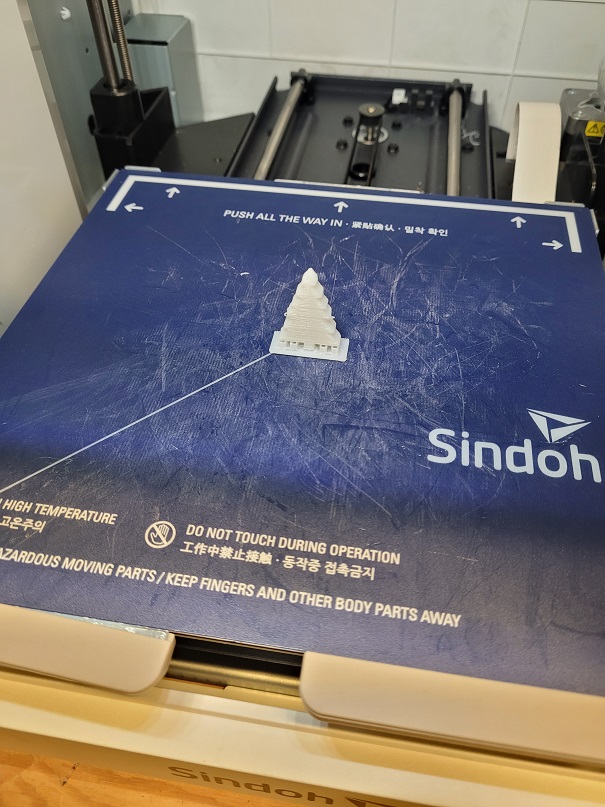
Heartened, I tried to then add a gap that the chain could ostensibly start. See below, the heart hanging by the top cone.
And thus, I had some shapes made!

I hope that I'll be able to make my chain soon...It could be a nice addition to my hood! a little addition, not functional at all, just aesthetics.
Scanning
The worst part of this assignment was understanding my own hubris. "It's scanning," I thought. "How hard could it be to get 360 degree pictures of an object?"
...Well, they say learning is a process.
I looked into Photogrammetry and found an app for Ipad called Polycam. The Archshop had a camera but honestly I thought it was more useful for me to use a tablet or phone app that I would more realistically use again someday.
First, I attempted to do a banana. My bed was the largest flat object so I tried to scan that first. Honestly, I probably knew it wouldn't go that smoothly because my sheets are orange but I didn't expect this results.
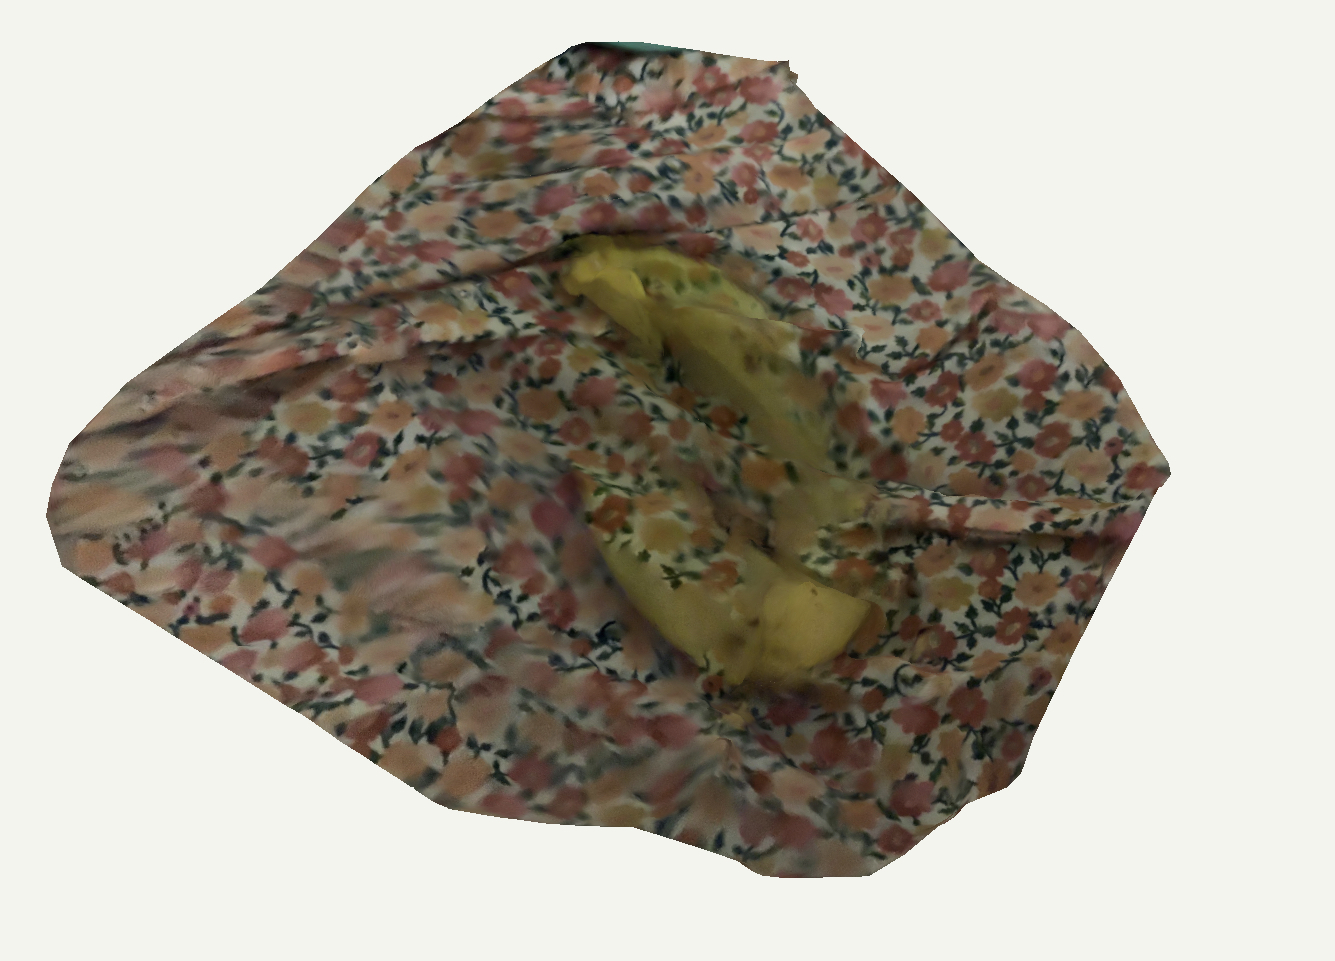
I.......... Honestly this is a bit embarrassing but I'm keeping it because it is also kind of funny. I did SUCH a poor job that my single banana turned into two ghost bananas.
My second attempt was somewhat more successful in that there were at least a few accurate shots of the object (this time, an apple). The top, where I had the most control/ability to photograph, turned out clear.
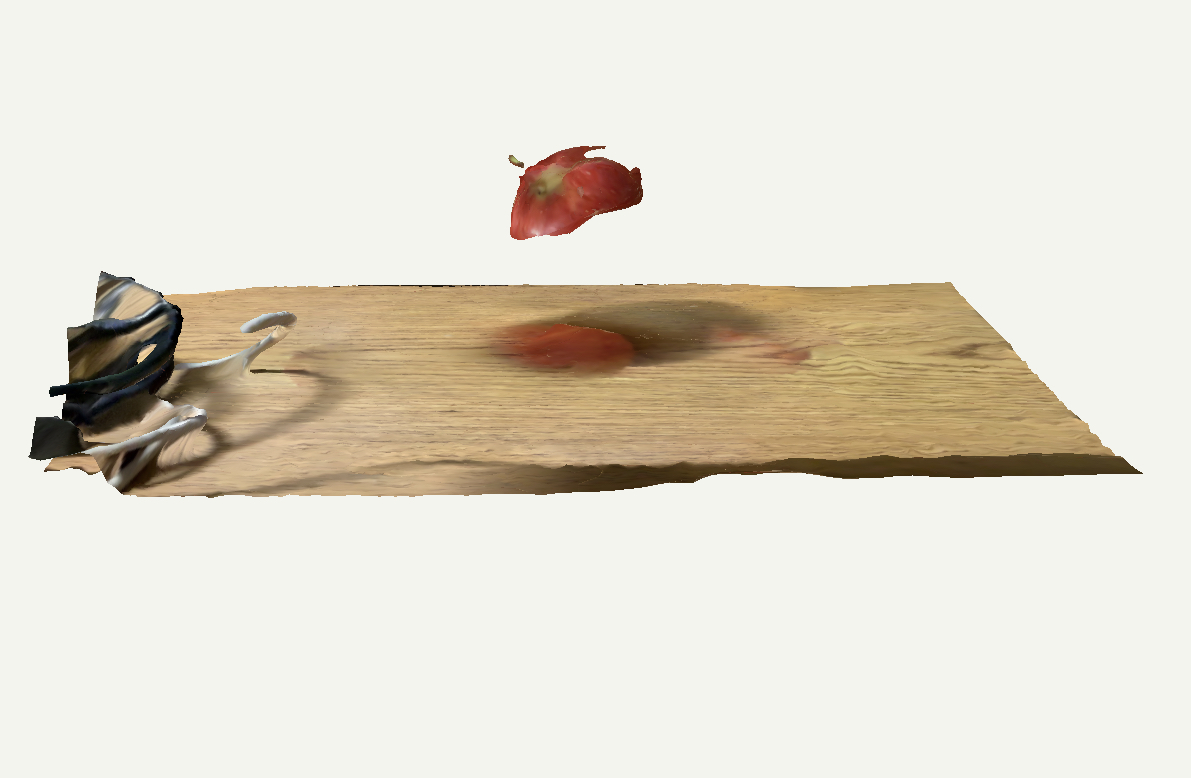
Plus, I was able to get a semblance of the apple's height from my desk, which I was unable to do with the banana-bed shot. Still, it's more of a ghost apple than a real scan.
I realized I needed something that I could physically circle with my iPad. The awkwardly holding it and shifting it around an object was proving not a good technique, so I knew I had to try something else.
There was a lot of talk about shoes so I set up my slide on a cinder block in my dorm basement and went to work. And here is the result: