Week 5: Computer Controlled Machining
In which we have a sheet of OSB
and are tasked with making something.
Safety Training & Characterizing Machine
Jen held the training online via Zoom since the
space was so small. She went over the tutorial
posted on the archshops website and showed us
the results of her press fit tests.
One thing she notes is how the OSB thickness is unreliable, and to not trust the provided specs, but to measure it yourself, since it may depend on what batch the OSB was processed in (since the stock in the lab likely came from the same batch, the test should hold true for most of us).
Even though it was a whirlwind, Jen reassured us this is the start and that full understanding of the machines comes with practice, and we'll always be with a staff member while using these technologies
ArchShops Tutorial

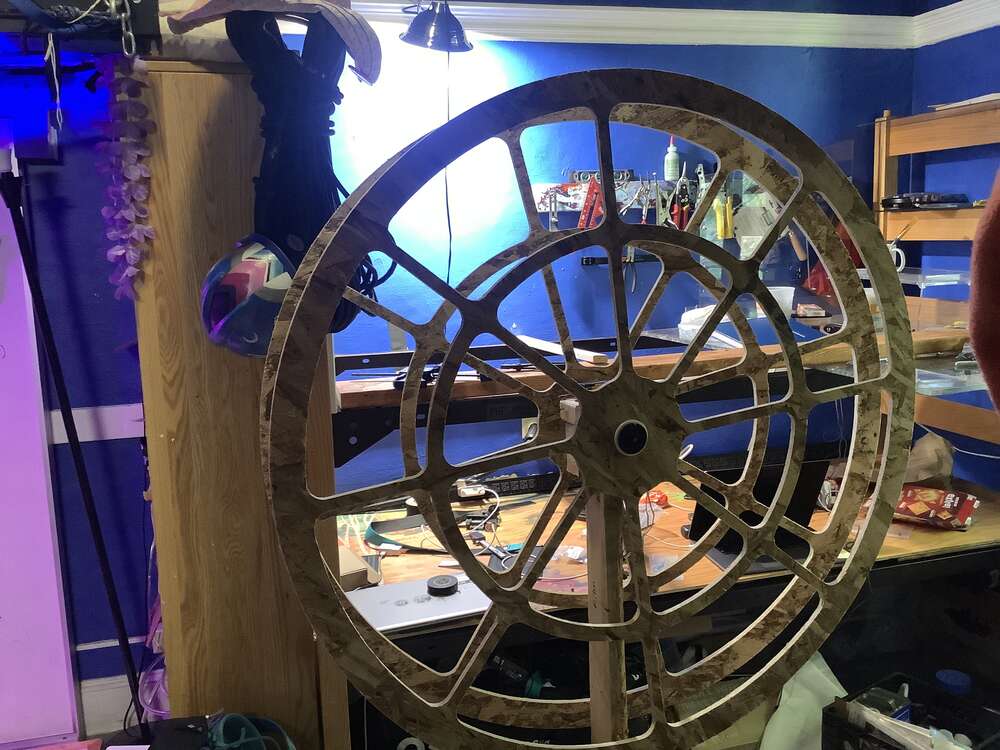
Sophia's Chromatrope
My friend Sophia will gush with shining eyes
whenever she talks about chromotropes, a visual
illusion that comes out of two transparent disks
with static paterns rotating in opposite
directions and create visual animations.
I decided I would try to make one this week, but mechanically with wood, since these machines could create very exact smooth circles whereas hand or power tooling cannot recreate.
This site describes chromotropes with nice visual effects:
https://kieranbrowne.com/research/how-chromatropes-work/
I decided I would try to make one this week, but mechanically with wood, since these machines could create very exact smooth circles whereas hand or power tooling cannot recreate.
This site describes chromotropes with nice visual effects:
https://kieranbrowne.com/research/how-chromatropes-work/
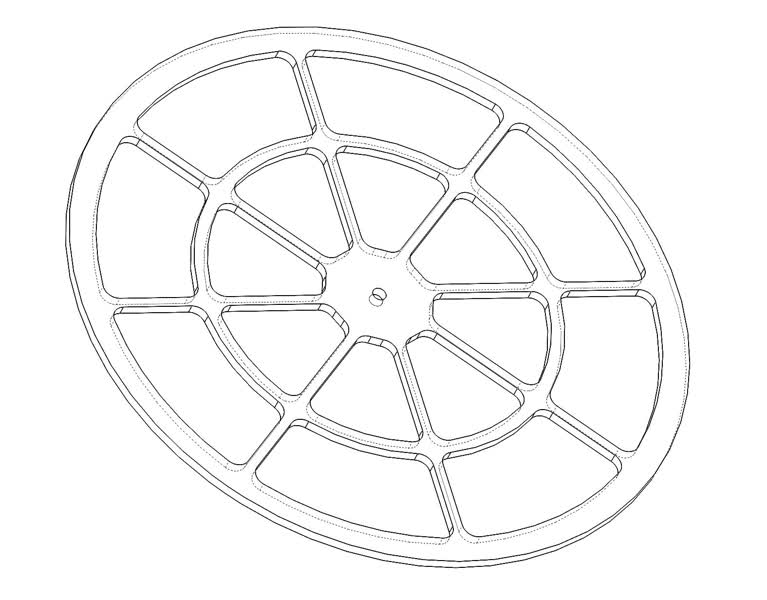
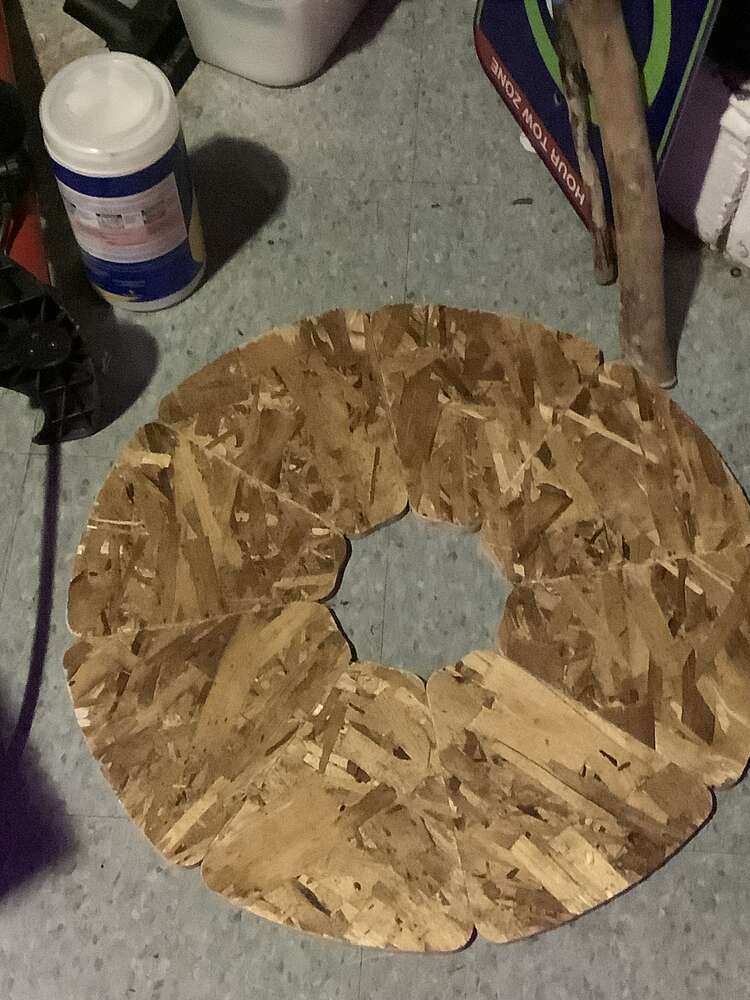
Sweet and Simply Circular
I CAD-ed using SolidWorks this time, as I got a loaner laptop to be able to use software that runs in Windows. Knowing these machines might be limited by time and that I only had one sheet, I tried to keep things simple. I intentionally make every cut a smooth curve (which took a suprisingly long time to figure out), to that problems like dogbones which are necessary for staright interior cuts, won't be an issue.
Something I did wish was that I planned ahead of time how to attach and spin these wheels. I assumed at the time I'd just figure it out, (which did eventually happen), but doing the scavenging earlier and creating a full plan would've been helpful.
WheelFile.DXF
Something I did wish was that I planned ahead of time how to attach and spin these wheels. I assumed at the time I'd just figure it out, (which did eventually happen), but doing the scavenging earlier and creating a full plan would've been helpful.
WheelFile.DXF

N51 Sunday Lab
Apparently, my simple CAD was very well received by
Calvin, the TA who would work with us. As a first
time using the machine, I was glad it worked out.
I was sort of concerned about the weight of the finished piece, but I was happy to know it is carryable by someone like me! the holes were large enough to loop my arm through and removed enough weight despite the large size. Would definitely reccomend keeping transportation in mind.
I was sort of concerned about the weight of the finished piece, but I was happy to know it is carryable by someone like me! the holes were large enough to loop my arm through and removed enough weight despite the large size. Would definitely reccomend keeping transportation in mind.
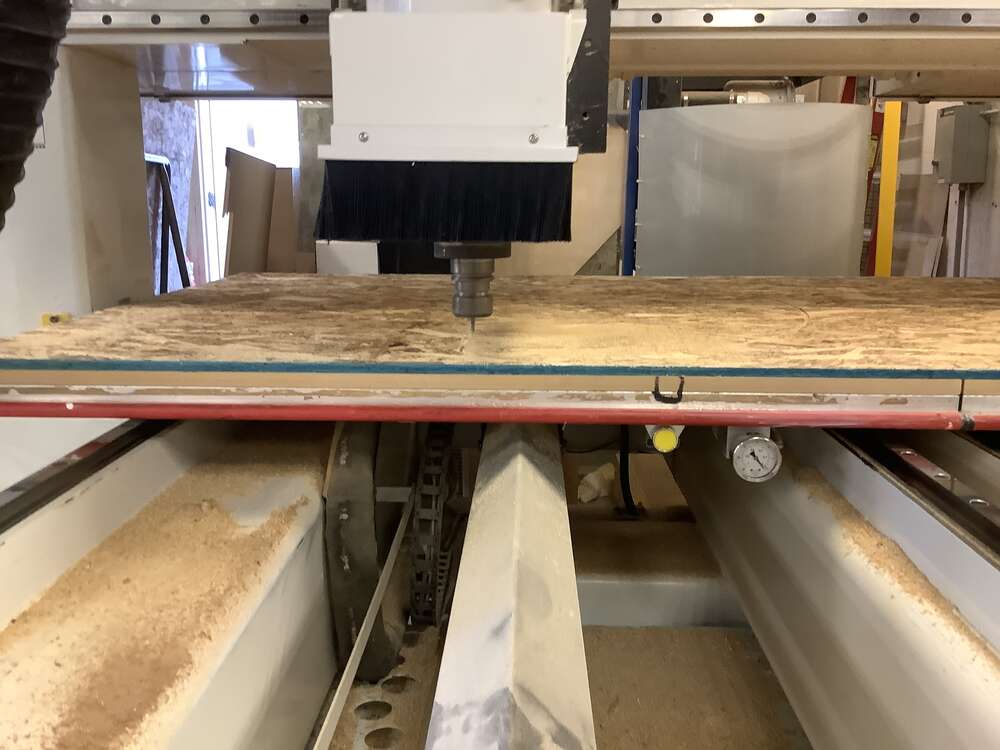
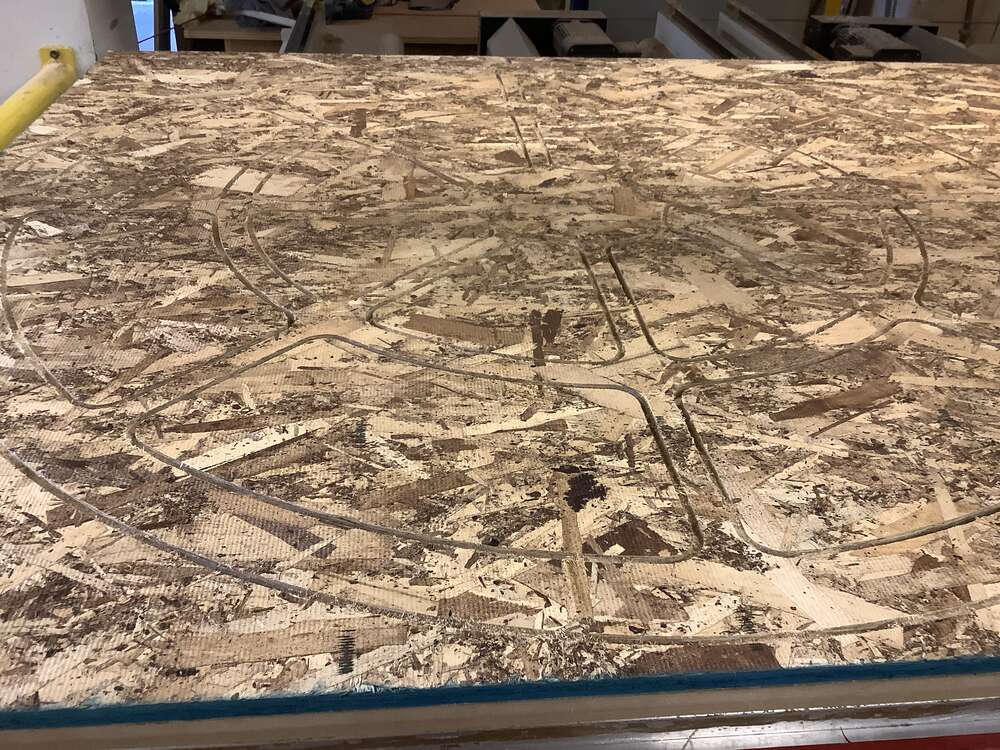
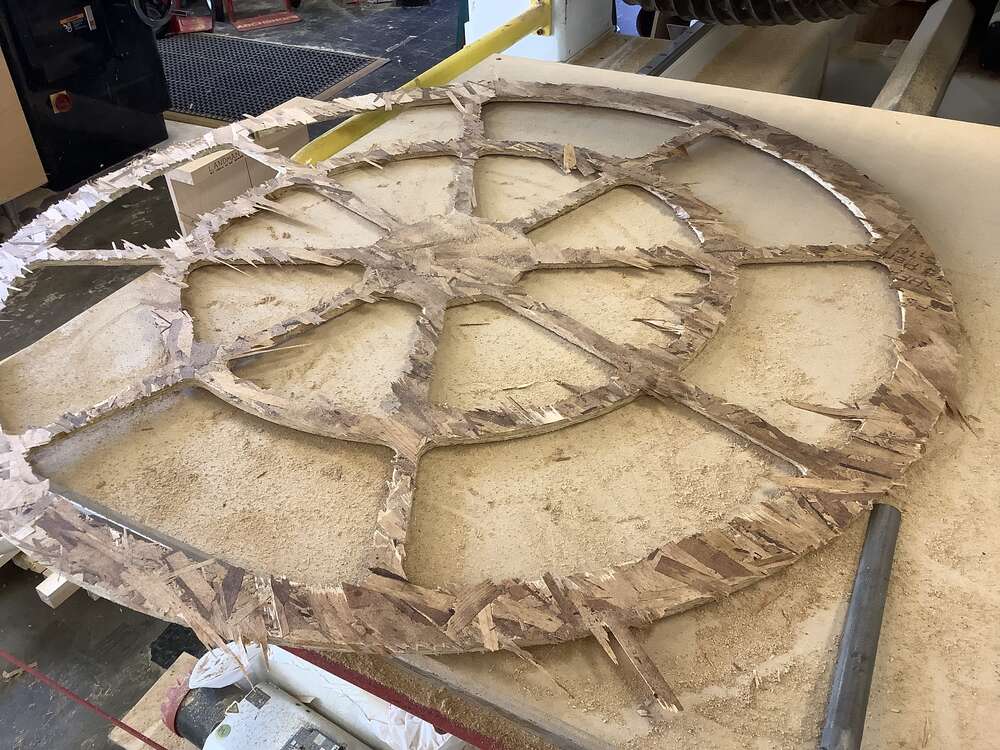
Filing the "Onion Skin": Post-Processing Cuts
The Onsrud machine does not cut all the way through,
which makes machining a bit different
from laser cutting (even though the design aspect is similar
and it features a vacuum adhesion mechanism). The thing is if the
vacuum seal is broken, the stock won't be held as tightly and would
pose a danger by shifting or spinning out of place with the flutes.
It operates similar to an end mill cutting the traces very deep, but leaving a small amount of stock, the "onion skin," which serves to maintain the vaccum seal and can be easily removed afterwards.
It starts off with popping out the uneeeded pieces. I learned to push on the unwanted sections from the side with the onion skin, so they fray in a direction where material on the part we want is kept rather than ripped out which risks indents on the part we want.
Then, I filed the edges smooth. I started with the larger, courser file, then moved to the smaller, finer one. Again, I file so I am bending the onion skin "in" to minimize ripping/tearing off chunks of the meterial I want.


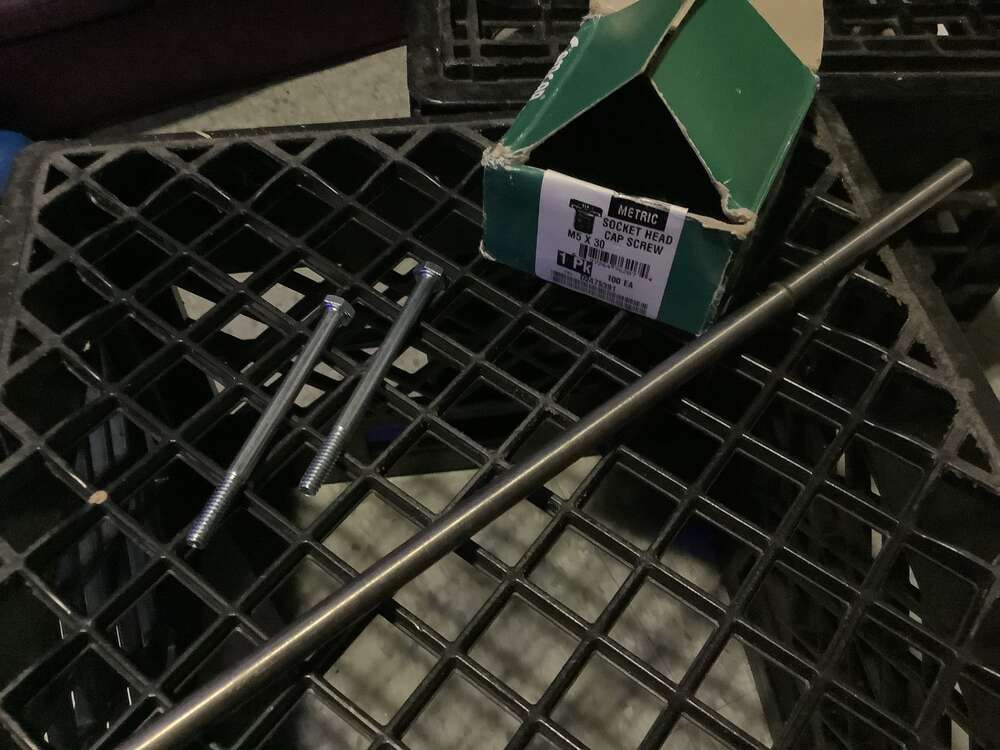
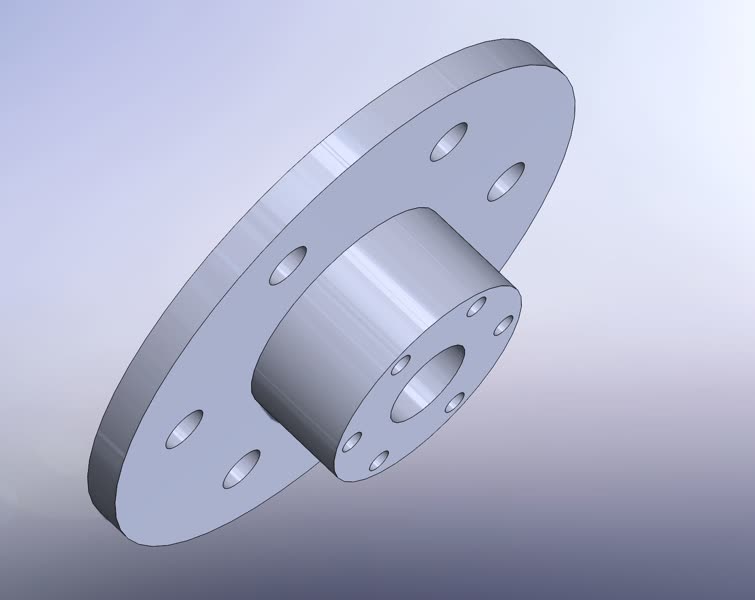
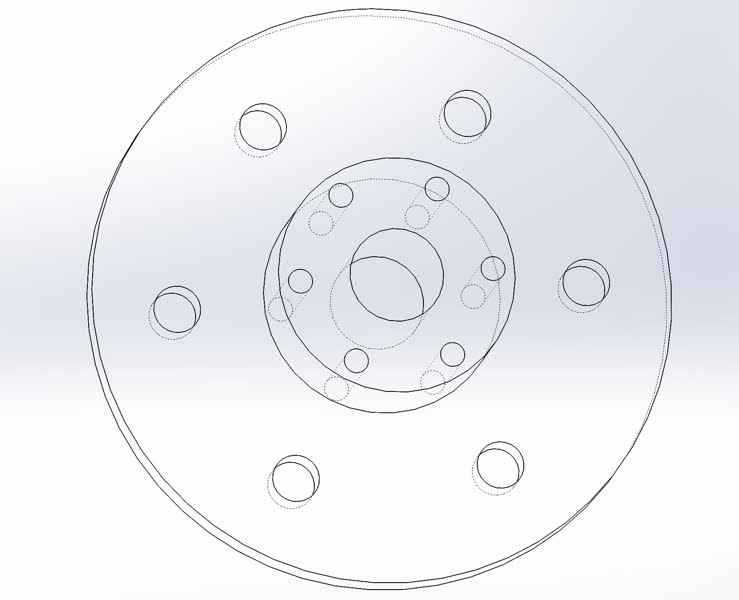
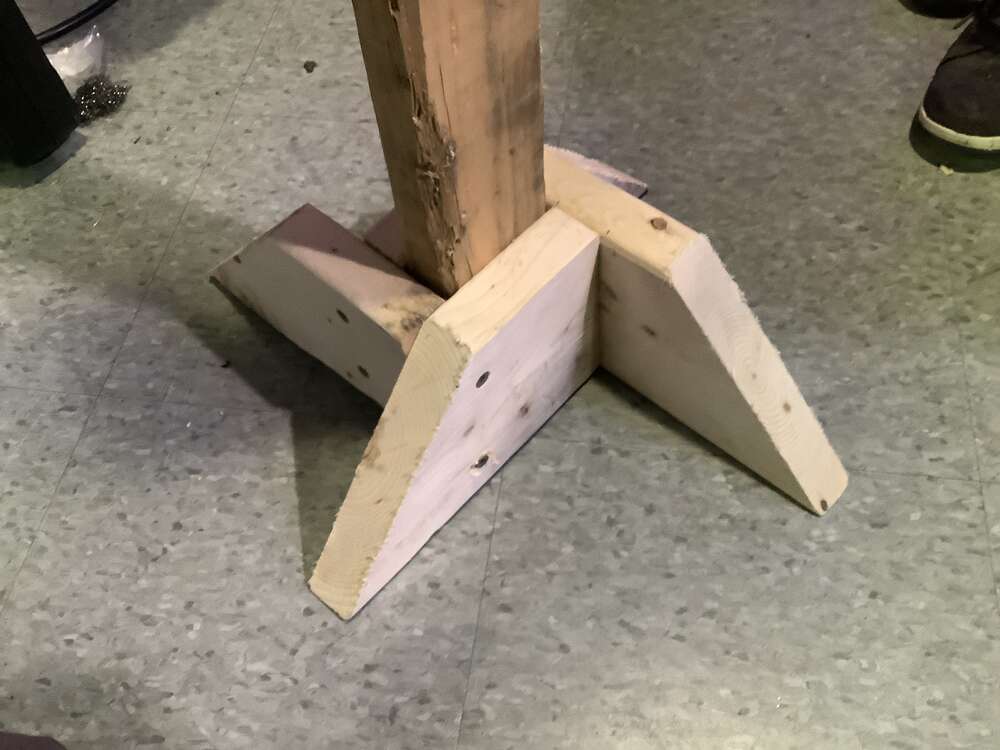
Assembly
3D printed a piece to mount it. The entire thing
was janky as I used old wood I had from previous
dorm events to create the base to keep the wheels upright.
I cheated and did use fasteners for this, wood screws
from Simpson Strongtie (leftover from building
Fort), and bolts I managed to find around hall.
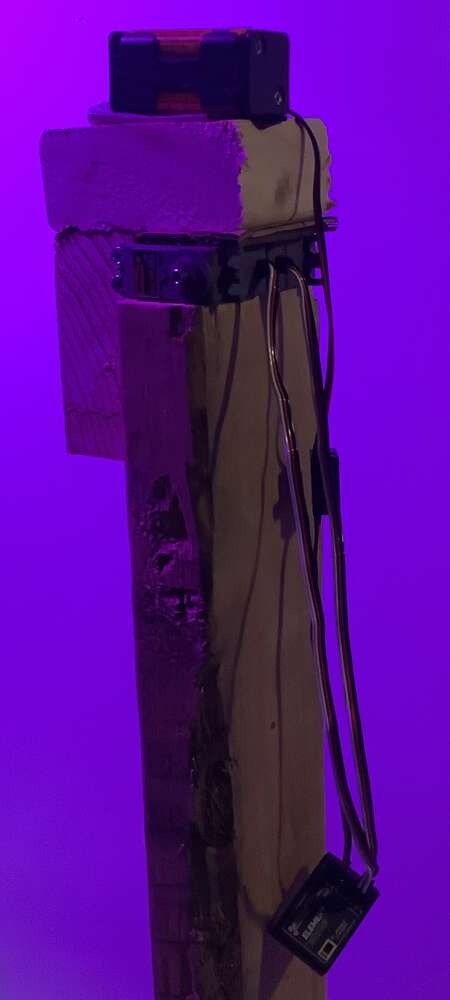
I made a simple bearing: Connector.STL
The control is built around the setup for motors I had for 2.007, a design class where I made a robot.
I made a simple bearing: Connector.STL
The control is built around the setup for motors I had for 2.007, a design class where I made a robot.
To Class
So I brought it to class. What happens in this video also
happened there. Except the connector bit broke
into two pieces.
I did really enjoy making this, and I am looking for a proper rod to just manually hand-turn it.
I did really enjoy making this, and I am looking for a proper rod to just manually hand-turn it.