
3D Printing
Tools: Original Prusa i3 MK3S+ Extruder Printer, Artec Leo Scanner Material: PLA 1.75mm
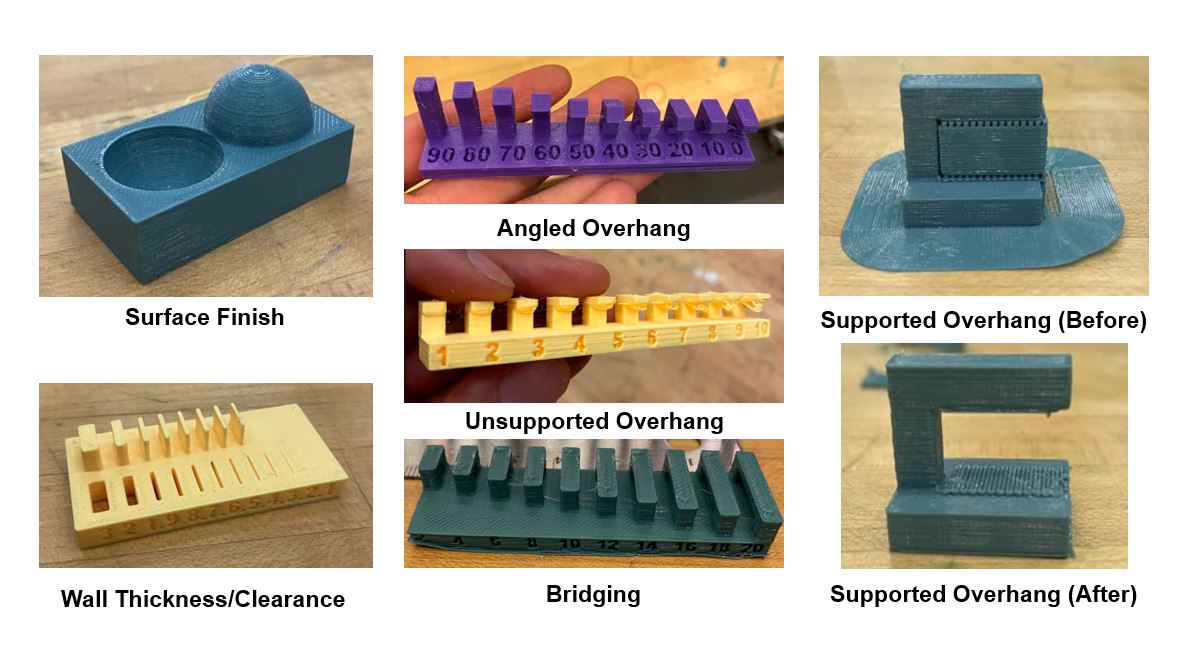
Group Assignment (Design Rules):
*Some images taken from group Gitlab postings and discussion
Surface Finish: PrusaSlicer allows for 0.05-0.30mm detail
Wall Thickness: >= 0.4mm wide to a height >=5mm
Clearance: is mostly a function of extrusion settings and print speed, but we demonstrated up to 0.2mm gaps. Generally, tolerance is expected to be -0.1mm to +0.3mm.
Angle: stable prints with angles 90-180 degrees with spaghetti beginning at around 110 degrees
Unsupported Overhang: spaghetti begins at 5-6mm overhang
Bridging: spaghetti present but successful structures created from 2-20mm apart
Infill: there are many stable infill patterns and percentages. Fractional amounts below 10% don't work well. Functional range is 20-80% depending on print.
Supported Overhang: limited by width of minimal removable support structure. 2mm is a reasonable estimate of lower limit because we tested larger overhangs successfully.
Individual Assignment:
AR Mesh:
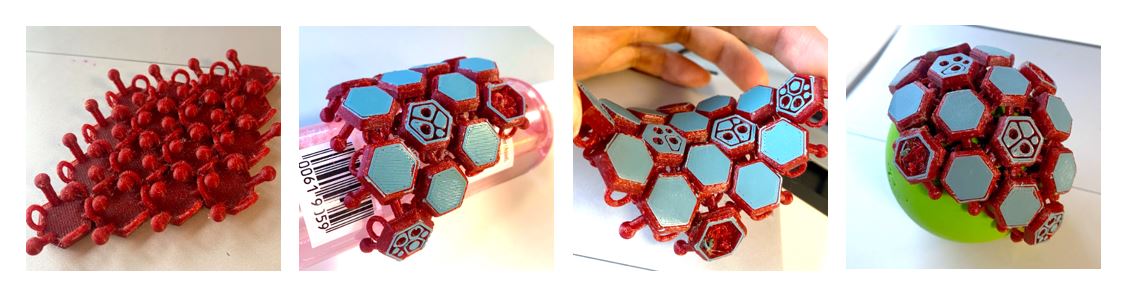
I thought of a concept of 3D printing a 'print-in-place' chain mail link to satisfy the assignment requirements. I was inspired by a discussion
in my lab to add some 2D pattern fiducials to be able to derive orientation and scaling via OpenCV. This would allow a VR application to overlay and image or texture onto the conformable mesh or
calculate deformation and 'strain'. In the past I used AprilTags and Aruco Markers, which are dead simple to set up, but I find them rather ugly and QRCode-looking. I found a new fiducial called Seedmarker that allows
generation of patterns on most simple closed geometric forms. They also look pretty.
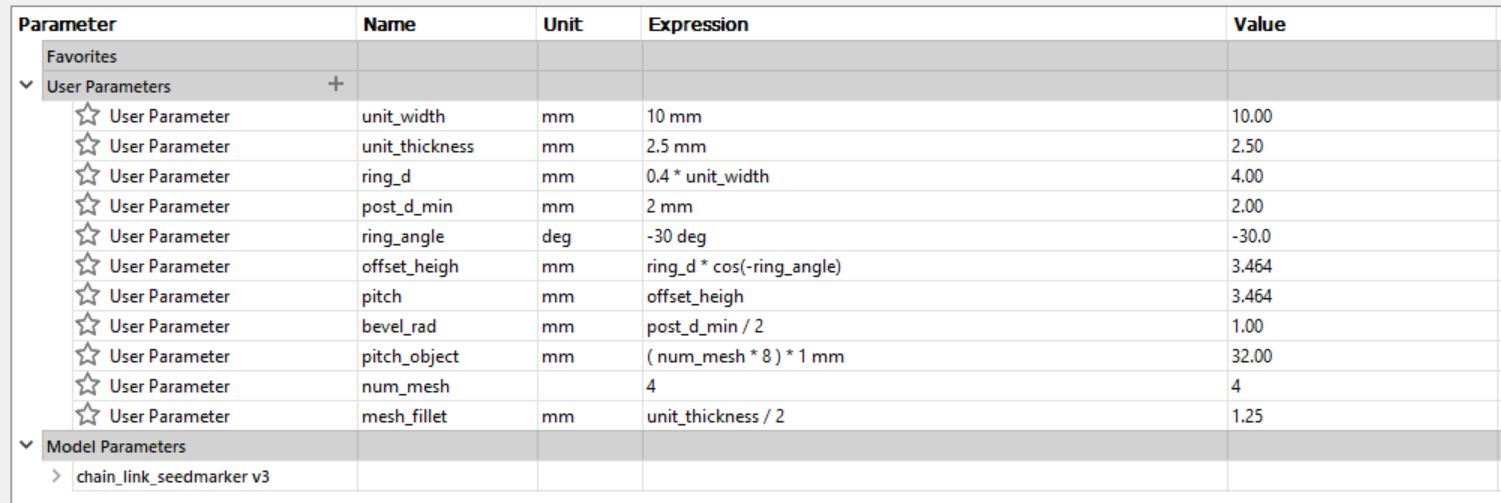
Design Process:
I designed the model parametrically in Fusion360. The design was fairly simple for a complex end result because most operations involved making circular or rectangular patterns.
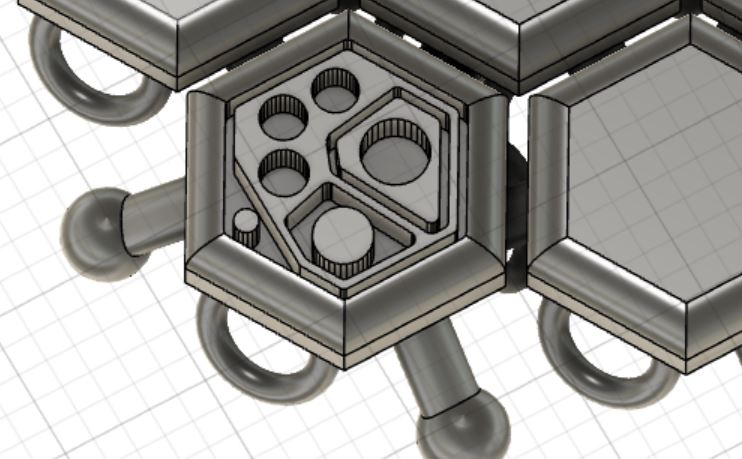
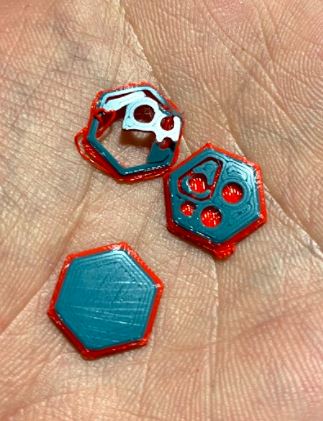
Next, I imported some Seedmarkers generated in a hexagon and subtractively extruded them into the faces of the hexagons. Design file below:
 Slicing and Printing:
After slicing the model on PrusaSlicer with 80% infill and 0.15mm thickness, I decided to print a model with minimal support on the base platform. The first couple print passes failed
because the extruder was too far away from the stage. I live adjusted the z-height until the extrusion looked nominal, turned up the extrusion speed, and reduced the print speed to 70.
I also turned up the build platform temperature to 72C. To create the contrast for the fiducials, I paused the print after layer 2, reloaded with a different color filament, and continued.
Slicing and Printing:
After slicing the model on PrusaSlicer with 80% infill and 0.15mm thickness, I decided to print a model with minimal support on the base platform. The first couple print passes failed
because the extruder was too far away from the stage. I live adjusted the z-height until the extrusion looked nominal, turned up the extrusion speed, and reduced the print speed to 70.
I also turned up the build platform temperature to 72C. To create the contrast for the fiducials, I paused the print after layer 2, reloaded with a different color filament, and continued.
Post-Processing:
Trimming out the supports took a while and was messy, so I tried printing again without supports in the meantime. It turns out that the weeding was worth the effort. In the unsupported print,
the patterns bowed and delaminated, causing the print to fail. support lines between the patterns help hold down the extruded filament, ensuring the smooth addition of subsequent layers.
There were some failed parts of my print, but overall it worked!
 Testing:
The chain mail conforms well to different curved surfaces but unfortunately I could not get the detection to work. I think the fidelity of the pattern printed so small along with the
convoluted calibration procedure makes it difficult. Testing would have been easier with AprilTags.
Testing:
The chain mail conforms well to different curved surfaces but unfortunately I could not get the detection to work. I think the fidelity of the pattern printed so small along with the
convoluted calibration procedure makes it difficult. Testing would have been easier with AprilTags.
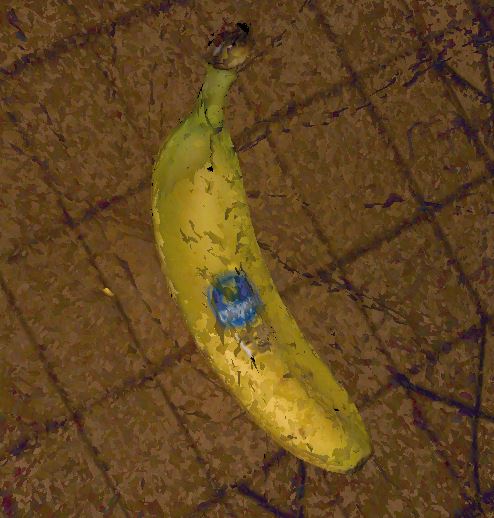
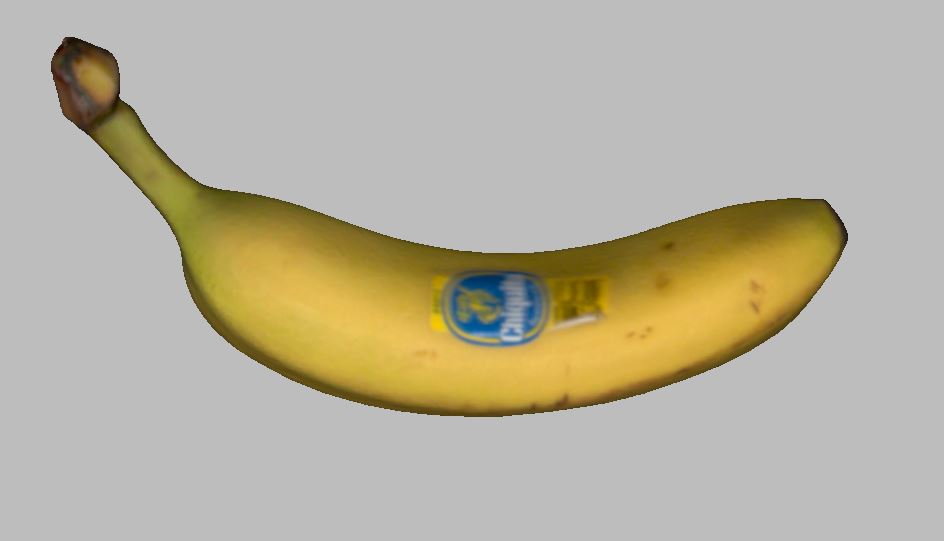
3D Scanning
I scanned a banana with the Arctec Leo. I followed the typical procedure of converting to a mesh, erasing the base plane and extra features, filling the hole, smoothing out the rough edges, and mapping the color and texture back.
Here's the final product and the associated .stl:
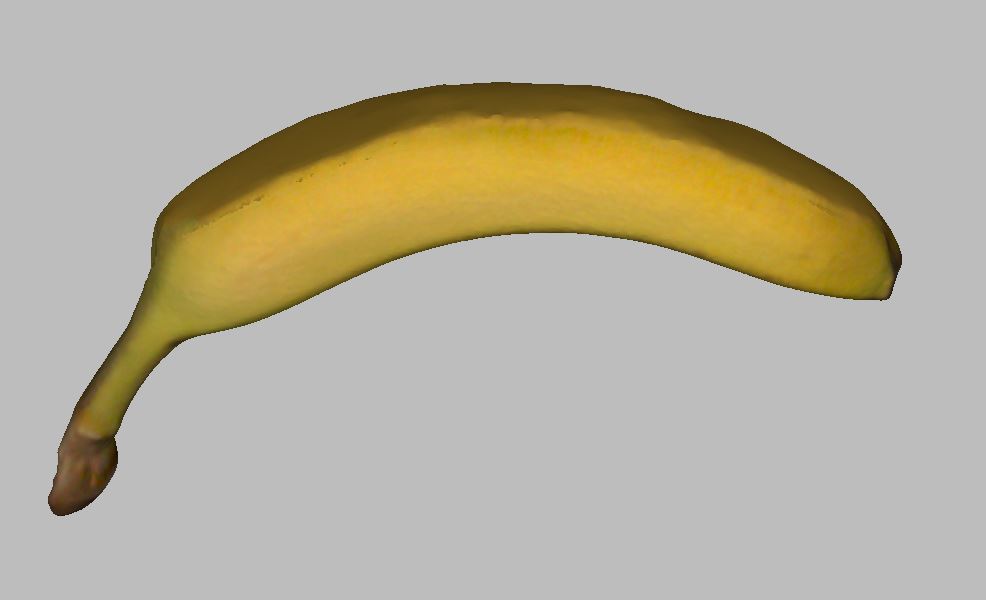
This banana was printed in a translucent purple color on the J55. Here's the result:
