Week 2
Project Management & Cutting
Vinyl Cutting
Design
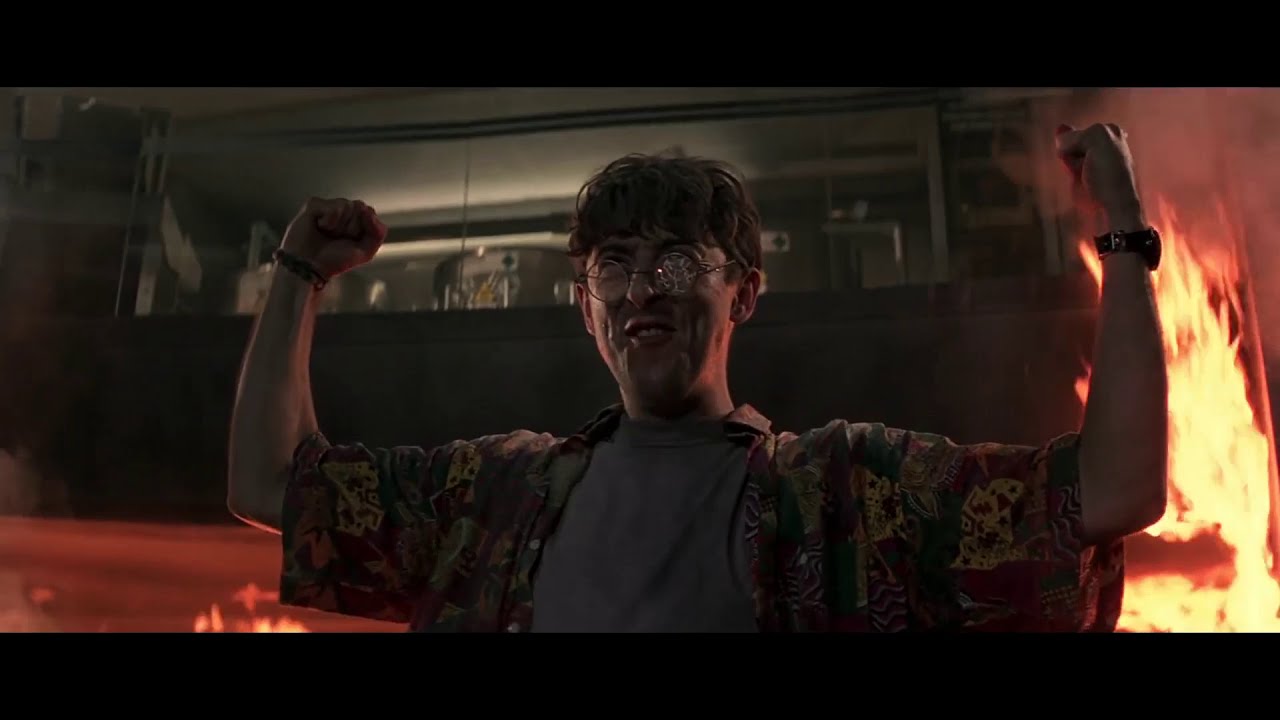
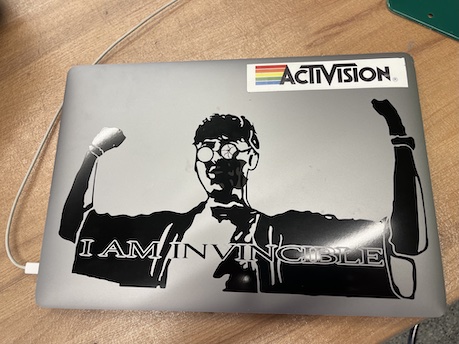
For the vinyl cutting, I decided to design a laptop sticker by modifying a classic movie image using adobe Photoshop and Illustrator. The scene is from Goldeneye, when the genius hacker, Boris, yells his catchphrase with broken glasses, "I am invincible!"
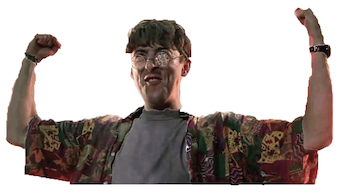
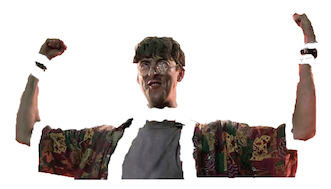
I began by modifying the image to better serve the image trace feature in illustrator. A series of adjustments to primarily the brightness and contrast allowed for easier image manipulation. I then separated the body parts to assist image trace
Once I had it separated, I used the image trace feature and manual manipulation to create a silhouette of the image that is recognizable. I also added his catchphrase, "I am invincible" to aid in identification.

Fabrication
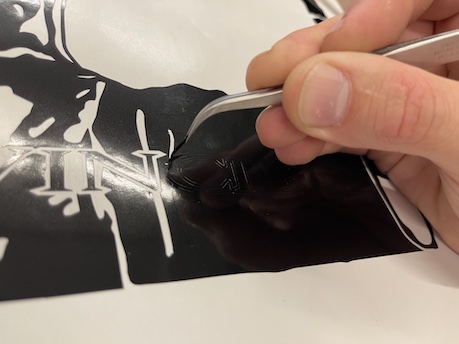
Once I exported the image as a png, I used the program module to create the vinyl cutter's tool path.
The vinyl cutter was setup well enough that adjustments weren't needed for the cut. There were some inconsistencies (cut through and missed cuts), but they were rare and unlikely to benefit from adjustment.

After cutting, I removed the excess vinyl that wasn't part of the design, making extra cuts where a few were missed. This removal happened before transfer to protect the laptop.
To get the transfer paper on the vinyl smoothly, I used a technique with the cutting mat to extend it beyond the edges of the vinyl, then cut out the area needed. This helps in placement.
Finally I transferred it over to the computer. All of these moves required focus on the sheer angle and ensuring no vinyl accidentally lifted.
Laser Cutter
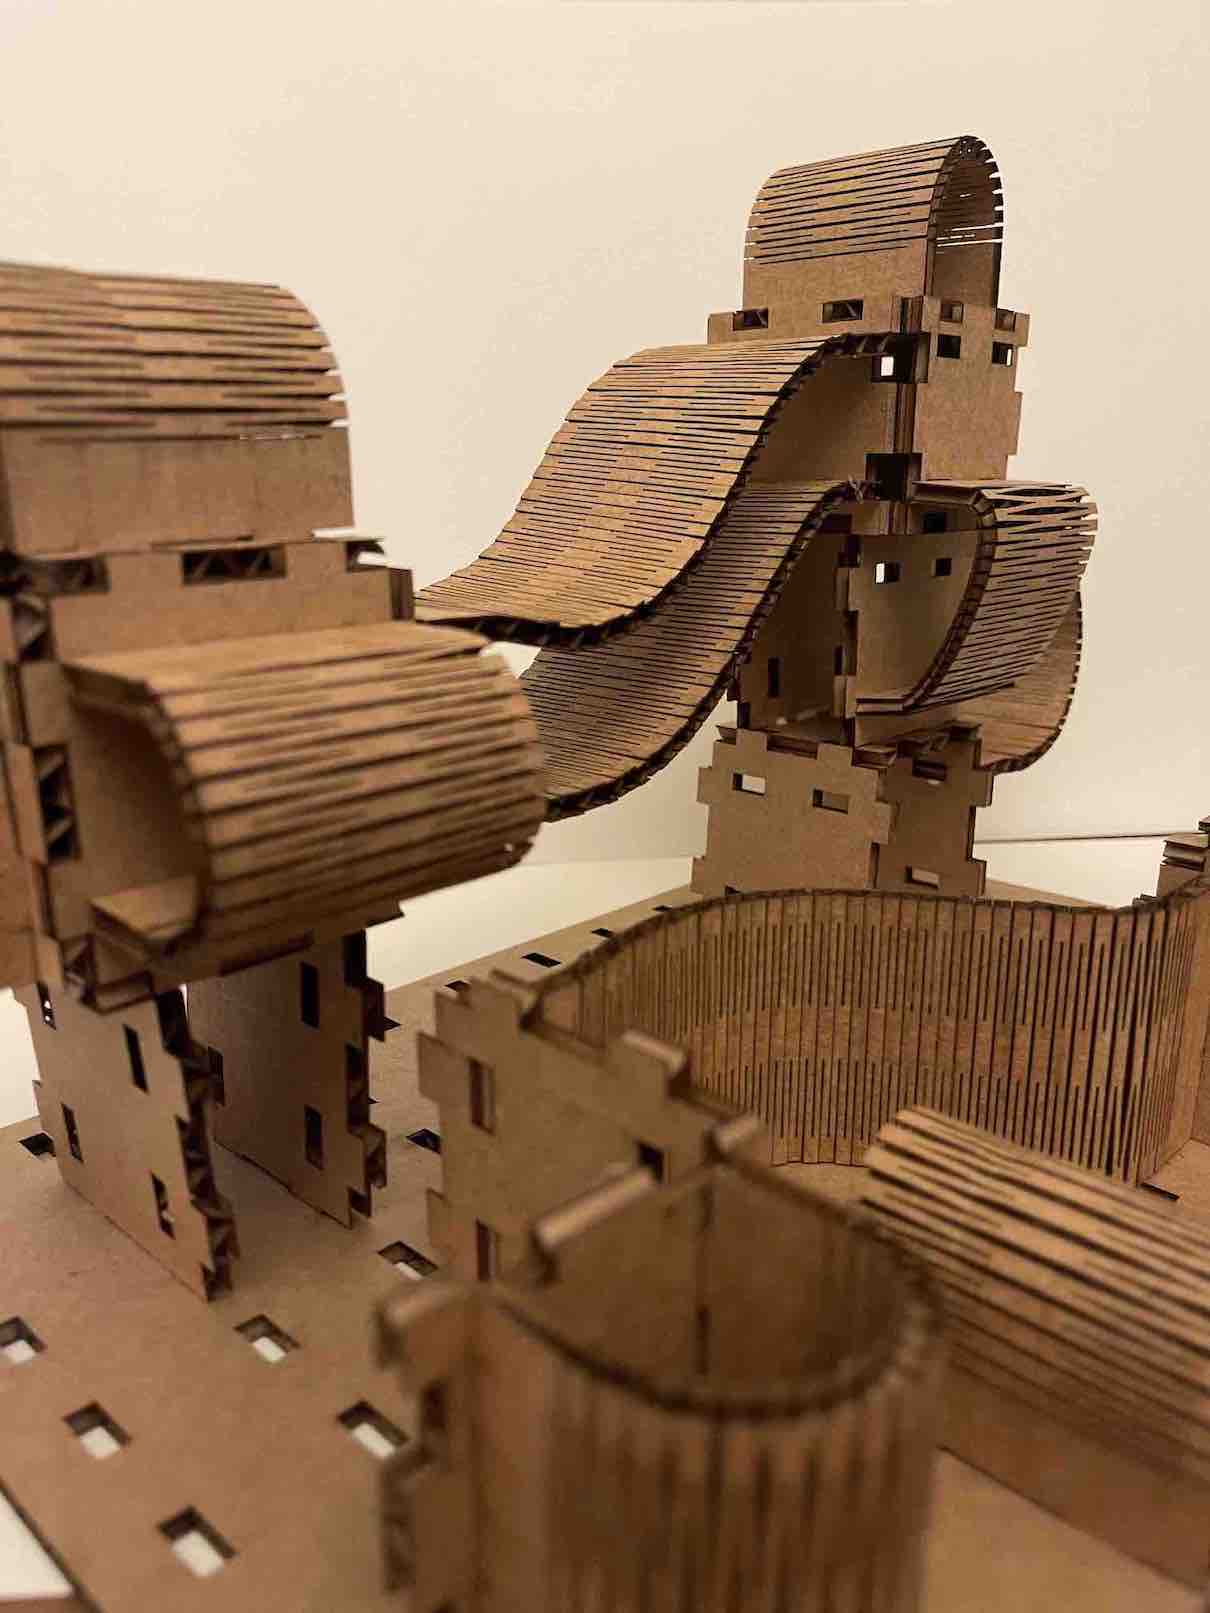
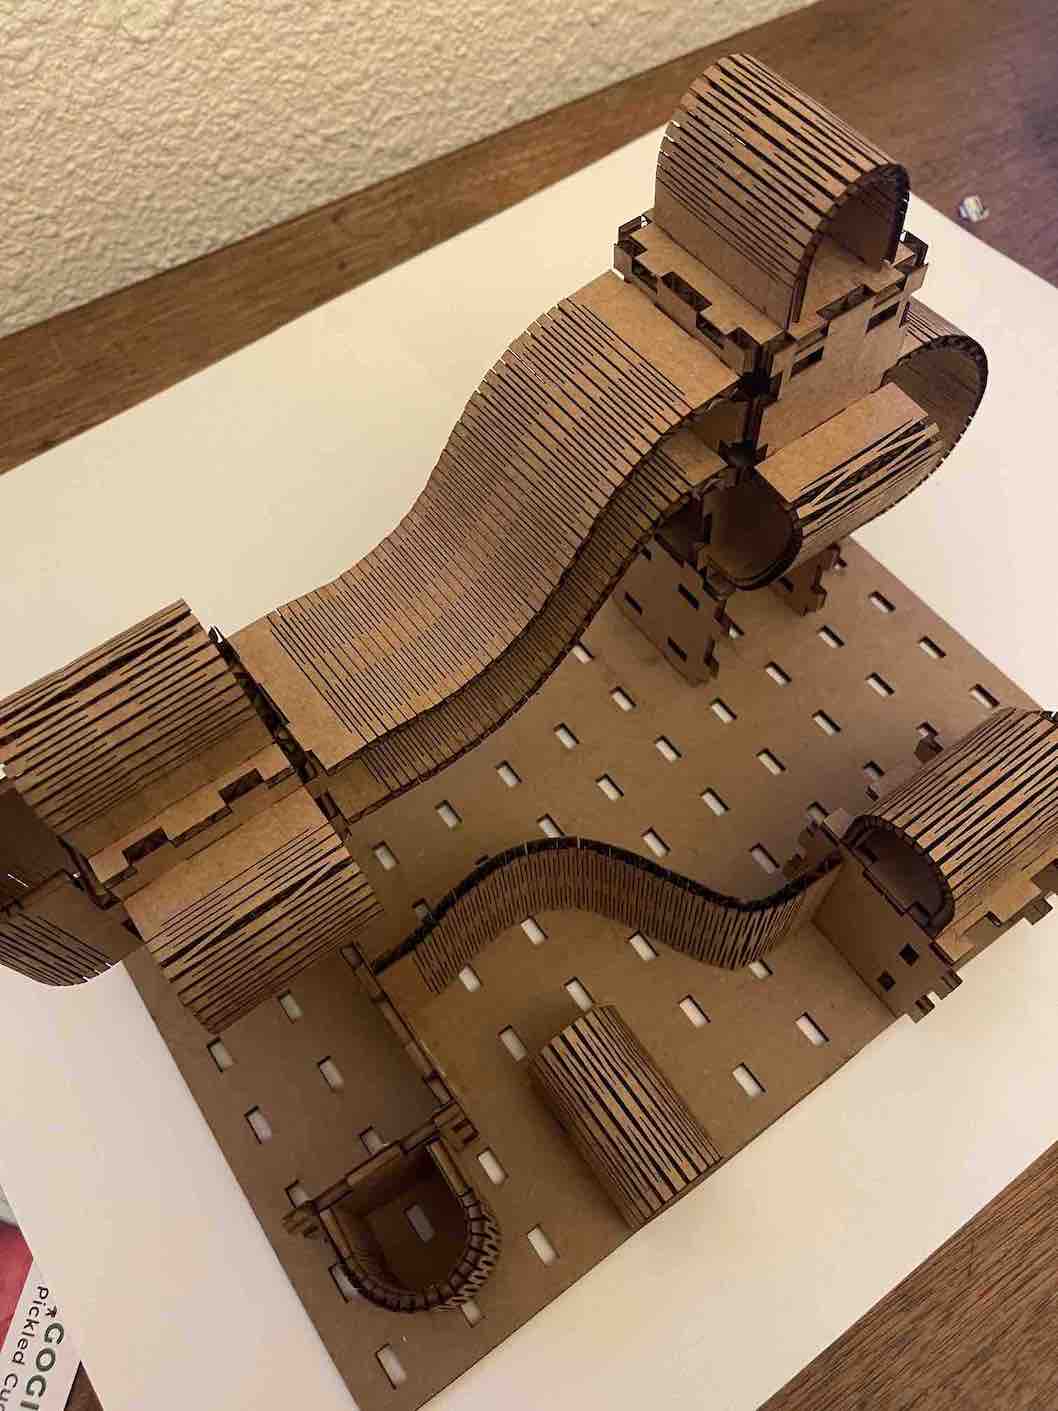
To design this project I used OnShape due to familiarity, but using variables for parametric design was new. I roughly sketched out an idea inspired my childhood. I always built lairs in which I played with my action figures. So I wanted something that could be assembled in many ways to create those environments.
To design this project I used OnShape due to familiarity, but using variables for parametric design was new. I roughly sketched out an idea inspired my childhood. I always built lairs in which I played with my action figures. So I wanted something that could be assembled in many ways to create those environments
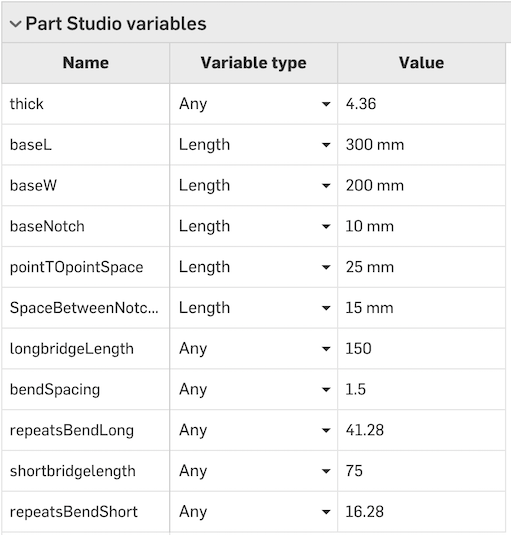
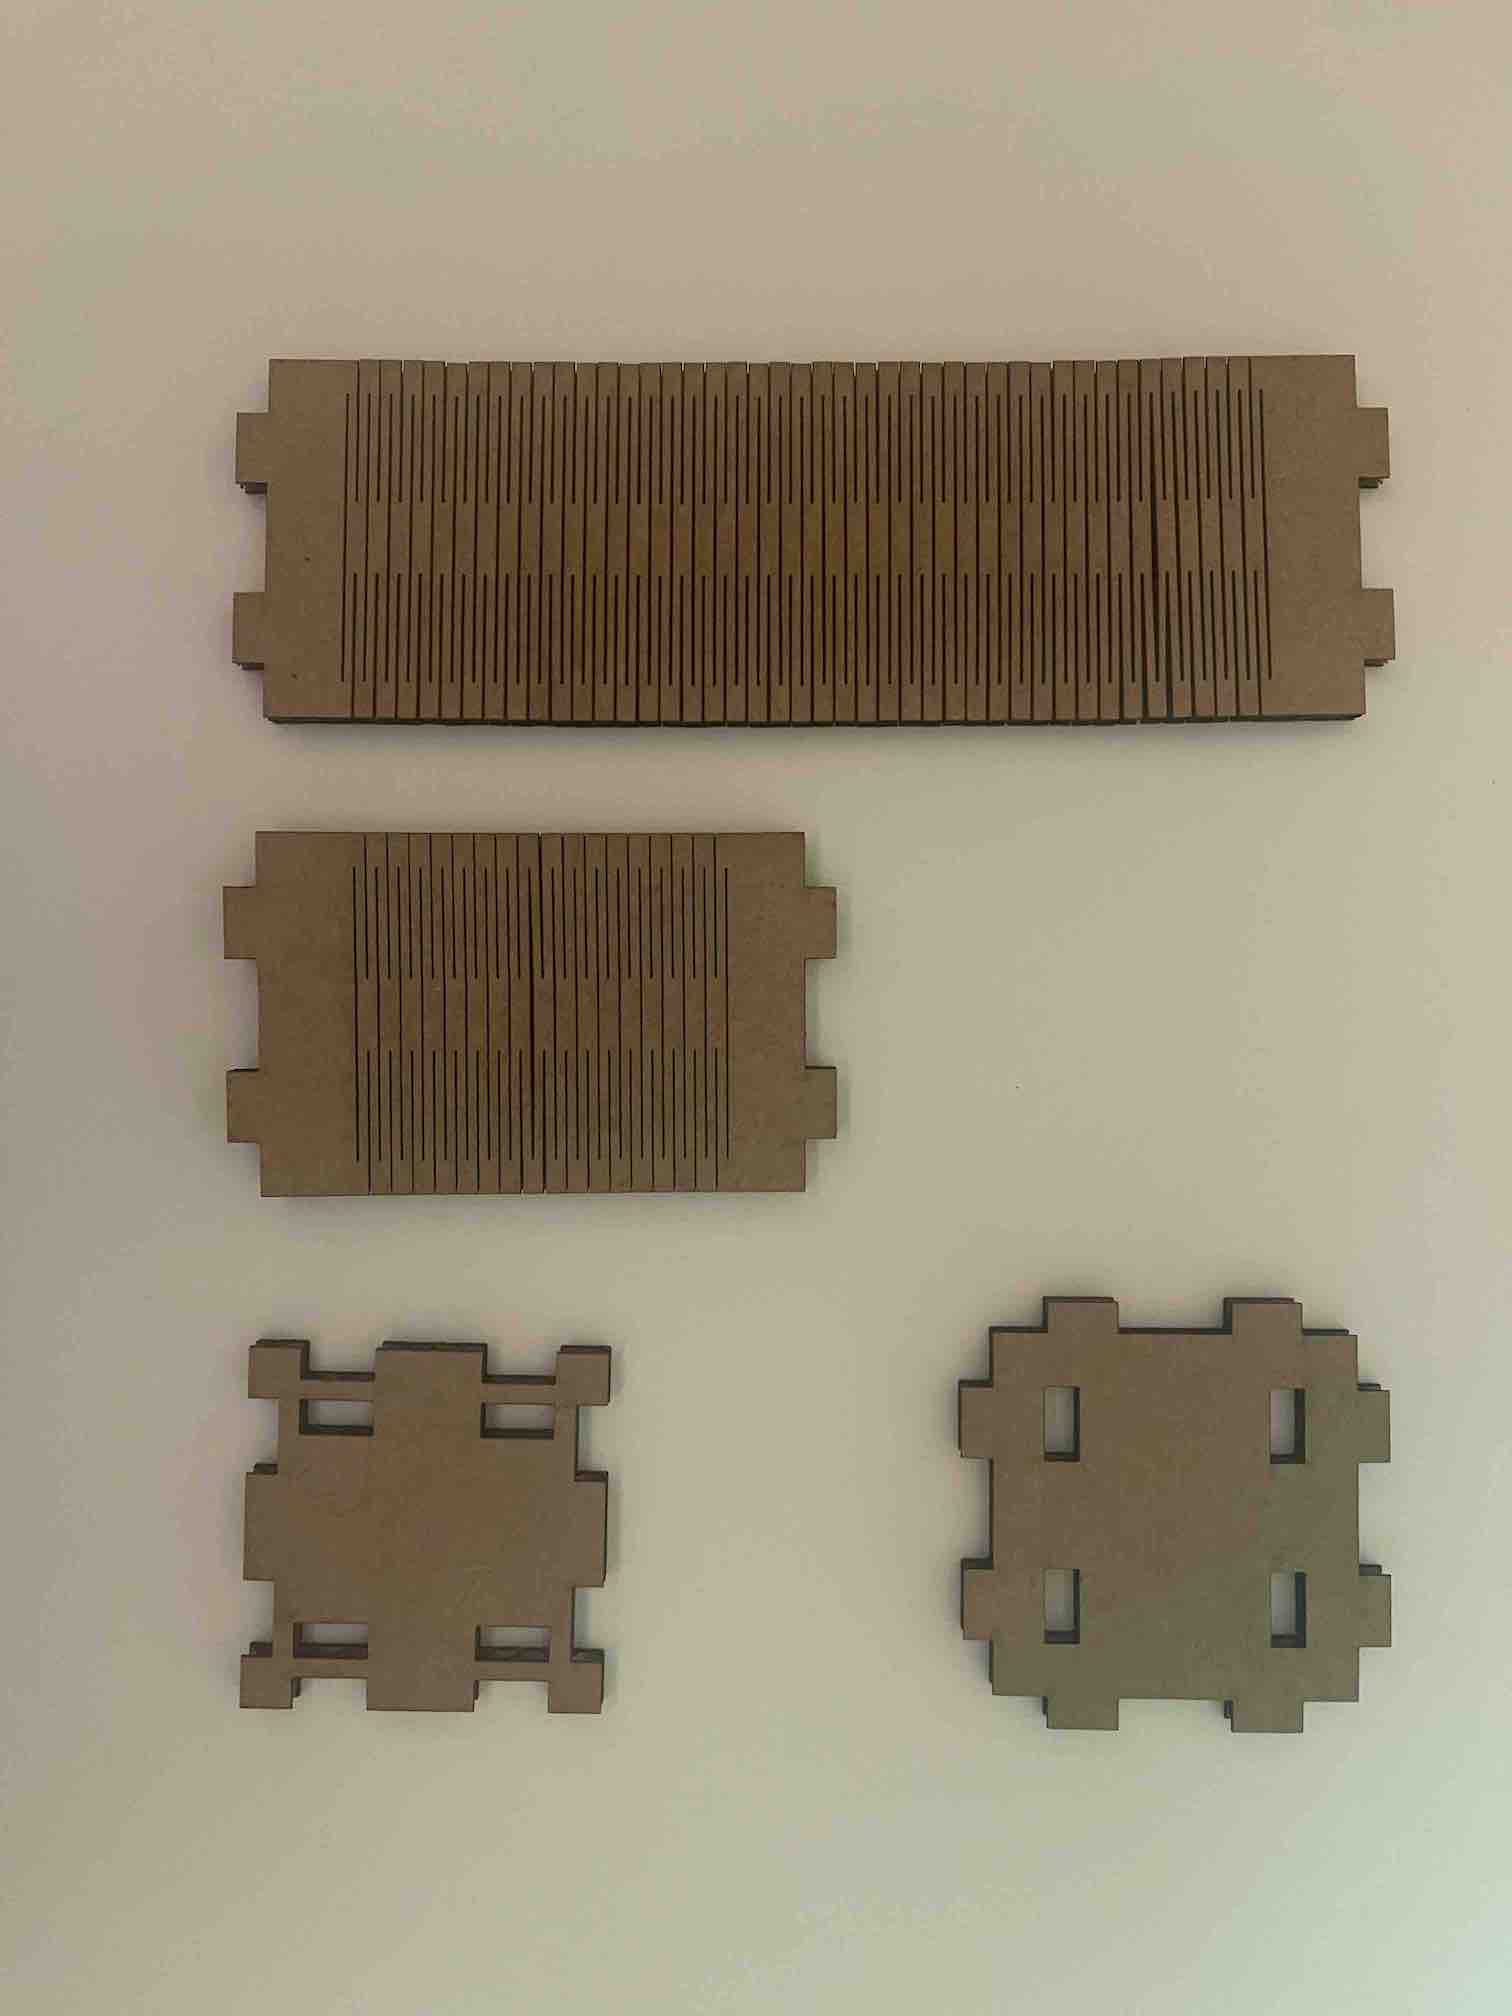
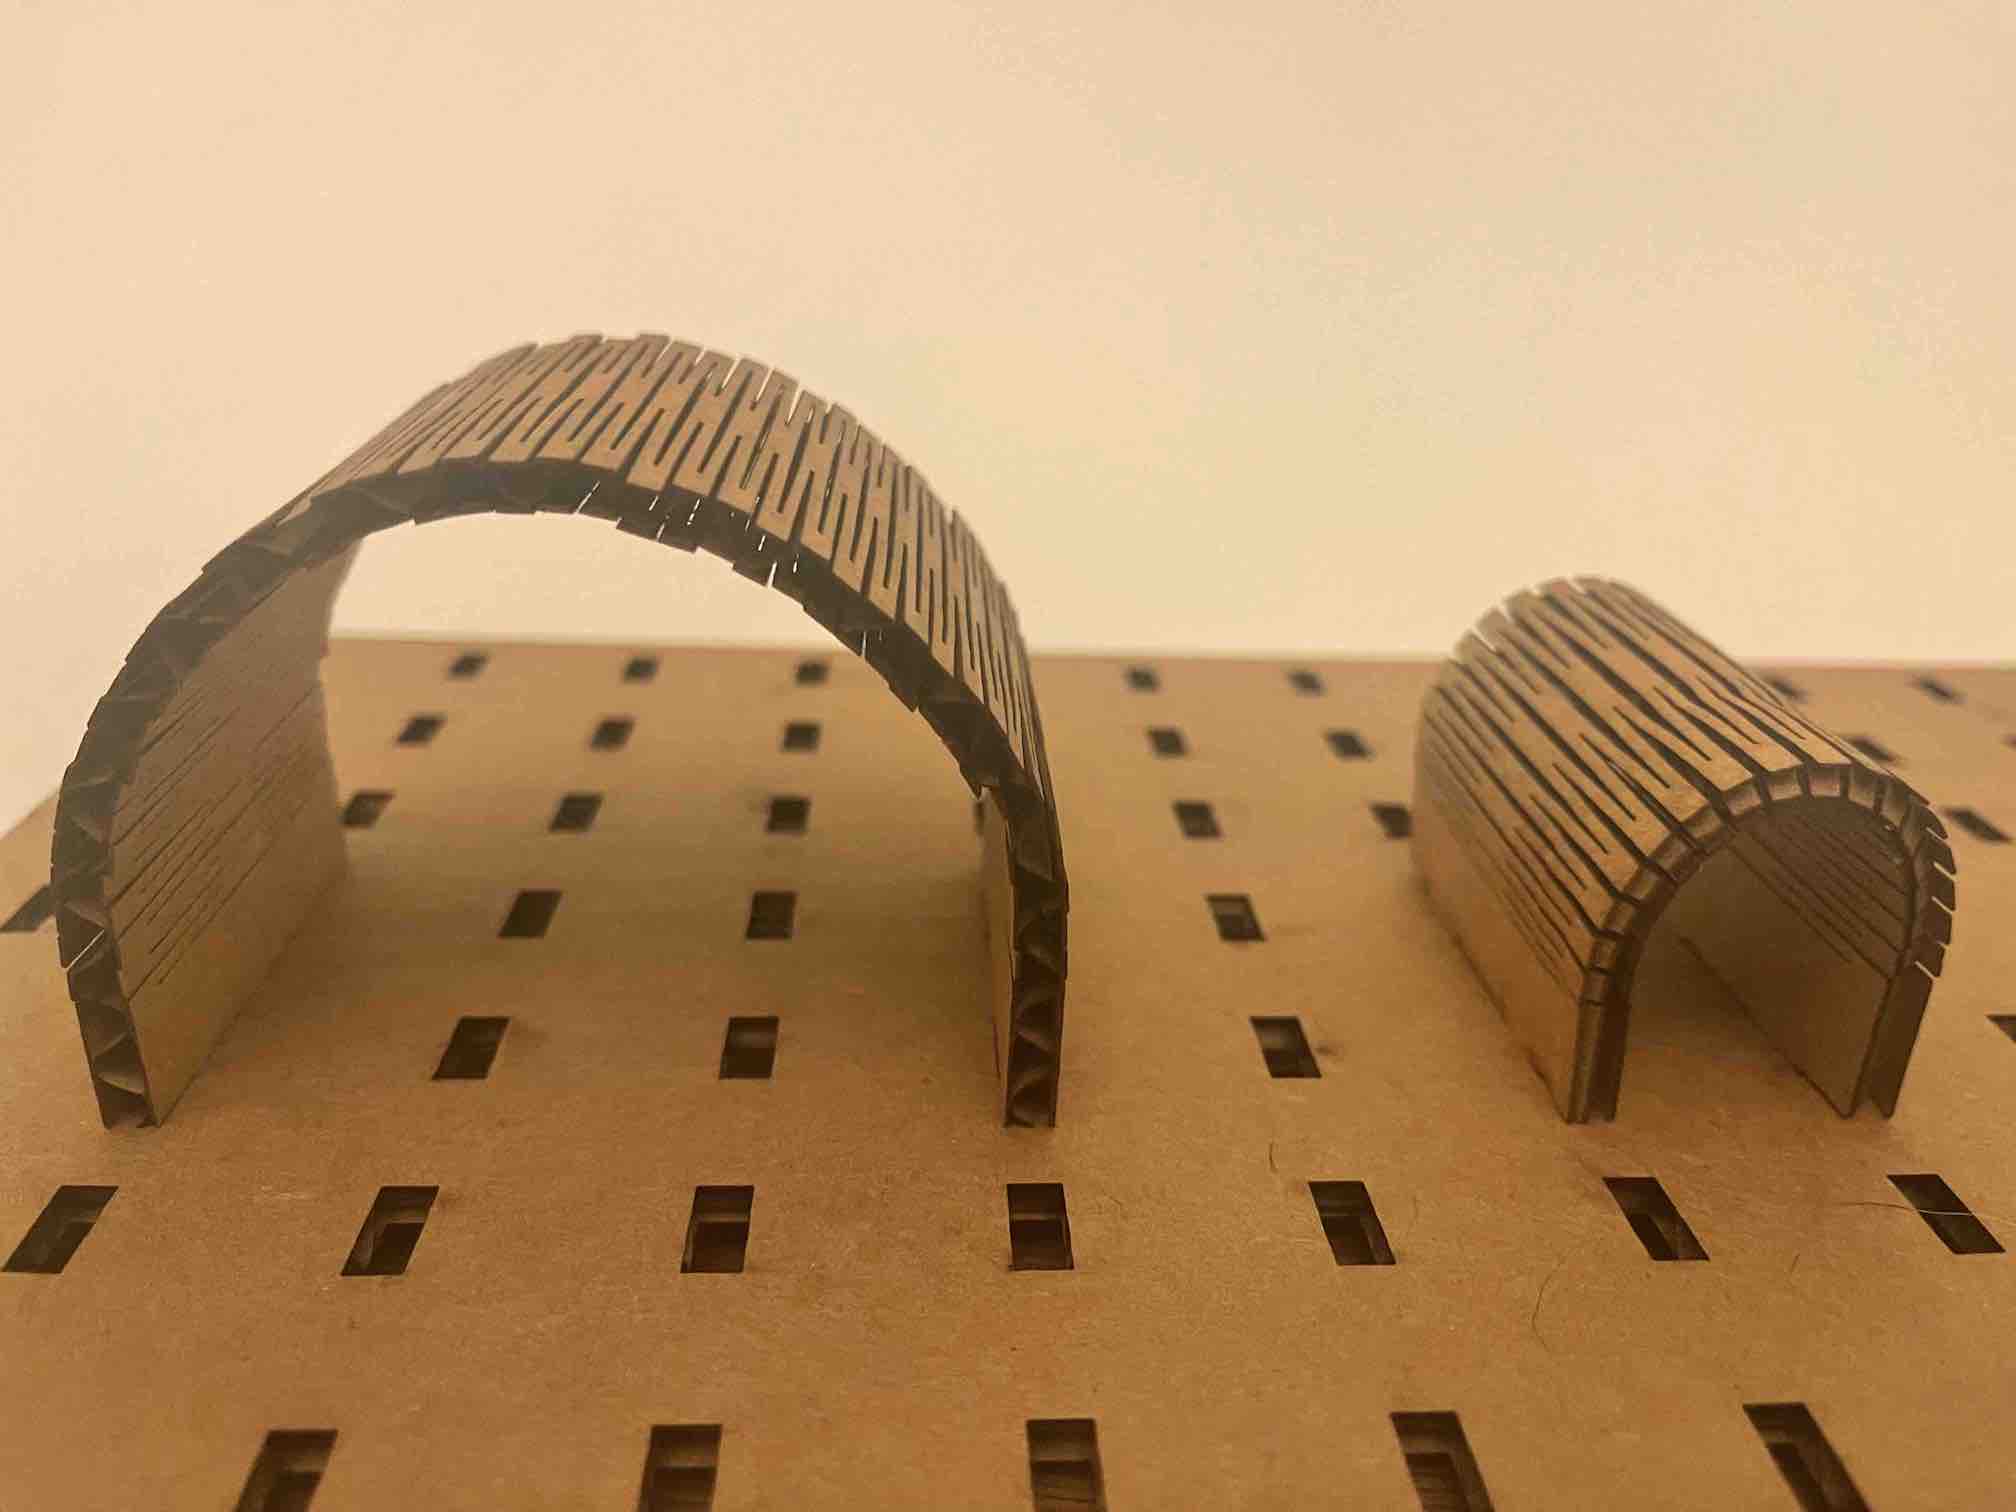
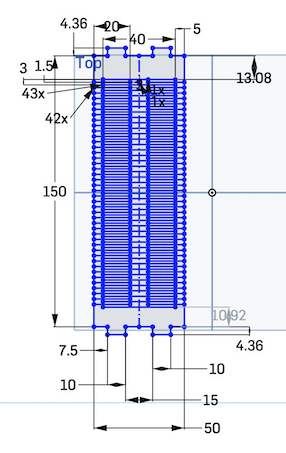
I was able to get everything designed parametrically, but by far the hardest one to think through were the living hinge bridges. I wanted to be able to adjust cut spacing while still maintaining the end integrity for 6 times the material thickness. This is when adding new calculated variables was extremely helpful.The resulting designs can be seen below. The pieces include a male square, female square, small bridge, large bridge, and base. It was designed for dynamic fits and linking of structures.
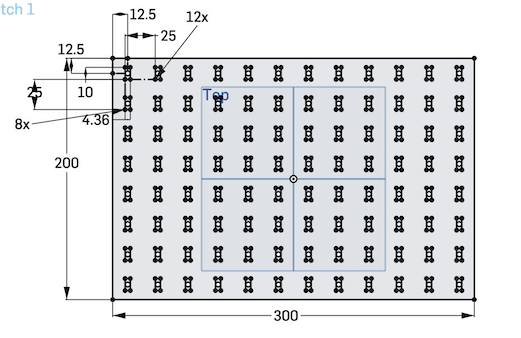
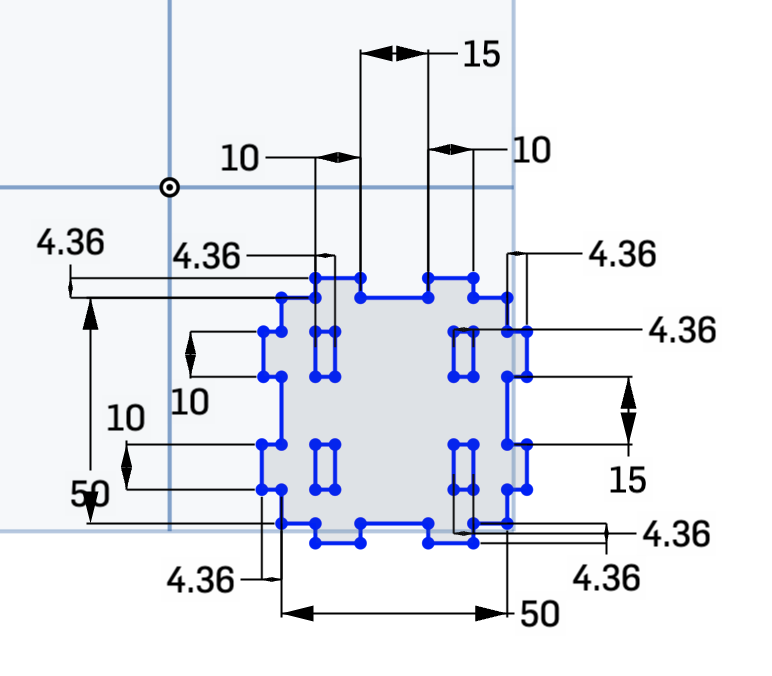
To define the behavior of the laser, I ran a test using a series of 25mm x 25mm squares at varying settings. I made the task easier by limiting adjustments to speed (power 100%, focus consistent measure, DPI 1000). This was possible because of knowledge in the lab.

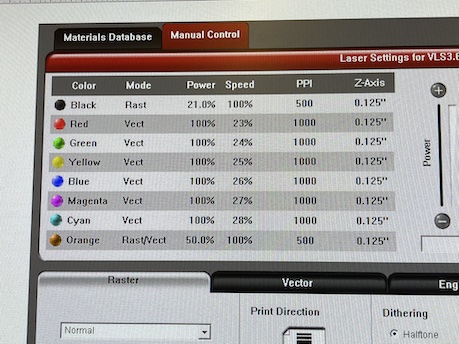
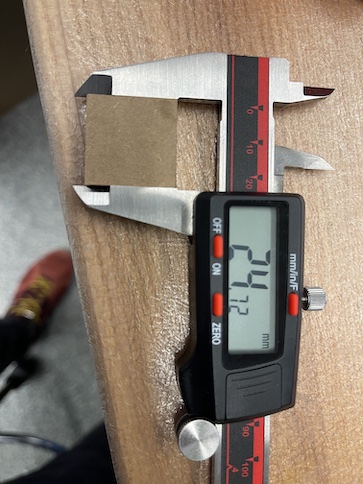
Once I had a square that didn't cut all the way through, I found the last one that did and measured the kerf using calipers (.14mm). However, my initial test on the pieces proved that it was an anomaly that a speed of 33% worked. I repeated the same process with my male-square pieces until I had cut through (24% speed and .16 kerf). This was used to modify line offsets.
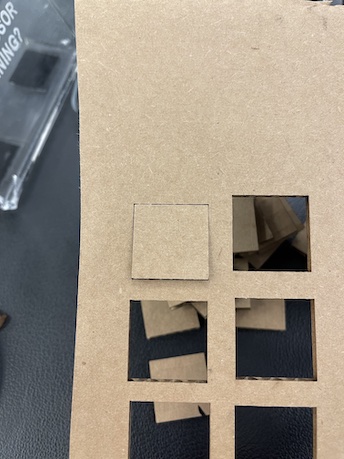
Once this was dialed in, the rest of the cutting had no issues aside from many students needing the laser. I produced 16 of each square, 8 small bridges, 4 large bridges, and a base. Below you can see the resulting cuts and structure built. It should be noted that I was pleasantly surprised by