Week 8
Tip of the Week
You don't have a ton of space on the wax, so don't overthink the design. Get that done quickly and create your wax mold by Friday so you can have several Oomoo molds. This will let you play with a lot of casting techniques, play around with additions, etc. That's the best part of the project, but waiting and few molds will limit your abilities.
Molding & Casting
Design
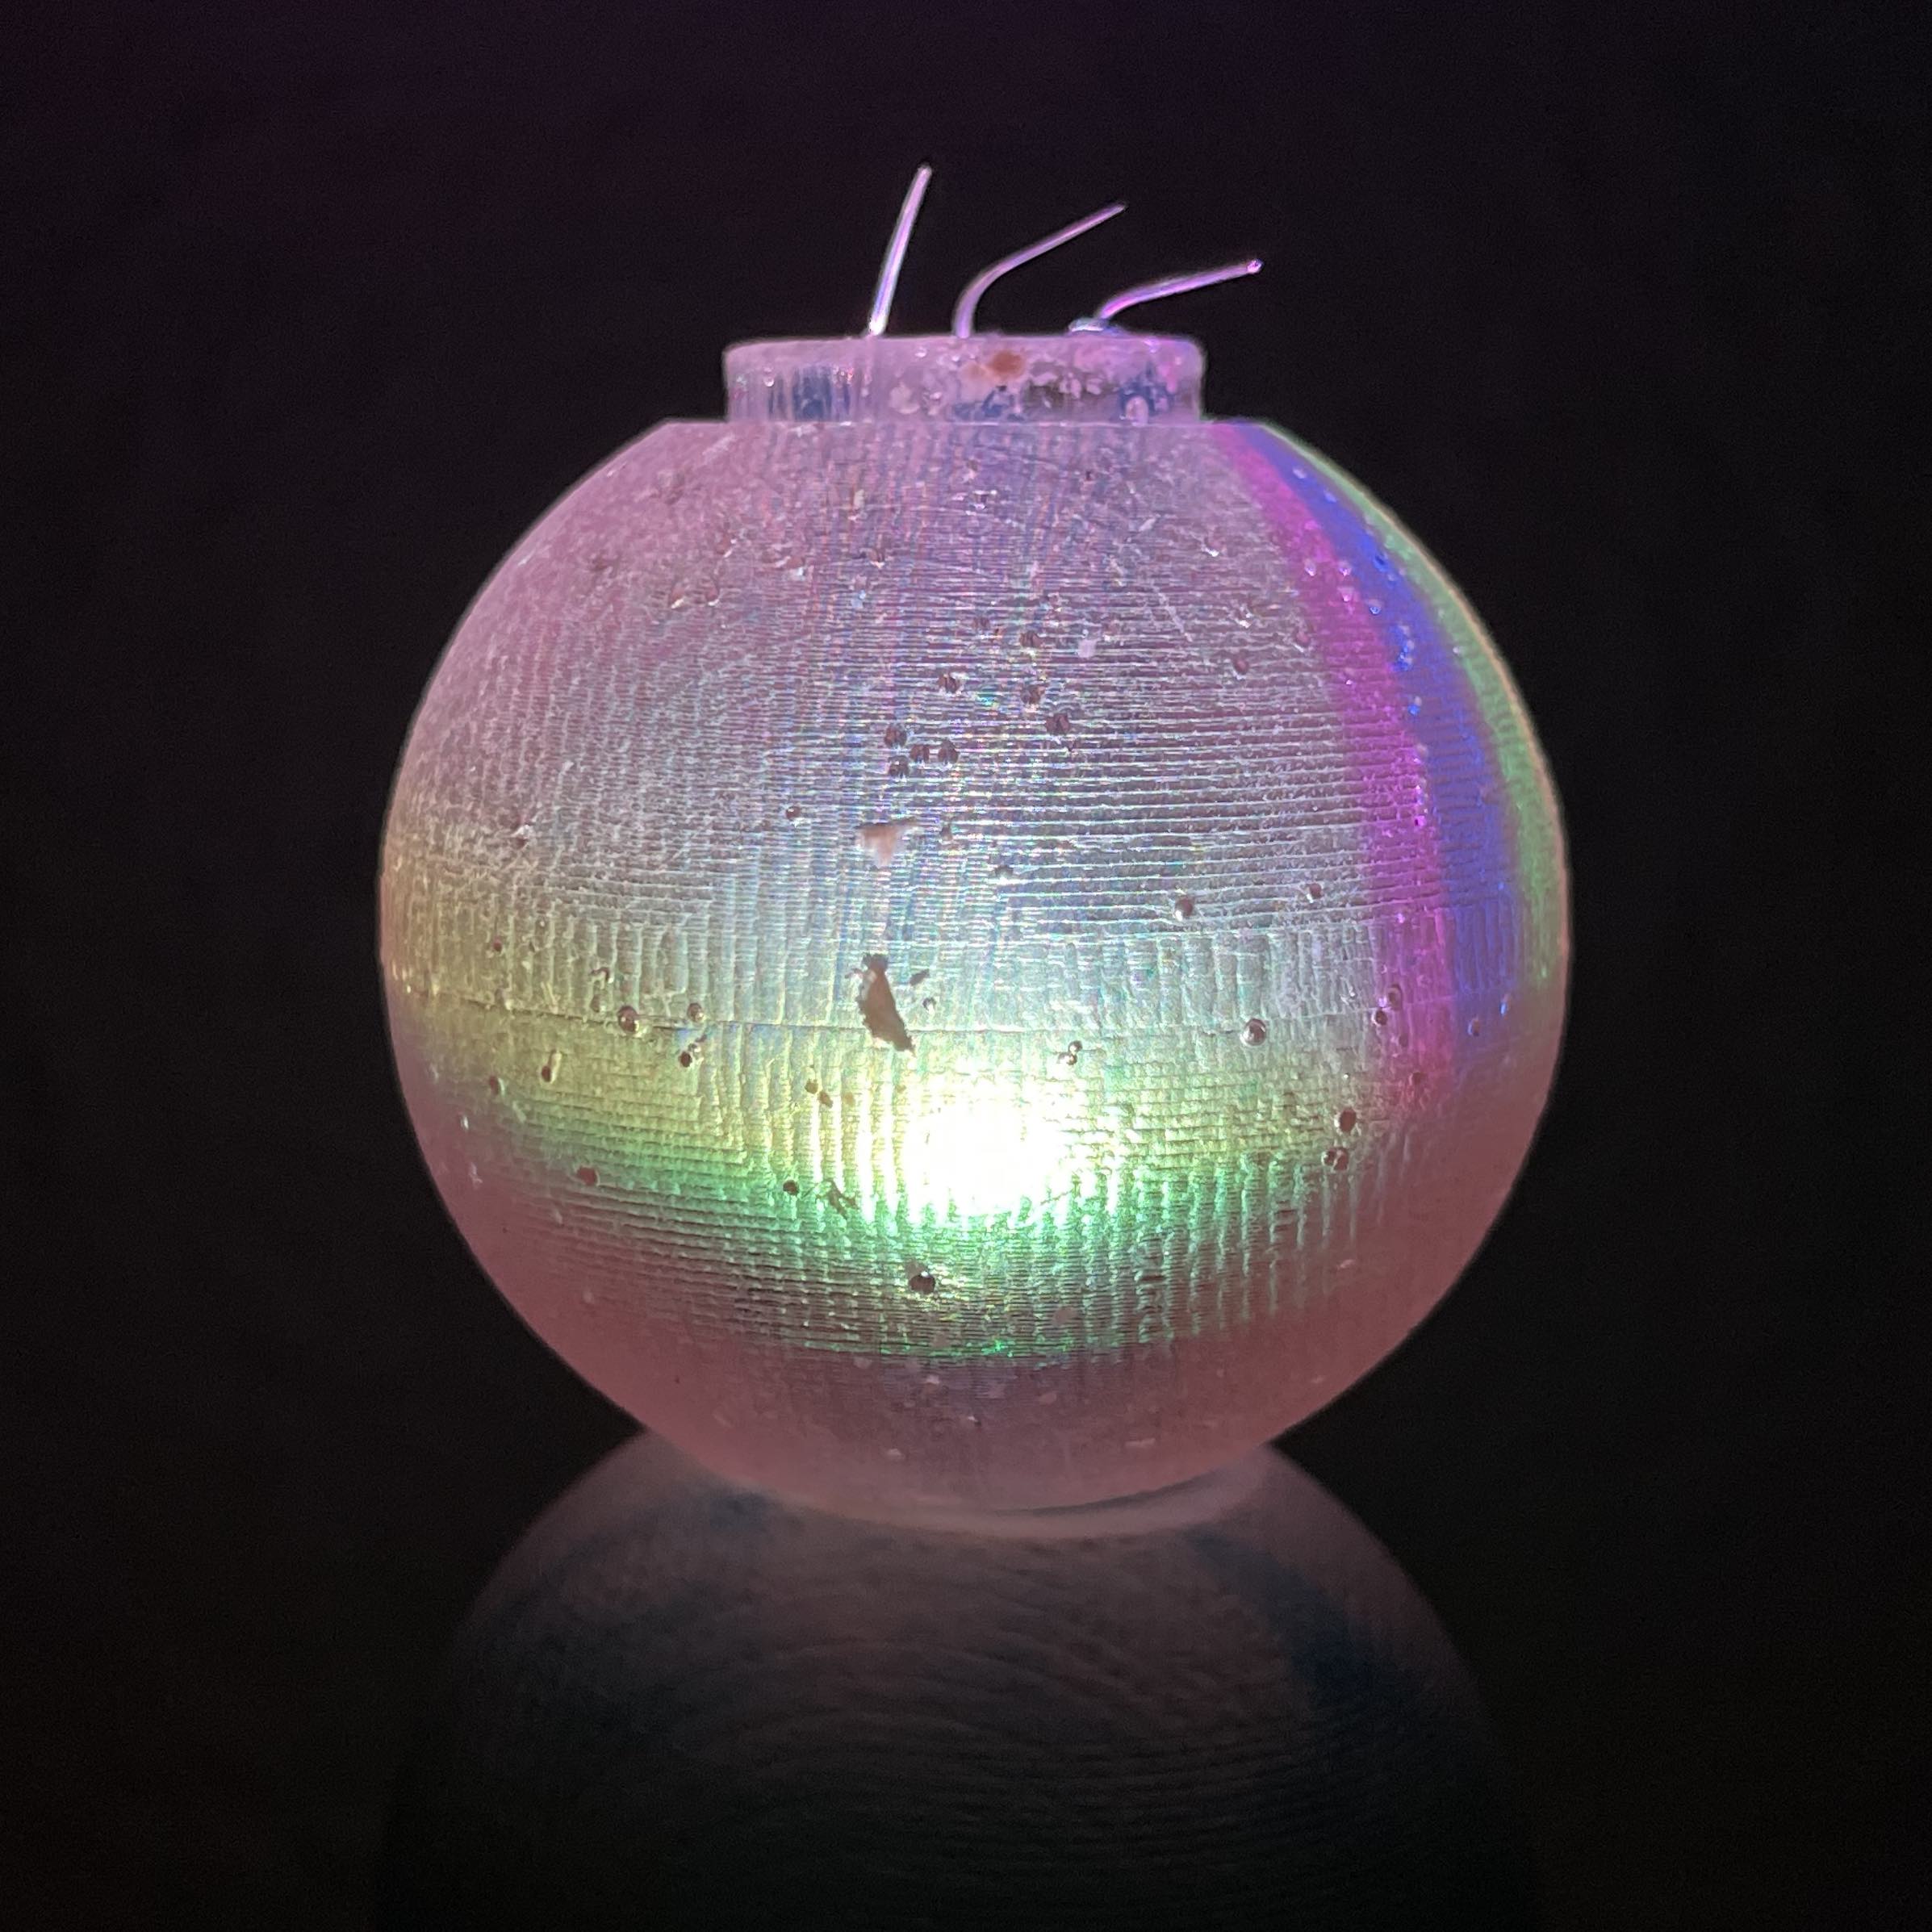
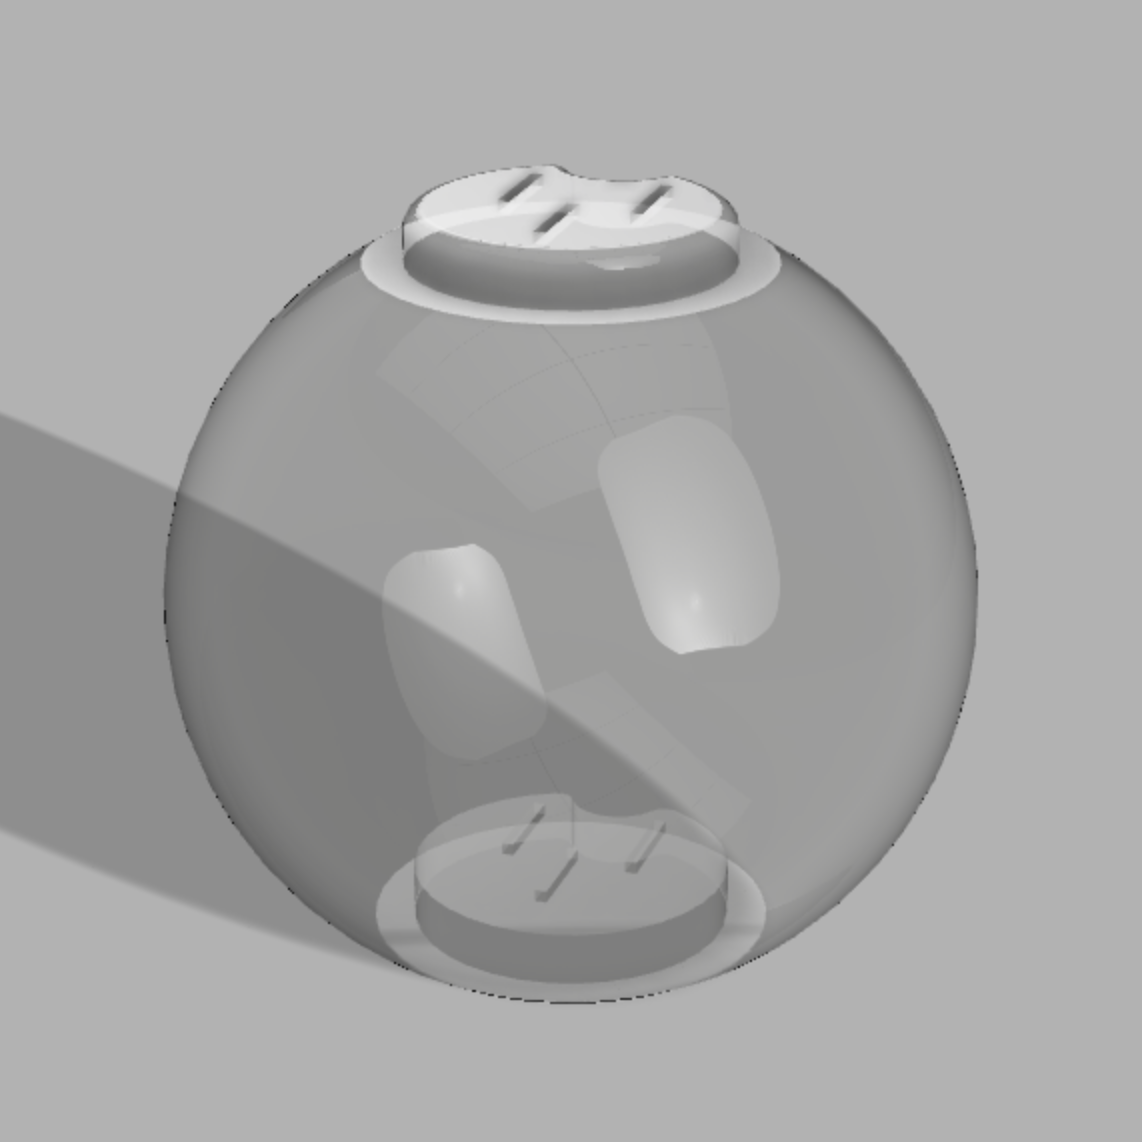
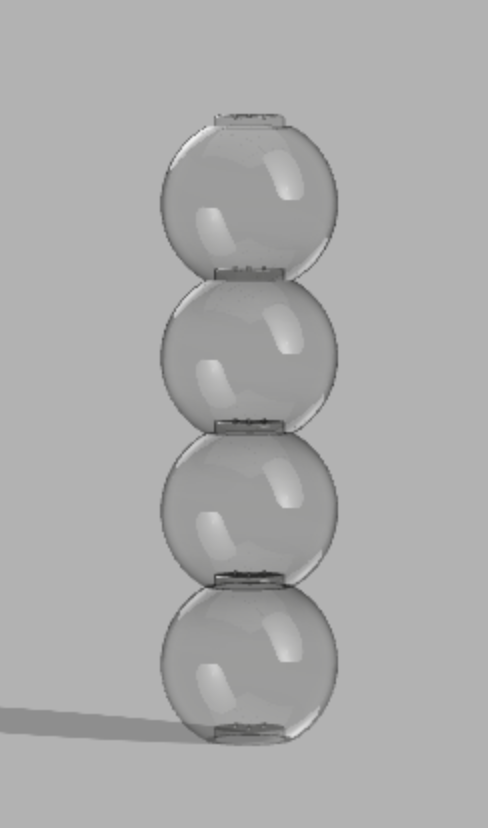
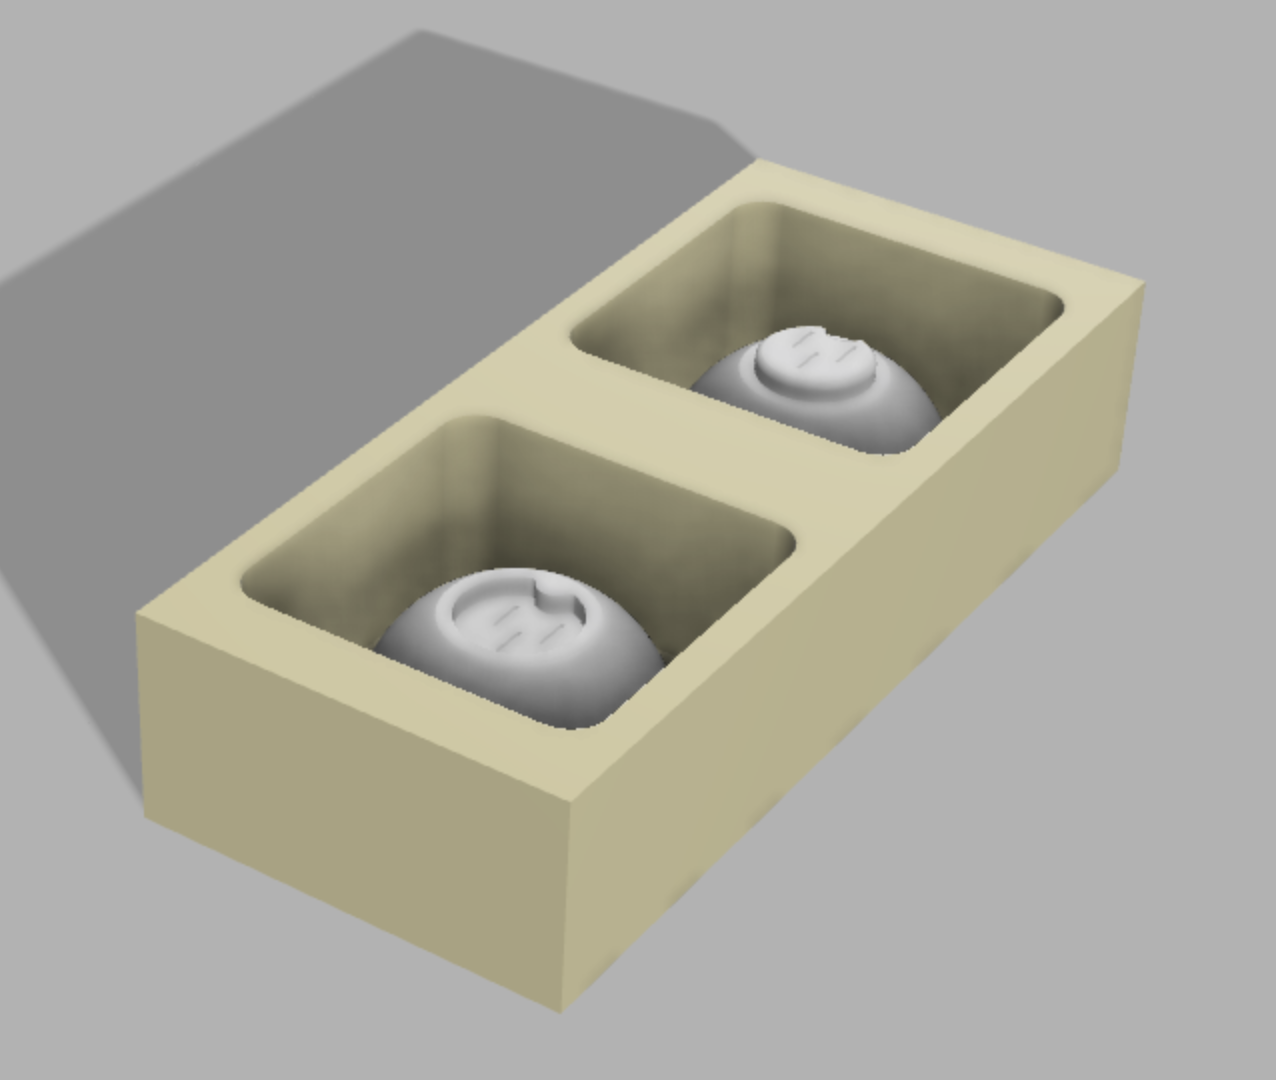
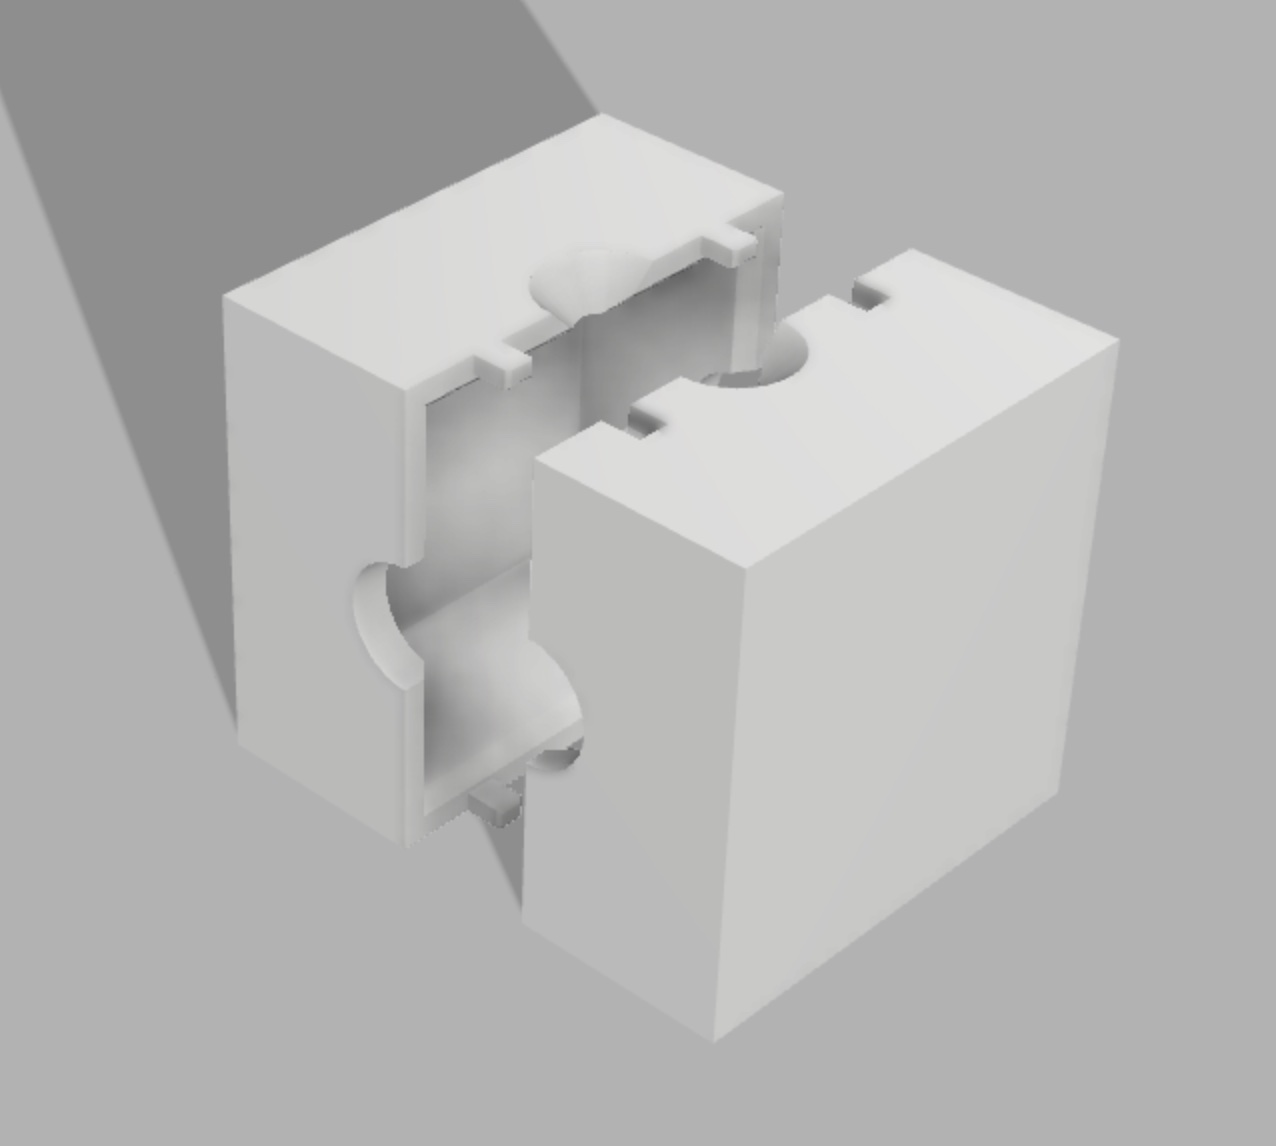
I began with the idea of creating stackable objects with embedded addressable LEDs that connect through contact. Th point was to have something that looks cool, is fun to play around with, and could be a fun "night light" for a kid (maybe one of my nephews or my niece). Design this parametrically and use nesting parameters like I suggested in previous weeks. The important one is to create "tolerance" for easy overall adjustments.
I also designed with a poka-yolk technique to ensure connections are always properly oriented. Lastly, this has to be a 2 part mold due to the overall shape. I put the parting line on the mold halfway down (red-line) because the mold can be made without undercuts.
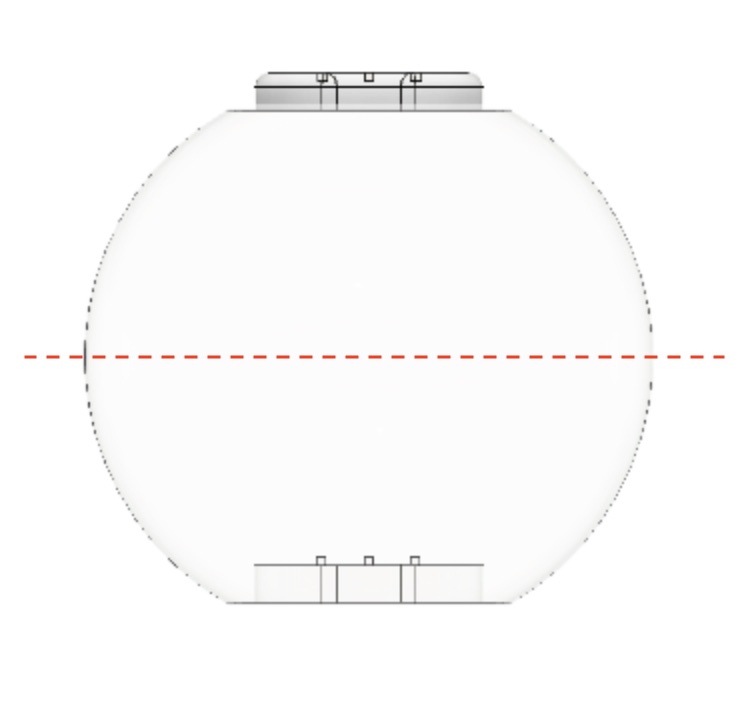
Designing the Mold
Like I mentioned before, place your part line where you won't have any overhangs that require undercuts. Some other suggested techniques are to create features that help align your molds, round your corners, and try to leave at least a 1/4" clearance to speed up the cutting.

Making the Mold
To make the mold, you first need to create the CAM, which can be done natively in Fusion. Below is a recording of the setup along with audio. I did this along with my TA, Anthony Pennes. Some critical considerations is to spend time on the important features (such as the mold connection or curves) and do inconsequential parts fast (e.g. walls). Also, take your time to make sure there aren't misses, It can be tough to see, so slow down and adjust the view from different sides. The simulation is also very helpful.
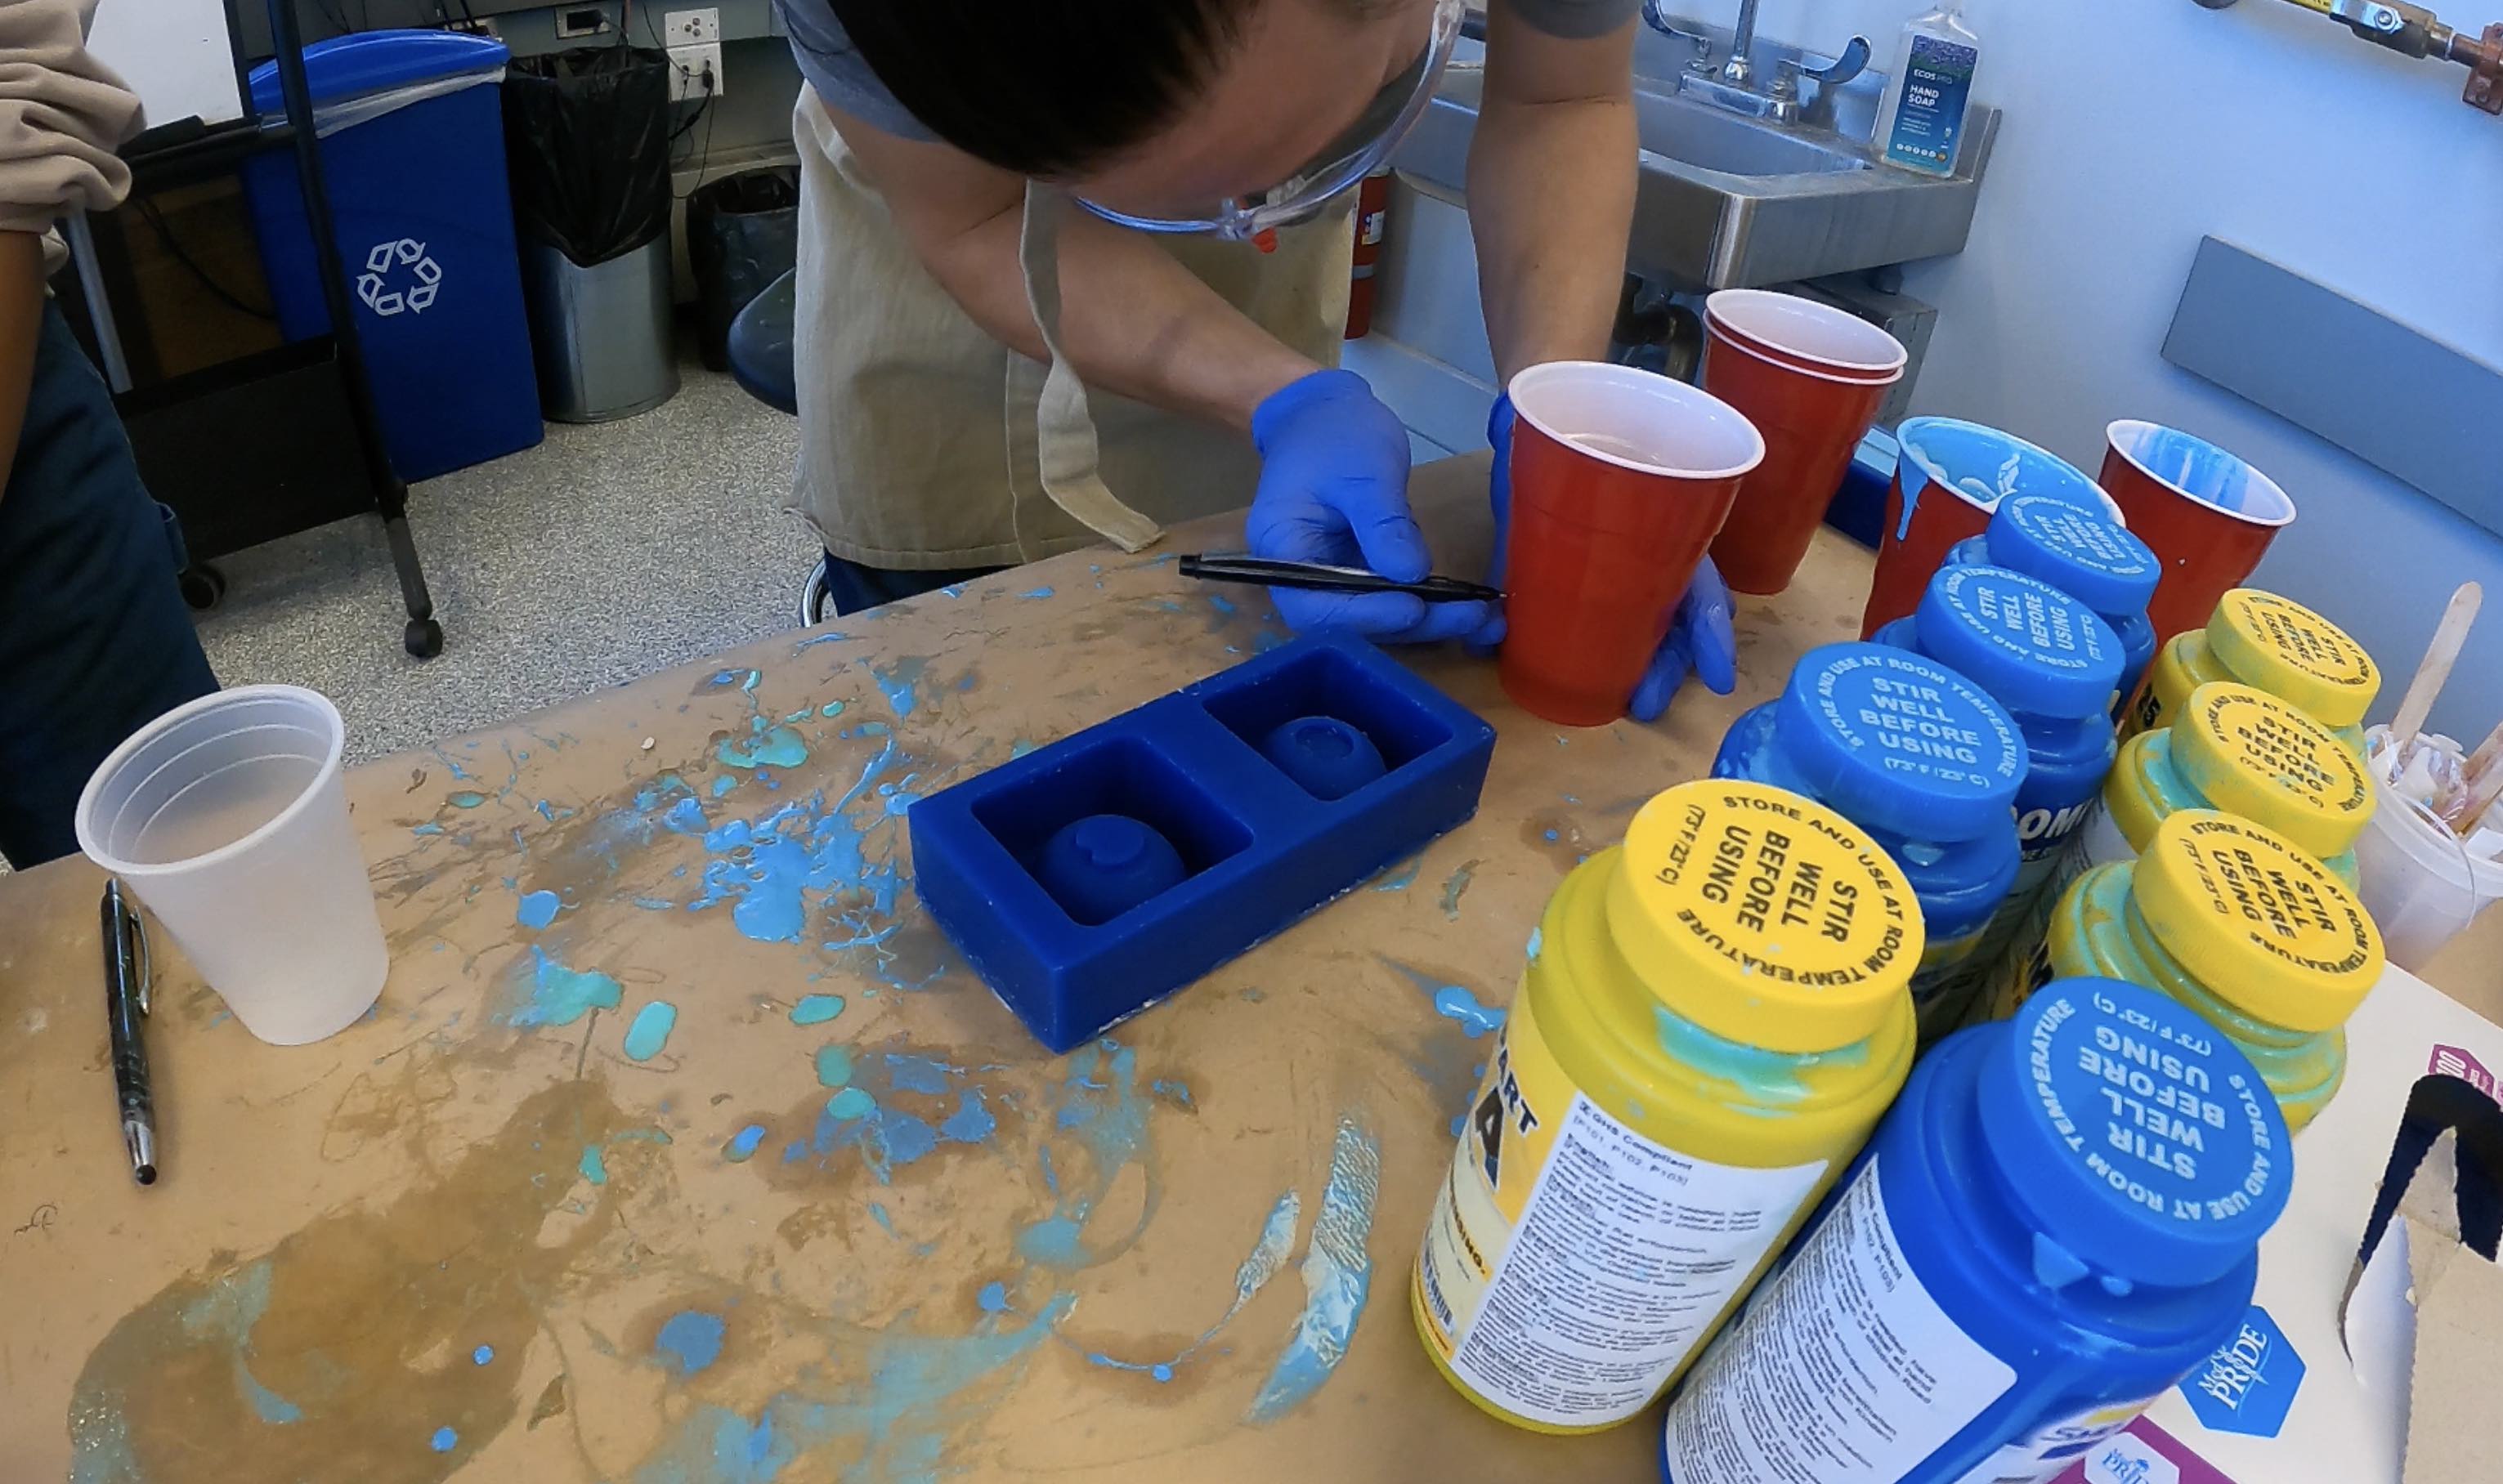
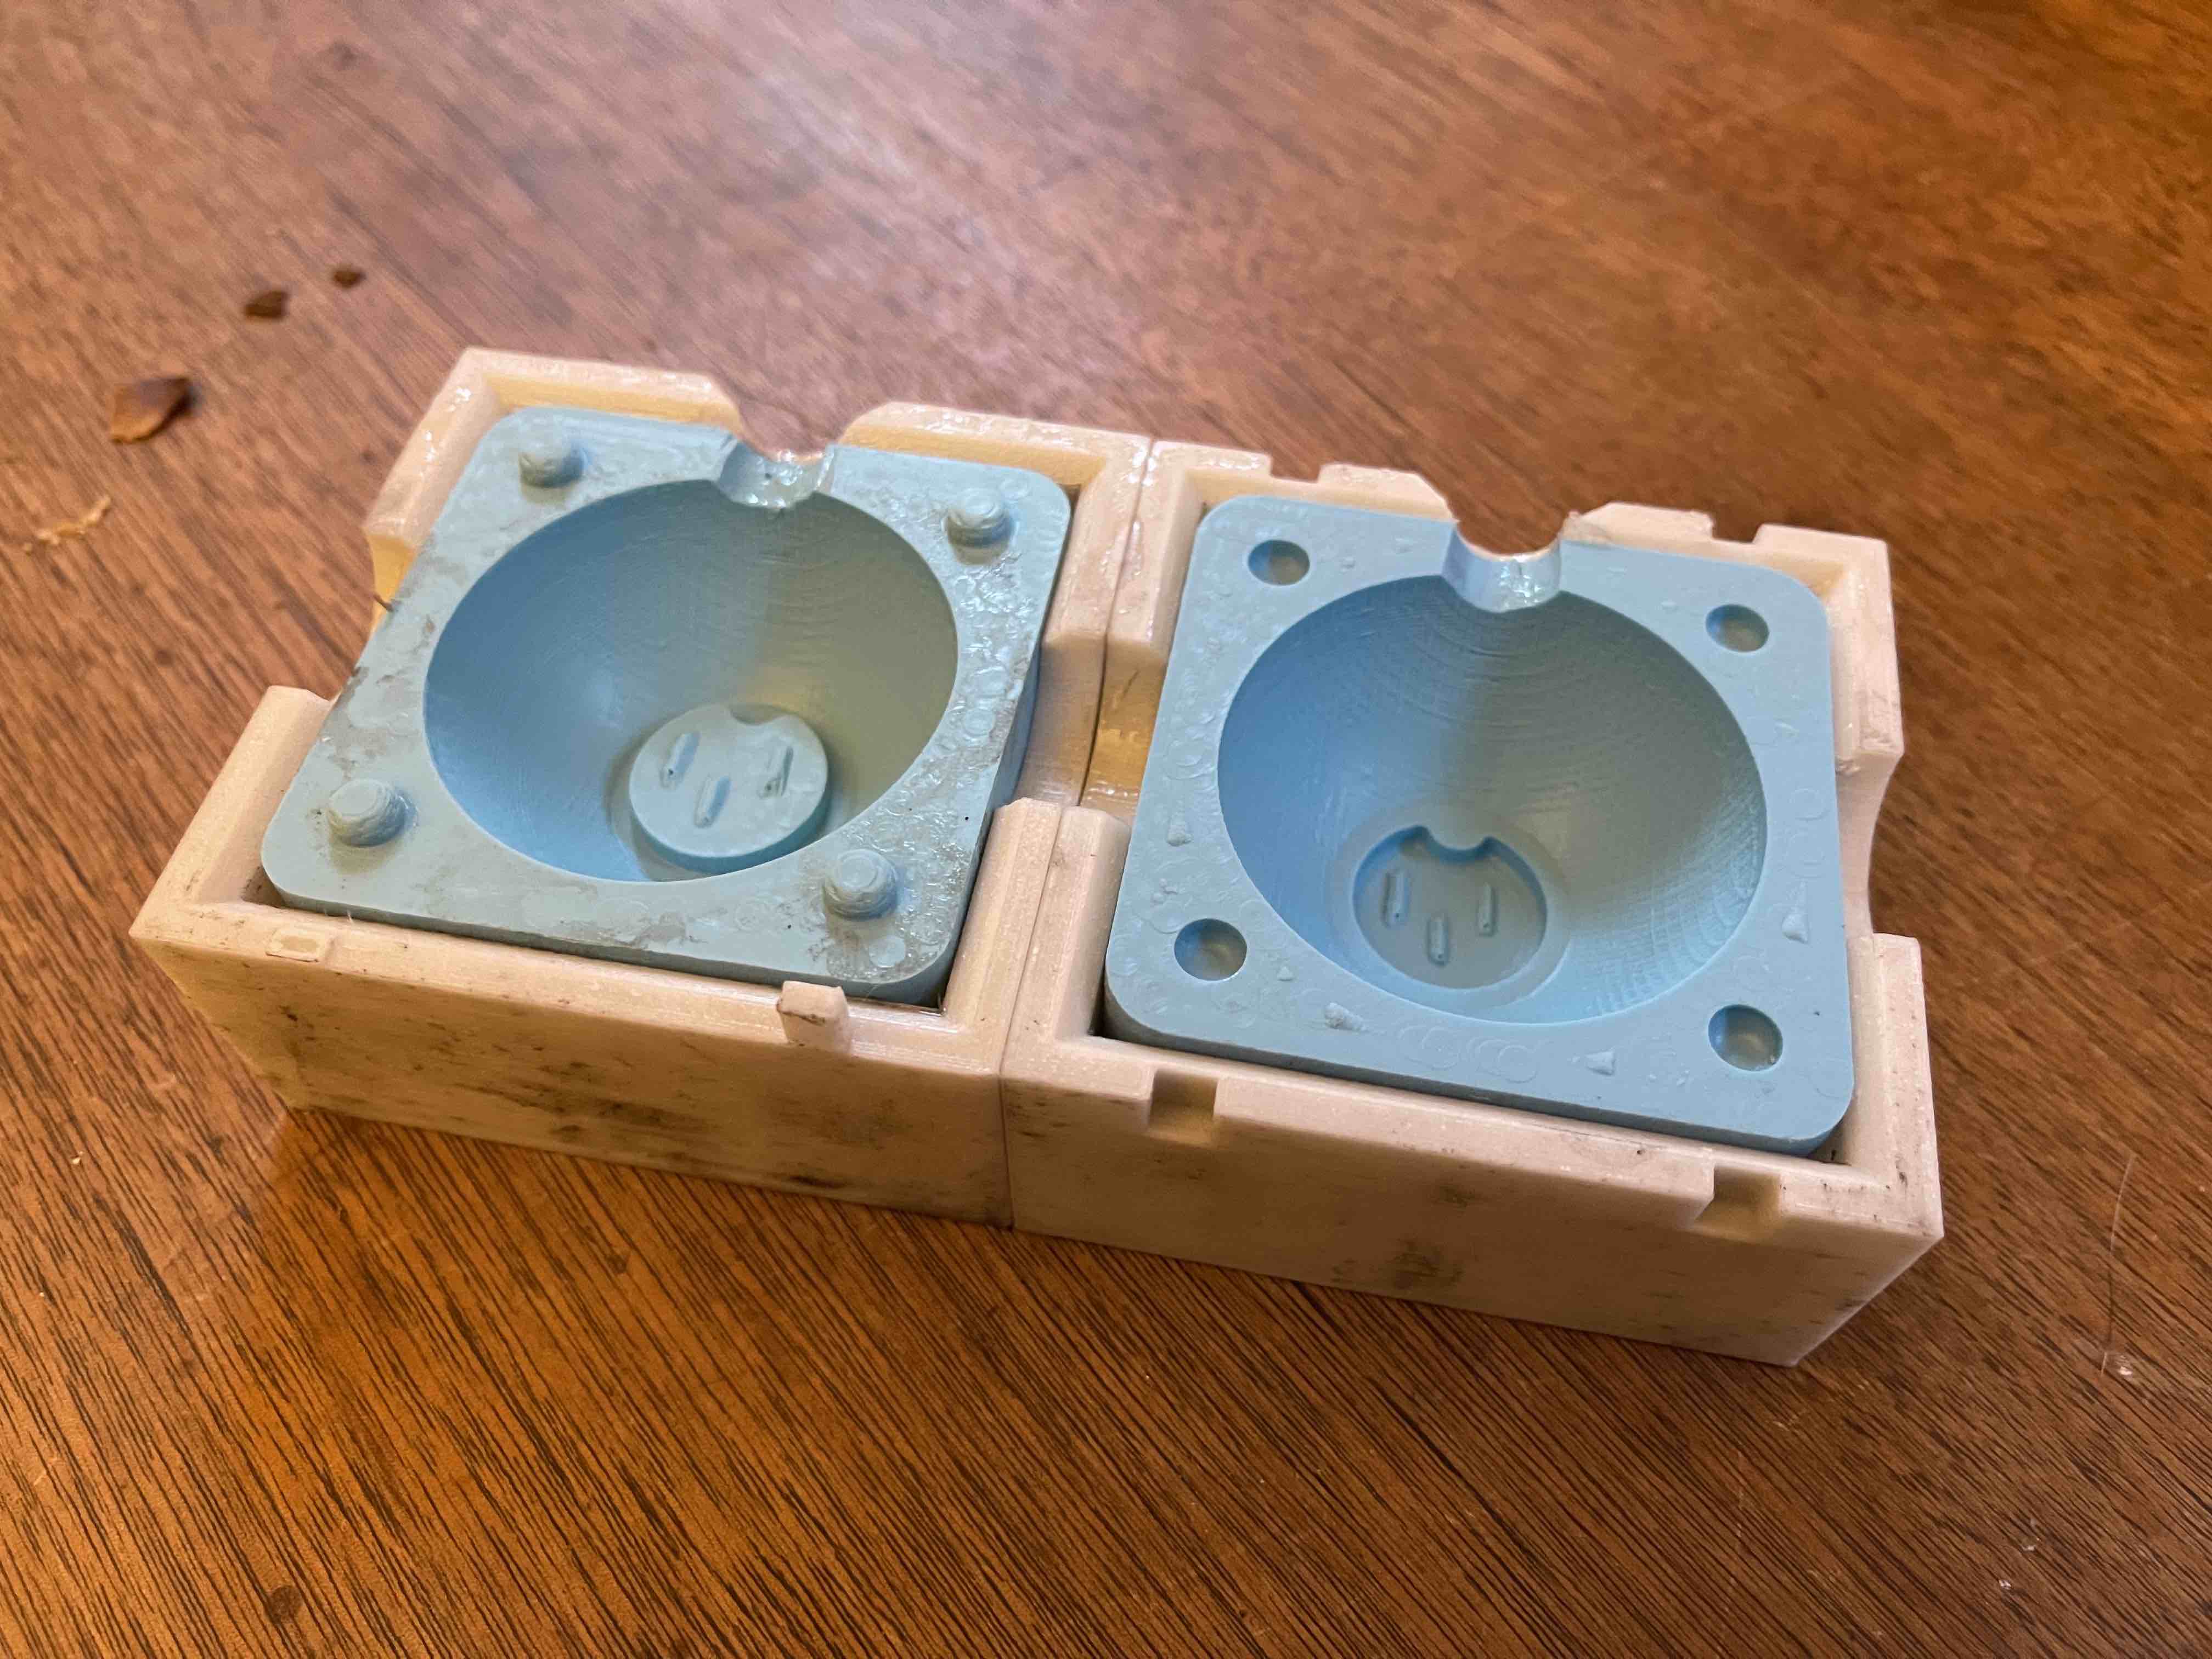
Making Oomoo Mold
To create the mold that will actually cast our part, we fill our mold with Oomoo. This is a 2 part silicon mixture that takes approximately 2 hours to set. Some key steps are below.
- Make sure you have roughly equal parts of the Oomoo bottles. It doesn't need to be perfect, but close. To do this, fill half your mold with water, then transfer it to a cup. Make a mark at the top of the line and use a little more than that of each mixture (dry mold after doing this).
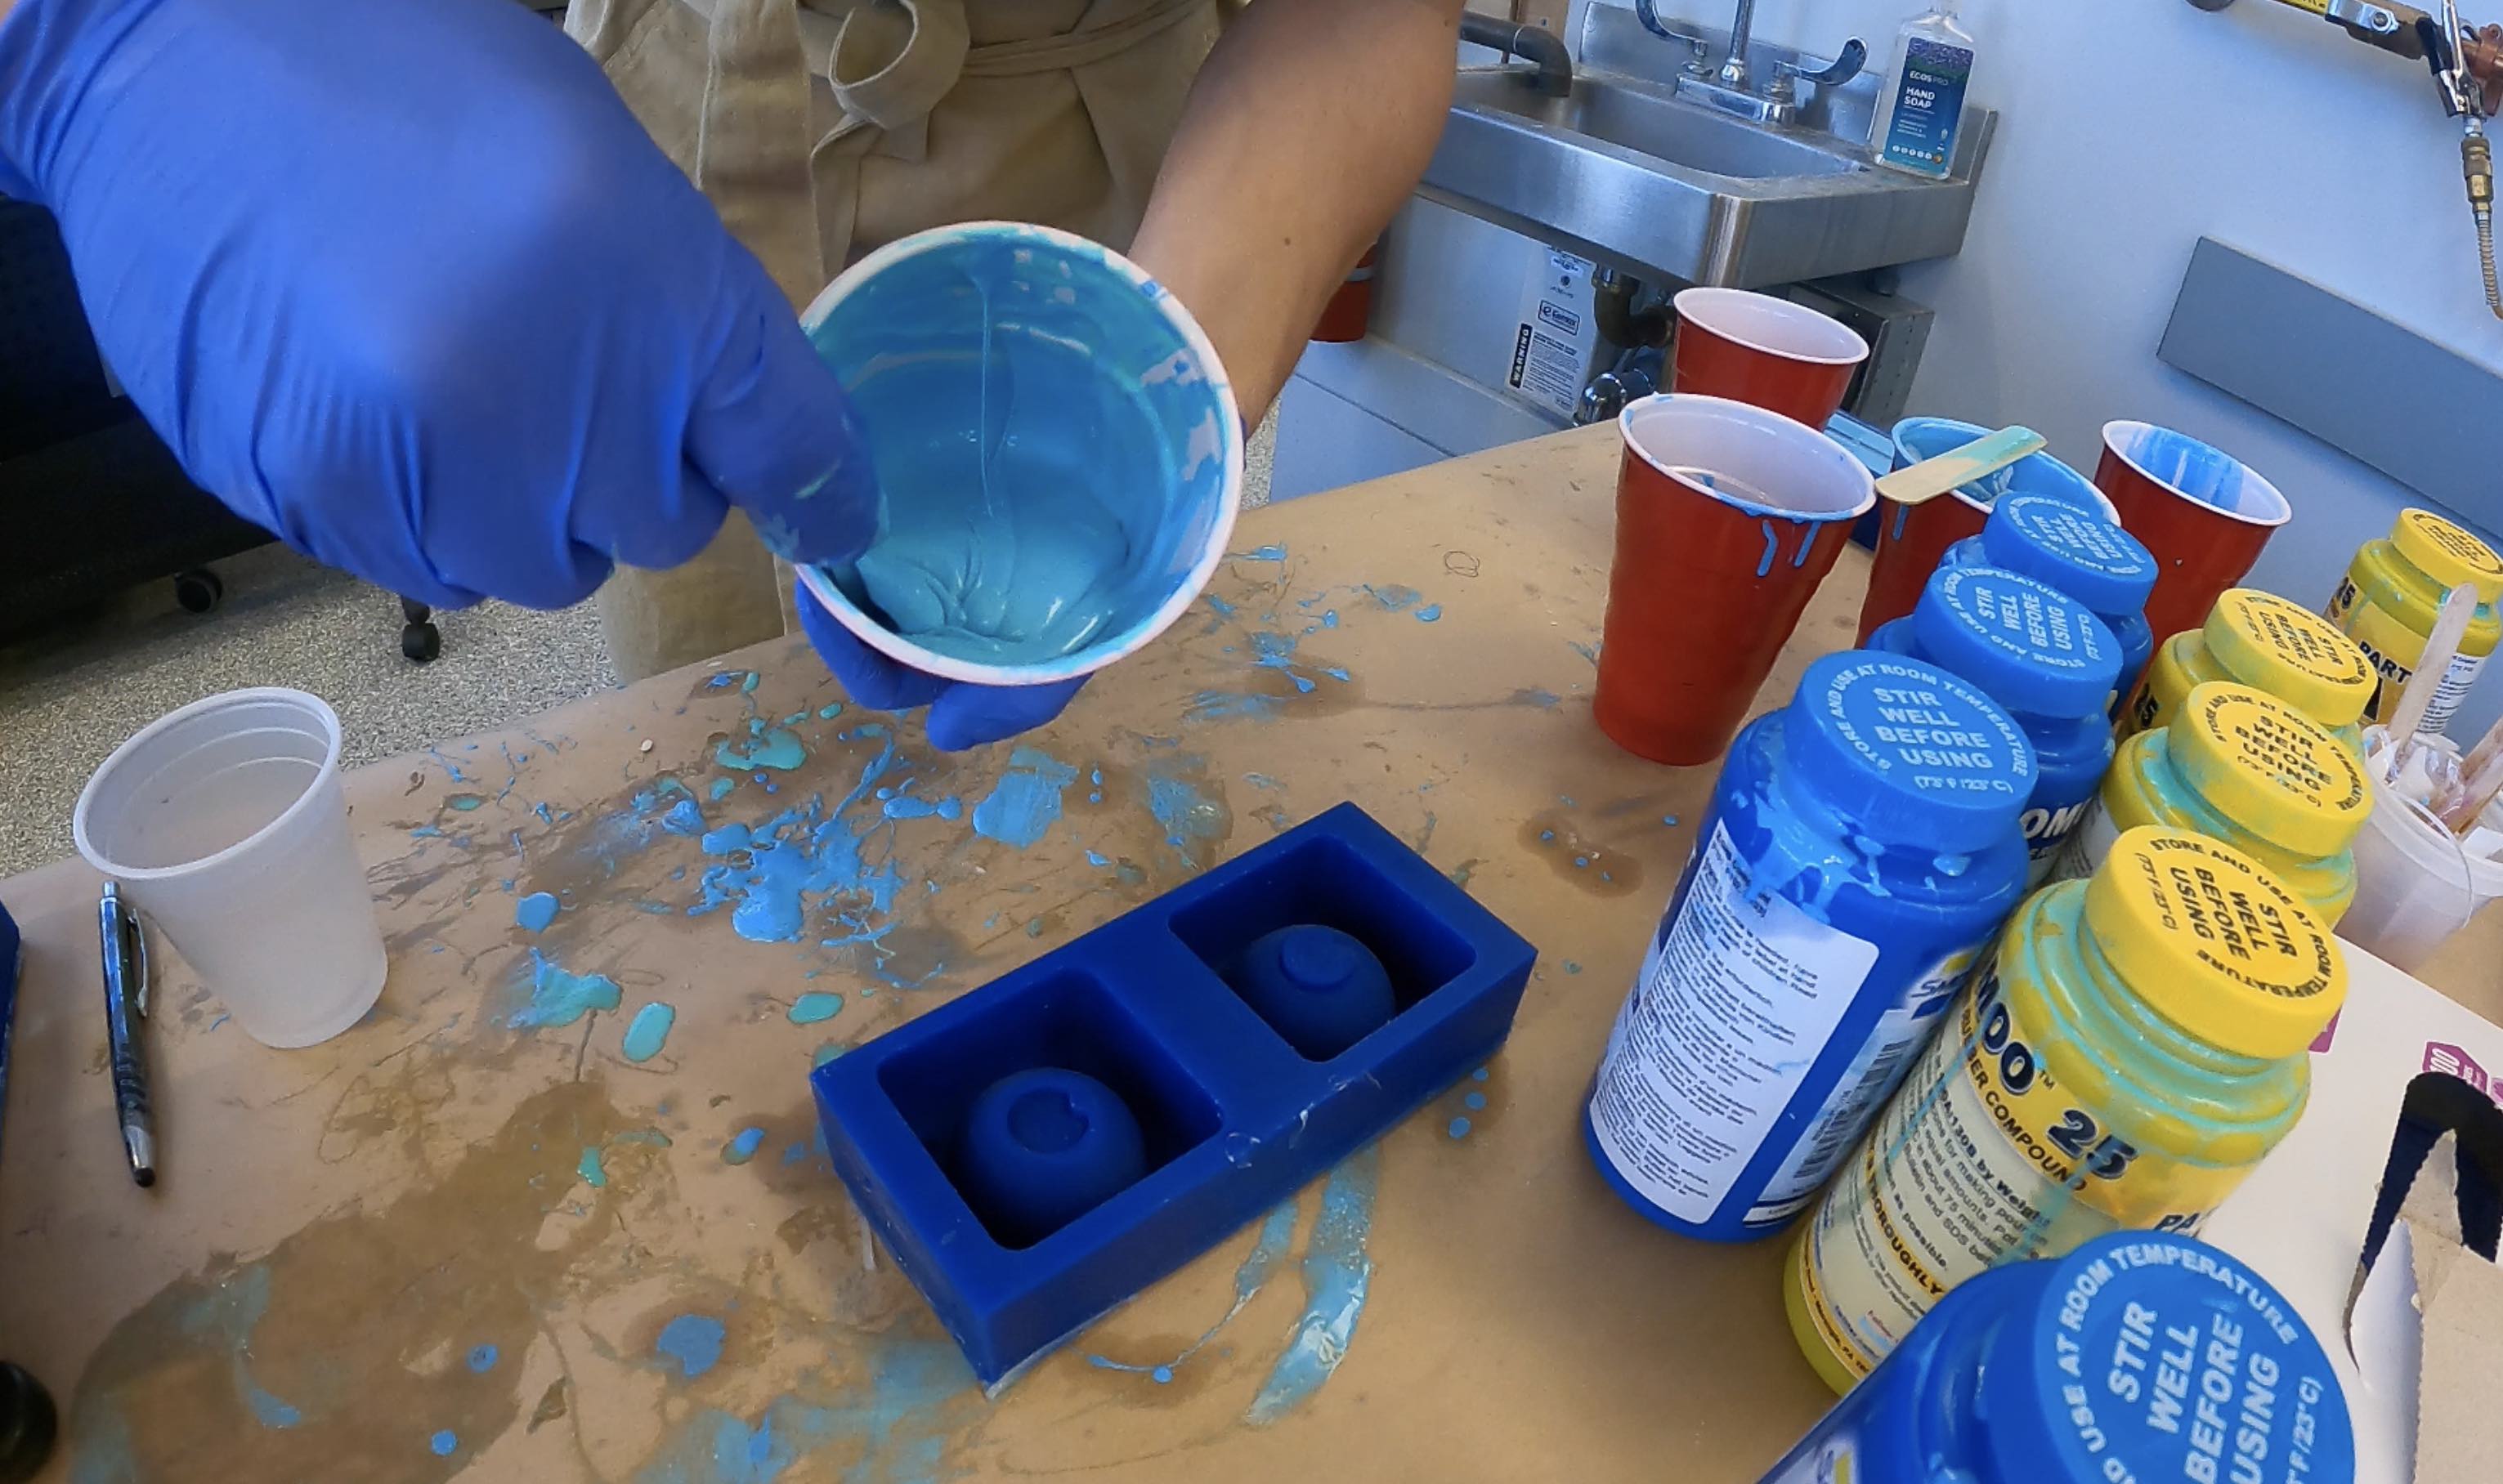
- MIX THOROUGHLY! You will have a goopy mess if you don't. So scrape the walls, sing a song, or watch a show, just don't be lazy. (TIP! Clear cups let you see if mixture isn't fully homogenous)
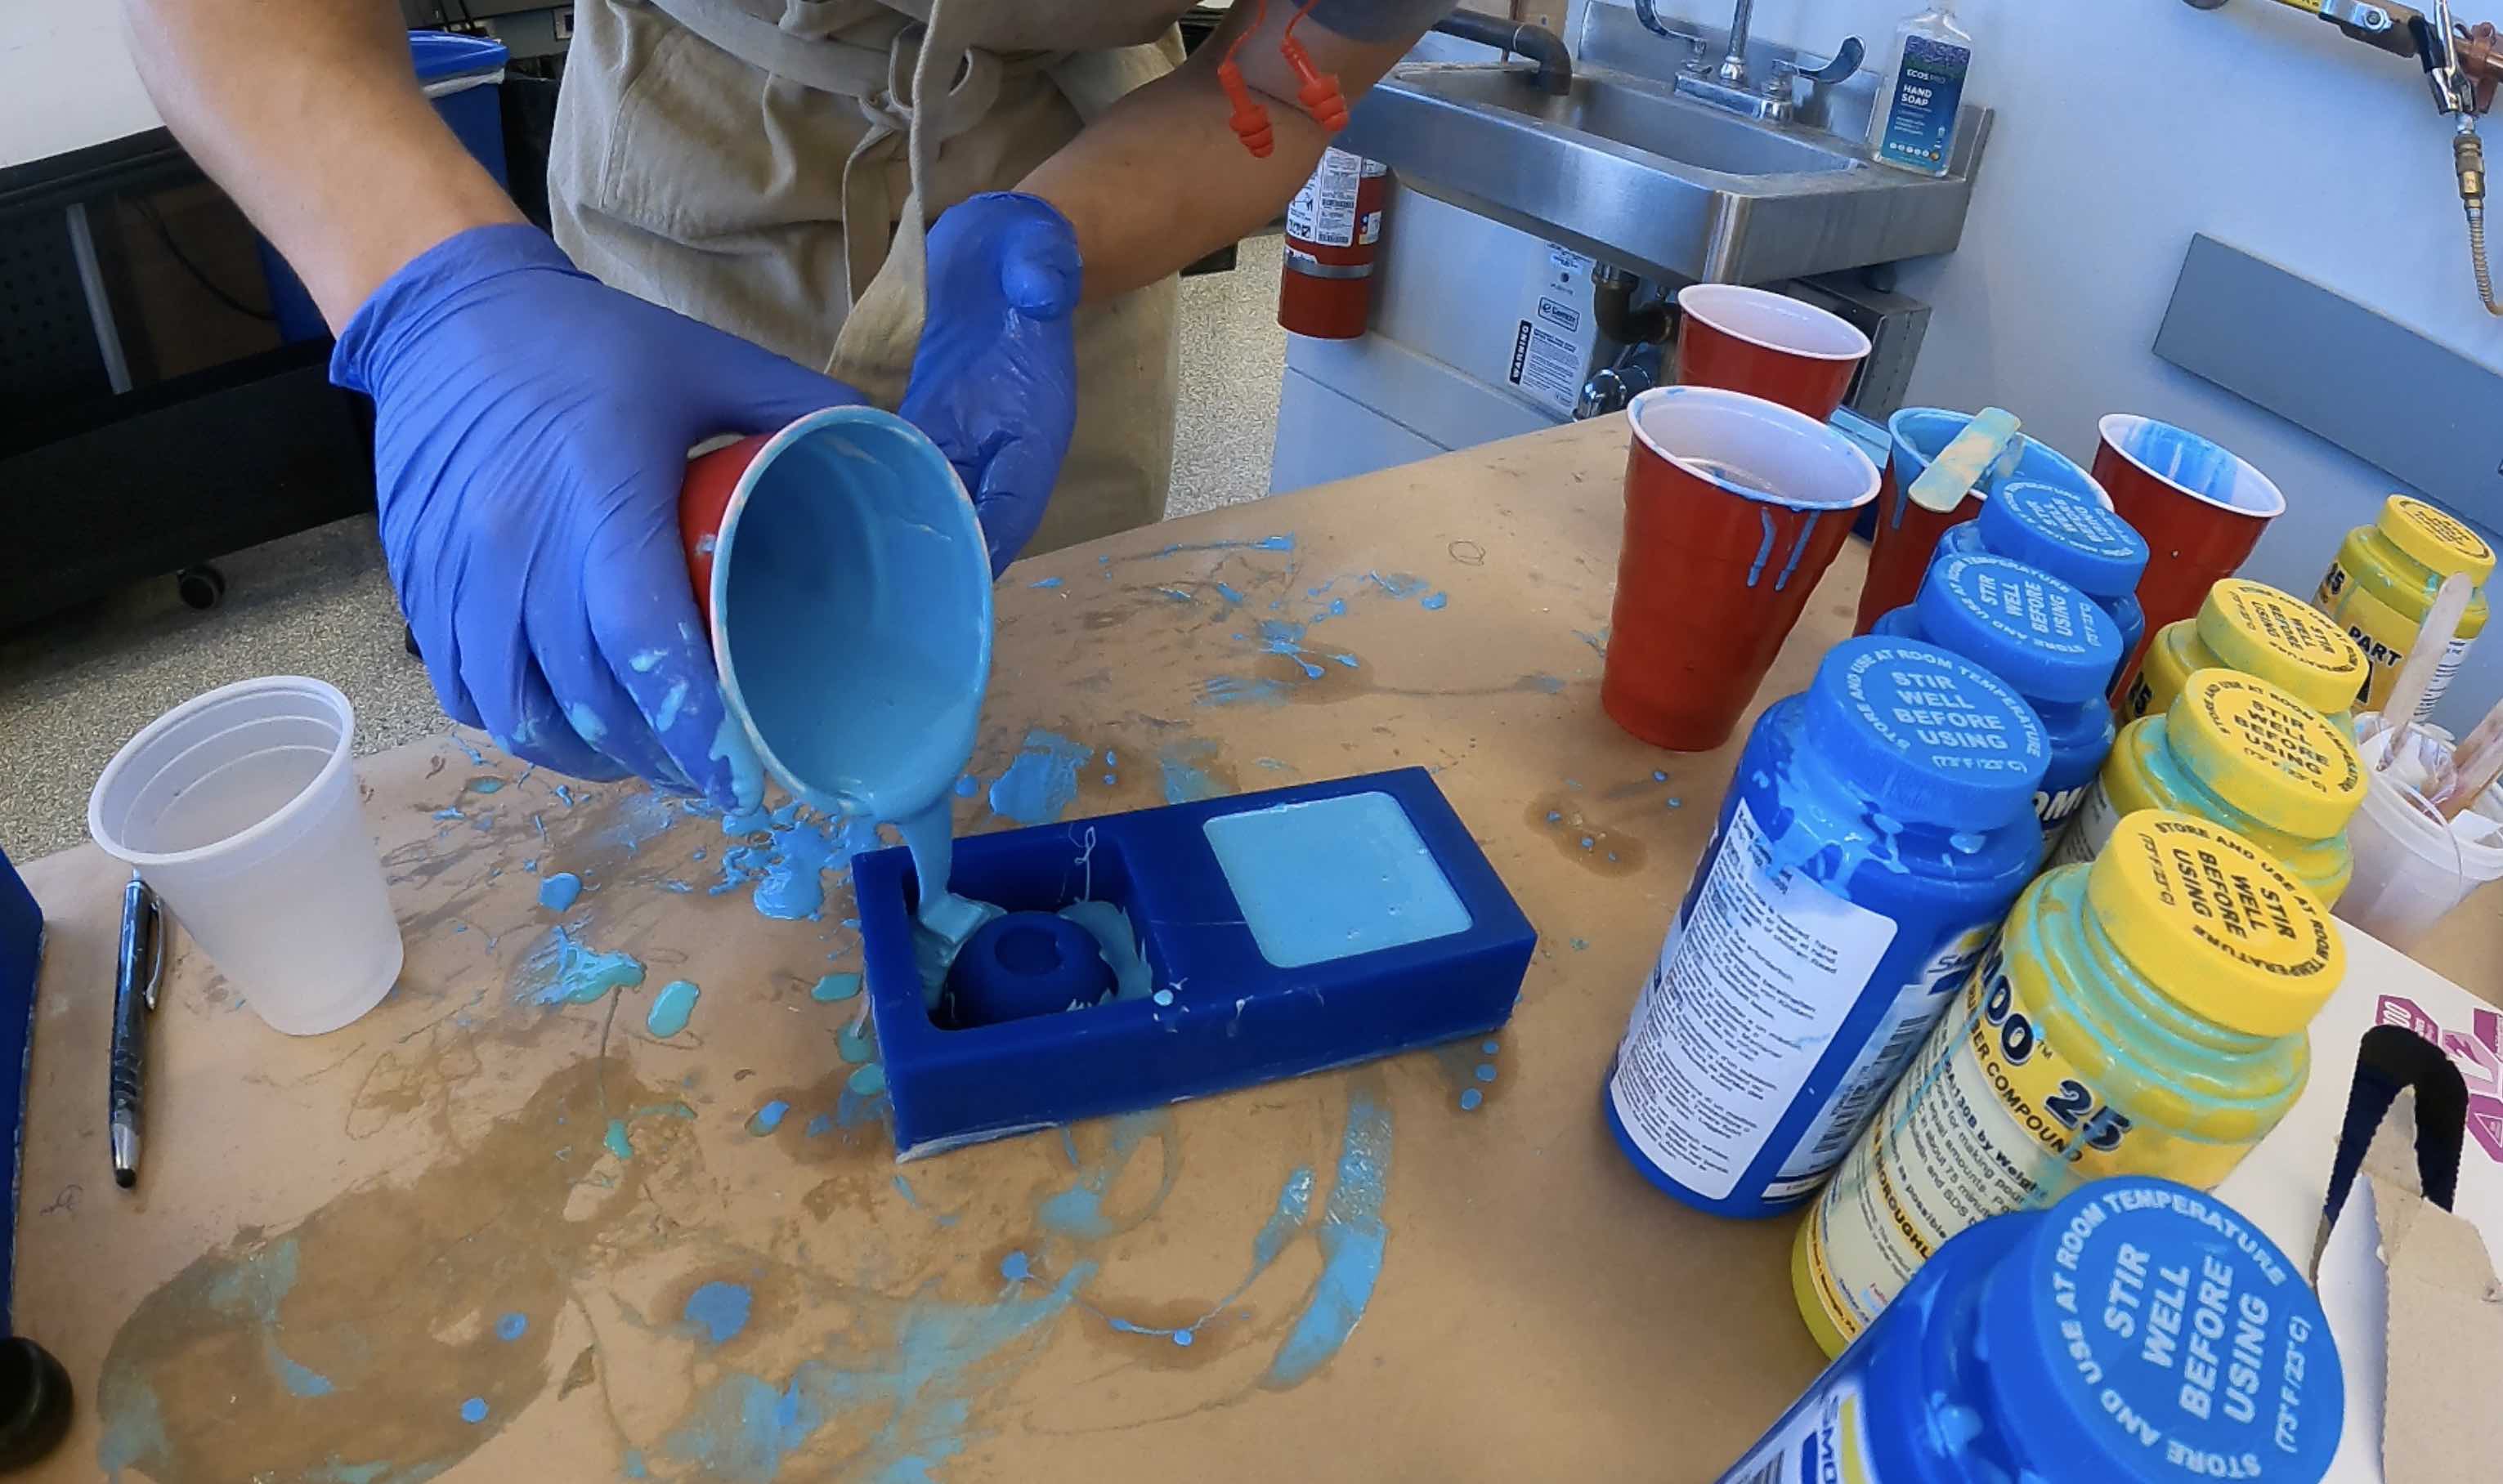
- When pouring, avoid bubbles by creating a stream from high up and starting at low corners. This will let the mold gradually fill up.
- You will notice I over pour. This is done to help ensure the casting-jig is squeezing the mold properly.
Casting & LEDs
I wanted this to cast with minimal parting lines around the middle, so I created a casting-jig to hold my part together. Using rubber bands on Oomoo tends to distort the shape. So I created a 3D printed holder that is slightly undersized to hold the mold together.
Suspending LEDs is a bit tricky. I did this by soldering the LEDs to they would suspend vertically. You can use any wire for this, but I found winding wire for motors to be best. They can be twisted, slotted through lines to continue to provide signals, they slide through molds well, and they can be manipulated into bends more easily. For LEDs, I used Neopixel floras. The video shows my process but here are a few key takeaways.
- Use 220 grit sand papaer to expose the copper
- Twist ends of connecting lines (Hot-to-Hot for example) and slide it through the Neopixel hole, using a screw motion
- Make loops at the ends for Digital in/out to hold in the neopixel while soldering
When placing the LEDs, it is critical to be consistent with the layout. Ground, hot, and digital-in/out need to be consistently in the same place on the molds for connections. You don't need to follow my layout, just pick one and stick to it. When placing the LEDs, pull them tight to the bottom of the mold, light facing up, with about 3 mm clearance. The bottom is the female feature. Do that first, then slot through the other side and create tension by pulling wires as you close the mold.
To pour my molds, I used EasyCast clear epoxy. My preference is for ArtResin, but the quantities didn't make sense. Follow instructions on your epoxy, making sure to pay attention to ratio and environment. These will impact fills significantly. Also, OVER POUR! Epoxy can shrink, which isn't aesthetically pleasing to be shallow in one spot.
The hardest thing about epoxy is removing bubbles, especially in a closed 2-part casting like this. Start by mixing slowly, trying to avoid mixing in air. Second, you can use a Random Orbital Sander to vibrate surfaces to remove bubbles (pressurizers are awesome too if you have access!). Third, pour a slow thin stream.
Programming
This is a VERY messy code that I made by modifying an old project, which was derived from code by Marcelo Coehlo (my teacher at the time). It is setup to allow for R, G, B individual controls and reset of those pieces. This can create anything you want on the spectrum (almost).
#include

#ifdef __AVR__
 #include // Required for 16 MHz Adafruit Trinket
#endif

#define BUTTON_PIN  2
#define BUTTON_PIN_2  4
#define BUTTON_PIN_3  5
#define BUTTON_PIN_4  6

#define PIXEL_PIN_R  3 // Digital IO pin connected to the NeoPixels.

#define PIXEL_COUNT 1 // Number of NeoPixels

//Adafruit_NeoPixel strip(PIXEL_COUNT, PIXEL_PIN_R, NEO_GRB + NEO_KHZ800);
Adafruit_NeoPixel pixelsR = Adafruit_NeoPixel(PIXEL_COUNT, PIXEL_PIN_R, NEO_GRB + NEO_KHZ800);


boolean oldState = HIGH;
boolean oldState_2 = HIGH;
boolean oldState_3 = HIGH;
boolean oldState_4 = HIGH;
int   mode   = 0;  // Currently-active animation mode, 0-9
int modeR = 0;
int modeL = 0;
int brightness = 0;
int brightnessR = 0;v huu
int rLights = "on";

int R = 0;
int G = 0;
int B = 0;
int lightsR = 'ON';
int red = 0;
int blue = 0;
int green = 0;
int light = "strip.Color(red,  green,  blue), 50)";


void setup()
{
 pinMode(BUTTON_PIN, INPUT_PULLUP);
 pinMode(BUTTON_PIN_2, INPUT_PULLUP);
  pinMode(BUTTON_PIN_3, INPUT_PULLUP);
   pinMode(BUTTON_PIN_4, INPUT_PULLUP);
 pixelsR.begin(); // Initialize NeoPixel strip object (REQUIRED)
 pixelsR.show(); // Initialize all pixels to 'off'
}


void loop()
{

 colorWipe(pixelsR.Color( red, green, blue), 3);


//RIGHT SIDE LIGHT BRIGHTNESS
boolean newState_2 = digitalRead(BUTTON_PIN_2);
 // Check if state changed from high to low (button press).
 if((newState_2 == HIGH) && (oldState_2 == LOW)) {
  // Short delay to debounce button.
  delay(20);
  newState_2 = digitalRead(BUTTON_PIN_2);

  red = red + 10;
  if(red > 250){
   red = 0;
  }
  Serial.print('red');
  colorWipe(pixelsR.Color( red, green, blue), 3);
 }

boolean newState_3 = digitalRead(BUTTON_PIN_3);
 // Check if state changed from high to low (button press).
 if((newState_3 == HIGH) && (oldState_3 == LOW)) {
  // Short delay to debounce button.
  delay(20);
  newState_3 = digitalRead(BUTTON_PIN_3);

  blue = blue + 10;
  if(blue > 250){
   blue = 0;
  }
  Serial.print('red');
  colorWipe(pixelsR.Color( red, green, blue), 3);
 }

boolean newState_4 = digitalRead(BUTTON_PIN_4);
 // Check if state changed from high to low (button press).
 if((newState_4 == HIGH) && (oldState_4 == LOW)) {
  // Short delay to debounce button.
  delay(20);
  newState_4 = digitalRead(BUTTON_PIN_4);

  green = green + 10;
  if(green > 250){
   green = 0;
  }
  Serial.print('red');
  colorWipe(pixelsR.Color( red, green, blue), 3);
 }

  // Get current button state.
boolean newState = digitalRead(BUTTON_PIN);
 // Check if state changed from high to low (button press).
 if((newState == HIGH) && (oldState == LOW)) {
  // Short delay to debounce button.
  delay(20);
  // Check if button is still low after debounce.
  newState = digitalRead(BUTTON_PIN);
  Serial.print('push2');


  if(newState == HIGH) {   // Yes, still low

   if(++modeR > 1) modeR = 0; // Advance to next mode
   switch(modeR) {      // Start the new animation...

// Black/off
    case 0:
     red = 0;
     green = 0;
     blue = 0;// Black/off
     break;

// Red
    case 1:
     red = 0;
     green = 0;
     blue = 0;// Black/off
     break;

// orange
    case 2:
     red = 0;
     green = 0;
     blue = 0;// Black/off
     break;

// yellow
    case 3:
     red = 0;
     green = 0;
     blue = 0;// Black/off
     break;

// Green
    case 4:
     red = 0;
     green = 0;
     blue = 0;// Black/off
     break;

// Blue
    case 5:
     red = 0;
     green = 0;
     blue = 0;// Black/off
     break;

// purple
     case 6:
     red = 0;
     green = 0;
     blue = 0;// Black/off
     break;
   }
   colorWipe(pixelsR.Color( red, green, blue), 3);

 }

 }

 // Set the last-read button state to the old state.
 oldState = newState;
 oldState_2 = newState_2;
 oldState_3 = newState_3;
 oldState_4 = newState_4;

}


void colorWipe(uint32_t color, int B) {
 for(int i=0; i  pixelsR.setBrightness(B*65);
  pixelsR.setPixelColor(i, color);     // Set pixel's color (in RAM)
  pixelsR.show();// Update strip to match
  delay(50);// Pause for a moment
 }
}