Week 6: Computer-Controlled Cutting
Goal: Make (design+mill+assemble) something big (~meter-scale)
Group Project
This week's group project was to test runout, alignment, speeds, feeds, materials, and toolpaths for our labs machine. Anthony told us he would handle setting up the machine with the right runout, alignment, speeds, and feeds, for the material (OSB) that we were working with. He also ran the tool paths from fusion for us so there wasn't much to do, but sit back and watch. We were able to test joint widths, however, to decide what sort of buffer space between slots we found best for our design.
The Idea
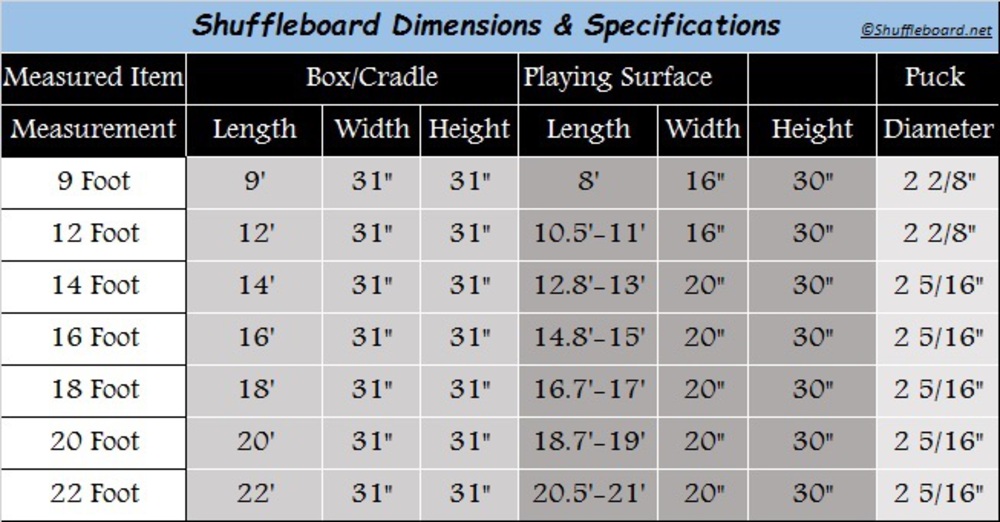
This summer I played shuffleboard for the first time and had a suprisingly good time so for this weeks assignment I wanted to try and create my own (miniaturized) version for my house. The length of a typical shuffleboard table ranges from 9 to 22 feet, however, so I decided to scale it down given the fact that we were only allotted a 4 ft. x 8 ft. piece of OSB. I also wanted to experiment with getting a nice finish on the wood to allow a puck to slide smoothly over it. After looking at the material and talking to Anthony, our lab TA, about the idea, I realized getting a nice finish was going to be the real challenge this week. Stay tuned to see if I was about to do it!
CAD Design and Testing
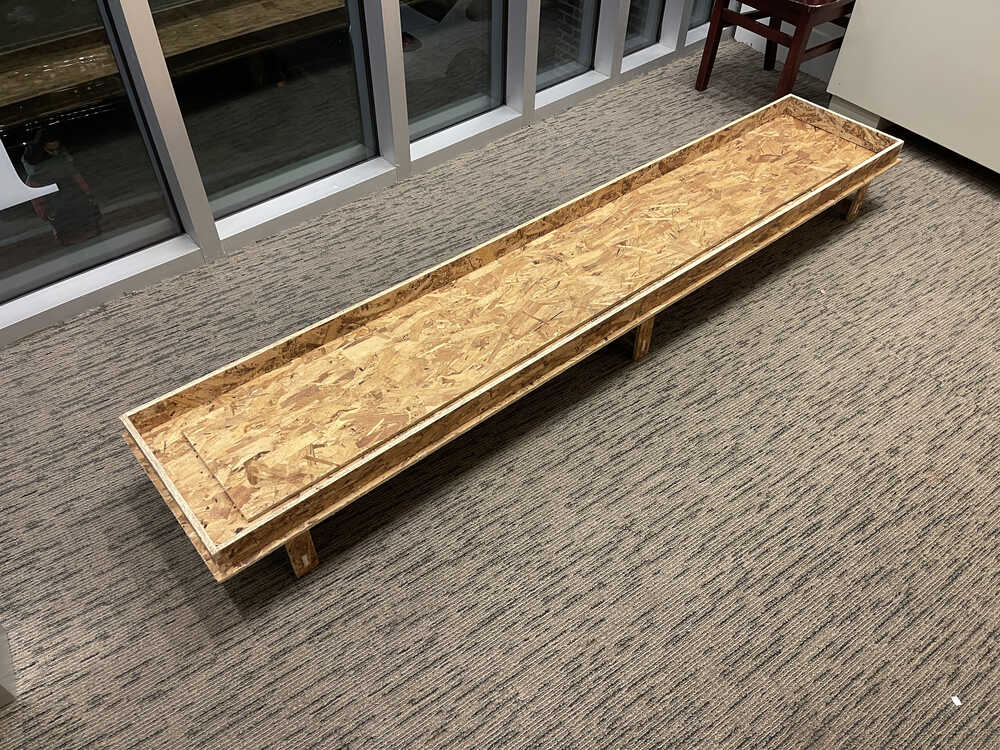
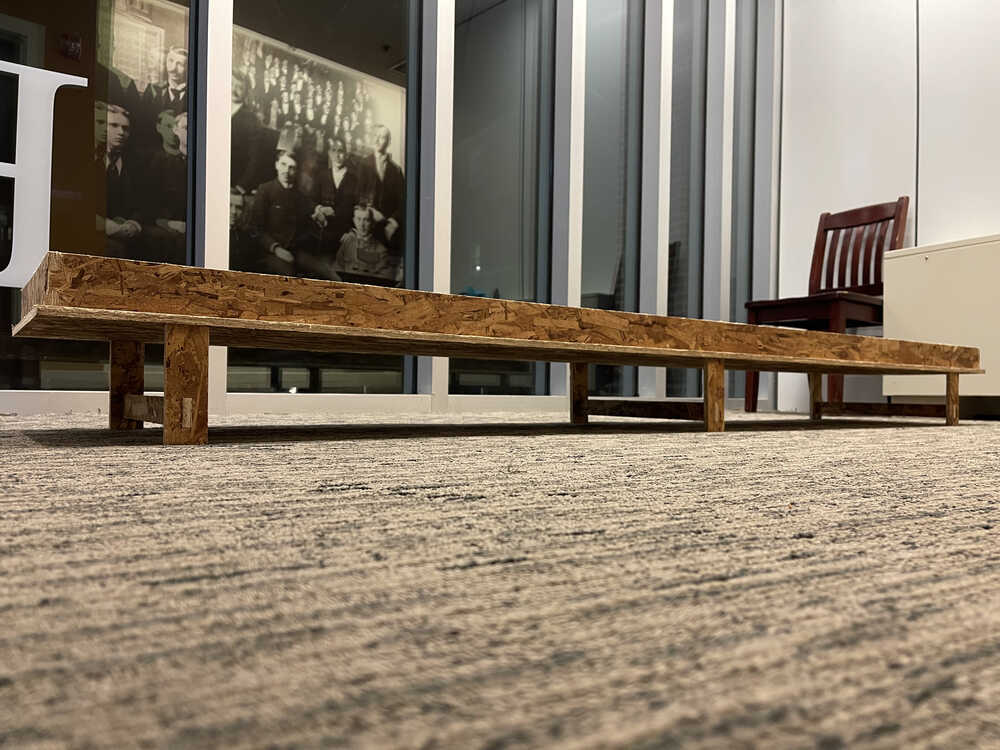
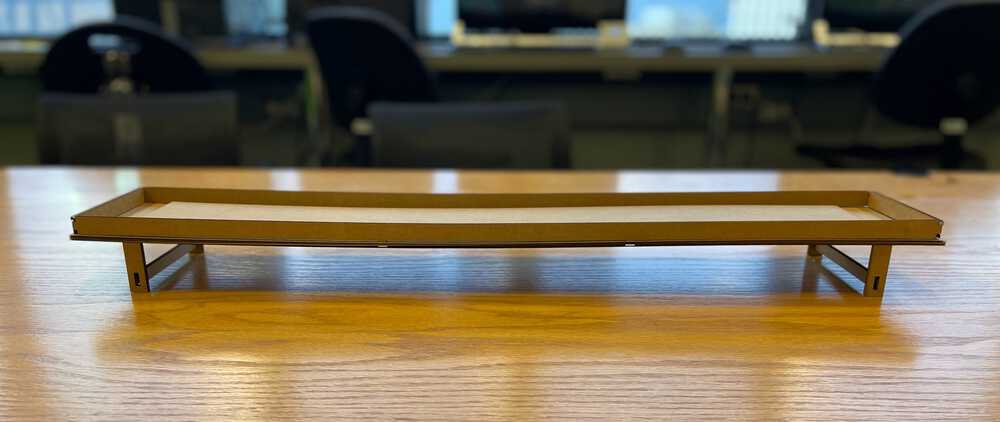
Here are is my final CAD design. As someone with very little design expertise I opted to try and copy the supports I have seen on tables before where they support the corners of the table and have a cross beam to help keep them orthogonal to the ground and table. I used press fit joints for all the leg attachments and edge attachments on the top of the table. On these attachments I chose to set their width equal to that of the attachment tabs. My thinking was that by the time I assemble and disassemble a couple times the joints will still fit snuggly. In lab when we were being trained on how to use the milling machine I found that after testing out different joint clearances the one I liked best was equal to the size of the tab and it maintained its fit the best. I also measured the OSB sheet I was using in N51 with Calvin in a couple spots and determined the depth of the tabs should be slightly larger than the average width of the board or about .48 inches. Before cutting it out on my piece of wood I first did a scale model of my design on cardboard and realized that I was getting a decent amount of unwanted bending near the middle of the table when I just had two supports so I decided to go ahead and add in extra supports for the final design. Below is my cardboard design showing off the bending as well as the final cad.
Milling
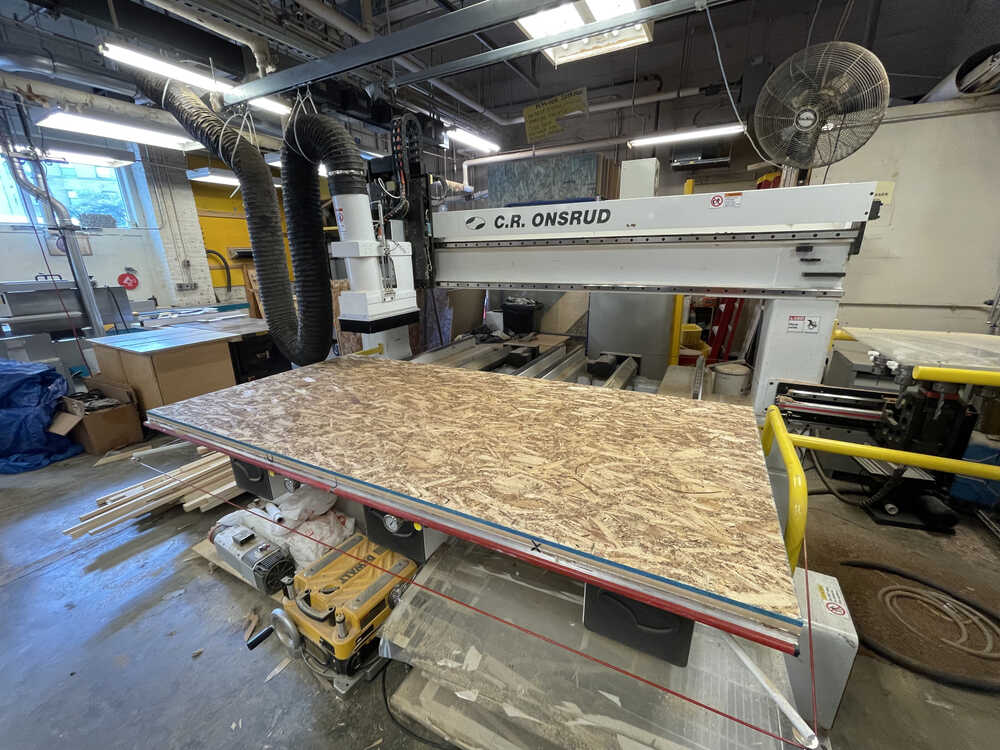
I was able to venture away from EDS this week and mill on the Onsrud in N51 with the help of Calvin for this week in order to accomodate my wish to mill out components larger than 4 feet in length. After being trained on the Shopbot and being somewhat dissapointed that we used composite nails to pin down the wood to prevent movement during cutting, I was super excited to see the vacuum of the Onsrud in action. I was not dissapointed as I stood by as it completely flattened my previously curved 4 x 8 slab of OSB. Some other notable distinctions I noticed between the Shopbot and the Onsrud were that the Onsrud does automatic tool changes while the Shopbot requires manually changes. The Onsrud also has a dedicated computer while the Shopbot allowed us to control it from our own computer over ethernet if I remember correctly. Lastly, the Onsrud had a movable board while the Shopbot remained stationary and had a moving head with the end mill attached.
Milling Continued
The actual process of milling the board was mostly done with the help of Calvin who walked through the process of creating the milling paths on Mastercam where we made sure to keep the end mill on the outside of outer lines and the inside of internal cutouts. He also walked me through creating points on each of the internal corners of joints to make sure they did not end up rounded (i.e. rounded mill can't cut 90 degree angles). We then set it up so that these points would be drilled out in order to make the dog boned joints needed to ensure clean fits. After we set up the paths the actual milling process consisted of 3 parts:
- Drill out the corners of joints using a drill bit.
- Mill out pieces and interal cutouts using an 1/4 in. (iirc) end mill.
- Mill out extra material the drill bit did not fully get in the frist step using a 1/8 in. (iirc) end mill.
Cleaning and Assembly
After the milling process, the pieces that were cut out are very rough around the edges due to the onion skinning. In order to remove all the excess material I took a rasp and file and went to work slowly but surely abrasing the unwanted wood away from my components. One large mess, and a couple splinters later (Note: wear gloves when working with wood), I had nice(ish) looking pieces. The next step was to sand down the edges with a slightly finer abrasive sandpaper to make sure the joints would fit together better. Finally, I attempted to jam the pieces together and was briefly devasted. As you might have guessed, the pieces did not slide together easily... Luckily, Calvin came in to save the day and reminded me that hammers exist so I simply tapped the pieces with a hammer until they slid in. All was well and everything fit together quite snuggly as I wanted. The only challenge left was to bring back the built project to my room and figure out how to finish the surface of the main board to allow pucks to slide across nicely. My plan was to use a finish sander, put on score markings using a sharpie or possibly vinyl cutouts, then use an epoxy to get a nice clear coat on top of the wood. Below is documentation on the filing process as well as the assembled shuffle board!
Finished Board
Coming soon.