Week 8: Molding and Casting
Goal: Design a mold around the stock and tooling that you'll be using, mill it, and use it to cast parts.
Group Project
This weeks group assingment was to review the safety data sheets for each of your molding and casting materials, then make and compare test casts with each of them.

My Mold
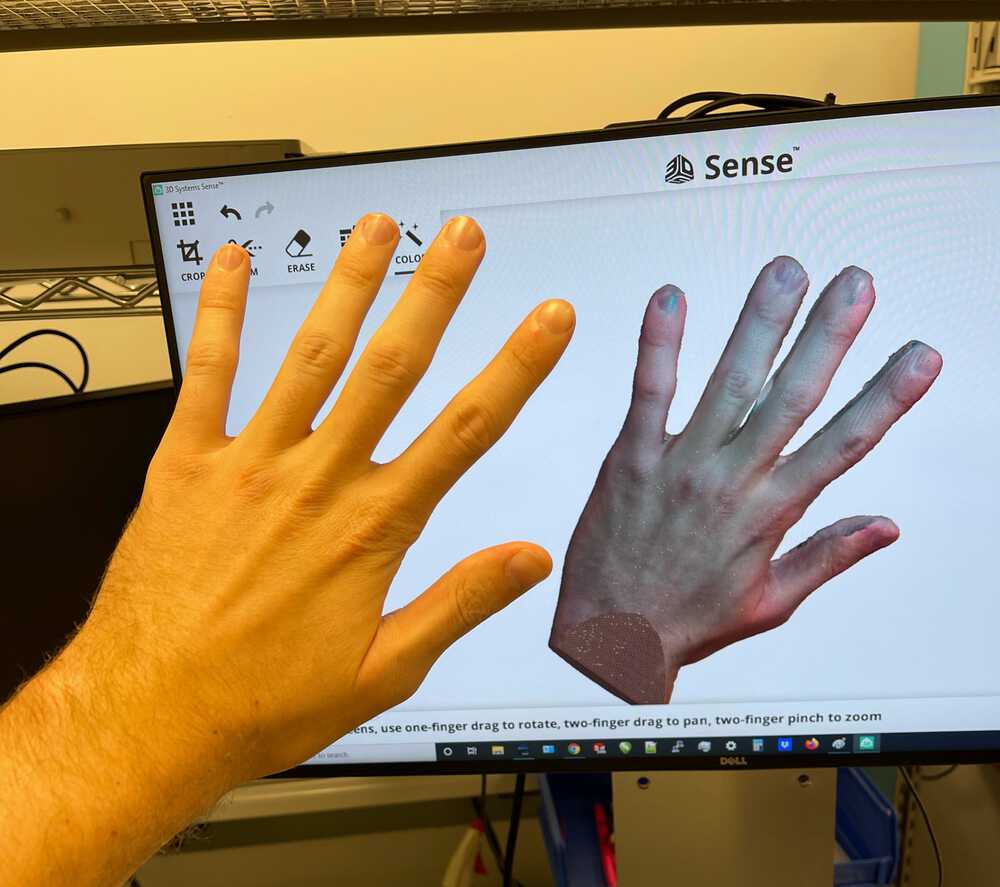
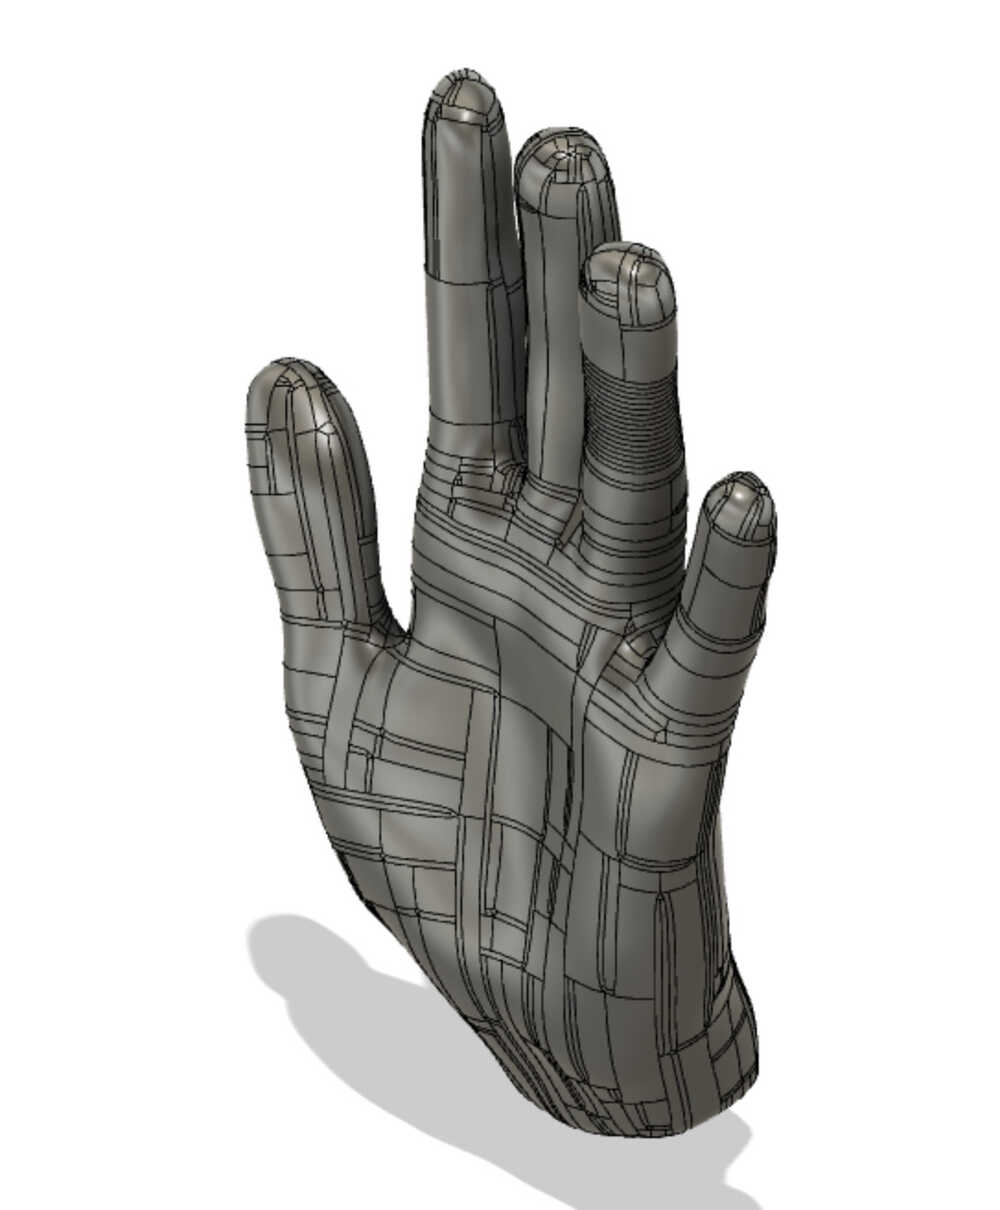
This week I decided I would not make something that would inevitable get lost amongst the junk on my desk. I wanted something I could actually use. Hence, I decided to make hand soap: soap in the shape of my hand. Relying on skills we picked up in previous weeks I started by using the 3D sense scanner (with the help of Michelle) to make a 3D scan of my hand (pictured below) and export it as an STL.
Smoothing the Hand Model
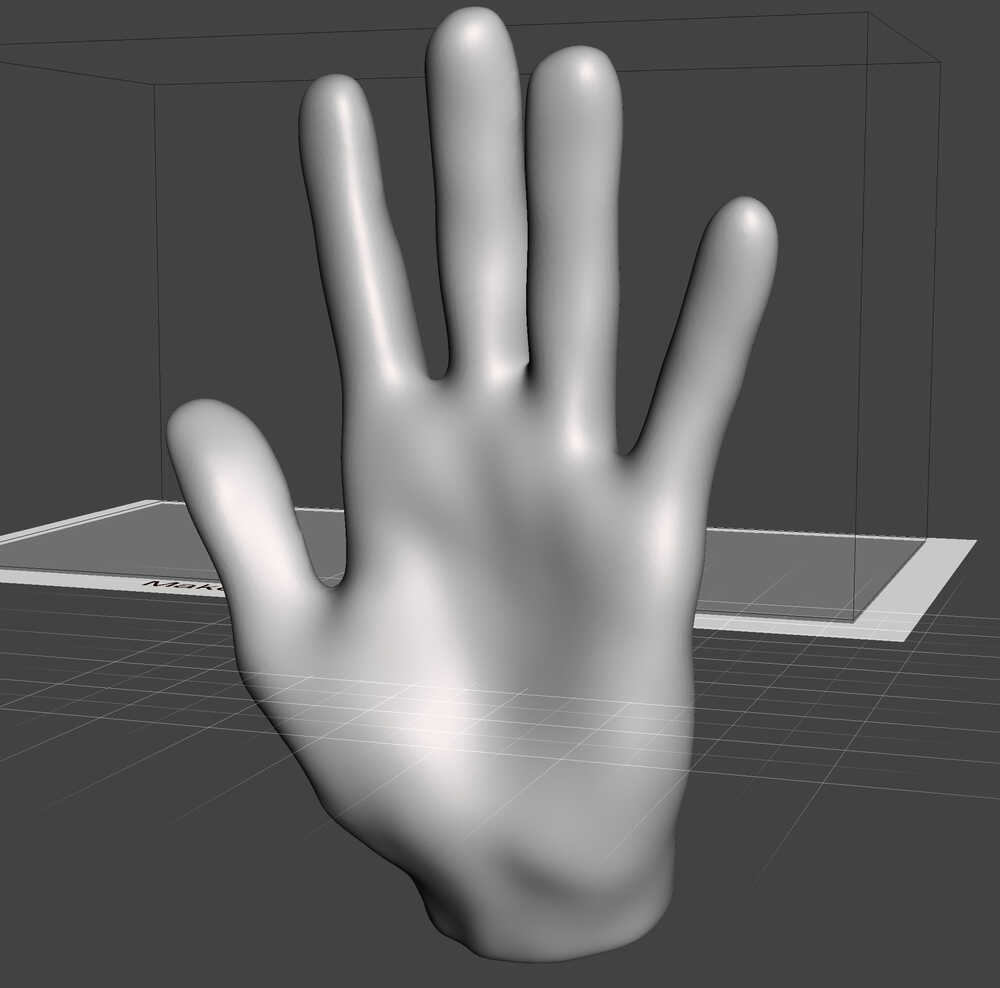
Unfortunately, after trying to load the STL model of my hand into Fusion 360 I ran into a bunch of problems with Fusion crashing due to what I think is the extremely large number of faces represented in the STL mesh. In order to fix this I found a nice tutorial online of how to edit the STL in order to make it easier to use in fusion. Here is the link to the tutorial I followed. https://www.youtube.com/watch?v=aMZKgzBpodI Essentially, the process consisted of
- Putting the STL in meshmixer and removing any holes from the model you want filled in and exporting it as a .obj file.
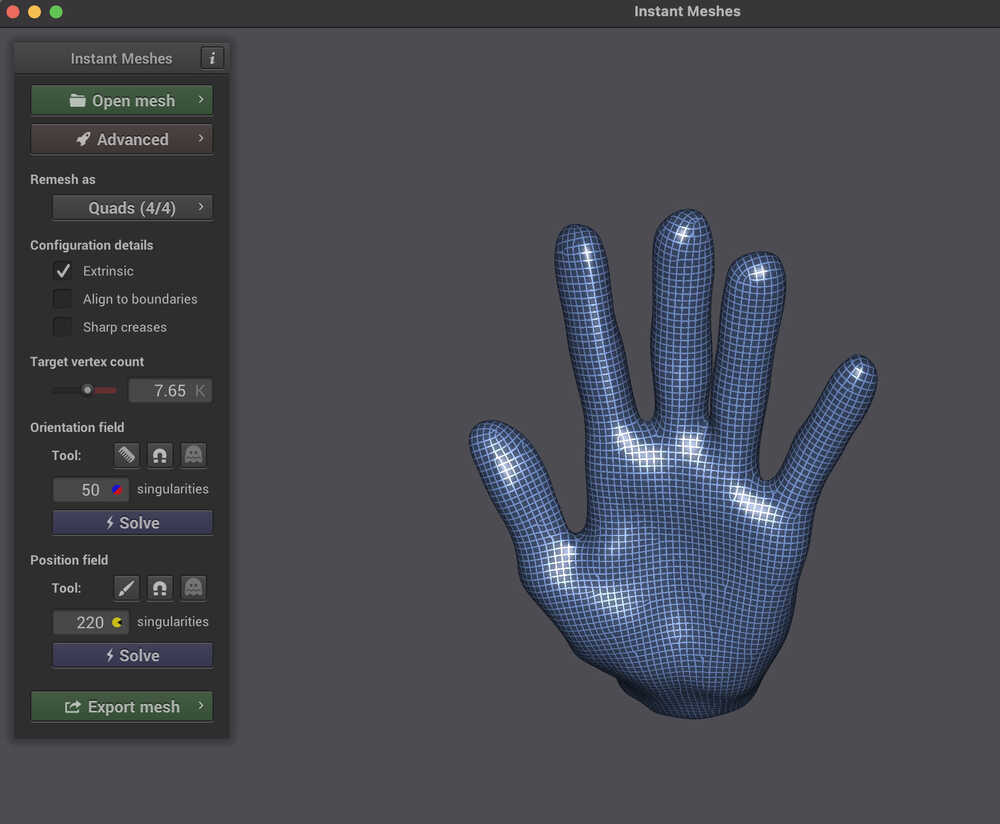
- Opening the .obj file in instant-meshes (instant-meshes), decreasing the vertex count to a lower resolution (smoothing it a bit) then exporting as a pure quad mesh.
- Inserting the pure quad mesh into Fusion 360, converting it to a T-spline form (this is Fusion's organic designing form representation??), repairing any holes in the representation, and finishing the form to turn it into a body.
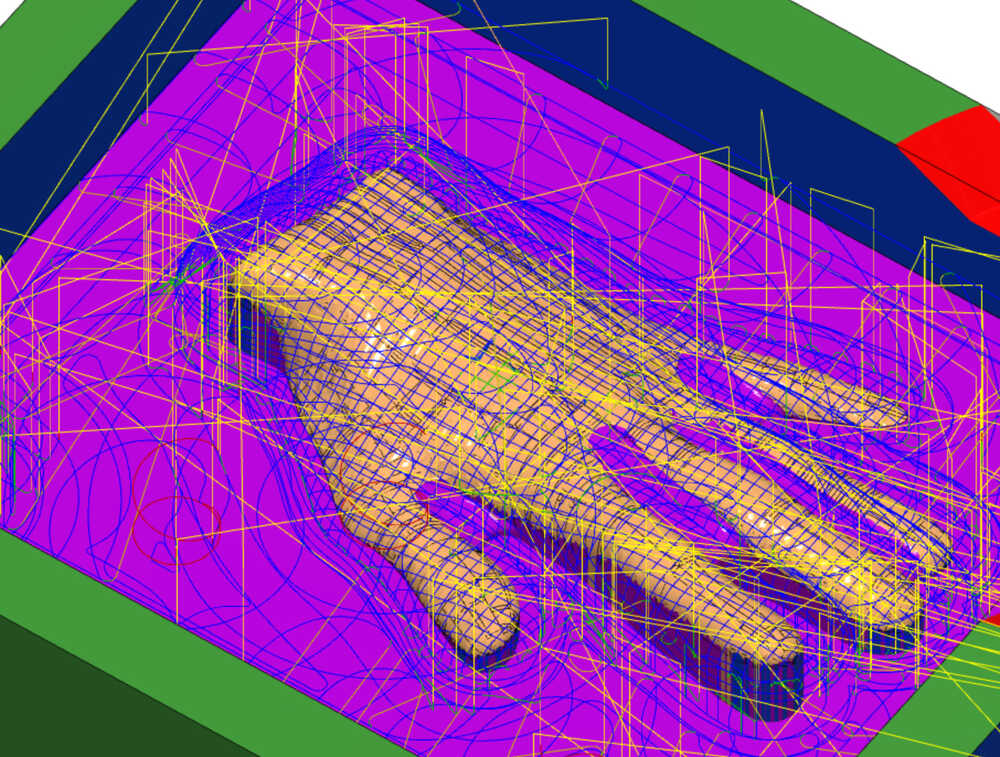
CAM
The next step in the process was to make the machine paths. Before doing this, I created a model of my material and sliced my hand in half in order to prevent the machine from having to do undercuts. Due to the shape of my hand in the scan, however, this was not perfect, so I decided I would just do some manual corrections to shave out some of the material that was left due to overhangs. After this was set up, the steps in my CAM were as follows:
- Adaptive Clearing (1/4 in. mill): To get rid of lots of material without much detail.
- Flat (1/4 in. mill): To finish all the flat surfaced of my model quickly. Since most of the surfaces of my model were curved, this basically just cleared around it at the bottom of the mold.
- Parallel (1/8 in. mill): To surface finish the hand with a smaller tool for better resolution.
- Pencil (1/8 in. mill): To finish around the edges of my hand in order to make the outer perimeter nice and clean.
Milling
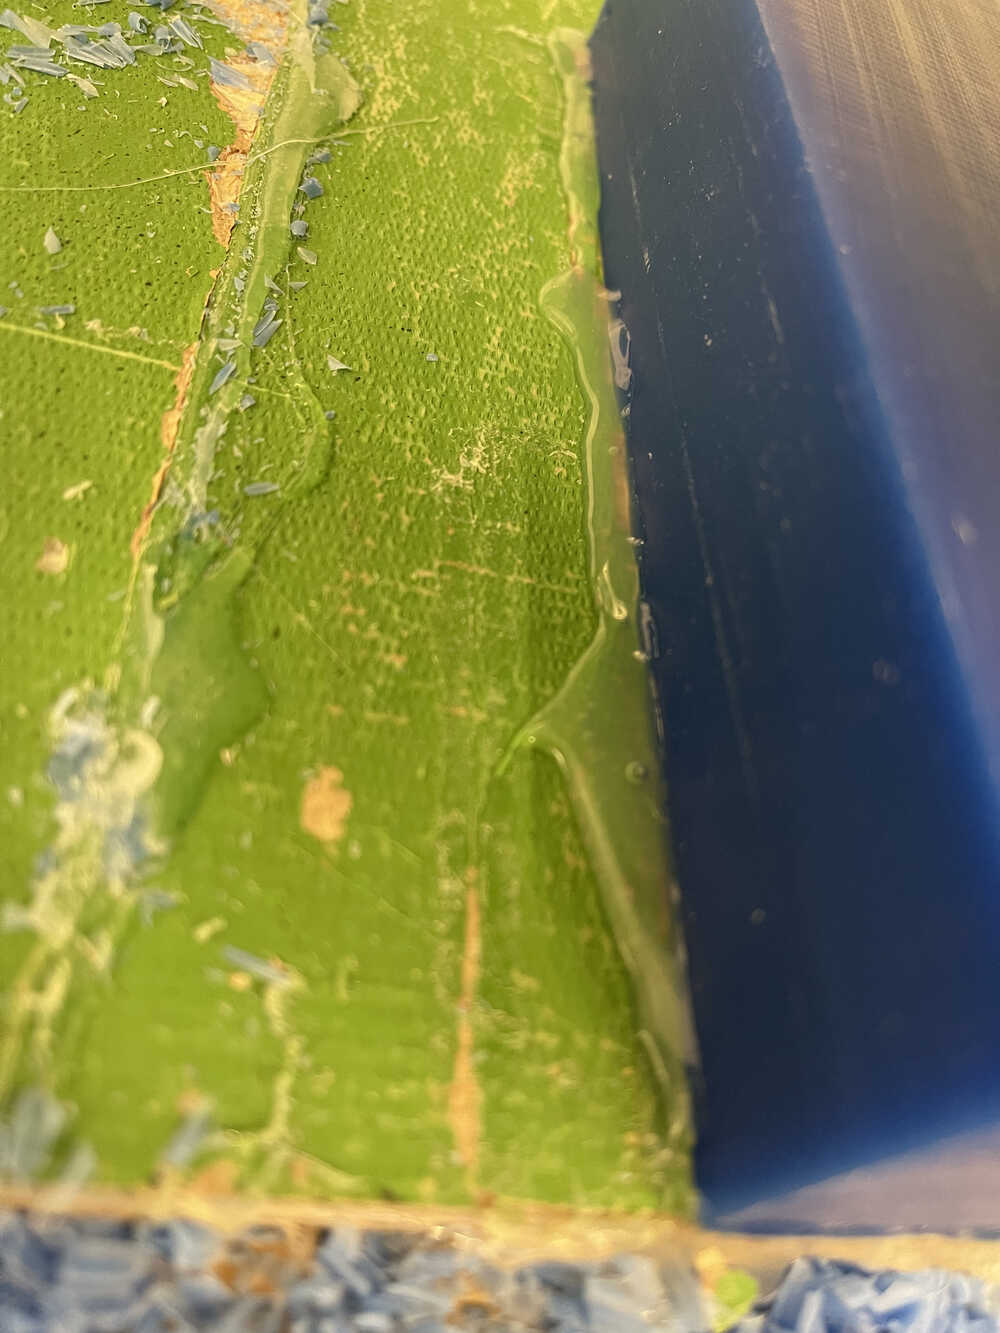
Milling on wax this week required us to hot glue the material to the working board of the ShopBot in order to hold it in place since the nails we used during make something big week are not really ideal for a large block of wax. After this was put in place we calibrated the machines x, y, and z and began milling. During my mill the shopbot messed up and would jolt out of position occasionally which ended up tearing through part of my mold casing. Luckily it only hit non-important pieces and I was able to just finish milling on the same piece of material, but eventually Anthony fixed the machine so I might go in at some point and re-mill if I want to have a nice mold without flaws. Below is some media on the milling and the finished result.

Casting
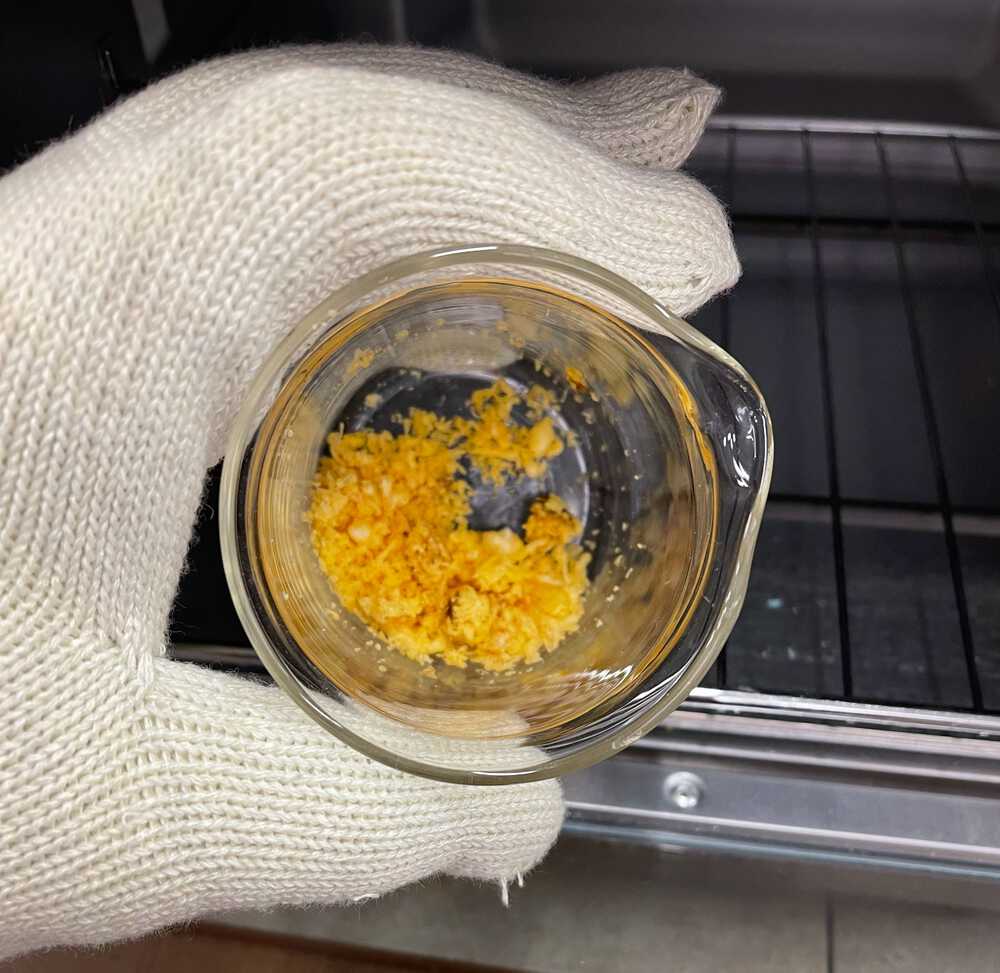
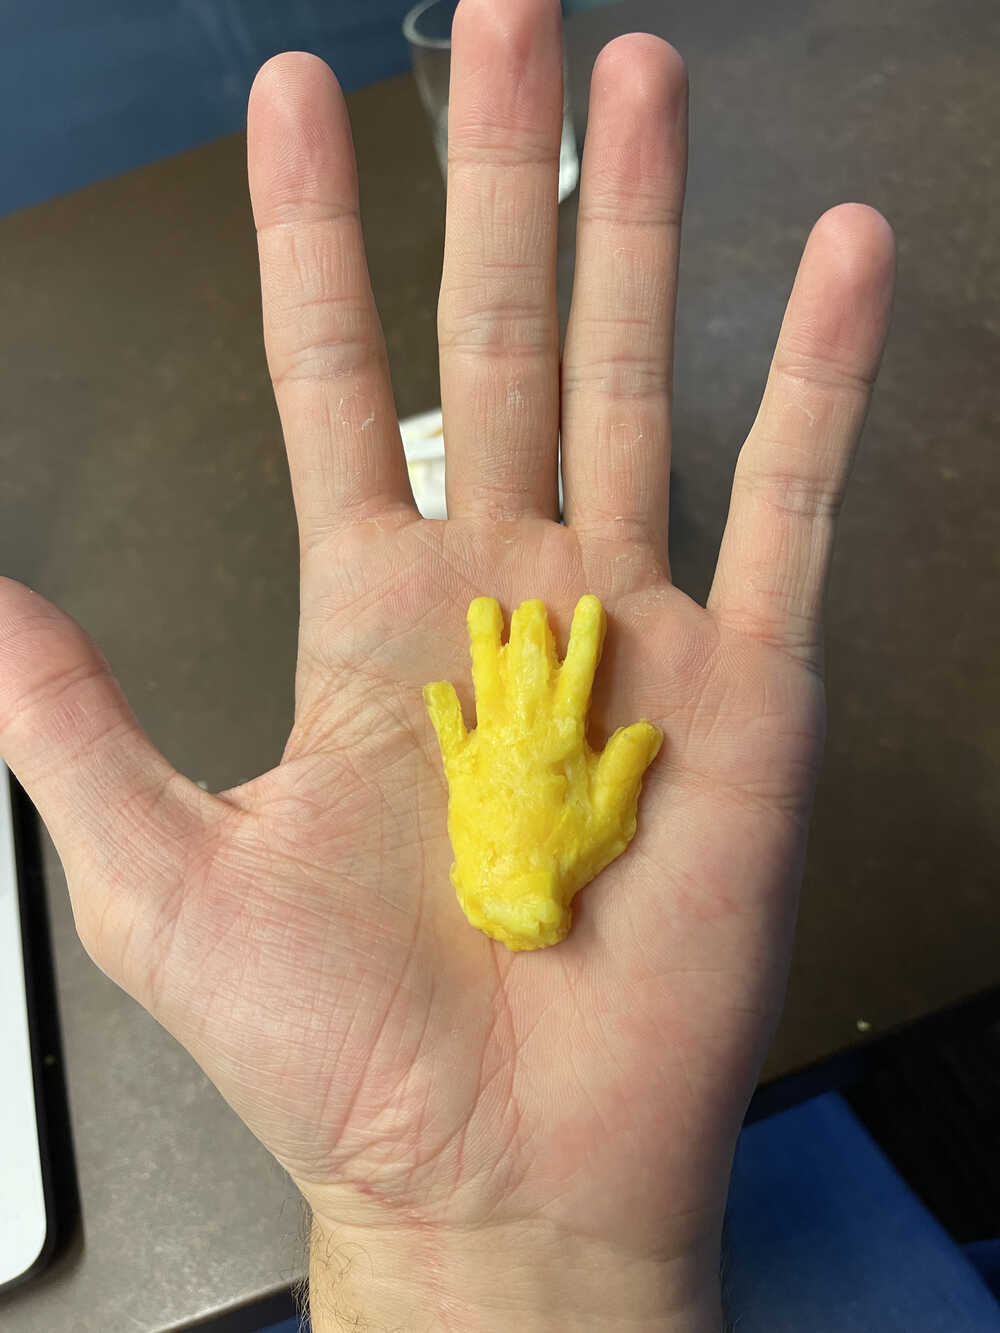
To make my oomoo mold, I filled my wax mold with water, poured it into a cup, then split the volume into two cups, marked how much volume the water filled on the side of the cup, poured out the water and dried the cups, then measured out the two parts of oomoo in a 1:1 ratio into the two cups. Finally, I poured them together and mixed, then poured the mixture into my wax mold and let it set for a few hours. The next step was cast something in the oomoo mold. After googling how to cast with soap I read a few lines and thought to myself: "Cool, this should be easy". I quickly realized, however, there are many different kinds of soap and picking the right one is of the utmost importance. As you probably guessed, I did not pick the right soap. Instead of spending the time this week watching soap making videos I just went ahead and ordered the cheapest bar soap I could find on Amazon which turns out does not work well for melting. I tried a couple approached with varying levels of success, but never achieved something that was watery enough to cast well with. The first approach I took was to shave the soap into small pieces with a rasp and melt in a toaster over. The results of this was that the soap eventually started buring and did not melt out into a liquid, but rather grouped up into clumps. I probably could have played with the temperature and time longer, but I did not have unlimited time to spend with the toaster oven. The next technique I tried was wittling the soap down into a beaker, putting plastic wrap over the top, and microwaving. This resulting in the soap growing in size as the water inside evaporated and expanded, however, this left me with a hard to use air filled soap material that did not work well in the mold. The final technique, and the one that got me an actual result, although not a very good one, was to put small cubes of soap into a mug, pour a little water into it and heat up in the microwave in 5-10 second bursts, stirring occasionally until the texture was somewhat sticky. From here I just used a butter knife to press the soap into the mold. The results, were underwhelming, but I am happy to report that I now have a hand-shaped hand soap!
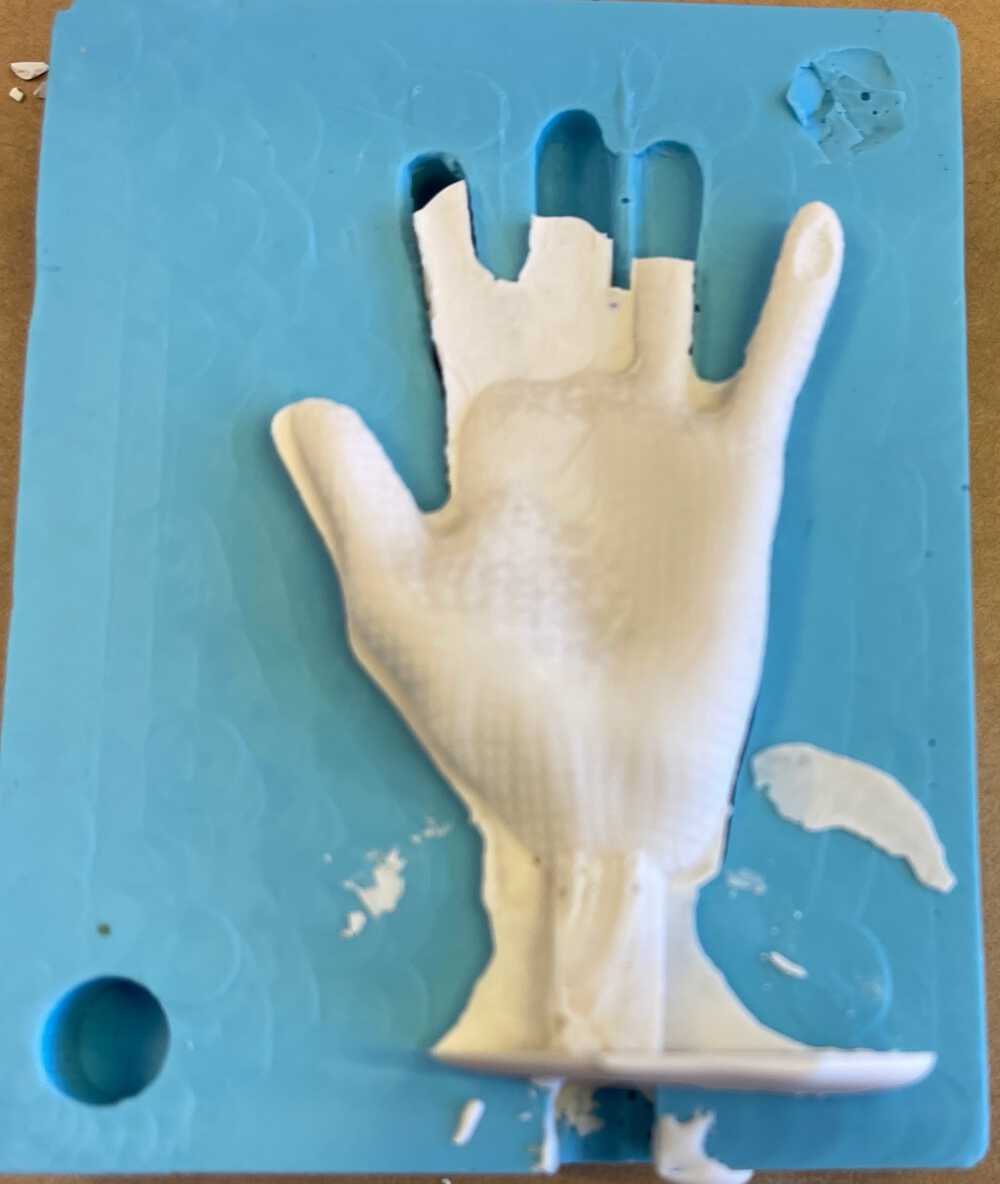
Hydrostone Casting
Before I was able to get the soap to work, I also tried hydrostone casting. I mixed together 32 parts water to 100 parts hydrostone by weight and slowly poured it into my mold. After letting it sit for a while I took out the mold and realized that the hyrdostone mixture was not watery enough to fill all the way down the fingers on my hand model so it ended up looking like the hook'em horns hand sign for the University of Texas. I might want to make my model a little bit larger next time.