Since trees are a commodity these days and wood expensive (due to supply shortages from pandemic and increased demand from people constructing houses in the suburbs), I wanted to make something that, if the final product turned out as planned, would be something that I'd actually want to keep and use. I opted to create something unrelated to my final project, as it would just end up being for show (a giant model of the airport??), considering the parts of my project that still need to CAD. I settled on making a shelf, dedicated solely to what my friends say is too many plushies -- ironic since they're the ones responsible for most of them, and we all know that there's no such thing as too many. Regardless, every time I move, I have to consciously decide where and how to arrange my plushies.
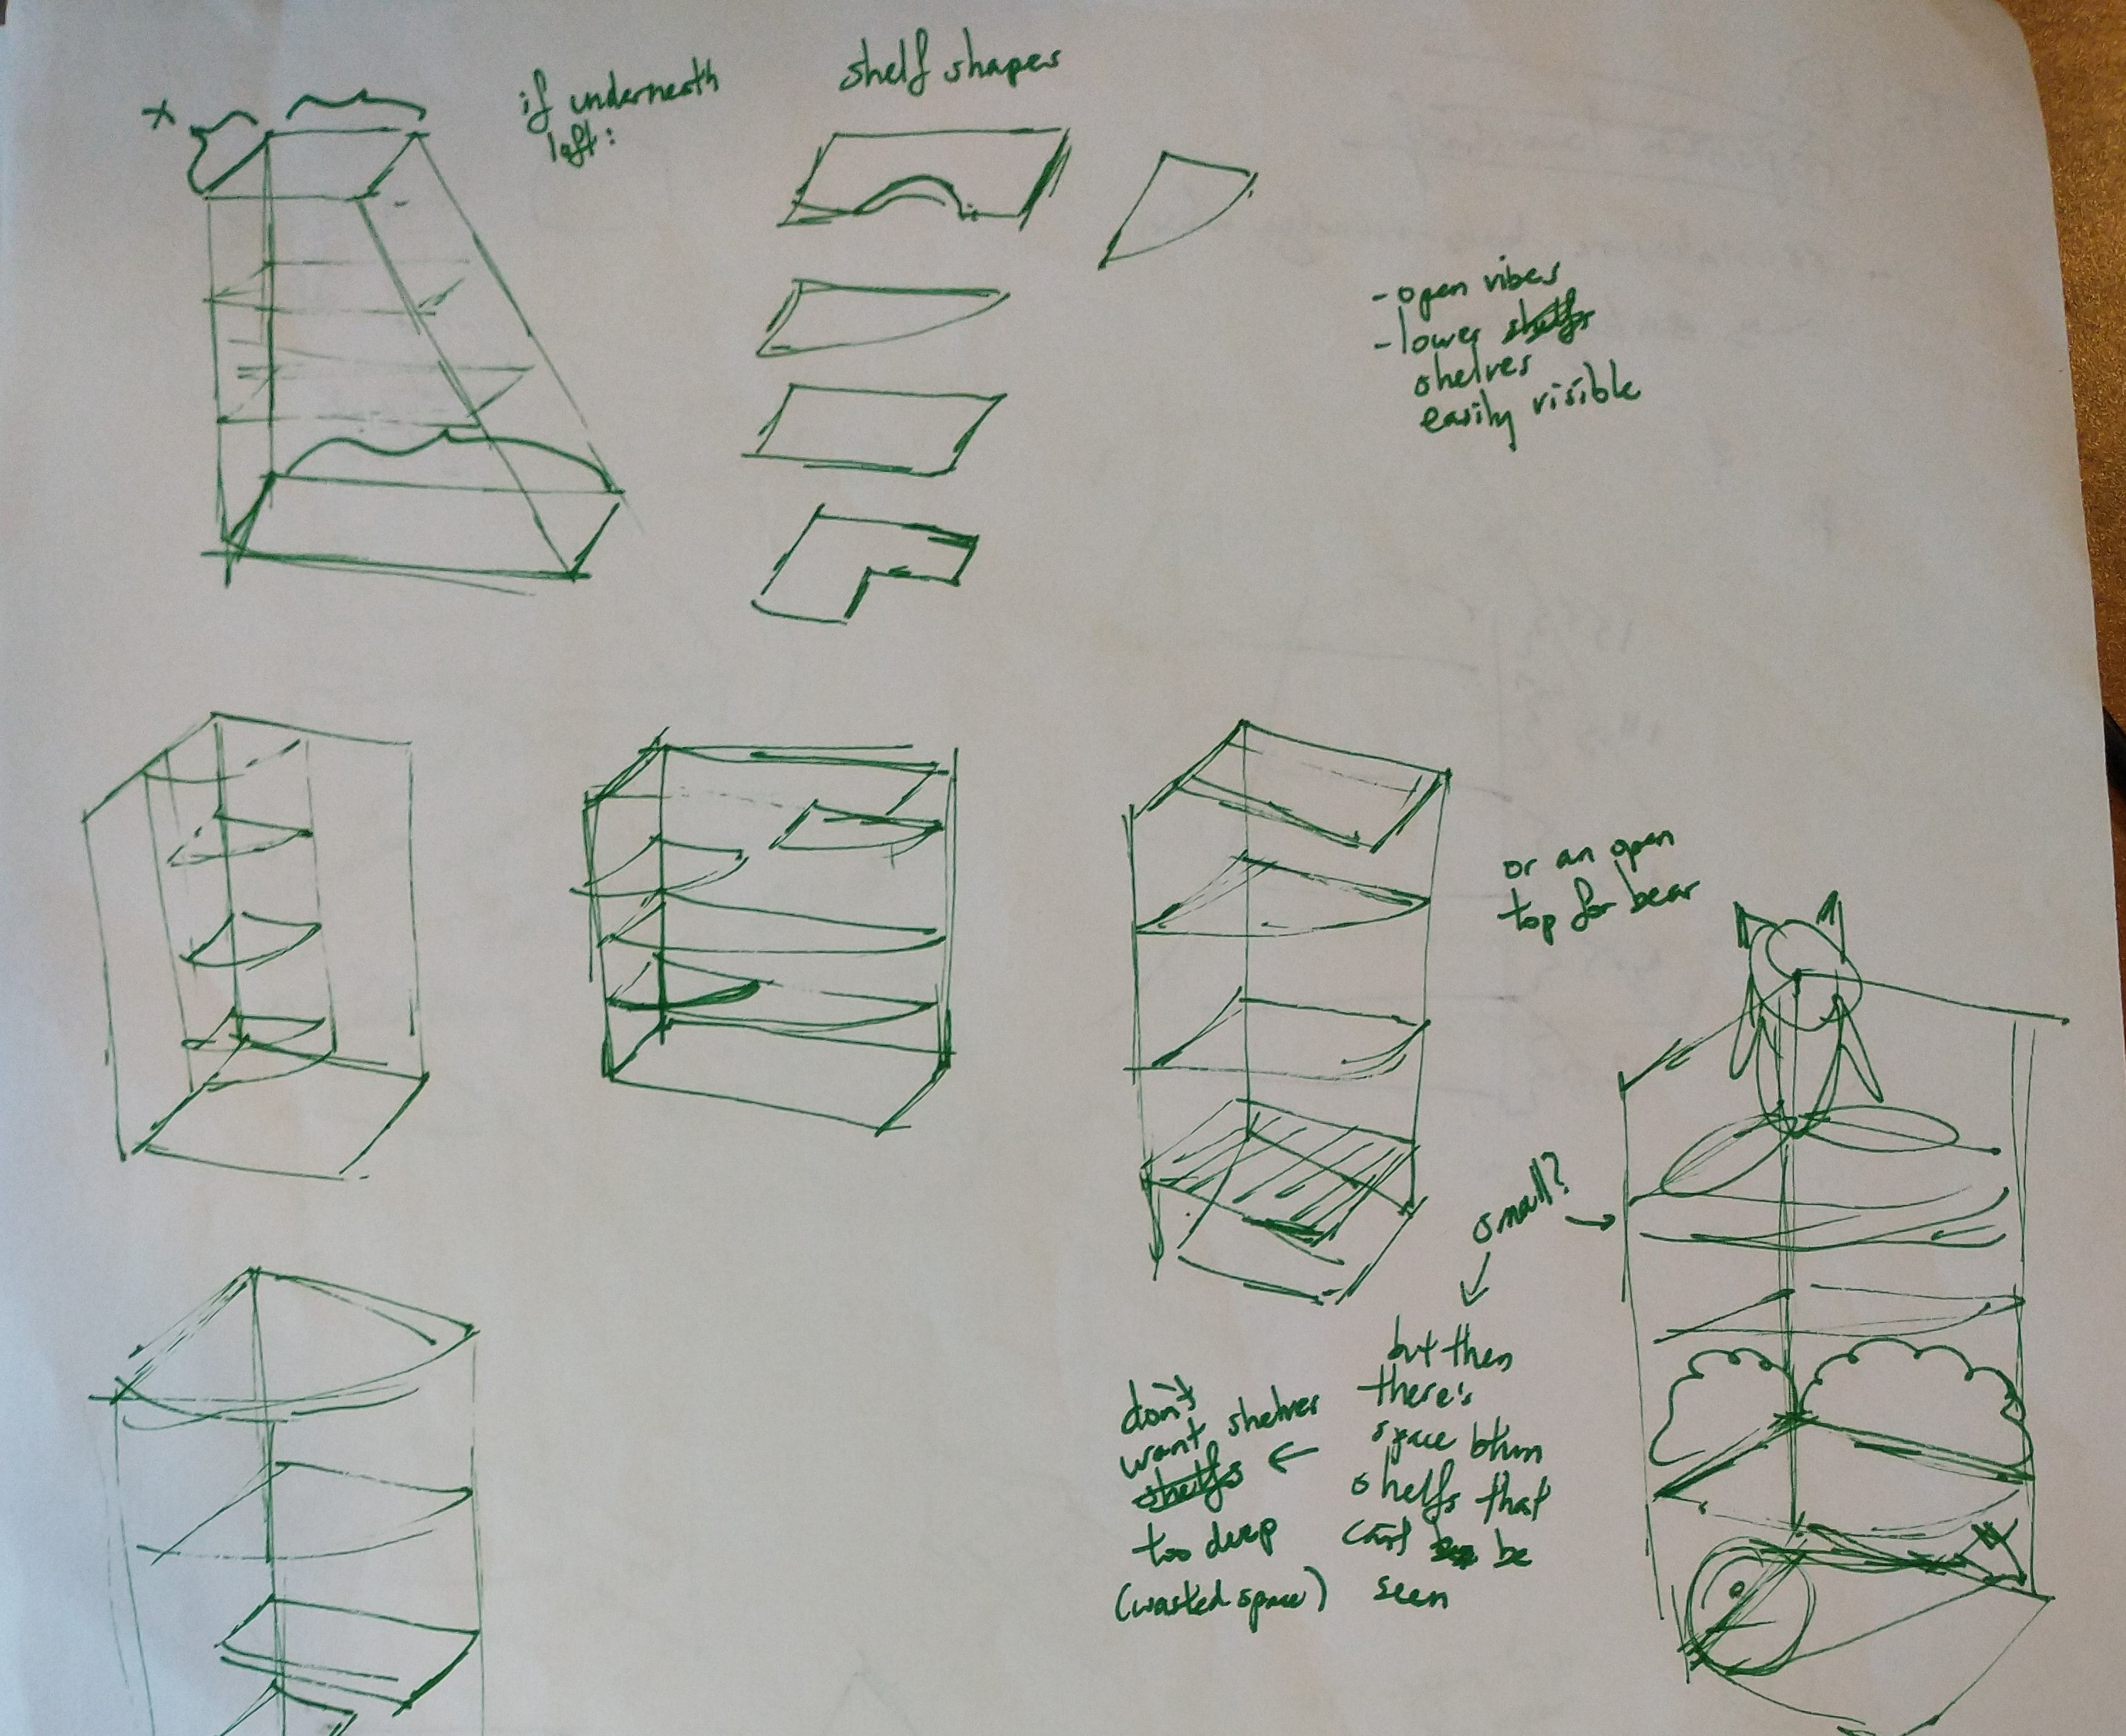
I didn't want a generic rectangular shelf, since I can just obtain one anywhere, and shelves are a fairly popular choice for students for this week's assignment. To make something that best suits my environment, lifestyle, and this free wood opportunity, I wanted a shelf that:
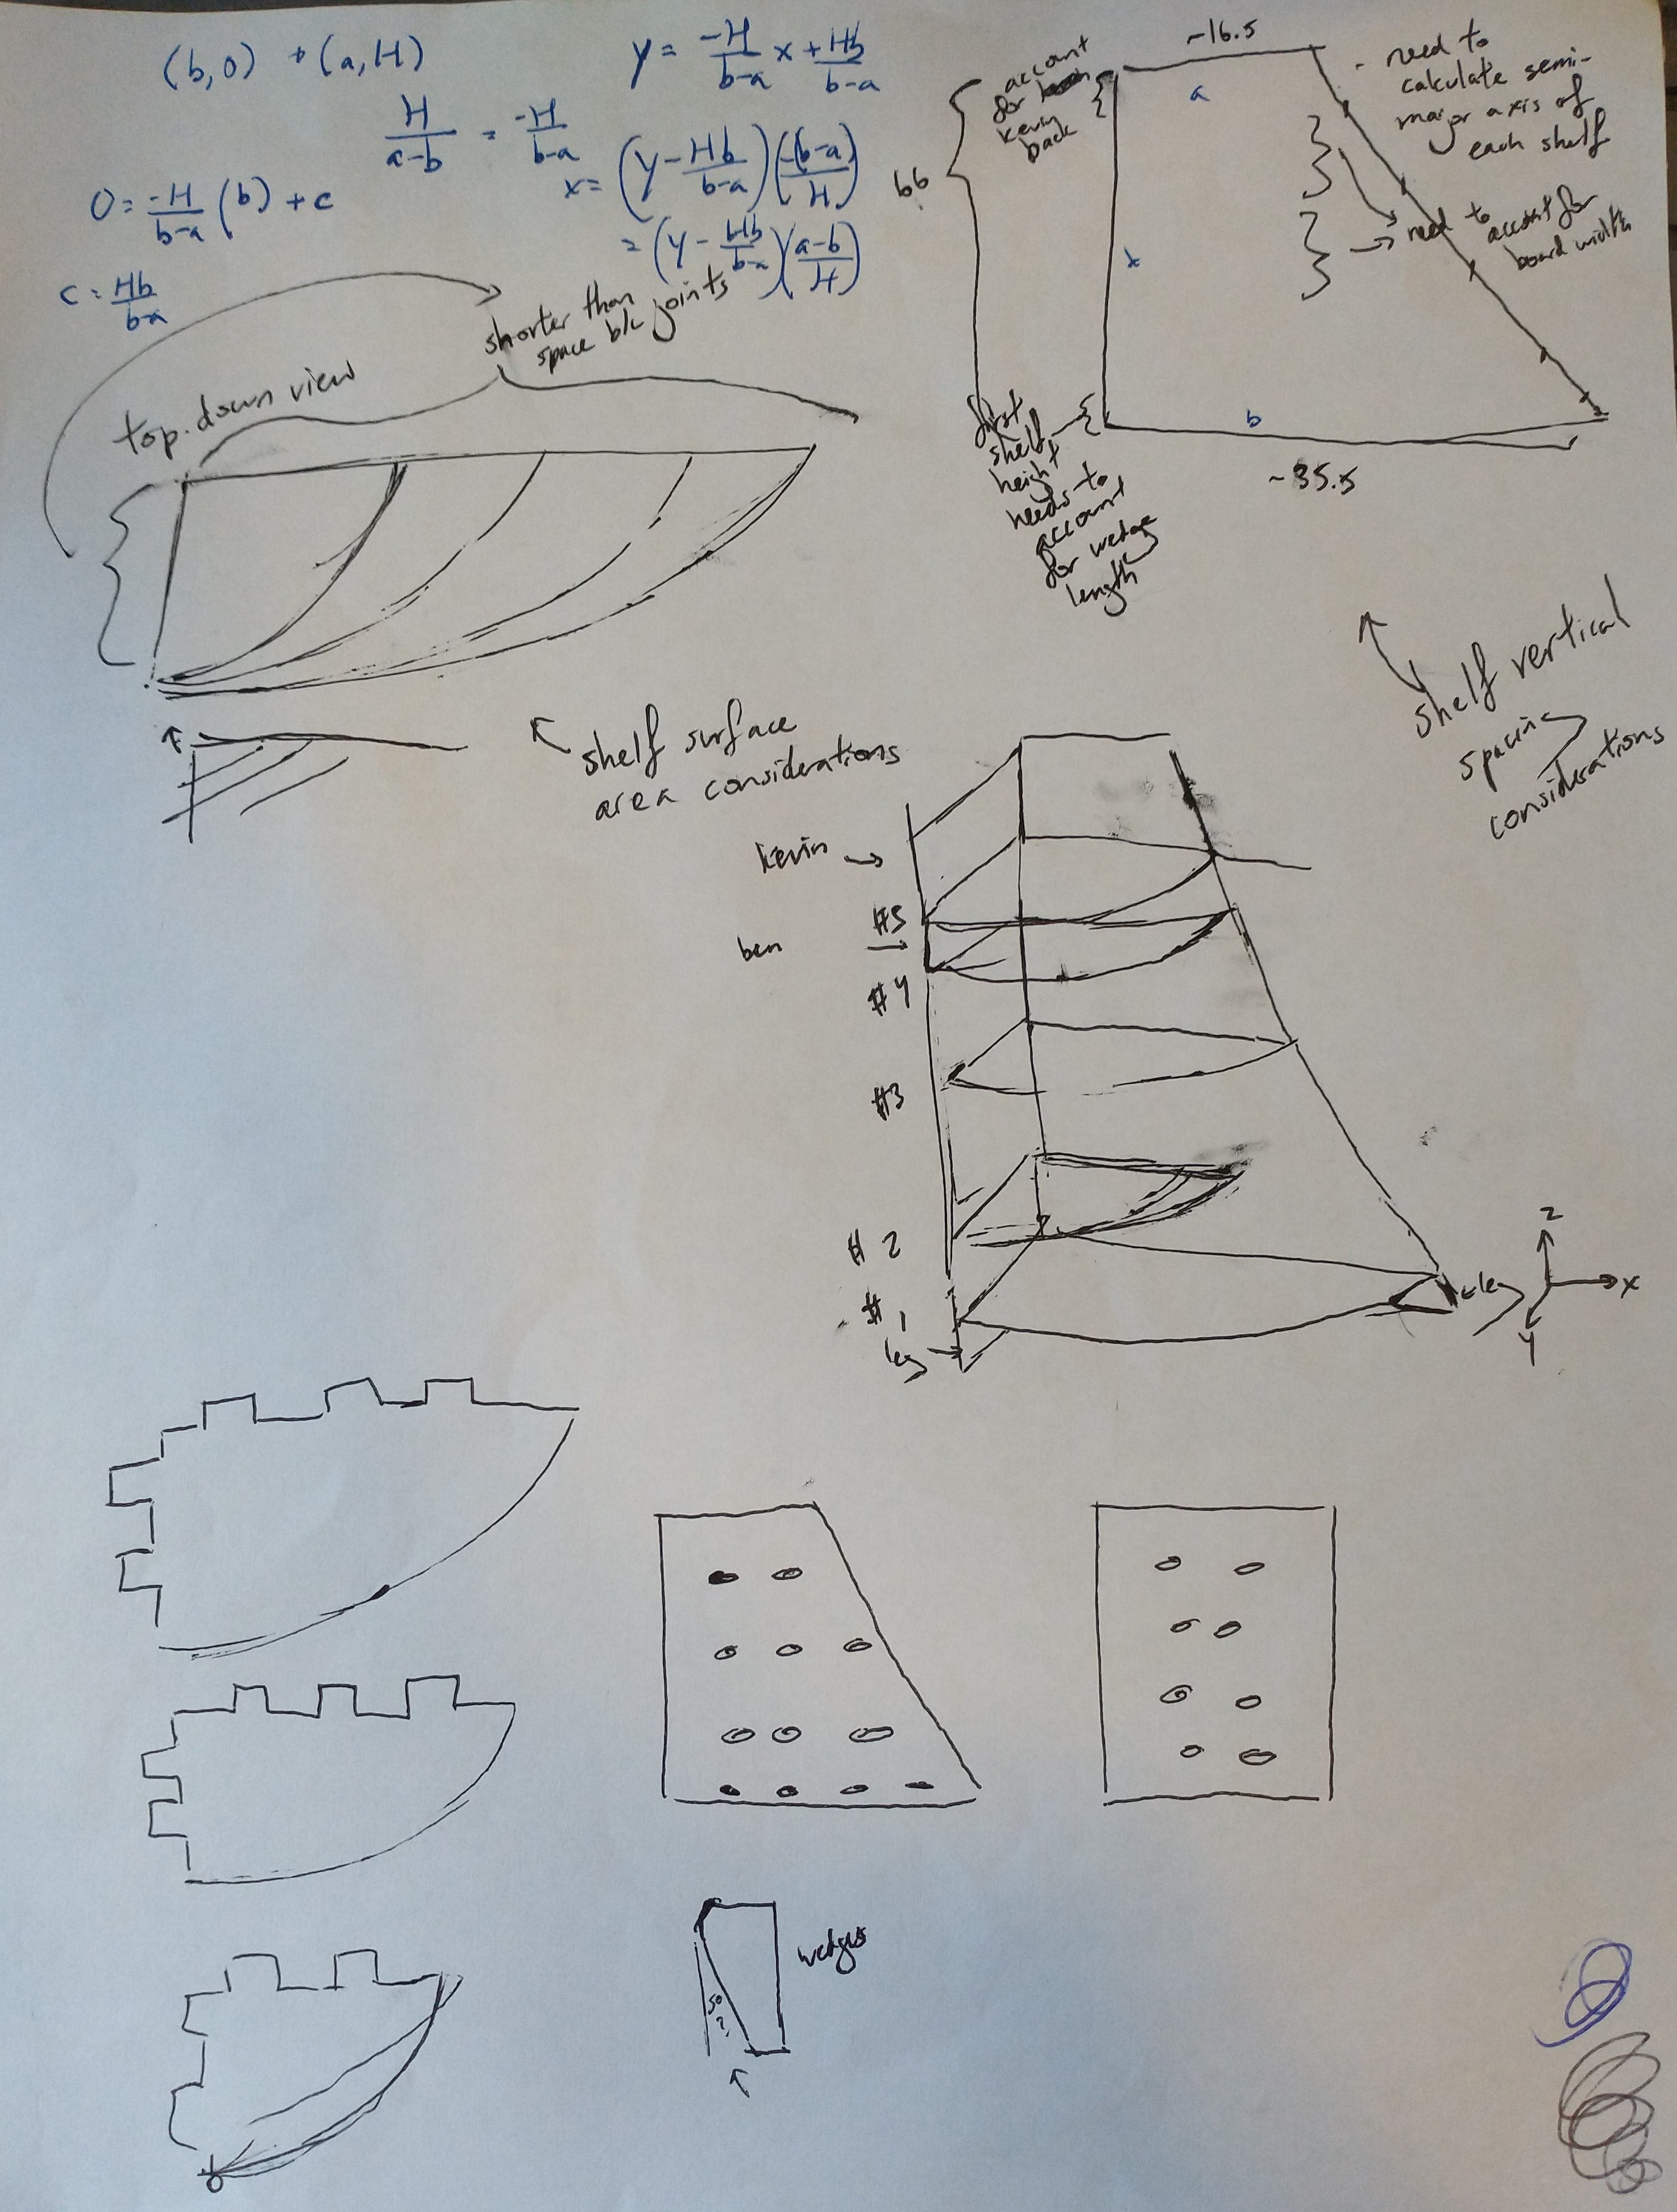
For once, I planned out my CAD process before starting to actually CAD - creating all the parameters and thinking through the steps and functions I'd need.
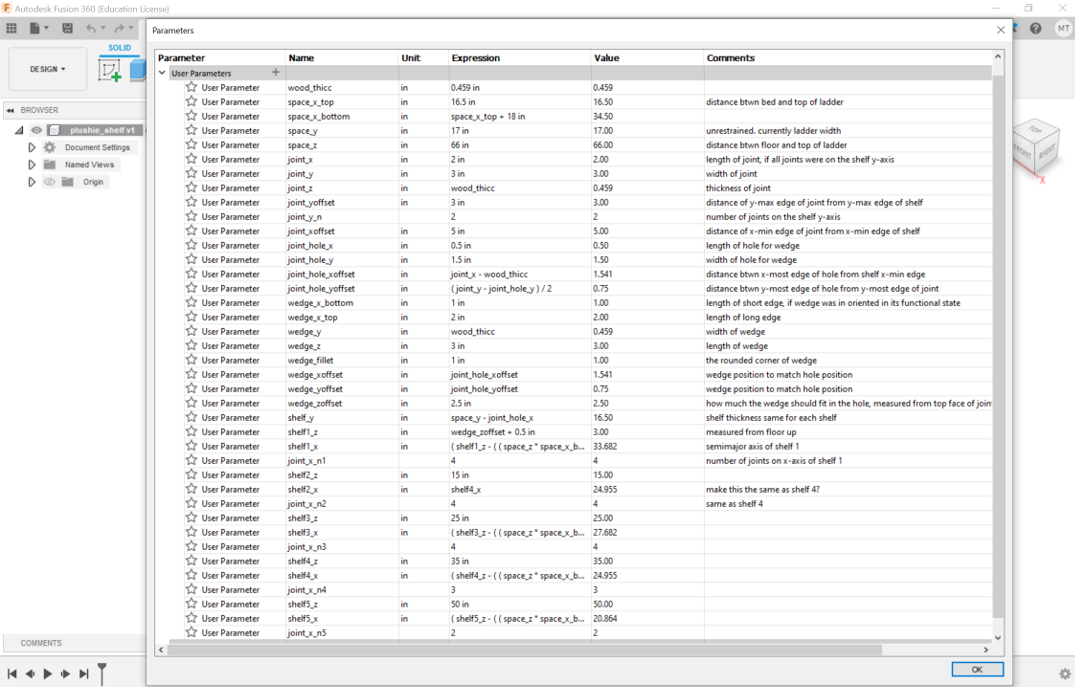
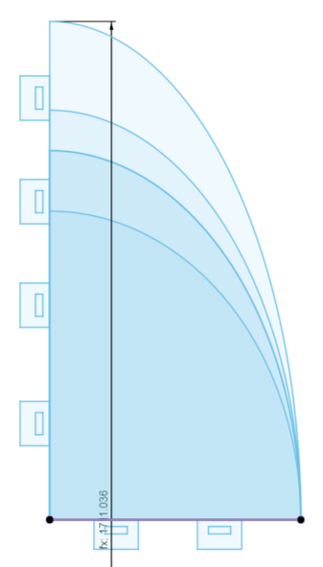
This more structured way of CADing worked very well, except it turns out that some of the functions I needed and used did not lend themselves well to parametric design. Most notably, making ellipses and the Move function did not exhibit the effect I wanted whenever I updated a parameter. Ellipse shapes and length did not change properly, and the Move function itself was quite irritating in that it executes XYZ movement independently and not all at once. Thus, as I updated some parameters after starting to CAD, particualarly the spacing between the different shelves, I had to redo my ellipse sketches and shelf positioning. And it turns out the only way to reorder the list of parameters on Fusion (without deleting and recreating them) is to just favorite them in the order you want.
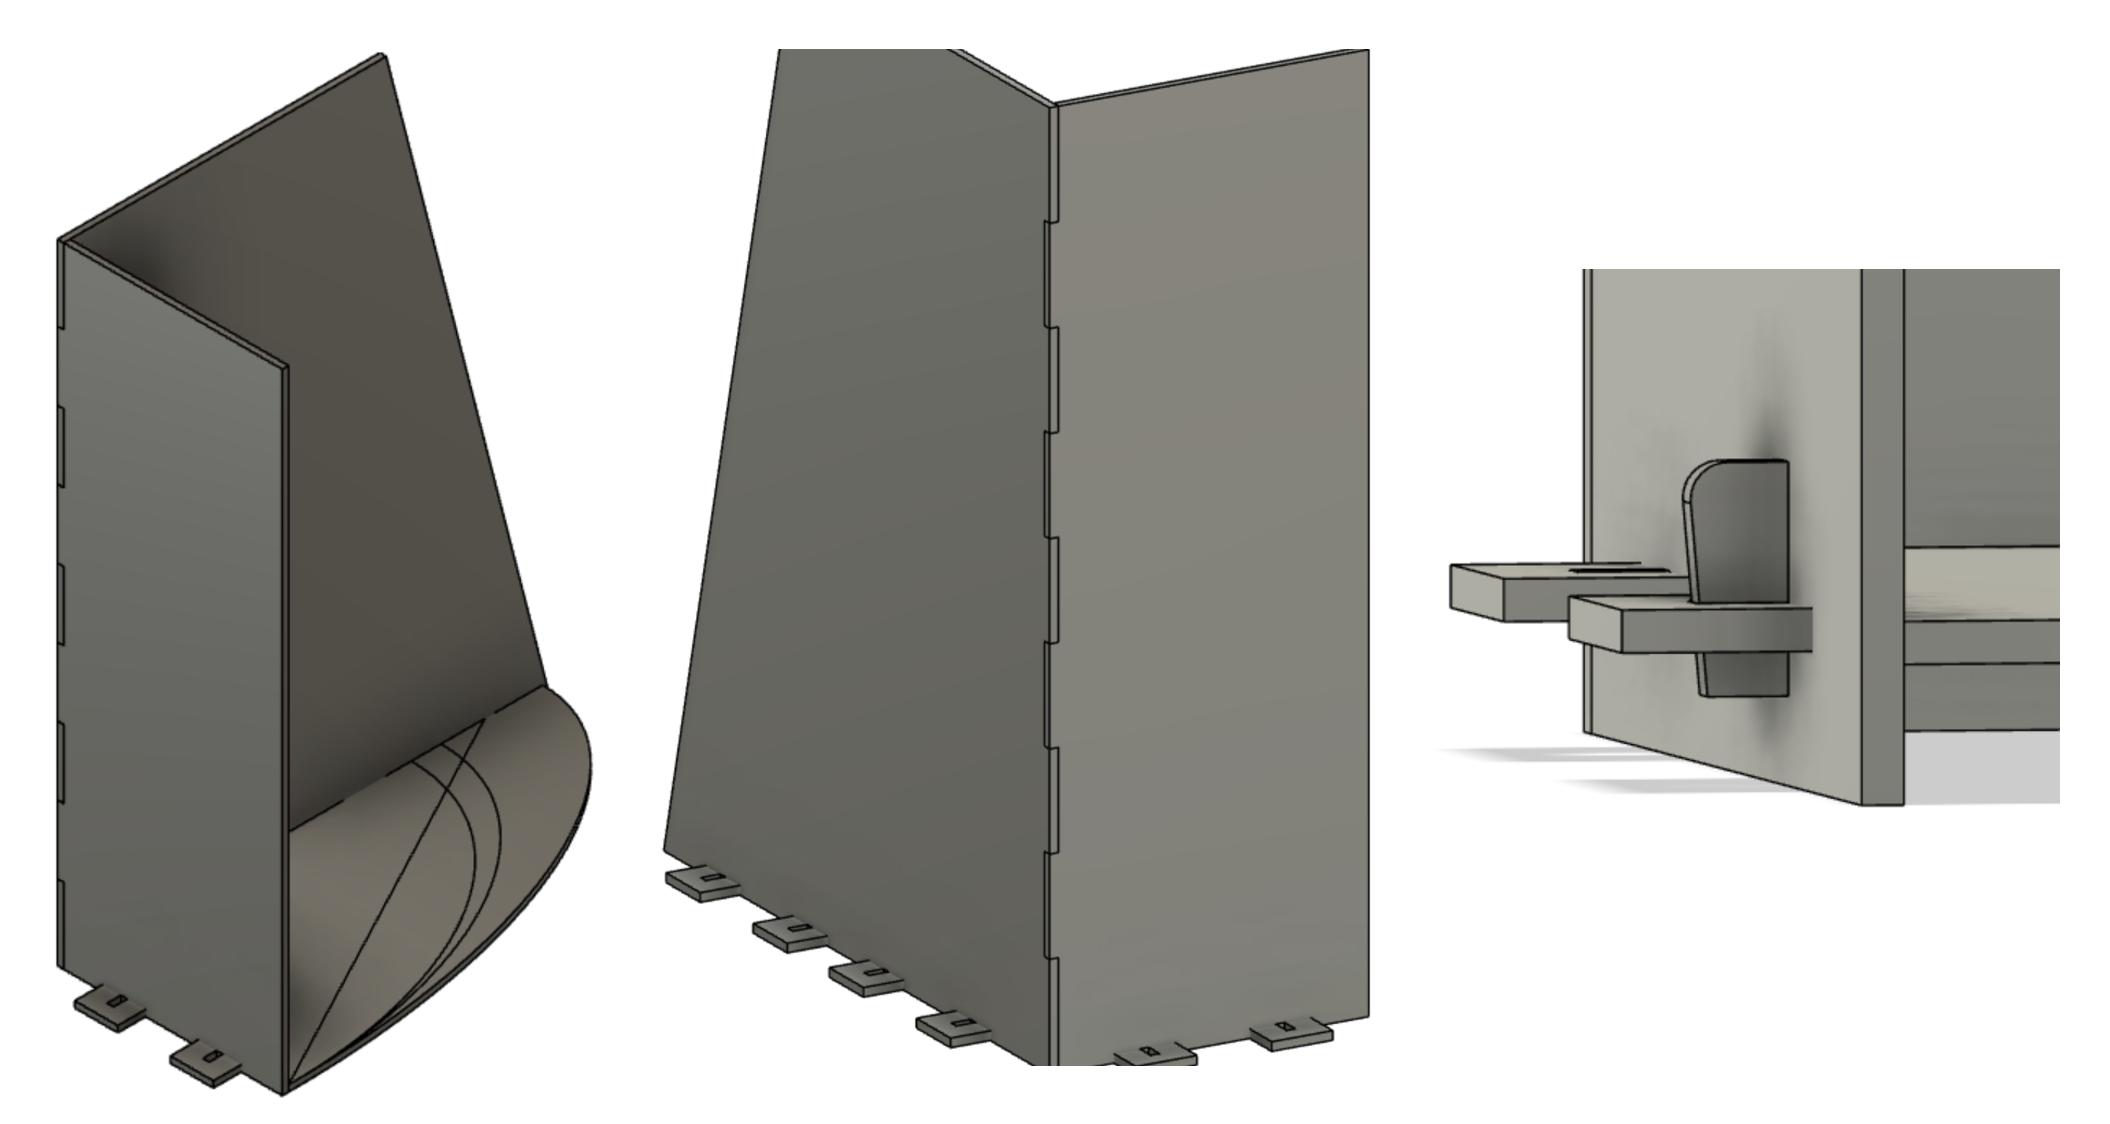
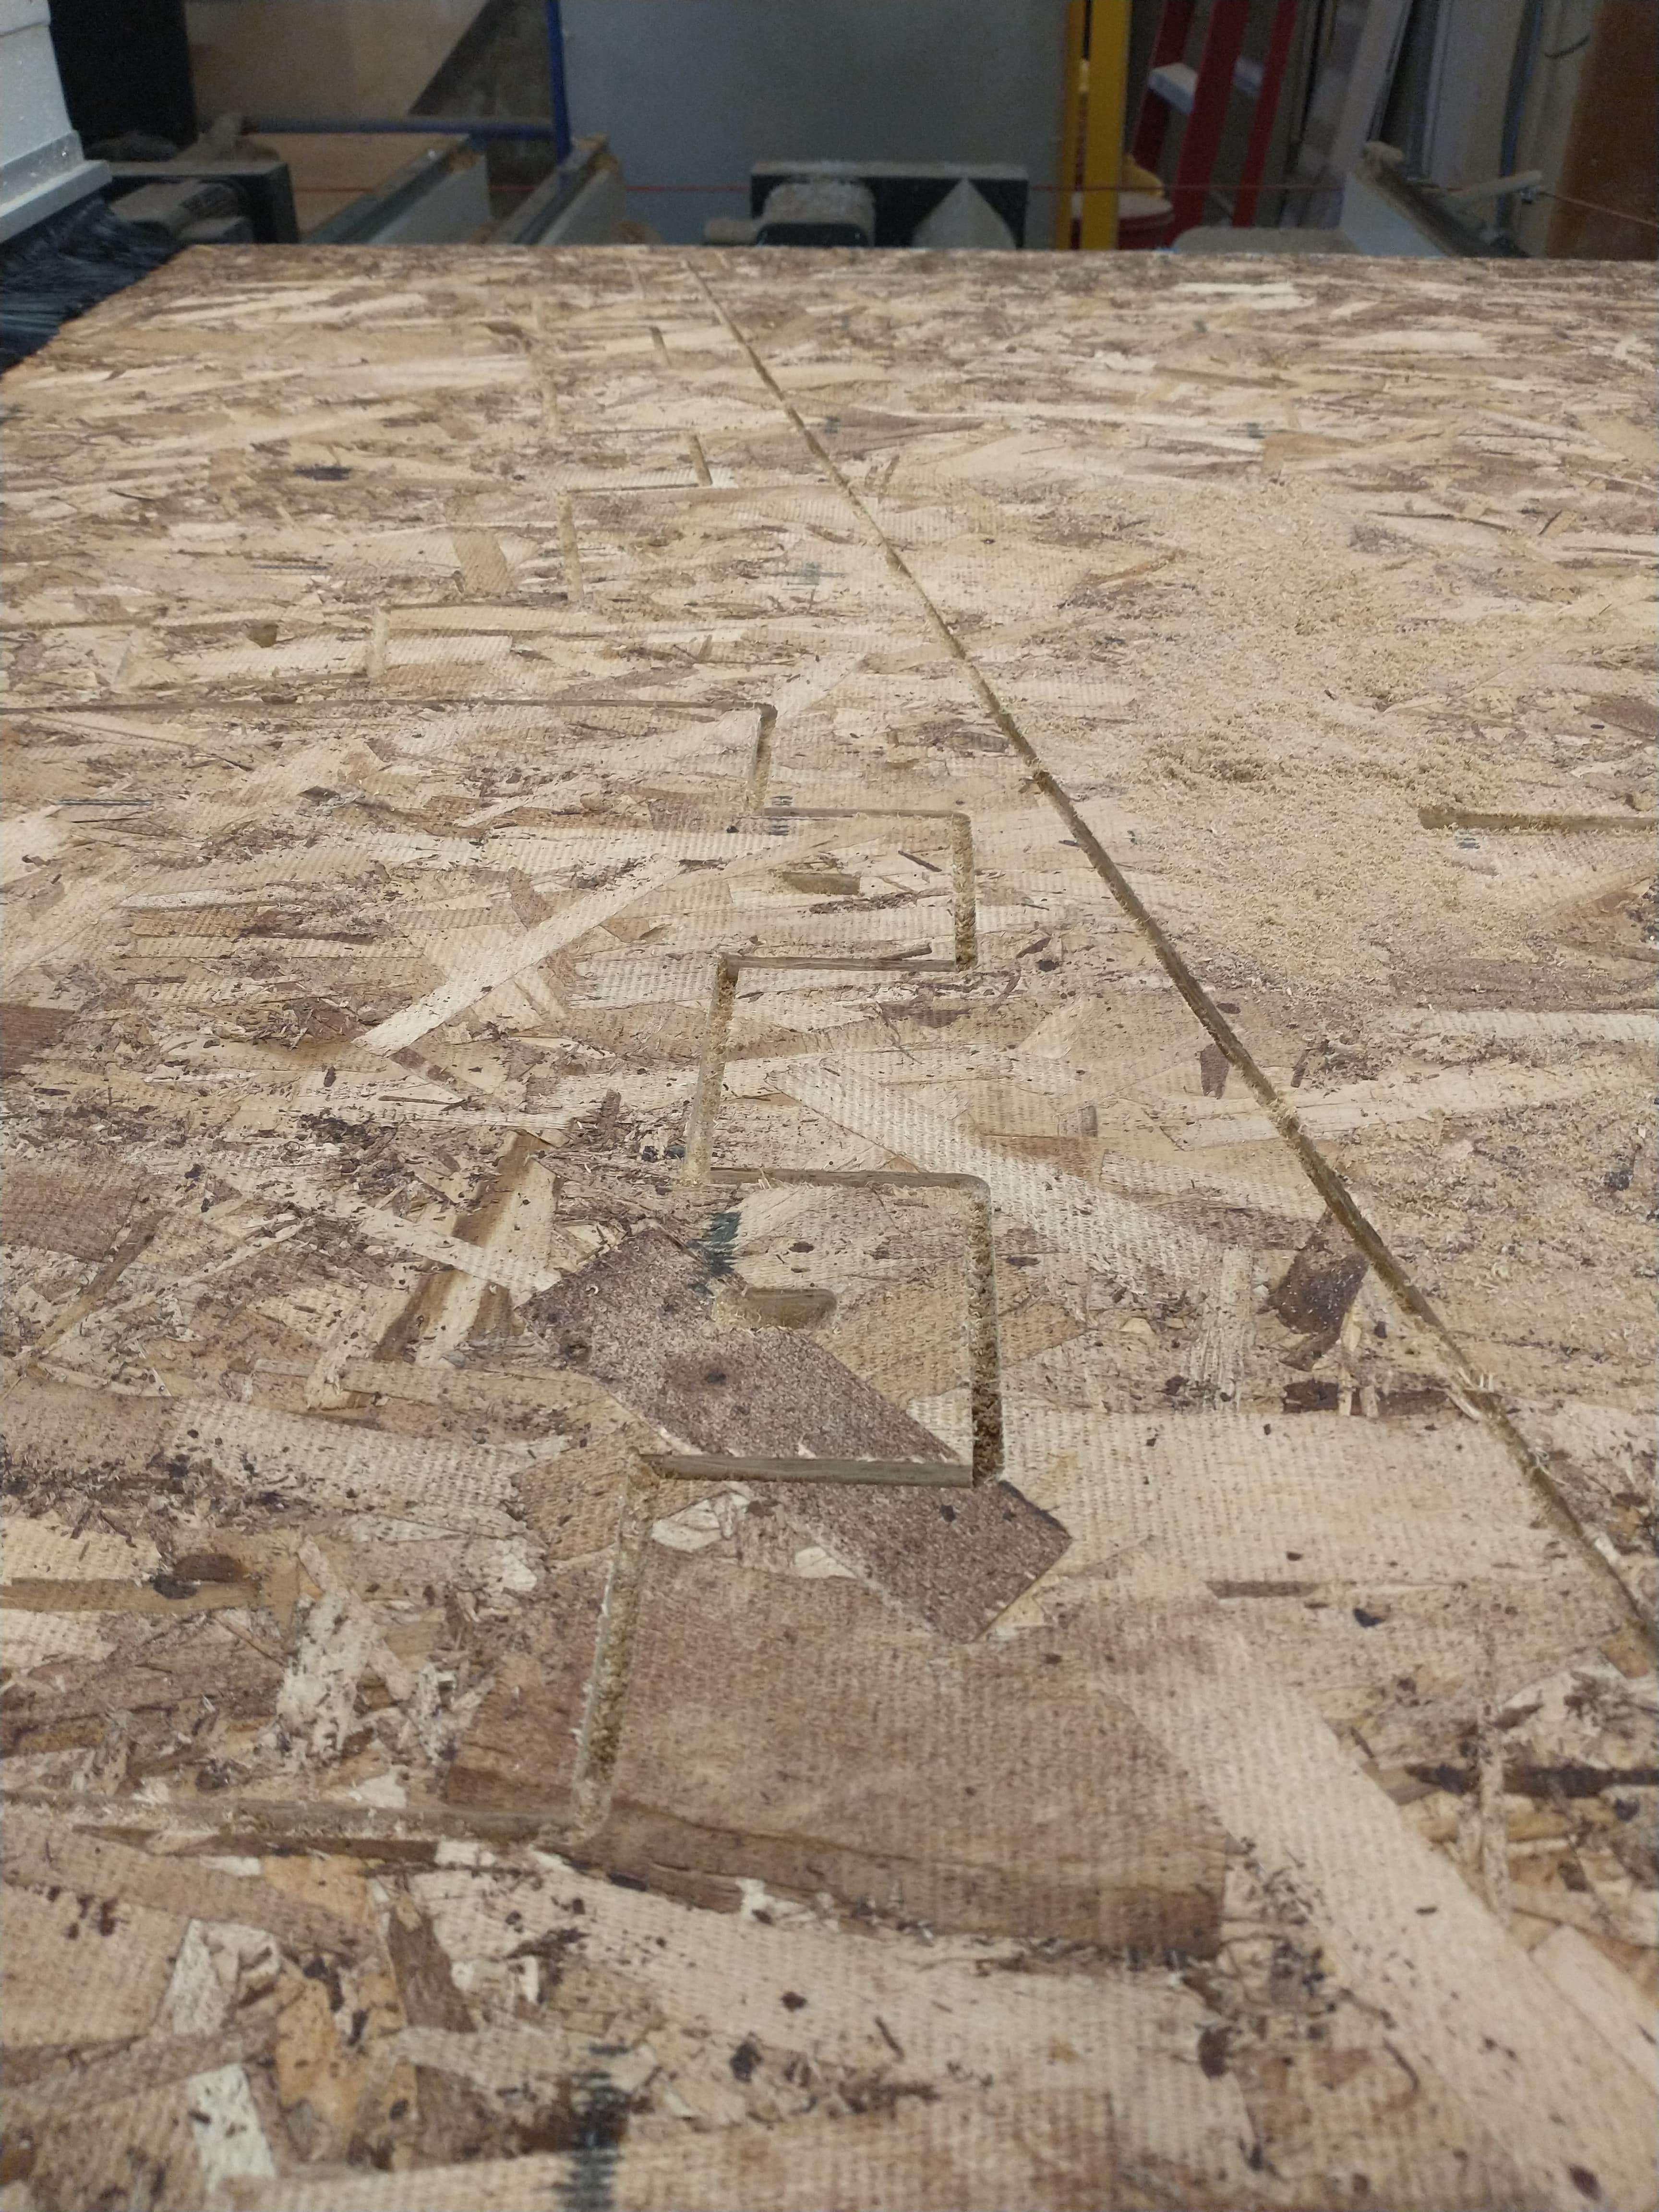
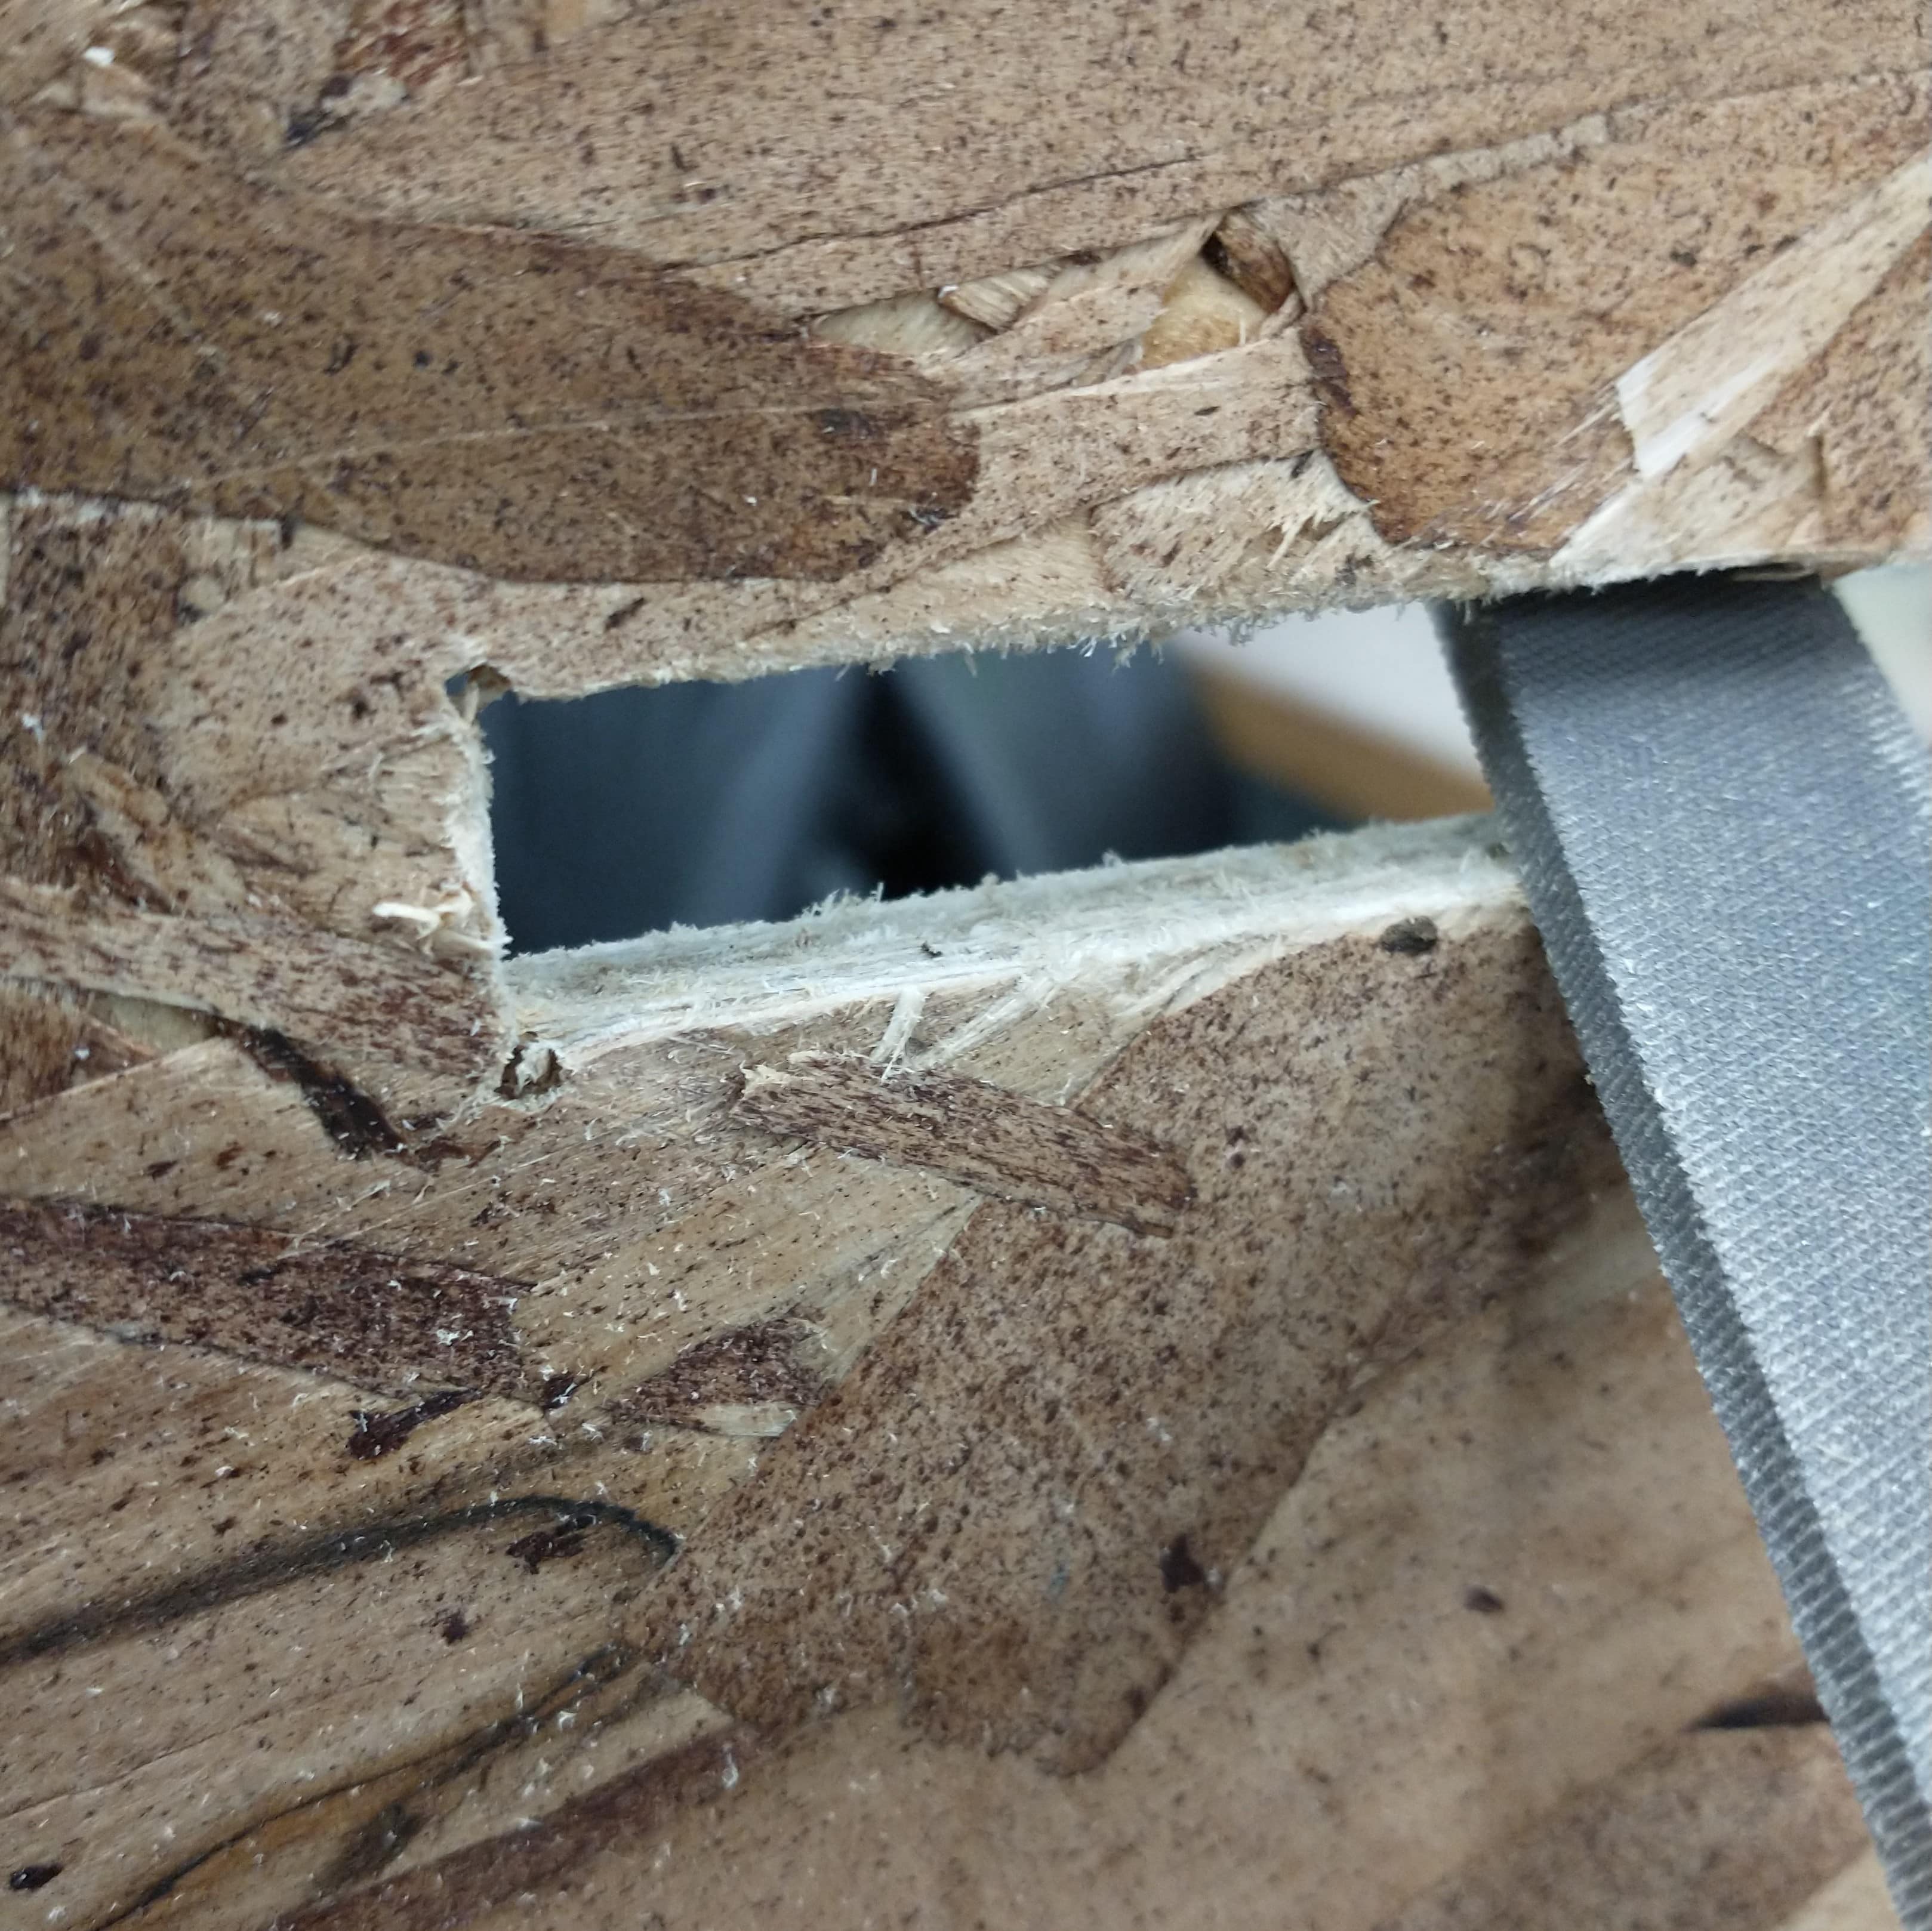
Creating the wedged mortise and tenon joints went fairly smoothly. Although the holes in the tenon joints are meant to fit perfectly with the wedge's diagonal edge, I just made the holes vertical, as we're only doing 2D cutting this week.
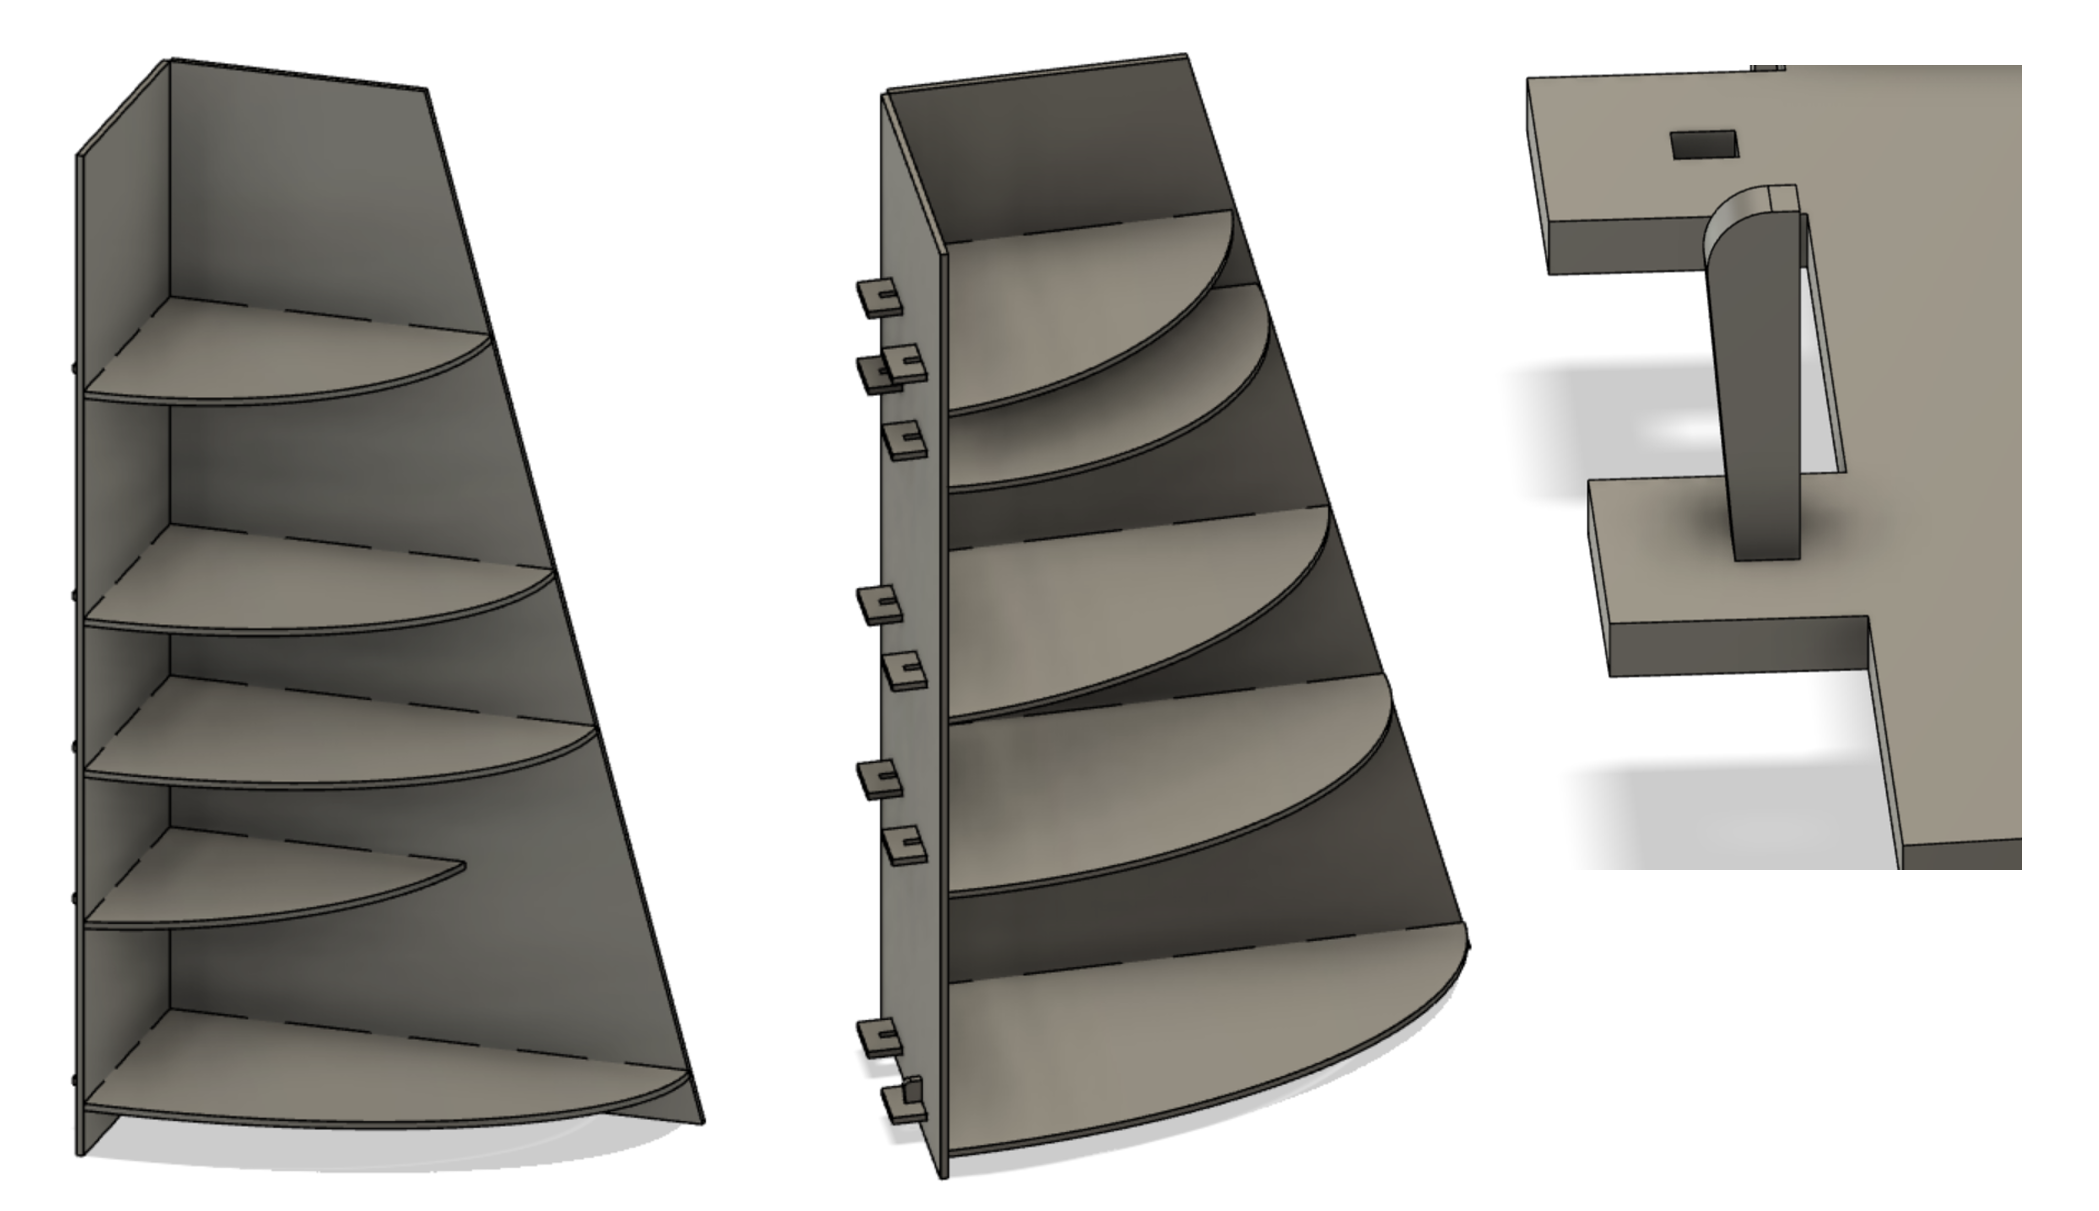
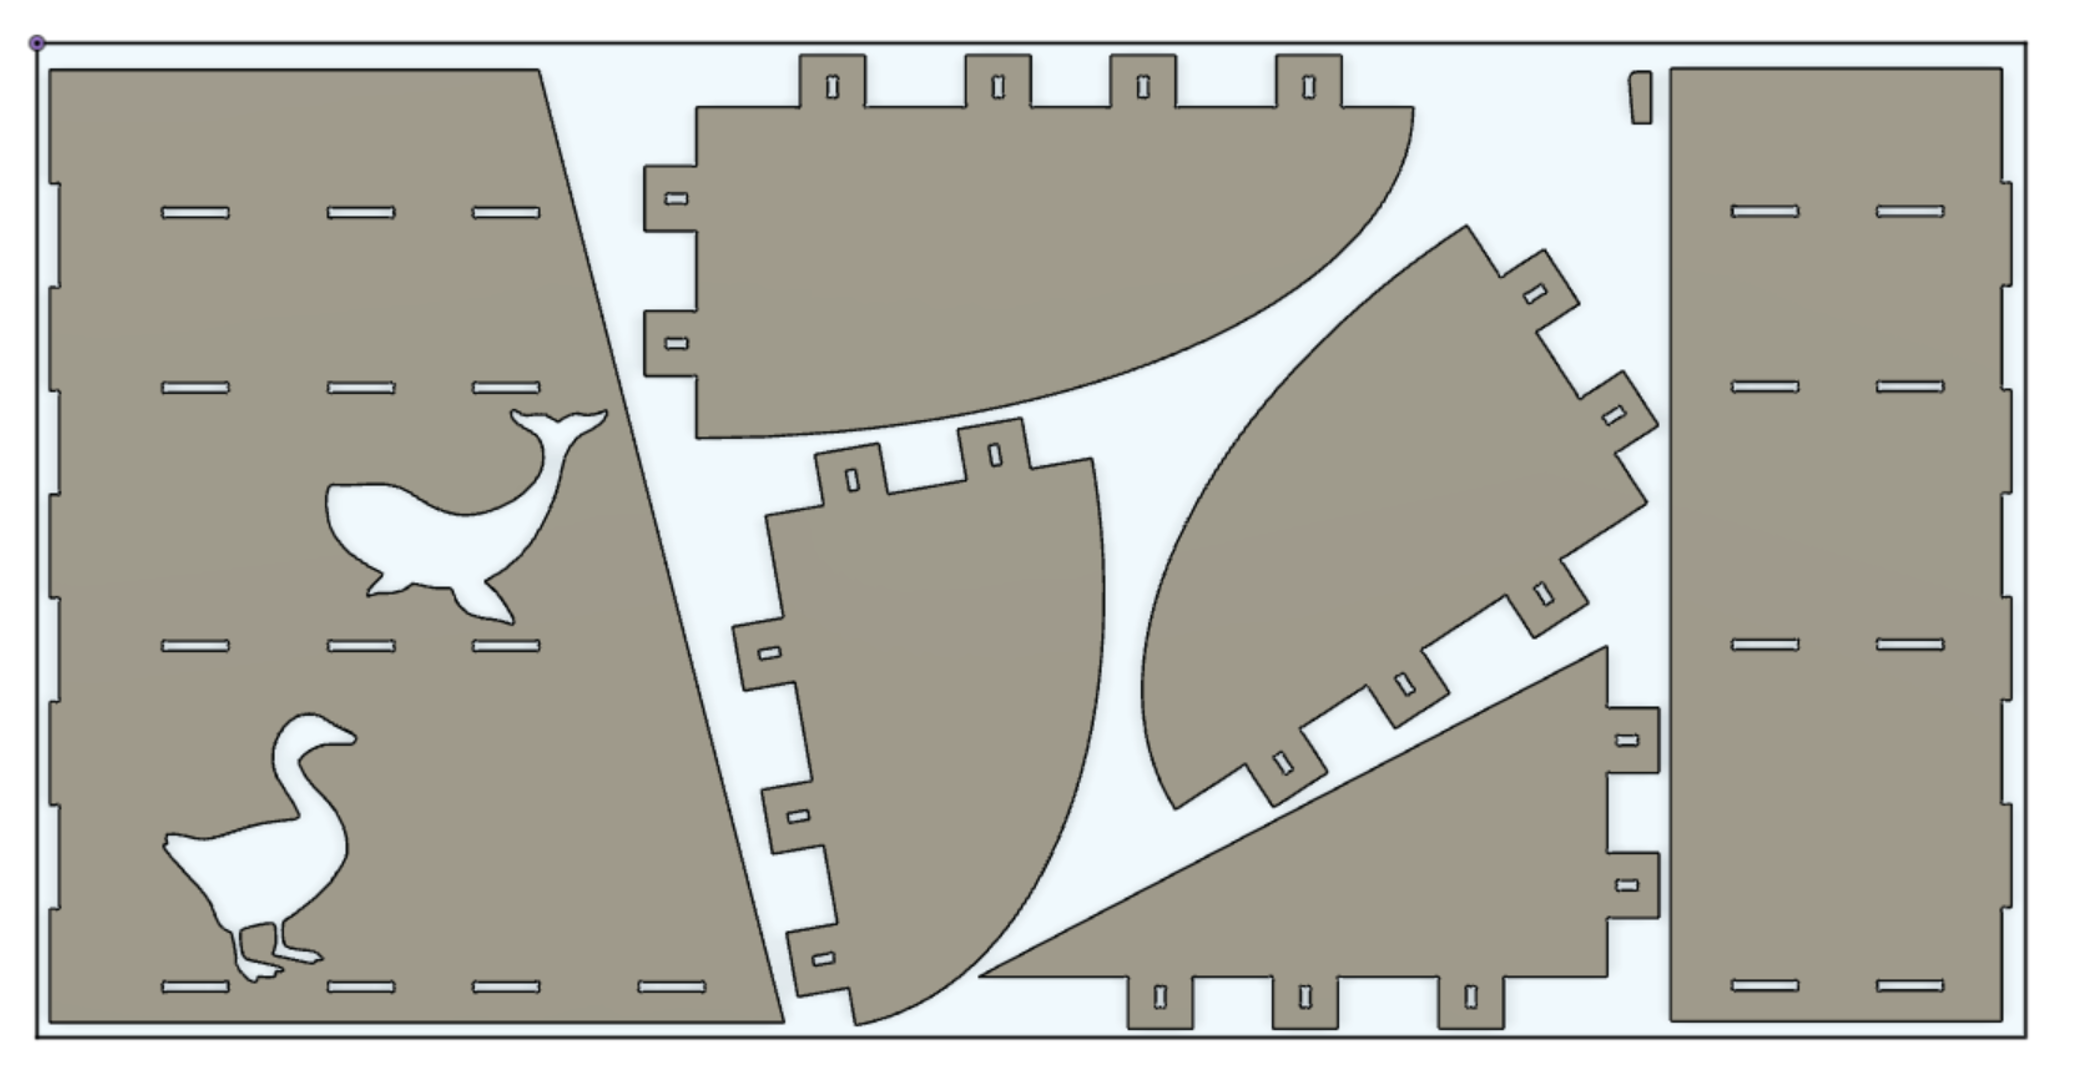
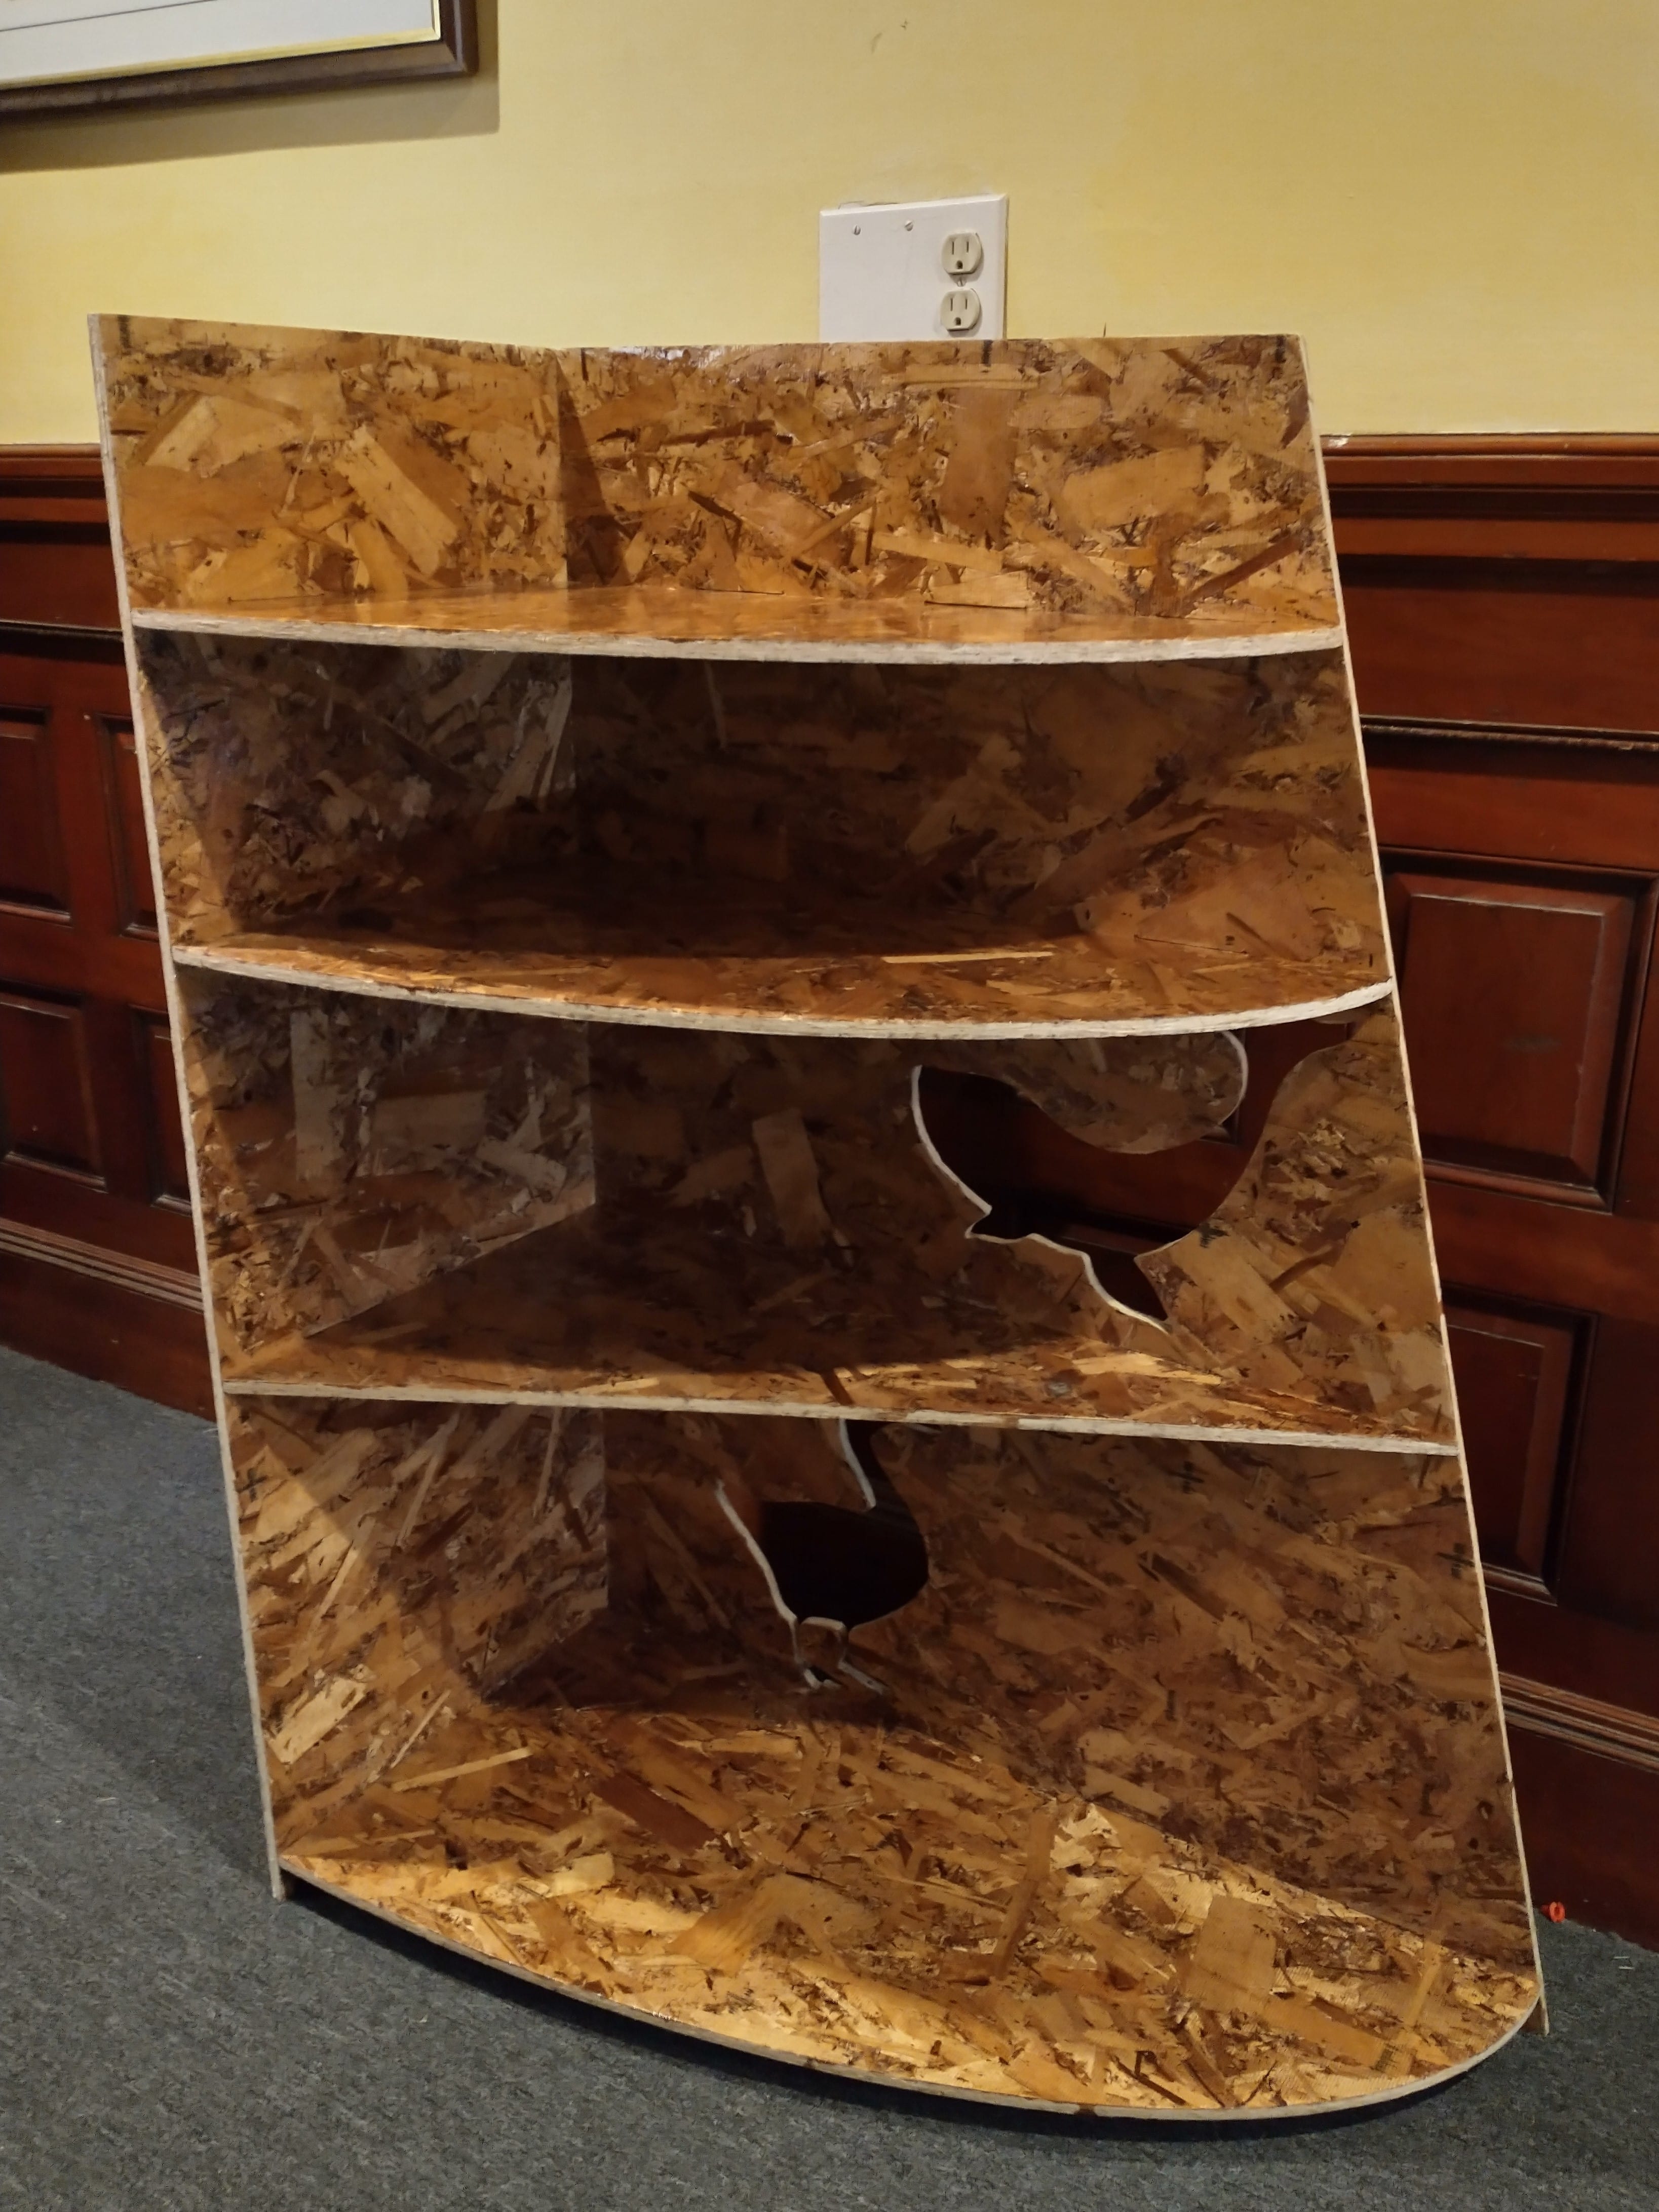
And then everything was perfect! Except I sat down to arrange my pieces on the 4x8' space I'd have on the sheet of wood, and my shelf was too tall. So I recreated the shapes I wanted with dimensions that fit on the sheet of wood, extruded them all, aligned them properly (the Align function is so useful), and cut out the slots on the walls. One of my shelves turned into a triangle to be able to fit on the wood, which worked out because I'd originally planned on making that shelf smaller to accomodate any very tall plushies on the lowest shelf. I also added finger joints to the walls of my shelf for added structural support, and I made sure to have twice the tool diameter between parts laid out on the 4x8' sheet. Finally, using a plug-in, I added dogbones on all the 90 degree corners.

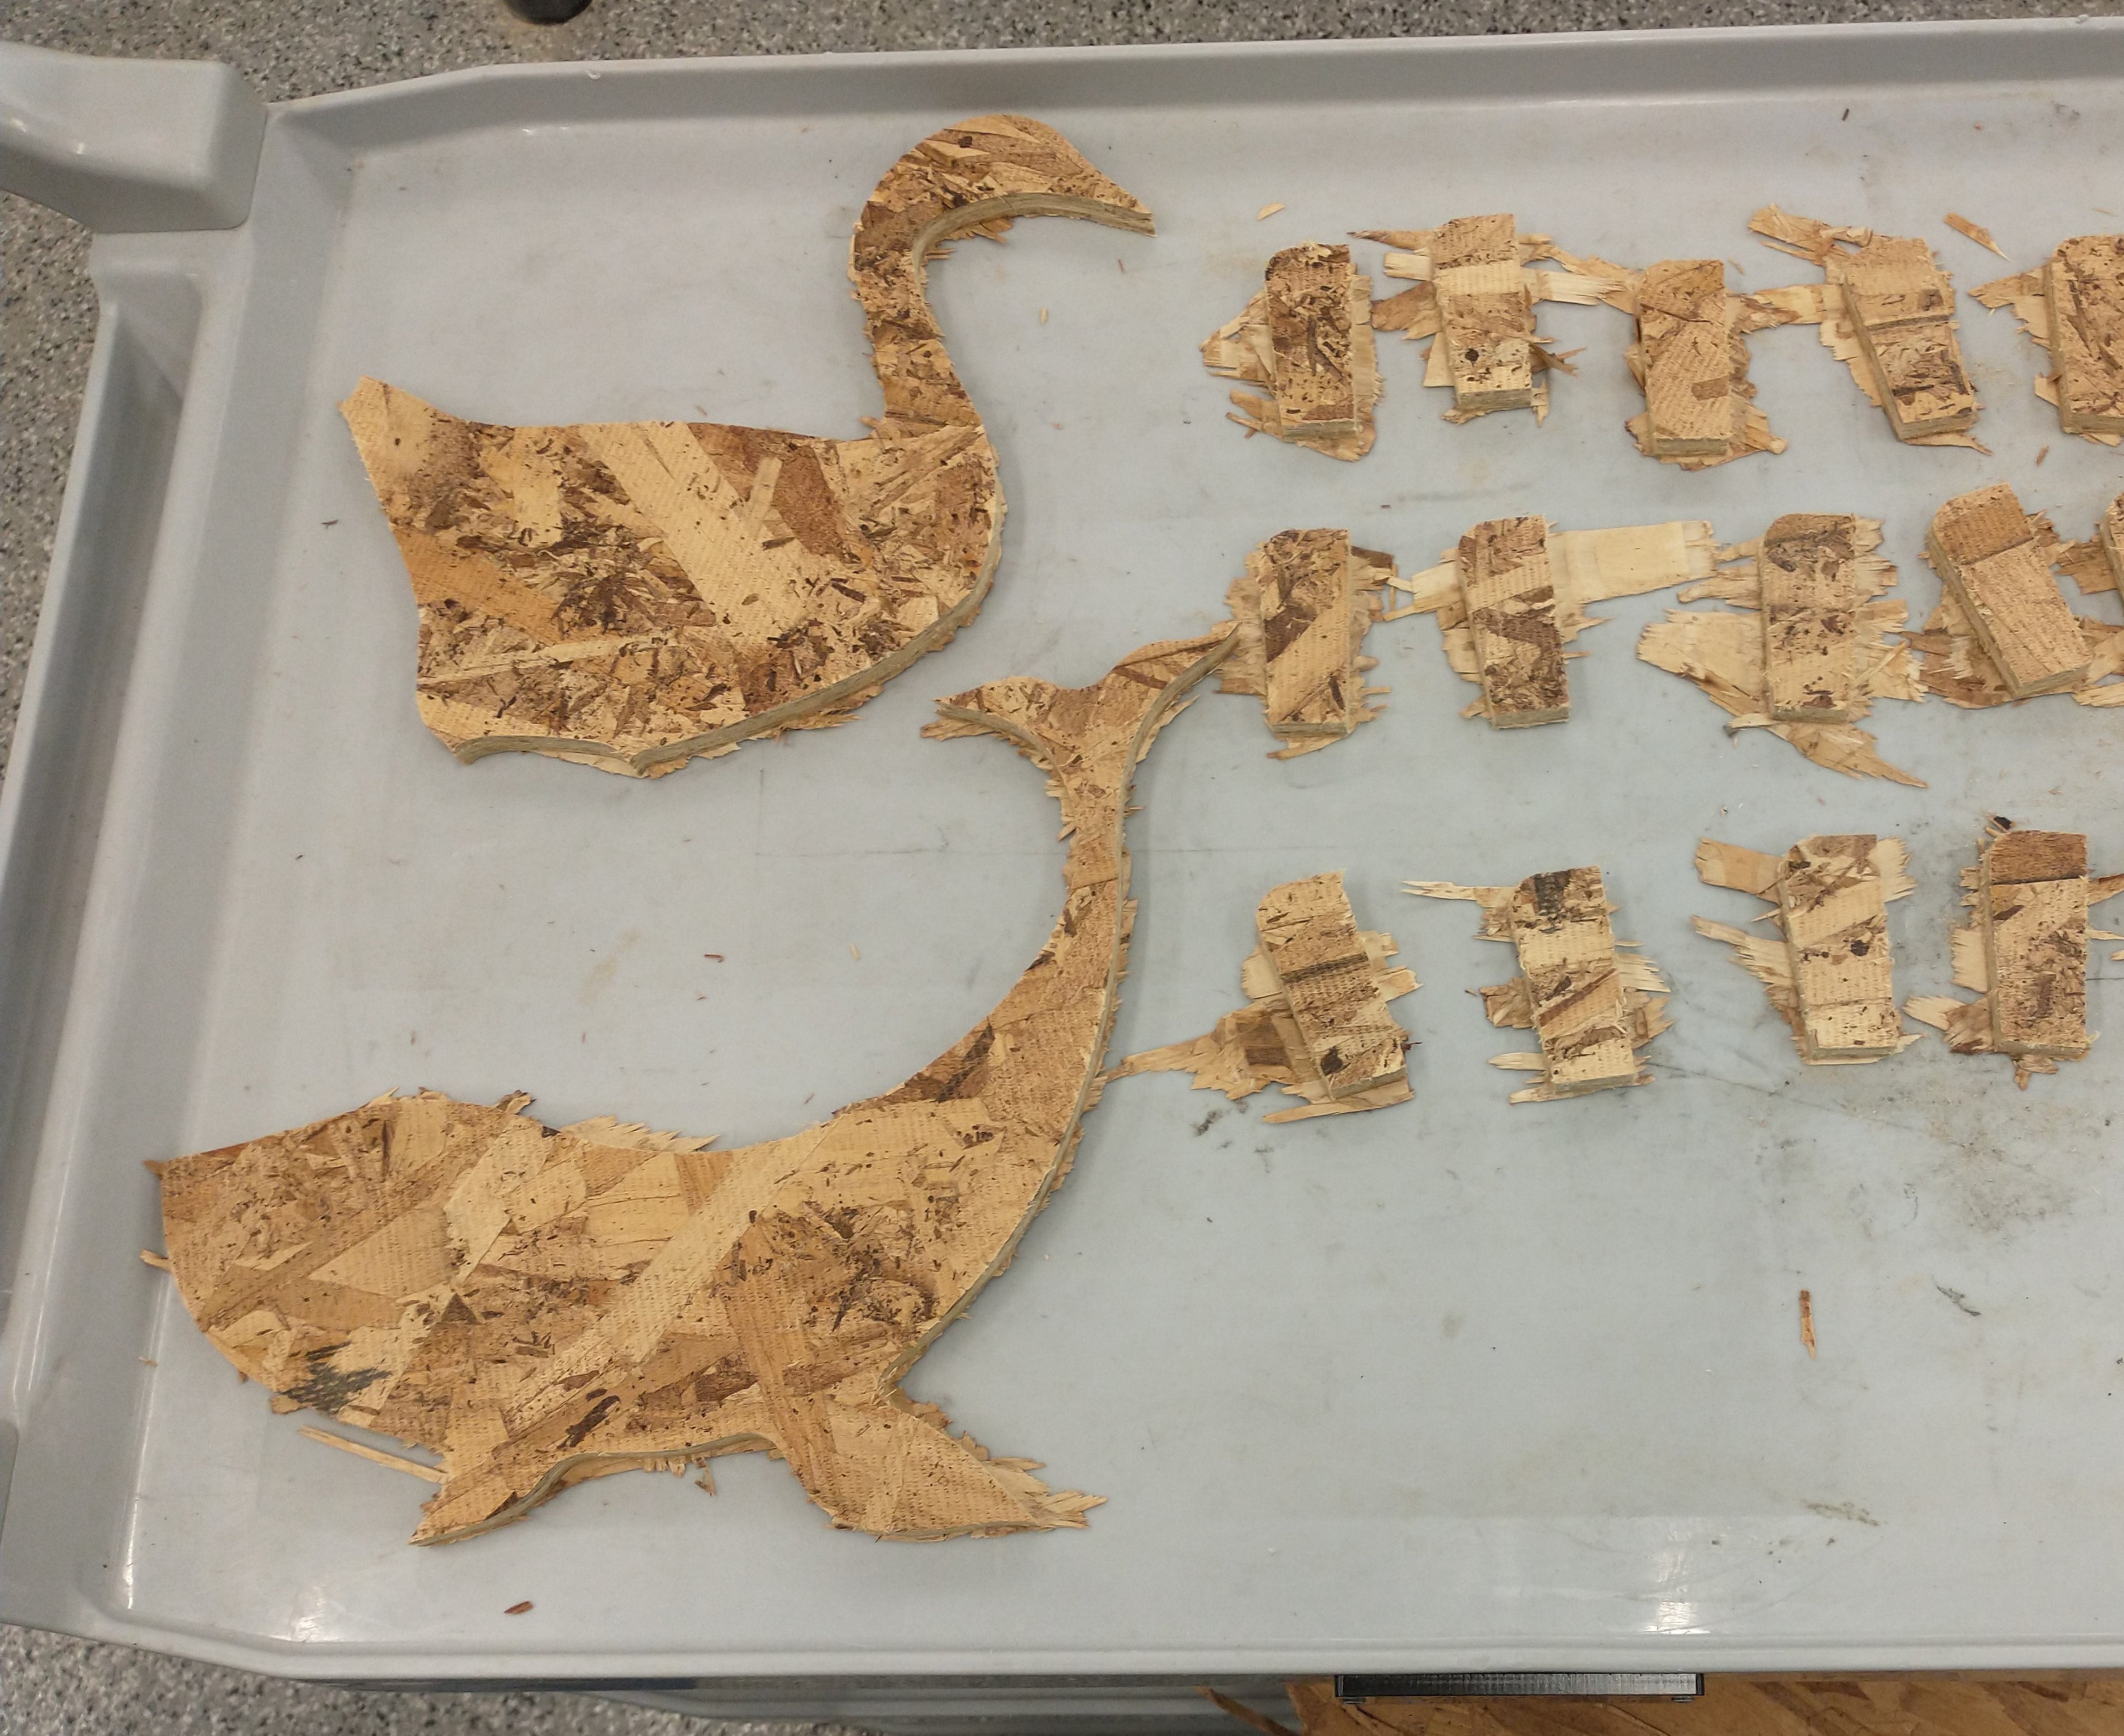
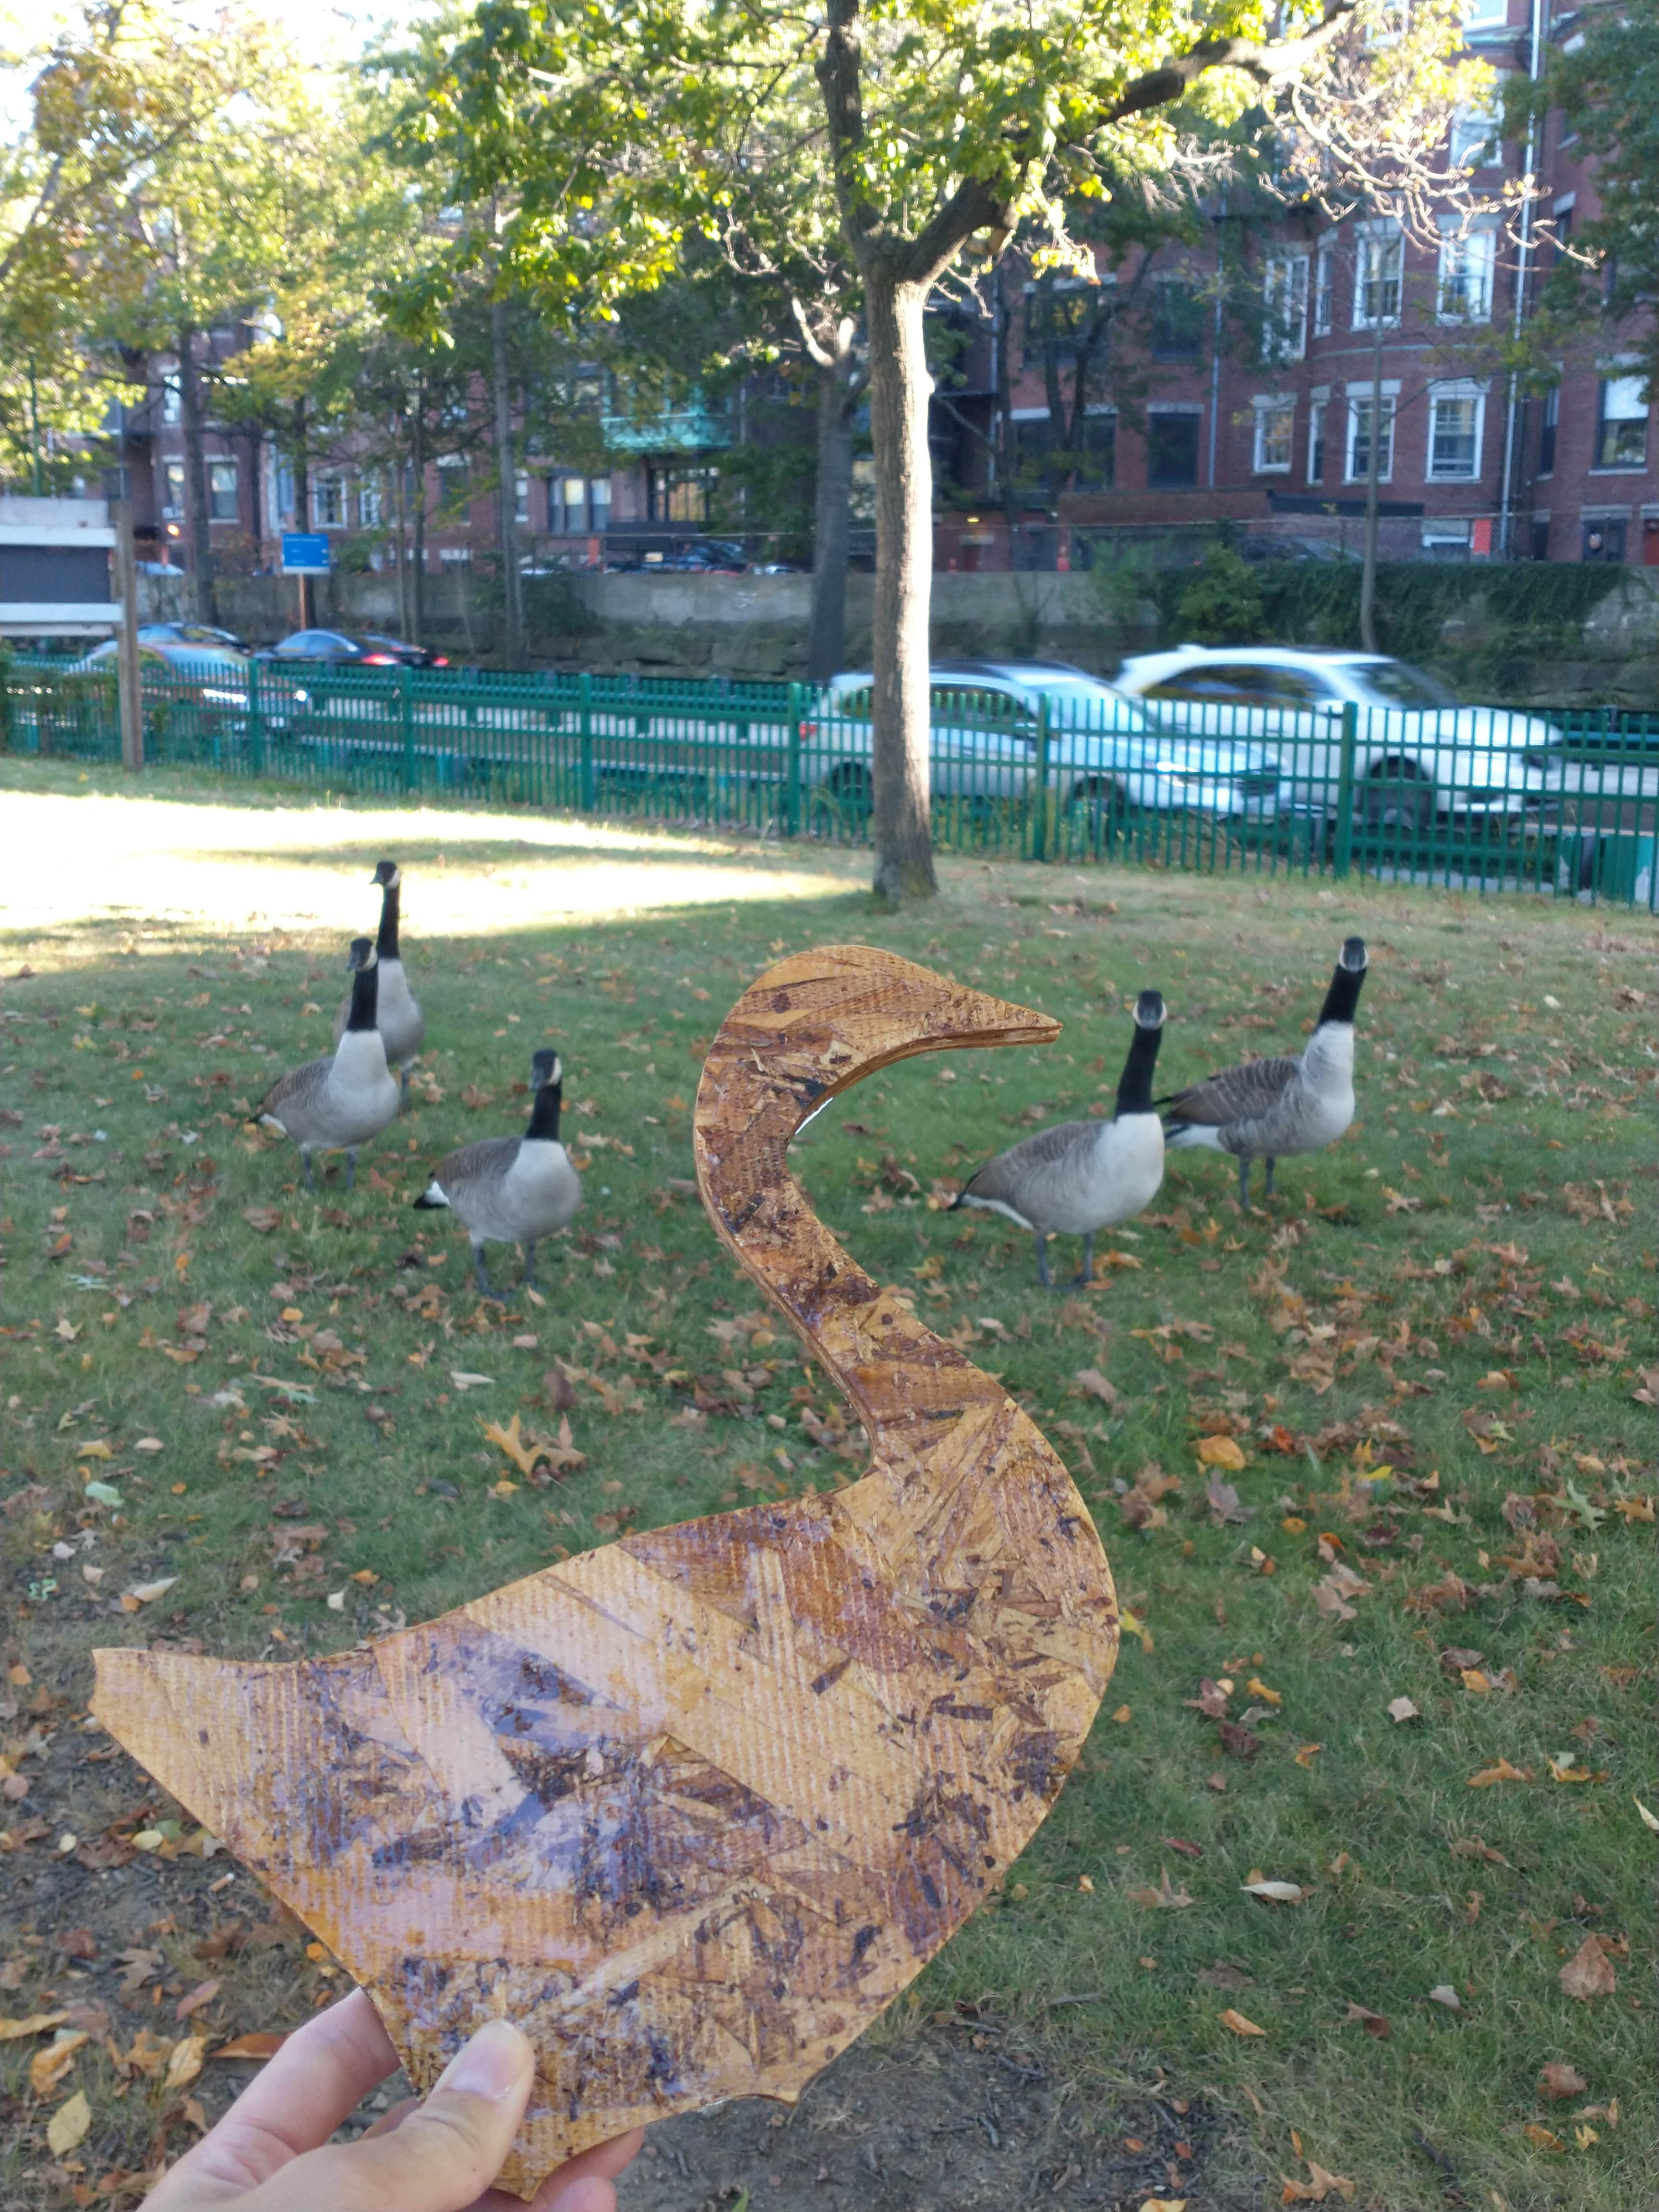
With some time left before my machining timeslot, I added a few animal cutouts to the shelf walls. It turns out some animal shapes lend themselves to nicer silhouettes. The goose and the whale worked very well, but crabs are a bit too complicated, and clam silhouettes do not look that good.
The CAD file can be found here.
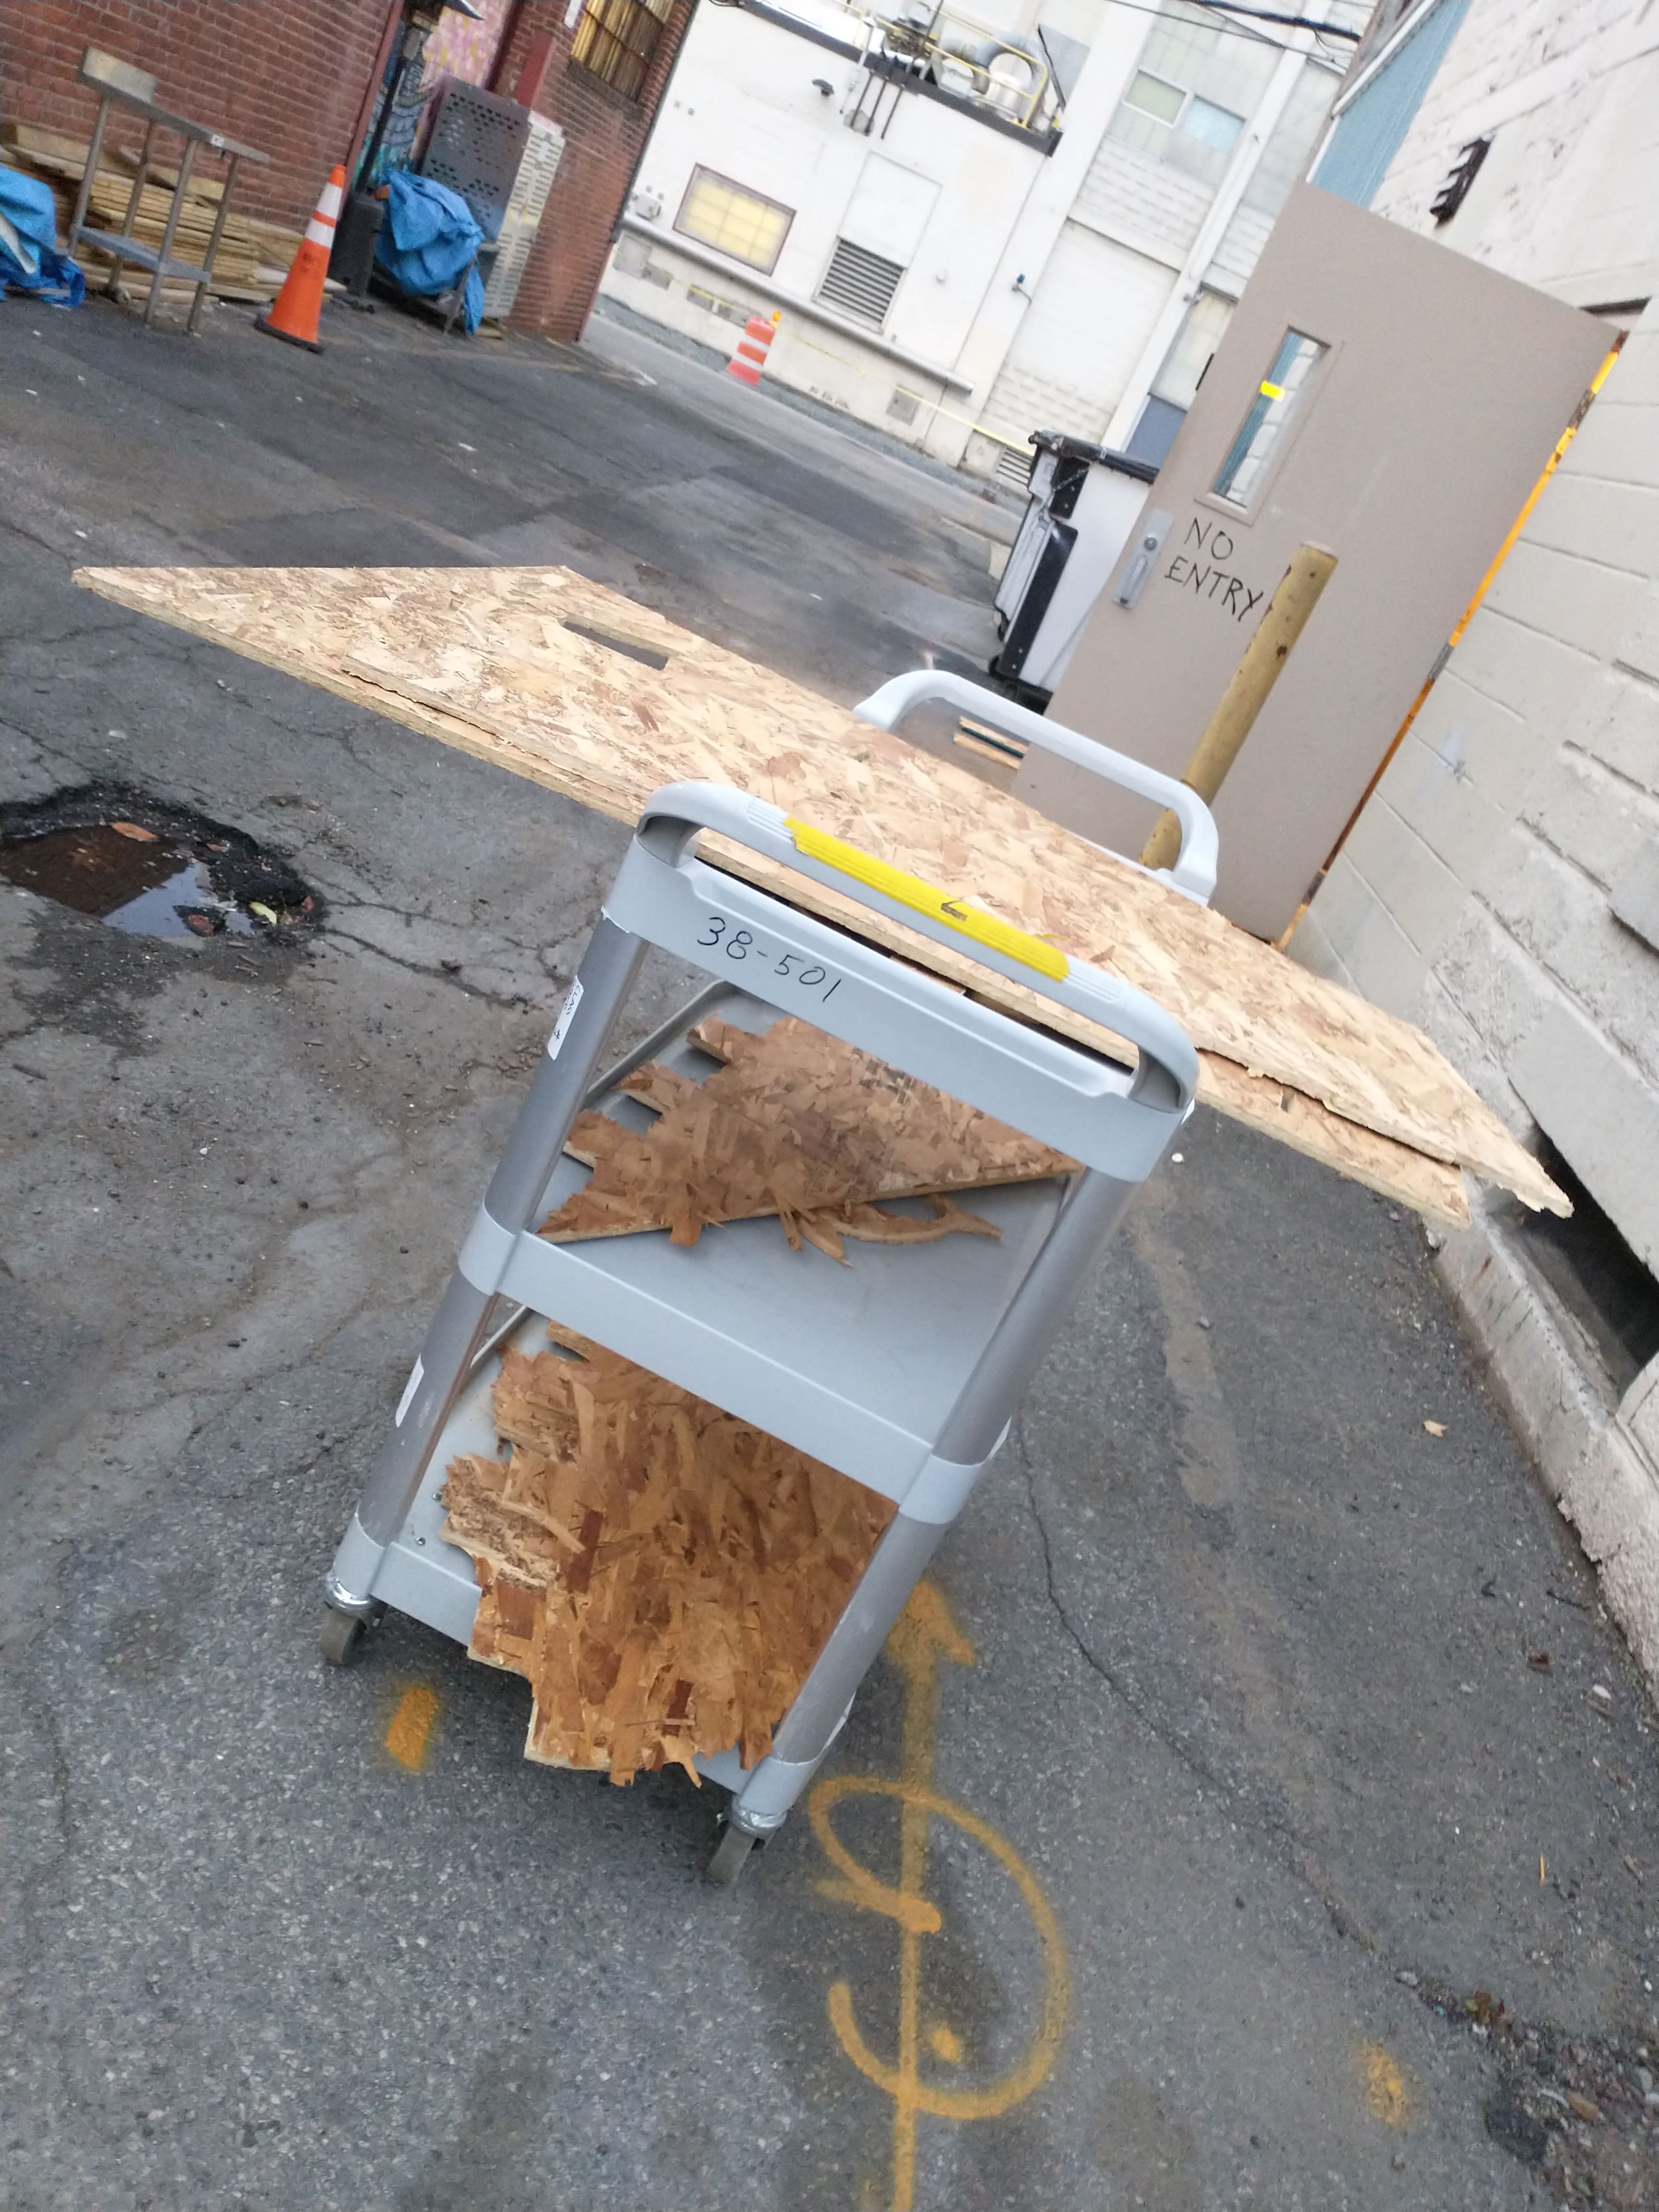
The 4x8' piece of wood that I needed is too small for EDS's machine, so I took a trip to N51 to the Arch shop for Calvin's help. Setting up with MasterCAM took up a good chunk of the machining time. Fusion lets you export the entire CAD as a dxf file, but it exported every piece I had, including my past shelf versions, so I had to figure out which dxfs were the ones I actually wanted.
Some changes we made included deleting the dogbones that the plug-in had already done, because Calvin said it would be faster to drill these individually. Calvin also went through each slot I had to change the thickness to 0.5 inches (which he measured from the center to avoid messing up geometries), which he said would work better than my previous 0.496 inches, set to the thickness of the OSB. We also added the 20 more wedges that I needed.
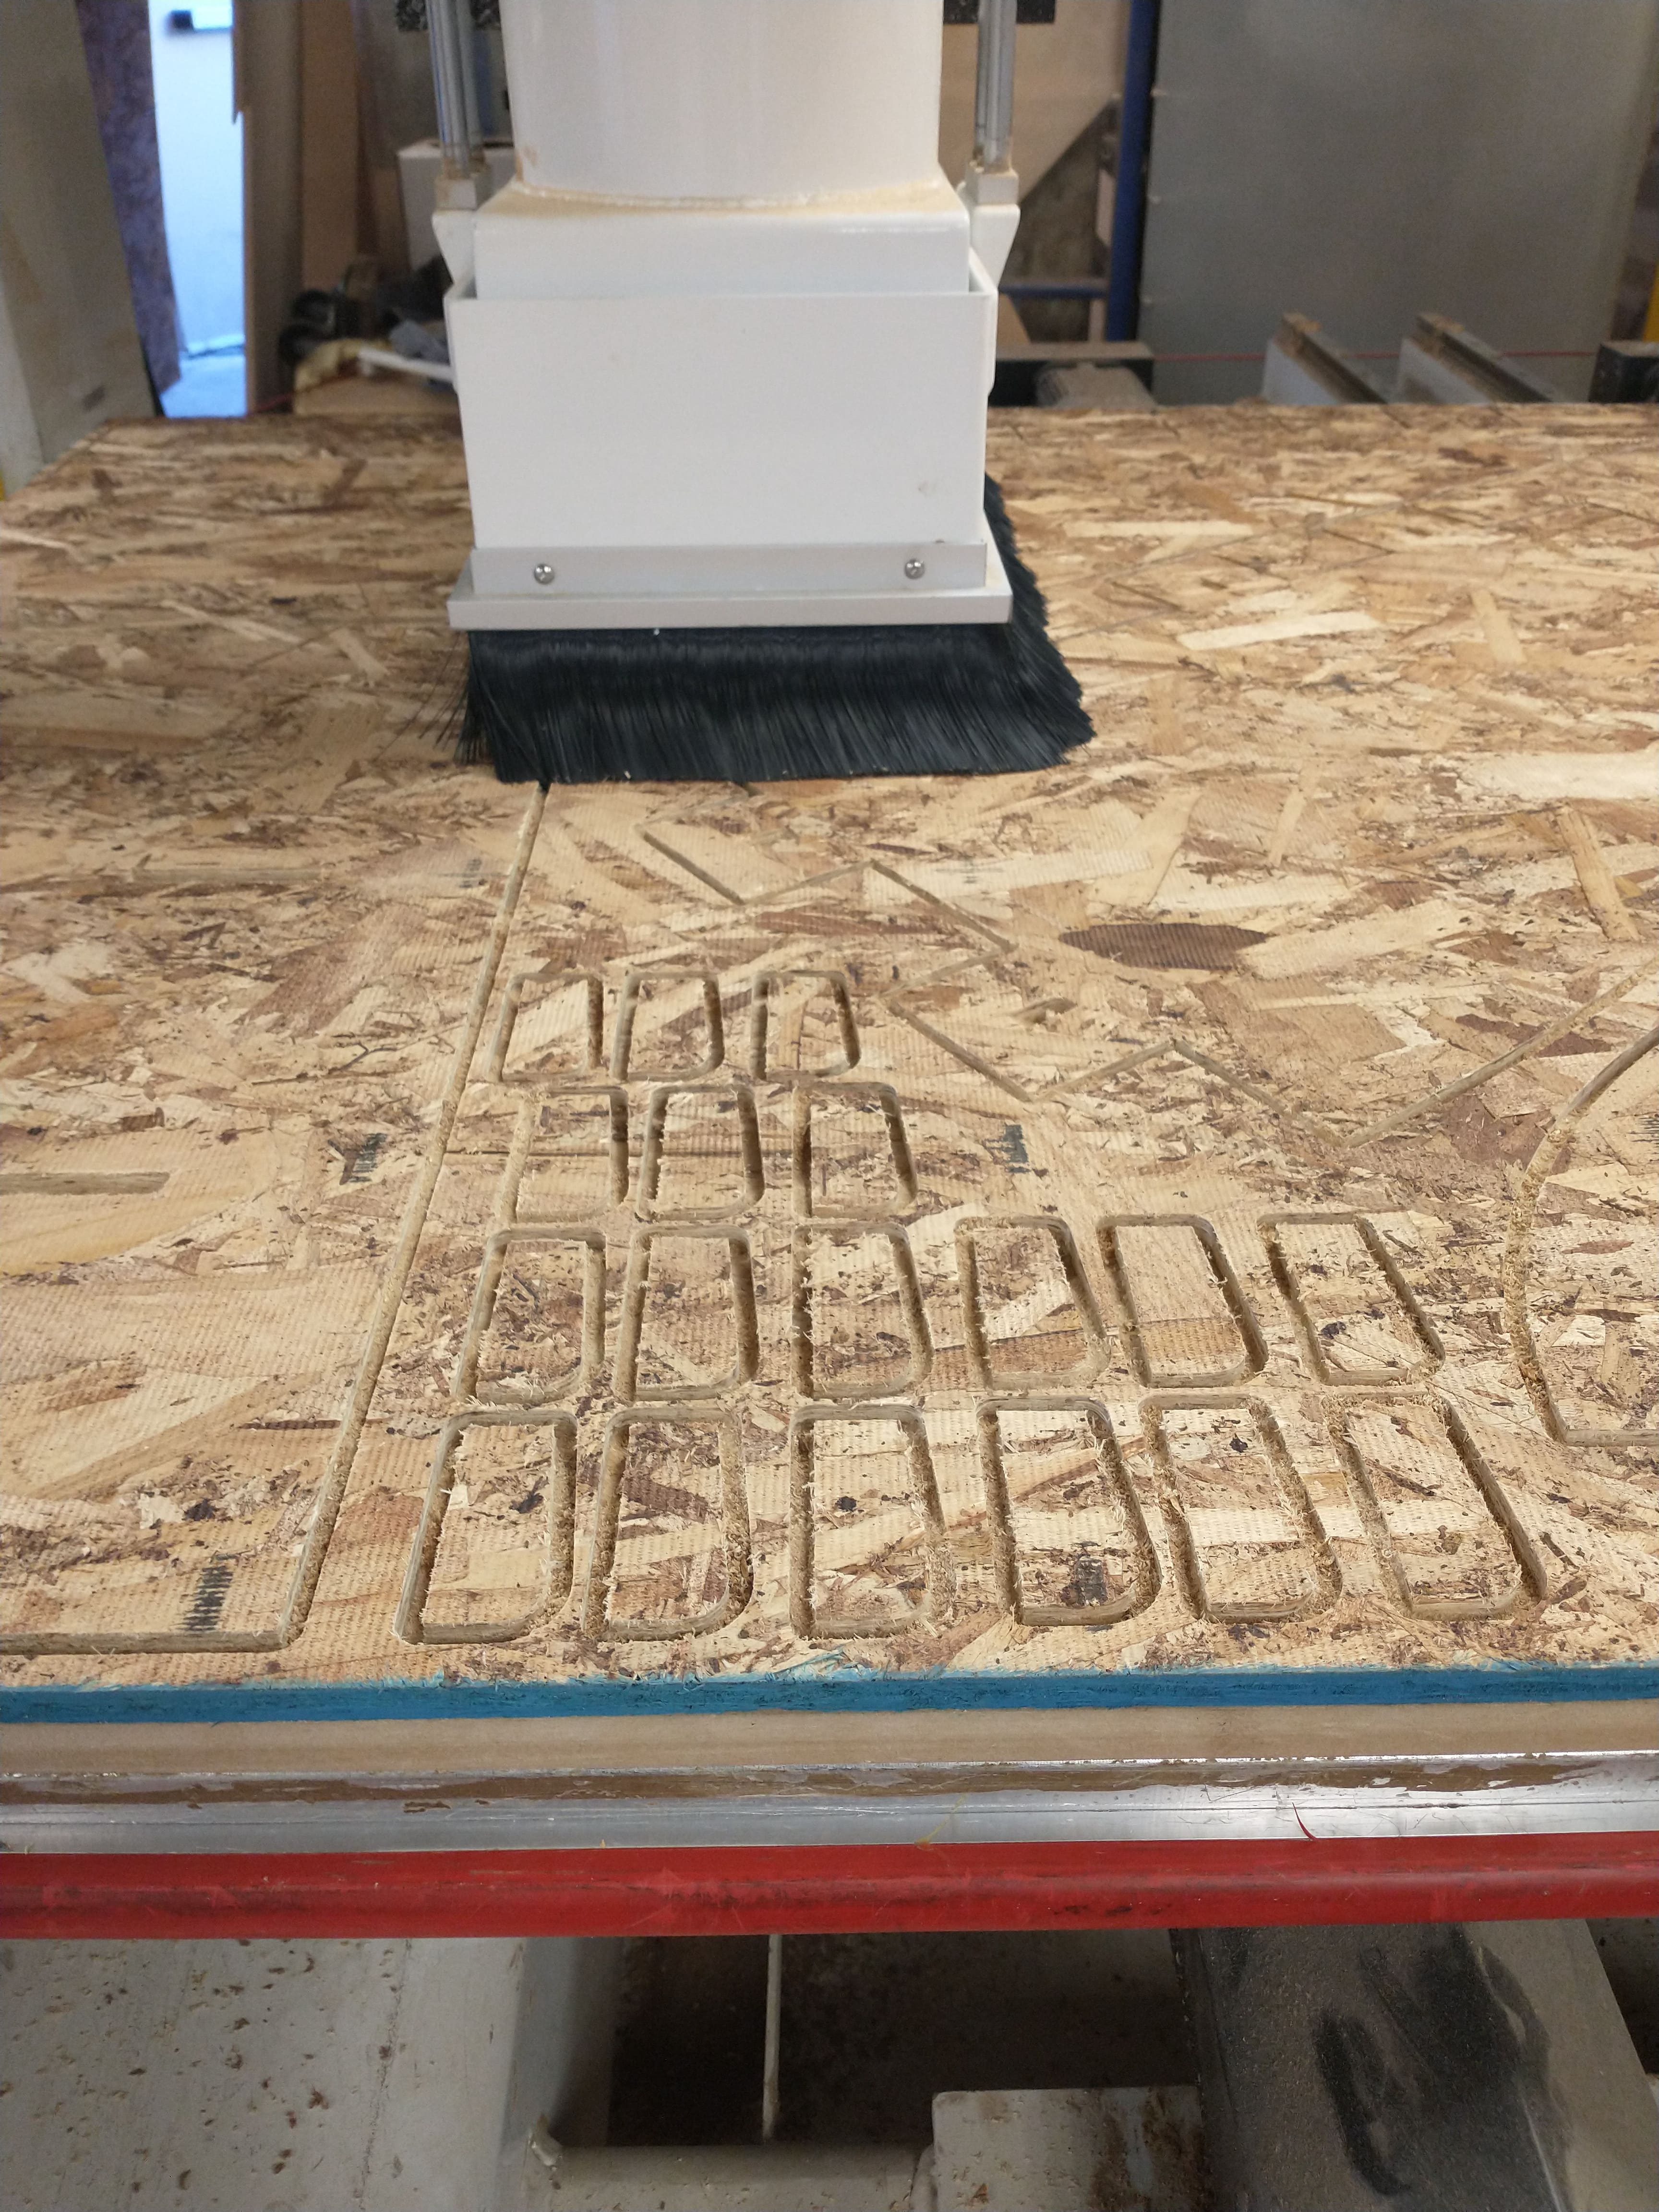
Once MasterCAM's settings were complete, the machining could begin! The one at the Arch shop has a vacuum bed and switches tools automatically, which means I just had to watch the 45-min job happen, and the OSB was of quite nice quality.

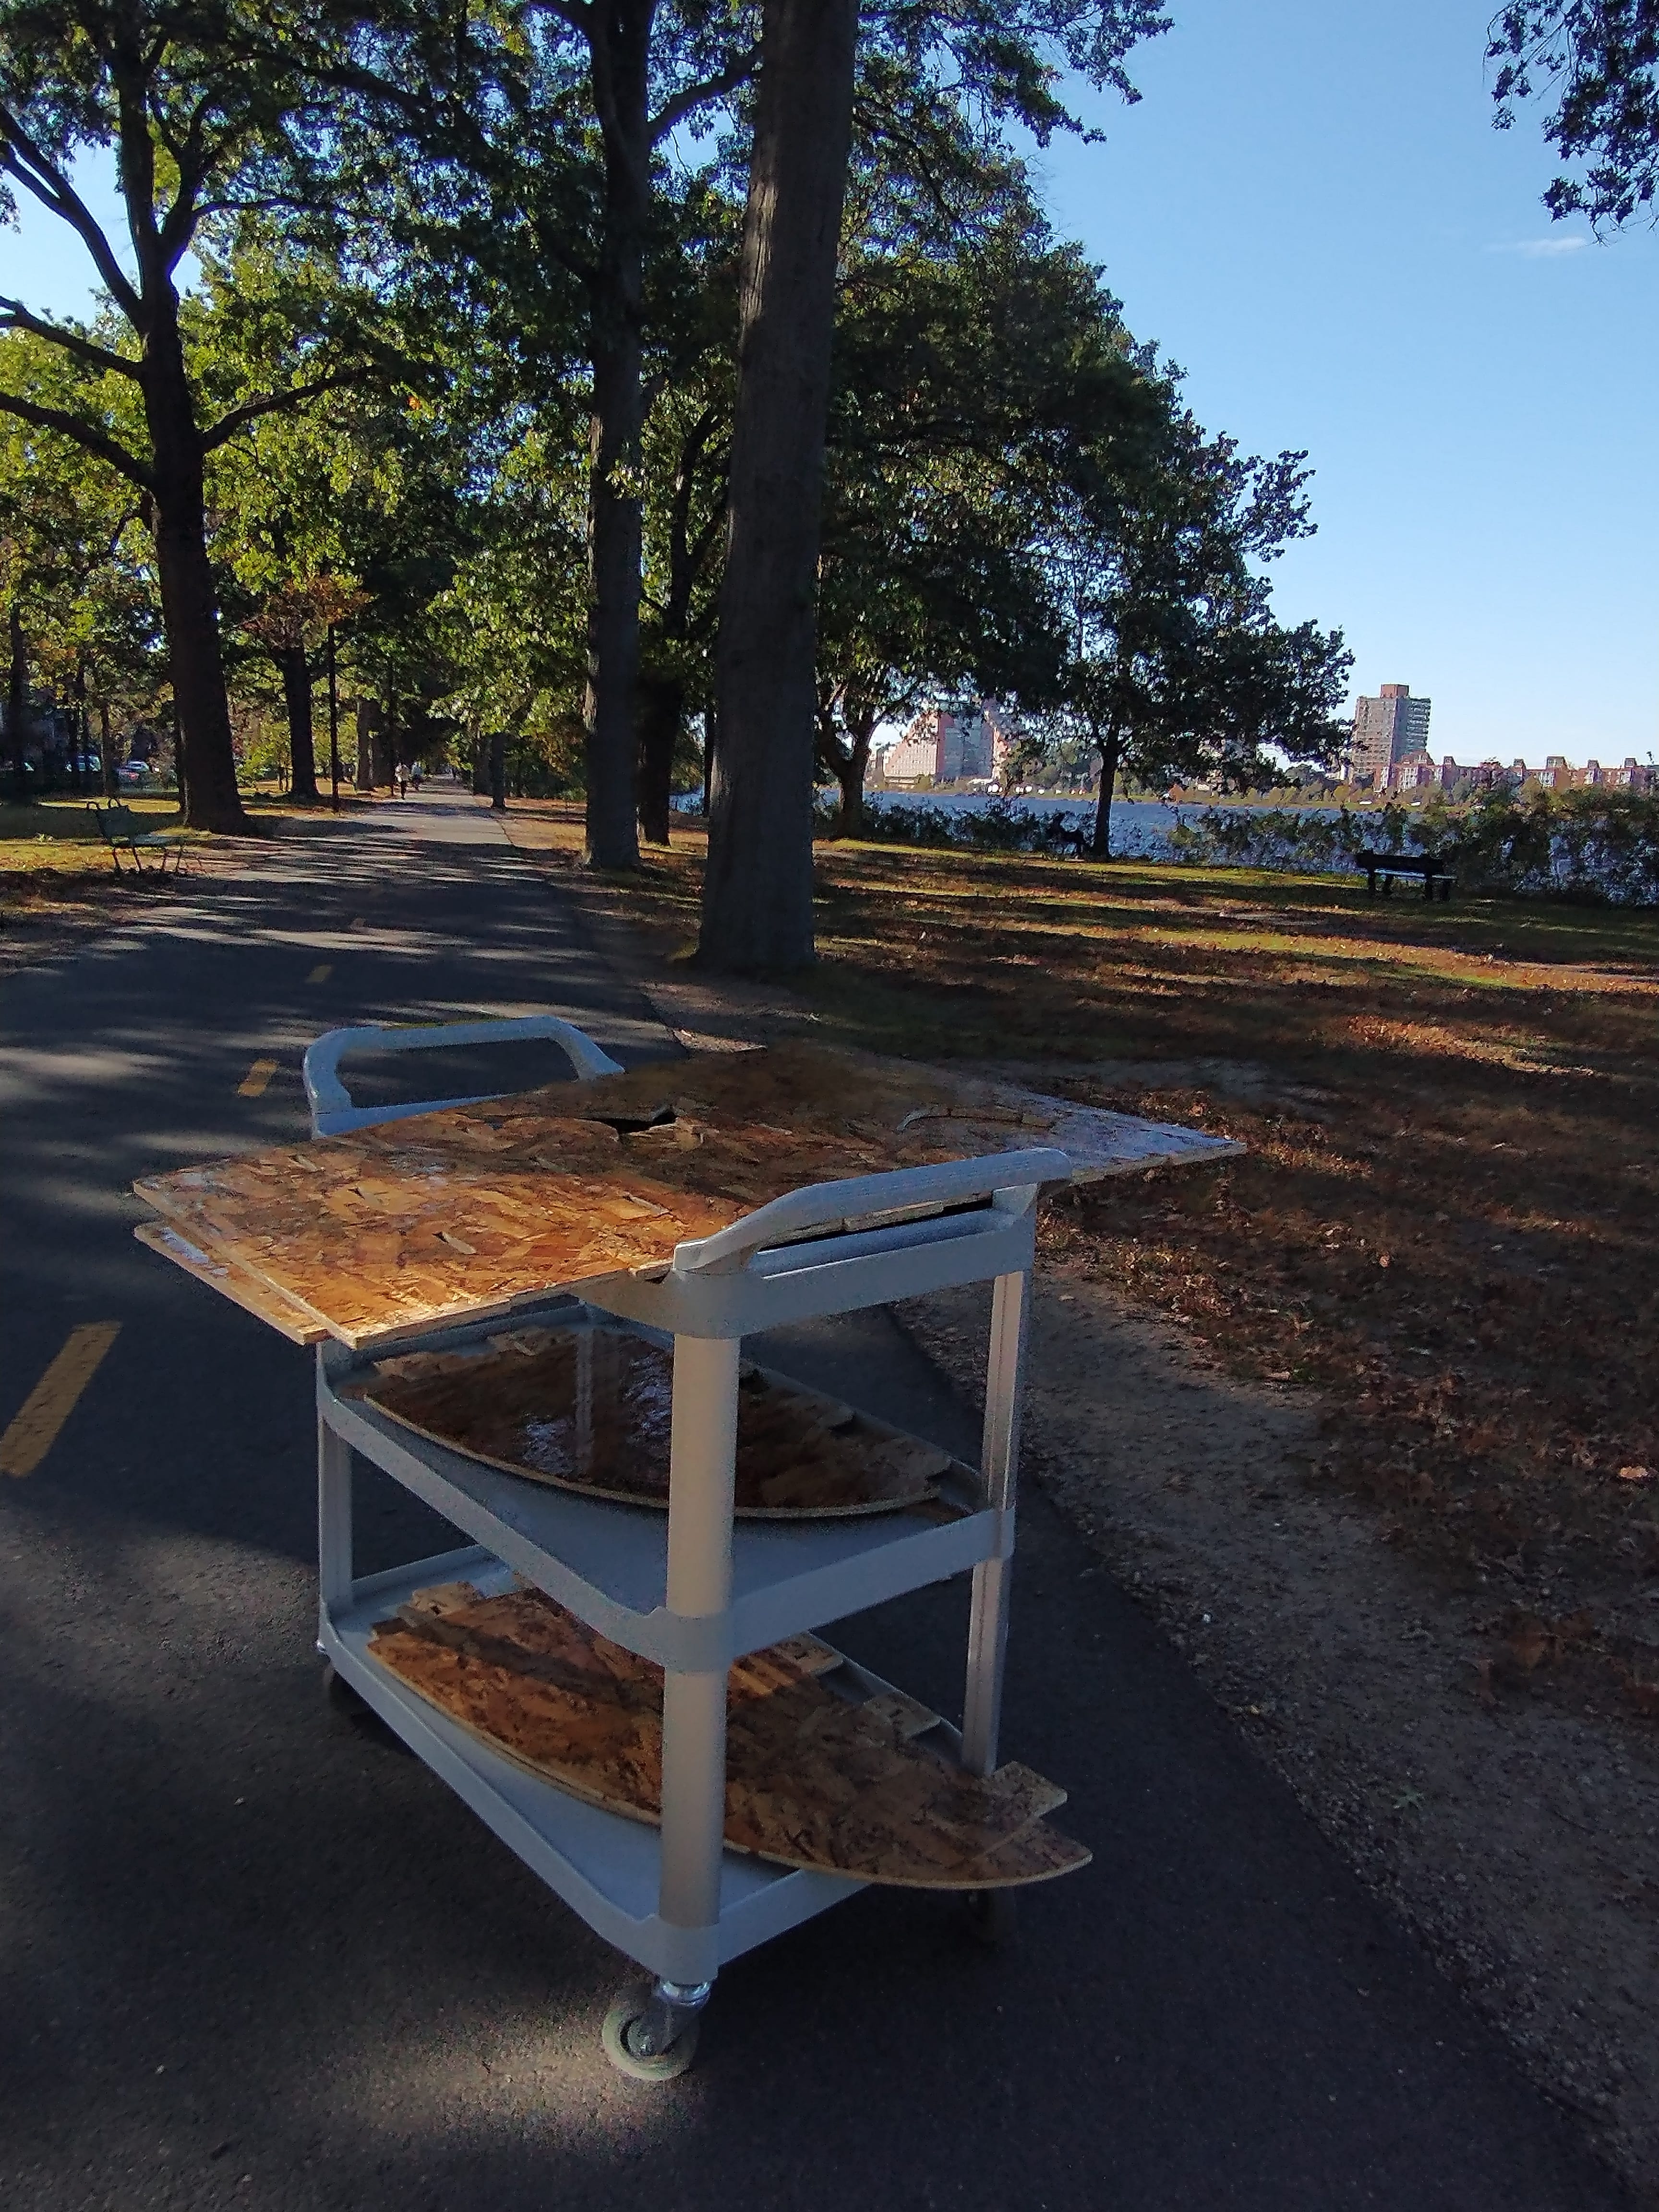
The pieces came out as expected, though the one thing I forgot to think about was that the the animal cutout pieces (that I wanted to keep) would be a bit smaller due to wood removal by the tool. The shapes are still recognizable though, even if the goose lost its legs, and the shape outlines on the shelf itself look excellent. Anthony kindly lent me a cart, with which I carted my wood back to EDS and narrowly avoided hitting a car going through the alley behind the Arch shop.
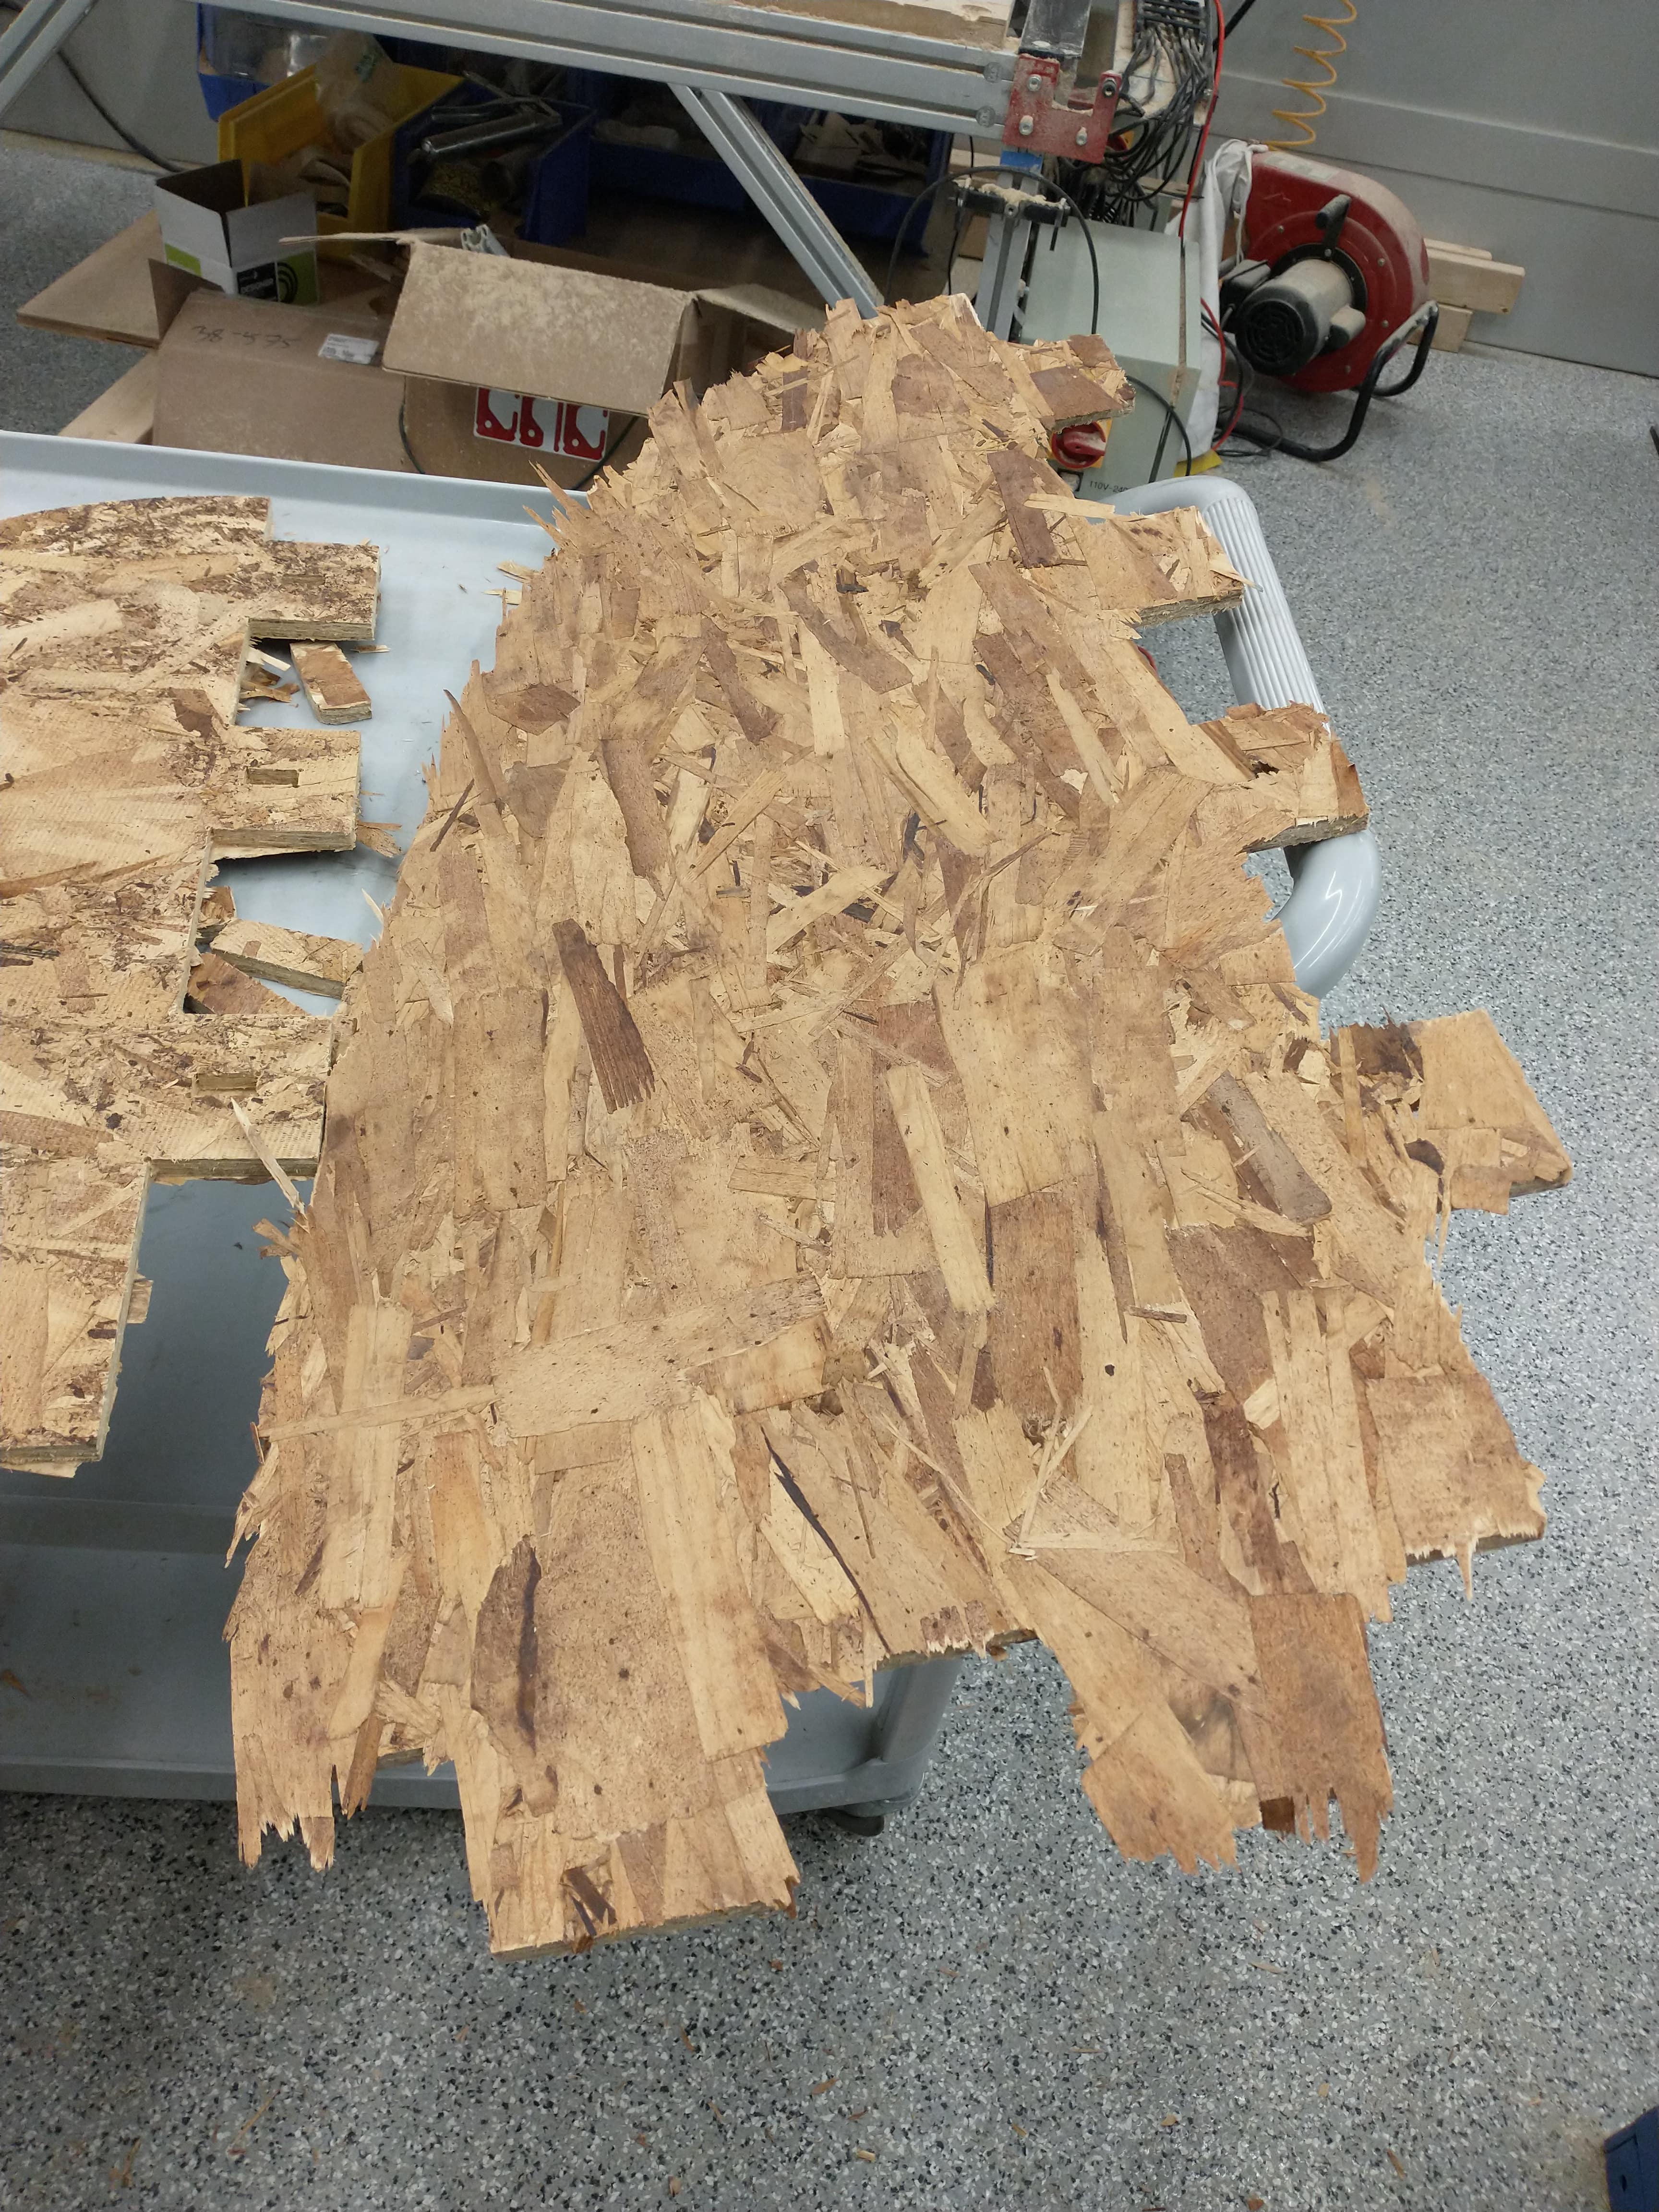
To get rid of the onion skin left on the pieces of wood, I went ham with a rasp for some amount of time. (Use broad forward/backwards motion, instead of small side-to-side ones).

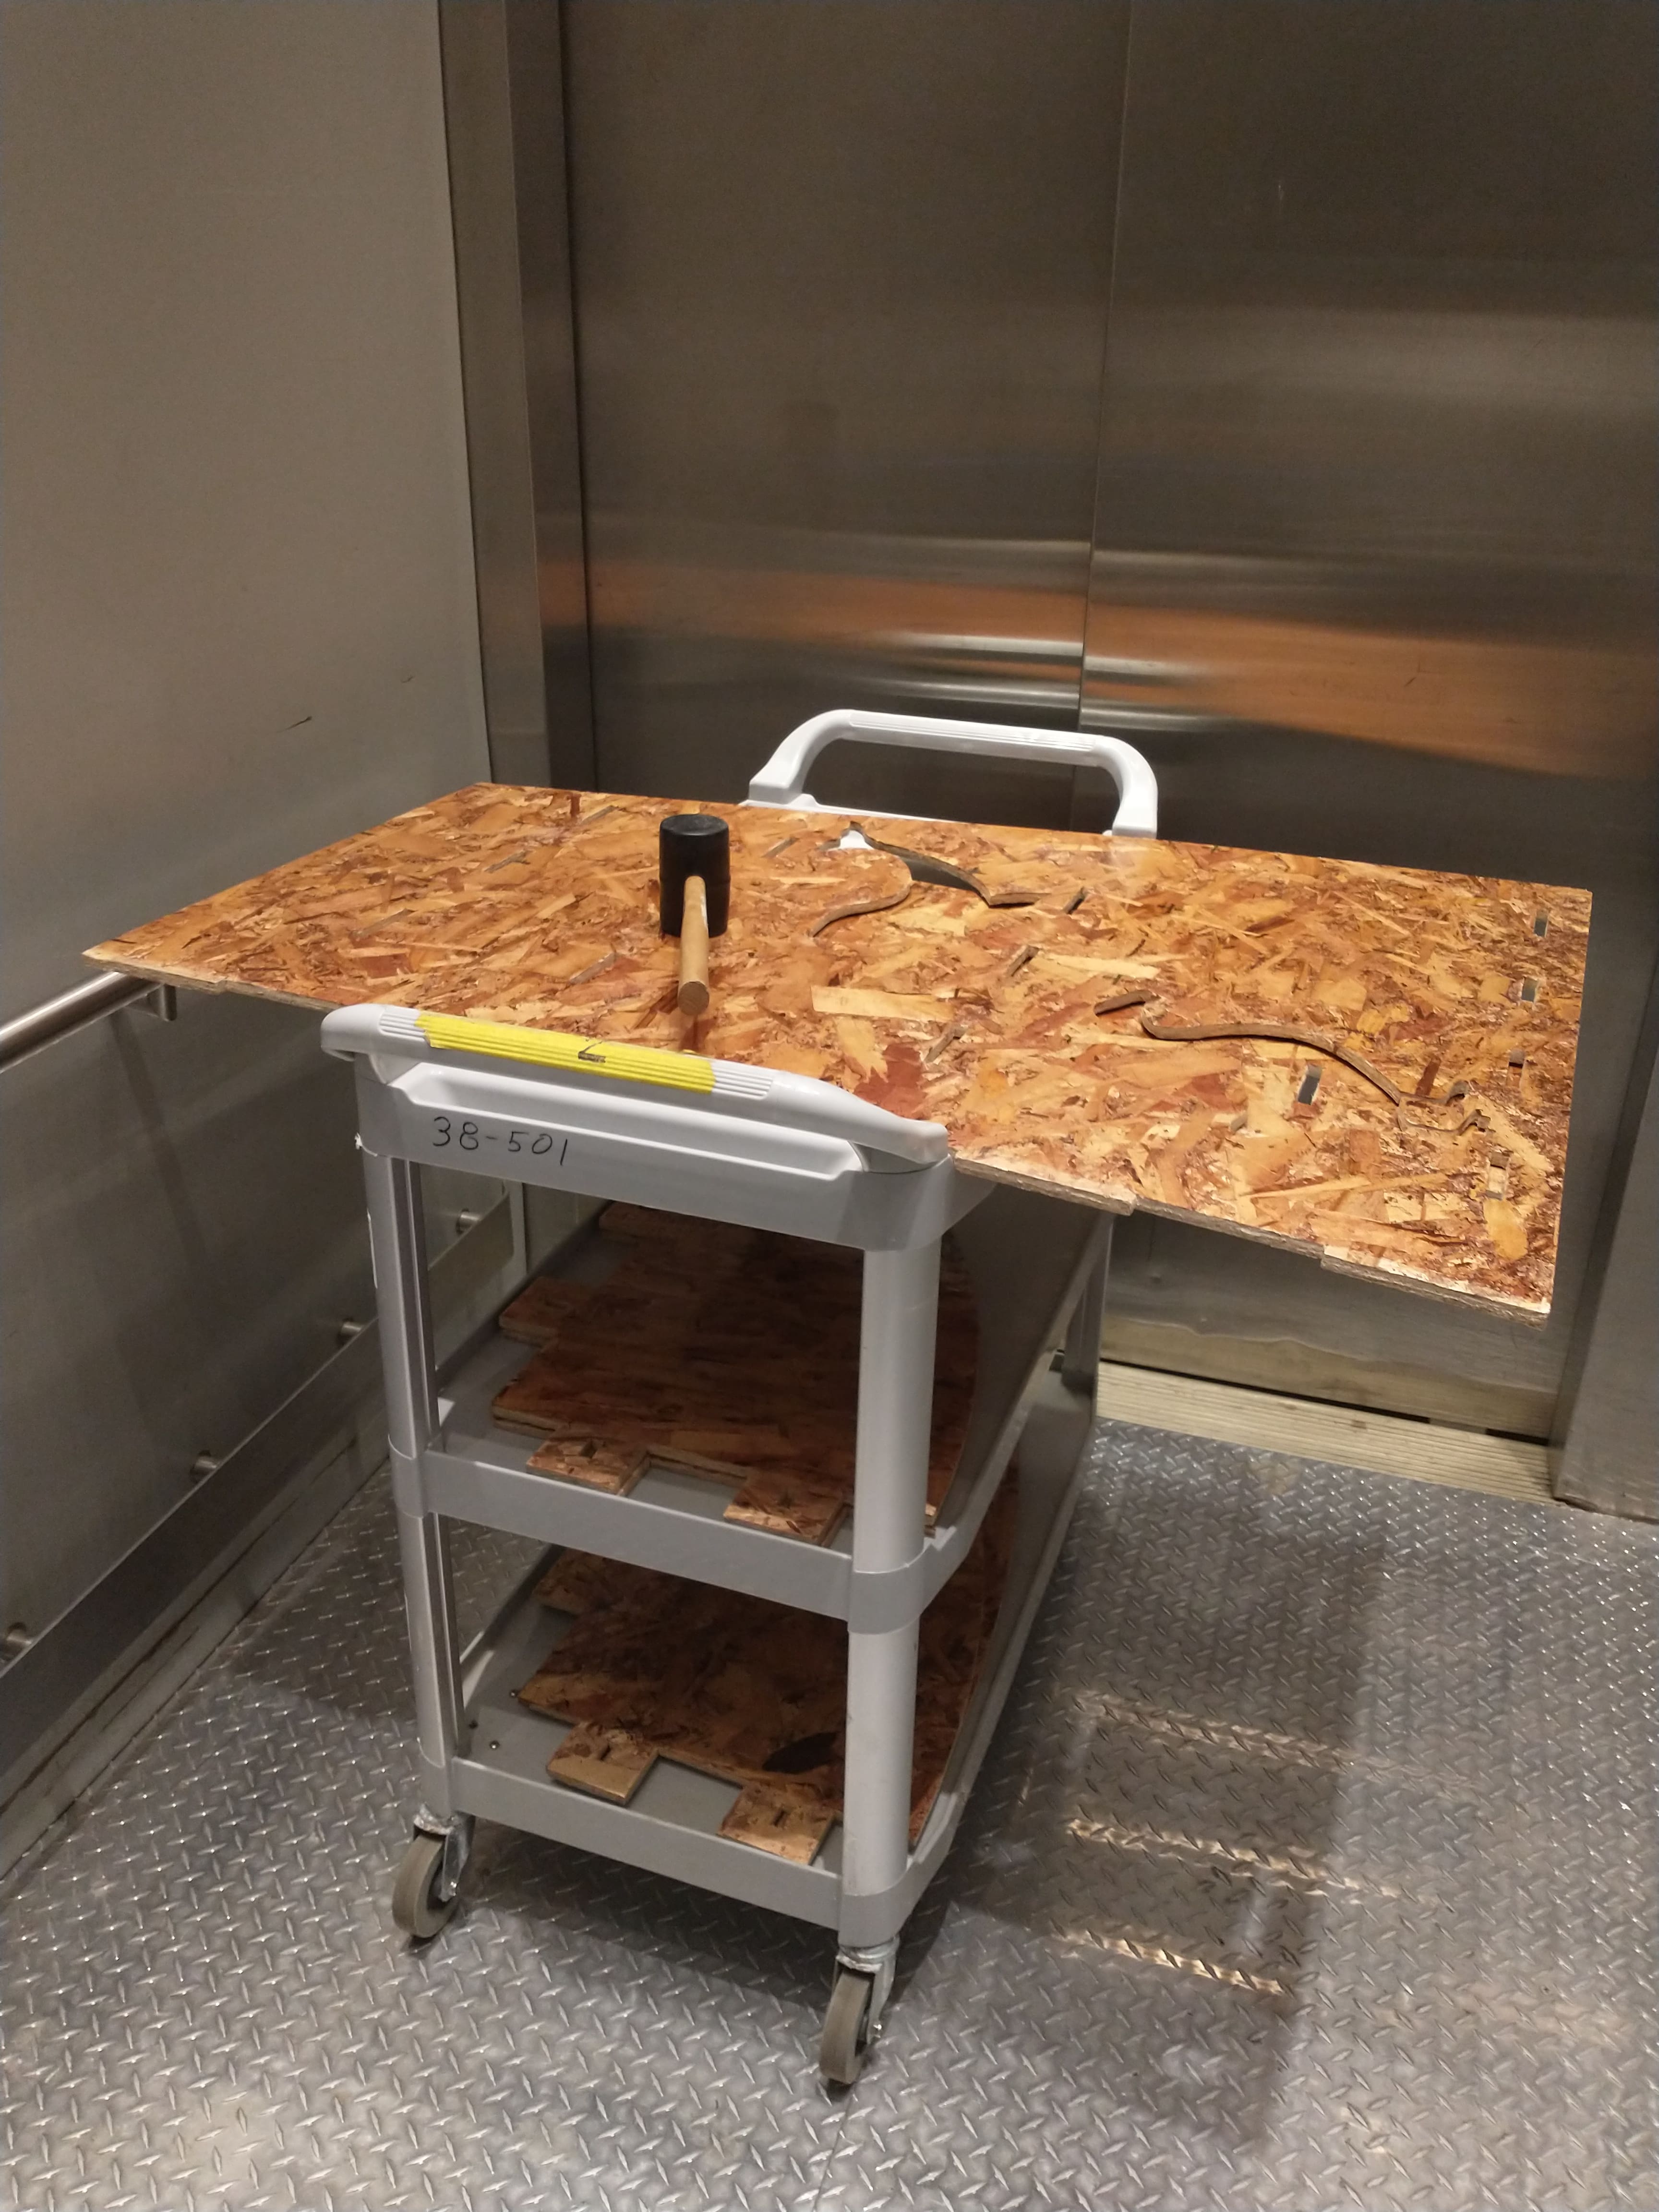
I also spent quite a bit of time making sure the parts fit together, and I had to horizontally enlarge a number of the slots with the rasp to make sure the tenons actually fit easily. A mallet was very useful with the process of checking the fit of the parts. By the time I was rasping Wedge 12 out of 21, I started questioning my life choices; fortunately, I was the only one at EDS at that point so I just blasted country music. (Anthony, have you considered installing a sound system?)
The joints work!!


And here's the post-rasp results.

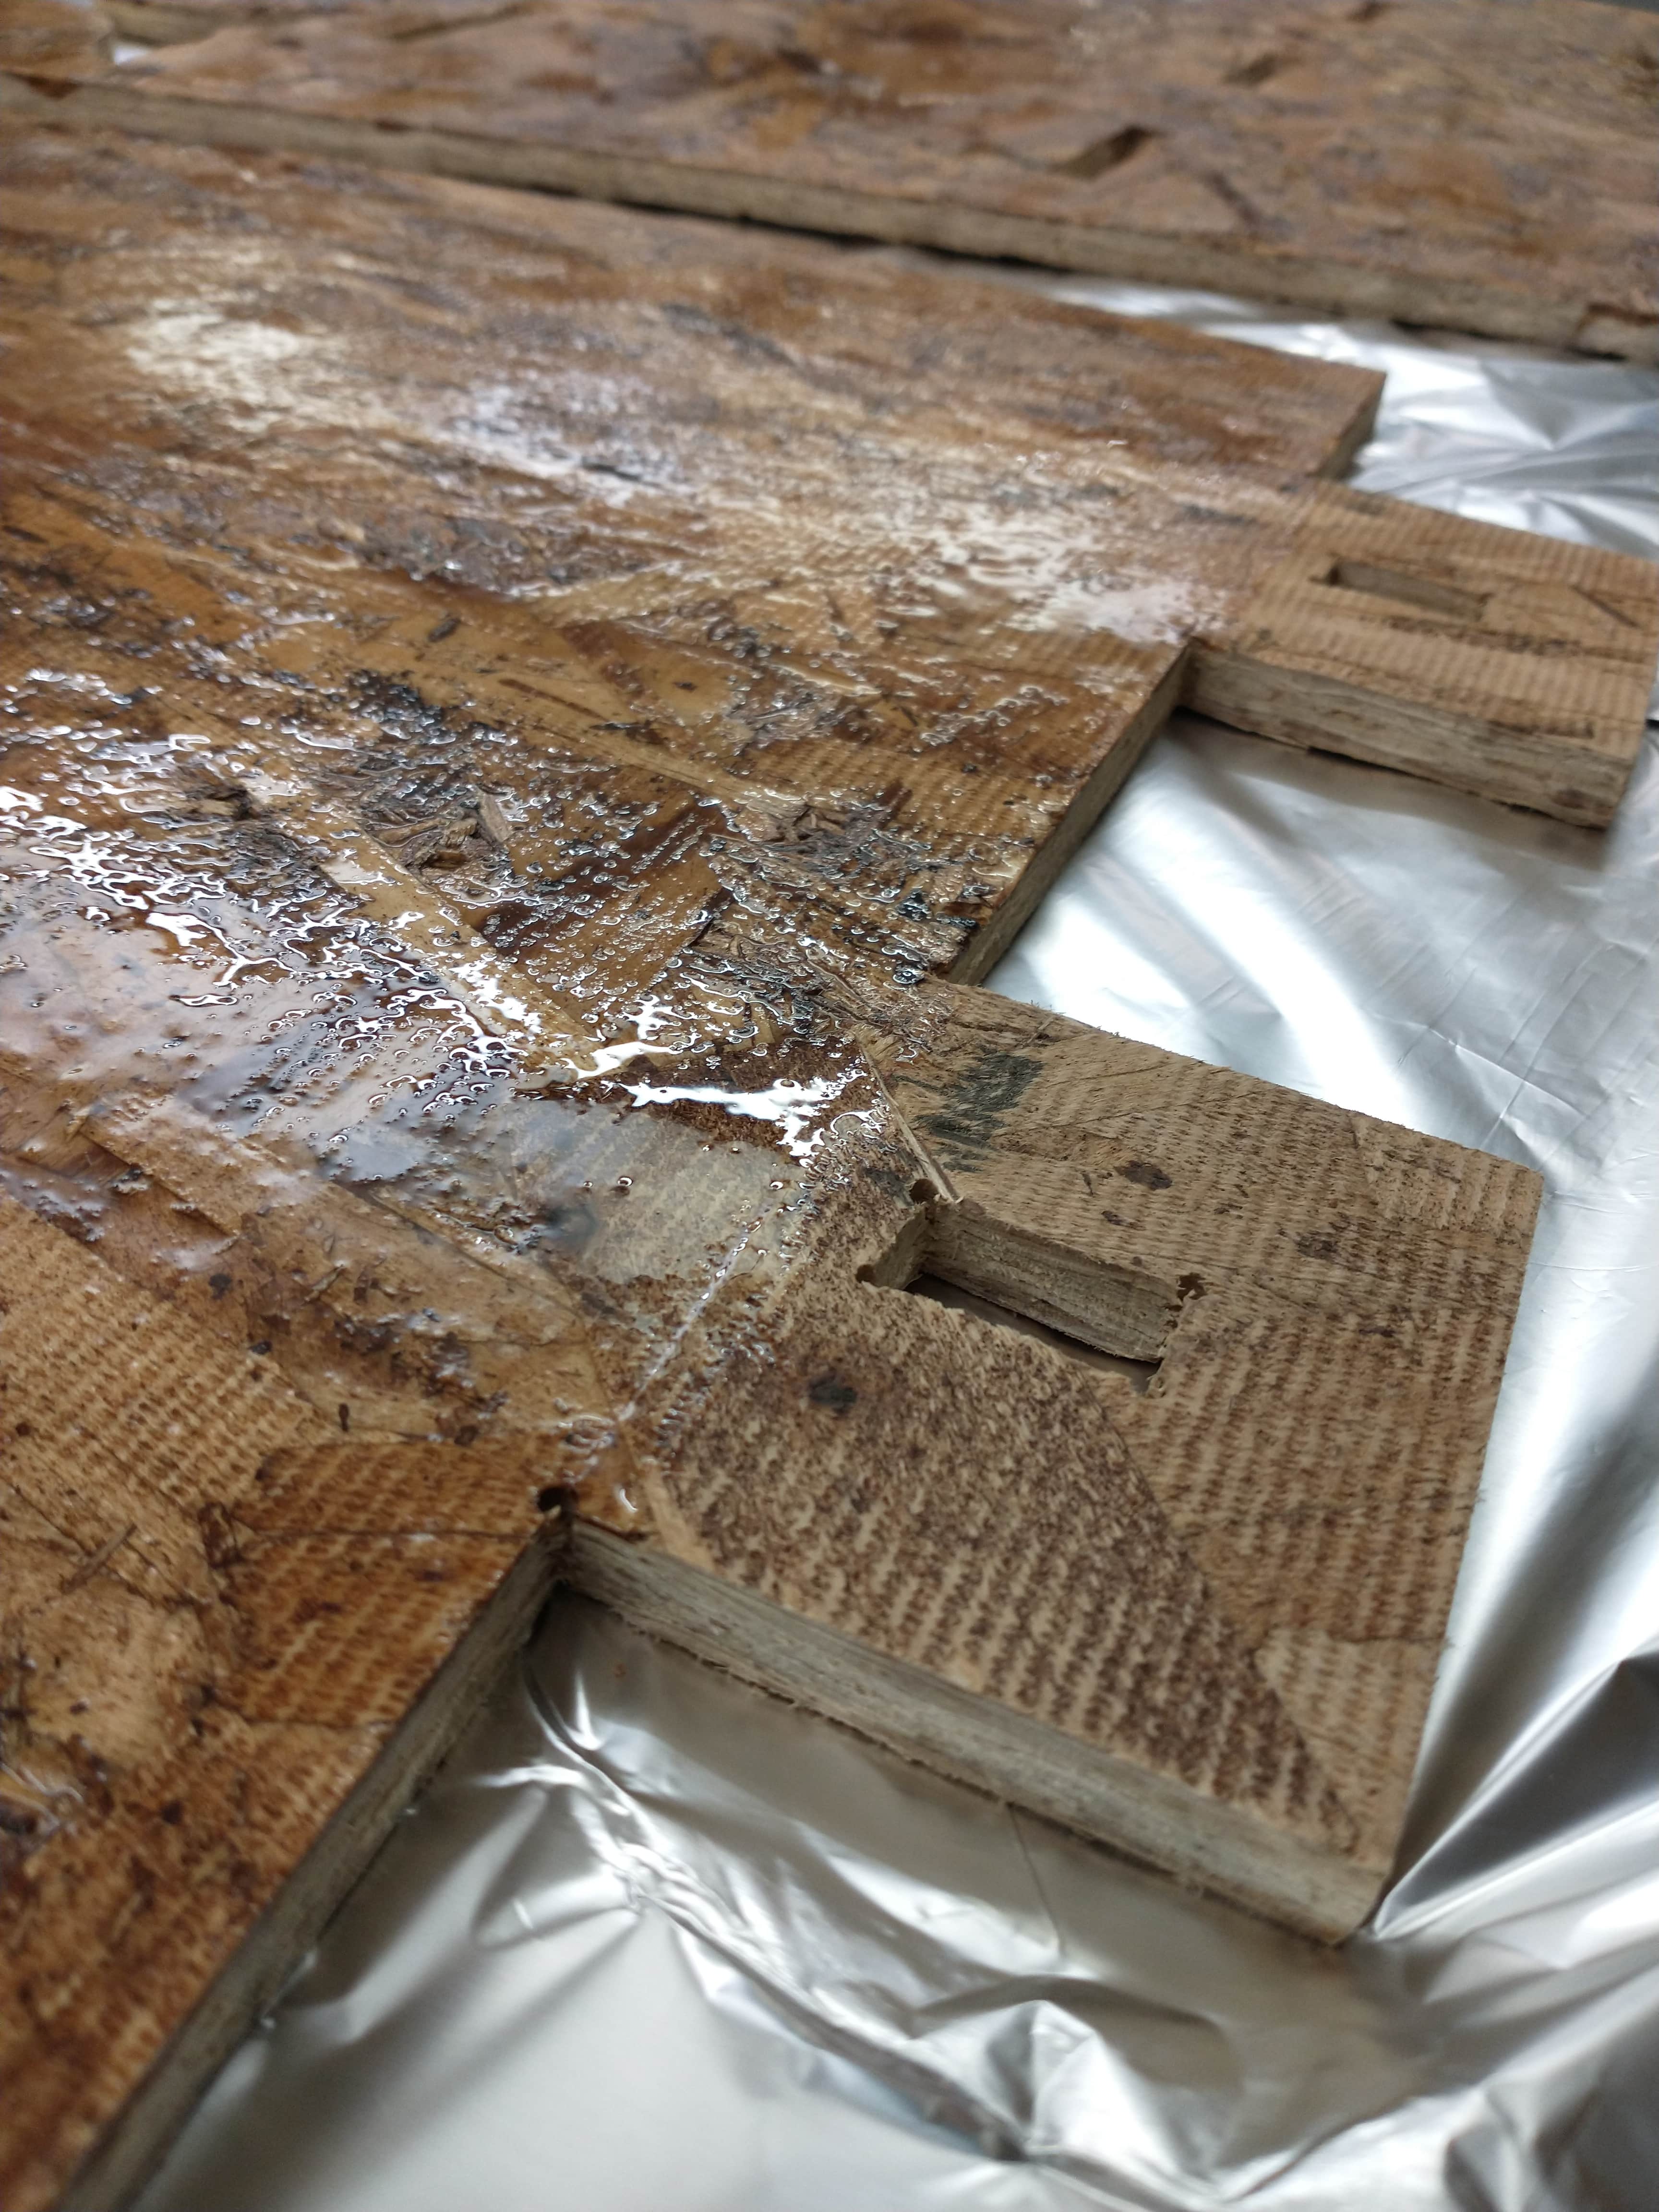
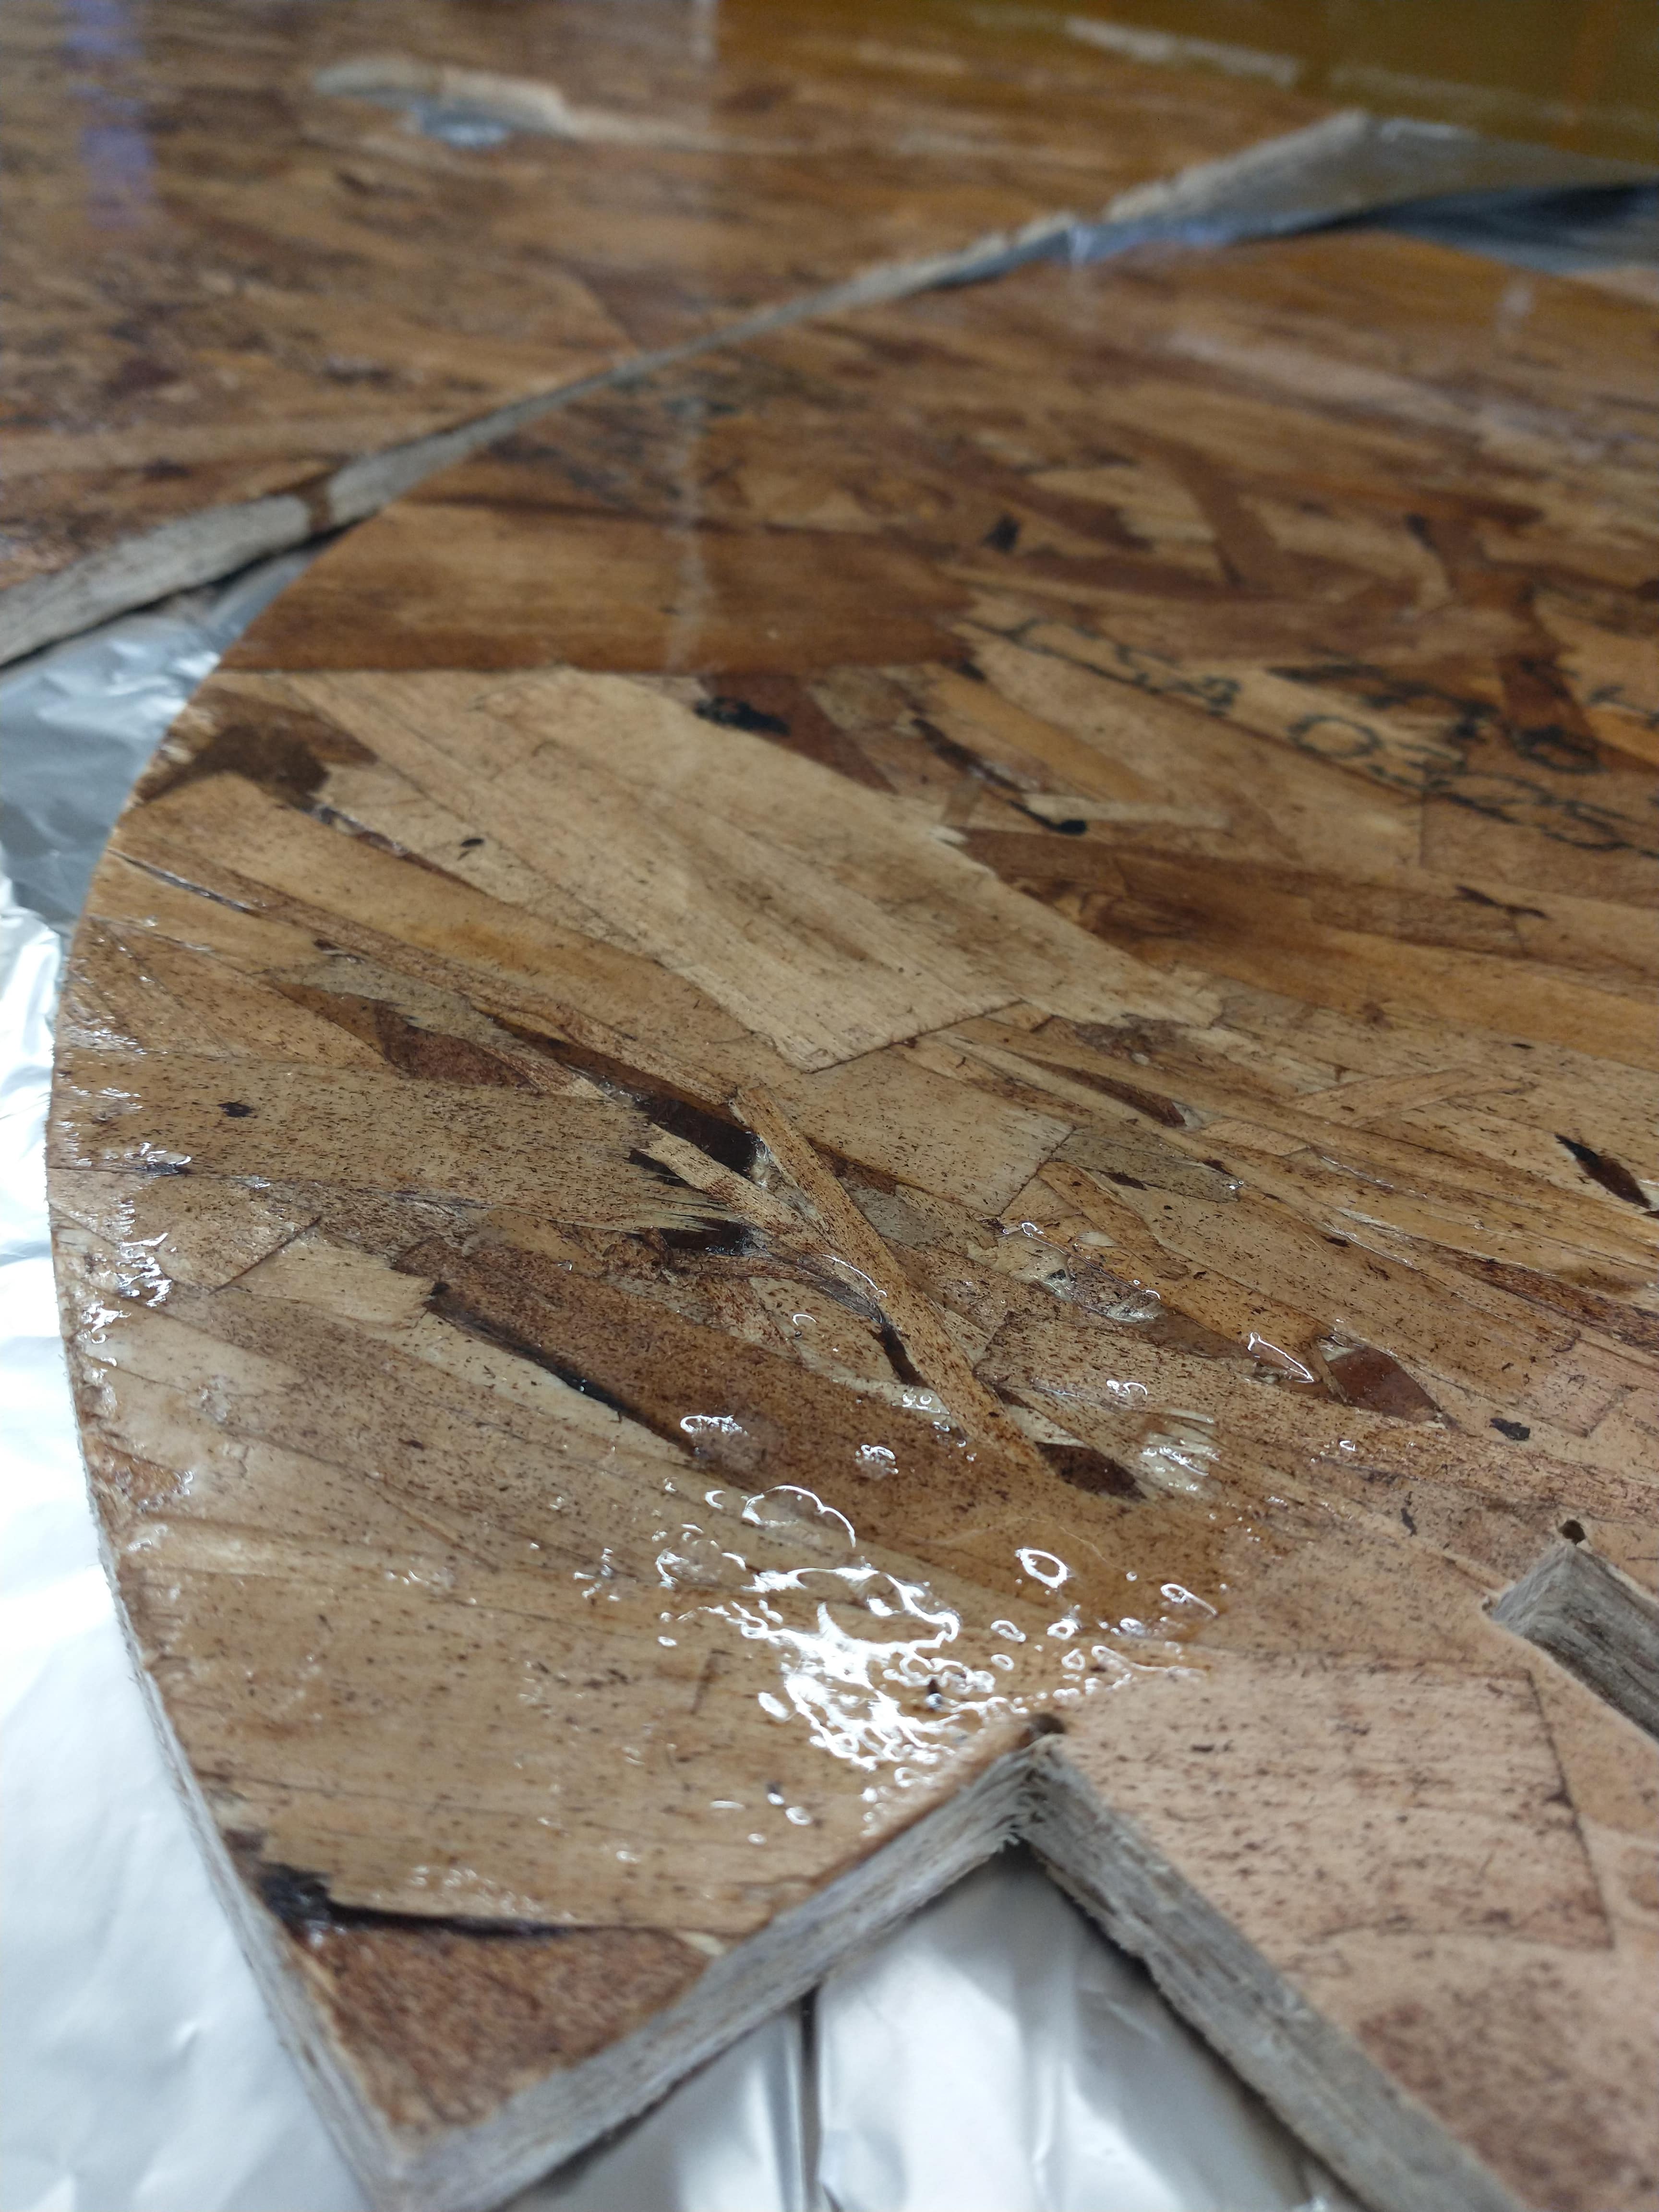
Because fabric on plushies easily stick to OSB, and I didn't want splinters every time I (dis)assembled my shelf, I wanted to finish the OSB pieces with epoxy. Anthony and I had done an epoxy test on a spare piece of wood the previous day, and I deemed the results sufficient for my purposes. To have a smoother, more even epoxy surface, I first sanded down all the surfaces of my OSB.

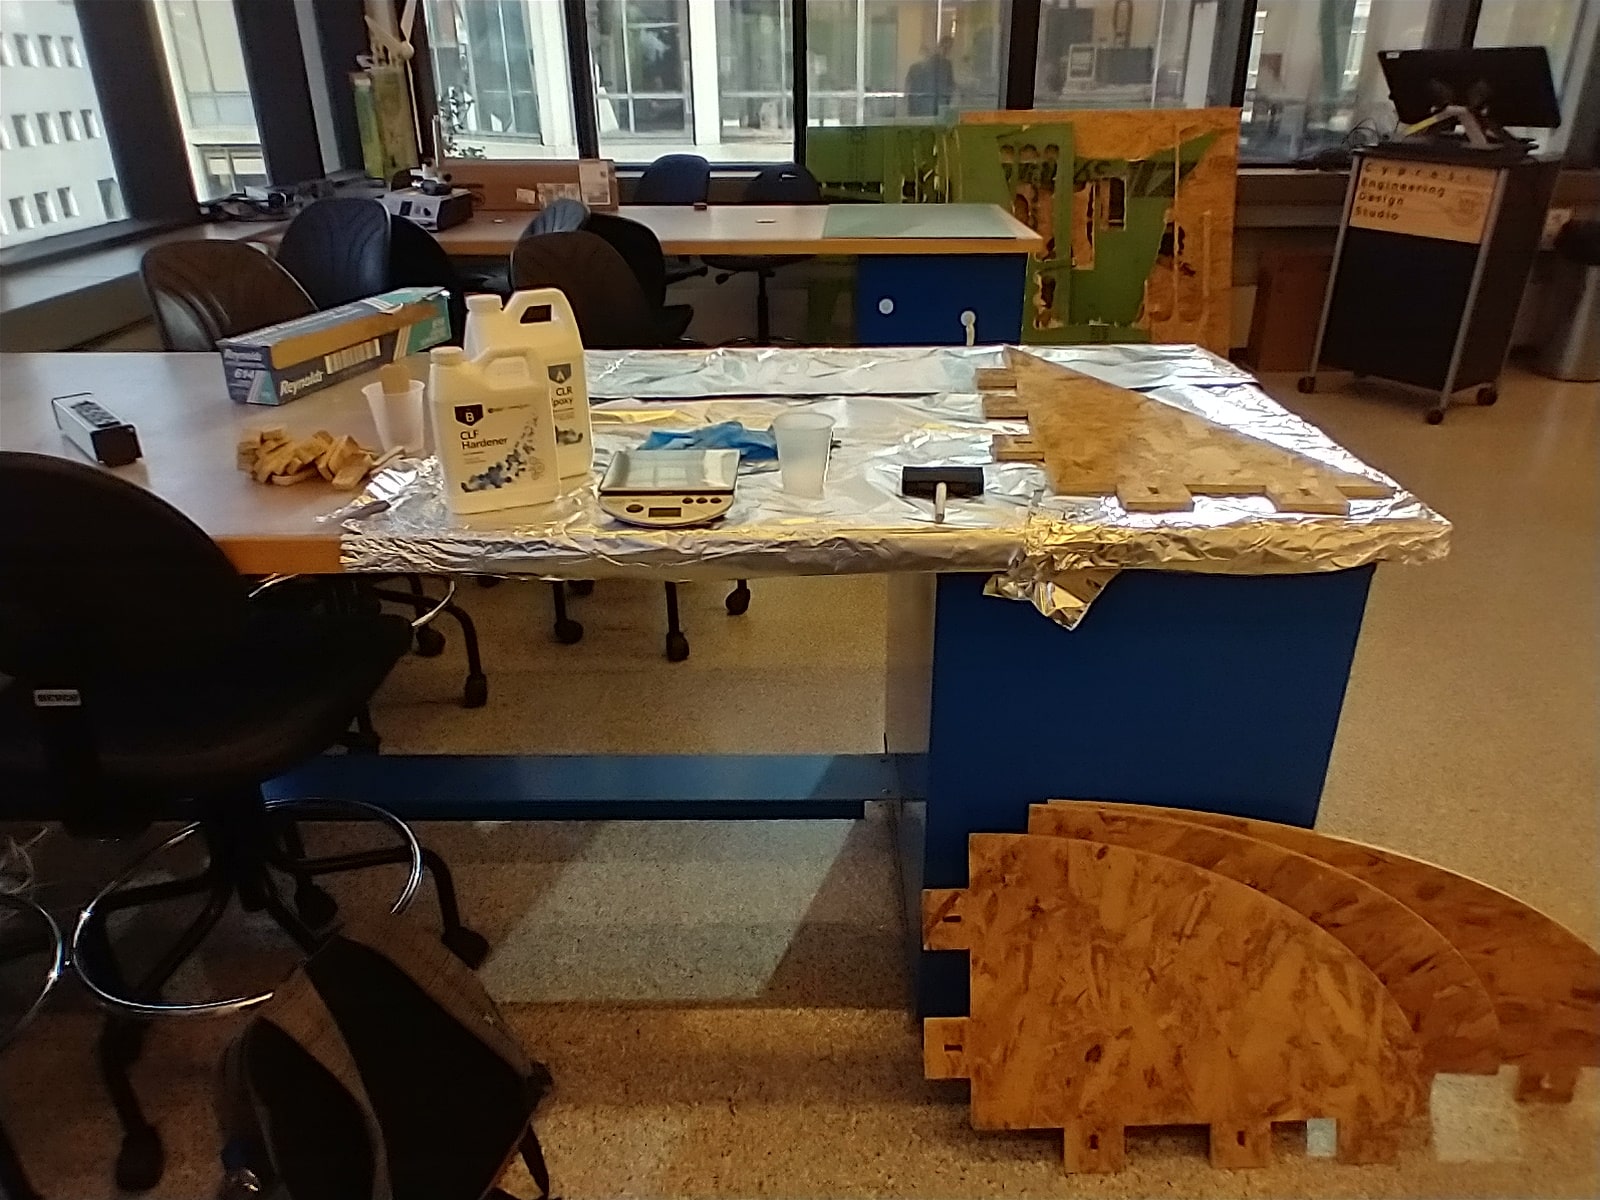
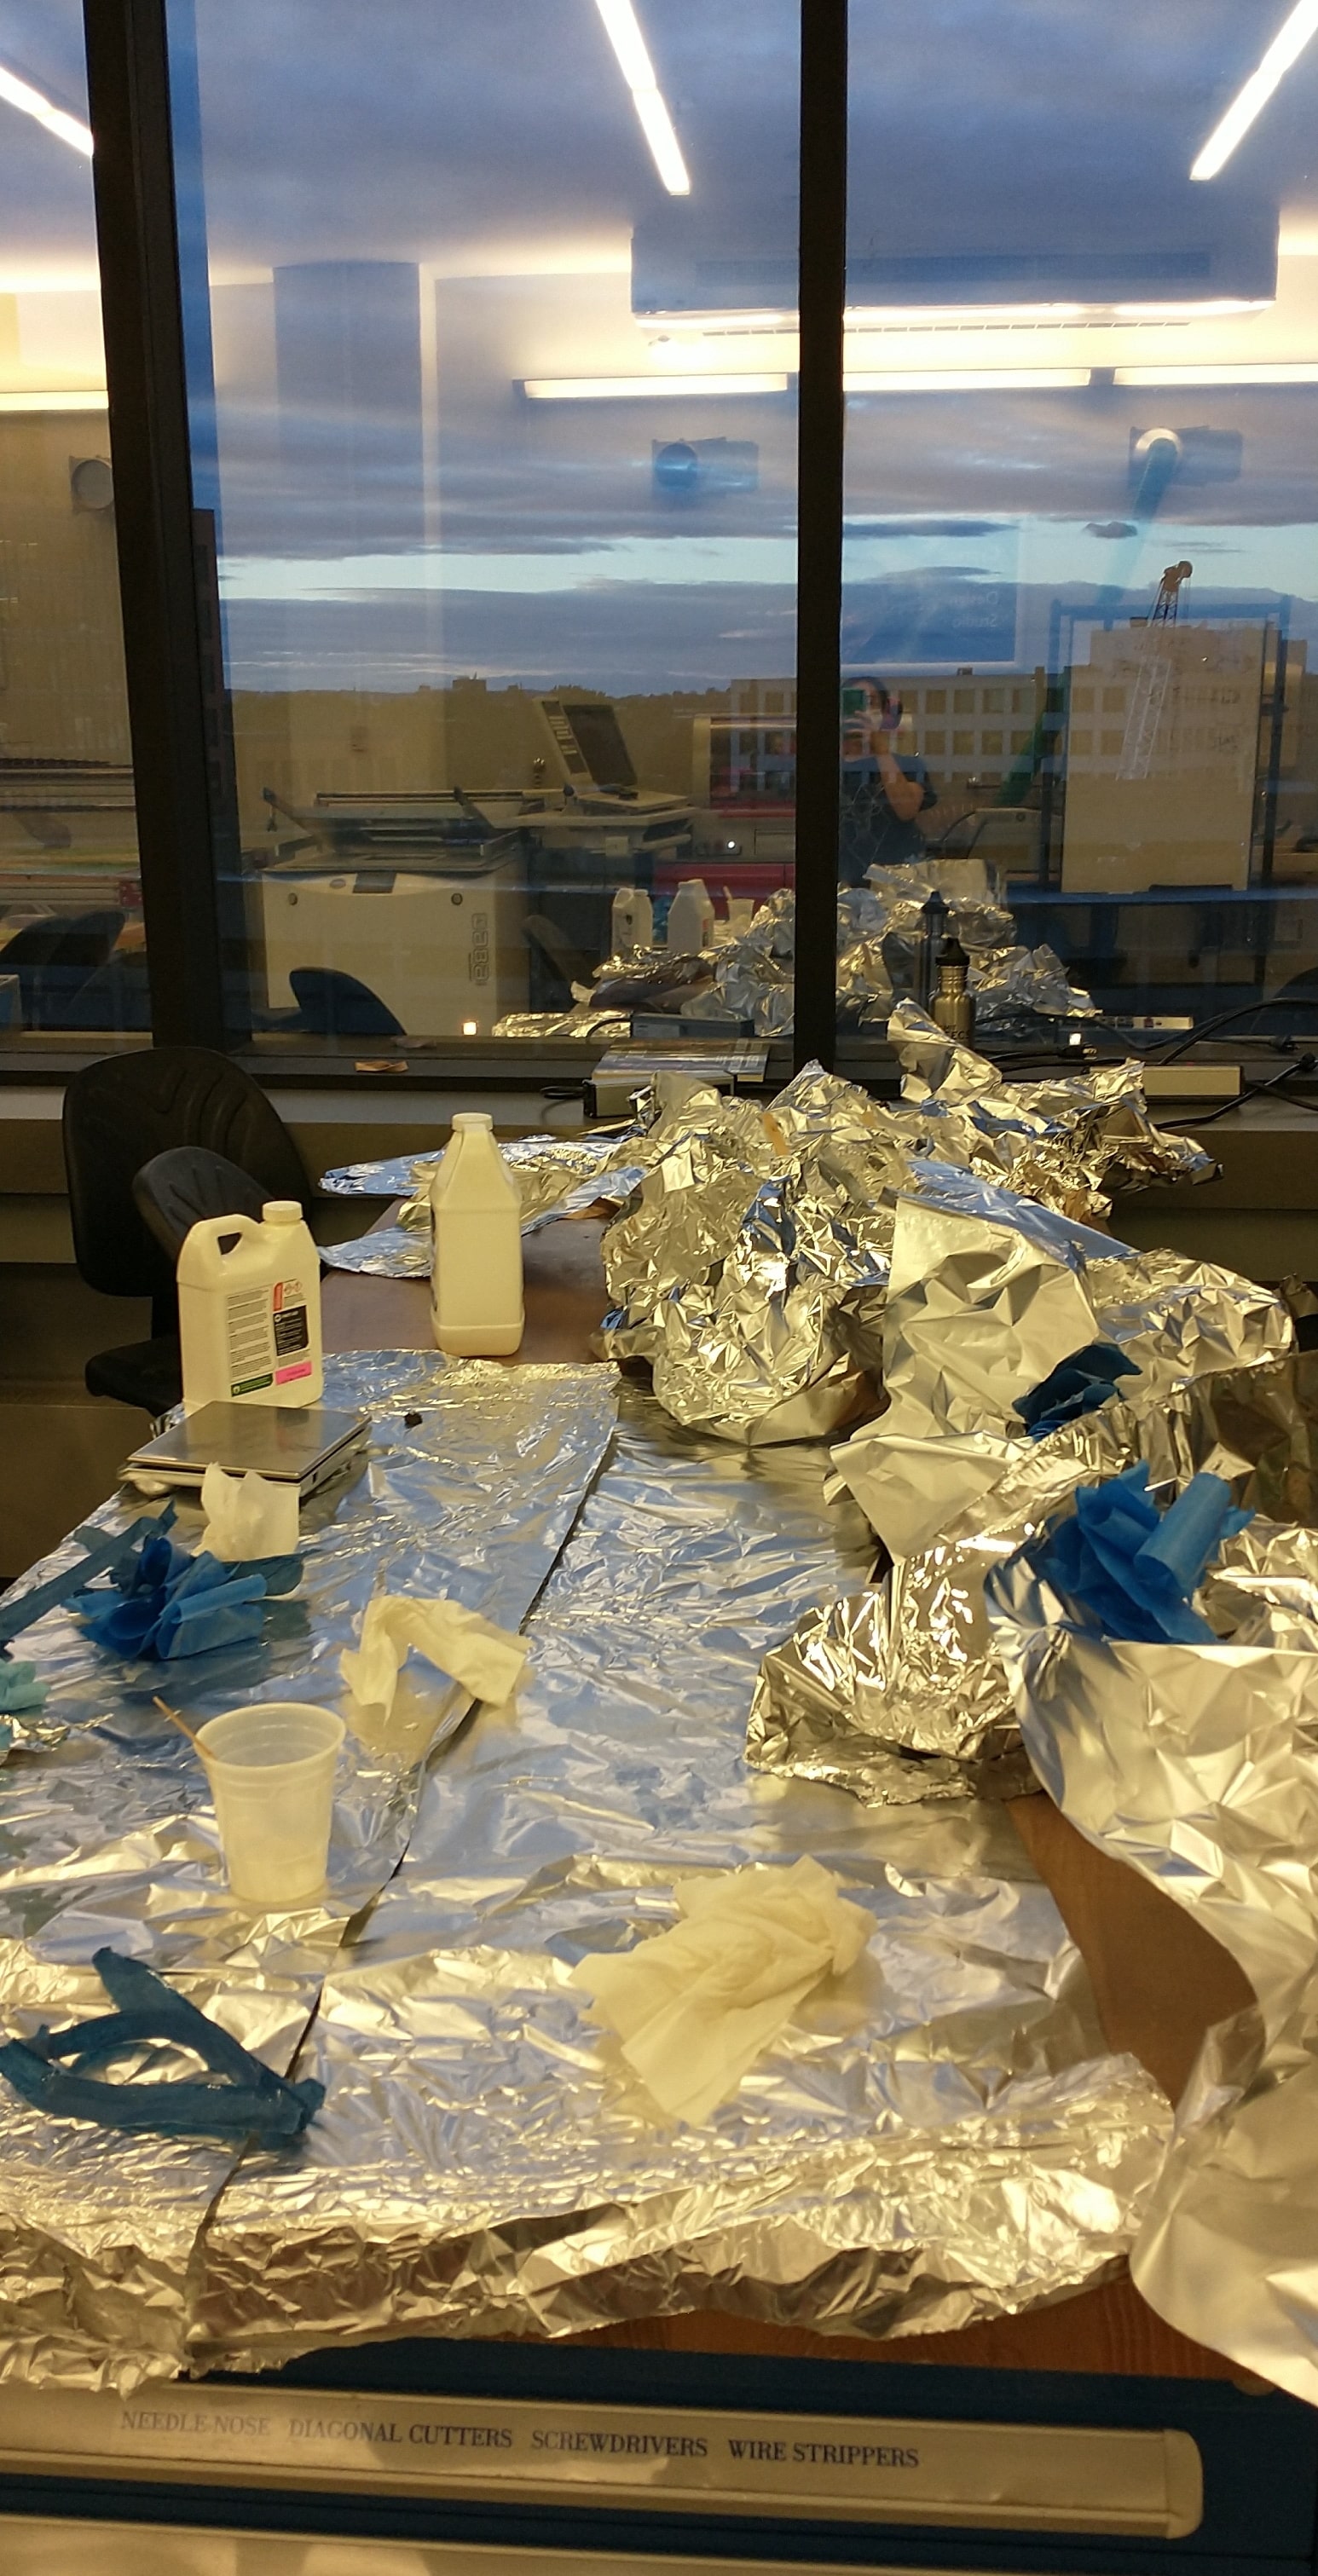
I taped all the tenons of my shelves before starting the epoxy mixing and application process. (Flashbacks to Alfonso's composites recitation.) Epoxy:hardener ratio is 2:1 by volume and 100:47 by weight.
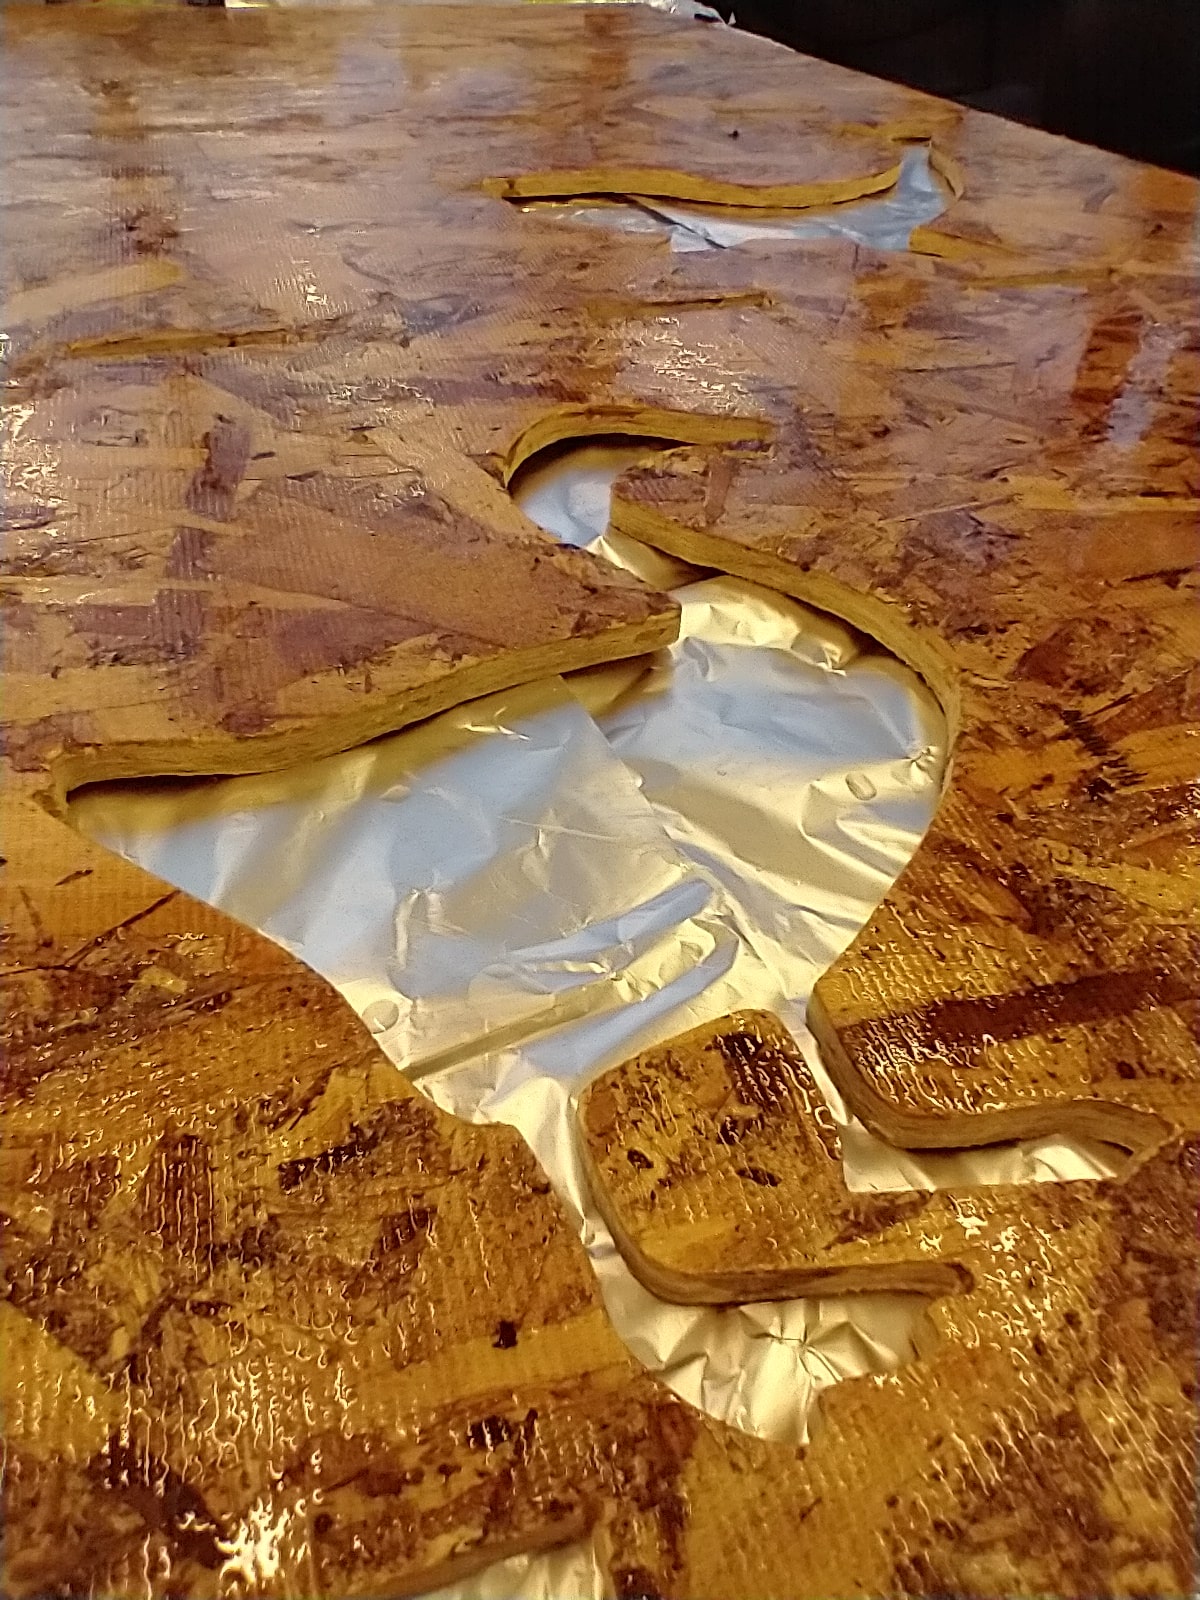

When I came by the next day, it seemed like the move was to have done a thick layer of epoxy (which I had done for my top shelf). I could've done a second layer on the rest of the shleves, but that just wasn't worth it, as all of my current layers already protect the plushies from the wood and seal the wood together.

Time to take everything home!


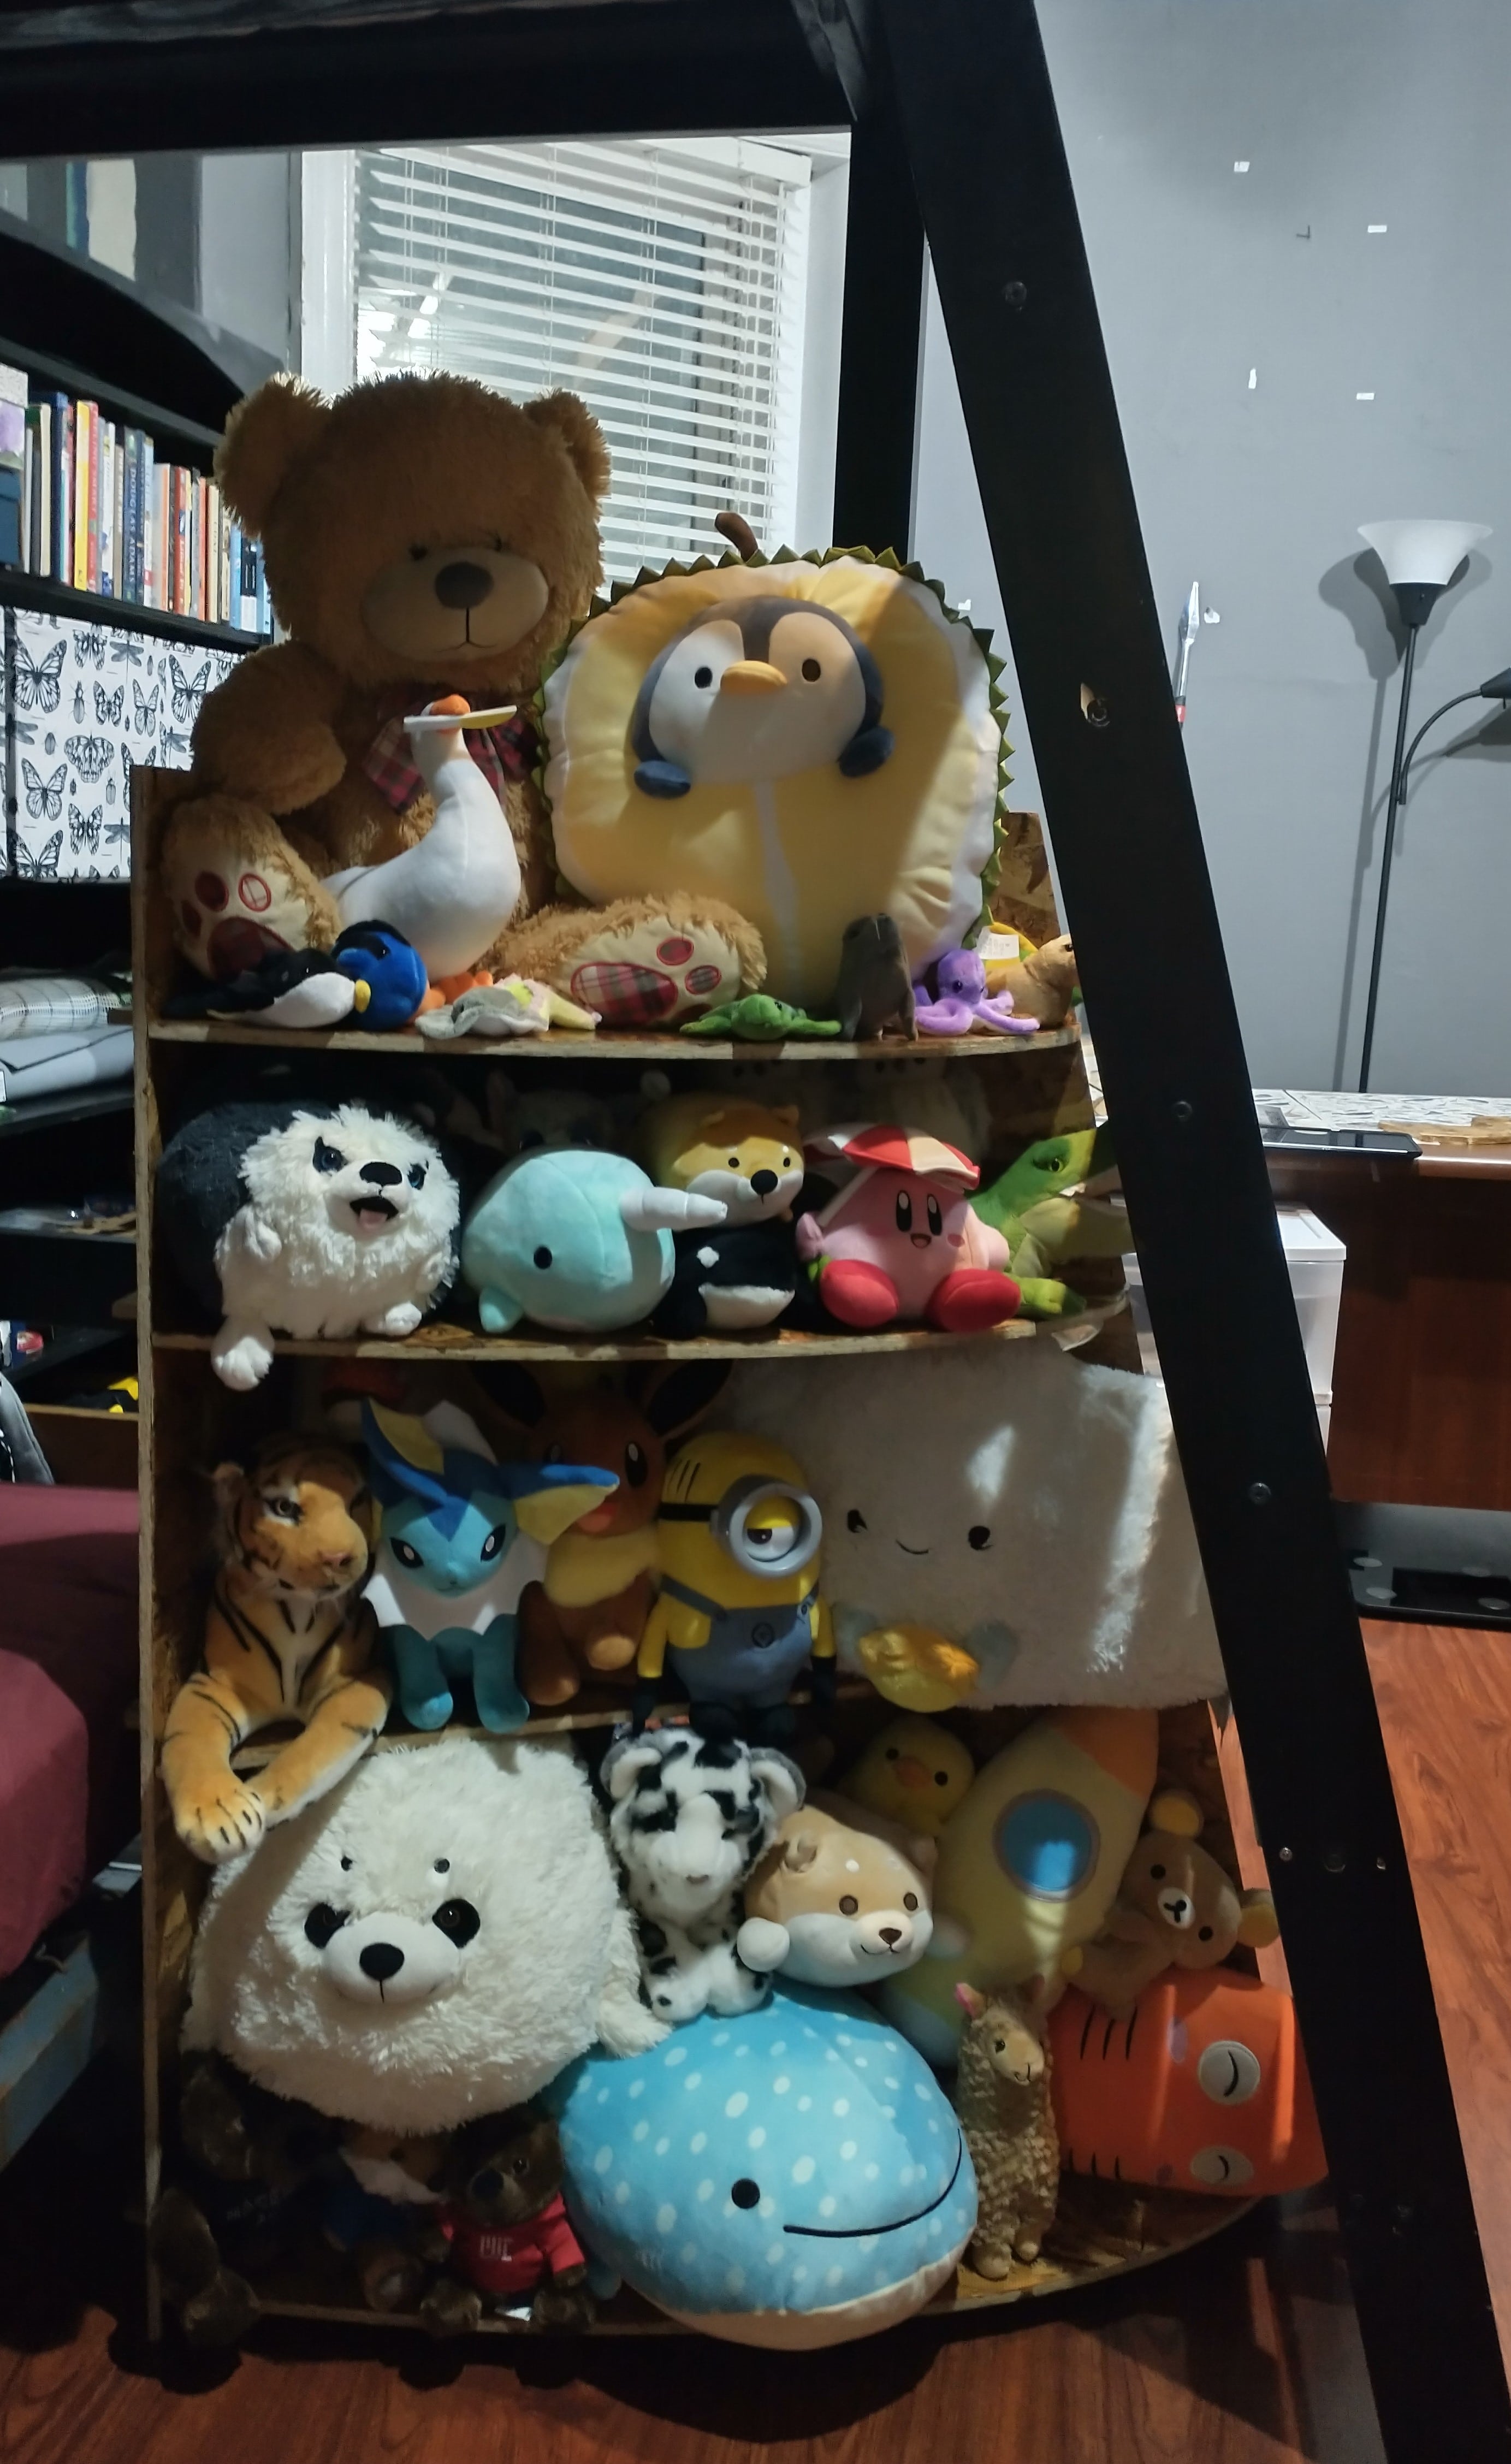
The shelf took about 10 minutes to assemble with a mallet. Anthony had mentioned that the wedges could've been an inch longer to be useful, but they worked pretty well, especially for the bottom shelf.


The shelf assembled beautifully, exactly as planned. I'm very glad I spent so much time the other night making sure all the pieces fit together easily. The shelf fits in its intended space, and even though the shelf isn't as tall as I originally wanted it to be (46 in vs 66 in), I was very surprised to find that all of my plushies made it on.

and a bonus picture!
Massive thanks to Calvin for all the machining help! Thanks to Alec for risking life and limb to take a top-down photo for me, Solomon for helping me rasp, and Harrison and the rest of my section for CAD questions and moral support. Thanks to Ramon for helping me assemble my shelf, to the random people in Building 38 who helped me open doors, to Anthony's cart for not breaking in our 3-4 mi total journey, and of course to Anthony for all of his advice and support.