Week 11:
Networking
ESP32 and google sheet?
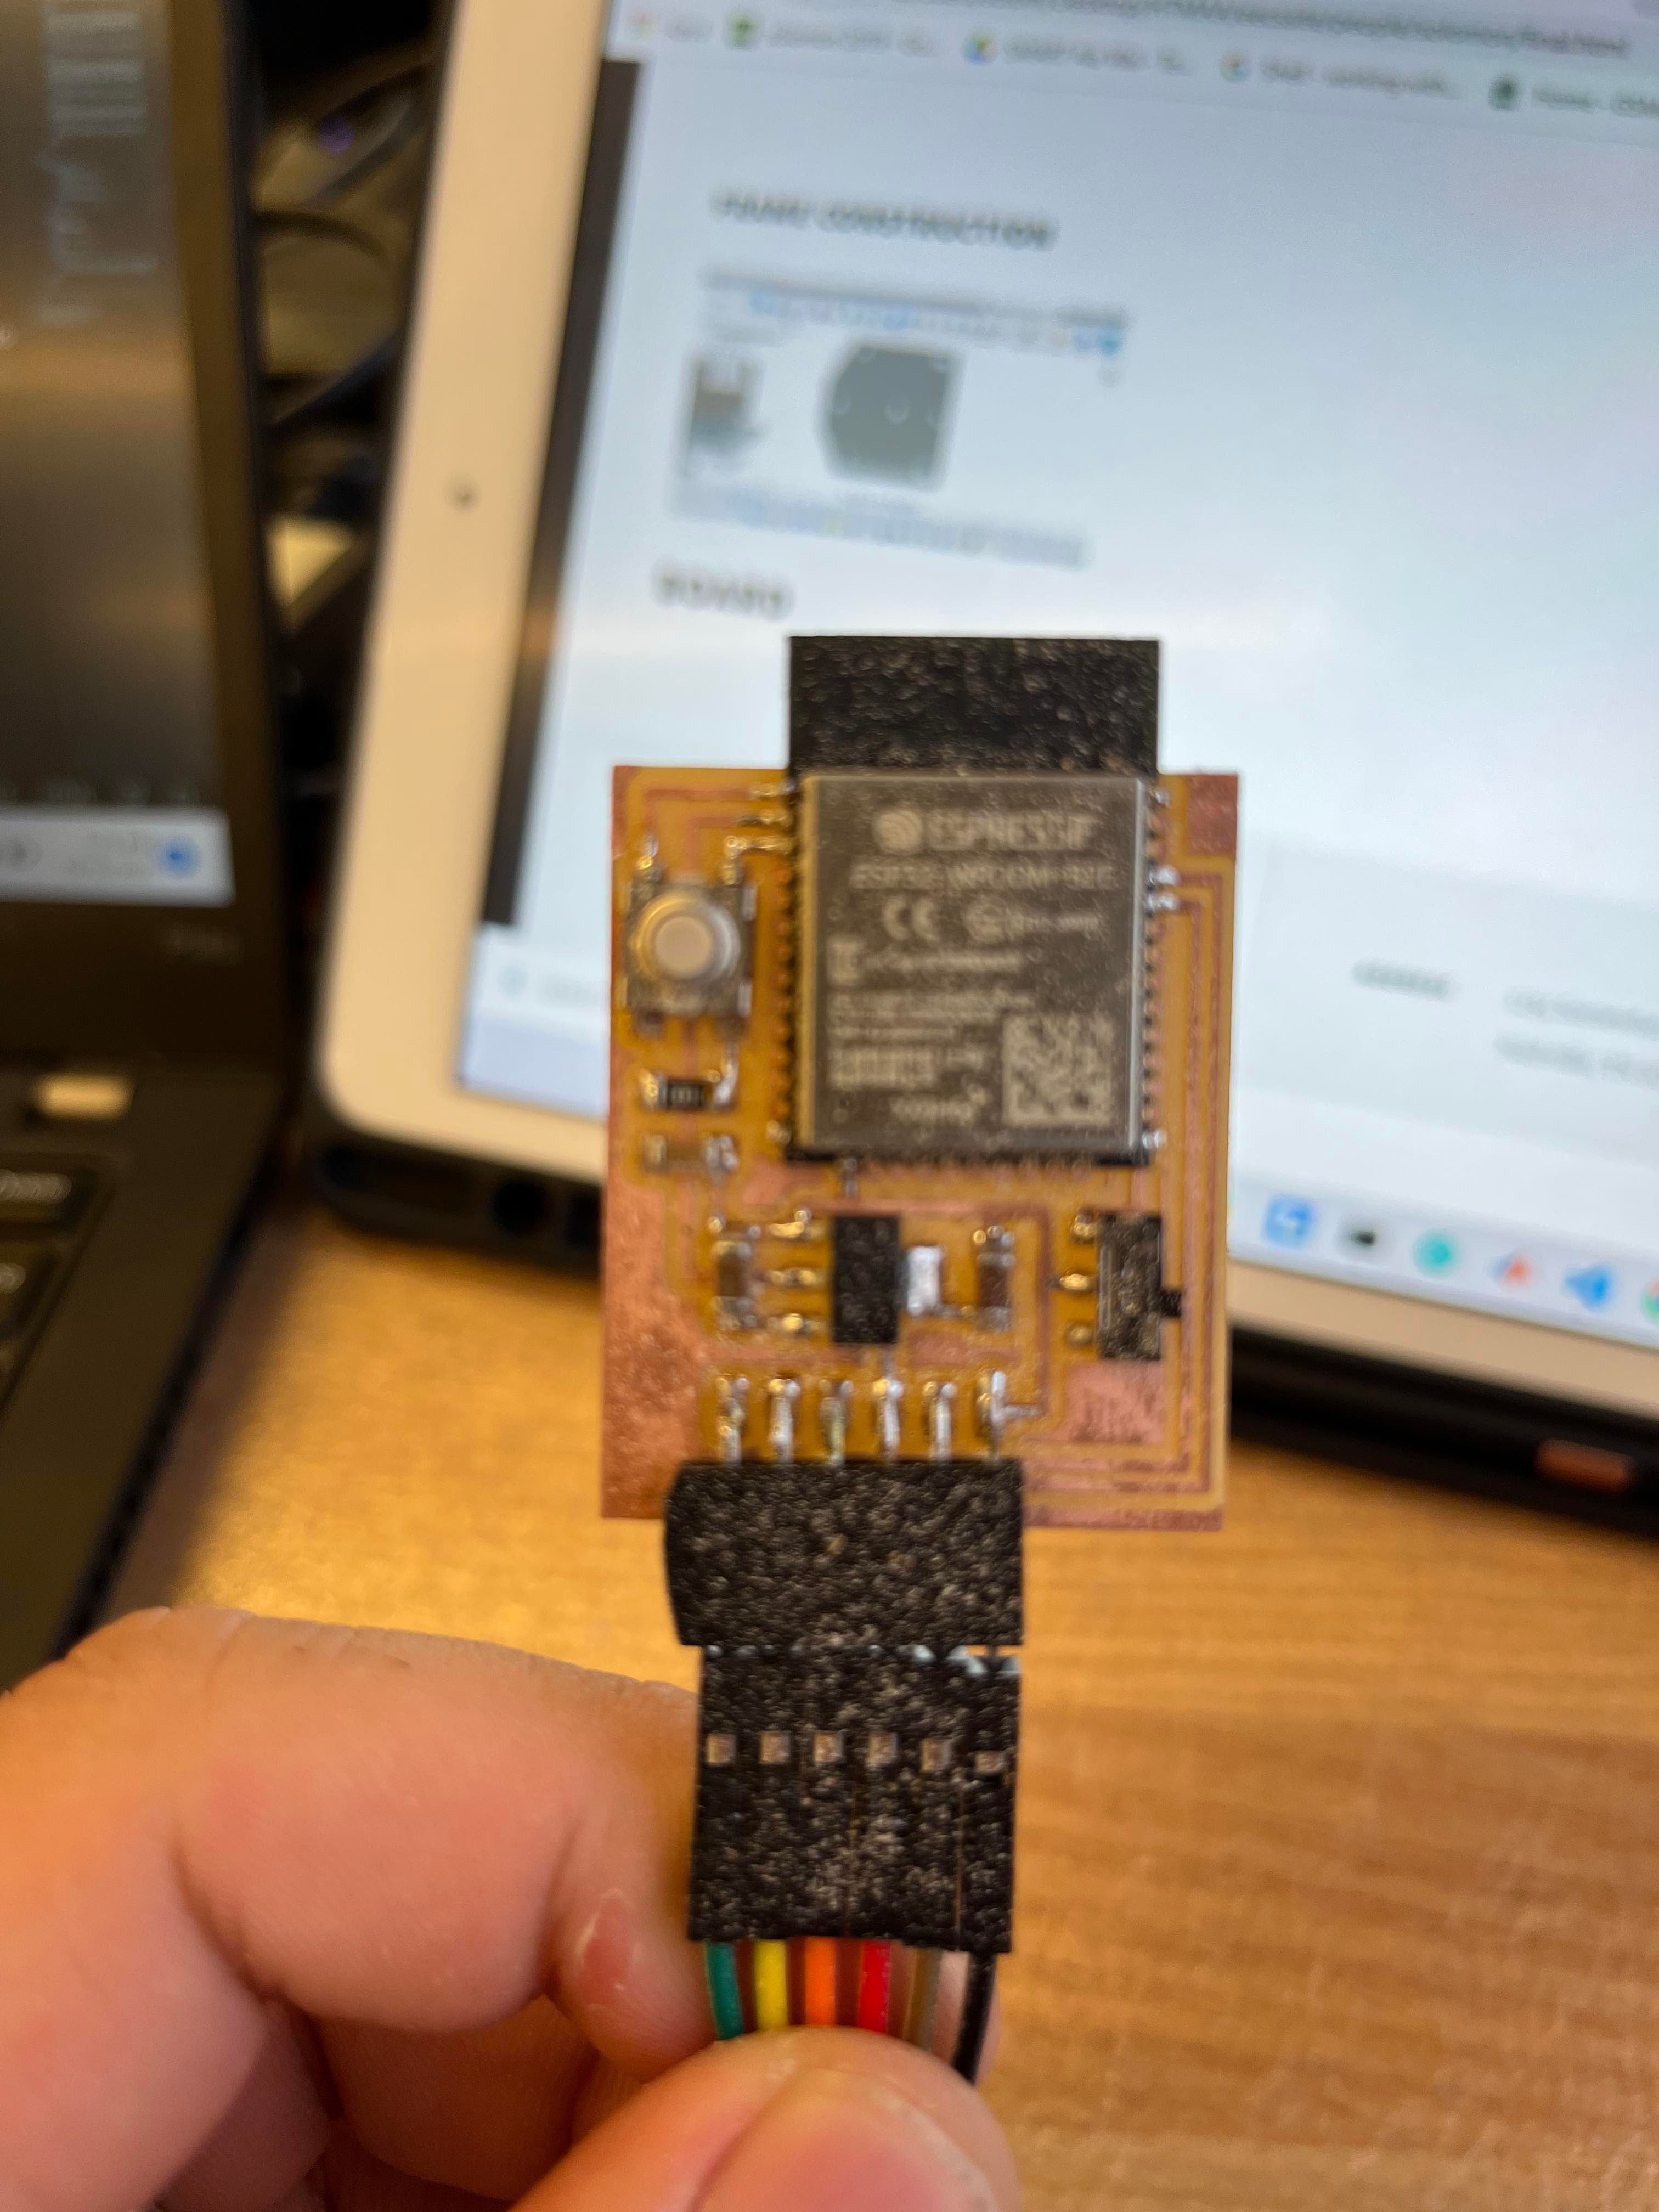
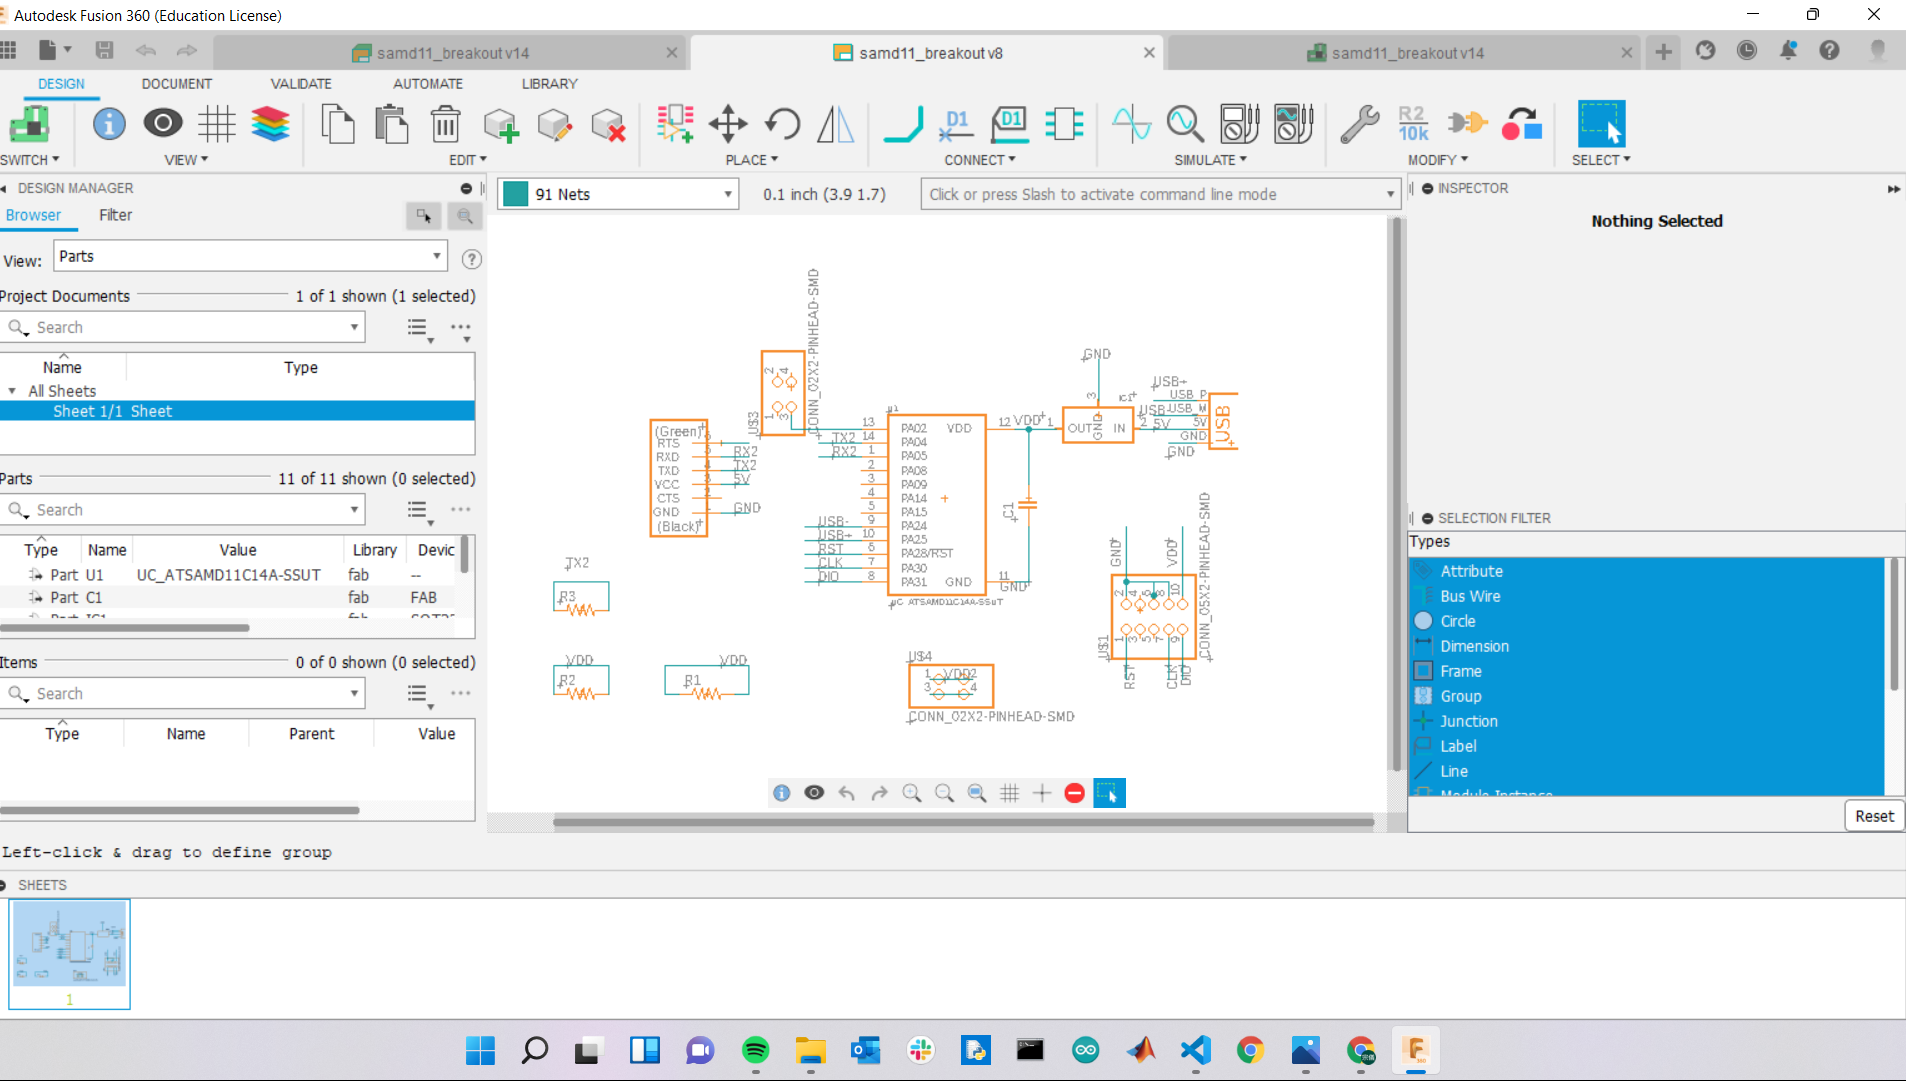
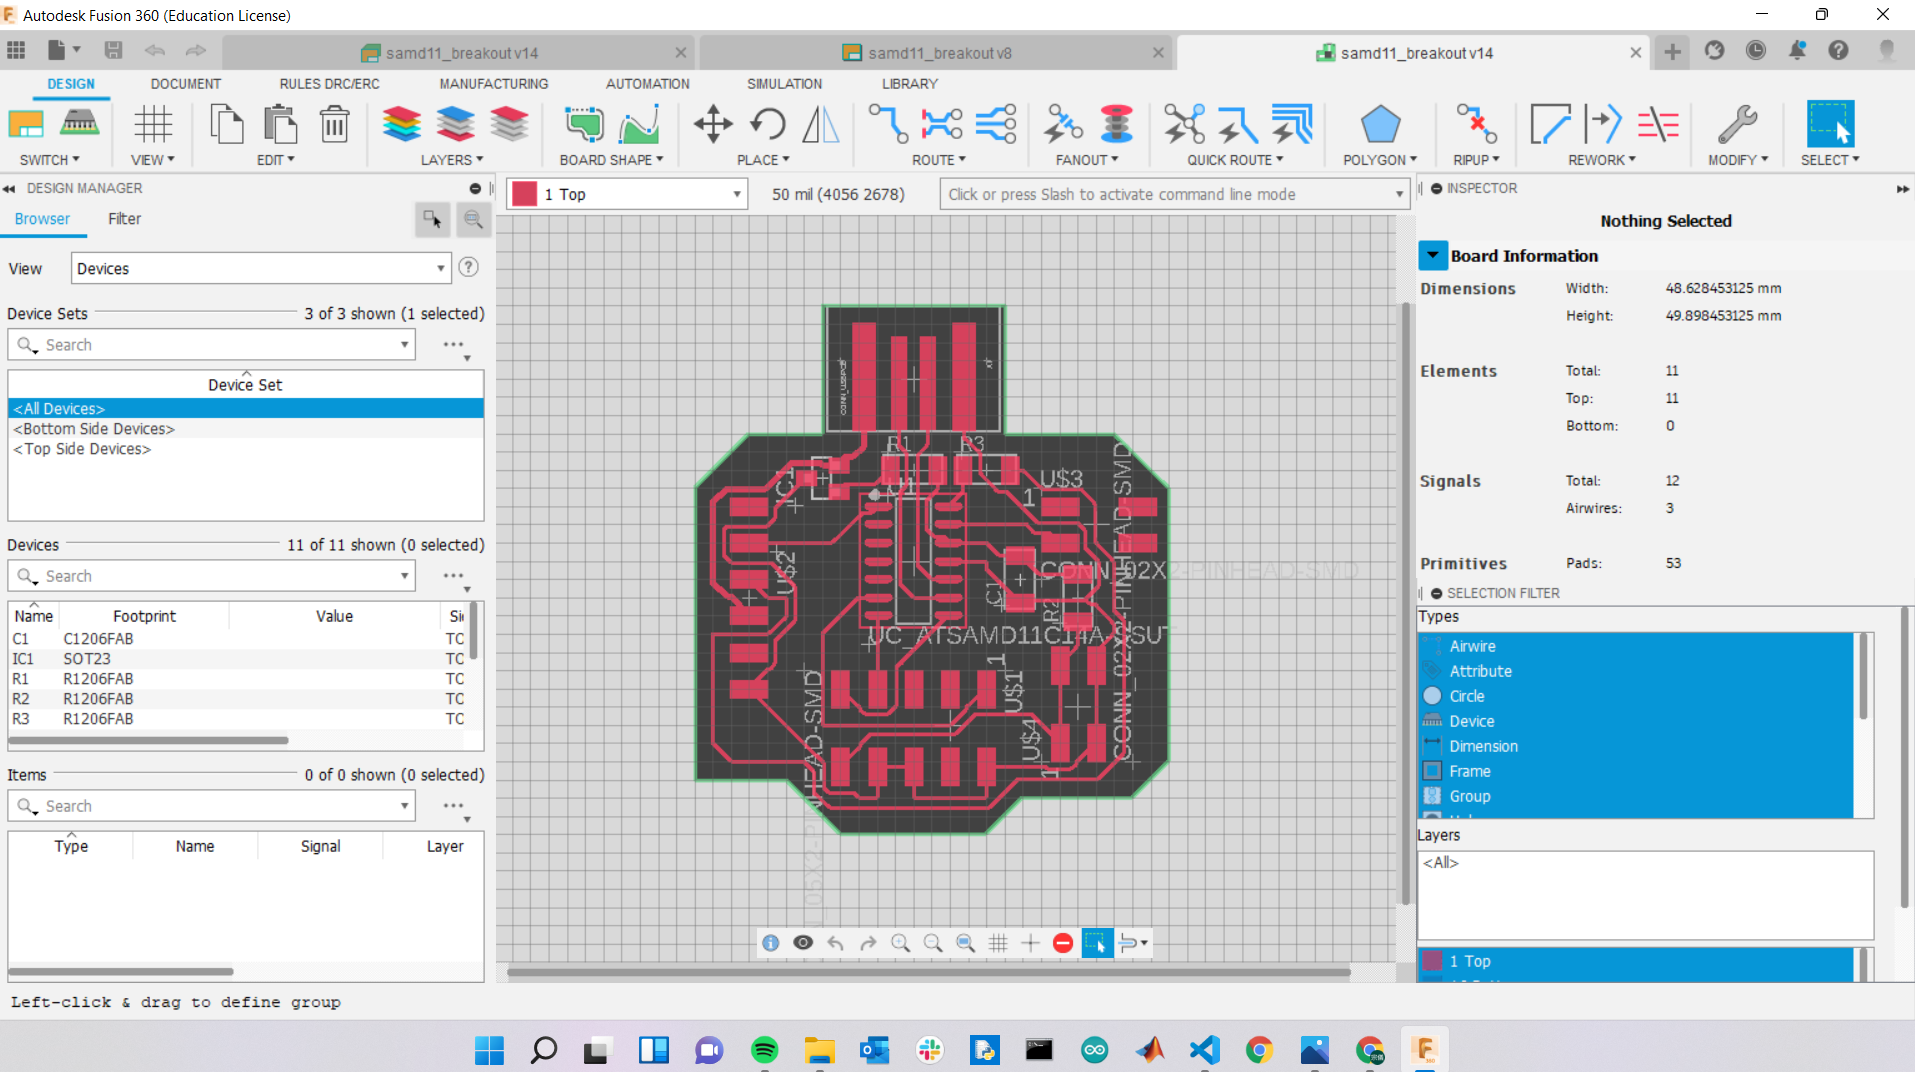
I am stuck writing a proposal this week, so this is very minimal but cool stuff to get esp32 to talk to the Wifi and trigger actions using webhook services. I understand that I technically need to make my own board, but I opt for Neil's hello world esp32 for the wifi component of this week's assignment. I also designed another board that it can talk via serial communication and take data from. This auxilary board will is designed with a SAMD11, breaking out most of the pins for development purpose. See images below:
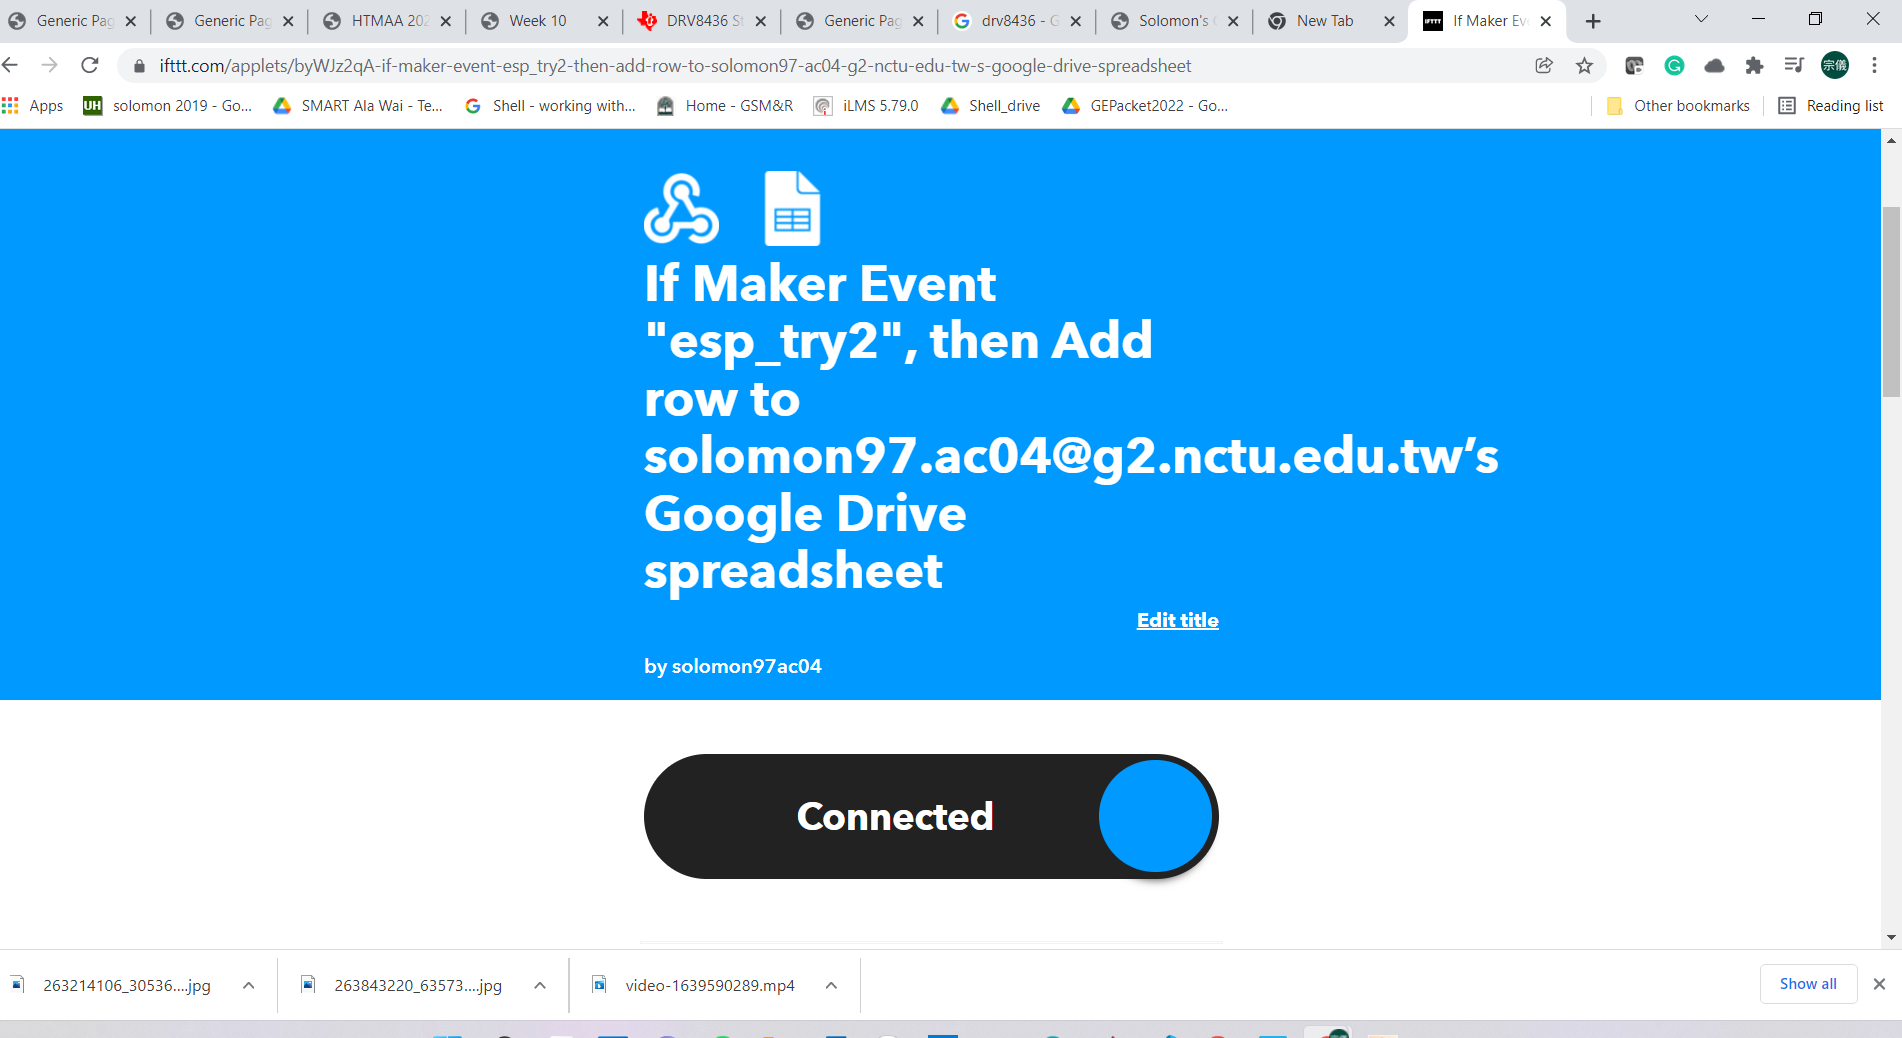
Afterward, I stuffed the esp32 hello world and used it for wifi communications. There were two options, sending data onto a server or utilize webhook to trigger actions and upload data onto a google sheets. Here is a tutorial I found. I chosed this to avoid the trouble to set up a server at the moment, but it's something I would want to try eventualy. By following the tutorial, I set up the applet for this assignment. Whenever esp32 makes a http request, the ifttt applet will than post my string object onto the targeted google sheet. This is what it looks like:
I pulled this code off from here and modified it to match with my wifi requirements. Note that esp32 only works with 2.4GHz, not with 5GHz. I had to re-configure my router to have esp32 connect to it properly. At the moment, it is just sending random numbers generated by the microcontroller. Here is the code:
                                    /*
 * Rui Santos
 * Complete Project Details https://randomnerdtutorials.com
 */

#ifdef ESP32
  #include
#else
  #include
#endif

#include
//#include
//#include

// Replace with your SSID and Password
const char* ssid     = "xxx";
const char* password = "zzz";

// Replace with your unique IFTTT URL resource
const char* resource = "/trigger/esp_whatev/with/key/lGK7aKcn9OWaue_fQRITCnbIYMOtxud7weBWvDjqr_-";

// How your resource variable should look like, but with your own API KEY (that API KEY below is just an example):
//const char* resource = "/trigger/bme280_readings/with/key/nAZjOphL3d-ZO4N3k64-1A7gTlNSrxMJdmqy3";

// Maker Webhooks IFTTT
const char* server = "maker.ifttt.com";

// Time to sleep
uint64_t uS_TO_S_FACTOR = 1000000;  // Conversion factor for micro seconds to seconds
// sleep for 30 minutes = 1800 seconds
uint64_t TIME_TO_SLEEP = 180;

// Uncomment to use BME280 SPI
/*#include
#define BME_SCK 13
#define BME_MISO 12
#define BME_MOSI 11
#define BME_CS 10*/

#define SEALEVELPRESSURE_HPA (1013.25)

//Adafruit_BME280 bme; // I2C
//Adafruit_BME280 bme(BME_CS); // hardware SPI
//Adafruit_BME280 bme(BME_CS, BME_MOSI, BME_MISO, BME_SCK); // software SPI

void setup() {
  Serial.begin(115200);
  Serial.println("starting up");
  delay(2000);

//  // initialize BME280 sensor
//  bool status;
//  status = bme.begin(0x76);
//  if (!status) {
//    Serial.println("Could not find a valid BME280 sensor, check wiring!");
//    while (1);
//  }

  initWifi();
  makeIFTTTRequest();

//  #ifdef ESP32
//    // enable timer deep sleep
//    esp_sleep_enable_timer_wakeup(TIME_TO_SLEEP * uS_TO_S_FACTOR);
//    Serial.println("Going to sleep now");
//    // start deep sleep for 3600 seconds (60 minutes)
//    esp_deep_sleep_start();

//  #else
//    // Deep sleep mode for 3600 seconds (60 minutes)
//    Serial.println("Going to sleep now");
//    ESP.deepSleep(TIME_TO_SLEEP * uS_TO_S_FACTOR);
//  #endif
}

void loop() {
  Serial.println("Im doing it");
  initWifi();
  makeIFTTTRequest();
  Serial.println("Im done doing it");
  delay(60000);
}

// Establish a Wi-Fi connection with your router
void initWifi() {
  Serial.print("Connecting to: ");
  Serial.print(ssid);
  WiFi.begin(ssid, password);

  int timeout = 10 * 4; // 10 seconds
  while(WiFi.status() != WL_CONNECTED  && (timeout-- > 0)) {
    delay(250);
    Serial.print(".");
  }
  Serial.println("");

  if(WiFi.status() != WL_CONNECTED) {
     Serial.println("Failed to connect, going back to sleep");
  }

  Serial.print("WiFi connected in: ");
  Serial.print(millis());
  Serial.print(", IP address: ");
  Serial.println(WiFi.localIP());
}

// Make an HTTP request to the IFTTT web service
void makeIFTTTRequest() {
  Serial.print("Connecting to ");
  Serial.print(server);

  WiFiClient client;
  int retries = 5;
  while(!!!client.connect(server, 80) && (retries-- > 0)) {
    Serial.print(".");
  }
  Serial.println();
  if(!!!client.connected()) {
    Serial.println("Failed to connect...");
  }

  Serial.print("Request resource: ");
  Serial.println(resource);

  // Temperature in Celsius
  String jsonObject = String("{\"value1\":\"") + random(0,100) + "\",\"value2\":\"" + (random(0,100)/100.0F)
                      + "\",\"value3\":\"" + random(0,100) + "\"}";

  // Comment the previous line and uncomment the next line to publish temperature readings in Fahrenheit
  /*String jsonObject = String("{\"value1\":\"") + (1.8 * bme.readTemperature() + 32) + "\",\"value2\":\""
                      + (bme.readPressure()/100.0F) + "\",\"value3\":\"" + bme.readHumidity() + "\"}";*/

  client.println(String("POST ") + resource + " HTTP/1.1");
  client.println(String("Host: ") + server);
  client.println("Connection: close\r\nContent-Type: application/json");
  client.print("Content-Length: ");
  client.println(jsonObject.length());
  client.println();
  client.println(jsonObject);

  int timeout = 5 * 10; // 5 seconds
  while(!!!client.available() && (timeout-- > 0)){
    delay(100);
  }
  if(!!!client.available()) {
    Serial.println("No response...");
  }
  while(client.available()){
    Serial.write(client.read());
  }

  Serial.println("\nclosing connection");
  client.stop();
}
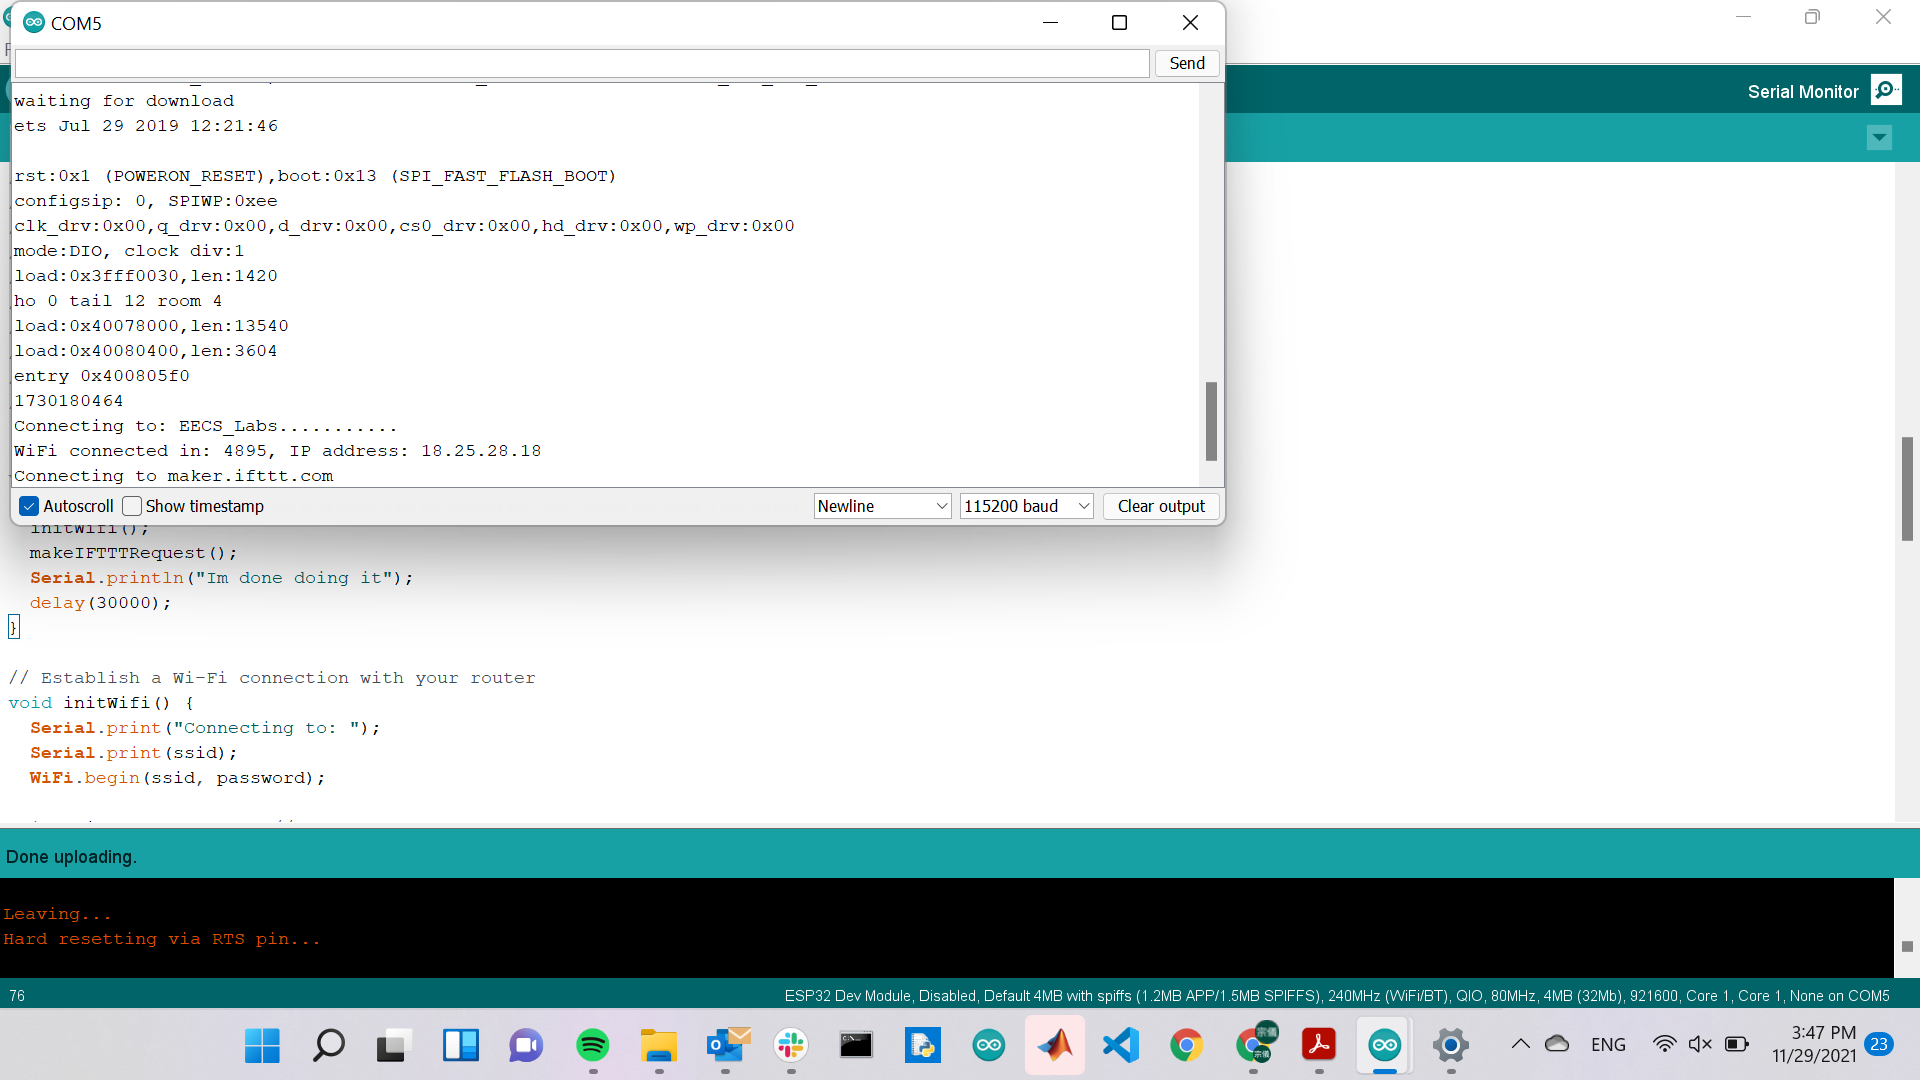
The wifi function actually comes at the end of the code, using Arduino Wifi library. It is pretty straight to initiate a wifi connections. After wifi connection is established, I can trigger HTTP requests by using client.println to post my strings to my google sheet. Here's what the serial command prompt looks like:
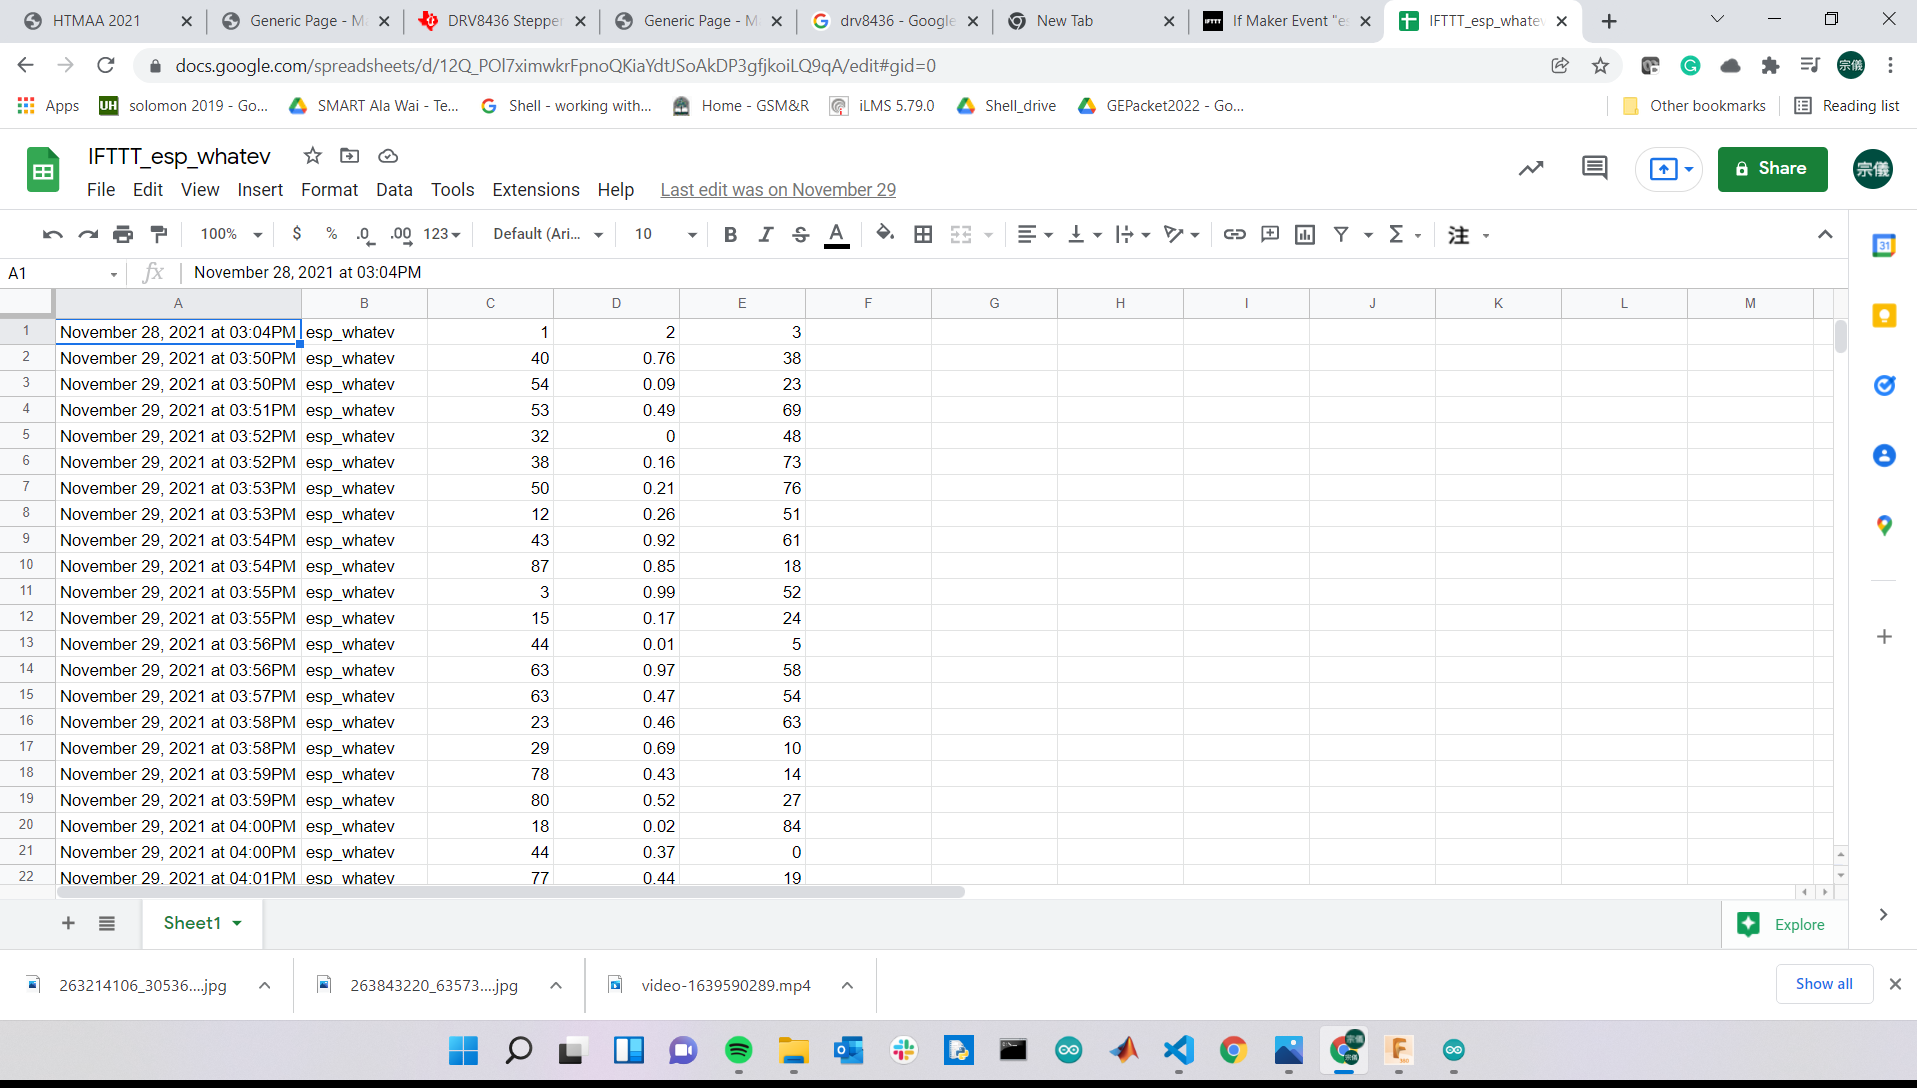
I modified the code to send a line over every 30 seconds, this is the results:
My design is linked here. (Note: this turned out to have a flaw, see 5V backup issue in the descriptions.)
Today I Learned:
1) I need to set up a home server using an RPi someday.