Important Data:
Credit to Rima, Dave, and Katherine -- they did beautifully on characterizing the milling process therefore the designing rules.
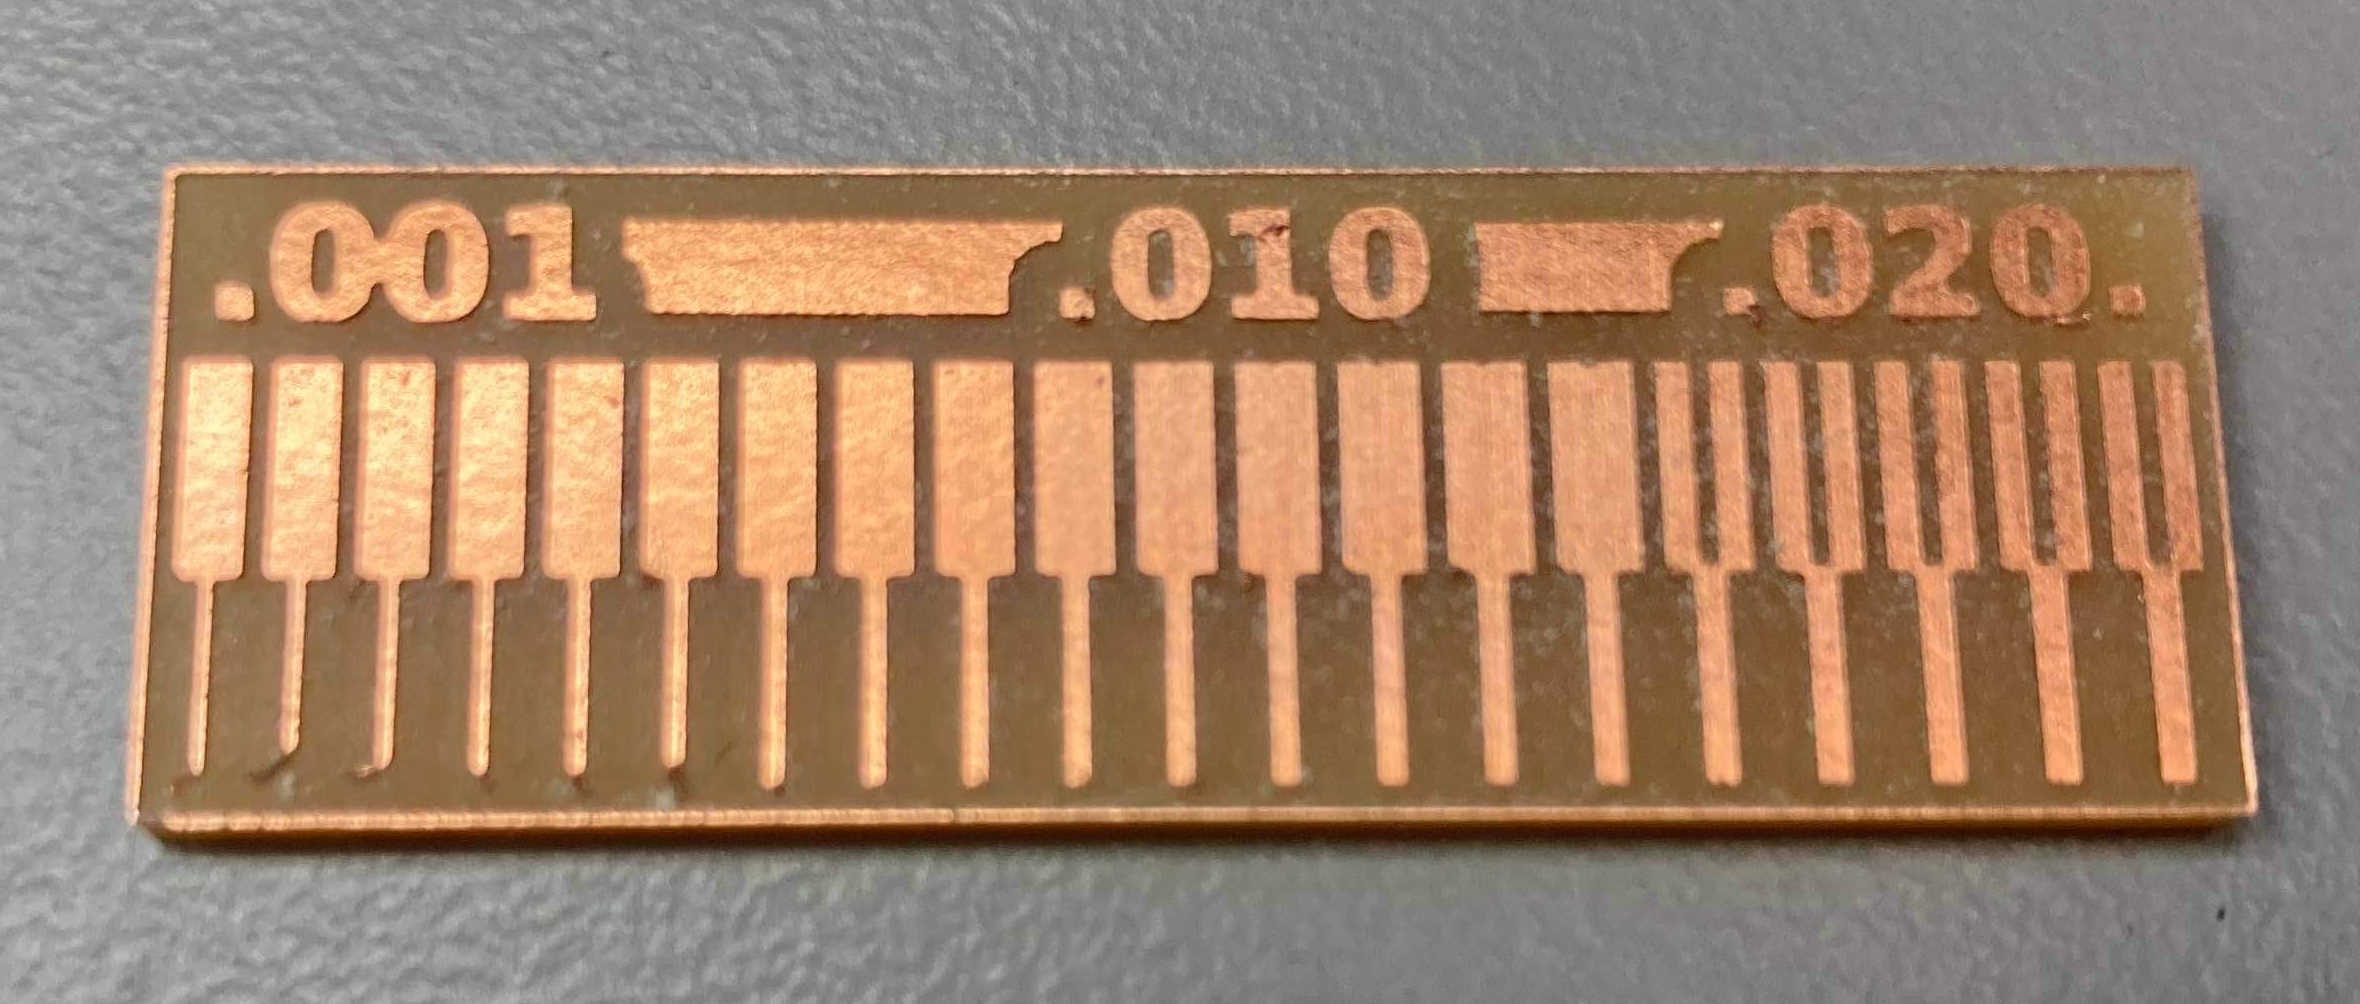
The picture shows how thin the trace can be, how tight the corners are, and where the dimension starts to affect the milling. We use Roland for this.
0.18 here is pretty good. Here is a cool picture for that.
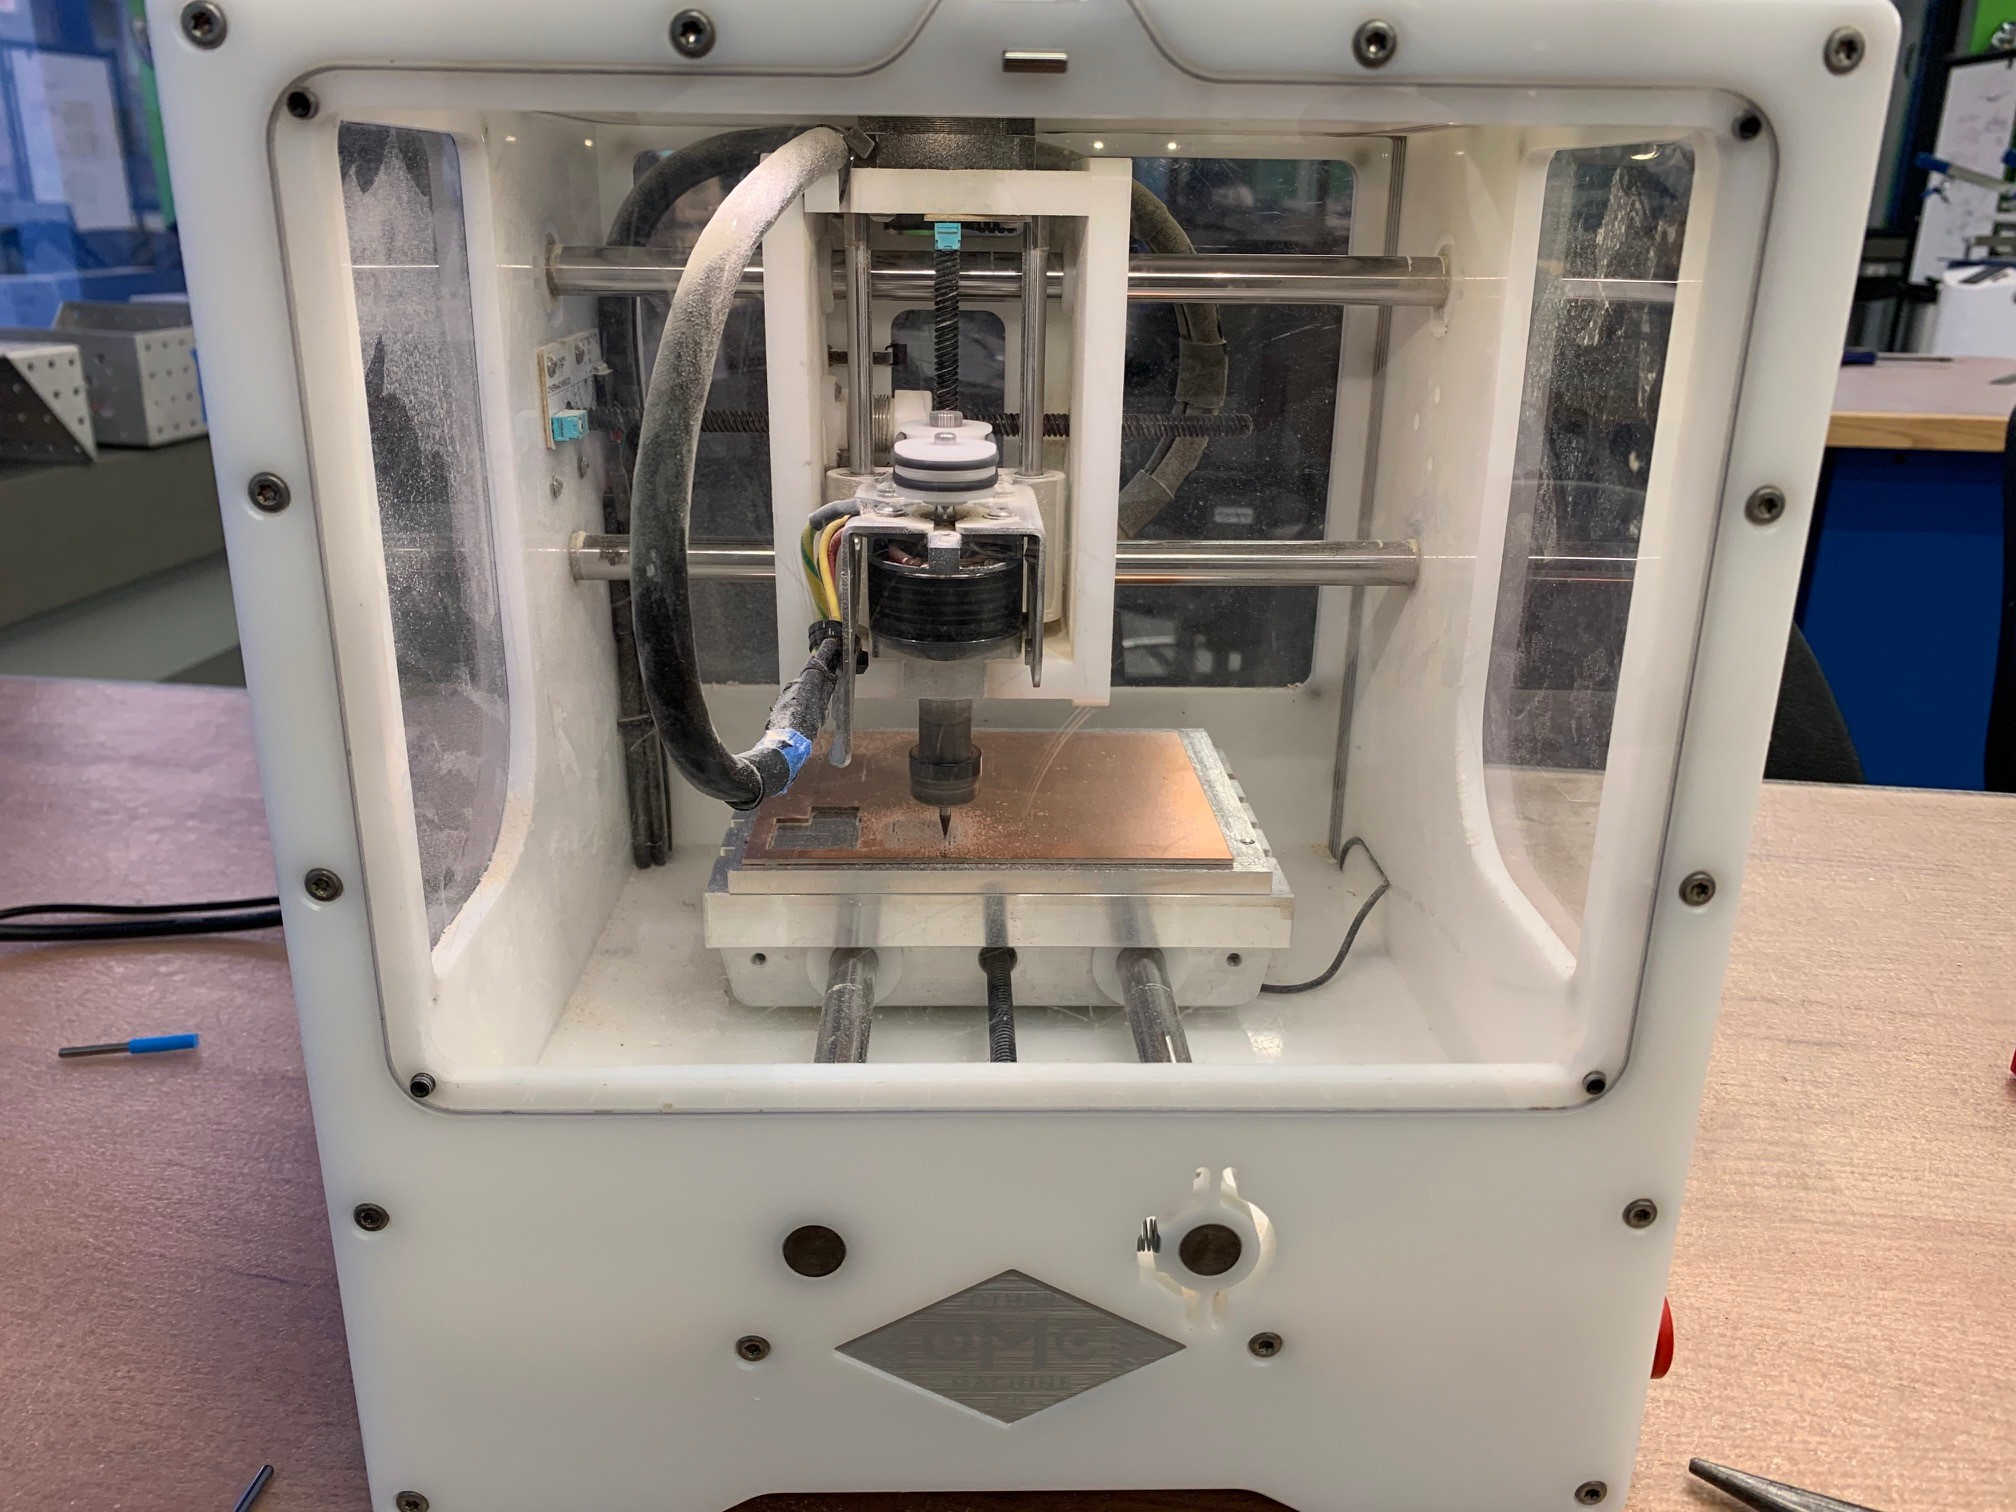
Milling the PCB wasn't all that complicated. Just make sure you have the outline file and trace tile ready in gerber, check end mill, and homing the mill correctly.
If you need to load new stock, make sure to get the thickness of the stock and adhesive. Once you're all set, just press start milling!
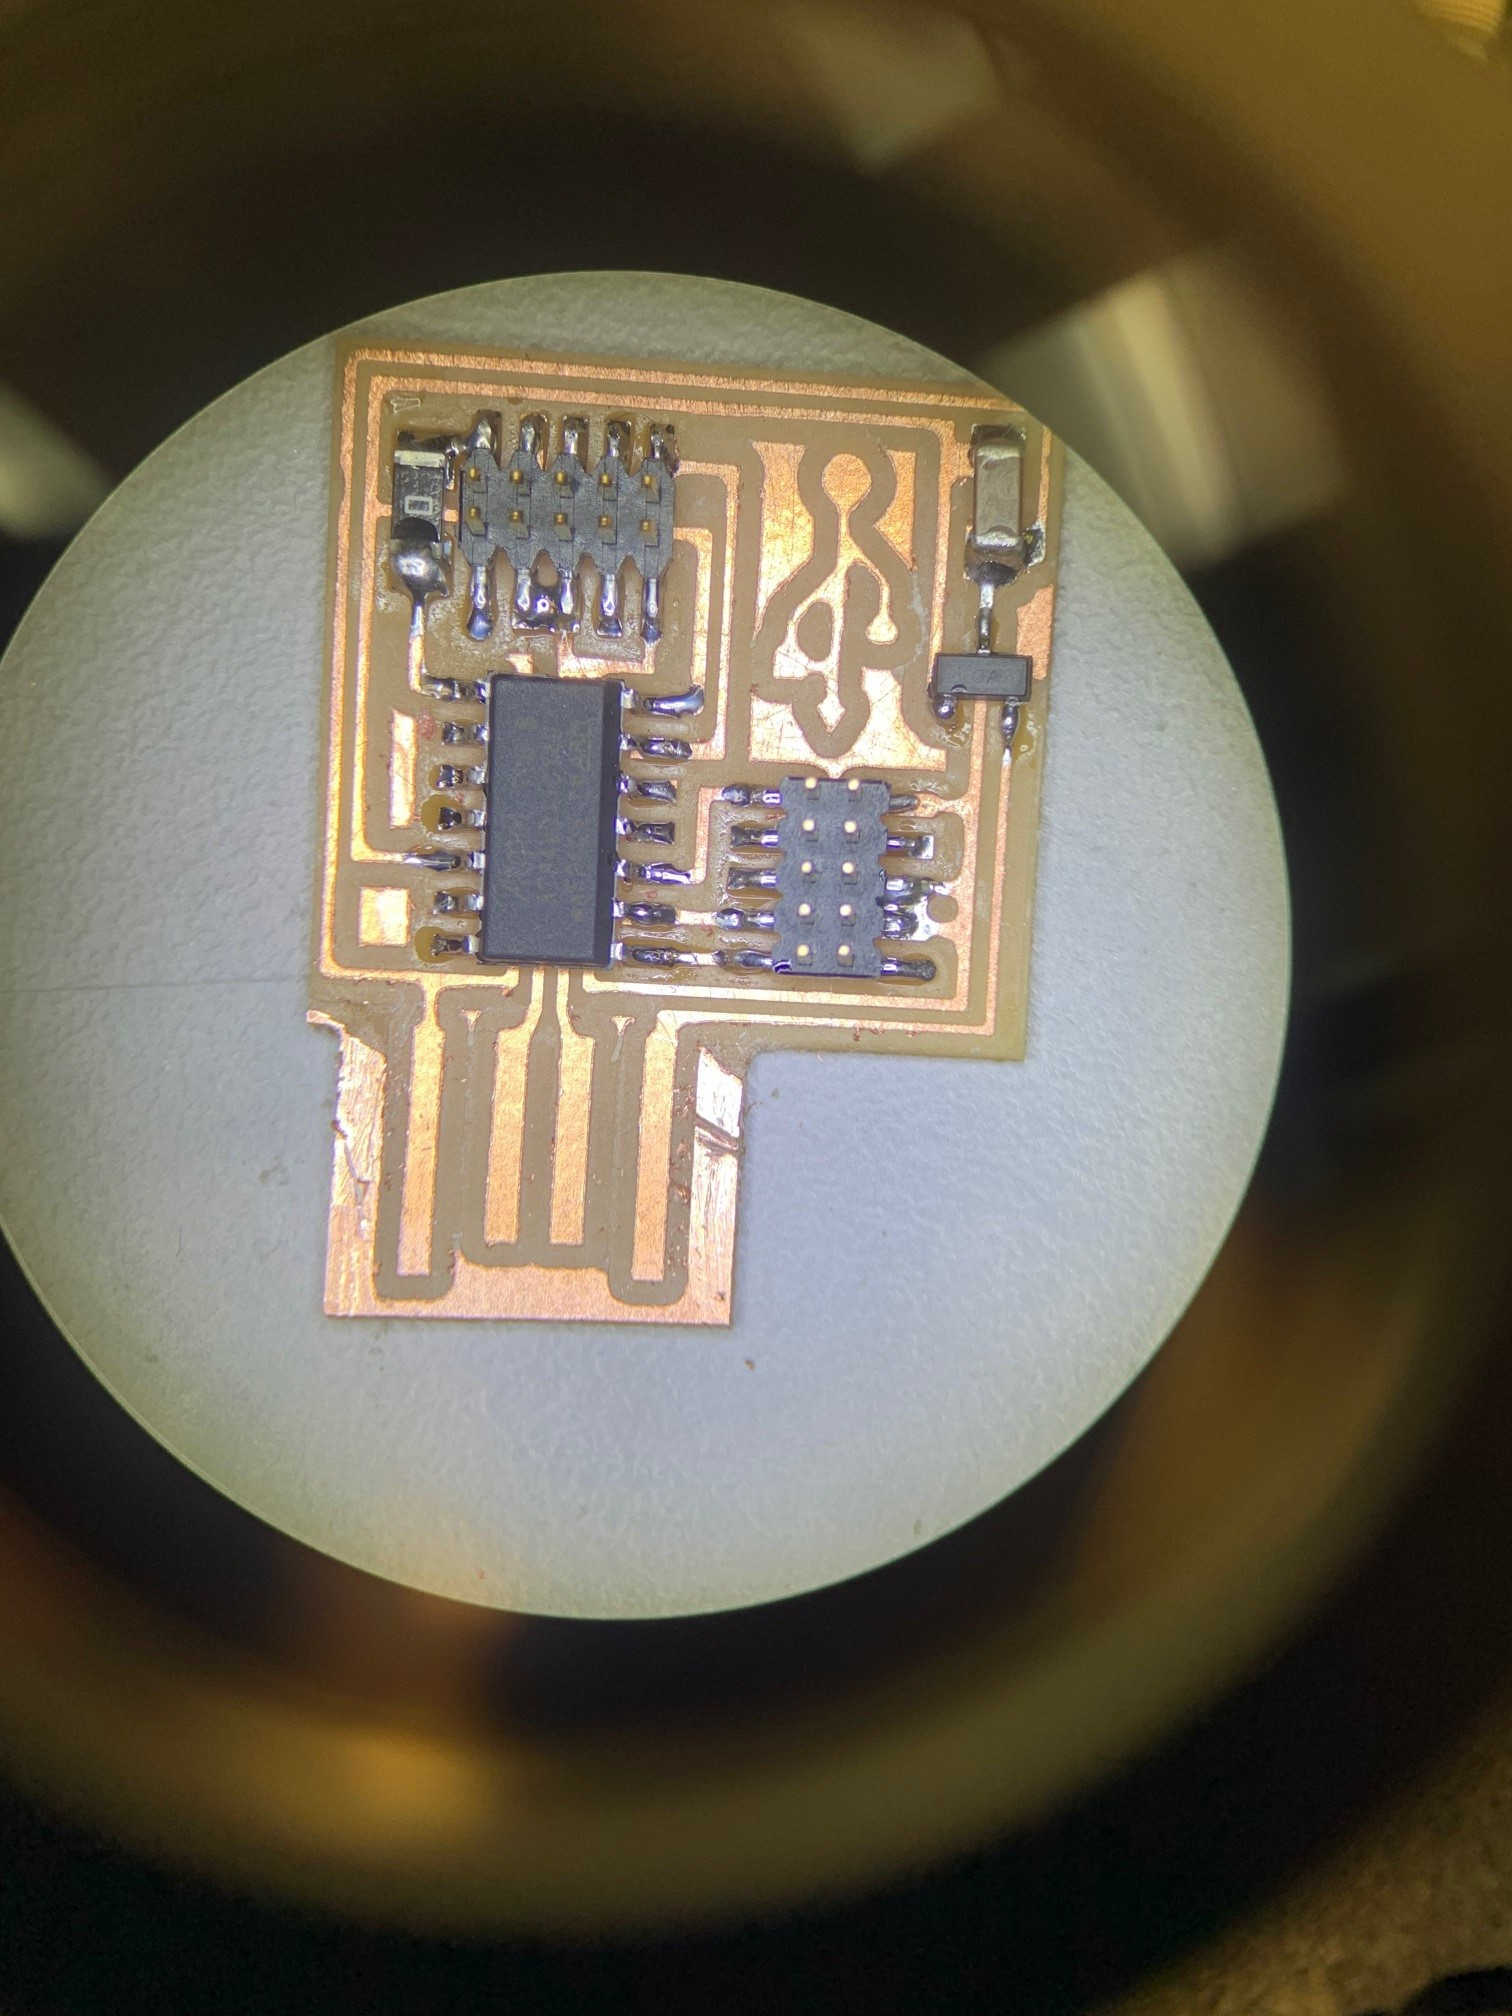
After the milling is done, it's time to stuff the board. I did the entire job under the microscope. It took me a minute to realize that you have no depth perception
under the scope, everything is just in and out of focus. Make sure to have the biocular ajusted properly so you're no just looking with one eye... it hurts.
You can also see in the picture that I have started scraping the edge of usb off to prevent potential shorting. The key is to be violent, you're removing material anyways.
Two pro tips:
1. Tacking saves your life. I did not know my hands were so shaky. Maybe eating a banana would've help.
2. Let the solder flow. I was really afraid of putting in too much solder, but realized that I make better joint if I made it flow. No fear! (I personally hate de-soldering)
Today I Learned:
I am pretty good at soldering lol. I want to come back and make a wearable ring device