[design process]
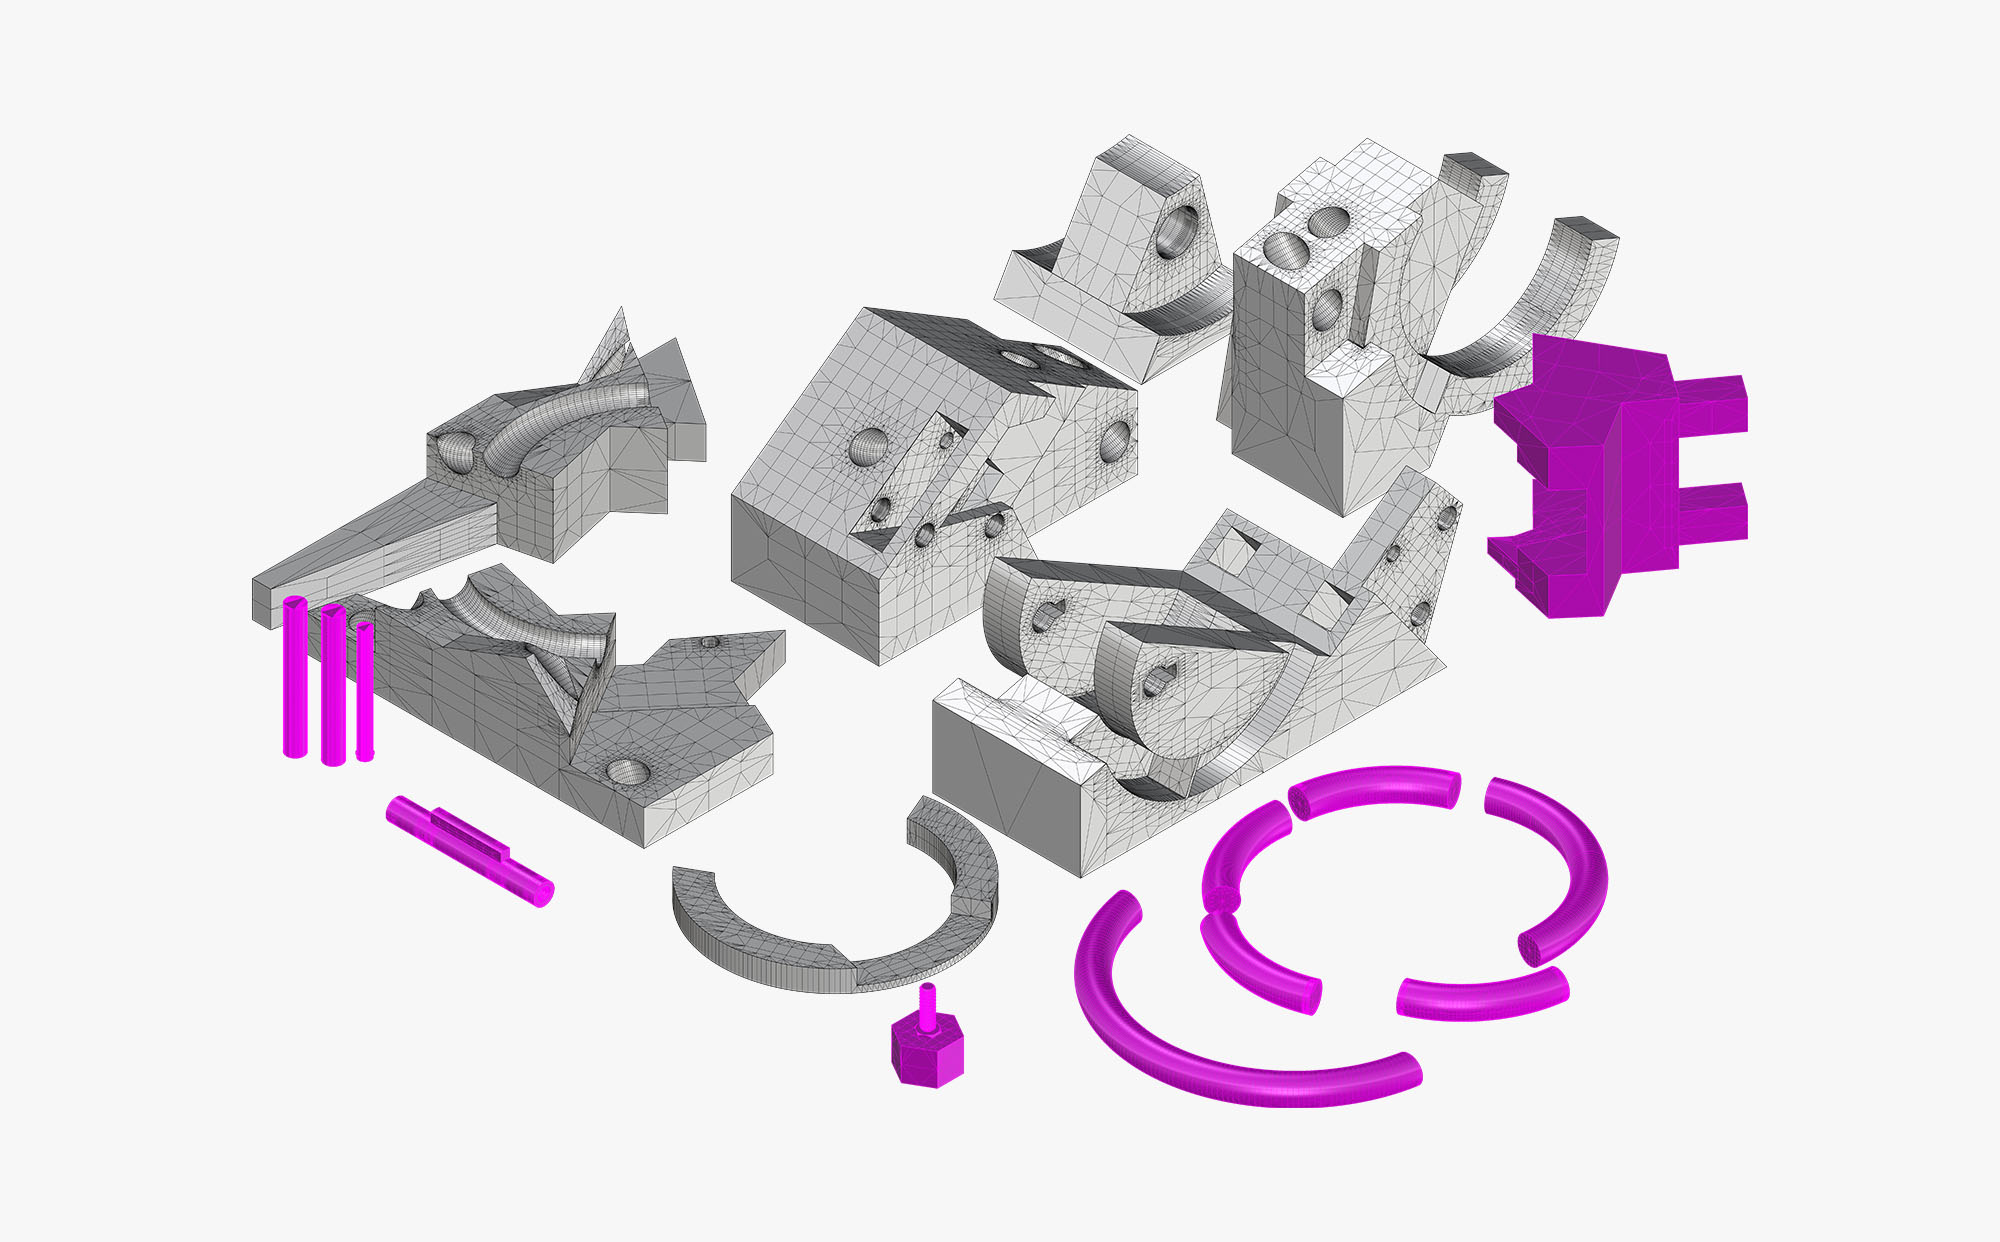
I started this exercise with the intent to explore a design merit that is linked with 3D printing. Designing with excessive undercuts, I became interested in "sectionally trapped objects", which could basically mean that the honest relationship between masses or volumes is only revealed in section.
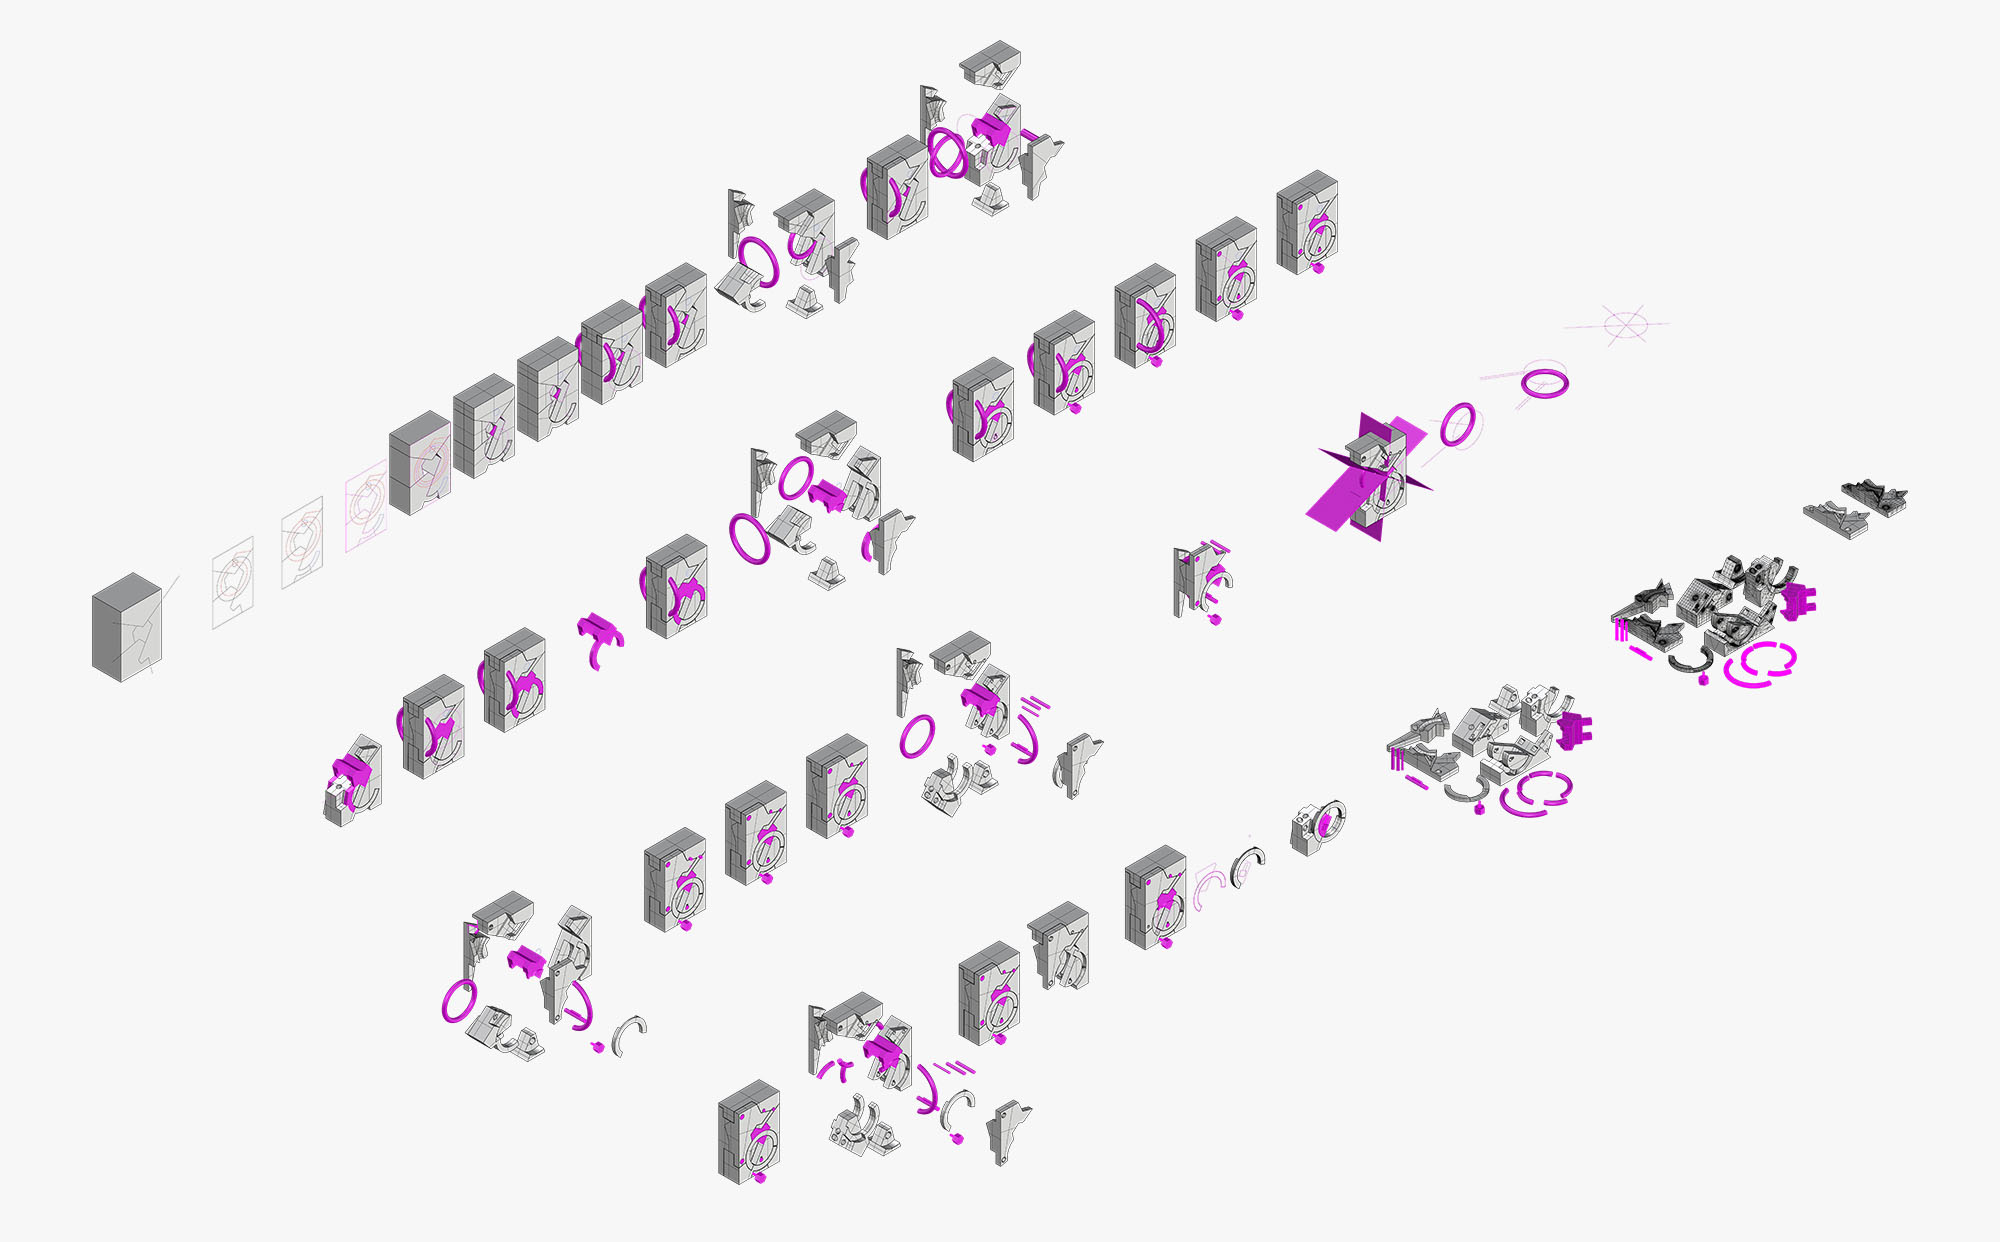
What seems like a clear relationship between the intersecting pieces, is covering a deeper interlocking mechanism that makes the design more playful and ambigous. Hence, a 3-dimensional puzzle.
An army of itteration. Building complexity gradually through an itterative process.
I was struggling to start. Where do I even begin with? So, I decided to just start... and hence the following:
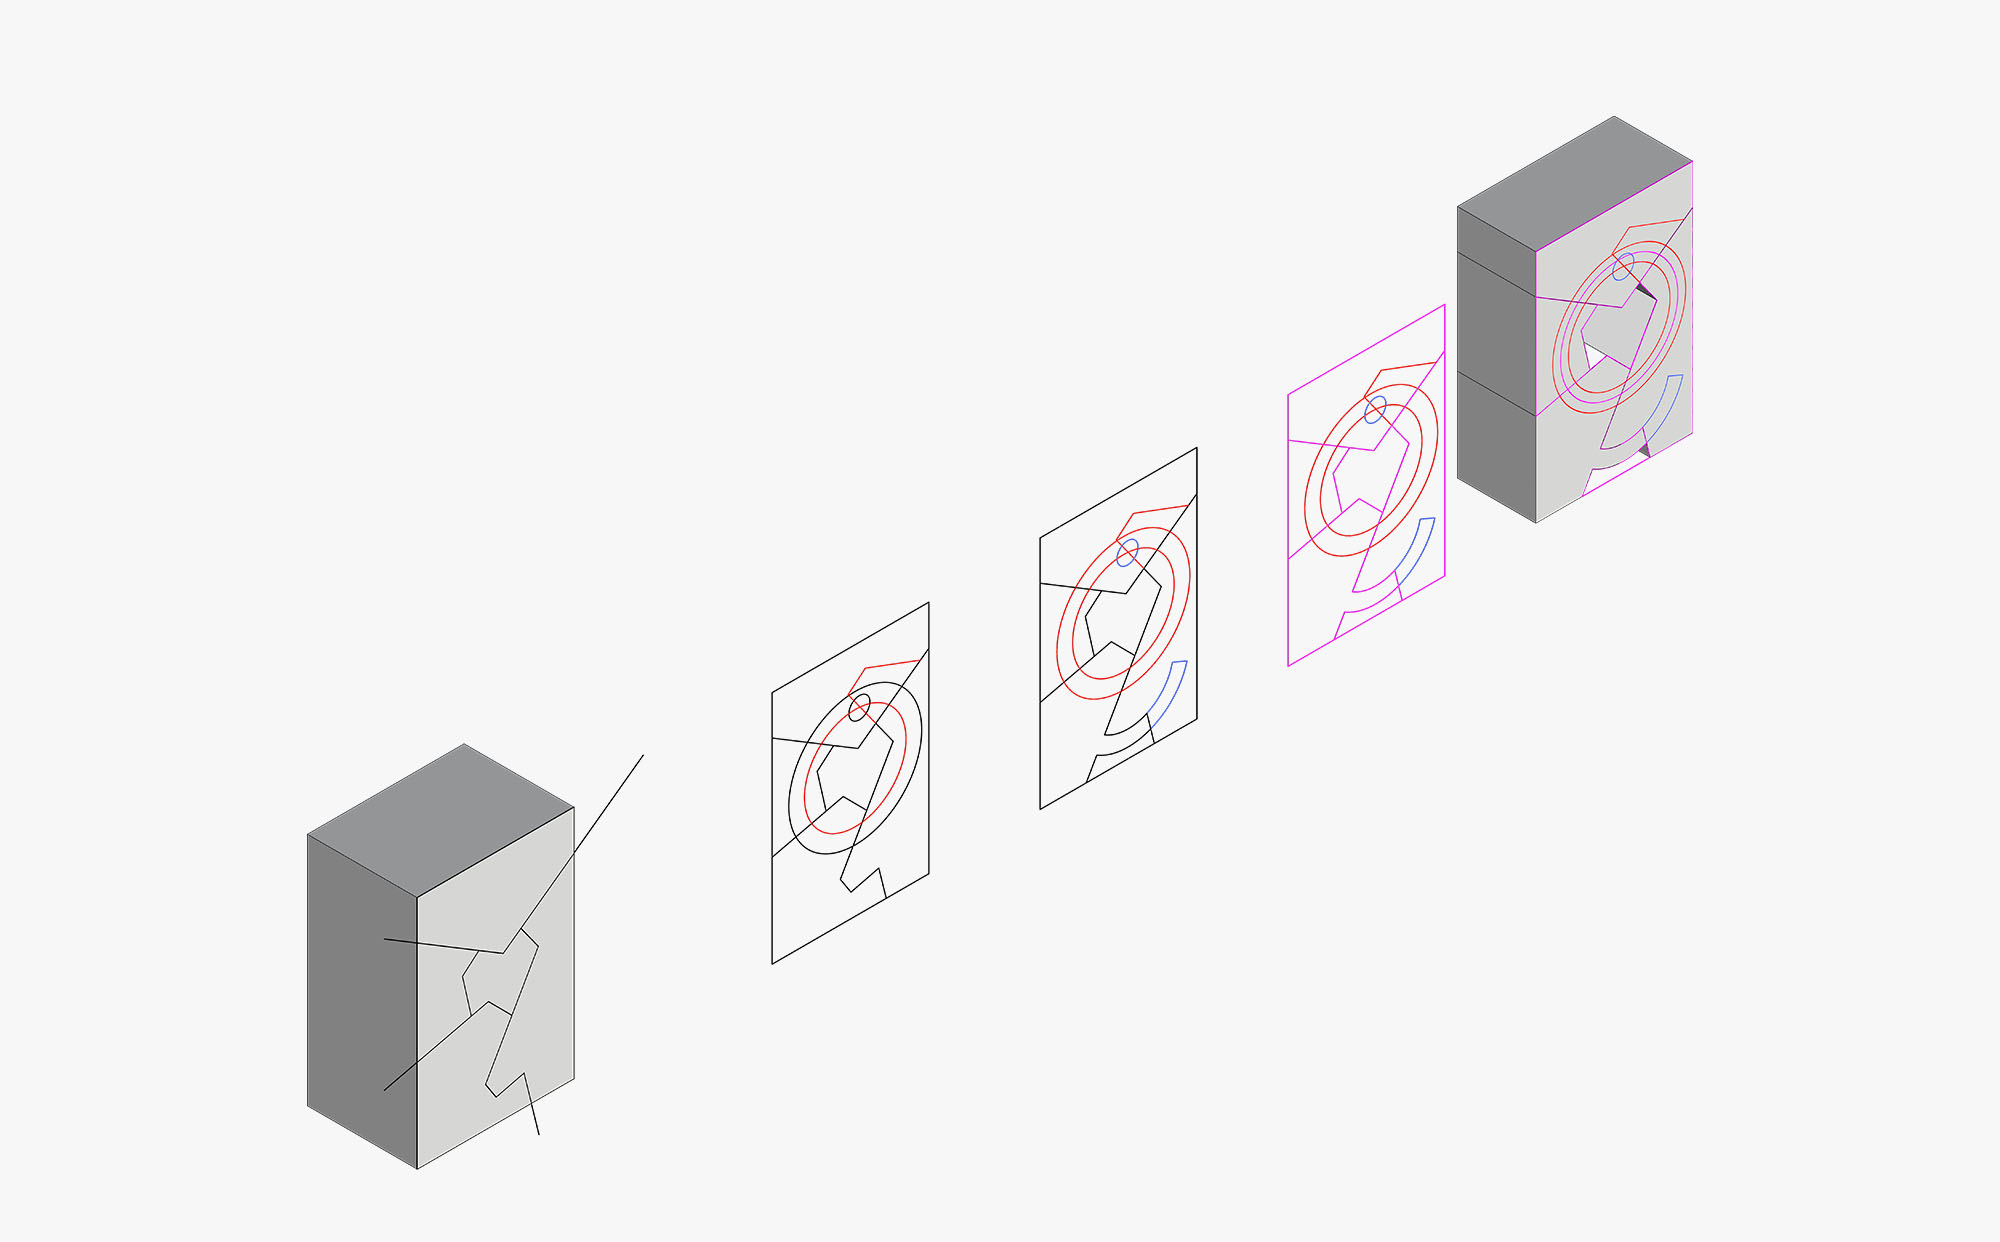
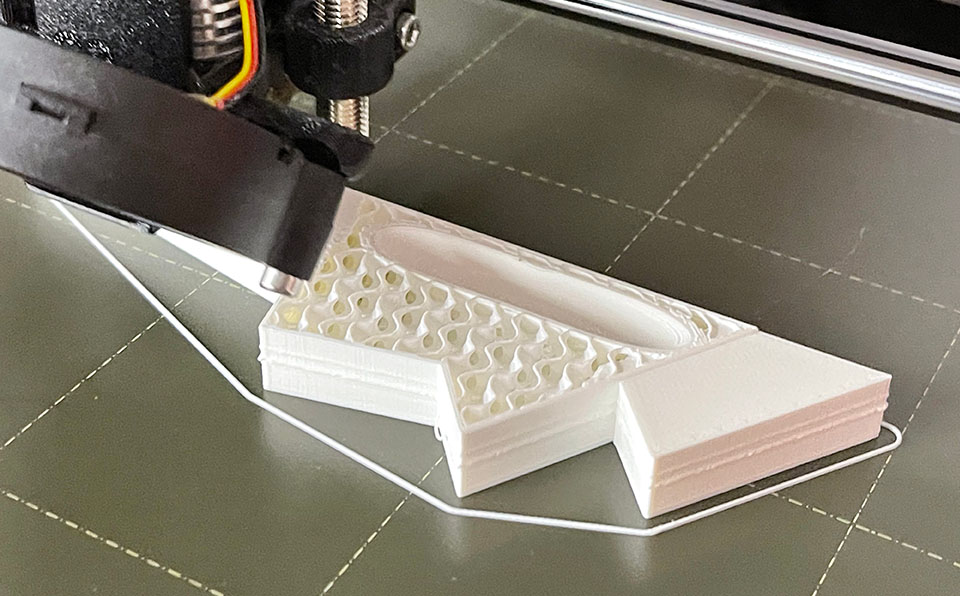
[starting line] translating a sketch into five interlocking piece, extruded at first.
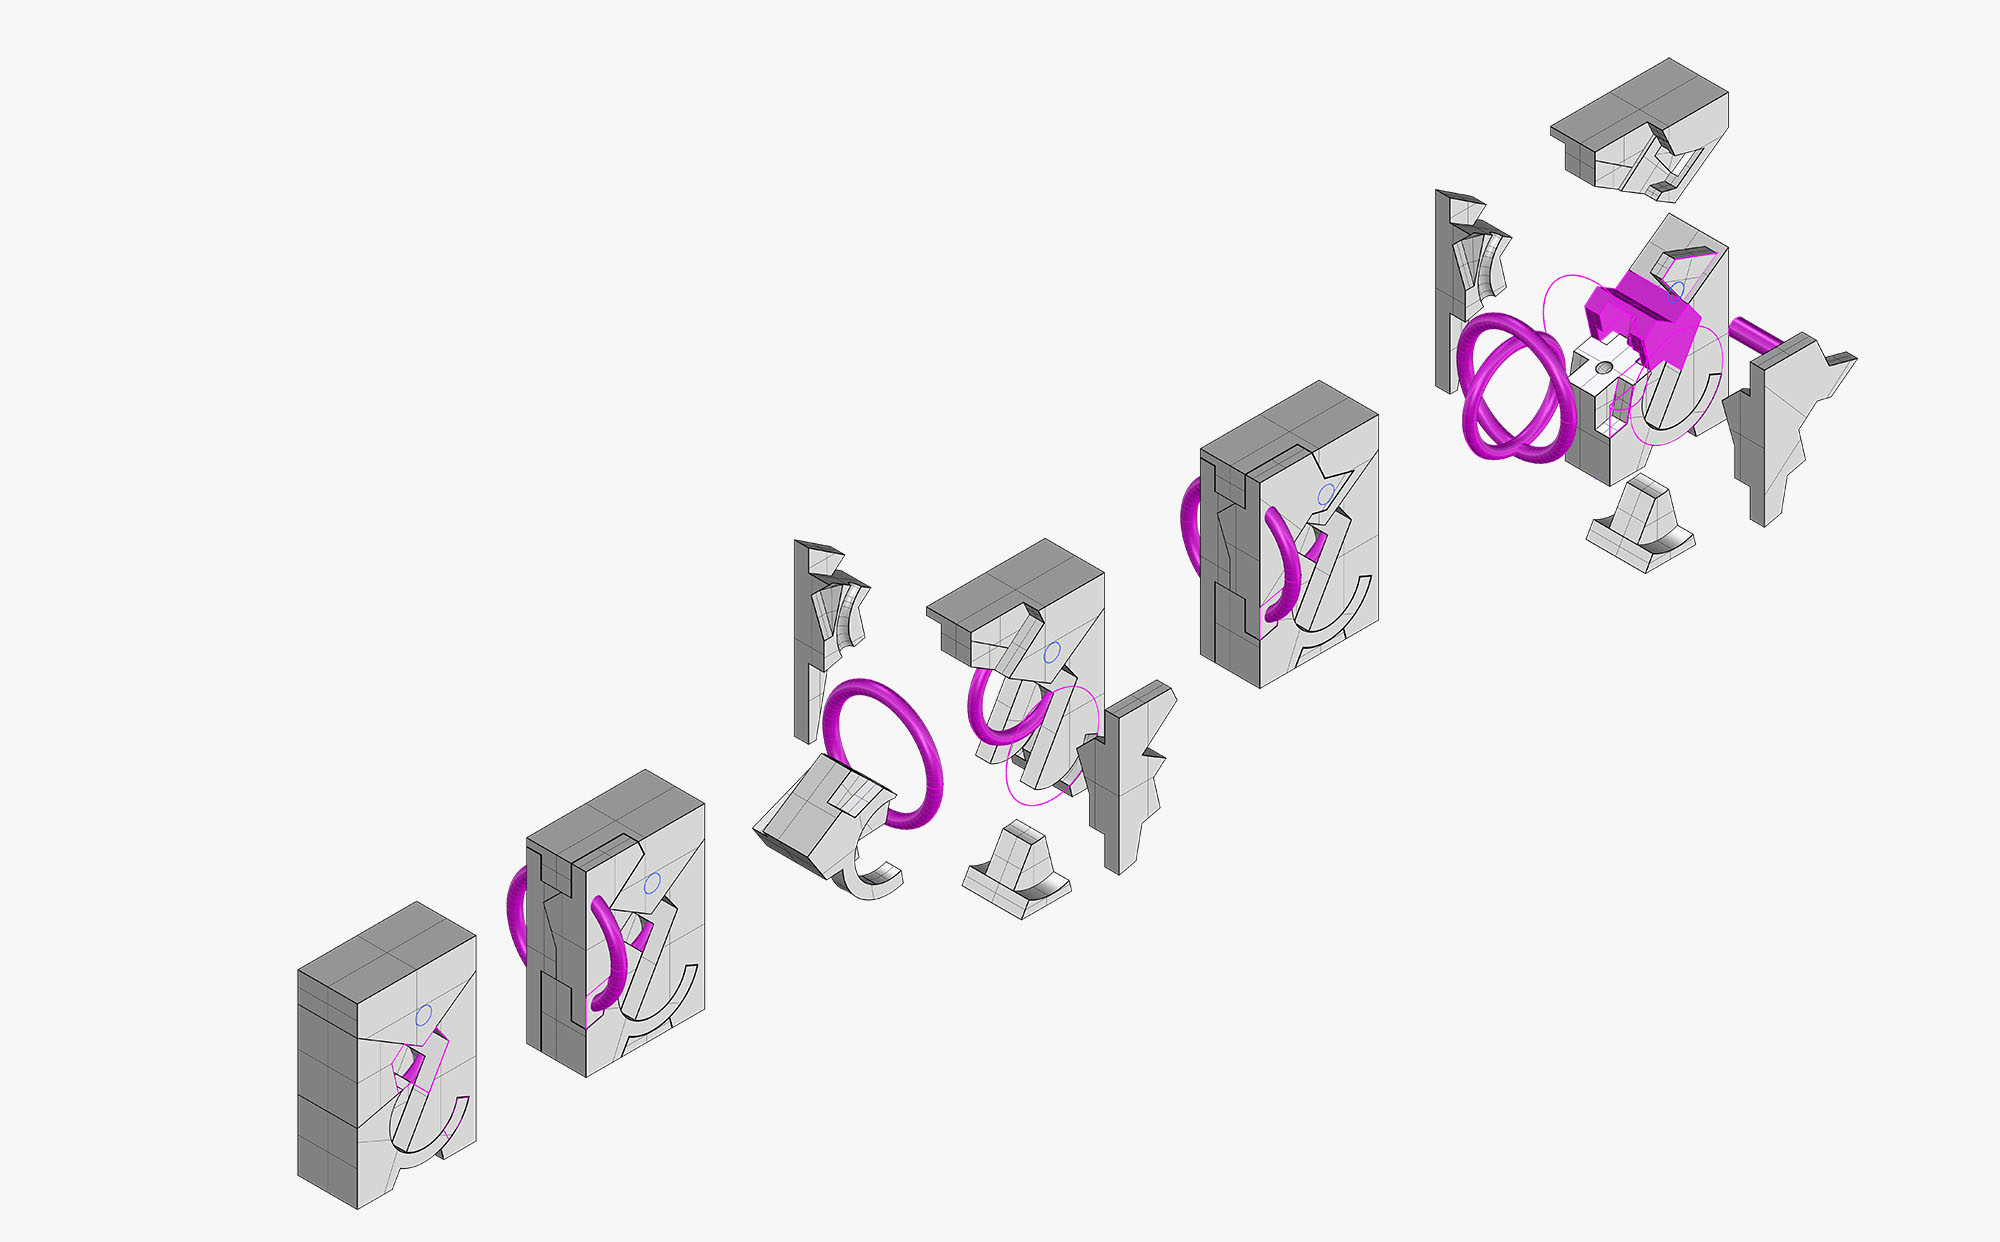
Here I began to look into non linear locking mechanisms: rotation, sliding, multu-step insertion..etc.
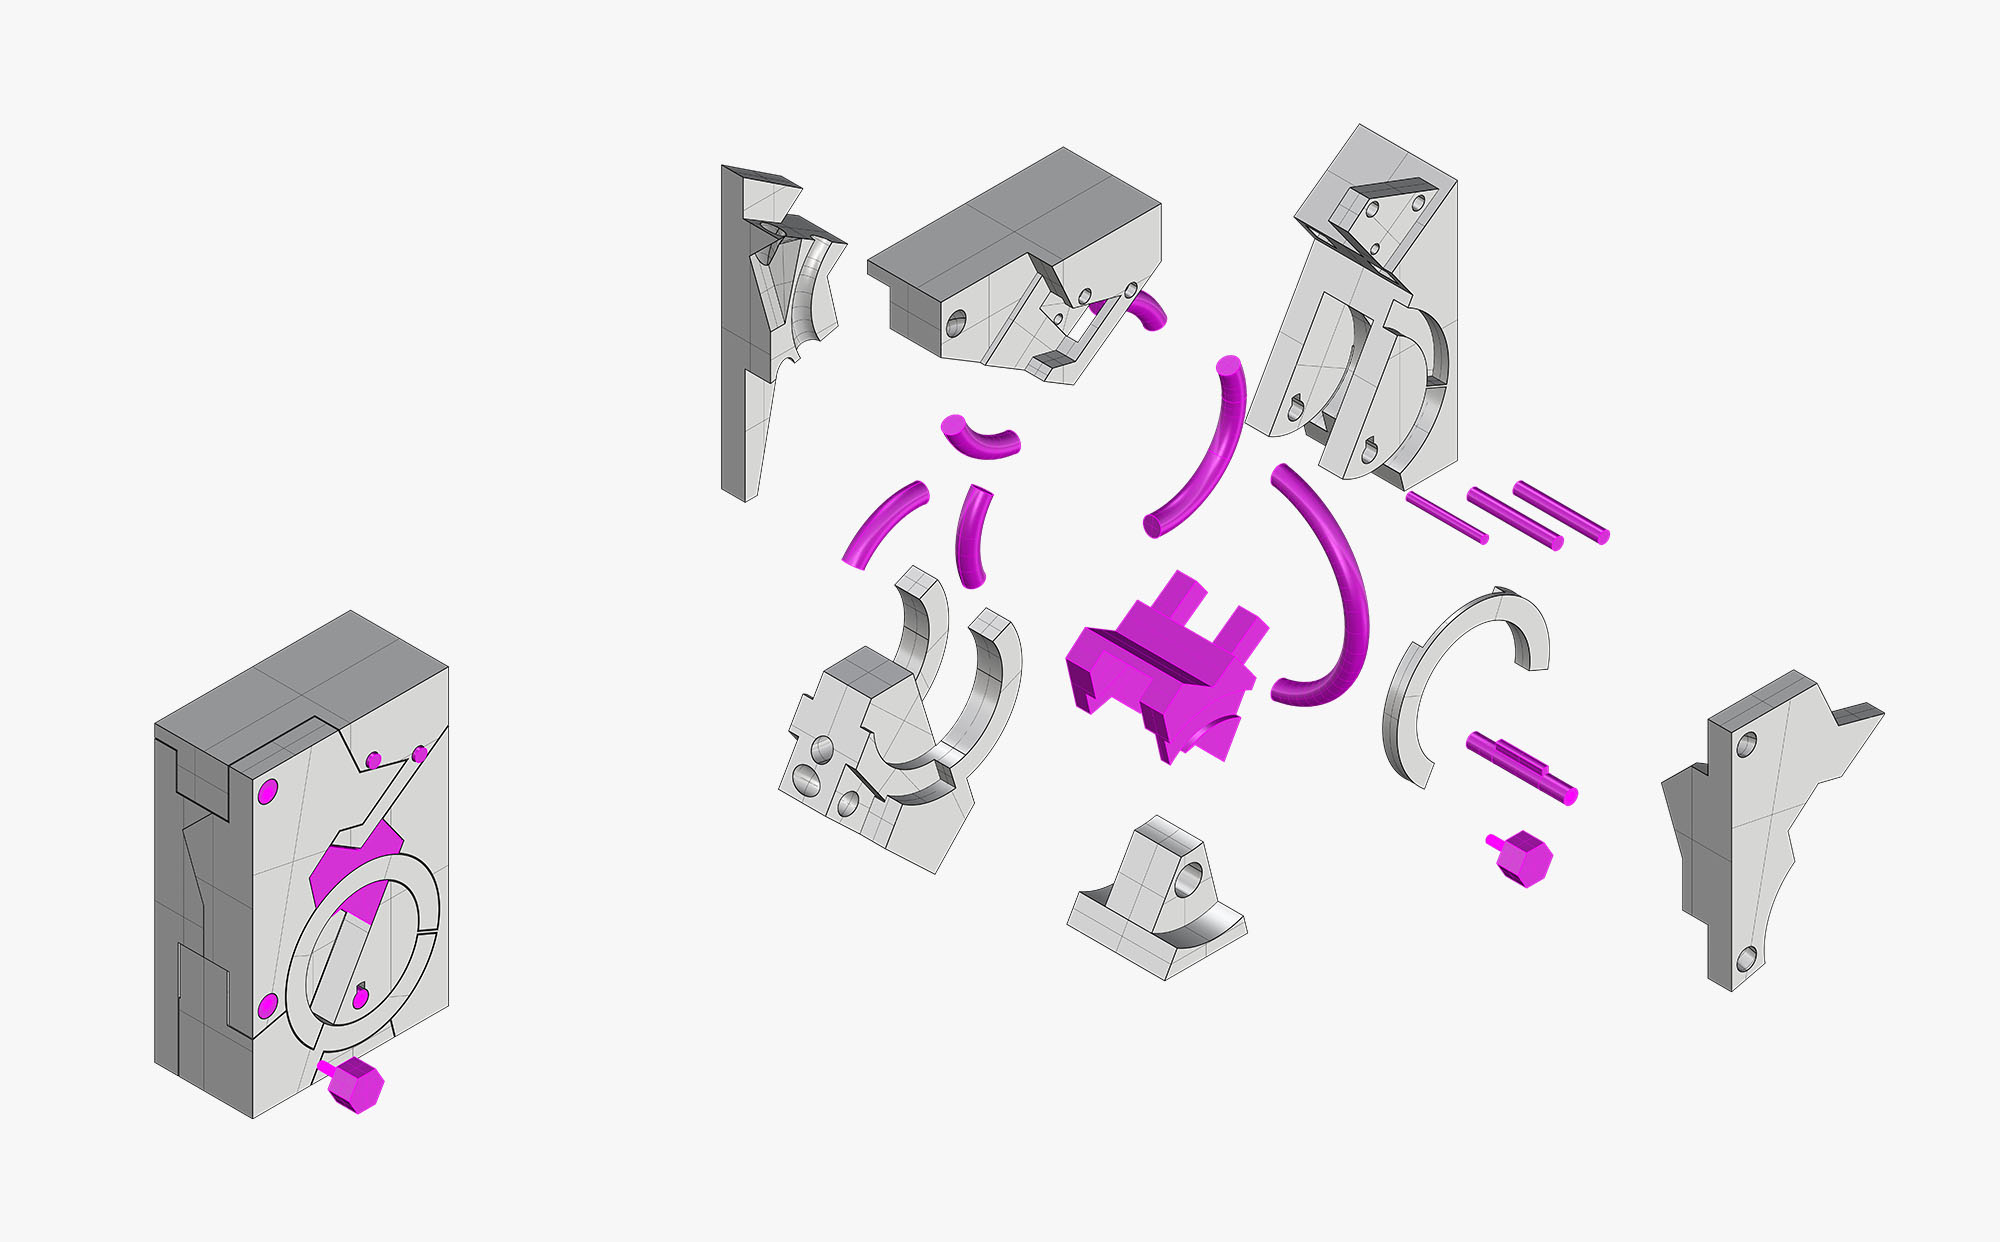
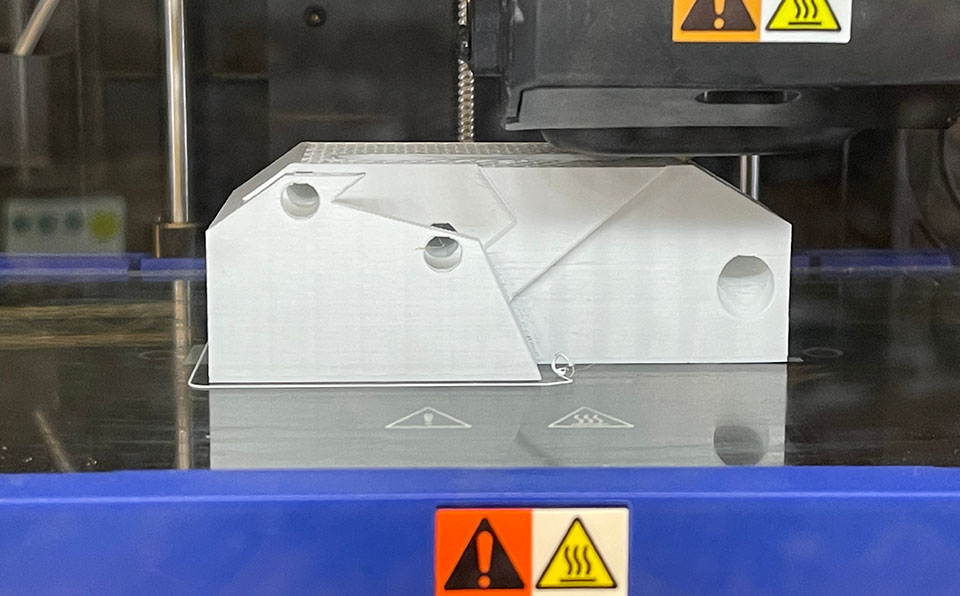
[components] 21 objects connect through 7 procedures. The unlocking process begings with a key (screw/bolt) that unlocks the path to the puzzle.
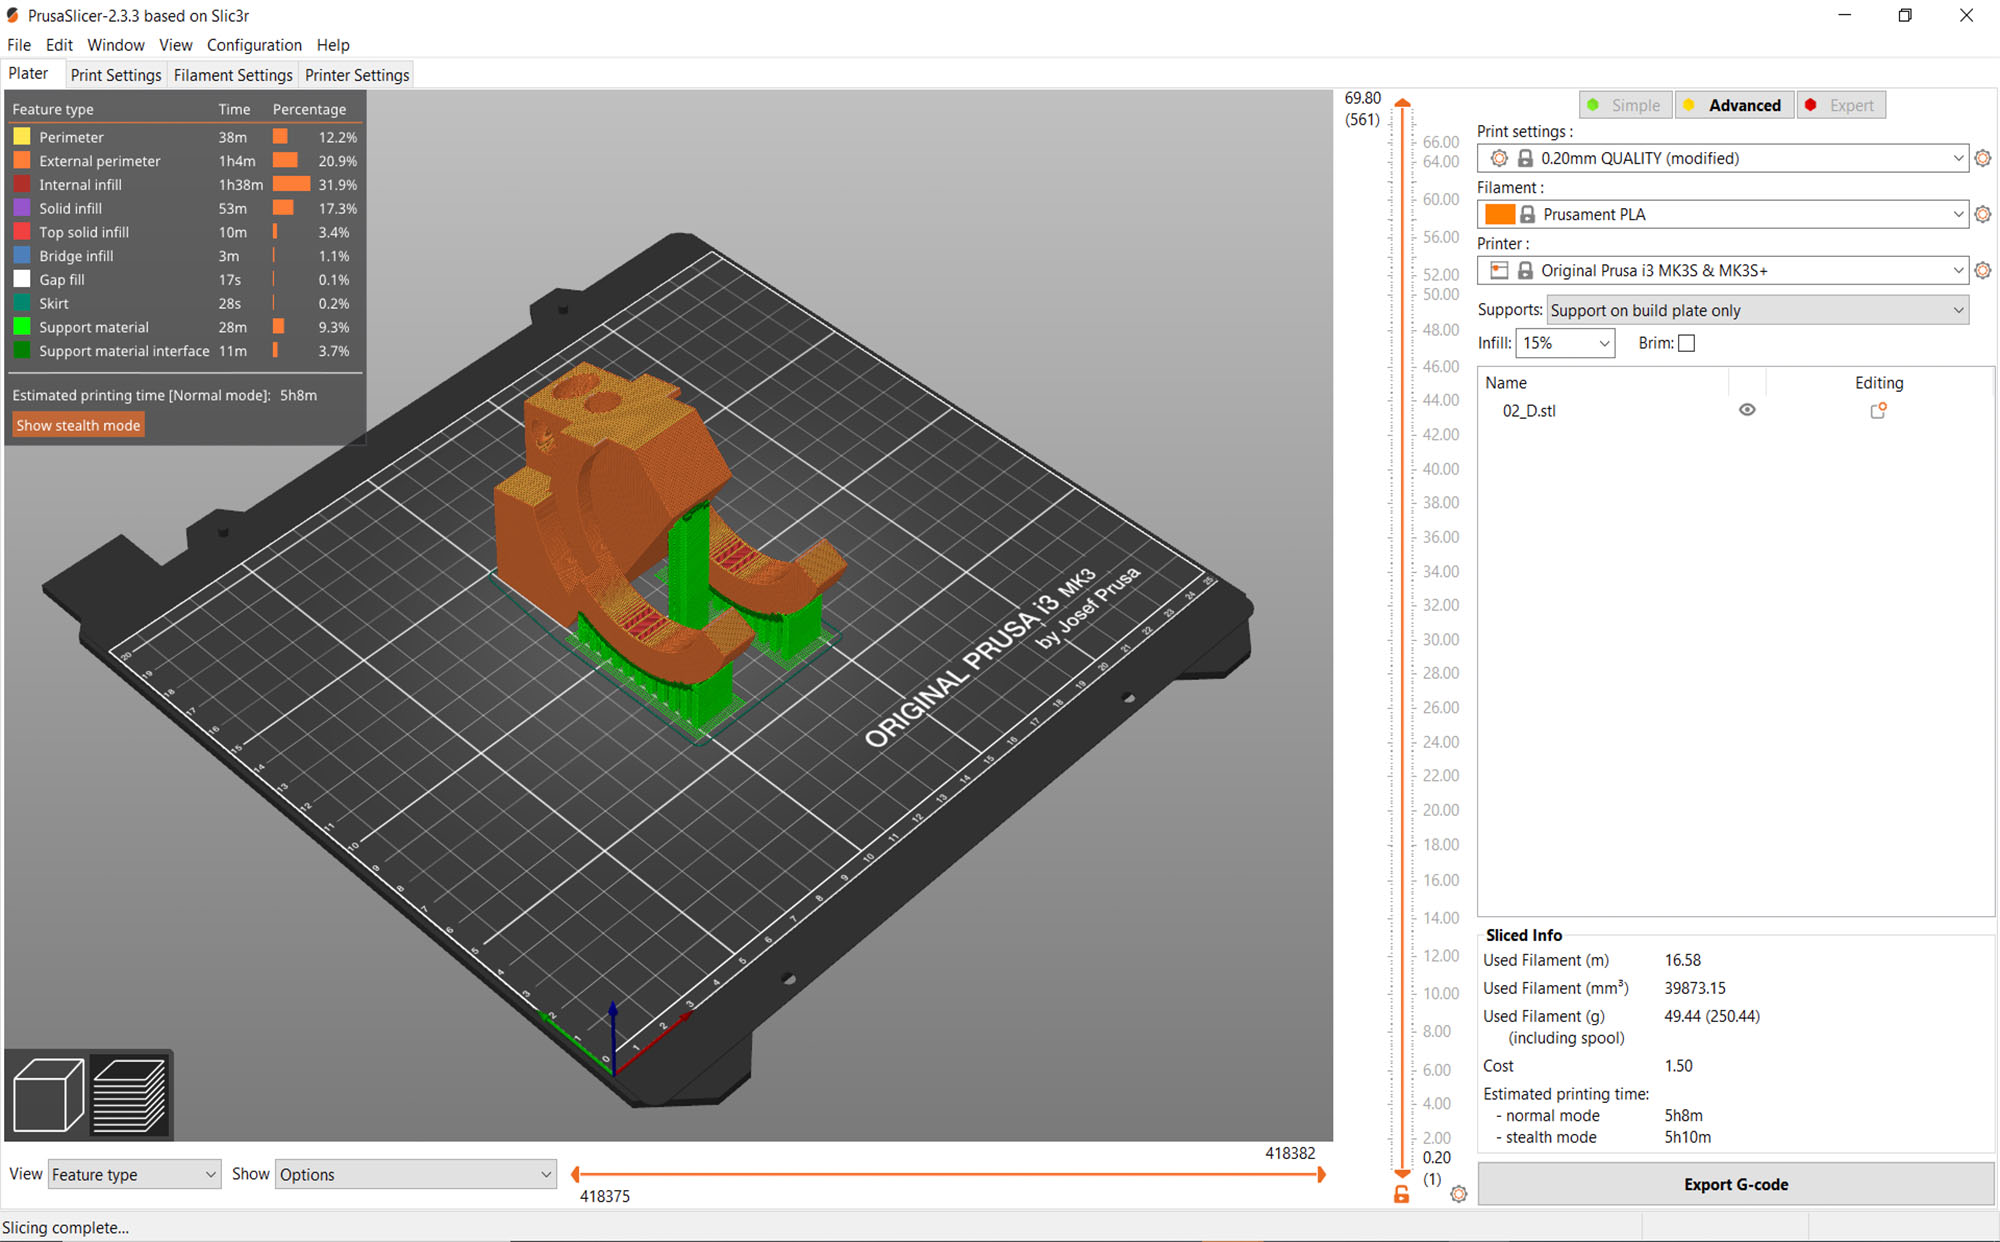
[slicing] On average, the larger parts (around 4) had an estimated print time of around 3 hours. Medium parts, printed in less than an hour and much smaller ones like the screw key was done in less than 30 minutes.
After several tests, I used a 0.2mm resolution and kept the default of 15% infill using both the Prusa i3mk3s at the science center, and the dremel printers at Gund.
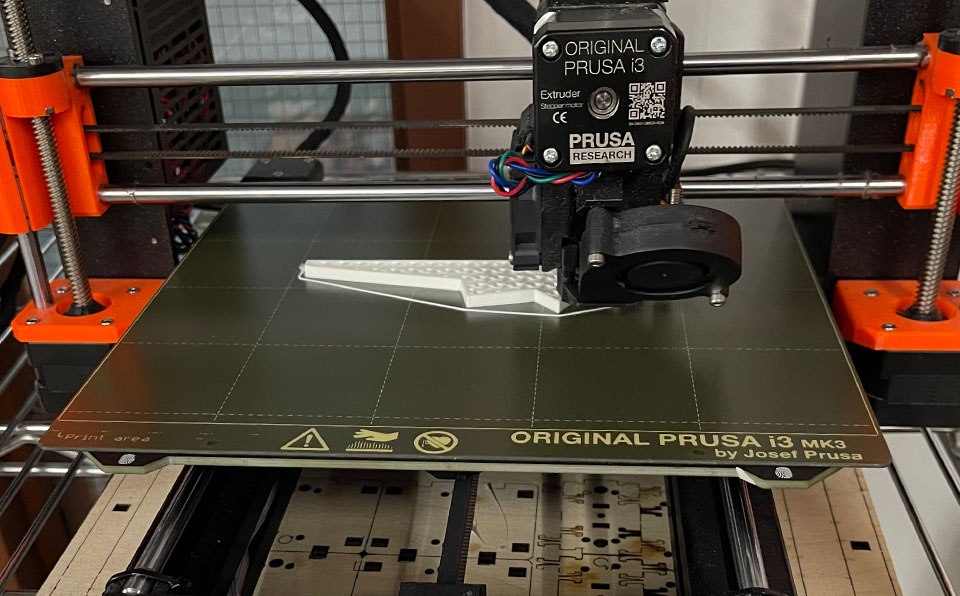
[printers] prusa i3mk3s slicer handled the files very well, with minor imperfections on some surfaces and a wide range of control options from the slicer software.
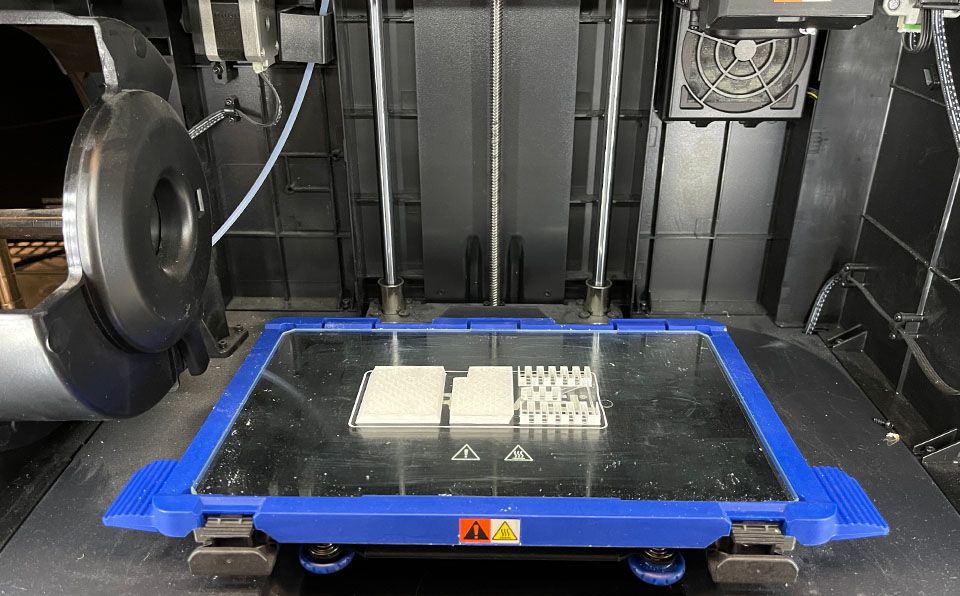
On the other hand, the dremel at Gund, connected to the printer cloud server, crashed alot more than expected. This was due to low maintenance on the most of the printers and interuptable cloud connection due to the not so great at the time internet.
[infill] Whereas the dremel slicer used a regular linear grid for infill, the prusa used a continous infinite surface topology, which is more rigid and is a stronger support system.
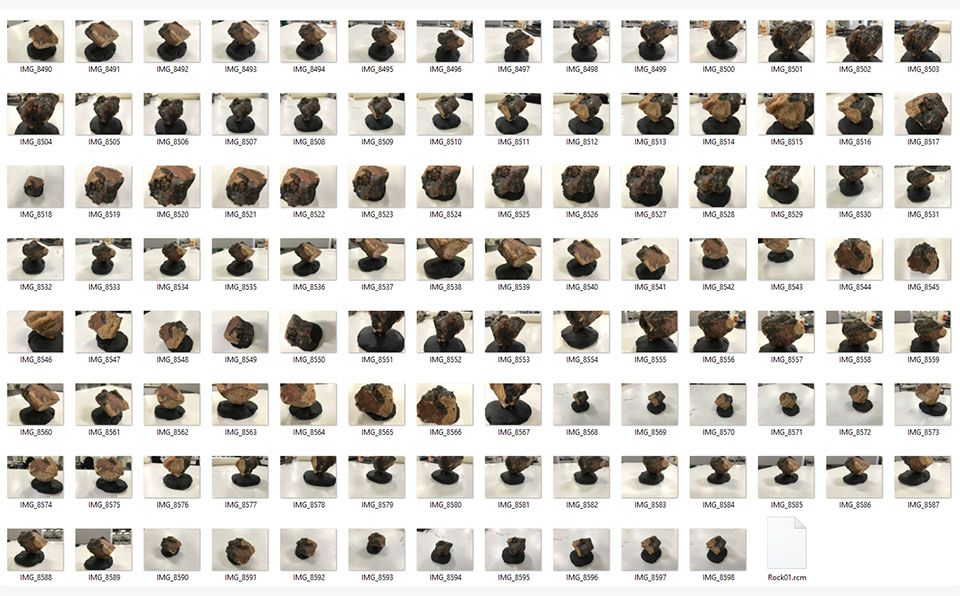
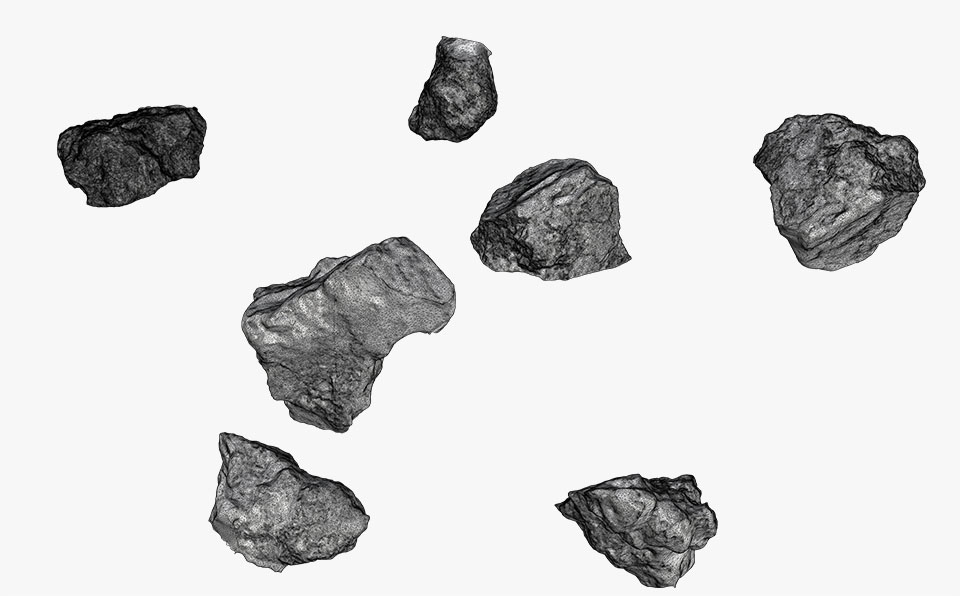
During the first week, I scanned few rocks to use in my final project sketch, where I hoped to design a machine that assembles irregular forms [ex: rocks] into useful structure.
I started by taking photos from all angles of the rock supported via clay [which will be cut off in the model]. I used Autodek recap, which was originally called remake in its first edition. The software is a cloud point based systen where you buy credits to use.
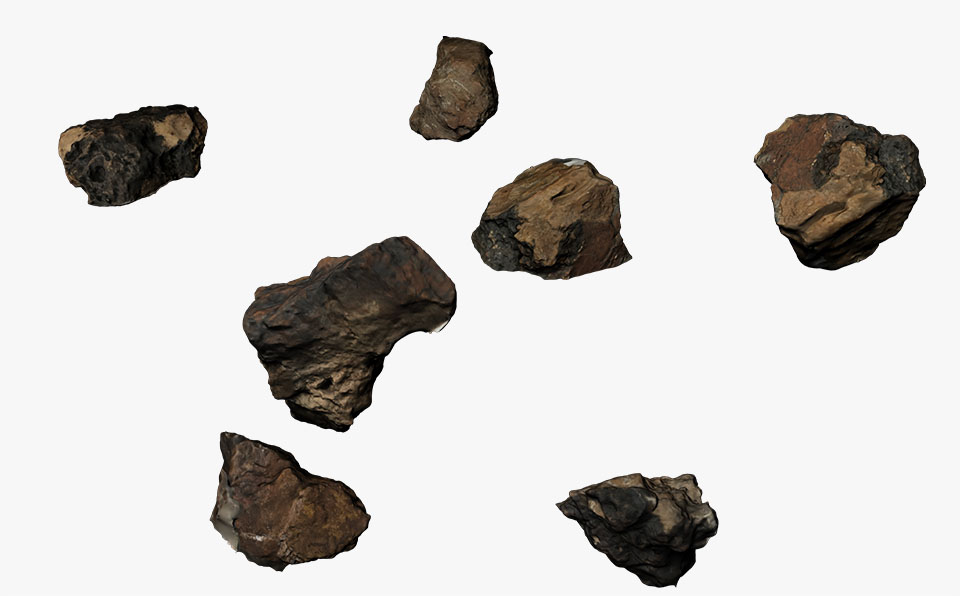
The results are failrly good resolution, since it manages to get the textures of the rocks to a fair degree of precision. It also imports the texture layer as jpeg which is very helpful as I navigate from one model to another and for visualization which tends to happen in a different software.
This allows me to import the mesh followed and then mapping the jpeg as a texture. It also helps improve the quality / precision visually since the texture captures the surface qualities that were not captured in the 3D model.