[design: a parametric personalized grocerries cart]
Grocery shopping is particularly a hassle to those who do not drive. I happen to be one of them in Cambridge. Therefore, for this week's assignment, I wanted to make a grocerry cart that I can attach to my bicycle.
While doing so, I would want to optimize its design to base it of my shopping list and/or schedule. This would also be an exercise to 3D packing concepts that I hope to explore in my final project.
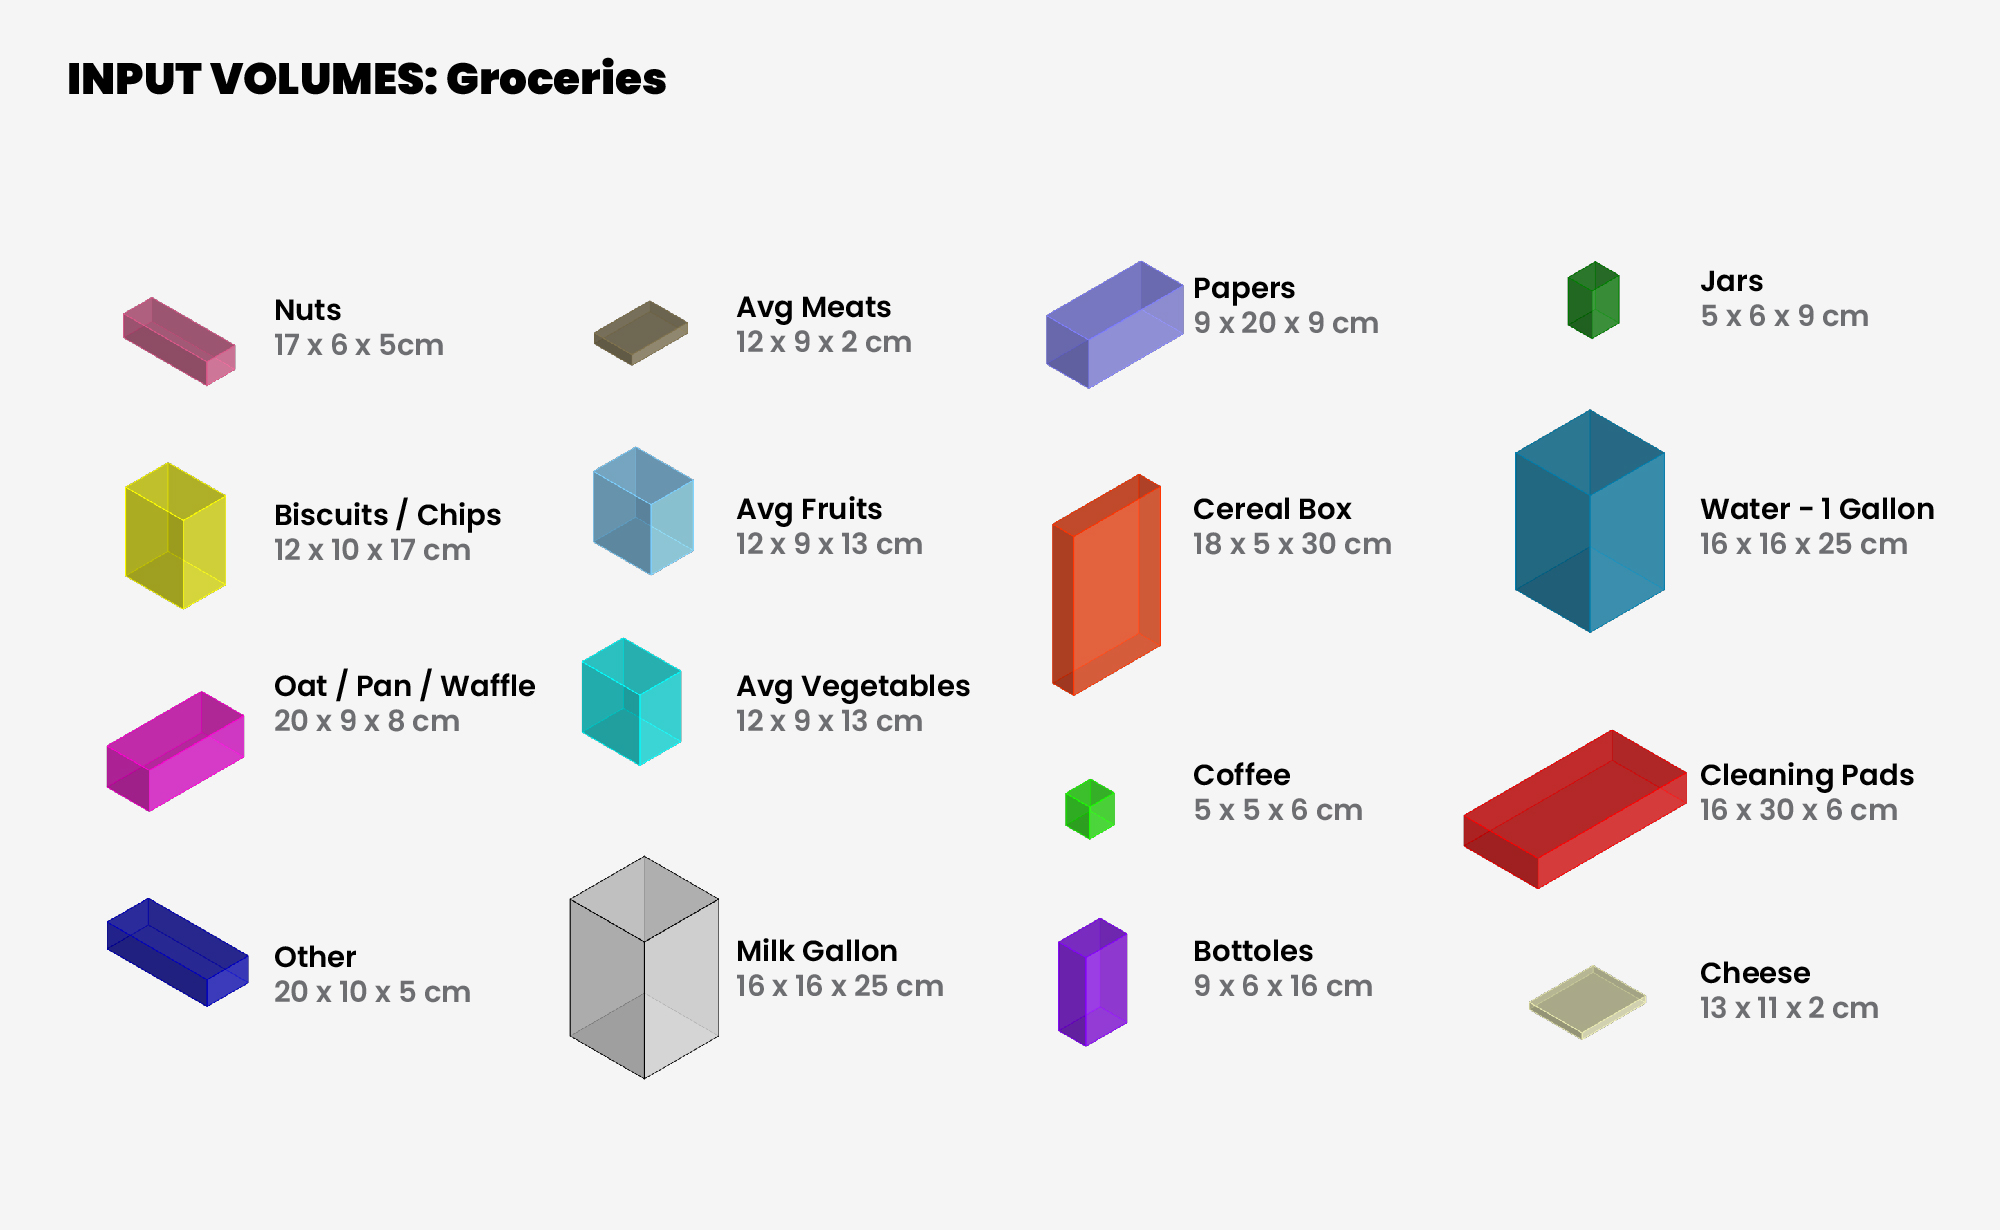
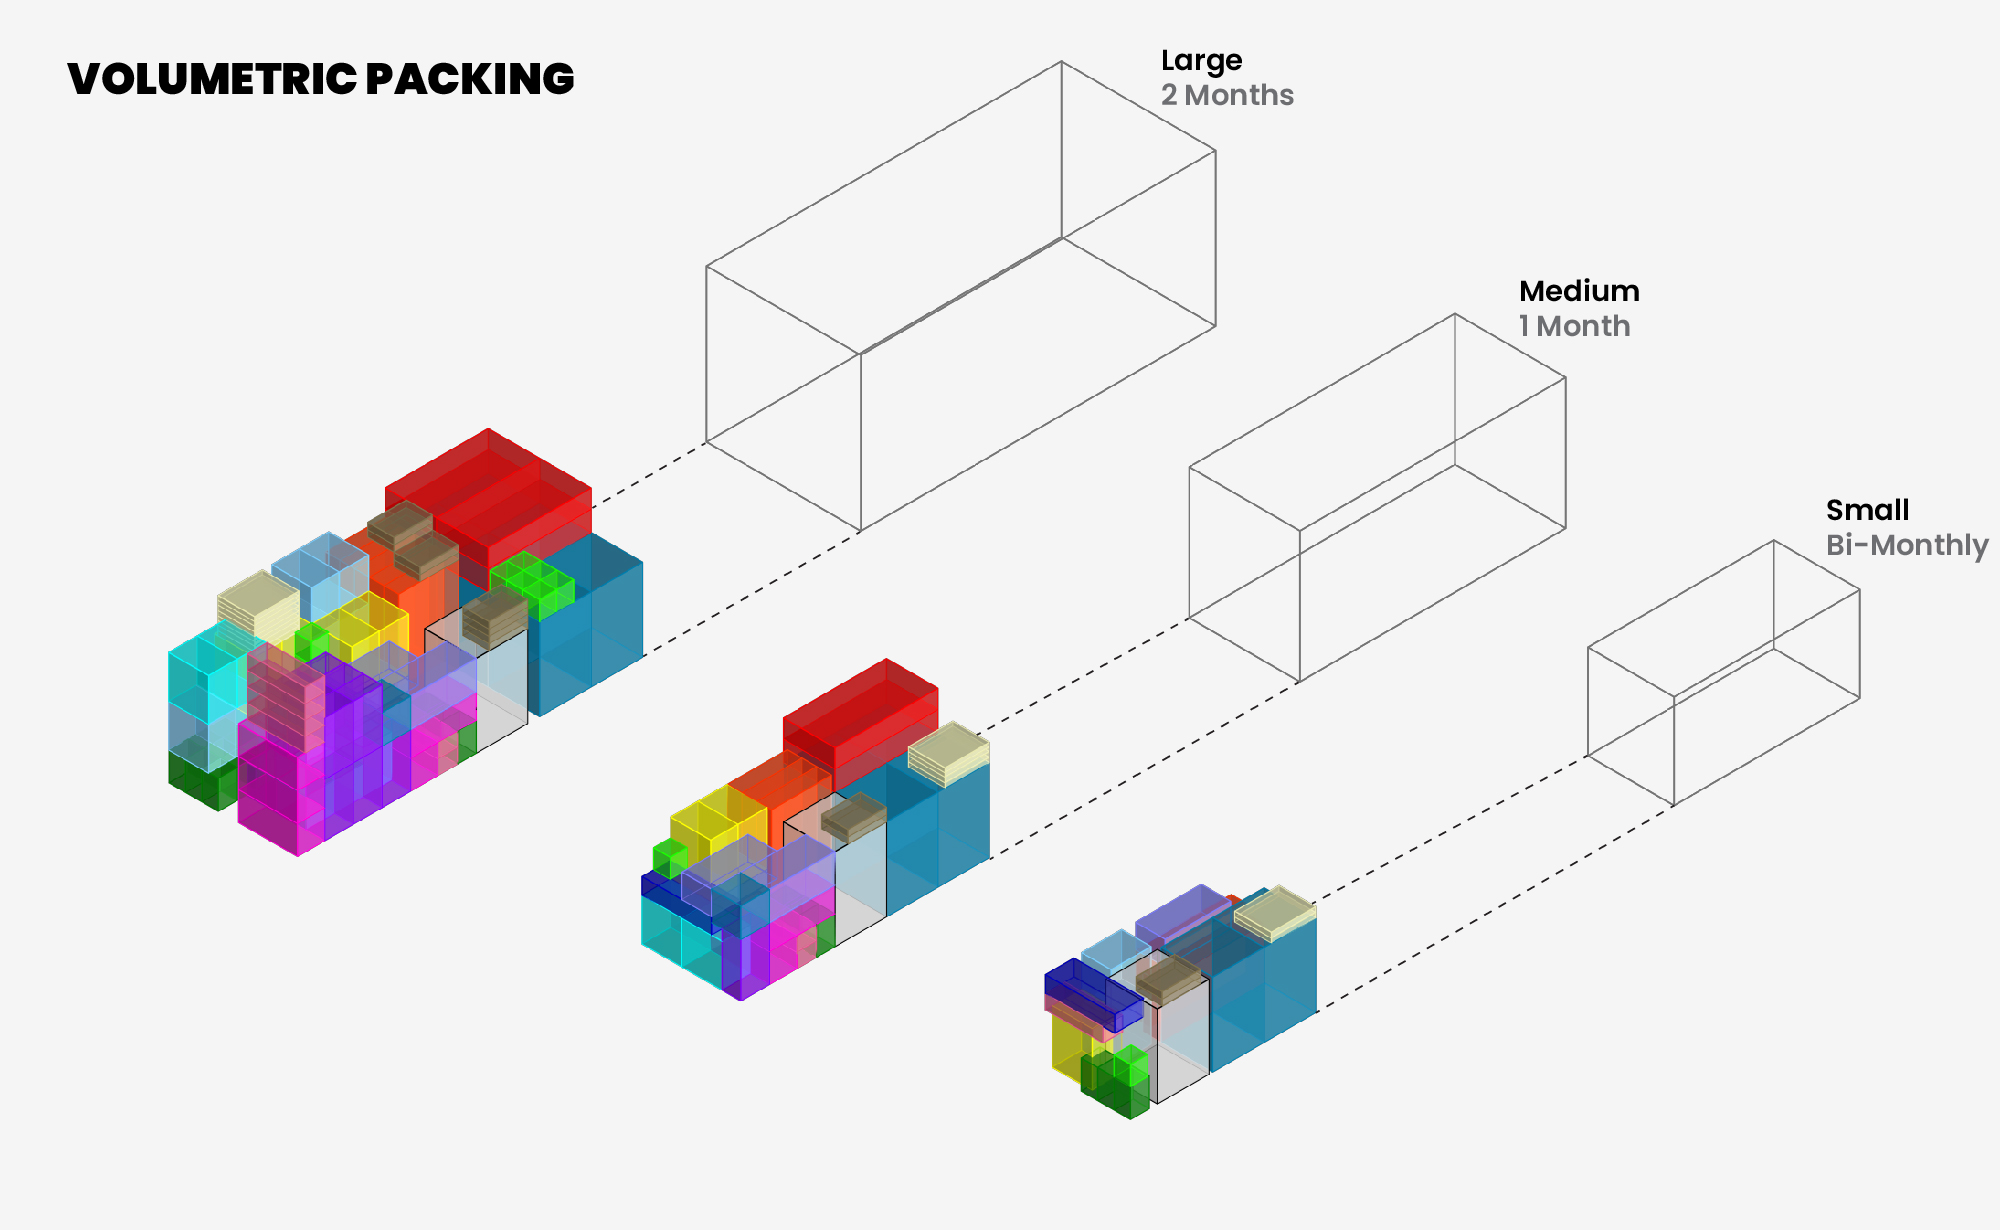
I started by listing the items I usually shop at specific intervals: 2 weeks, 1 month, 2 months. I then computed a 3D packaging to find an optimal volume based on a maximum bounding box that I set for 3 sizes: small, medium and large.
The guiding formula is based on the 1 gallon of water container, that is usually the heaviest regular item I shop for on a weekly bases. In the selected medium size volume, it was based on the width of two gallons.
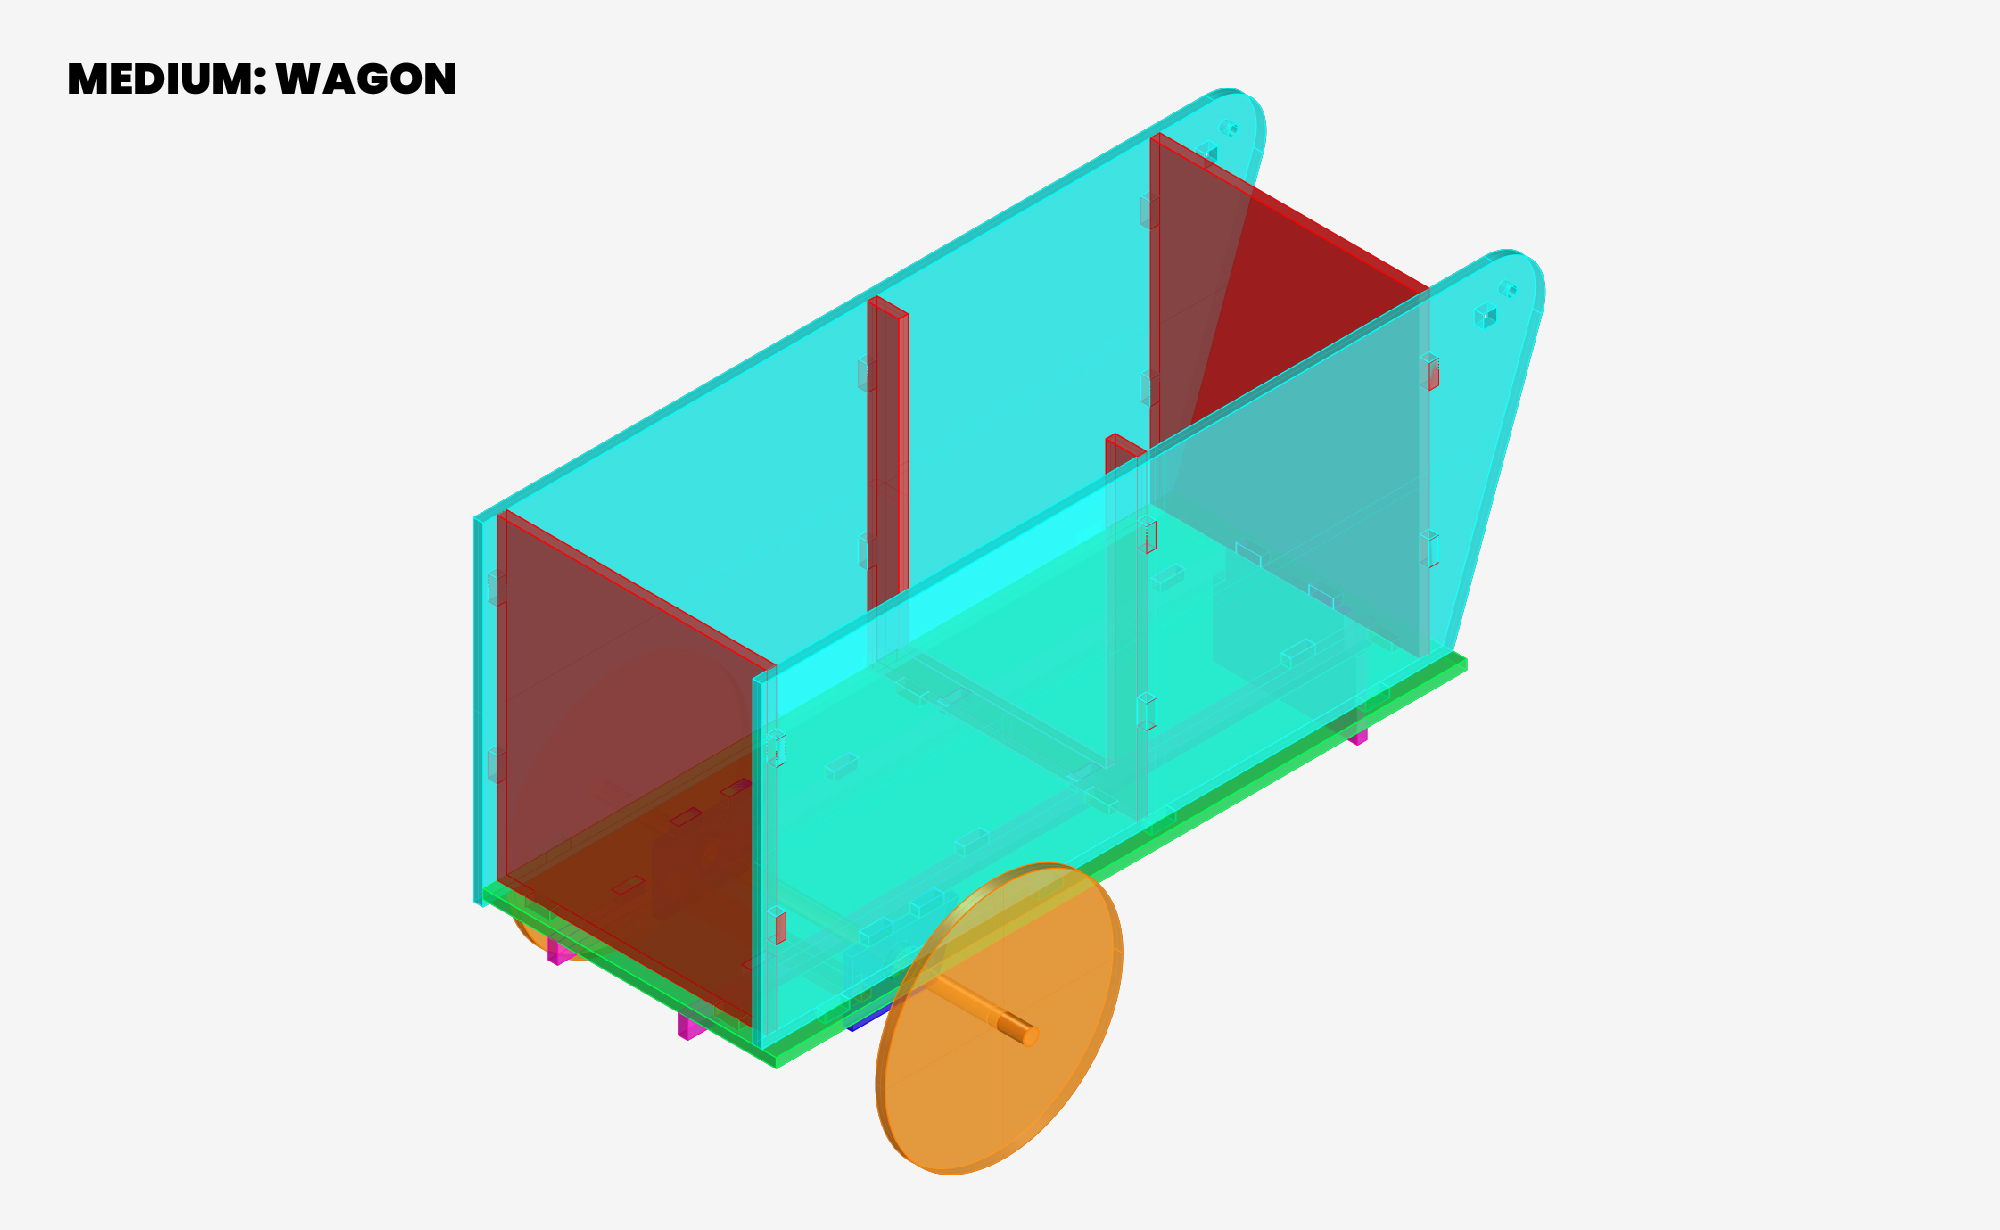
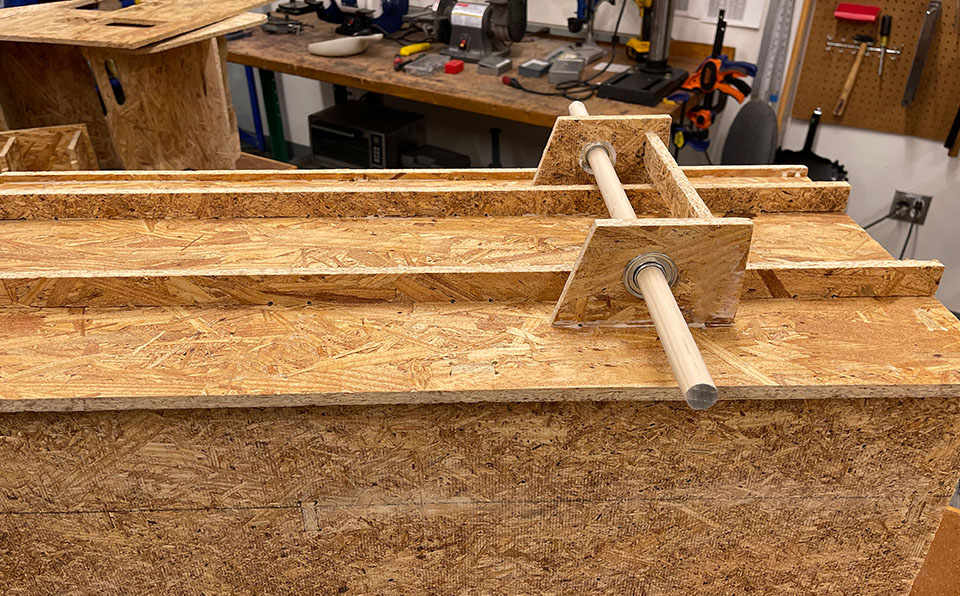
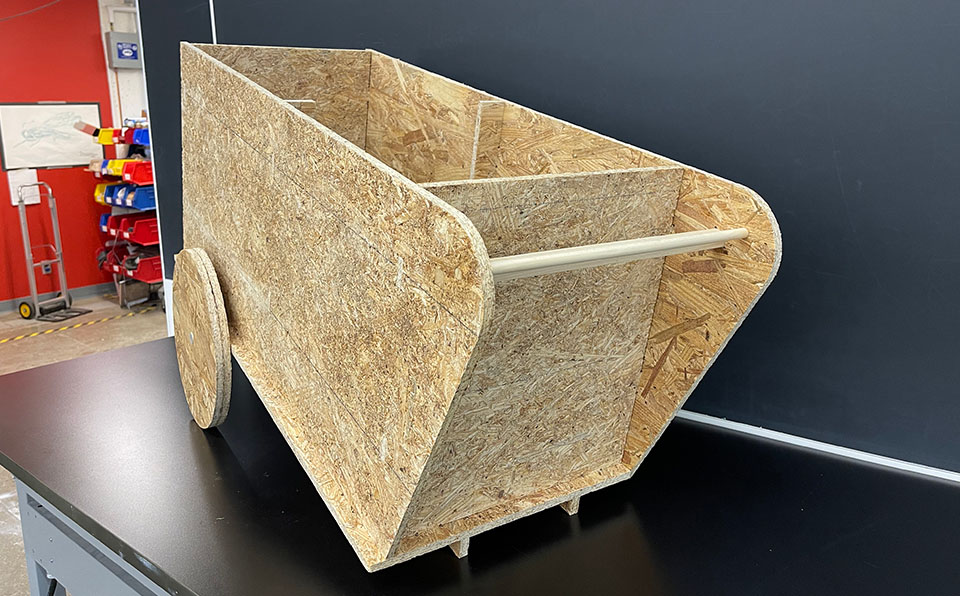
The generative volume [edited] to house the medium size / 1 month grocery store visits. An overal bounding box of 80cm x 34 cm x 40 cm height. I included 2 metal bearing on which a wooden dowel fits tightly to create the wheel mechanism.
I believe I could have designed a notched [all OSB] system instead of metal and dowel. However, I wanted to create a relaiable system on which I can use often.
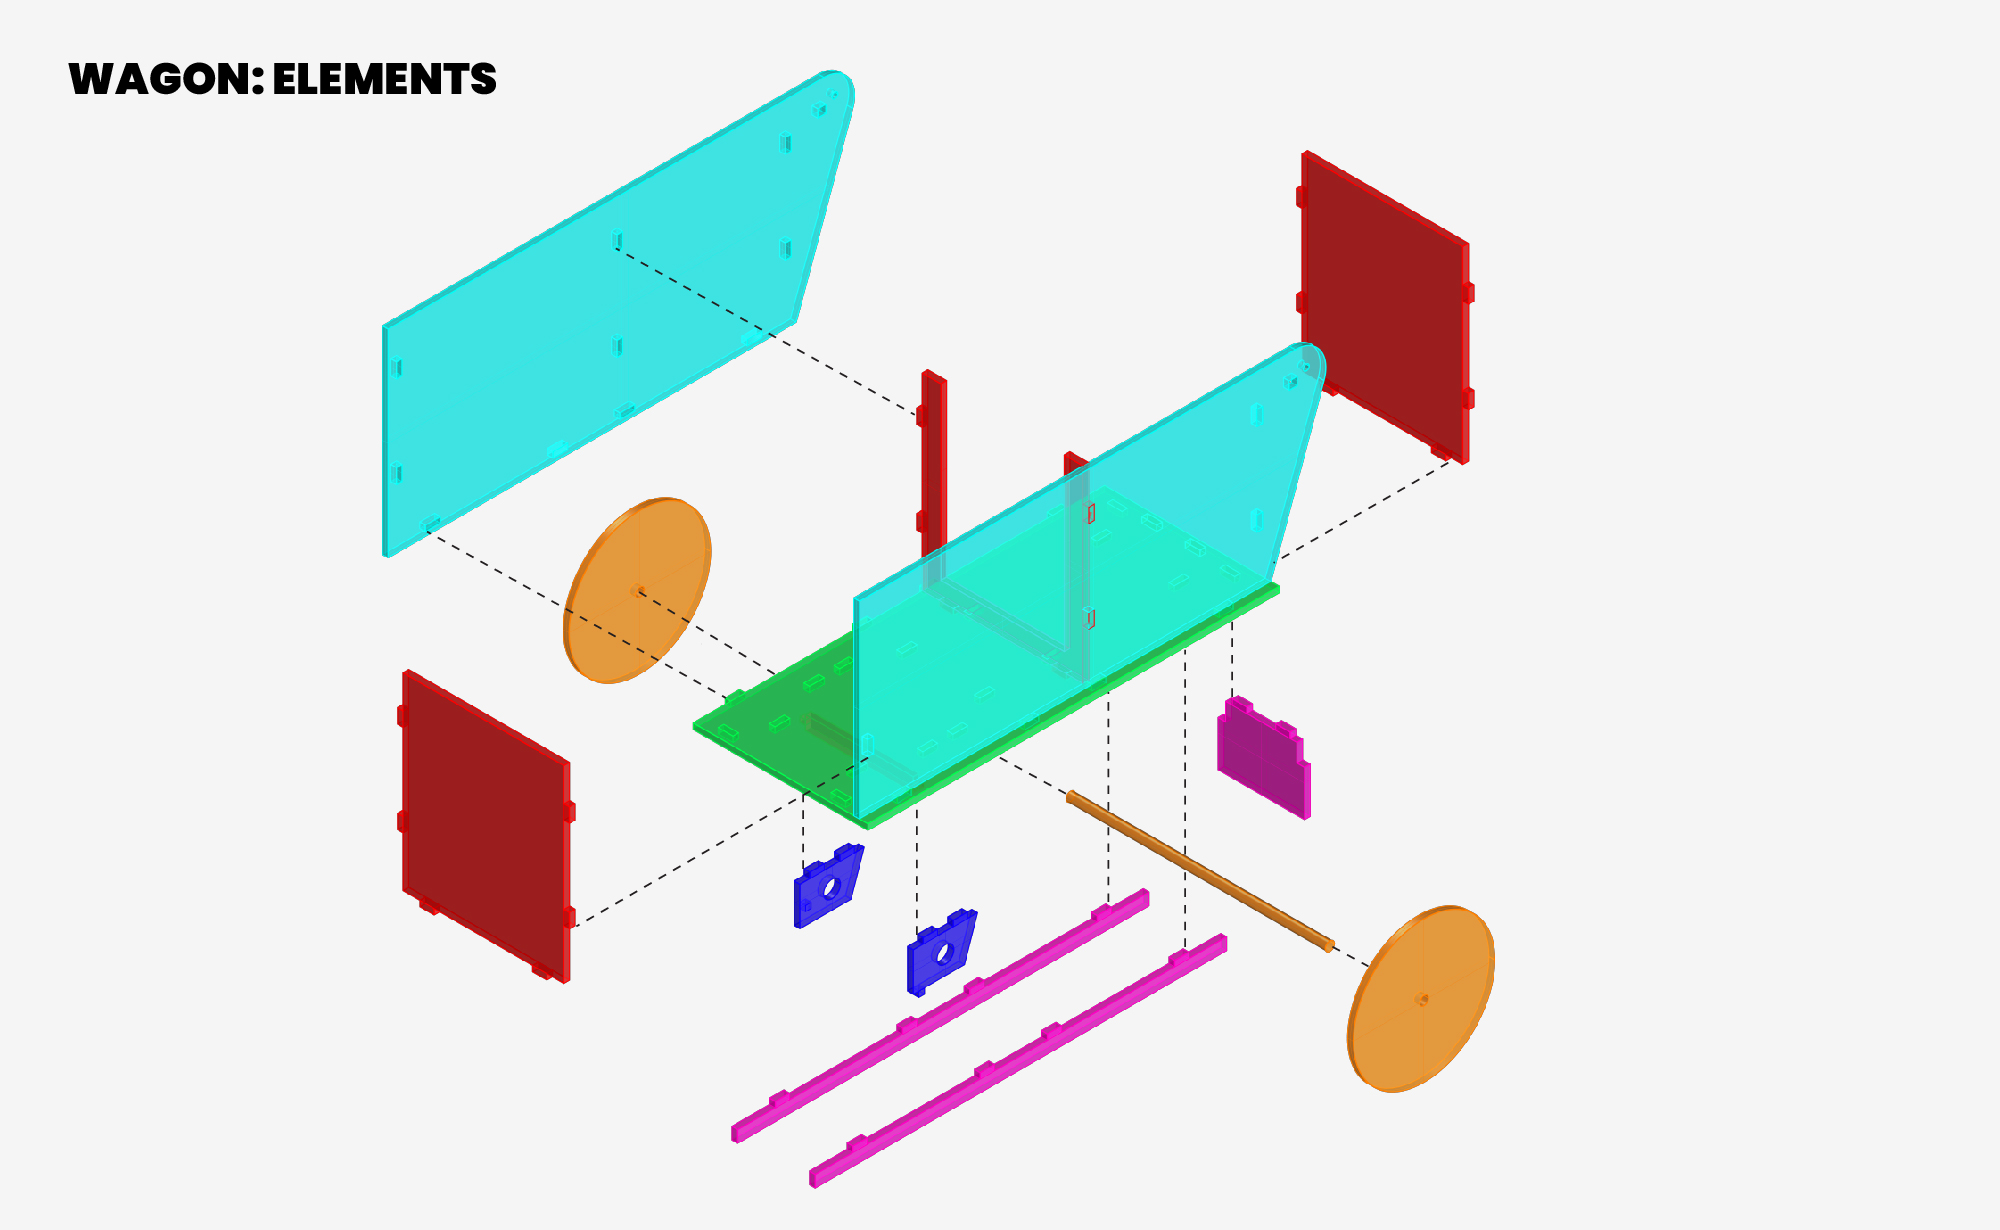
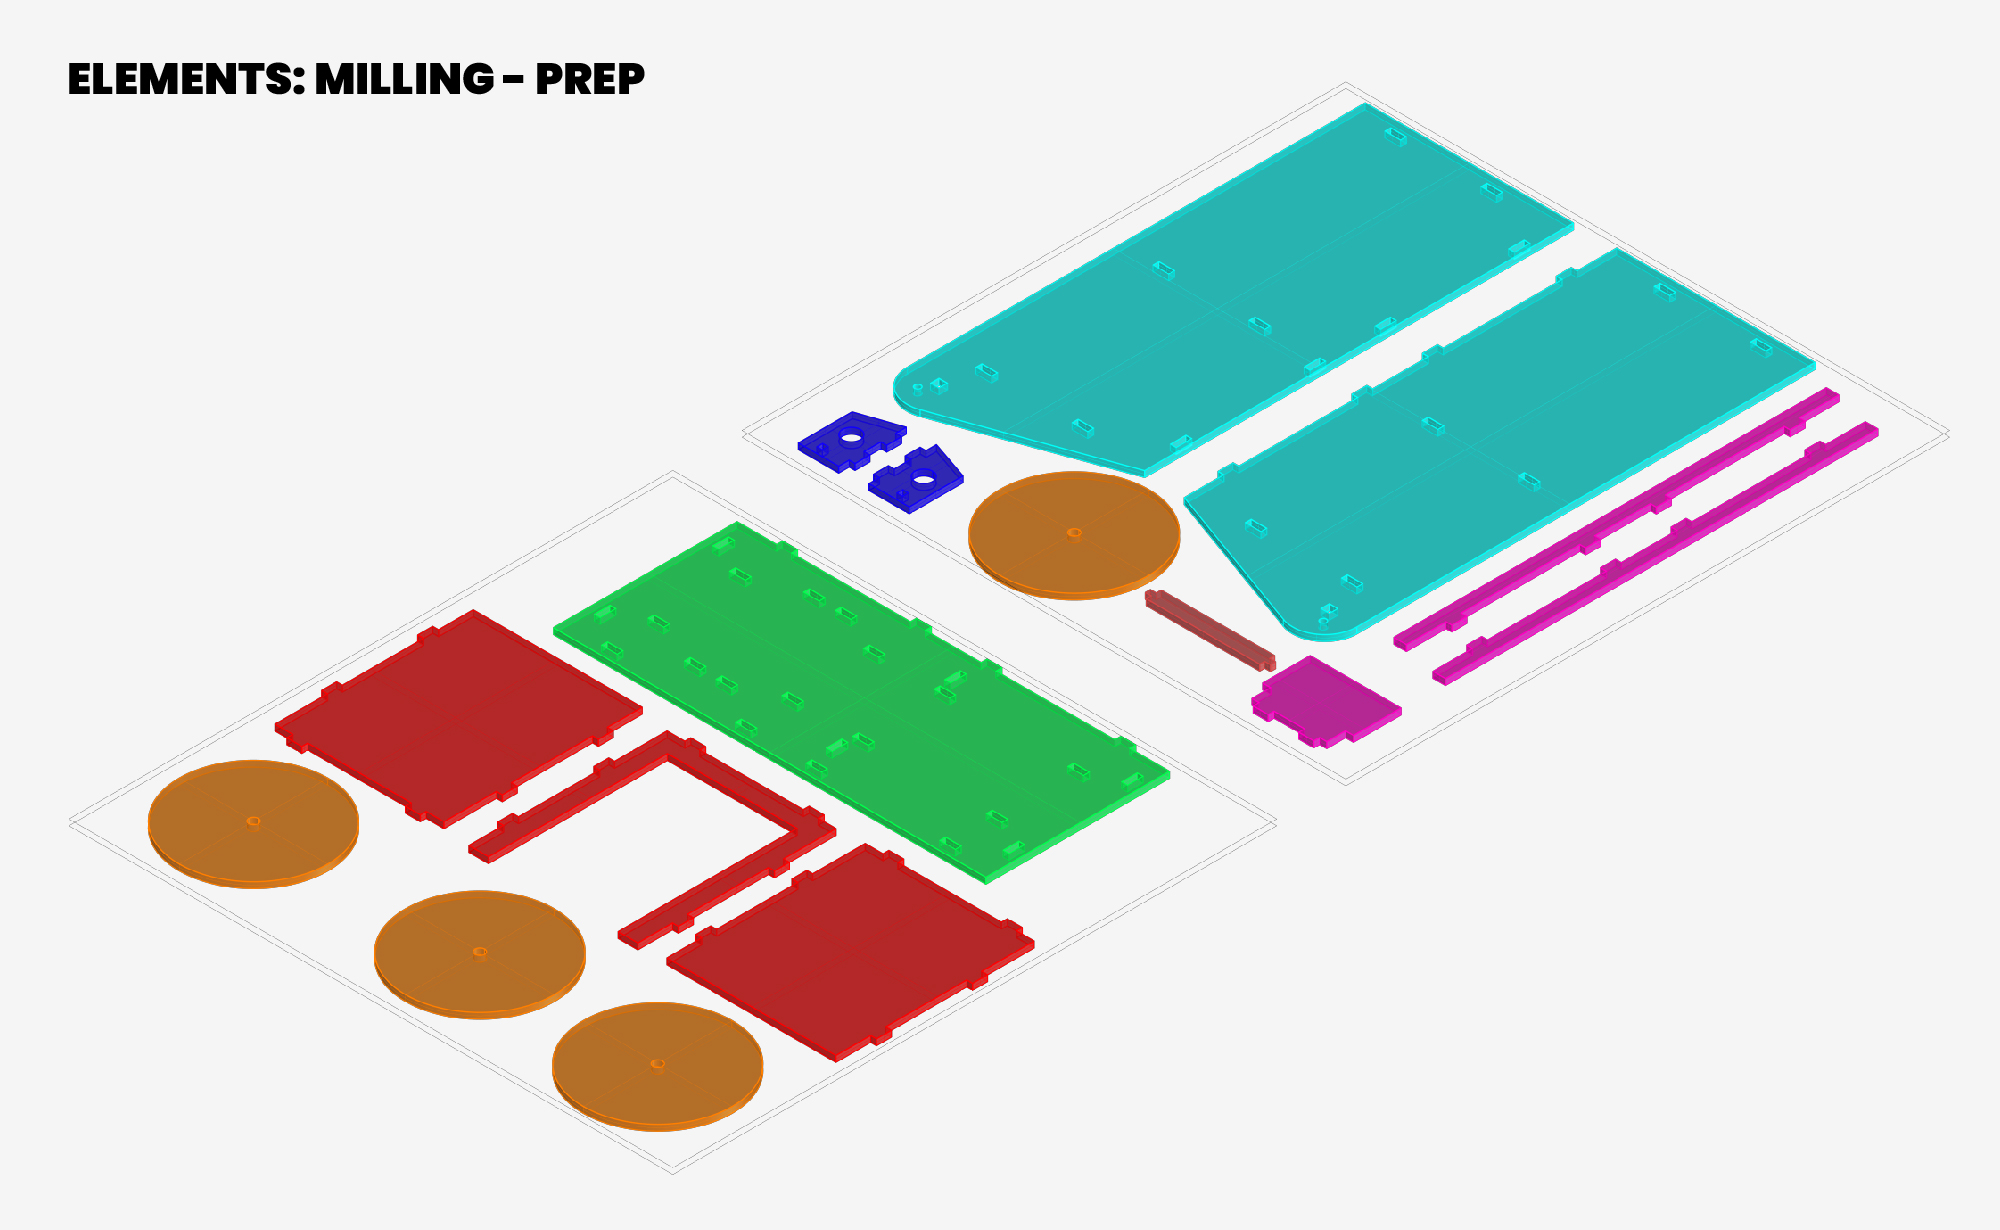
Exploded drawing of the different elements.
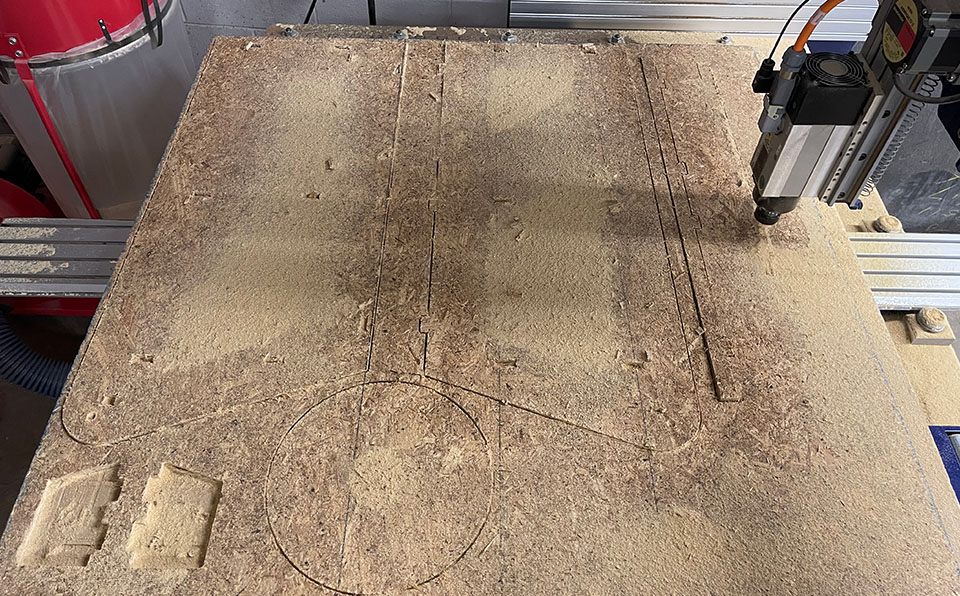
Through vectors and 2D packing, the elements are then stacked into a 4' x 8' sheet that is then cut to 4' x 4' to fit the science center shopbot machine.
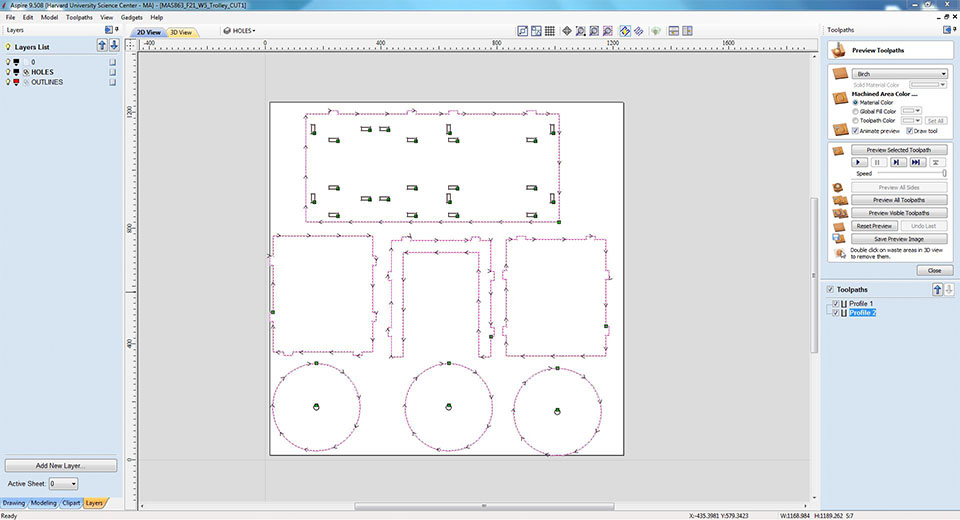
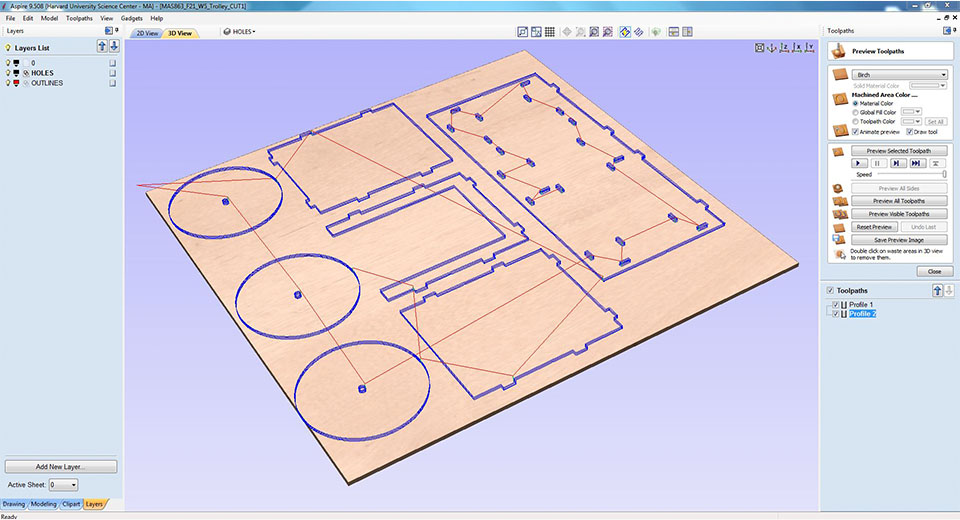
Using aspire software to generate two toolpaths: the first is the inner pockets, mainly cutting through the notches, and the second, the outlines of the pieces. I used a stock that was 0.465" and set the interval of the cut to 4 passes with a 12mm depth of cut.
Using a 1/8" end mill tool, with a 18000 spindle speed and an offset from the boundary of the stock that is no less than 20mm.
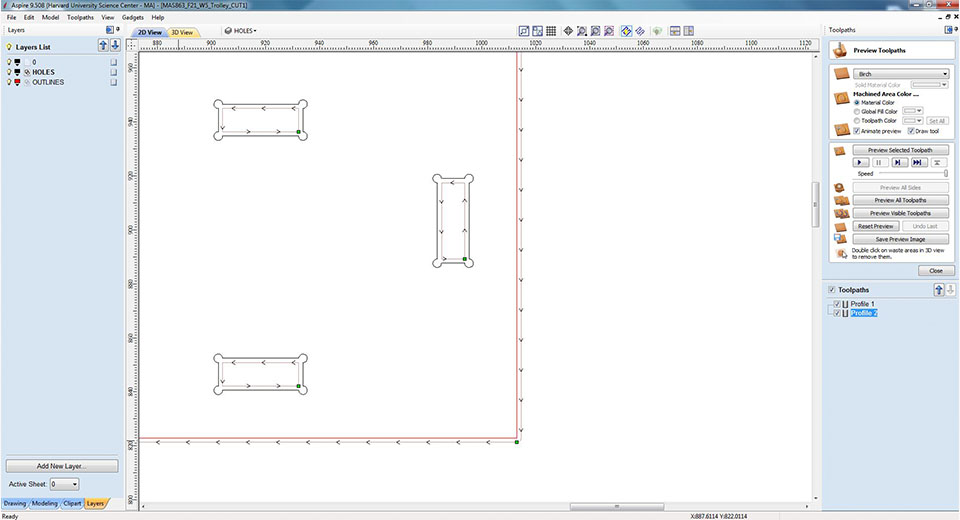
This was not the best way to do the 'dog bones', since it slowed the machine while approaching narrow corners. Instead, I should have drilled holes in those sharp corners and then passed a regular cut following the geometries' outlines.
I believe this would have saved 30-40% of the cutting time. Overall I used 2 hours in the shopbot lab to cut the two 4'x4' sheets.
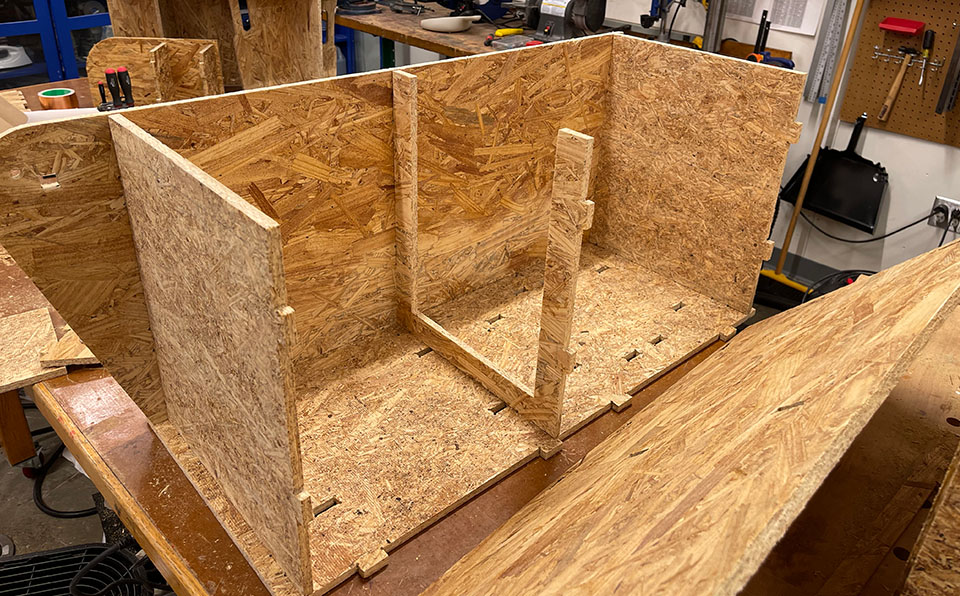
The assembly was straight forward and somewhat easy given that tolerance test done earlier. It fit tight enough to stand strong and not too tight for me to use extensive force to put it together.
Before taking it outside for a first ride and to fill its belly with grocerries :). Let's see if it'll pass the test..
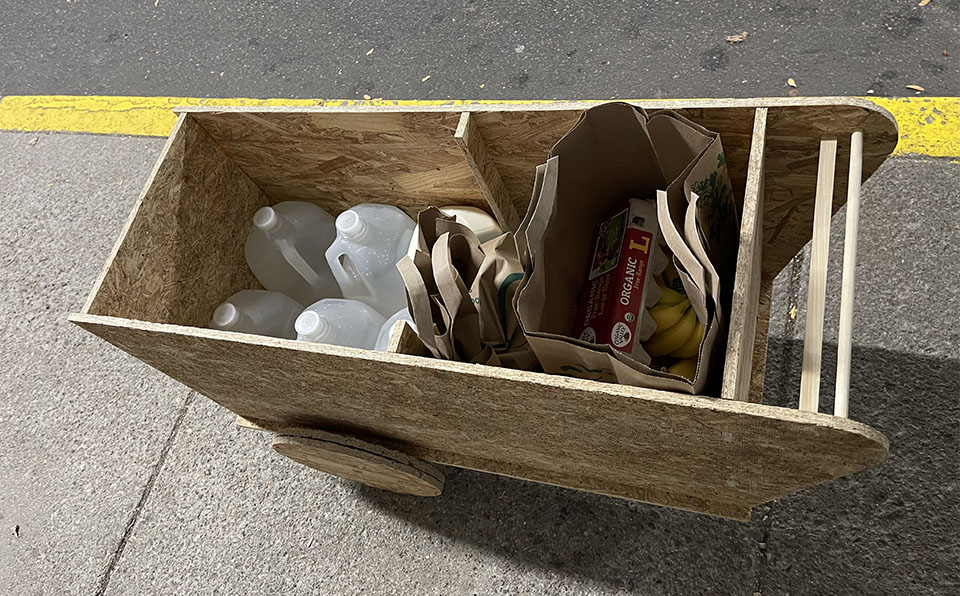
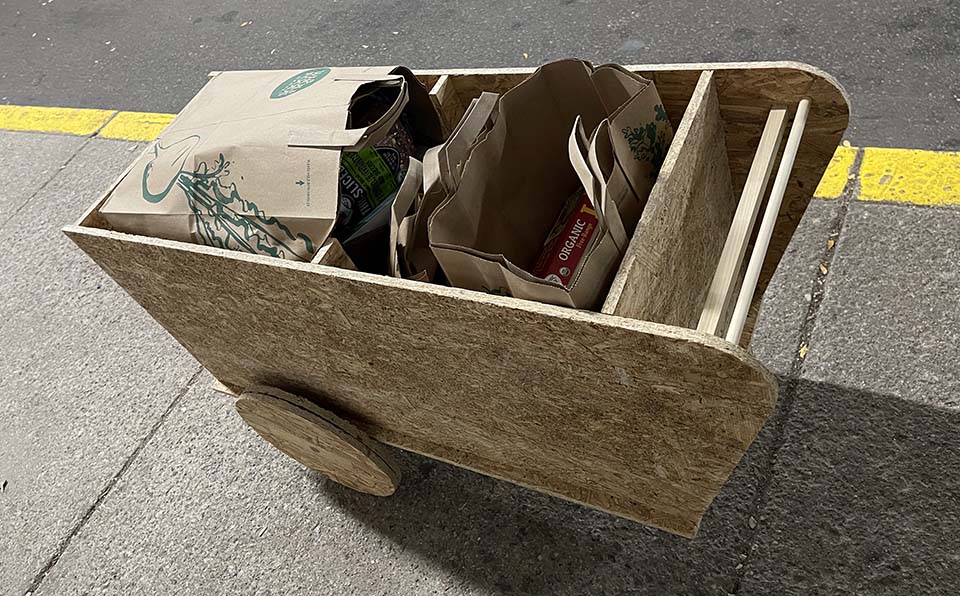
Finally putting the wagon to real test! I took it a trip to whole food with the mission to buy 6 gallons of water and grocerries for the month. I was unsure of couple of things, 1) whether it will survive the not so smooth trip from home to whole foods.. and it did very well!
2) whether it will be structural enough to withstand that much load given its fastner free.. and it did, and it could take more! The result of this week's assignment saved me atleast two third of my trips to the grocerry store. What I used to get in 3 times (since I do not drive) I was able to get in 1 trip!
... the live demonstation ... What was funny, the assistance worker said "pull up your car and we will load those into it", so I said yes sure and went to pick bring the wagon from the bike rack. When they saw me coming with it, they laughed so much and doubted that it will carry the weight. But they, and other passing by people where very happy to see it.
A mother stopped me to show her kid!