Molding & Casting
dematerialization
[dematerialization] casting fabric properties into metal.
For this week's assignment, I started by planning to make a double curved panel that has sharp bends and folds that resemble the 'drape' effect of fabrics.
I then wanted to challenge the process by morphing the surface into a series of 3mm diamater tubes that flow from one end to another. The challenge was to keep a modular design where one panel could attach to another from the ends of the pipes.
I explored a series of patterns through a parametric model and decided to go ahead with one that could give a variety of surface articulations from solid moments where the pipes are close to one another at ending moments, to sparse see through mesh effect at the peremiter.
Below is a walkthrough the joyful, and addictive, process of casting metal [bizmith].
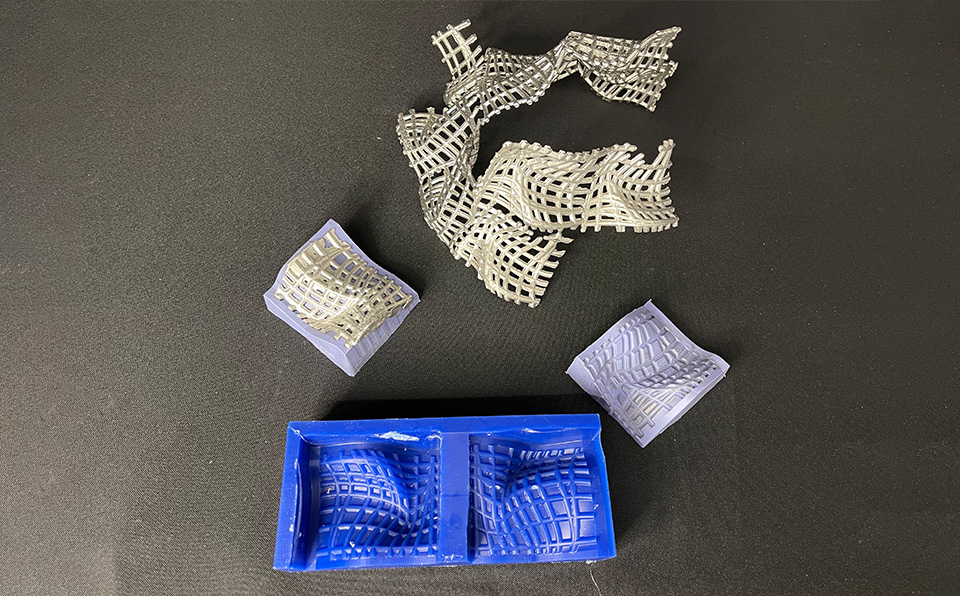
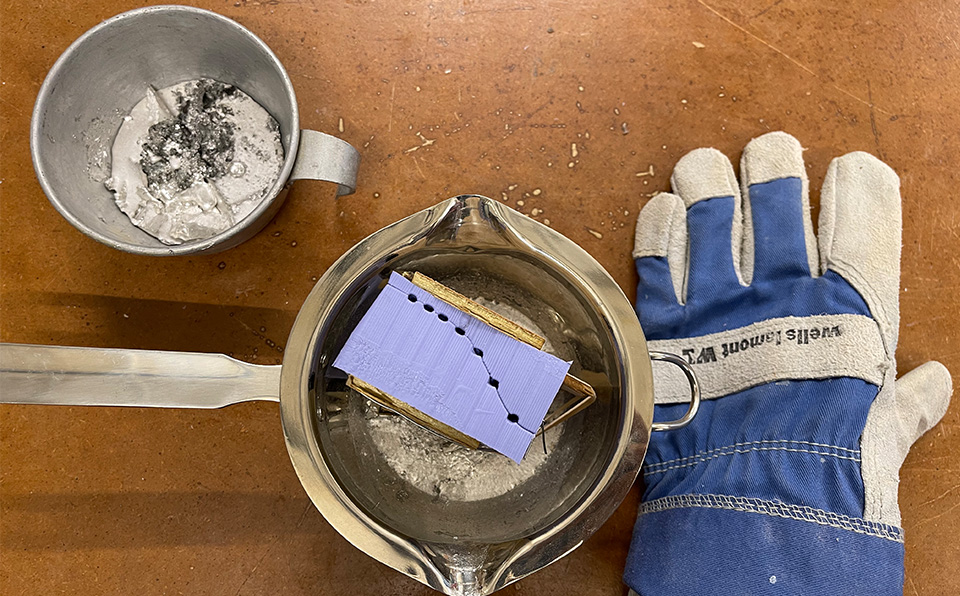
The above image shows the tools used to create the irregular 3D andulating surface. It combined the mold milled on the science center's shopbot, the silicon omu molds and the bizmith casts within.
Using simple yet modular system, I was able to create an asymetrical composition that resembles qualities found in other materials. The maleability of the system made it easy to work with and left room for human error and mis fitting.
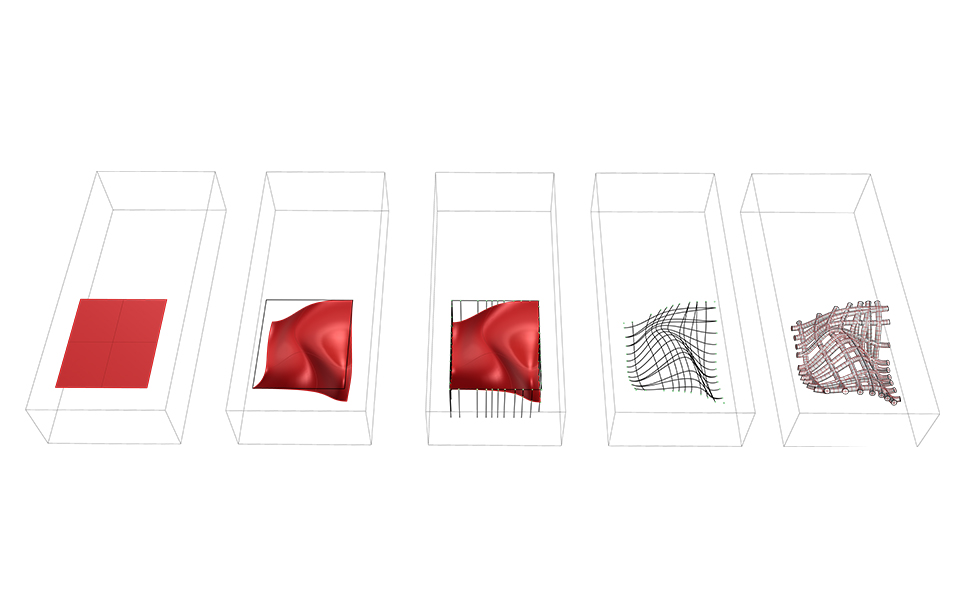
The process like in many cases started with a digital model. Here I began with a surface that fits the wax material stock I had. I then transformed the surface into a double curvature one with sharp folds to exaggerate the drape effect.
I thought there could be merit in translating the surface using lines, where I would start to get different readings according to the density of the lines and taking into account the imperfect process of casting metal.
After several iterations and testing to predict the best diamater for the pipes, I ended up with a 2.7mm tube diameters.
To mill the surface. I sliced the model into half using an extened version of the base surface and then rotating in 3-dimension (not reflecting) into the other side of the stock.
Using aspire on the lab's computer, I ran two paths. Starting with a rough pass using a 1/2" endmill bit, it took around five minutes to complete. Knowing that I wanted a finer detail and that I had a two part mold, I ran my file close to midnight so that I don't extend to someone else's time.
I used a 1/8" ballnose with 50% stepover for the finish pass, which took around one hour to complete.
I should also note that I initially thought that I would not need a rough pass, so I tried to go though the material straight to finidh with a ballnose and ended up breaking the bit.

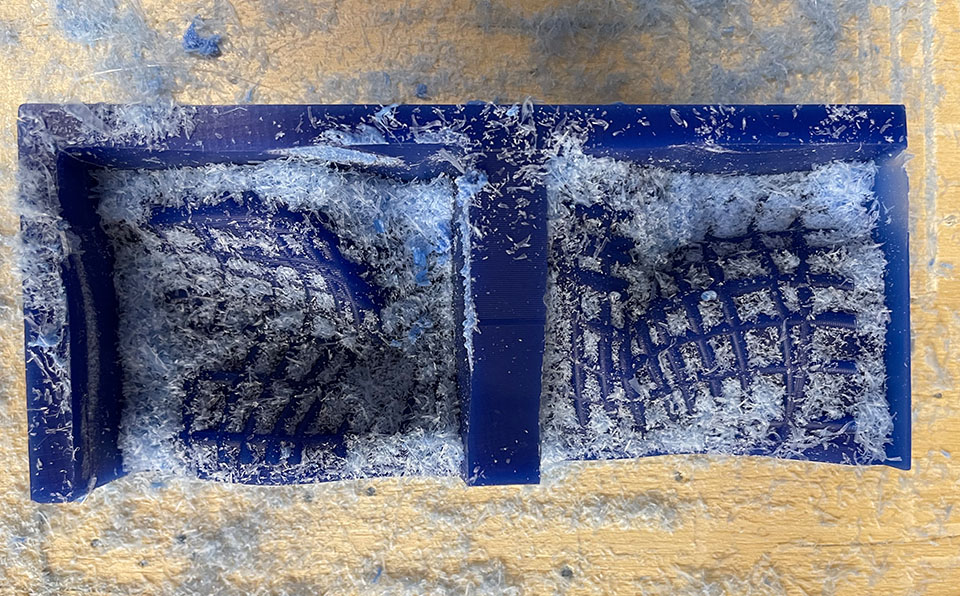
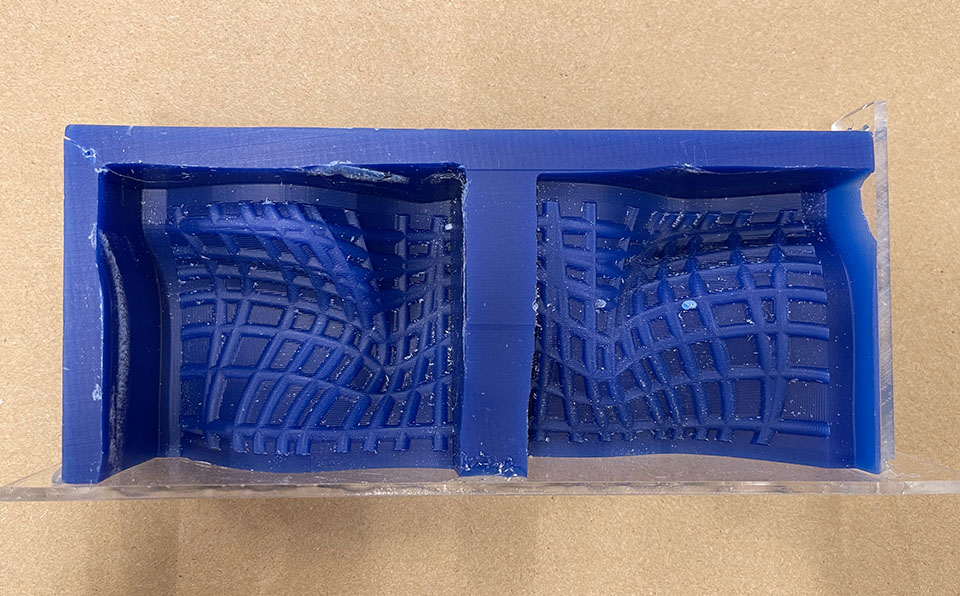
Now that I cleaned and preped the model, it was time to cast the negative. I used Omoo 30 with a 1:1 ratio by volume. My two molds used 200ml, approximetly one full cup.
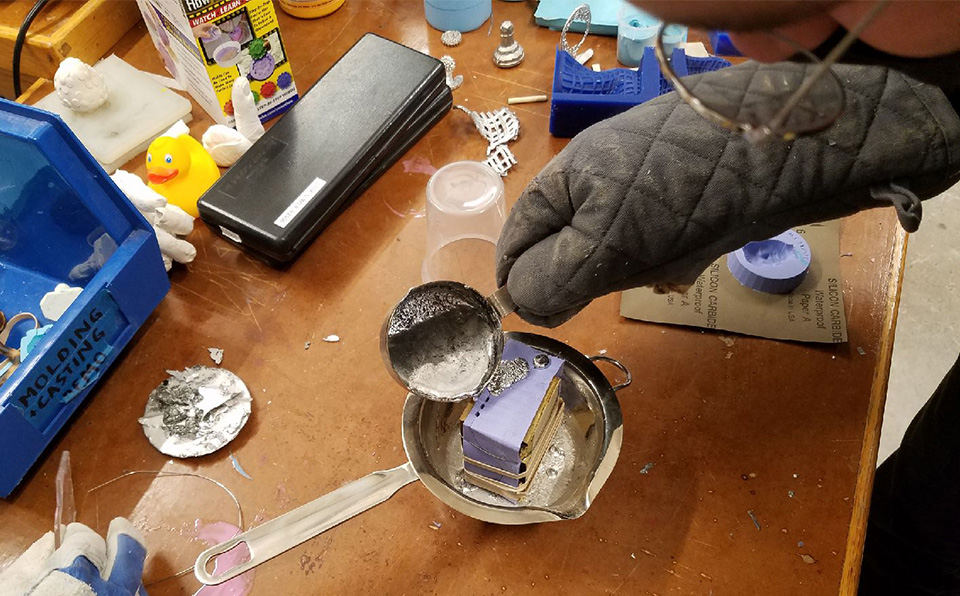
This was my first time casting metal, so I was extremly worried, especially that we used the oven in the lab to melt the metal using "pizza settings"which seemed strange and worrying. After several attempts and different settings, the metal finally started to metal at 450 degrees celcius for around 10 minutes in.
One the metal was in a good liquid state, I used heavy use gloves to pure inside the mold which was sitting within another metal container. Luckily my mold had multiple vents which meant that I did not near an air or casting vents.
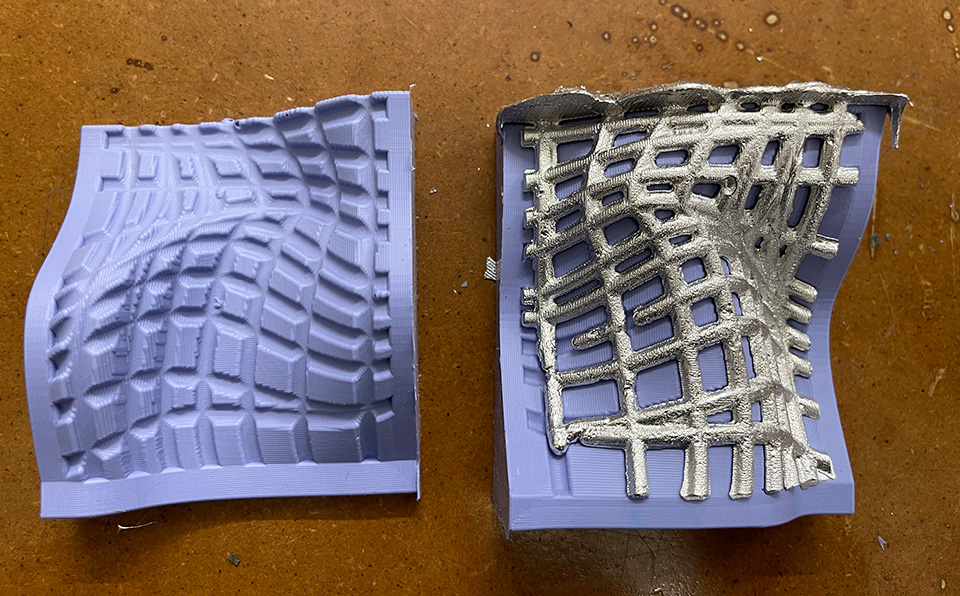
While the model had multiple vents, I still had to figure out the best corner and orientation to cast from to ensure that the metal flows through all the paths. After several trial and error, I was able to get several successful pieces.
The end I was casting from started to deteriorate and therefore the metal started to form surfaces. Luckily, I was able to remove most of them either with shop tools such as plyers or more difficult ones using the soldering tool.
After approximetly 10 casts, the mold was clearly in a state diffierent than the starting one. The head started eating from the silicon mold surfaces and the diameters of the tubes went from 2.7mm to 3.1mm. In some instances the lines were too think that they looked like a surface.
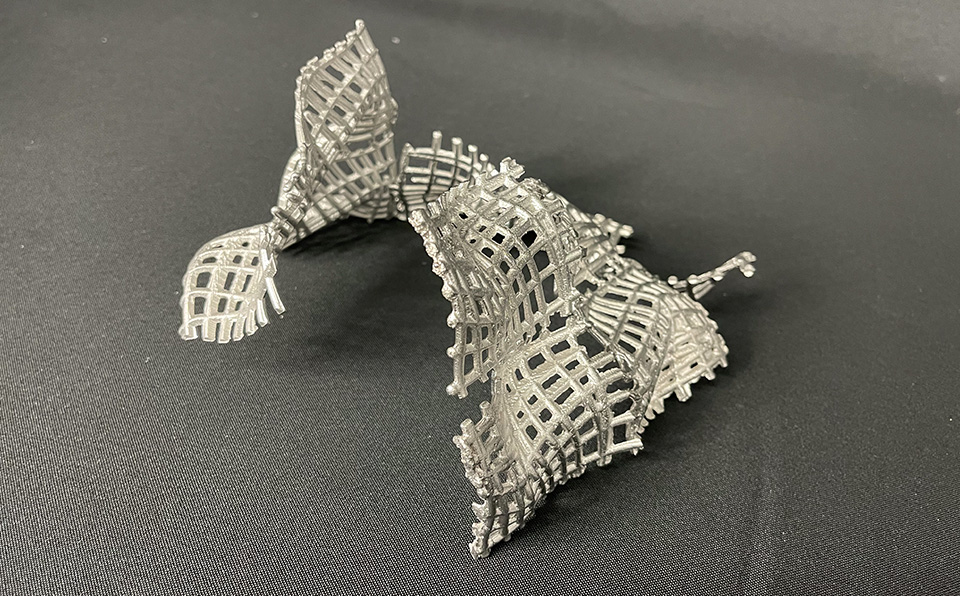
Since the module can connect from four different sides, the I started the assmebly process with a maximum volume in mind that I did not want to exceed.
From there I started trying out different organizations to get a composition that portrays the initial concept well. I was happy with the result after the 10th module was on.
I assembled the pieces together with the soldering gun by melting ends of the two pieces together without using any lead or additional bizmith in most cases.