Redrawing the Board
This week we built upon the electronics production skills from week 2, designing a PCB in addition to the milling, soldering, and bootloading we had done previously. The first step in this process was to choose a board and redraw the schematic in either KiCad or Eagle. I'm more familiar with Fusion360, which integrates with Eagle, but decided to learn KiCad as it is a free resource that will likely be more available after leaving the academic community. I also chose the SAMD11C.echo.1 chip that Neil had recommended in class, as the ATTiny was cautioned as a more complicated process which often relies on Linux operating systems.

To begin the redrawing process, I dropped all the nessecary components into te KiCad schematic, using the fab libraries wherever possible. Not all the symbols lined up perfectly with the diagram, but this was later resolved through footprint mapping. I then exported to SVG and inverted the colors in Inkscape to produce a mods-friendly PNG. A lot of folks in the class also struggled with getting the sizing right, so I used the "measure" feature in KiCad to check sizing against the SVG to PNG converted image.

Milling and Soldering
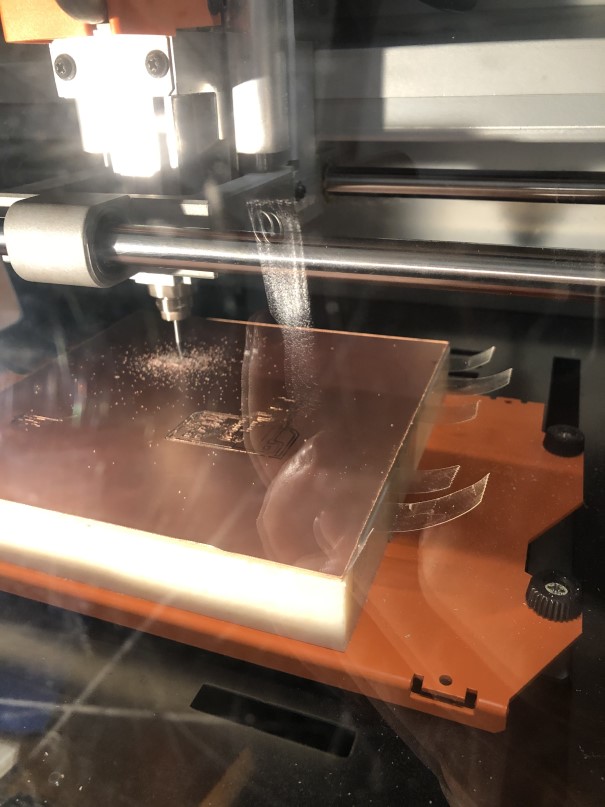
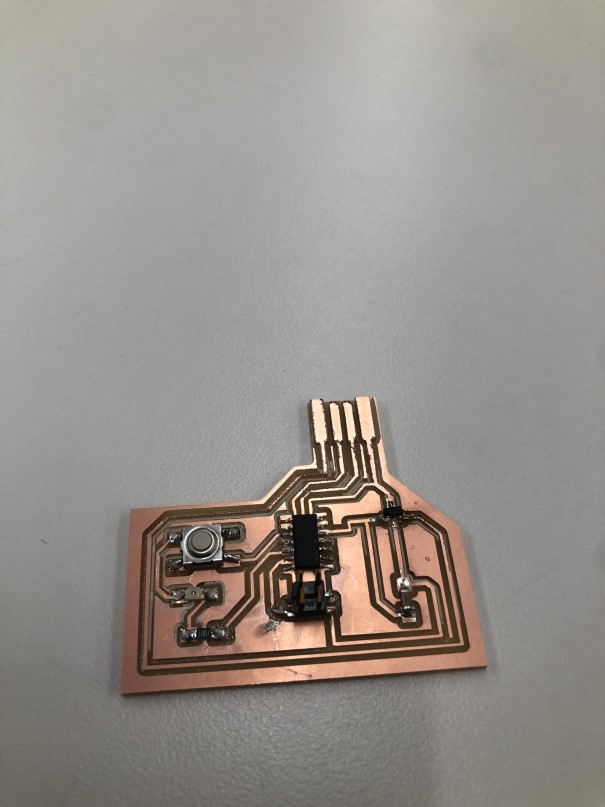
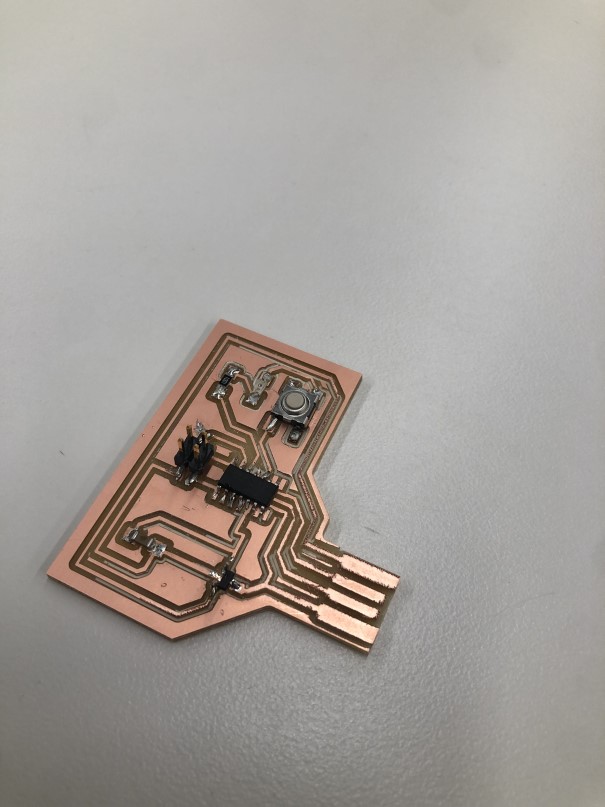
It took a few attempts to get the board milled appropriately, with some bends in the PCB making passes to shallow or deep, and some image sizing that caused the outline to cut off the edges of the board, unfortunately taking some traces with it. With a successful board in hand, I then got to solder, which is quickly becoming my favorite part of the process. I'm still getting familiar with a lot of the components, so finding them and matching to the schematic can be challenging, but once I've got all my ingredients together, I really enjoy getting into a flow with the solder to add them to my board.
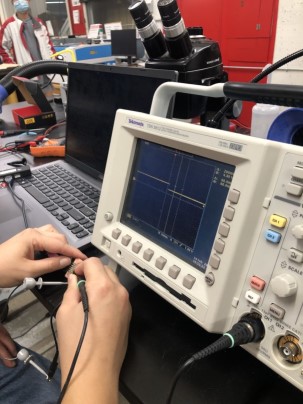
To finish out the week, Rob helped us bootload and test out our boards. As part of that process, he also walked us through the group assignment, showing everyone how to use the multimeter and oscilloscope. He illustrated how to test circuits to ensure they were geting the right output, and showed us how to adjust the view of those signals on the oscilloscope as a tool for debugging board issues. It seems like there's a lot more to learn in this area, as he said board issues can come from a range of sources, so I'm sure we'll get more familiar with these tools.