Week 10
Output Devices
The Assignment
For this week's assignment I decided to do a cross between working on my final project and making my little sister happy. Two wildly different things that both somehow required the same general concepts. Back in Embedded systems I swore that my neopixel idea was merely put on pause and not fully abandoned. I came back to the Neopixel idea this week because my little sister had dressed as a "Rainbow Unicorn" for Halloween and had insisted that I wear a costume too. I told her that I would be a rainbow unicorn too so that we could be "twinsies" but she didn't want it to stop there. Because I was older she insisted that I make her a light-up unicorn horn and though she has made unmet childish demands before I decided to take her up on her offer by creating a neopixel rainbow unicorn hat. It was supposed to have a propeller too but I ran out of time. On the more serious side, I did a lot of research into 3D printer boards to see if that was something I should try to make... The answer to that one was no, but the individual motor control boards seemed feasible. So anyway this week's documentation will be broken up into two parts one with a rainbow unicorn helmet and one with a stepper controller device.
Some Exciting News
For weeks Neil has been telling us to ween ourselves off of the web IDE and I finally did it, you may not be able to tell, and there's almost no discernable difference to me either, but I am typing this up on VScode!!! I feel like I've come a long way from the first time I tried to write up my documentation and was laughed at for using google docs. I also added CSS, not a lot but enough to make a difference. One of the things I was really hoping to learn in this class was more EE stuff and I am both thrilled and terrified to be given the chance to do so.
I Want to Be A Rainbow Unicorn for Halloween
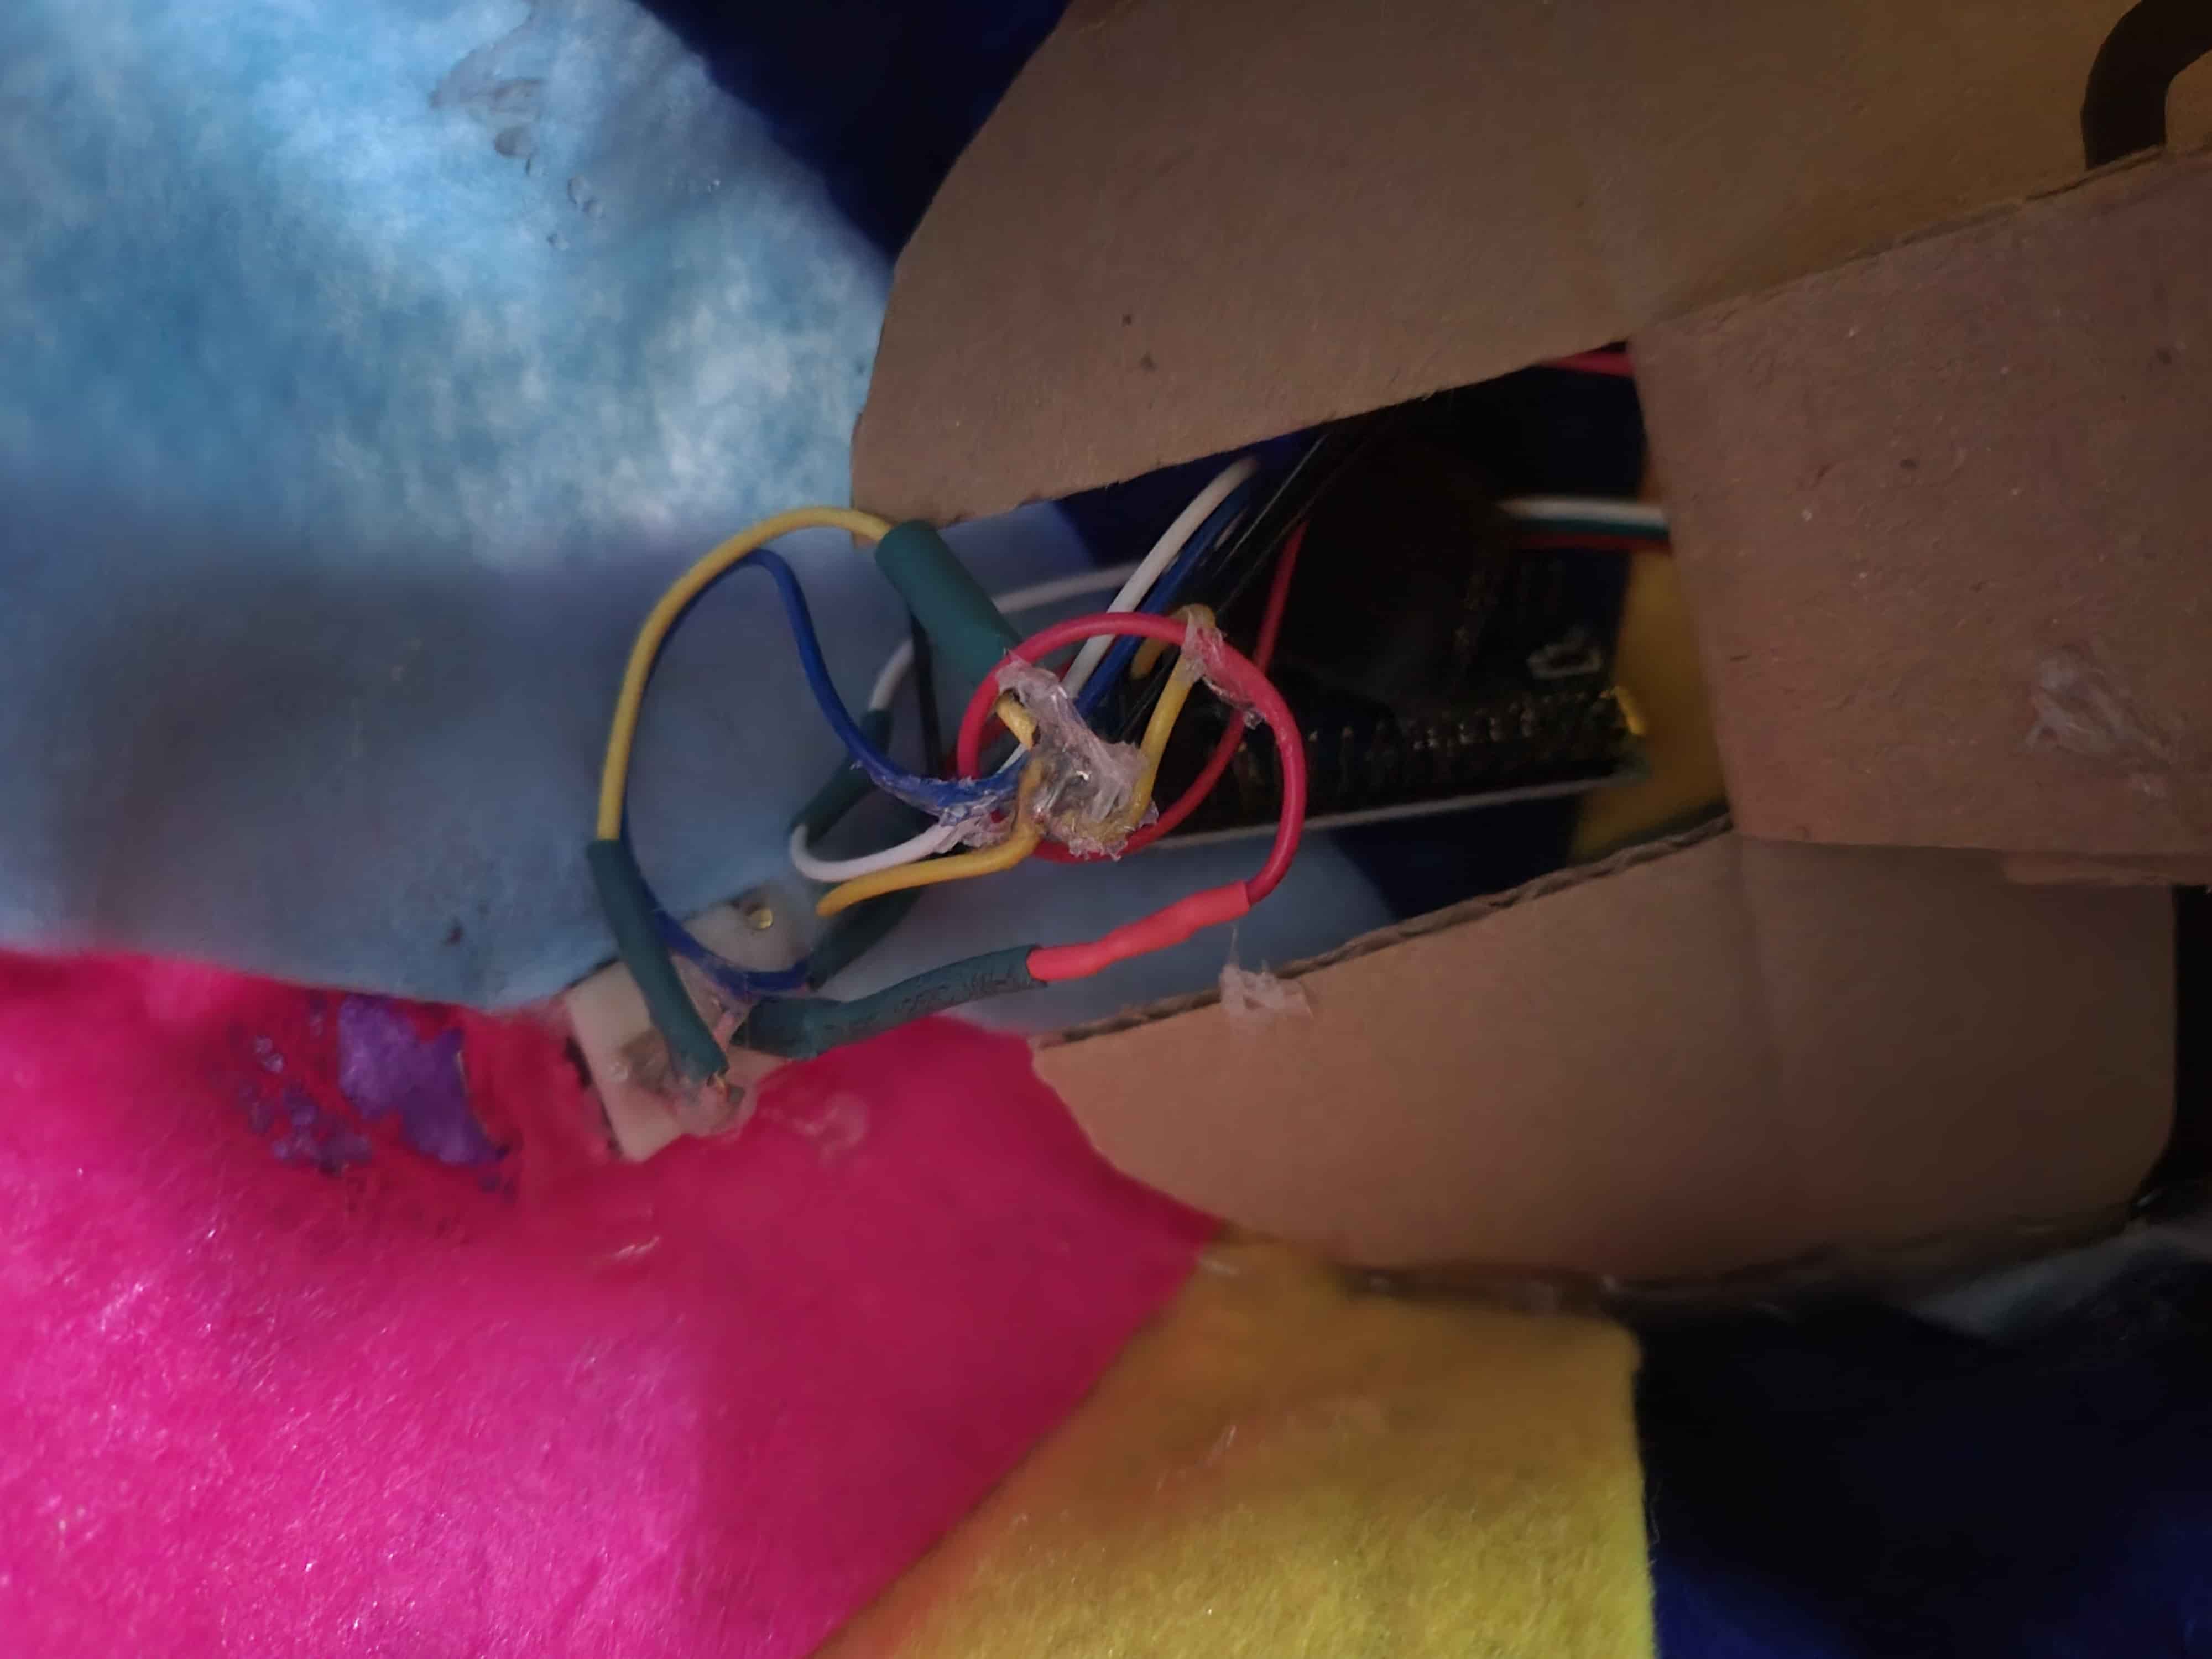
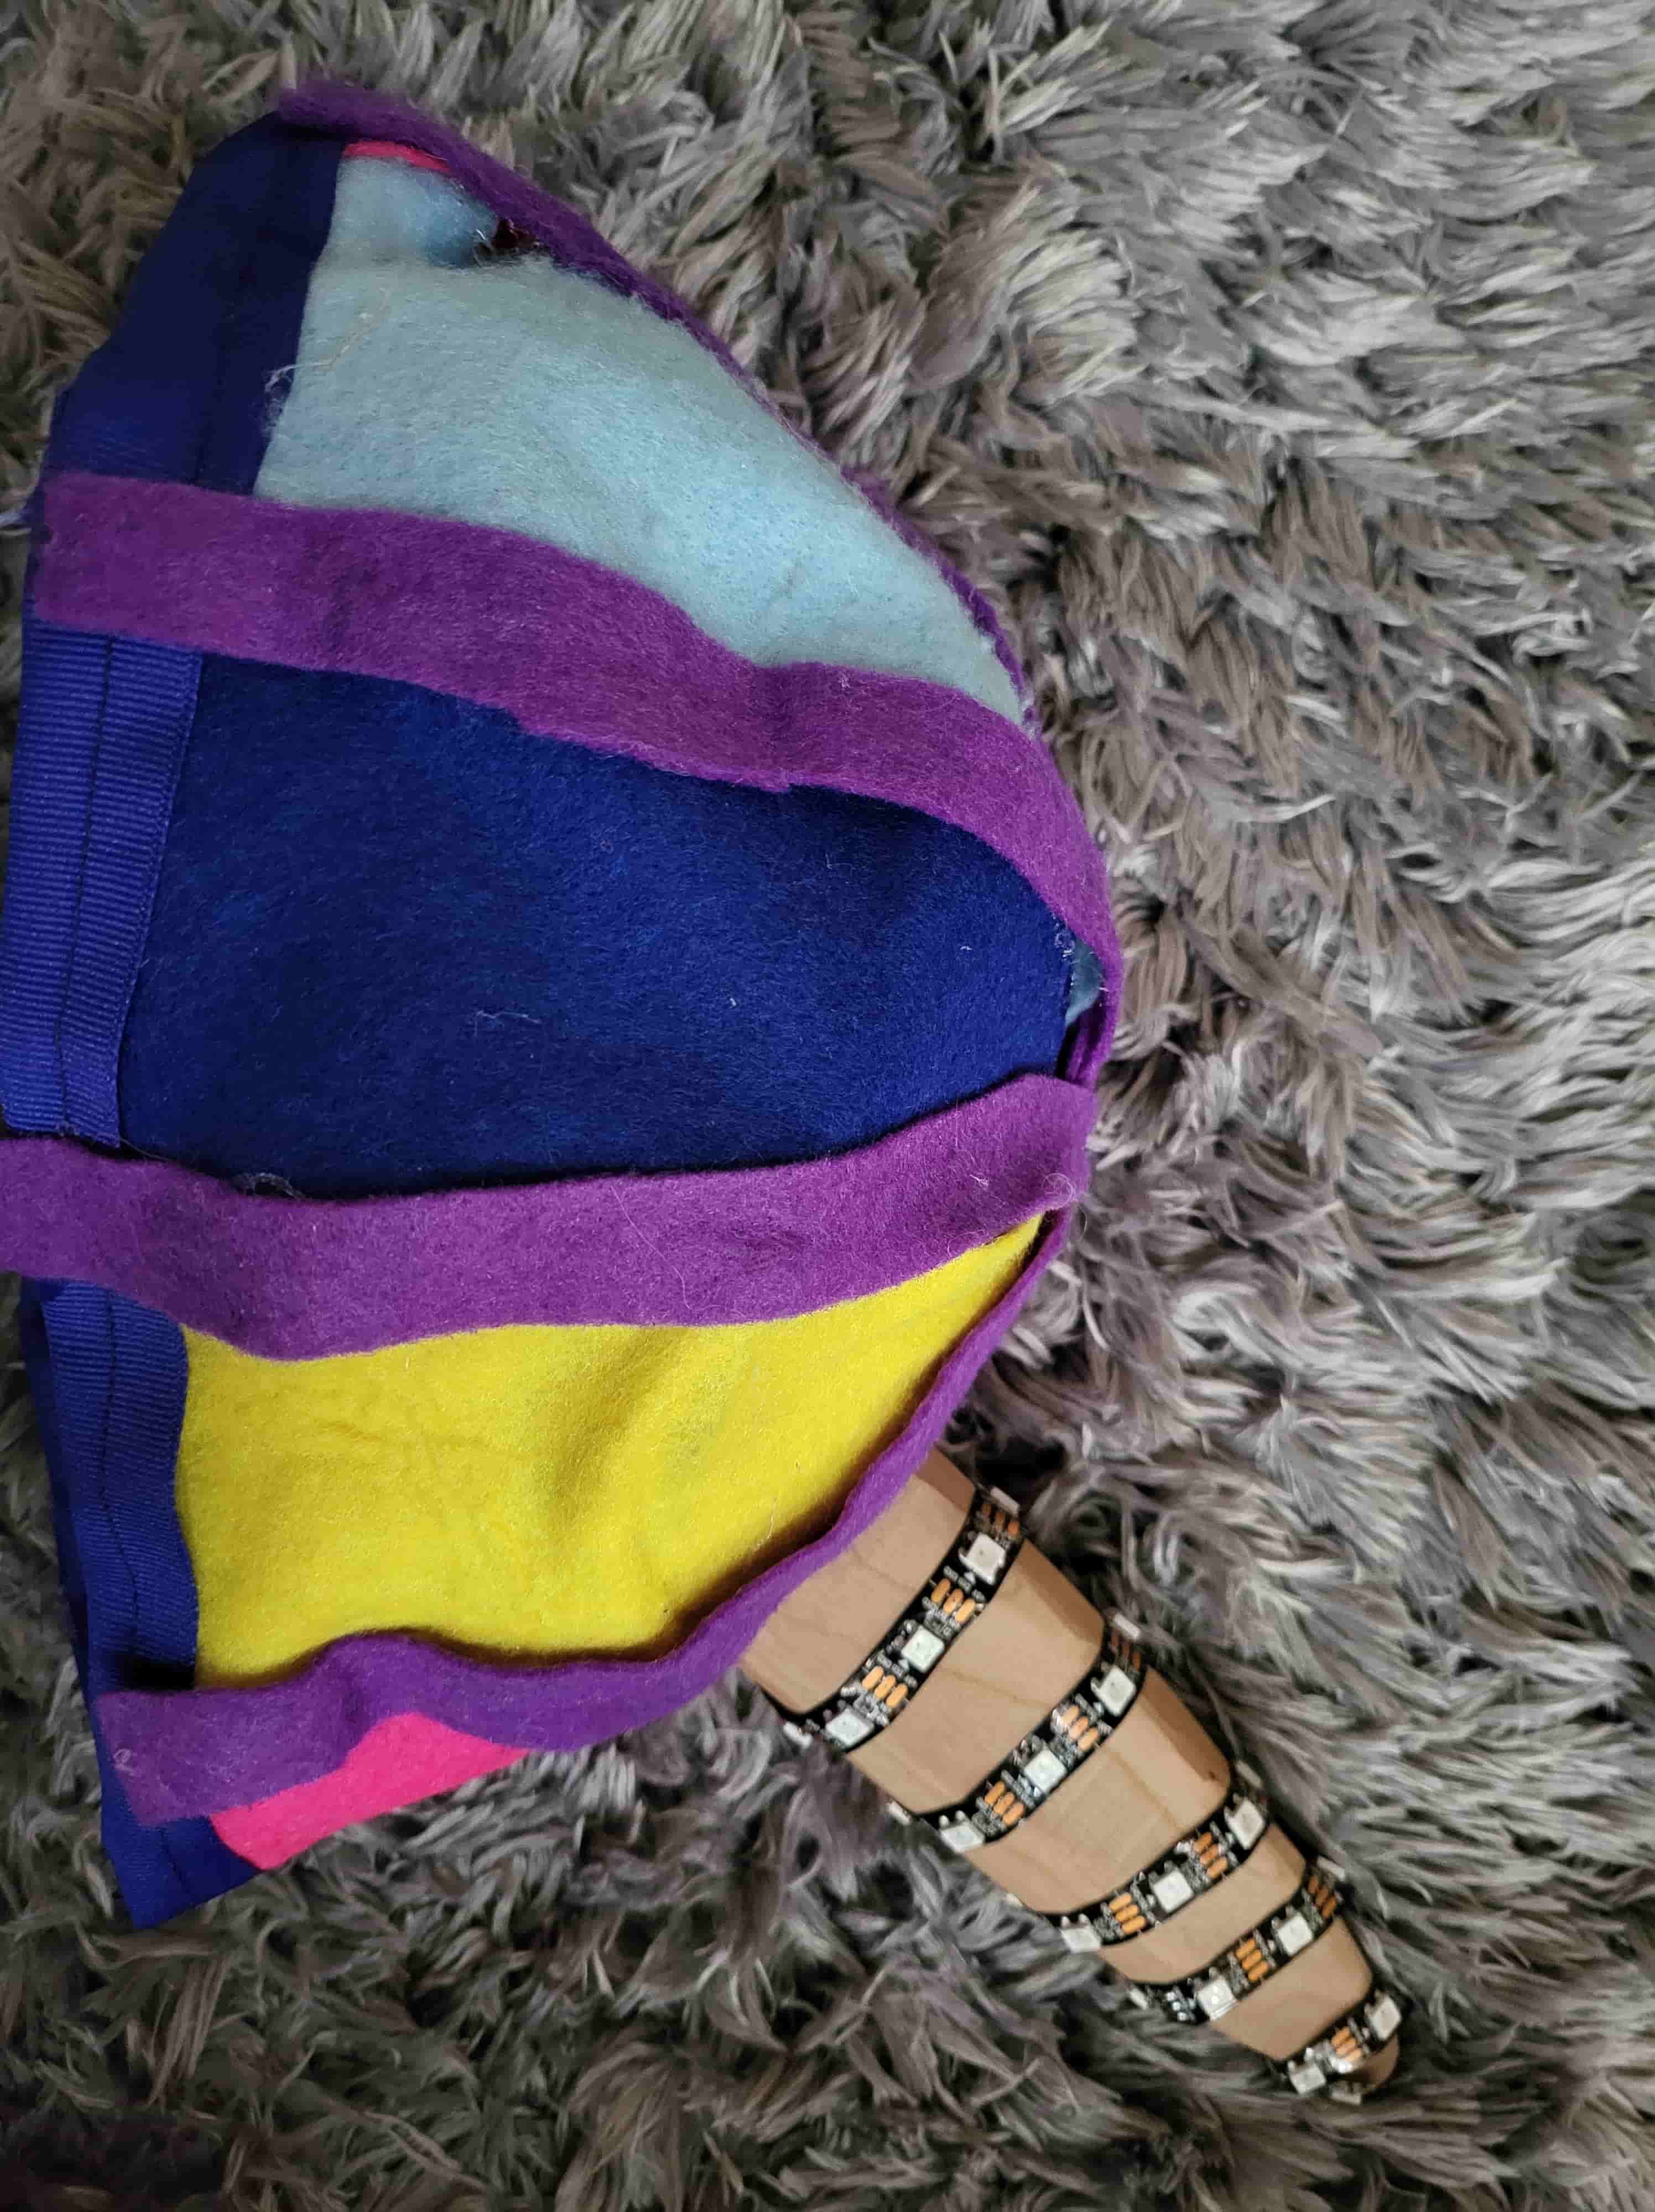
The rainbow unicorn project was made simpler by the substitution of a housemade board with an arduino nano. This gave me the opportunity to focus more on the coding side than the actual milling of the board. I still have the board that programs neopixels with a SAMD21 ready to be milled, but given the time constrainsts I had to act quickly. This project involved a lot more of my favorite part of making... design. As a precursor everything you are about to see was created within the span of 90 minutes. I decided to make the unicorn horn out a wood, so I grabbed a block from the Edgerton Student Center and headed to Metropolis to cut it down into the correct shape. Starting from a rectangular prism and going to a cylindrical cone is hard, especially just on the bandsaw, so I decided to use the sander to completely turn it to shape. I use this lazy technique where I do all my shaping on the sander quite often, and I have been told that this is either genius or ridiculously stupid. Regardless I made a pretty nifting unicorn horn then counted out 47, a prime number, lights to attach to the horn by wrapping them around. It took a while to program because, well I'm no good at Arduino stuff, but also the Arduino update meant that the nano I was using had a processor that was older than the software expected. It was a few troubleshooting clicks later when I figured this out and began to program the perfect rainbow sequence of lights. I needed the device to be free so I had to solder on a battery pack for a 9V battery and attach a swih for turning the contraption on and off. I was originally just going to make a headband, but a solid 6in unicorn horn weighs a bit more than I was expecting/ can be handled by a thin piece of wire. I then had the idea to upgrade to a hat, which involved sewing, hot glue, and a lot more patience than I had time for. I went for a propeller hat style hat and copied the pattern of plates I usually saw on them, I then sewed the bottom corners of the triangle-like pieces together and proceeeded to hot glue all the area that didn't fit because of my lack of measurements. Previously I had 3D printed a crown, and it had been a little too small for some heads, so I went larger with this project, but far too large. The weight of the horn still caused problems so I stuck reinforcement in the excess space at the top of the hat. This space holds the horn, holds the electronics, and helped to solve my too big prediament. Here are photos and videos of the finished hat. I called my sister whilst wearing it and her eyes lit up, I can't wait to give it to her in person.

Group Project: AKA Neopixels take a lot of batteries
I was only able to get the neopixels to work with a 9V battery and had some luck with a 6V battery pack. I originally tried a 3V coin cell battery pack, but not a single light turned on. It would glow nicely on my conputer then just die when I unplugged it. This turned out to be mainly because of faulty wiring but even when fixed the problem persisted. When given 3V of power only 5 LEDs turned on. It turns out that neopixels need a lot of battery power and my setup consumed nearly 5V, the lights would flicker with 4V and my 9V make them extremely bright and rainbow unicorny.
Stepper Control
For my final project I want to control a XY plane of two motors, and to do so I will need motor controllers. I could buy them, but even better is to make them. My dream of making the whole control board died when I realized that I'm no good with electronics and that I'm starting way too late to create something so complex. So I am going to create my own motor control boards, to attach to a premade 3d printer board. I want to use stepper motors because that's how real 3d printers operate as they give you tons of power, precision, and control.
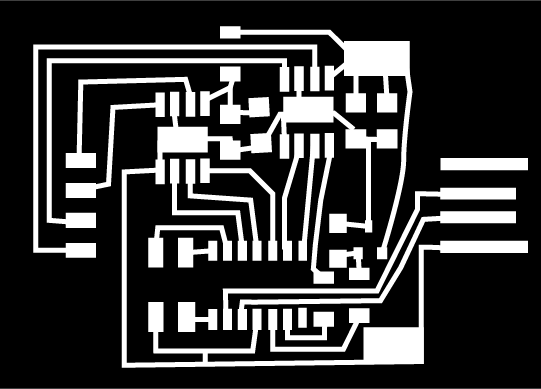
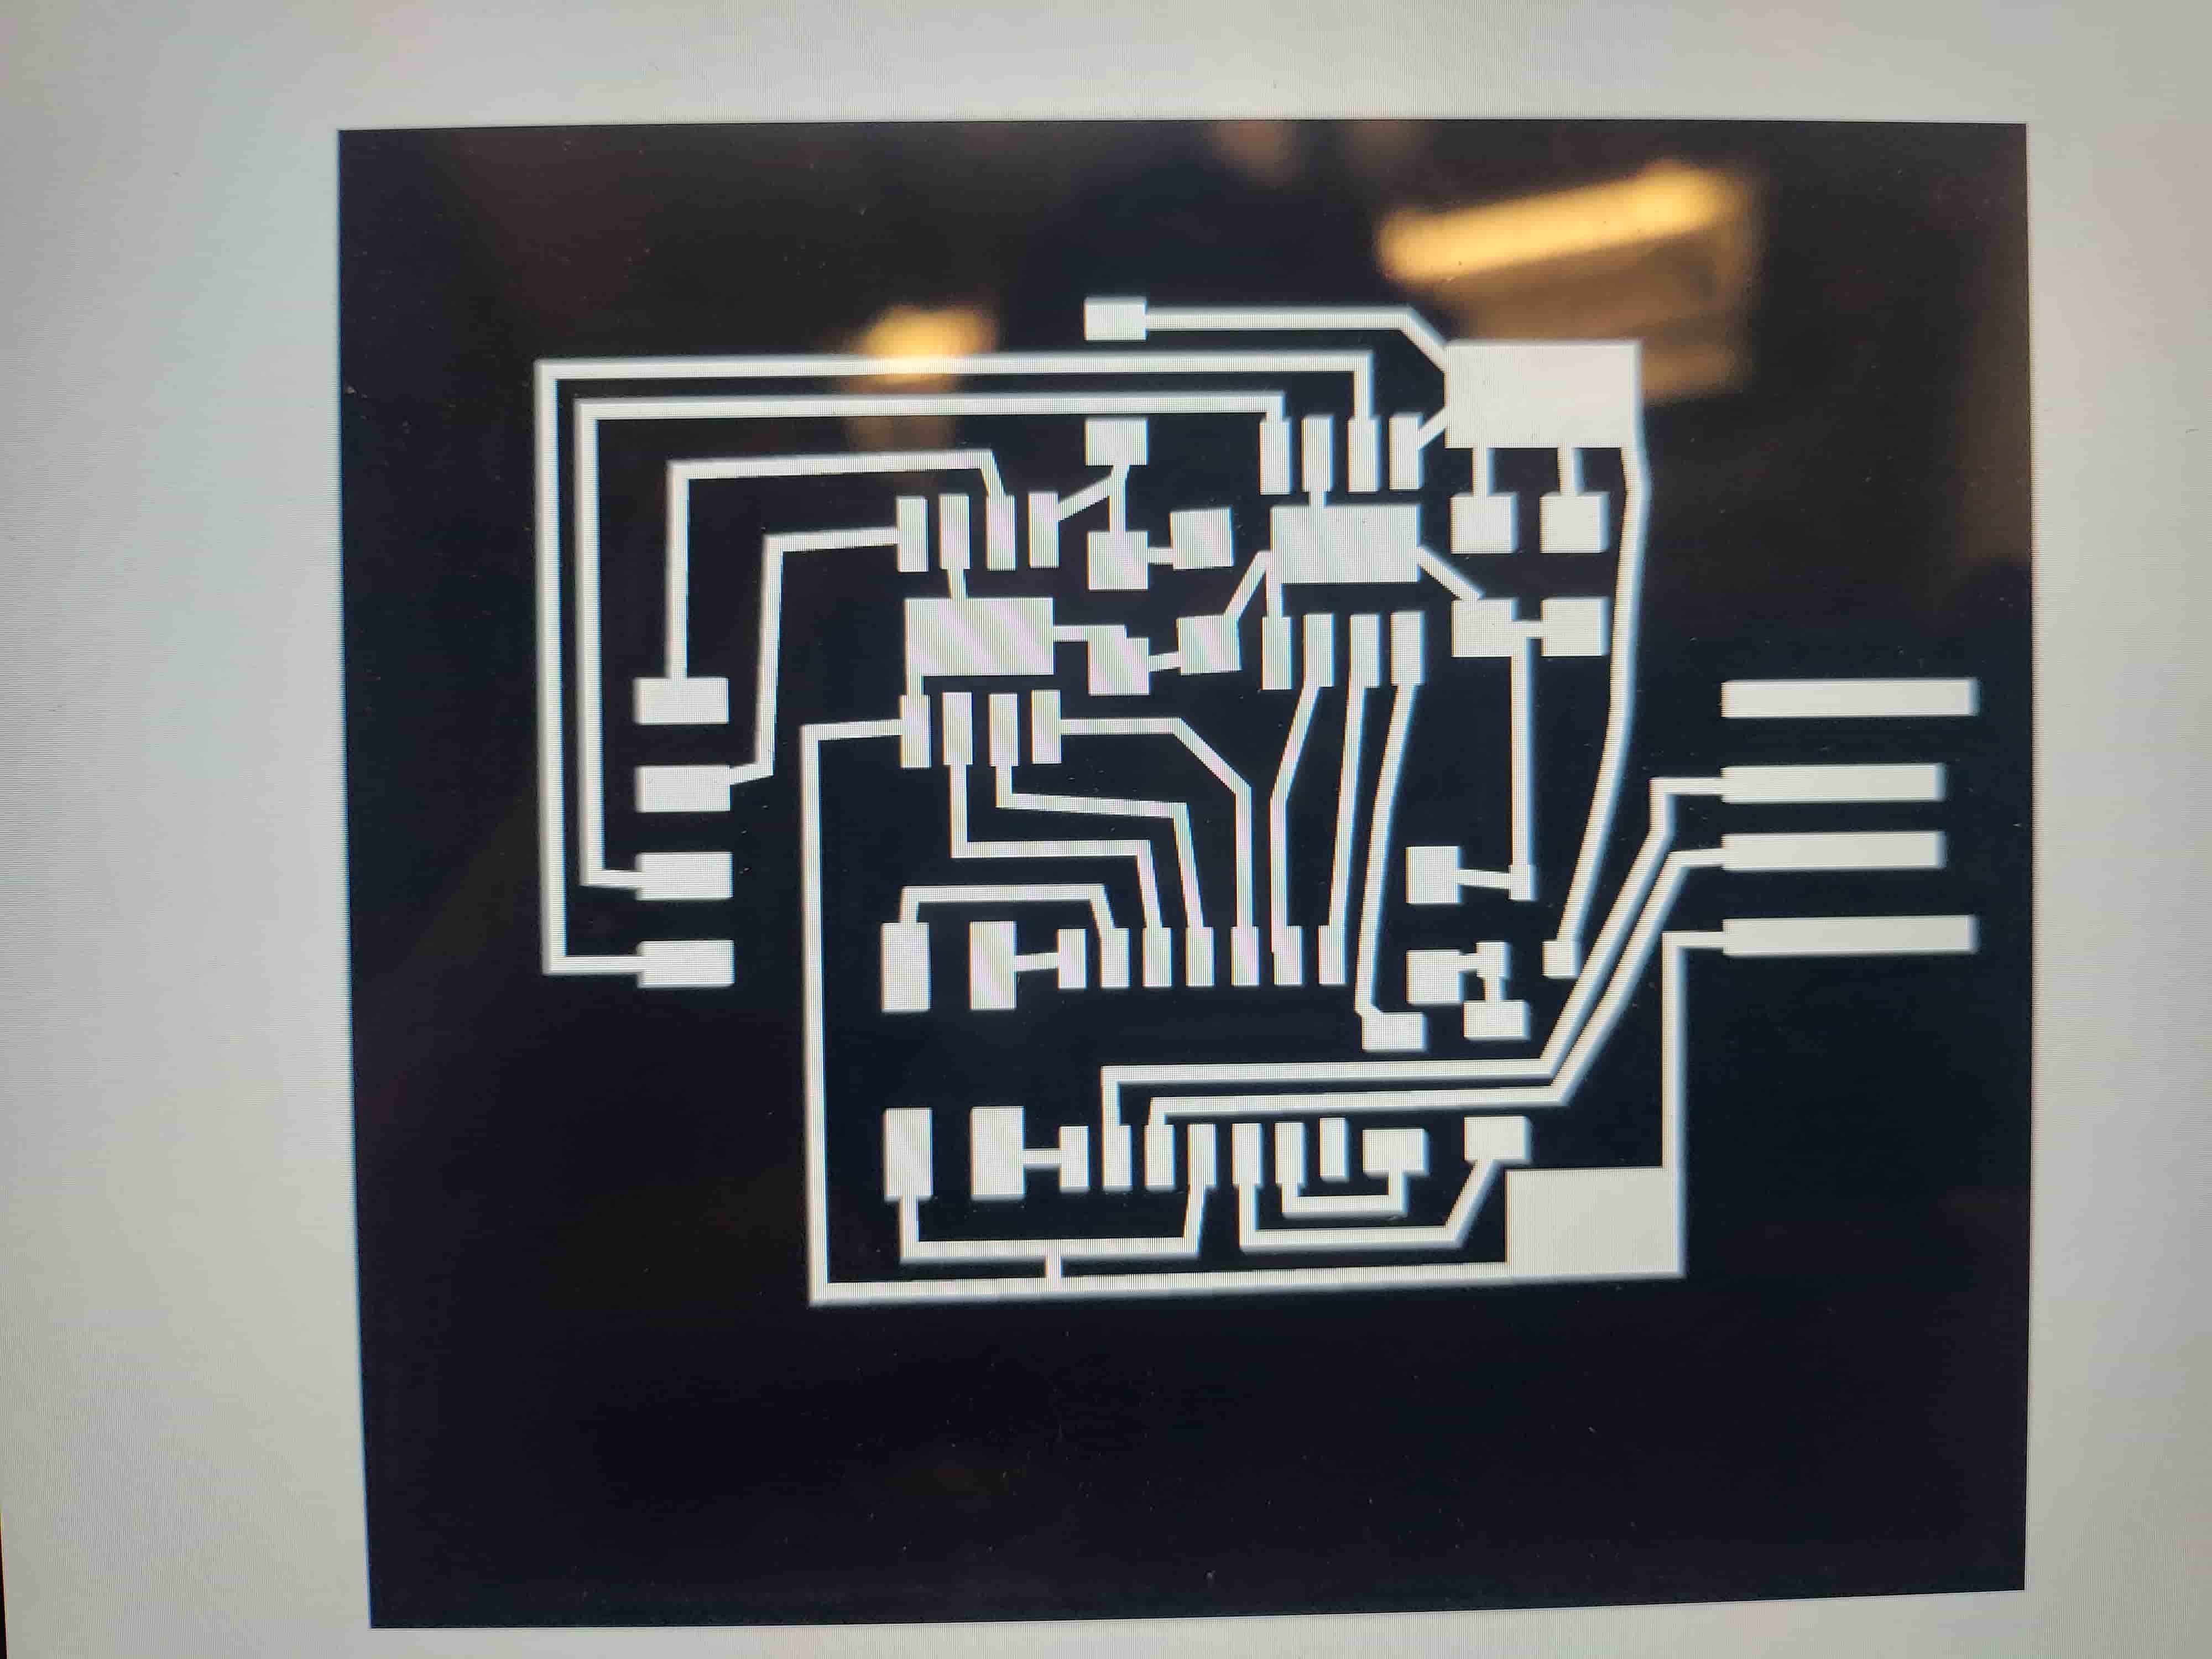
Illustrator Again
I am beginning to like Illustrator as a tool for quickly creating noncomplex boards. Something that would take me ages in Eagle takes a fraction of the time in Illustrator, and I think I finally know the reason why. In Eagle everything is methodical and preplanned out, which doesn't always works because routing is a pain, but in Illustrator you can add things as you see fit. When I was cadding I realized that I would need some 0 ohm resistors and because I was working in Illustrator, I just added them nice and easily to the design. It was as simple as pressing copy/paste. You can also tweak the footprints to wwork for you more easily. I wanted to get two wires through the resistors and to do that I shrunk the resistor pads to a size I knew they could still fit, but also left plenty of room between for 2 wires. I also added all the parts from this week to my Illustrator library, and though I am quite aware that by moving pad sizes and things from Eagle to Illustrator I am just recreating a simpler version of the software, it works for me and I see no reason to not continue, at least for simpler boards. Plus there is color, and greater artistic expression like what I did last week with the wavy lines.
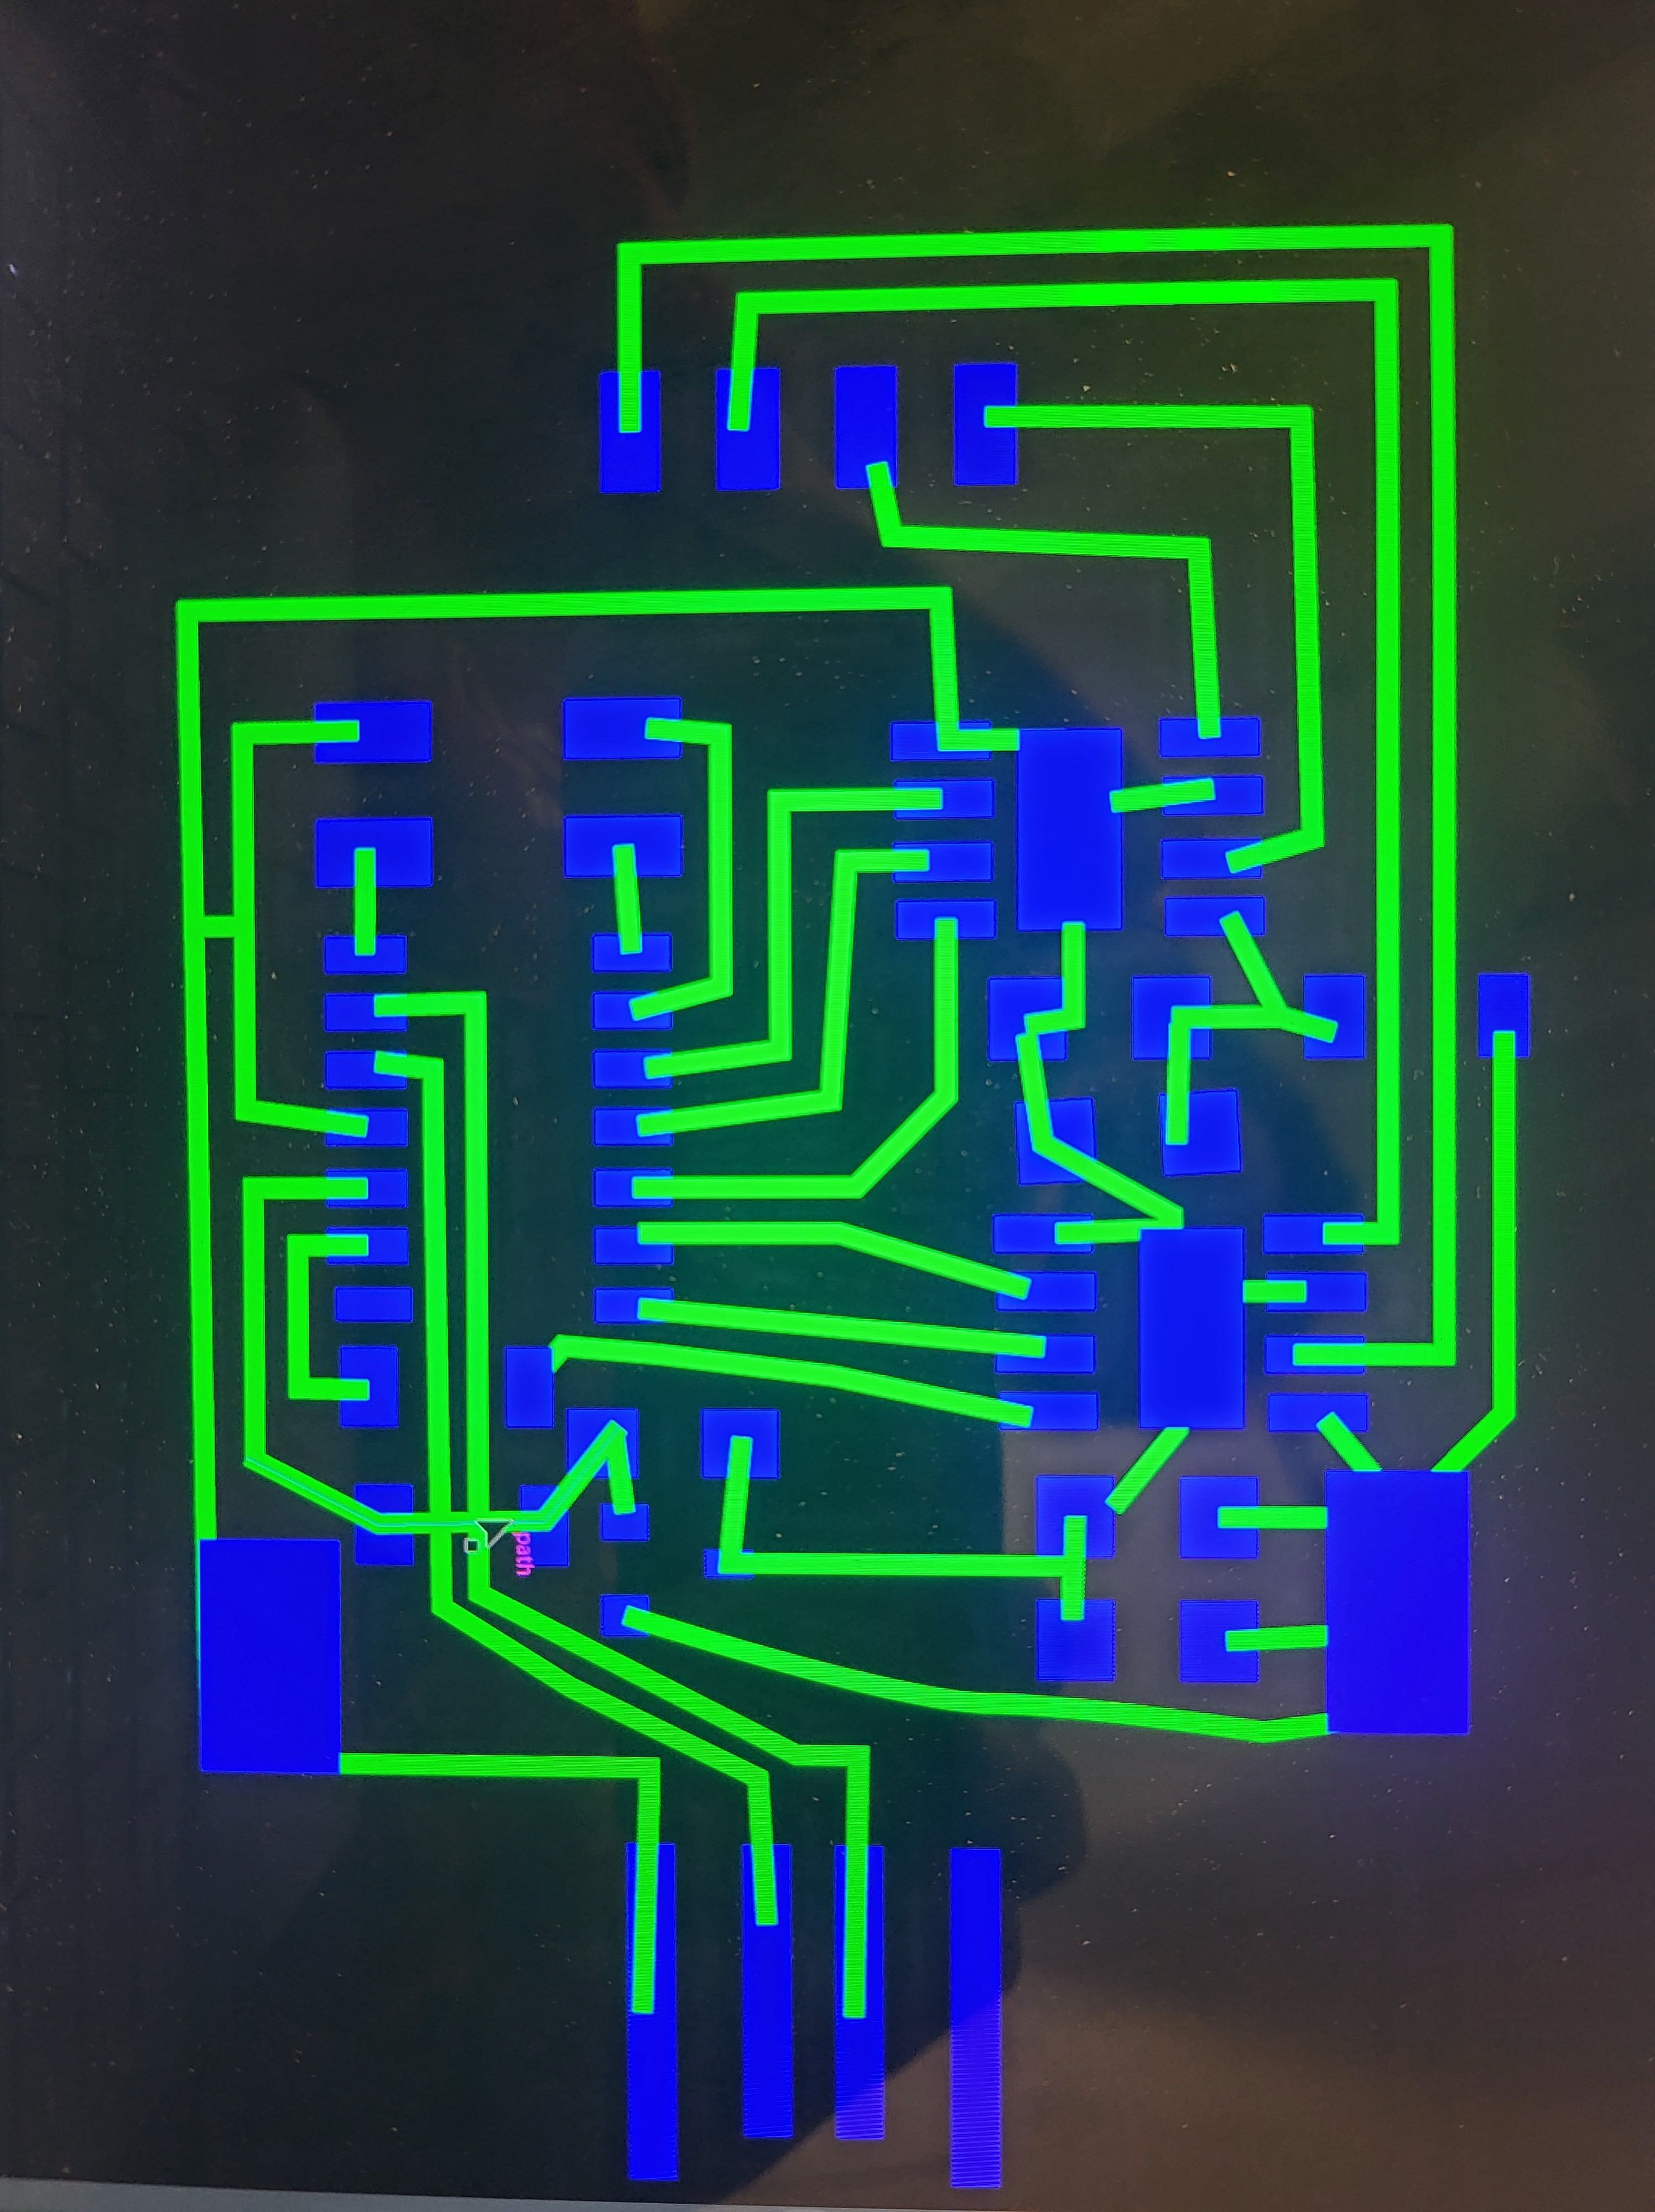

Milling and Soldering
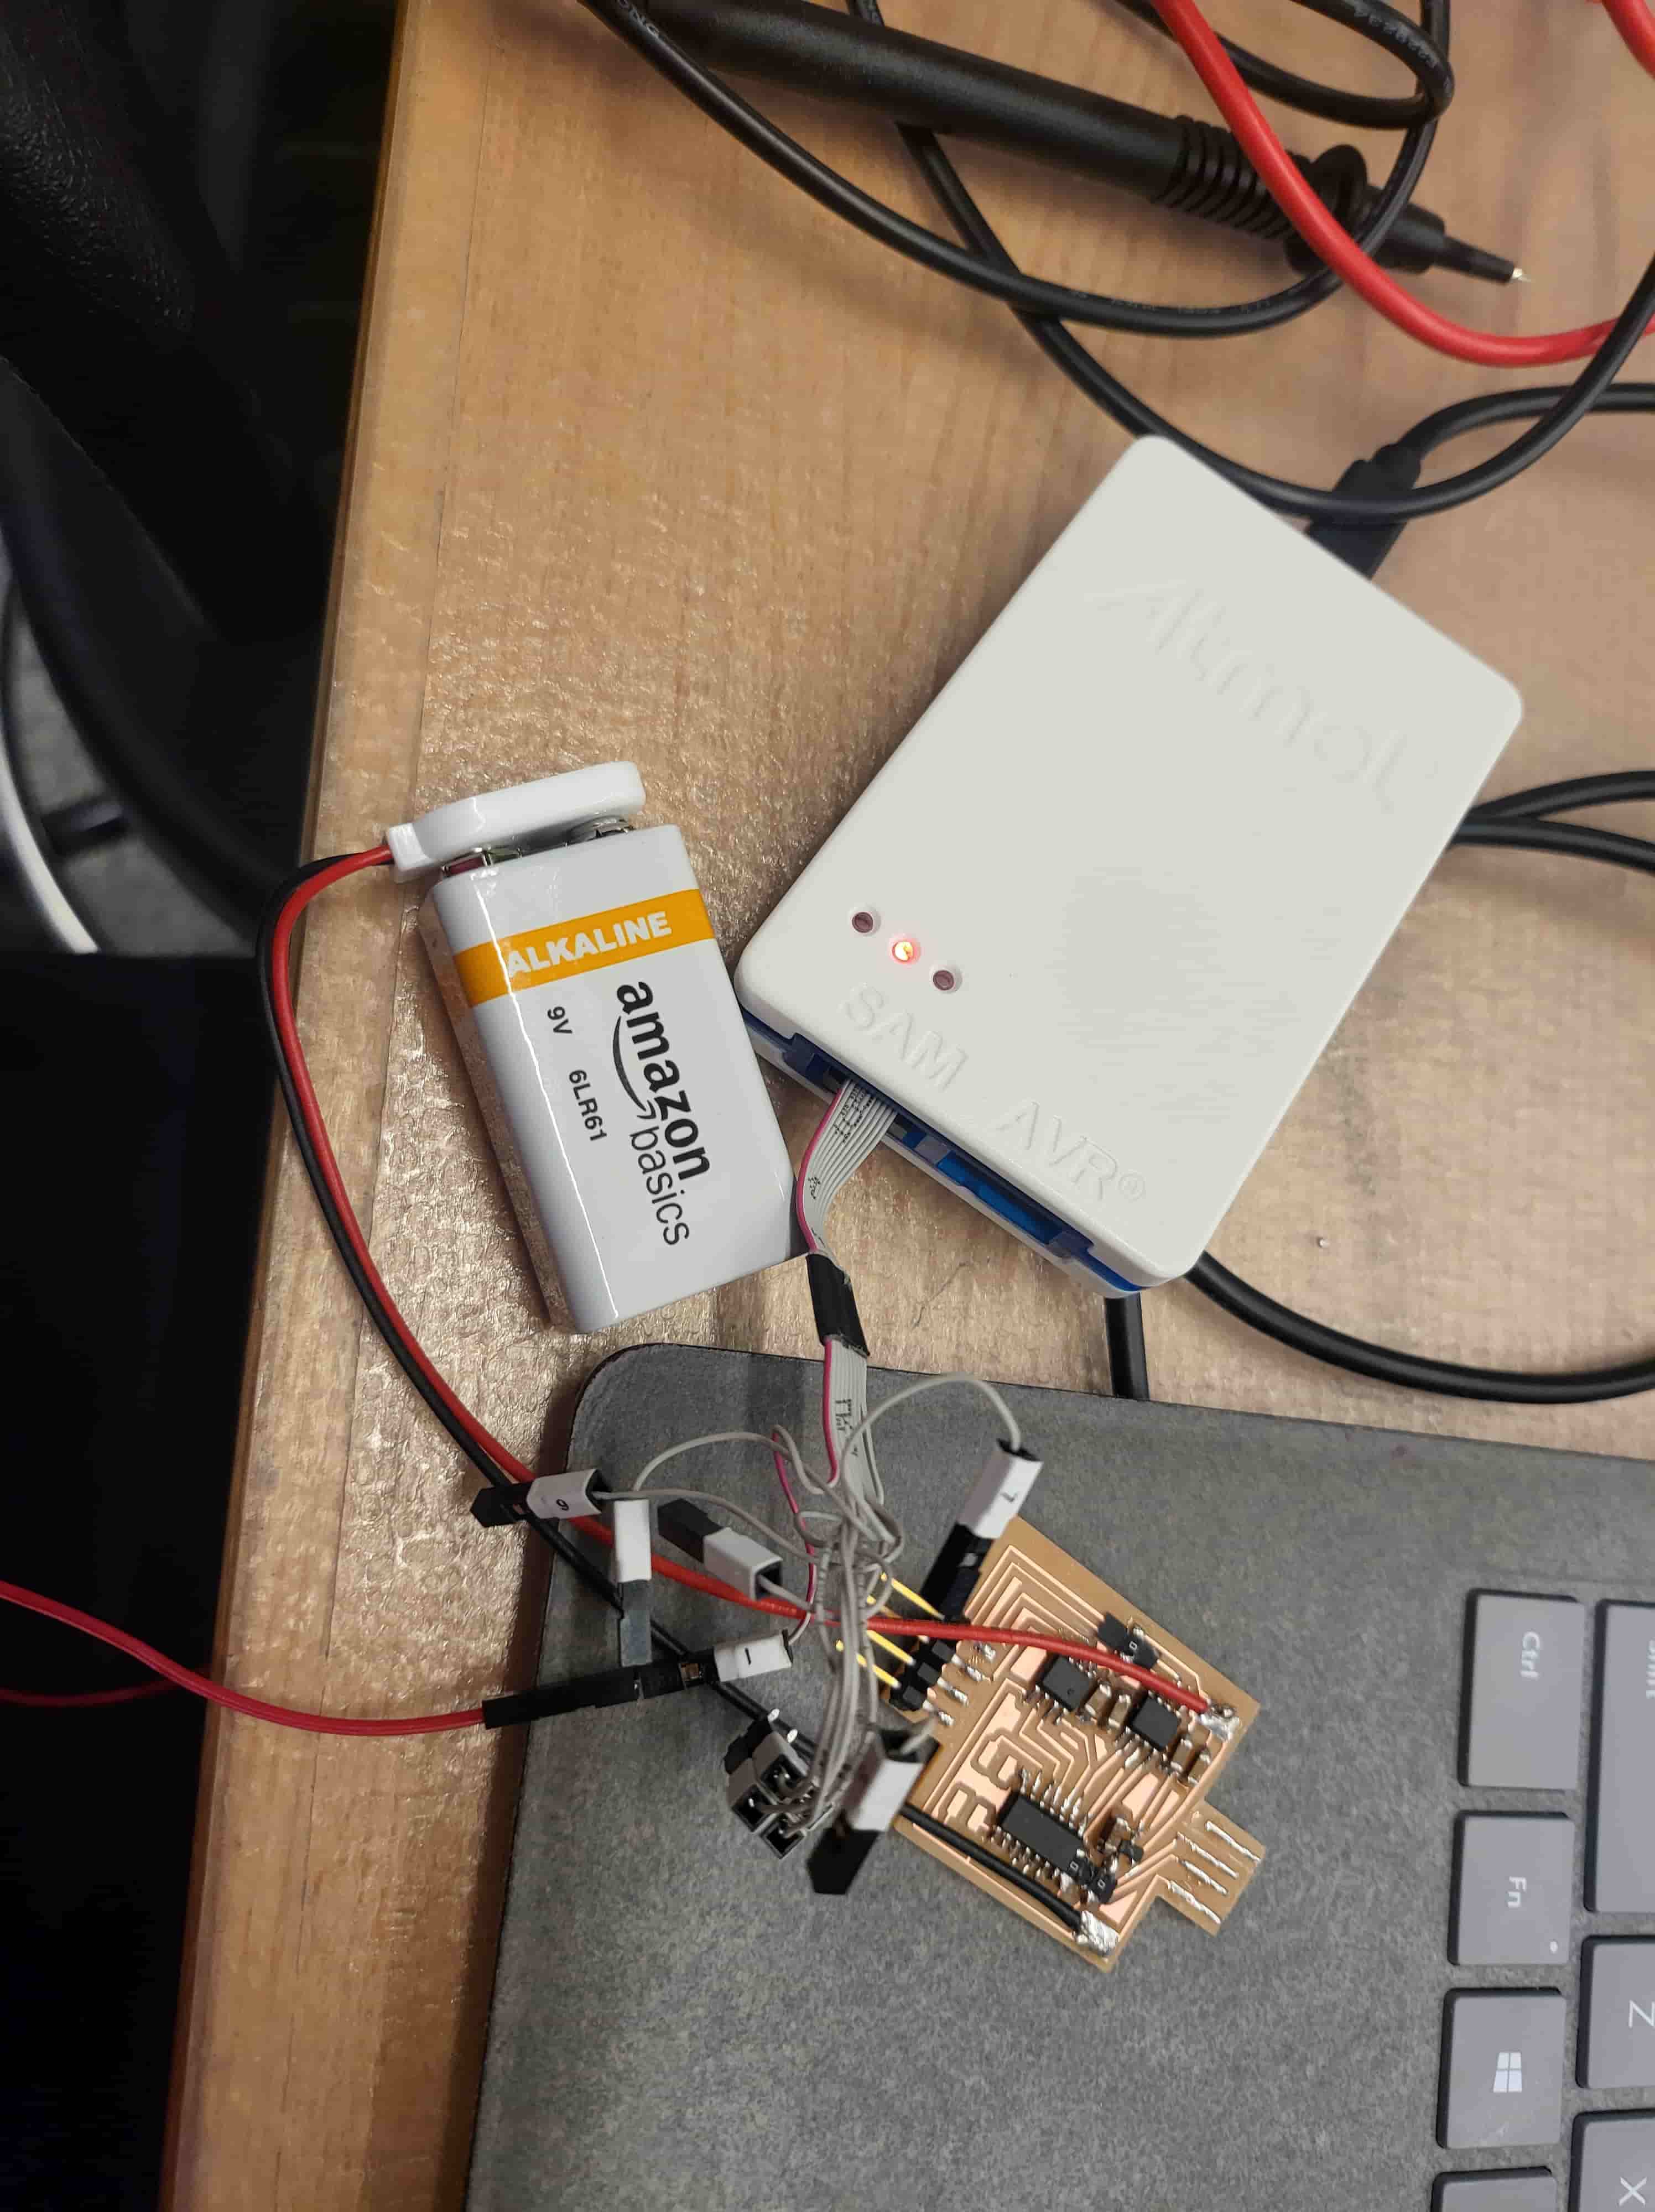
Milling and Soldering both went smoothly, but some small mistakes occured. The spoil board was really cut into so my piece didn't stay down too well, this caused uneven line thicknesses. My trace size is functionally much too small, I set it to 1.2pt instead of 1.35pt but this led to tiny unusable traces, at least for the final project. I used the soldering station in Edgerton because a lot of the soldering iron tips in arch shop are burnt, but I lost a capacitor on the way there and had to head back, it was much too small to see and had to be replaced.
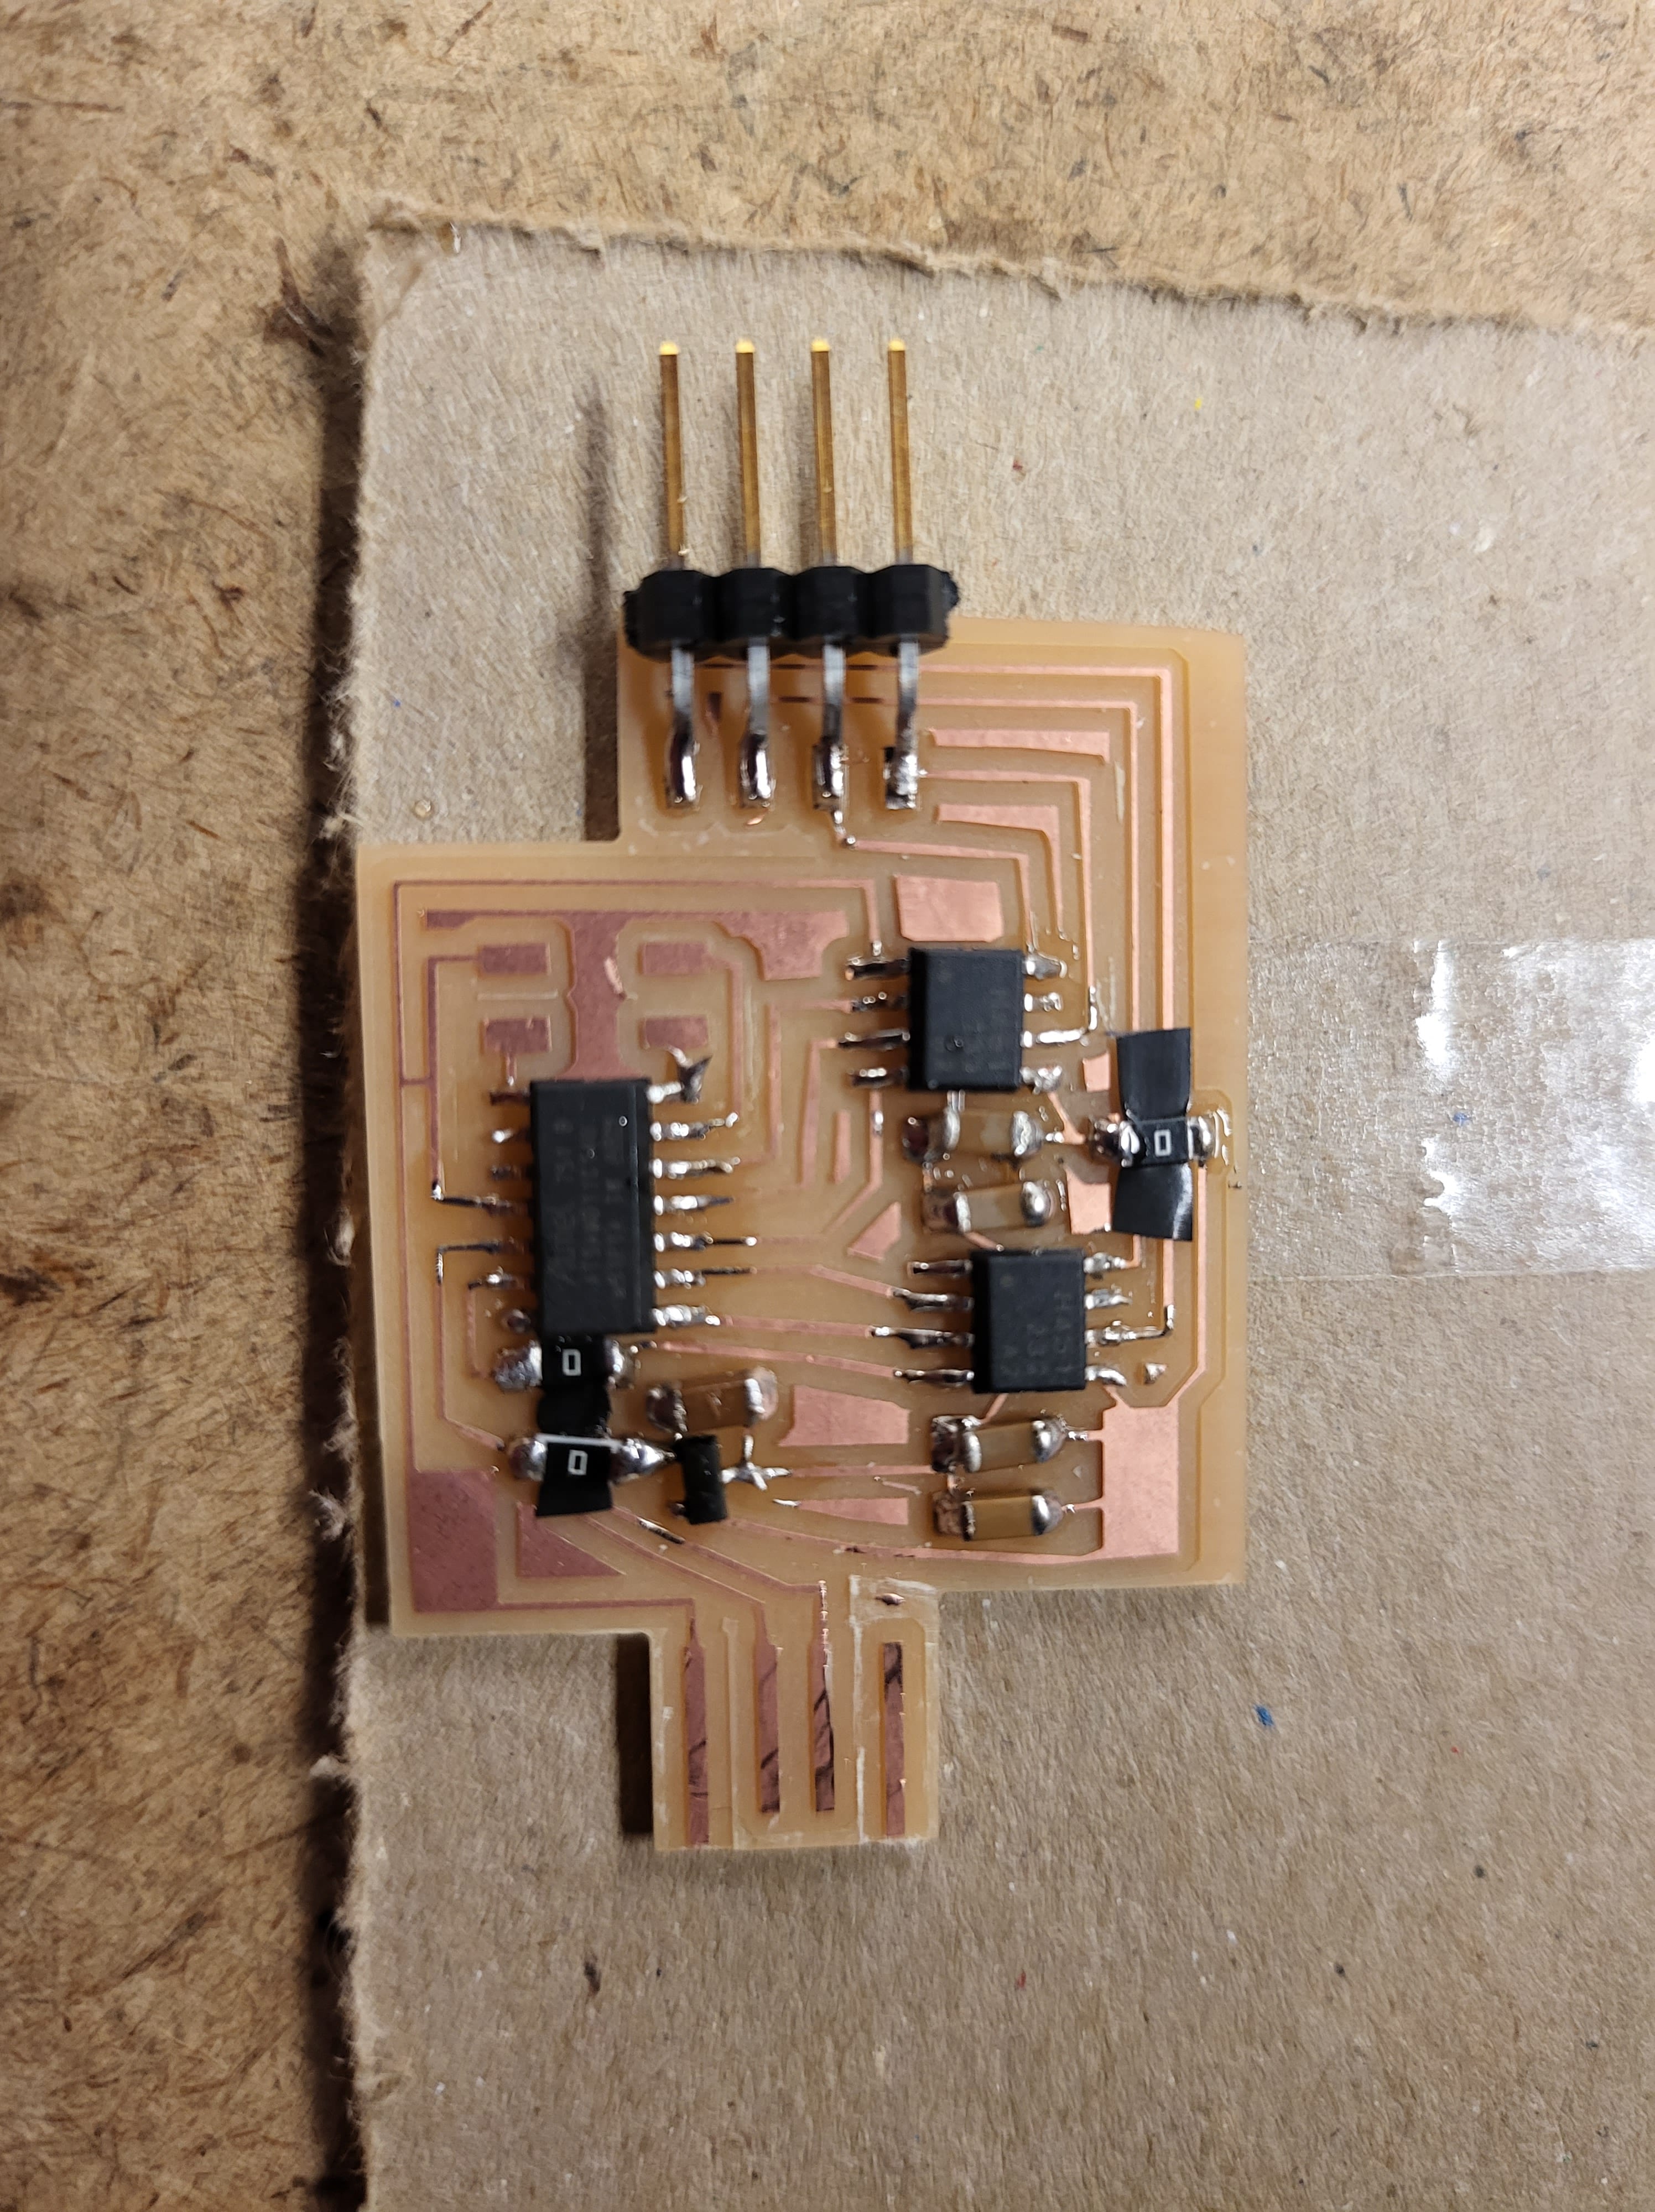
Actually Stepping
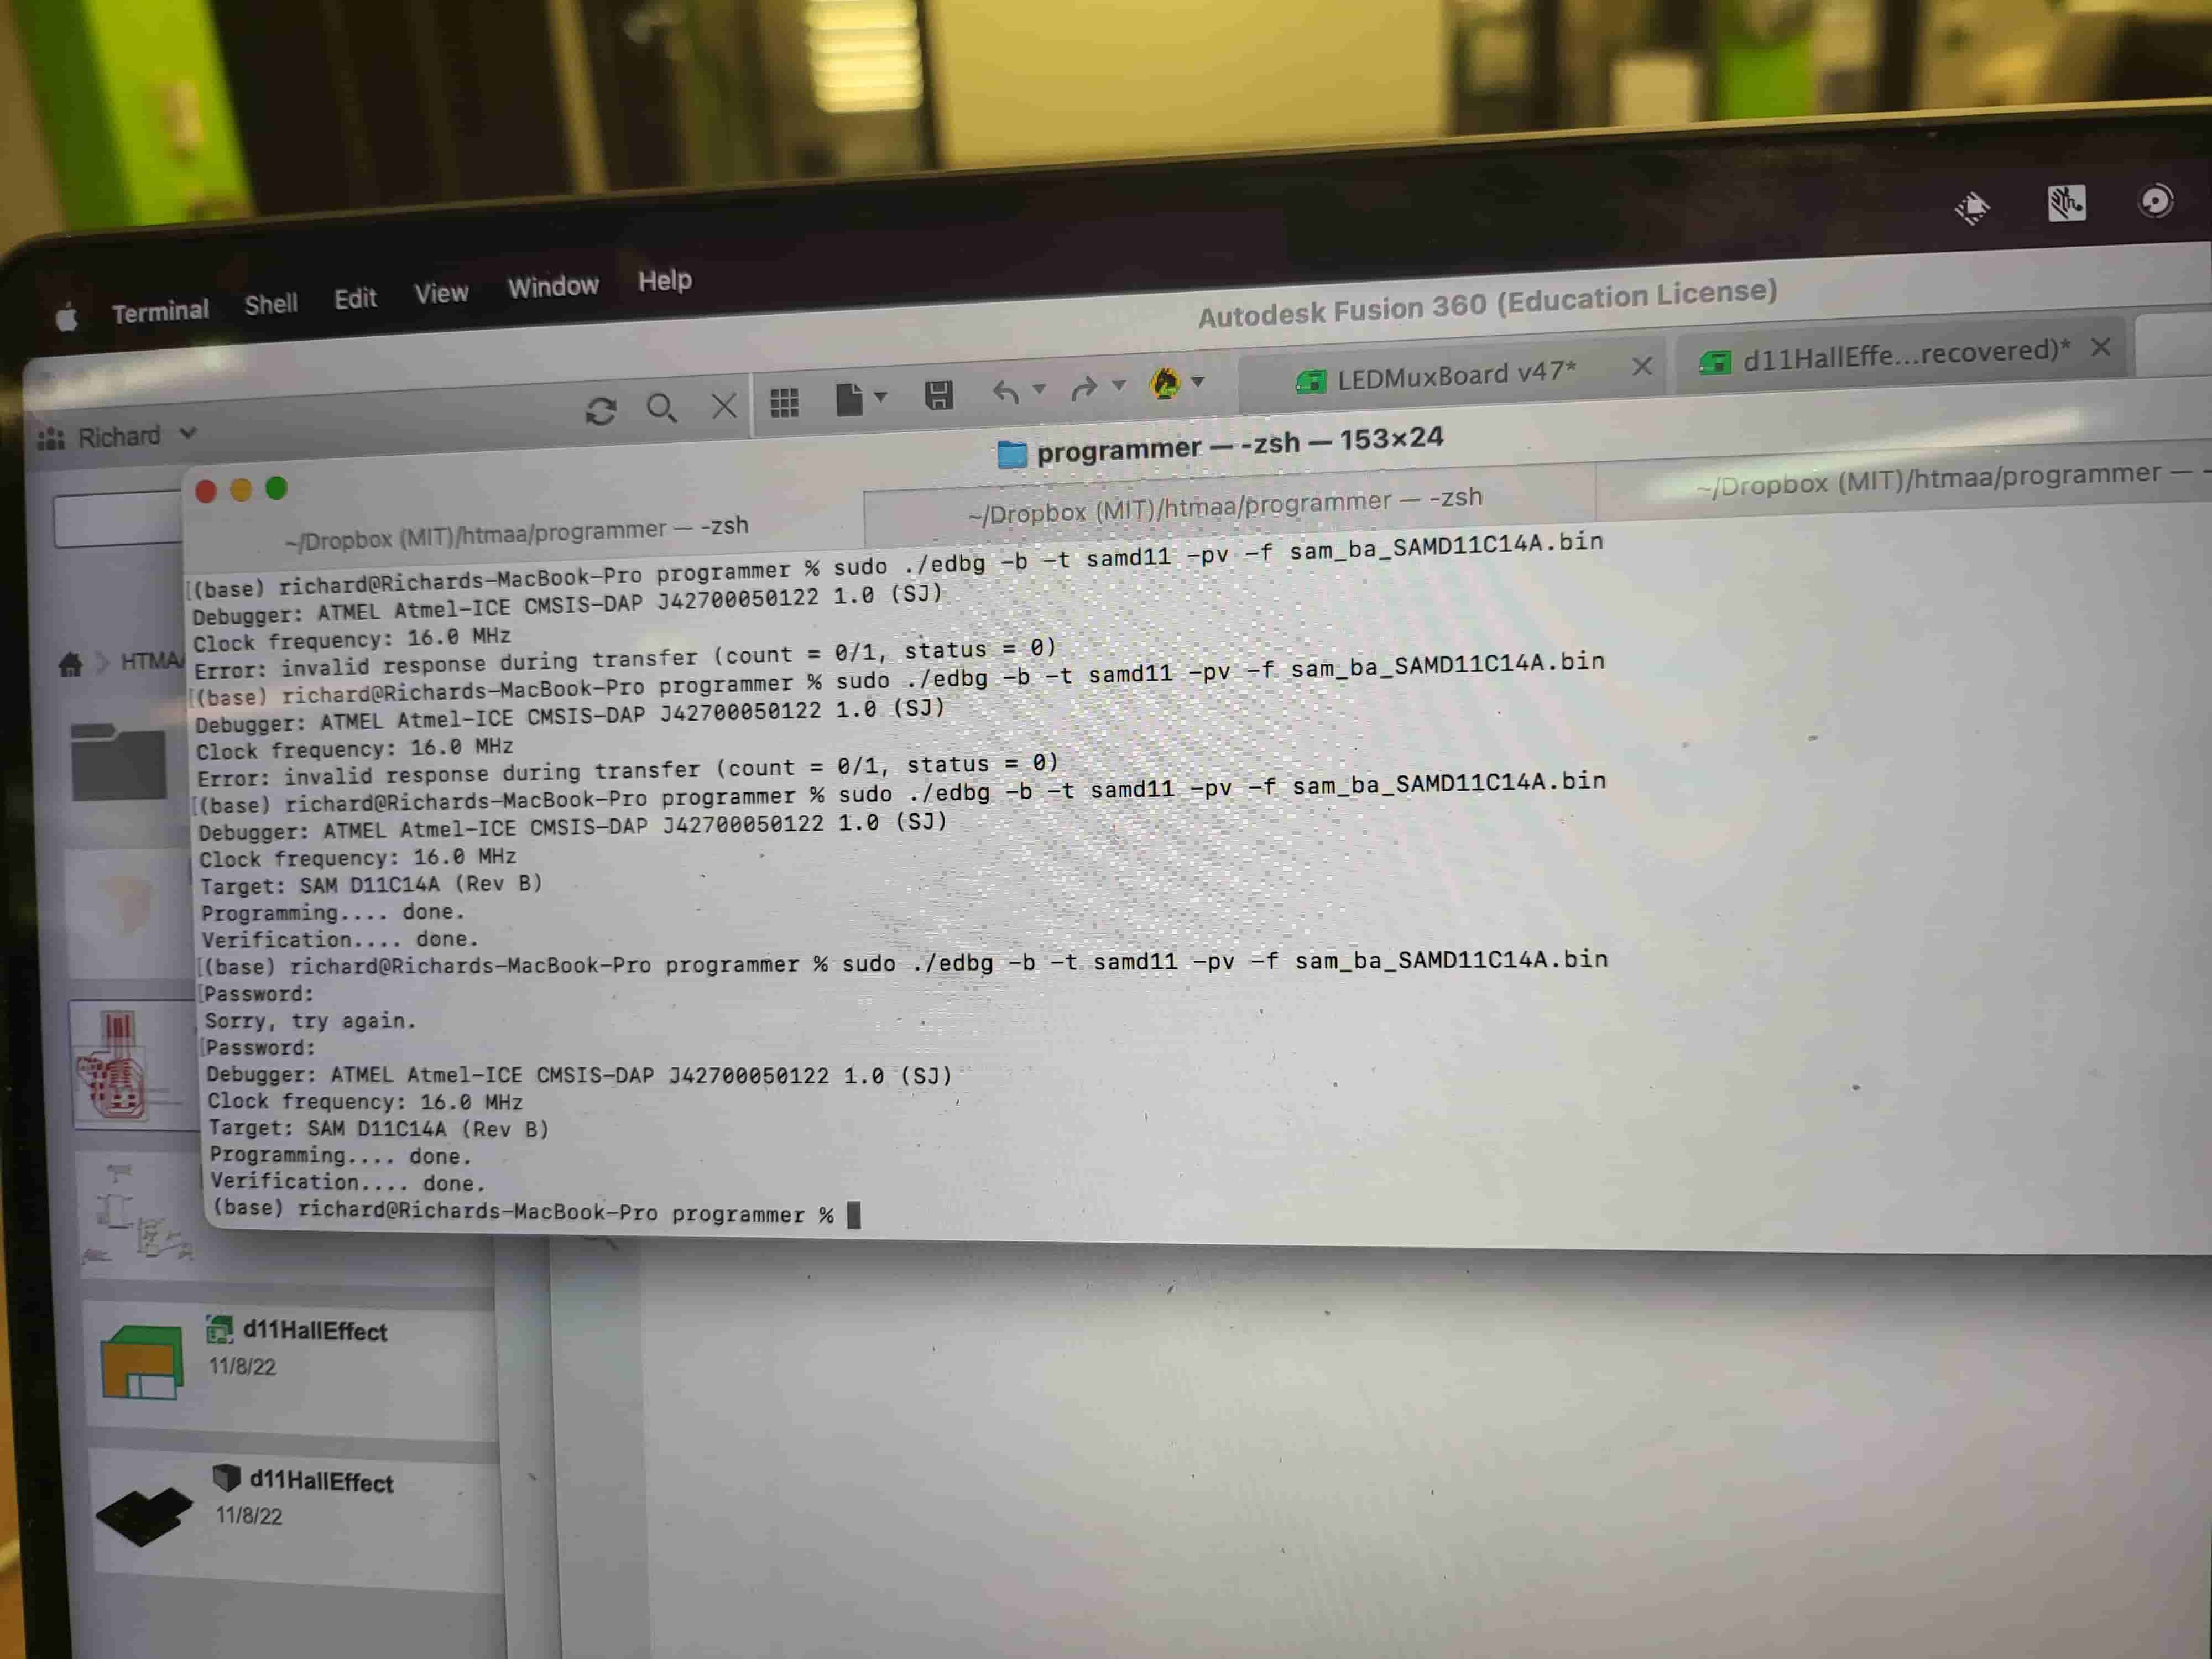
I couldn't find any of the right 4 pin steppers at Arch shop, so I went to EDS to get them and to get EE advice. With some help I was able to get my board flashed, but I had milled the usb connector too small, the outside was not imported into my Illustrator library. Luckily it was fixed with a bit of solder on the USB ports. I mostly followed Neil's H bridge example, but I swapped around some pins and used external power so his code doesn't work for me. So I had to rewrite it, but I kept getting really long upload/compiling time to my board which might be a my computer sucks problem, but also might be a my board sucks problem... we will see.