Programming the Board
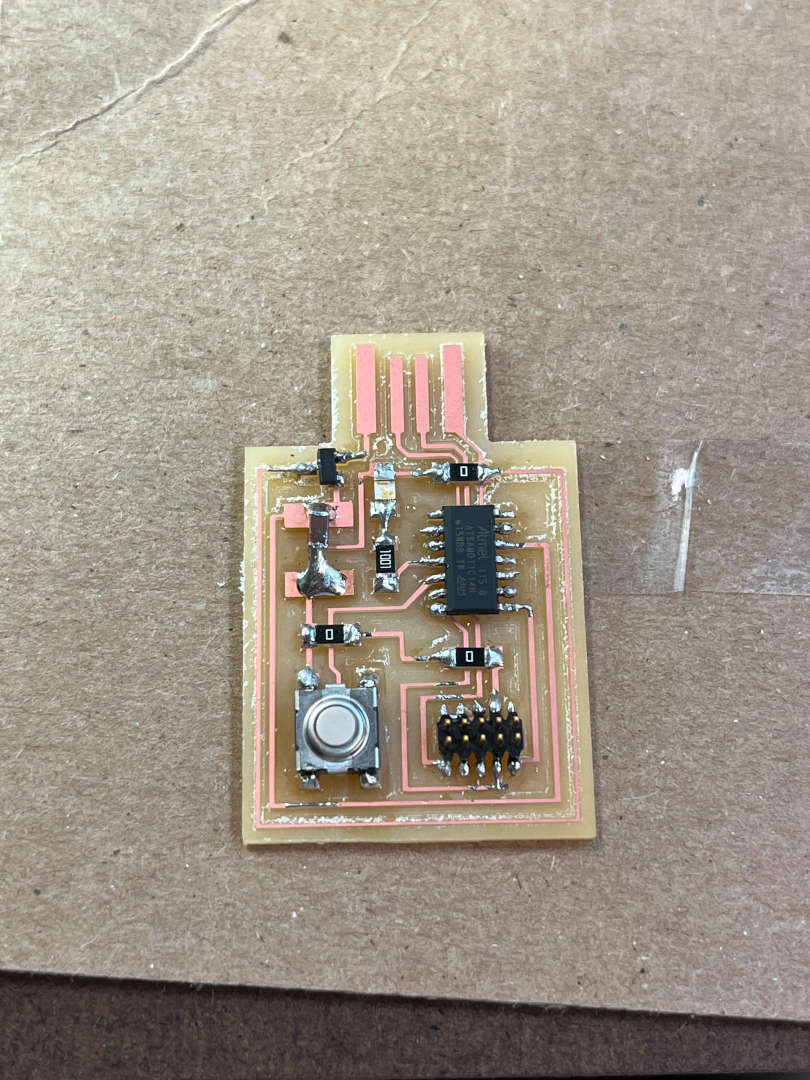
As a quick reminder, here is what my board looked like before I did anything this week!
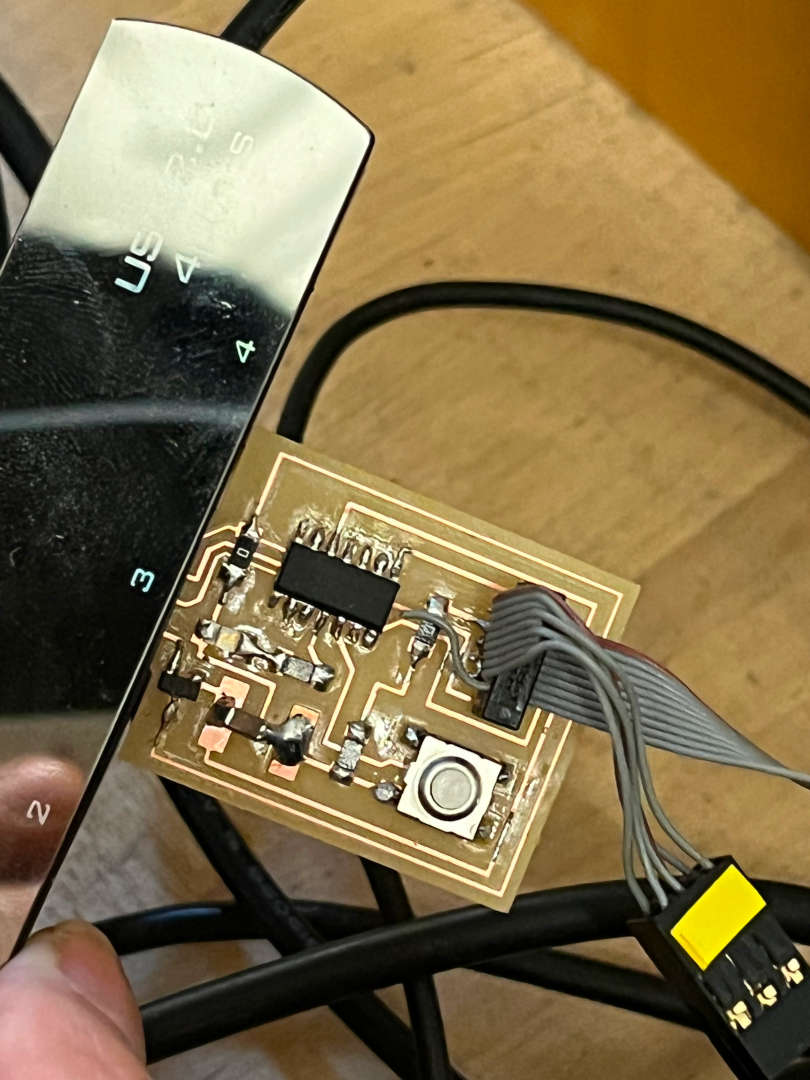
I tried to put the bootloader onto my board, but it didn't work! The Atmel SAM-ICE wasn't even lighting green, so there clearly were problems. Upon further inspection, I realized there were two problems. First, the LED I had was flipped (I didn't even know that LEDs had a direction). I got a new LED where the bottom had a green line which indicated the ground direction, and soldered the part on. Second, the 3V connection on the VCC pin of the SMD (top right SMD pin in the image) was not actually connected to 3V. To fix this, I soldered a jumper wire from that pin to the 3V copper connection flowing from the capacitor to the microcontroller.
The Atmel SAM-ICE finally turns green after plugging the new board in! One of the TAs, Demircan, had his laptop that we used to load the bootloader onto my board. Afterwards, I uploaded the Fade basic example Arduino program onto the board, and it worked!
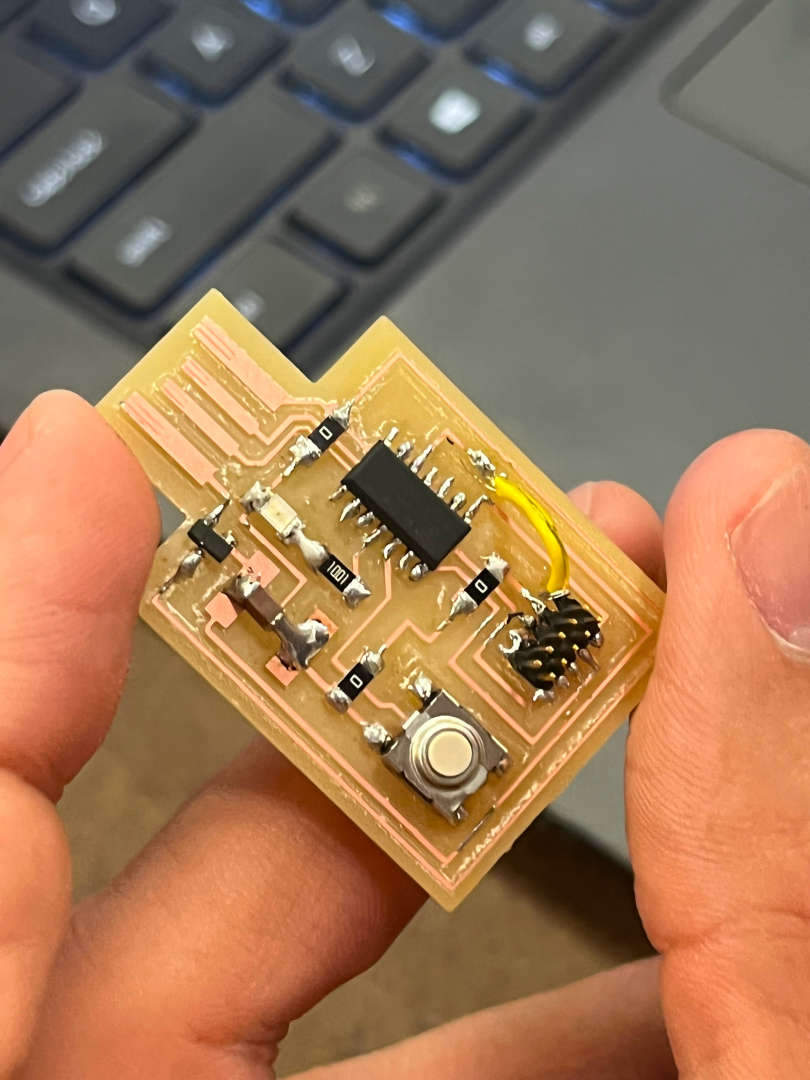
I tried to build my own program on my Mac, where the LED would switch on or off on every button press. After going through the initial Arduino setup, my computer recognized my D11C1 in the port. You can see the Arduino code I wrote below:
                const int led_pin = 4;
                const int button_pin = 5;

                int brightness = 0;    // how bright the LED is

                void setup() {
                  // put your setup code here, to run once:
                  pinMode(led_pin, OUTPUT);
                  pinMode(button_pin, INPUT);
                }

                void loop() {
                  // put your main code here, to run repeatedly:
                  if(digitalRead(button_pin) == LOW and brightness == 0){
                    brightness = 255;
                    analogWrite(led_pin, brightness);
                  }

                  if(digitalRead(button_pin) == LOW and brightness == 255){
                    brightness = 0;
                    analogWrite(led_pin, brightness);
                  }
                }
However, when I pressed upload, the board does nothing. I realized the reason why this did not work is because I was reading the wrong pin numbers on the datasheet! It was very confusing, but I eventually figured out that I had to use the PA14 kind of numbers as the actual pin number. This meant that the led_pin was 14, and the button_pin was 15. Unfortunately, the light was very buggy because my switch wasn't properly soldered onto my board. The faintest touch would make the button spazz out. I decided to simplify and write code such that the light would turn on only if i had the switch held down. And it works!
                const int led_pin = 14;
                const int button_pin = 15;

                int brightness = 0;    // how bright the LED is

                void setup() {
                    // put your setup code here, to run once:
                    pinMode(led_pin, OUTPUT);
                    pinMode(button_pin, INPUT);
                }

                void loop() {
                    // put your main code here, to run repeatedly:
                    if(digitalRead(button_pin) == LOW){
                        brightness = 255;
                        analogWrite(led_pin, brightness);
                    }

                    if(digitalRead(button_pin) == HIGH){
                        brightness = 0;
                        analogWrite(led_pin, brightness);
                    }
                }