Week 6: Computer-Controlled Machining
CBA Assignment
Assignment Details
group assignment:
- do your lab's safety training
- test runout, alignment, fixturing, speeds, feeds, materials, and toolpaths for your machine
individual assignment:
- make (design+mill+assemble) something big (~meter-scale)
- extra credit: don't use fasteners or glue
- extra credit: include curved surfaces
Class Debt: Fusion, CAM, and CNC
For context, I need to catch up in this class. I still need to finish this and all the other weeks.
Note: I don't know why I decided to play hard mode in an already difficult class. Anyways, here we are in Week 7.
I still need to acquire the essential skills I need to complete this week, which I should have learned in the previous weeks (i.e., Week 2) (i.e., CAD). And for this week, with those skills, we need to build something BIG...
Note: How BIG??
Anyways, looking at past year's projects, there is quite a range of "big" objects sketched, designed in a CAD program (e.g., Fusion, Onshape, Illustrator), imported into some CAM program (e.g., VCarve Pro), compiled onto some cutting machine (e.g., ShopBot), and then finally assembled in real life. Luckily I did attend training this week, so I have a basic understanding of the CAM/CNC process and the object's making. However, I still need to learn how Fusion works.
Fusion 360
...So basically the Fusion 360 Workflow is like:
- Create and name a new project
- Ensure default preferences are set
- Specify default units (in, cm, mm, ft)
- For our workflow this week we'll want to keep the units in in as the oriented straight board (OSB) that the BIG assemblies will be cut out of was measured in inches (W: .44 in in by L: ~48 in H: ~96 in)
- Create sketch
- For most workflows, you start by creating a 2-D sketch and then turning that into 3-D body
- Select origin face/plane
- Select the plane that is straight on or representative of how the object is sitting
- Select a tool to draw the component of interest within the sketch (e.g., rectangle, circle, spline, etc.)
- Draw from the origin
- Specify the dimensions of the component
- e.g., A rectangle would have some specified height (H) and length (L)
- And then sketch again (repeat steps 5-9 as necessary)
...Then some time later you basically get a project constructed:
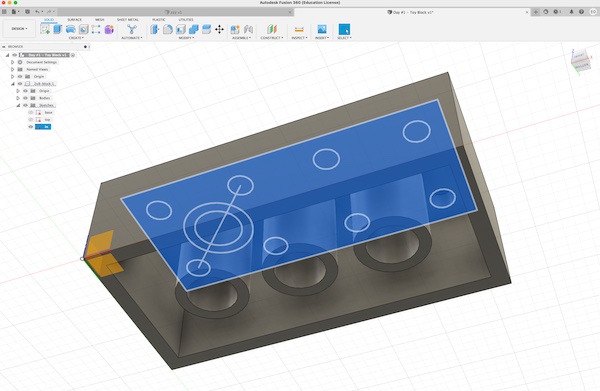
This was very cool and it was all done by watching the tutorial, Fusion 360 Tutorial for Beginner 2022. There is actually a "Learn Fusion 360 in 30 days" series by the same YouTuber, which I should have probably finished last month.
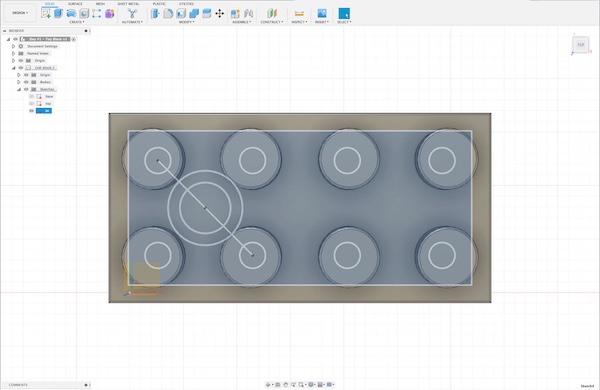
Okay, many interesting commands (operations) were performed throughout the construction of this lego brick. I need to continue working with Fusion to get those down, but the two most important concepts for me were the Fusion commands Extrude and Rectangular Pattern.
Extruding
There is the physical process of Extrusion. Then there is the Fusion 360 command Extrude which feels more like the physical process of Drawing.
Patterns
...
Assemblies for OSB pt. 1
While I think decomposing the lego brick into an assembly would be fun, I suck at Fusion. So instead, I'm going to make a box. This box will have two holes at the top.

For a first pass, I don't even want to worry about the joints or static mechanisms for assembly between the sketches. I want to export each of the sketches as a .DXF file (Drawing Interchange Format, or Drawing Exchange Format). Then, I will upload those to VCarve Pro and continue according to the ShopBot guide:
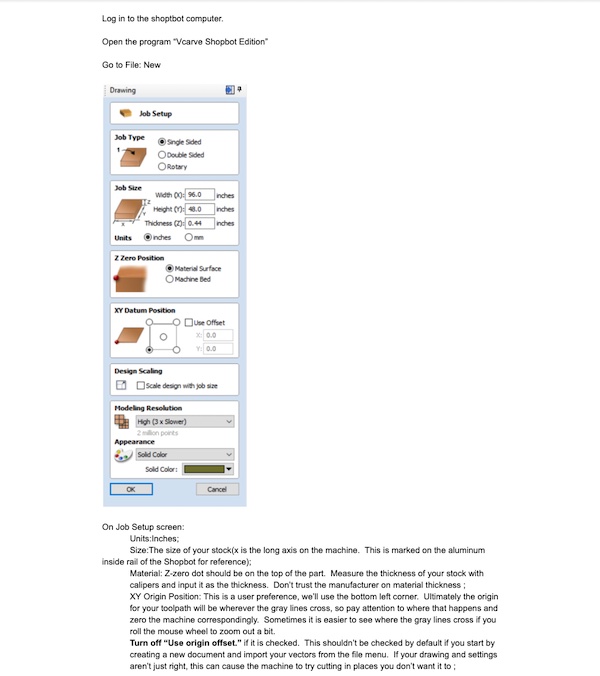
Then, to cut out the sketches and their guides, I need to convert these .dxf files into a planned path for ShopBot to execute.
SBP, GCODE, and Geometry
SBP
...
GCODE
...
Geometry
...
So basically, Tom did the entire VCarve Pro process for me. That was cool. However, if you see the figures below, I must have measured or miscounted something wrong, and the system still needs slots.
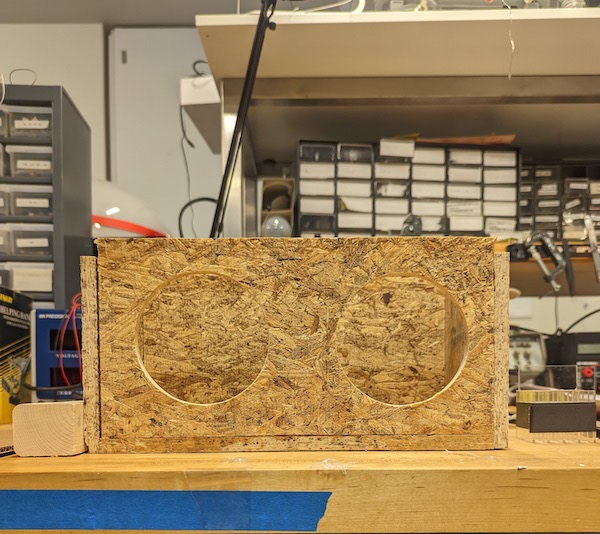
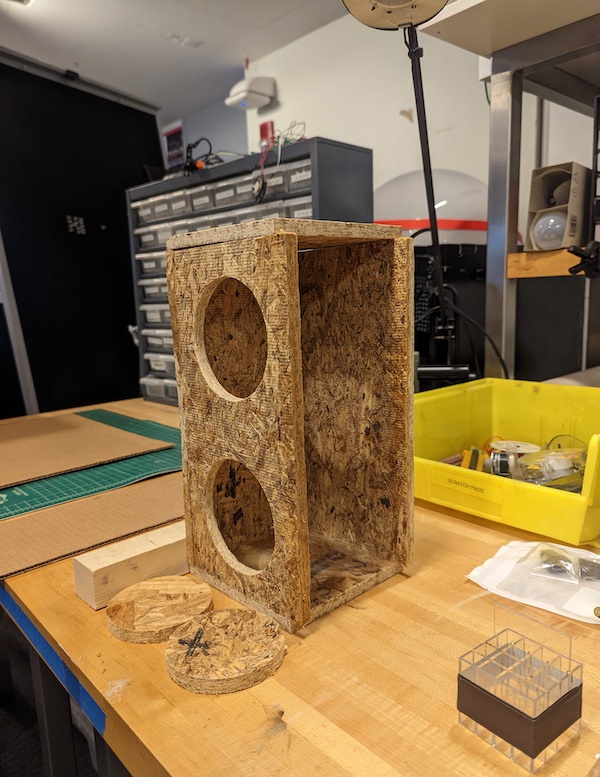
Now then, the goal for me is to at least design something better: A box with two holes at the top and slots