17. September 2022
Computer-controlled Cutting -- Vinyl
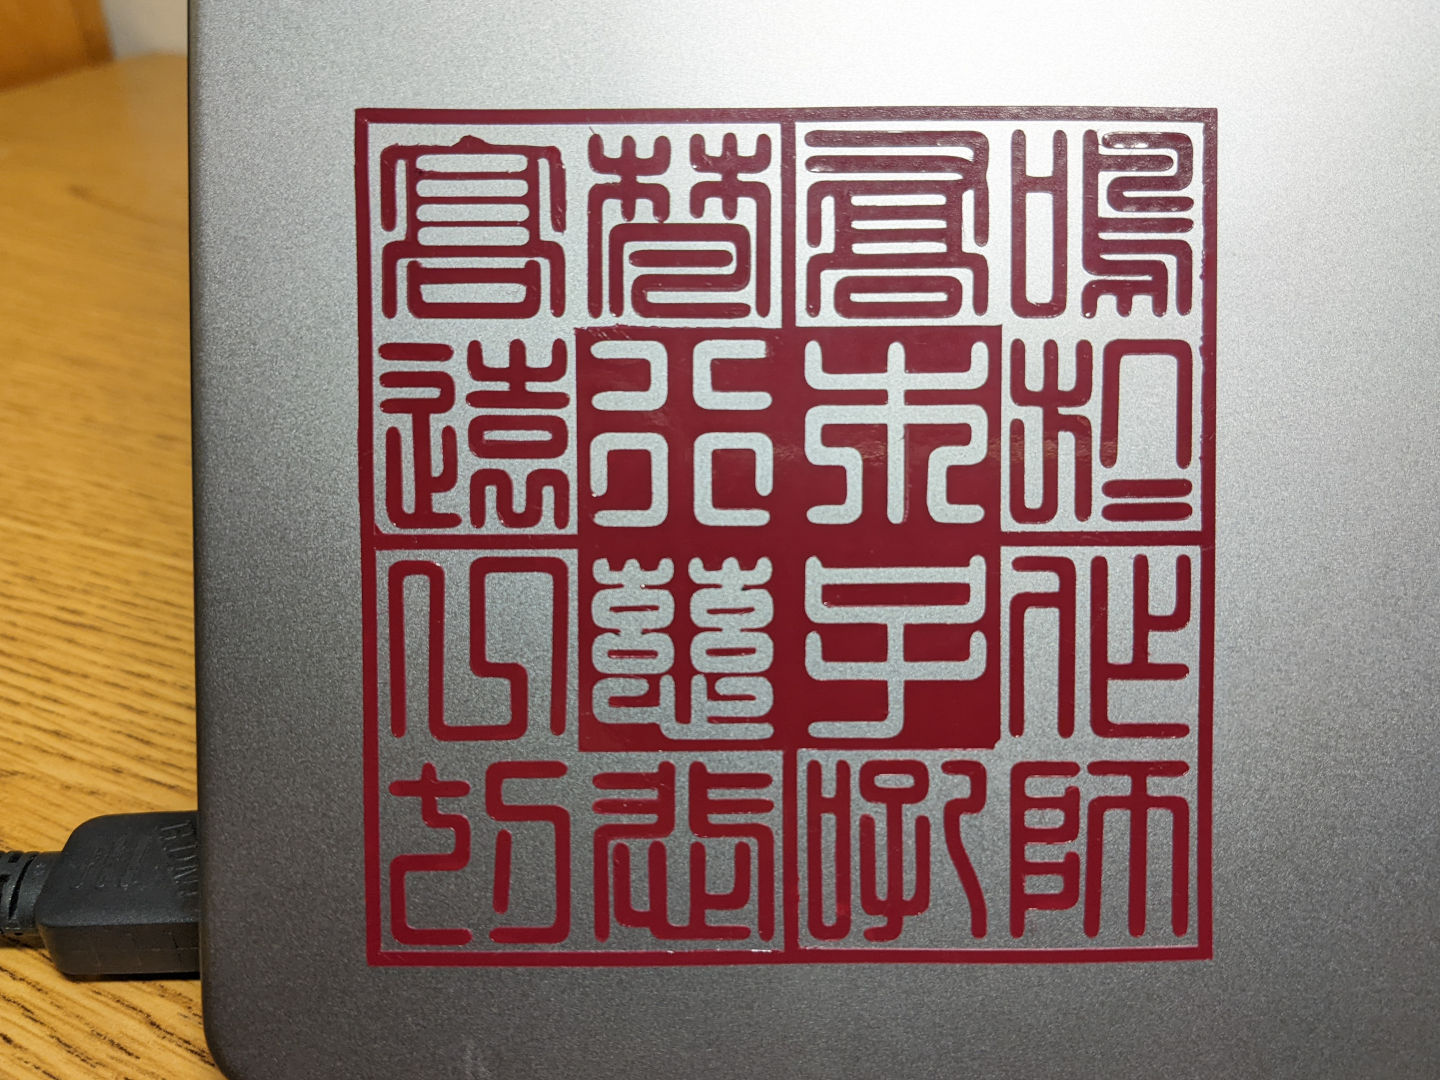
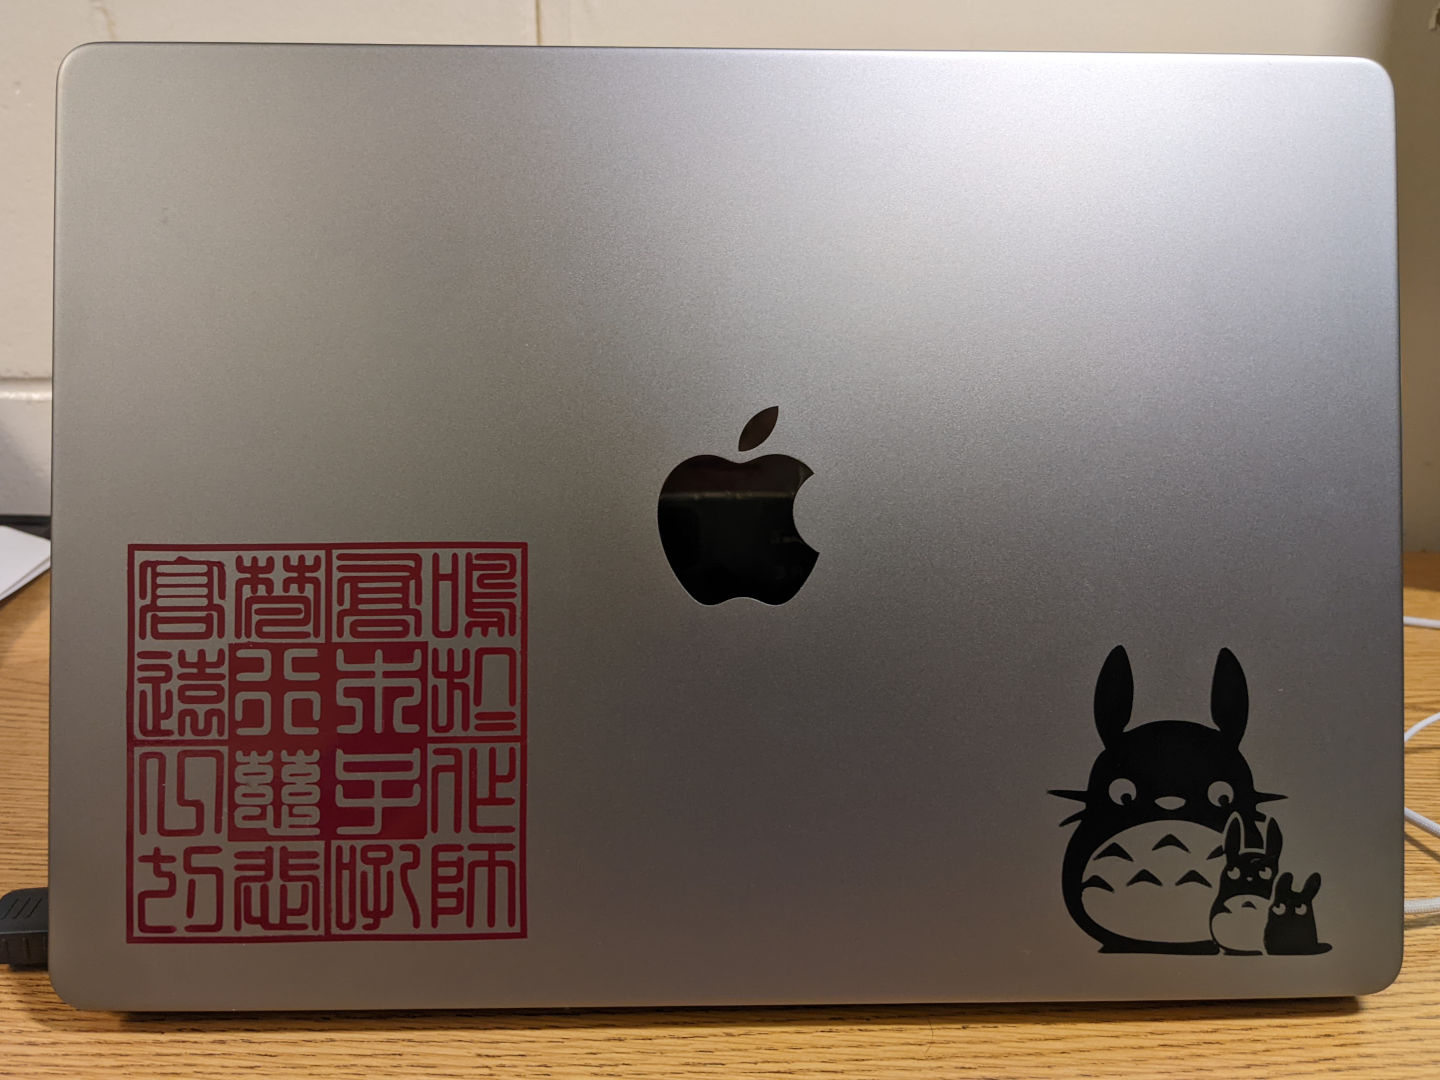
The first assignment this week was simply to “cut something on the vinyl cutter.” I decided to design a Chinese seal, a 4x4 array divided into four quadrants. Each quadrant is a four Chinese character phase extracted from Chinese poem or Buddhist scriptures written more than 2000 years ago, with my Chinese name embedded in the center of the four quadrants.
Design
I began by searching for fonts that I wanted to use in my design. Since many Chinese seals traditionally use Yin Zhuan (印篆), I decided to look at this font first. I also looked at Xiao Zhuan (小篆) and Li Shu (隸書) for comparison. After downloading the fonts, I assembled sample seals in Adobe Illustrator. For Xiao Zhuan and Li Shu, I quickly realized that there would either be too much spacing between the characters, or the seal could no longer be square. Thus, decided to go with Yin Zhuan, as I had originally planned.
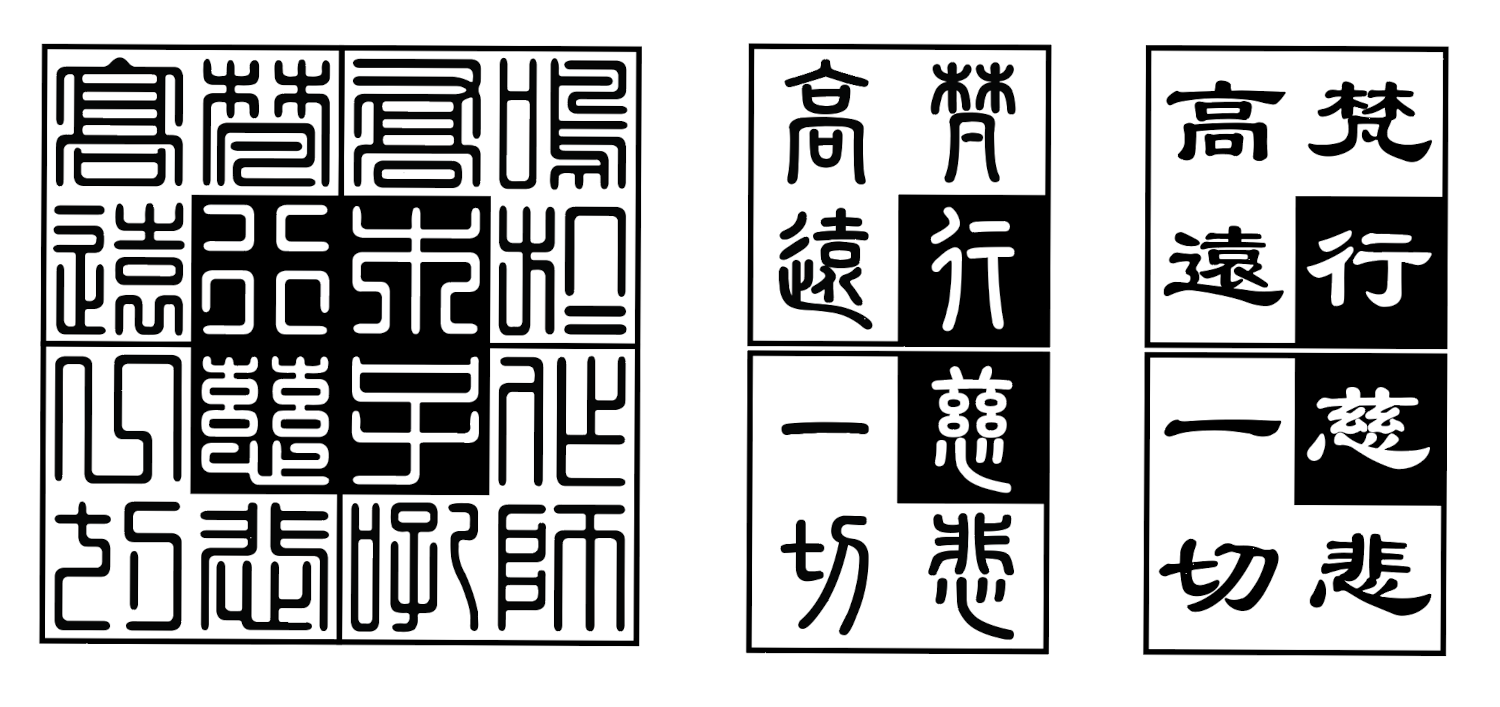
Laid out, the array can be read in 2x2 squares starting from the top right, reading top to bottom, right to left, as Classic Chinese. The translations are as follows:
- 鳴於喬木 (Ming Yu Qiao Mu) – From the highest trees;
- 作師子吼 (Zuo Shi Zi Hou) – Roar like a lion;
- 梵行高遠 (Fan Xing Gao Yuan) – Be pure;
- 慈悲一切 (Ci Bei Yi Qie) – And have mercy.
Then, the center 2x2 square encodes my name 李行慈 (Li Hsing-Tze) with with 李 (Li) composed of 木 and 子.
Vinyl Cutting
With my design finished, I was ready to cut my design on the vinyl cutter. However, my first few attempts were unsuccessful because the font was too thin and the cutter would peal parts of the vinyl while cutting. Hence, I had to modify my design slightly by thickening the font. After that, I was able to cut a 9x9cm seal.
As I had extra time, I also decided to vinyl cut an image of Totoro, the main character from my favorite Studio Ghibli film.
Weeding
After the outlines had been cut, it was time to peel off the pieces that weren’t part of the designs. I started with the Totoro because it was much less intricate, and I was finished in about 20 minutes. Then, I set out to peel the Chinese seal, which was a much more daunting task. In hindsight, I should have printed a larger seal so the parts would be easier to remove, but alas, five hours later, I had my completed seal.

Transferring
Finally, I transferred the designs on to my computer. Needless to say, I’m very happy with the final result!