INTRODUCTION

This week's assignment was to work with a digital fabrication machine that we have not worked with in the previous weeks. I was really interested in understanding how waterjet works hence I signed up to do some aluminum and stainless steel cutting with John on the waterjet at the Mars lab.
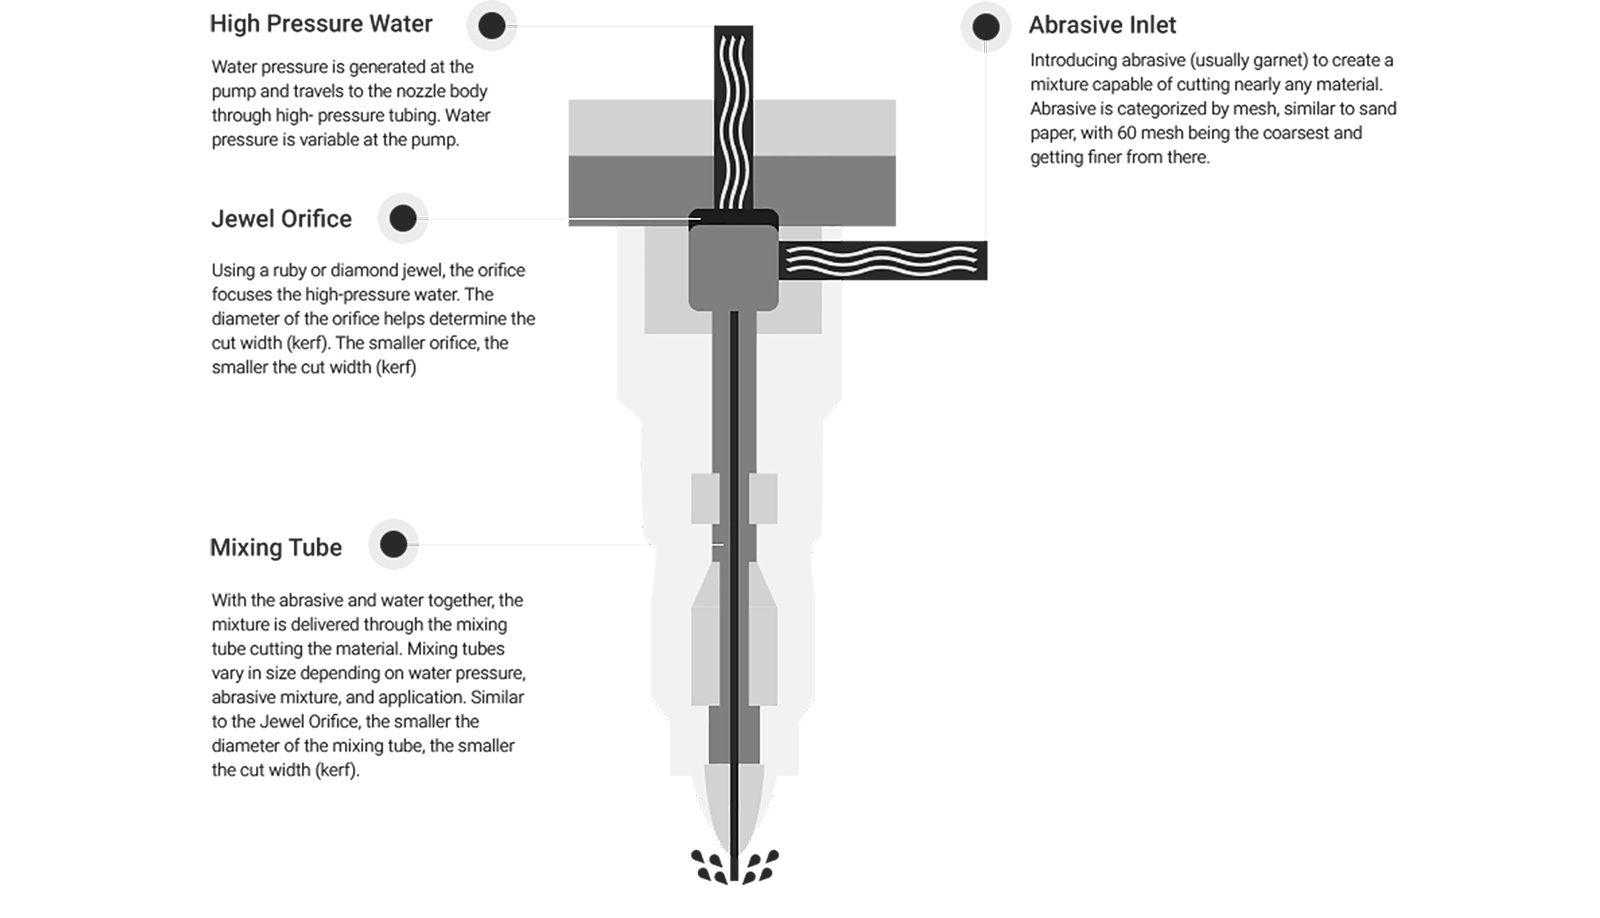
What is Waterjet Cutting?
Waterjet cutting is simply an accelerated erosion process within a selected material. Highly pressurised water is fired through a ruby or diamond nozzle into a mixing chamber. This pressure creates a vacuum and draws garnet sand into the stream where it is then fired at the object in place for cutting. The sand particles eat away at the material causing the effect of erosion to take place at such a high speed it is deemed as cutting.
How Does it Work?
A waterjet cutter is a machine that is made up of three main components to utilise a high-pressure stream of water to erode a narrow line within a piece of material. Depending on the material’s density and compound such as titanium a granular abrasive is added to the waterjet to increase the cutting power. The abrasive is added at the nozzle so that a simple switch between only water and abrasive cutting can be made.
Cutting 1/8" Anodized Sheet Aluminum
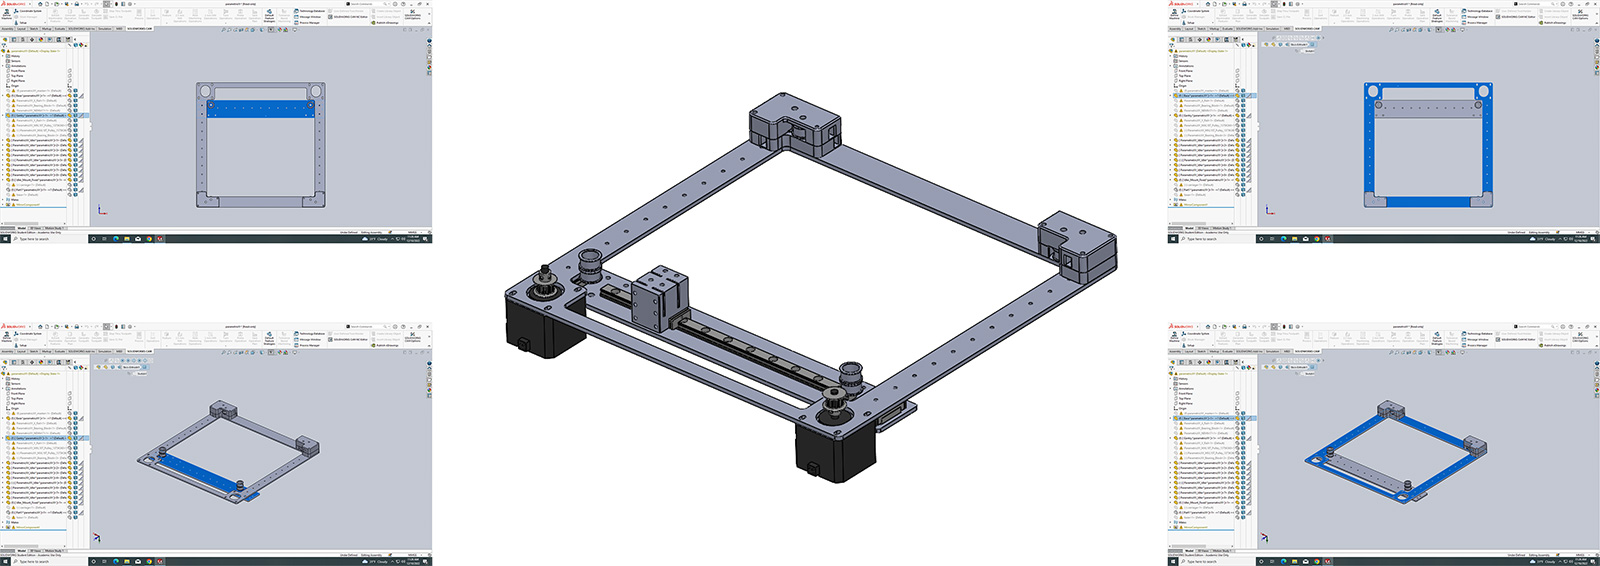
I utilized this week towards my final project where I'm building a parametric coreXY based maskless lithography with direct laser writing. For this, I started working on David's parametric coreXY
Solidworks: Exporting Cut File .dxf
It was the first time I worked on Solidworks so this week helped me in getting familiar with another CAD tool which will be very useful as a resource for future machien building projects. Yes, I am in love with machine building now thanks to this class, and I intend to continue contributing more to this area! I prepared the "base" and "gantry" .dxf files by selecting the parts and applying the "to normal" command. Once selecting the face of the part that I'd like to cut, I clicked "save as" and chose .dxf file format in the drop down menu. Once my files were ready, I shared these with John who helped me with toolpathing.
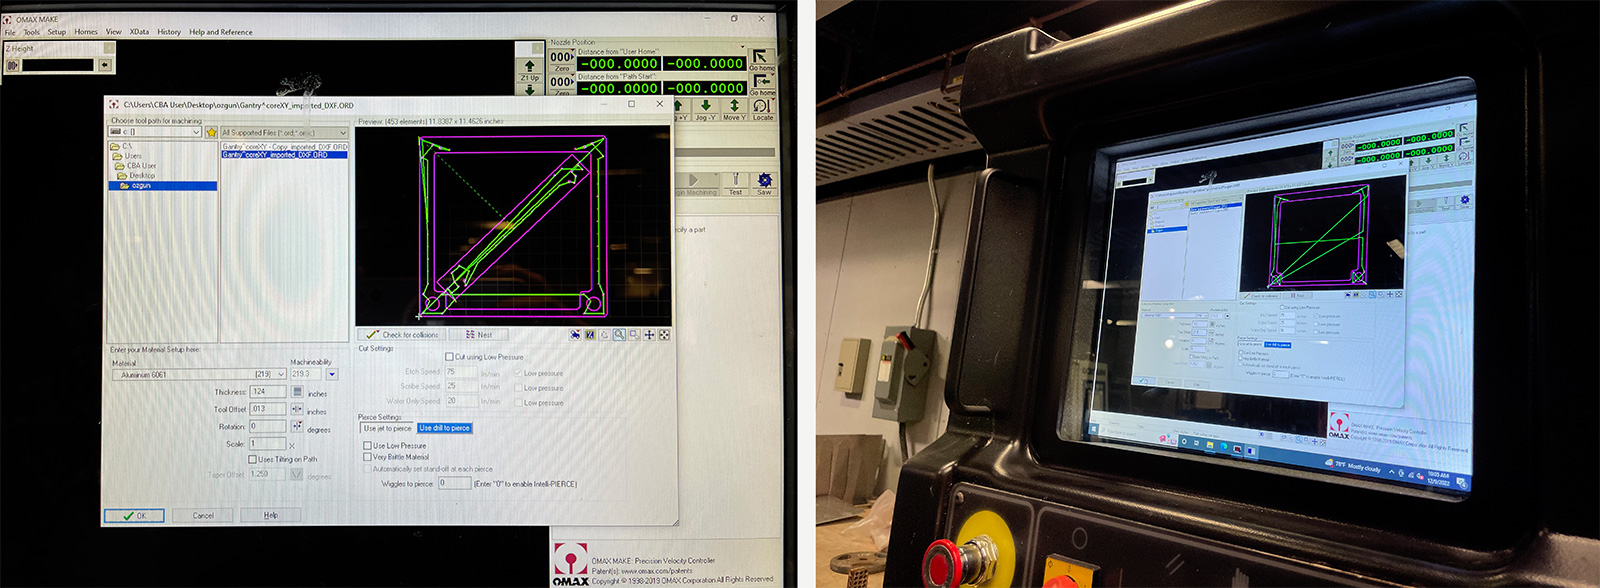
Preparing the Toolpath
Programming a waterjet, and operating one for that matter, was actually quite simple. The pipeline for preparing the toolpath was quite similar to that of the cnc toolpathing for shopbot, however the interface of OMAX was easier to digest. The .dxf files were imported to OMAX software afterwhich based on the material thickness, the cut depth was defined with a bit of buffer to ensure a full cut through. Since my material was 0.25" thick, we set a cut depth of 0.33". Once the toolpath was generated by the software, we exported two files; (1) the layout and (2) the make file.
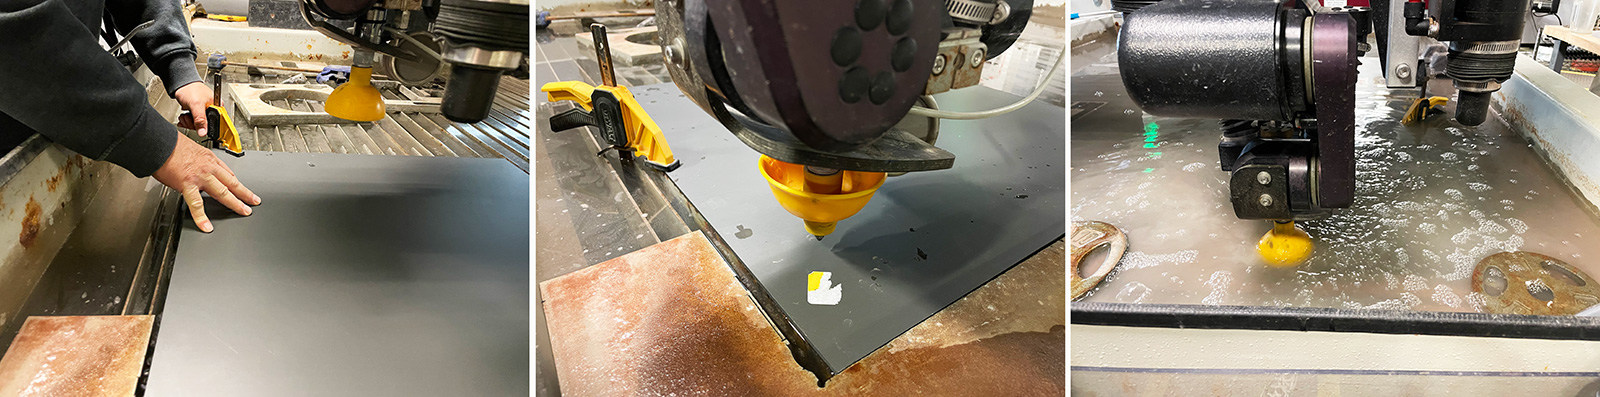
Fixing and Securing the Sheet on Cutting Bed
First and foremost, we clamped the material in place on the work surface of the catcher tank, jogs the cutting head to the position over the material where the waterjet is to begin the cut. We position the sheet so that we could clamp it at least on two points to the bed, and for additional security, John placed 2 weights on the other two sides of the sheet. Once we ensure that the piece was flat and stable on the bed, we moved to the next step which is initializing the machine.
Initializing the Pump, Setting Origin and Starting the Cut
Next step is turning on the pump, and pressing cycle start. This action initiates the program. The water and abrasive turn on and pop through the material, the jet begins to move, cuts the inside circle segments, moves away slightly on what is called a ‘lead out,’ and then the abrasive shuts off, the machine waits a second, the water turns of (this second where the water is on and the abrasive is off gives time to remove all abrasive from the cutting head in preparation of the next on cycle), the jet makes a rapid traverse move to the start point of the outer square, cuts that portion in similar fashion, and the program ends (often with an automatic shut off of the pump and a jog move to get the machine head out of the way).

The parts came out very clean and I was honestly awed by the quality (but I really shouldn't be for a machine with a 1/30000" kerf). All I needed to do for post-processing was to clean the excess garnet sand with water, and dry the pieces with pressurized air in the shop. After that, my pieces were ready to be assembled.
Below is a video of the cut in progress to see how wild it looks! But truly, John said that this is one of the safest machines in the lab. Nevertheless, one should still not put their hand in the water during the cut!