INTRODUCTION

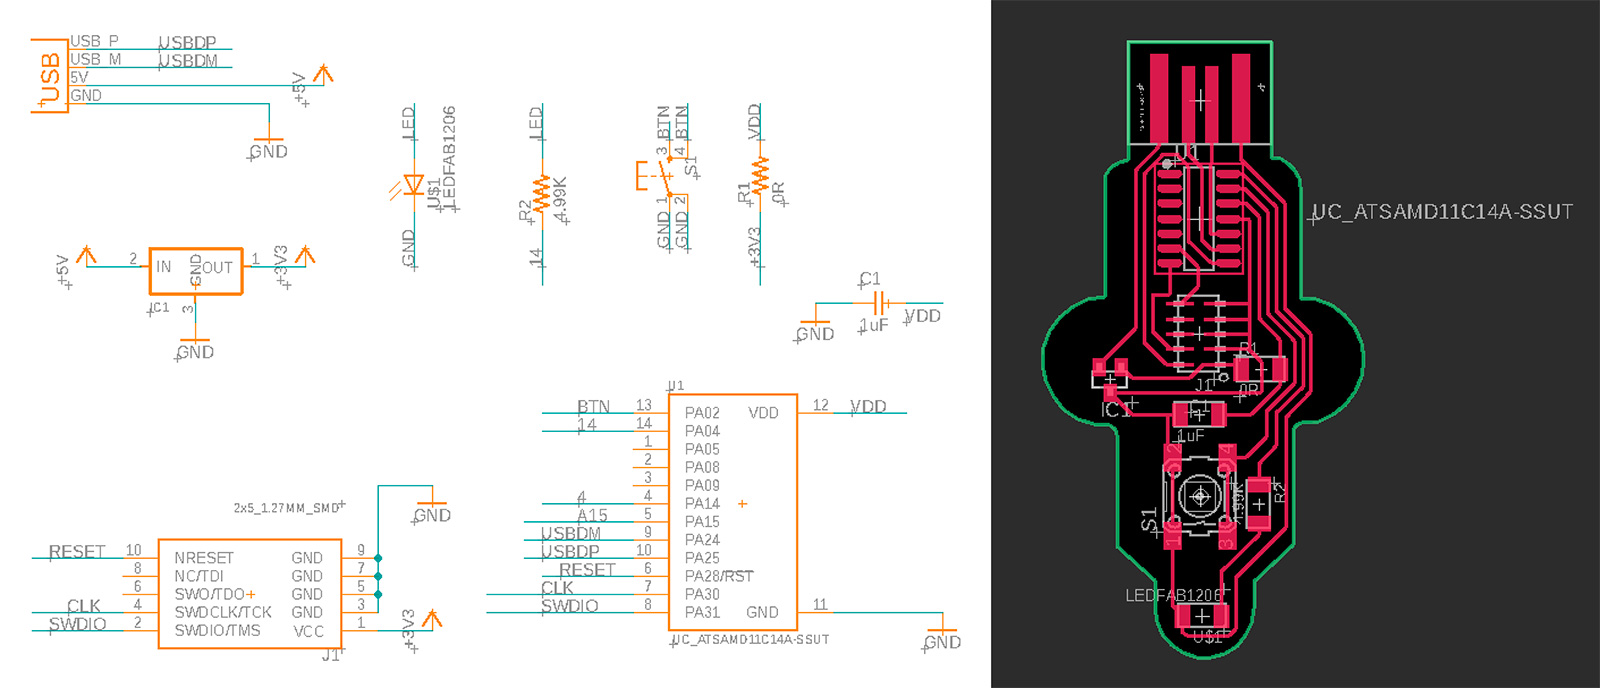
This week's assignment was to program our board from week 4 and make it do something. In week 4, I had already programmed my giant board and made it two different things with an LED and a button. However, my main objective for this week was to re-design my previous board to improve my routing as well as miniaturizing the board by saving a lot of space! In my previous design, I used four 0-Ohm resistors which is way too much, and also made such a simple board larger than it really needed to be. After re-routing, my new updated design had no 0-ohm resistors, and the overall size of the board was reduced significantly with a cute outline cut!
1. PCB Fabrication and Programming
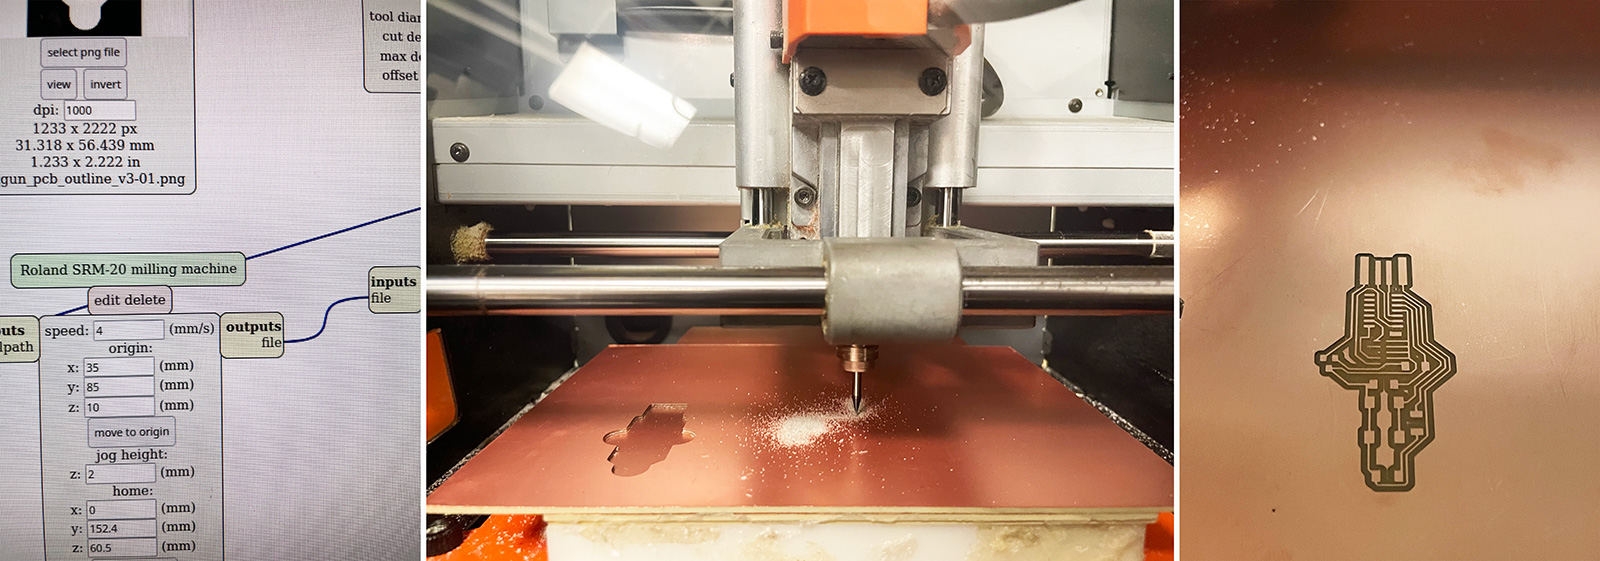
1.1 Milling and Stuffing
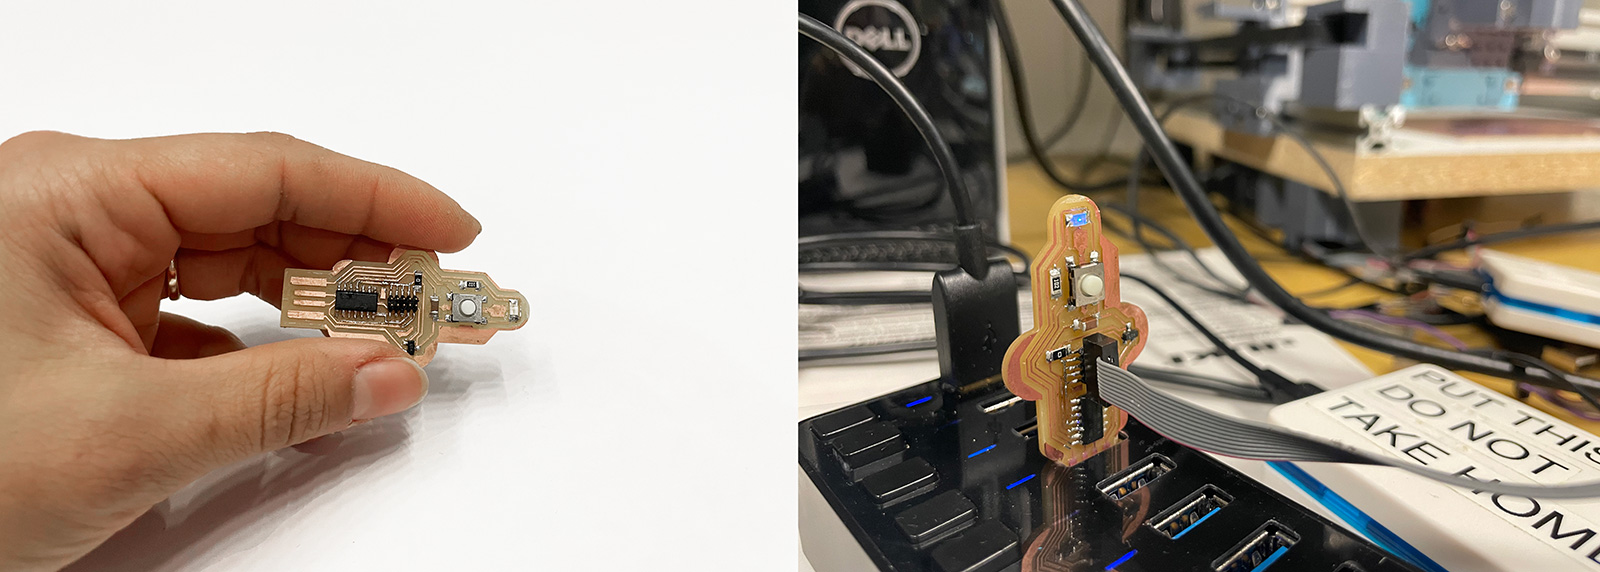
This week since Wedyan came down with Covid, I milled and stuffed both my and her board. Below I will detail the programming the bootloader and my embedded programming work.
1.2 Programming the Bootloader
Now that our boards were ready, it is time to load the bootloader to be able to use it for various functions later on. I followed Jake's guide in using edbg and downloaded the ATSAMD11C bootloader binary and used the edbg installed in the CBA workshop computer. Upon successful programming, the message on the right should be displayed.
1.3 Arduino Setup & Programming
Now that the bootloader is installed, I needed to download and install the Fab SAM core for the Arduino boards library using the library manager in order to get the board recognized by the Arduino. Again, I followed Jake's Fab Arduino SAM guide for this step. After installing it, I could see my device in one of the ports and, after picking the appropriate Arduino board settings for the board I am using. The board is now ready to be used with the Arduino software!!
Push Button and LED Control
As a proof of concept, I programmed the board with two codes of different simple functions. The first code enables the control of the LED using the push button, as seen in the above video.
Blinking LED
The second code was the basic blink code, where the LED was programmed to blink continuously as shown in the above video.