This was my first time doing any sort of design, save for a few hours spent playing with Blender. I used OnShape for this week, but plan to move to Fusion 360 in the future as it appears to be more robust.
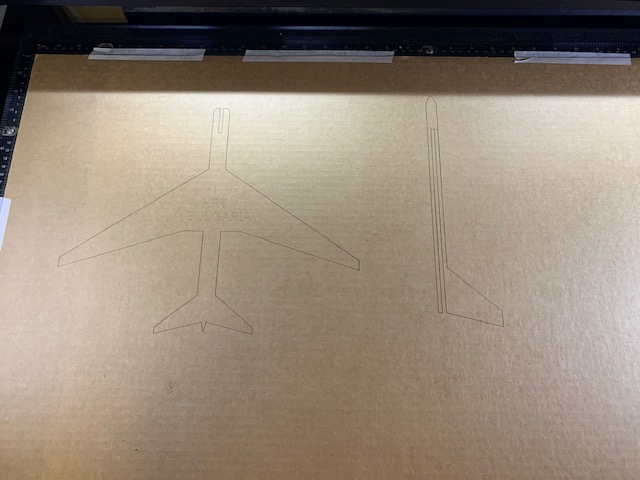
Since I love planes, I decided to make a simple model of an airplane for this week! I started by getting the real dimensions of a Boeing 777-300ER from here, and then scaling them down to millimeters instead of meters. However, that was actually a bit small, so I tripled the original size. For example, the length of the fuselage in the real 777 is supposedly around 74 m, so I made the actual size of my cutout 74x3 = 222 mm. This is what the first version looked like:
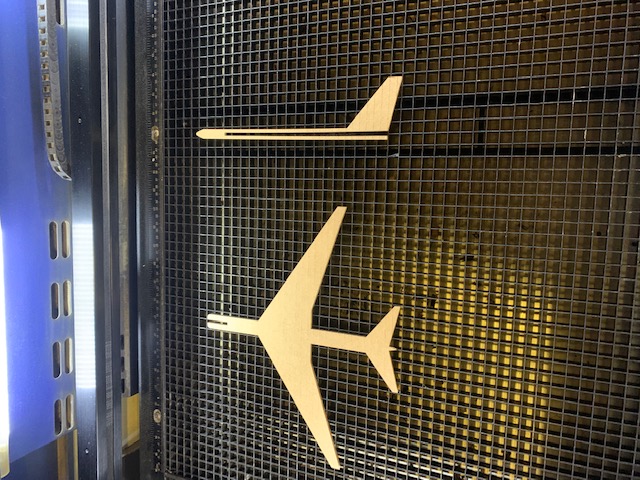
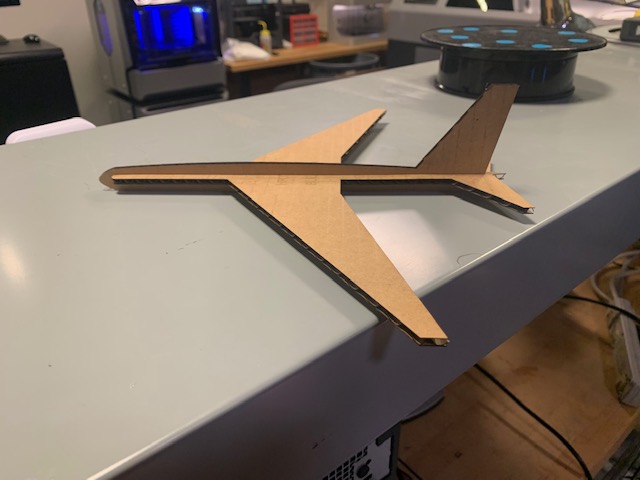
Though relatively simple, it was a good first time with the laser cutter! However, one big problem was that the slit that fit the middle of the plane was very thin and the tail of the plane did not snap fit, which made it very loose. So a slight design improvement involved adding a small snap fit to the back tail of the plane. This is what that looked like:
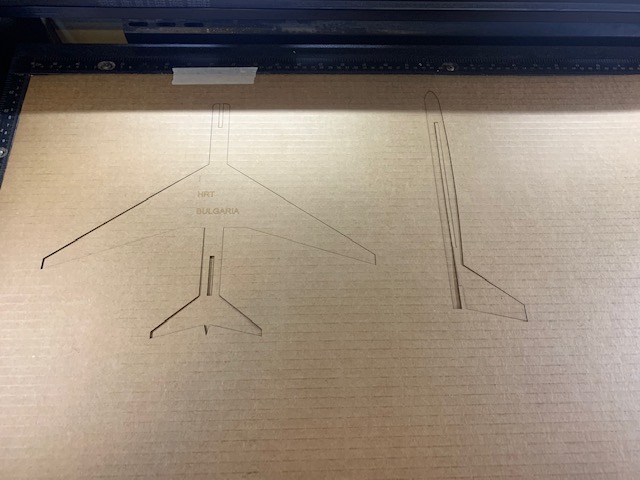
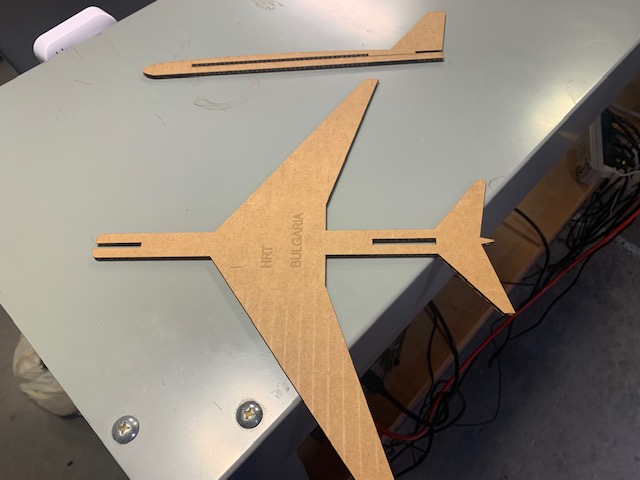
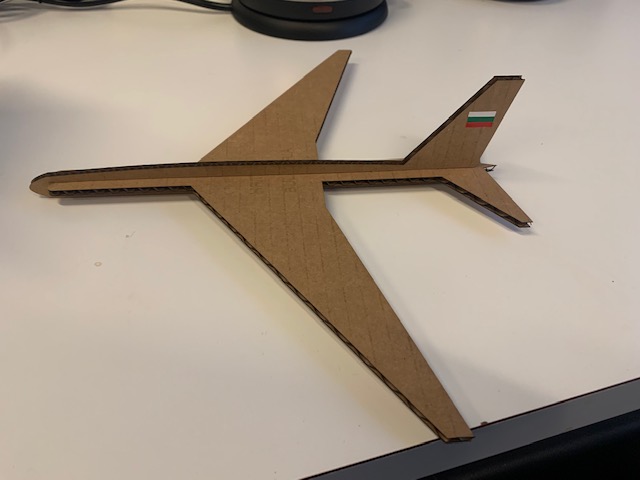
As we can see, this version included a nice press-fit slot in the back and the front of the plane for a more robust structure. Additionally, we can see a nice raster cut on the top (or bottom, depending on the orientation) of the plane. Put together, the final product looks like this:

All that was left was to add some color to it, so I added the Bulgarian flag to the tail of the plane, cut from the vinyl cutter. Here is the finished version:
Epilogue: Some thoughts on the Laser/Vinyl Cutters.
Overall, I had a great time working with these tools. With some others in the group we first made a comb of different gap sizes. We measured the thickness of the cardboard to be about 4.19mm, but after trying many different gap sizes (ranging from 3.8mm to 4.25mm), I settled on 3.98mm.
The kerf was measured by cutting out a small, 1-inch square, and then measuring the distance from side to side. From that calculation, we found the kerf to be about 0.007 inches. The other settings (like laser power) can be set on the laser. I personally found that cutting at a speed slightly below the recommended 2.5 was better for ensuring that the laser cut all the way through. I kept the power at 100, and would sometimes bump the PPI up a little over 200 just to ensure that the laser cuts through the cardboard everywhere.
A problem with this cardboard was that it was not uniformly flat, so no matter how well we taped it down it would be uneven in some places. That meant that the laser was unfocused when cutting through some parts of the cardboard, but I found that making the modifications mentioned above were helpful in fixing that.
For the vinyl cutter, it was quite annoying to go through the process of weeding and putting together really tiny slices of the Bulgarian flag. That is a big reason as to why I didn't do the British flag for example. But overall it was a fun experience.
I can't wait to try (and inevitably fail) to put a rotor on this plane.