(Group) characterize your lasercutter's focus, power, speed, rate,
kerf, joint clearance and types
(Individual) Cut something on the vinylcutter.
Design, lasercut, and document a parametric construction kit.
(Group) characterize your lasercutter's focus, power, speed, rate,
kerf, joint clearance and types
(Individual) Cut something on the vinylcutter.
Design, lasercut, and document a parametric construction kit.
I worked with Dexter, Simeon, and Eric from my CBA Lab section.
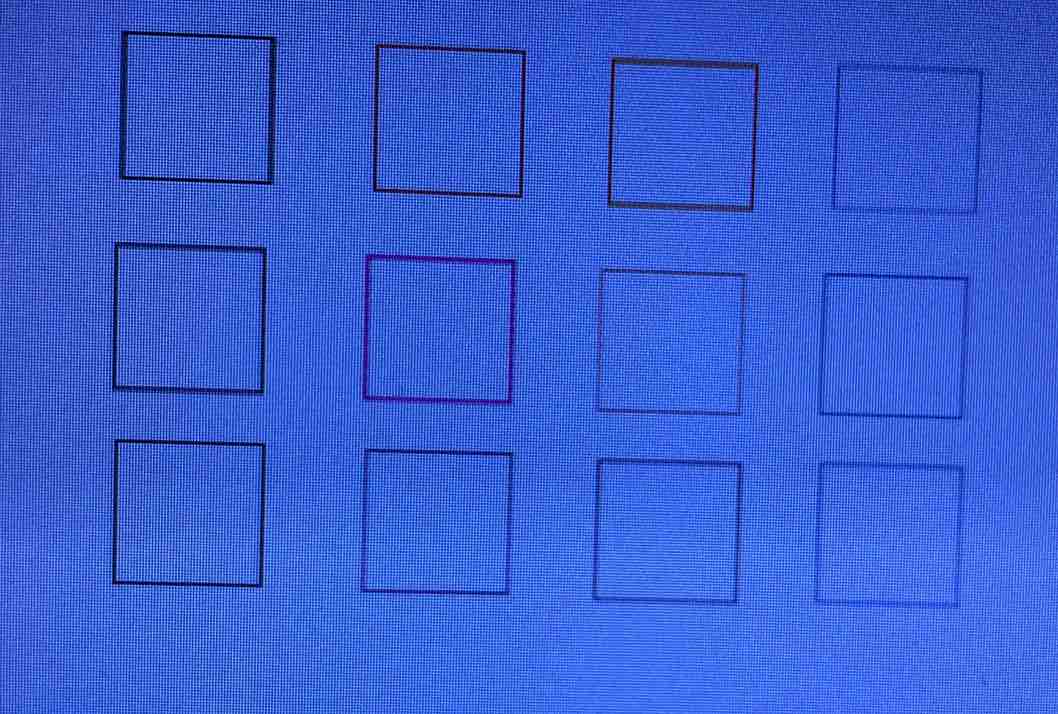
To characterize the kerf, speed, power, and PPI of the laser-cutting machine, we decided to optimize for efficiency by creating a 3 x 4 grid of 1" x 1" squares in the cardboard. This way, each column would represent a variable we were interested in characterizing.
Instead of cutting each square individually, which would require lots of loading and reloading, we decided to use the colors of the vector cut outline to our advantage. In the printer preferences, we were able to map the RGB colors (which was deceptively tedious since we needed to keep track of and then map from CMYK to RGB color codes) to cut settings.
For kerf, we created three identical squares using the recommending cardboard cutting setting of (Speed, Power, PPI) = (2, 100, 250). Then, we measured using the caliper the size of the actual cut. The difference (divided by two) was the kerf. We then averaged the kerf across three trials. The cuts yielded 0.125, 0.115, 0.12 mm for an average kerf of 0.12 mm.
For power, we tested a setting of (2, power, 250) where power varied within the set {25, 50, 75}.
For speed, we tested a setting of (speed, 100, 250) where speed varied within the set {10, 20, 30}.
For PPI, we tested a setting of (2, 100, PPI) where PPI varied within the set {200, 300, 400}.
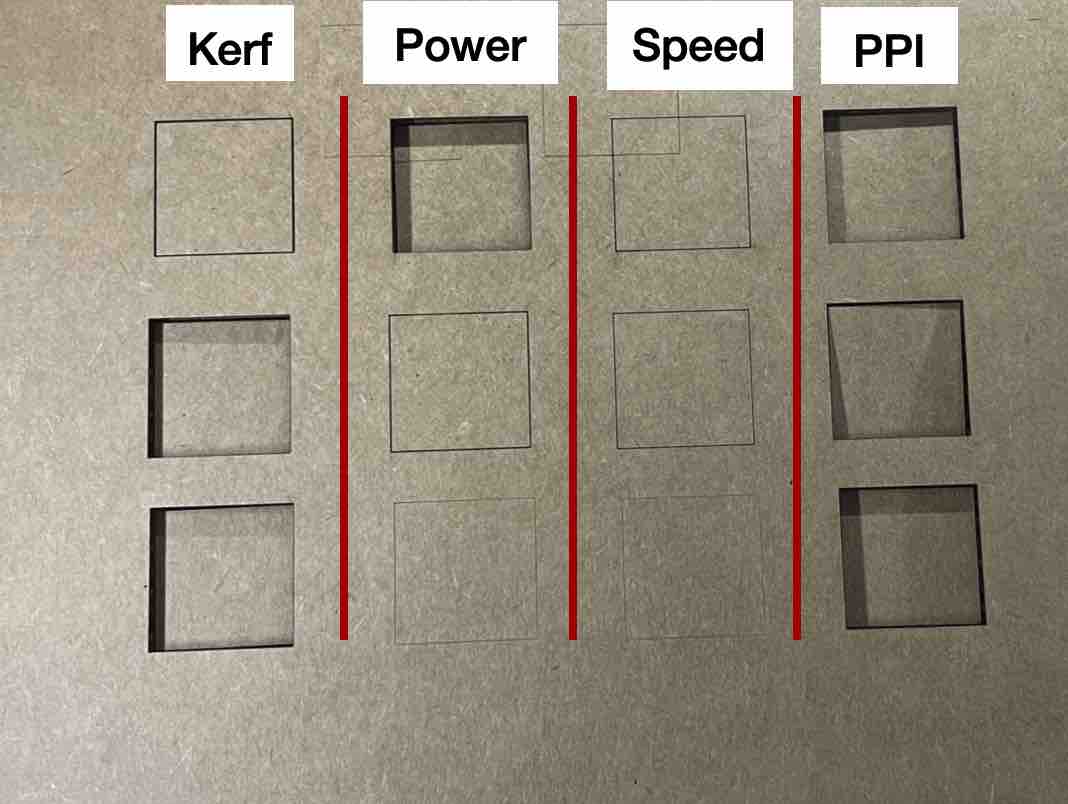
Our results showed that: using full power allowed for us to cut through completely; a low speed was the best approach for cutting cardboard (at least lower than 10, our suggestion being to use the known recommendation of 2), increasing PPI doesn't have considerable effect on the cutting since each square was able to cut through.
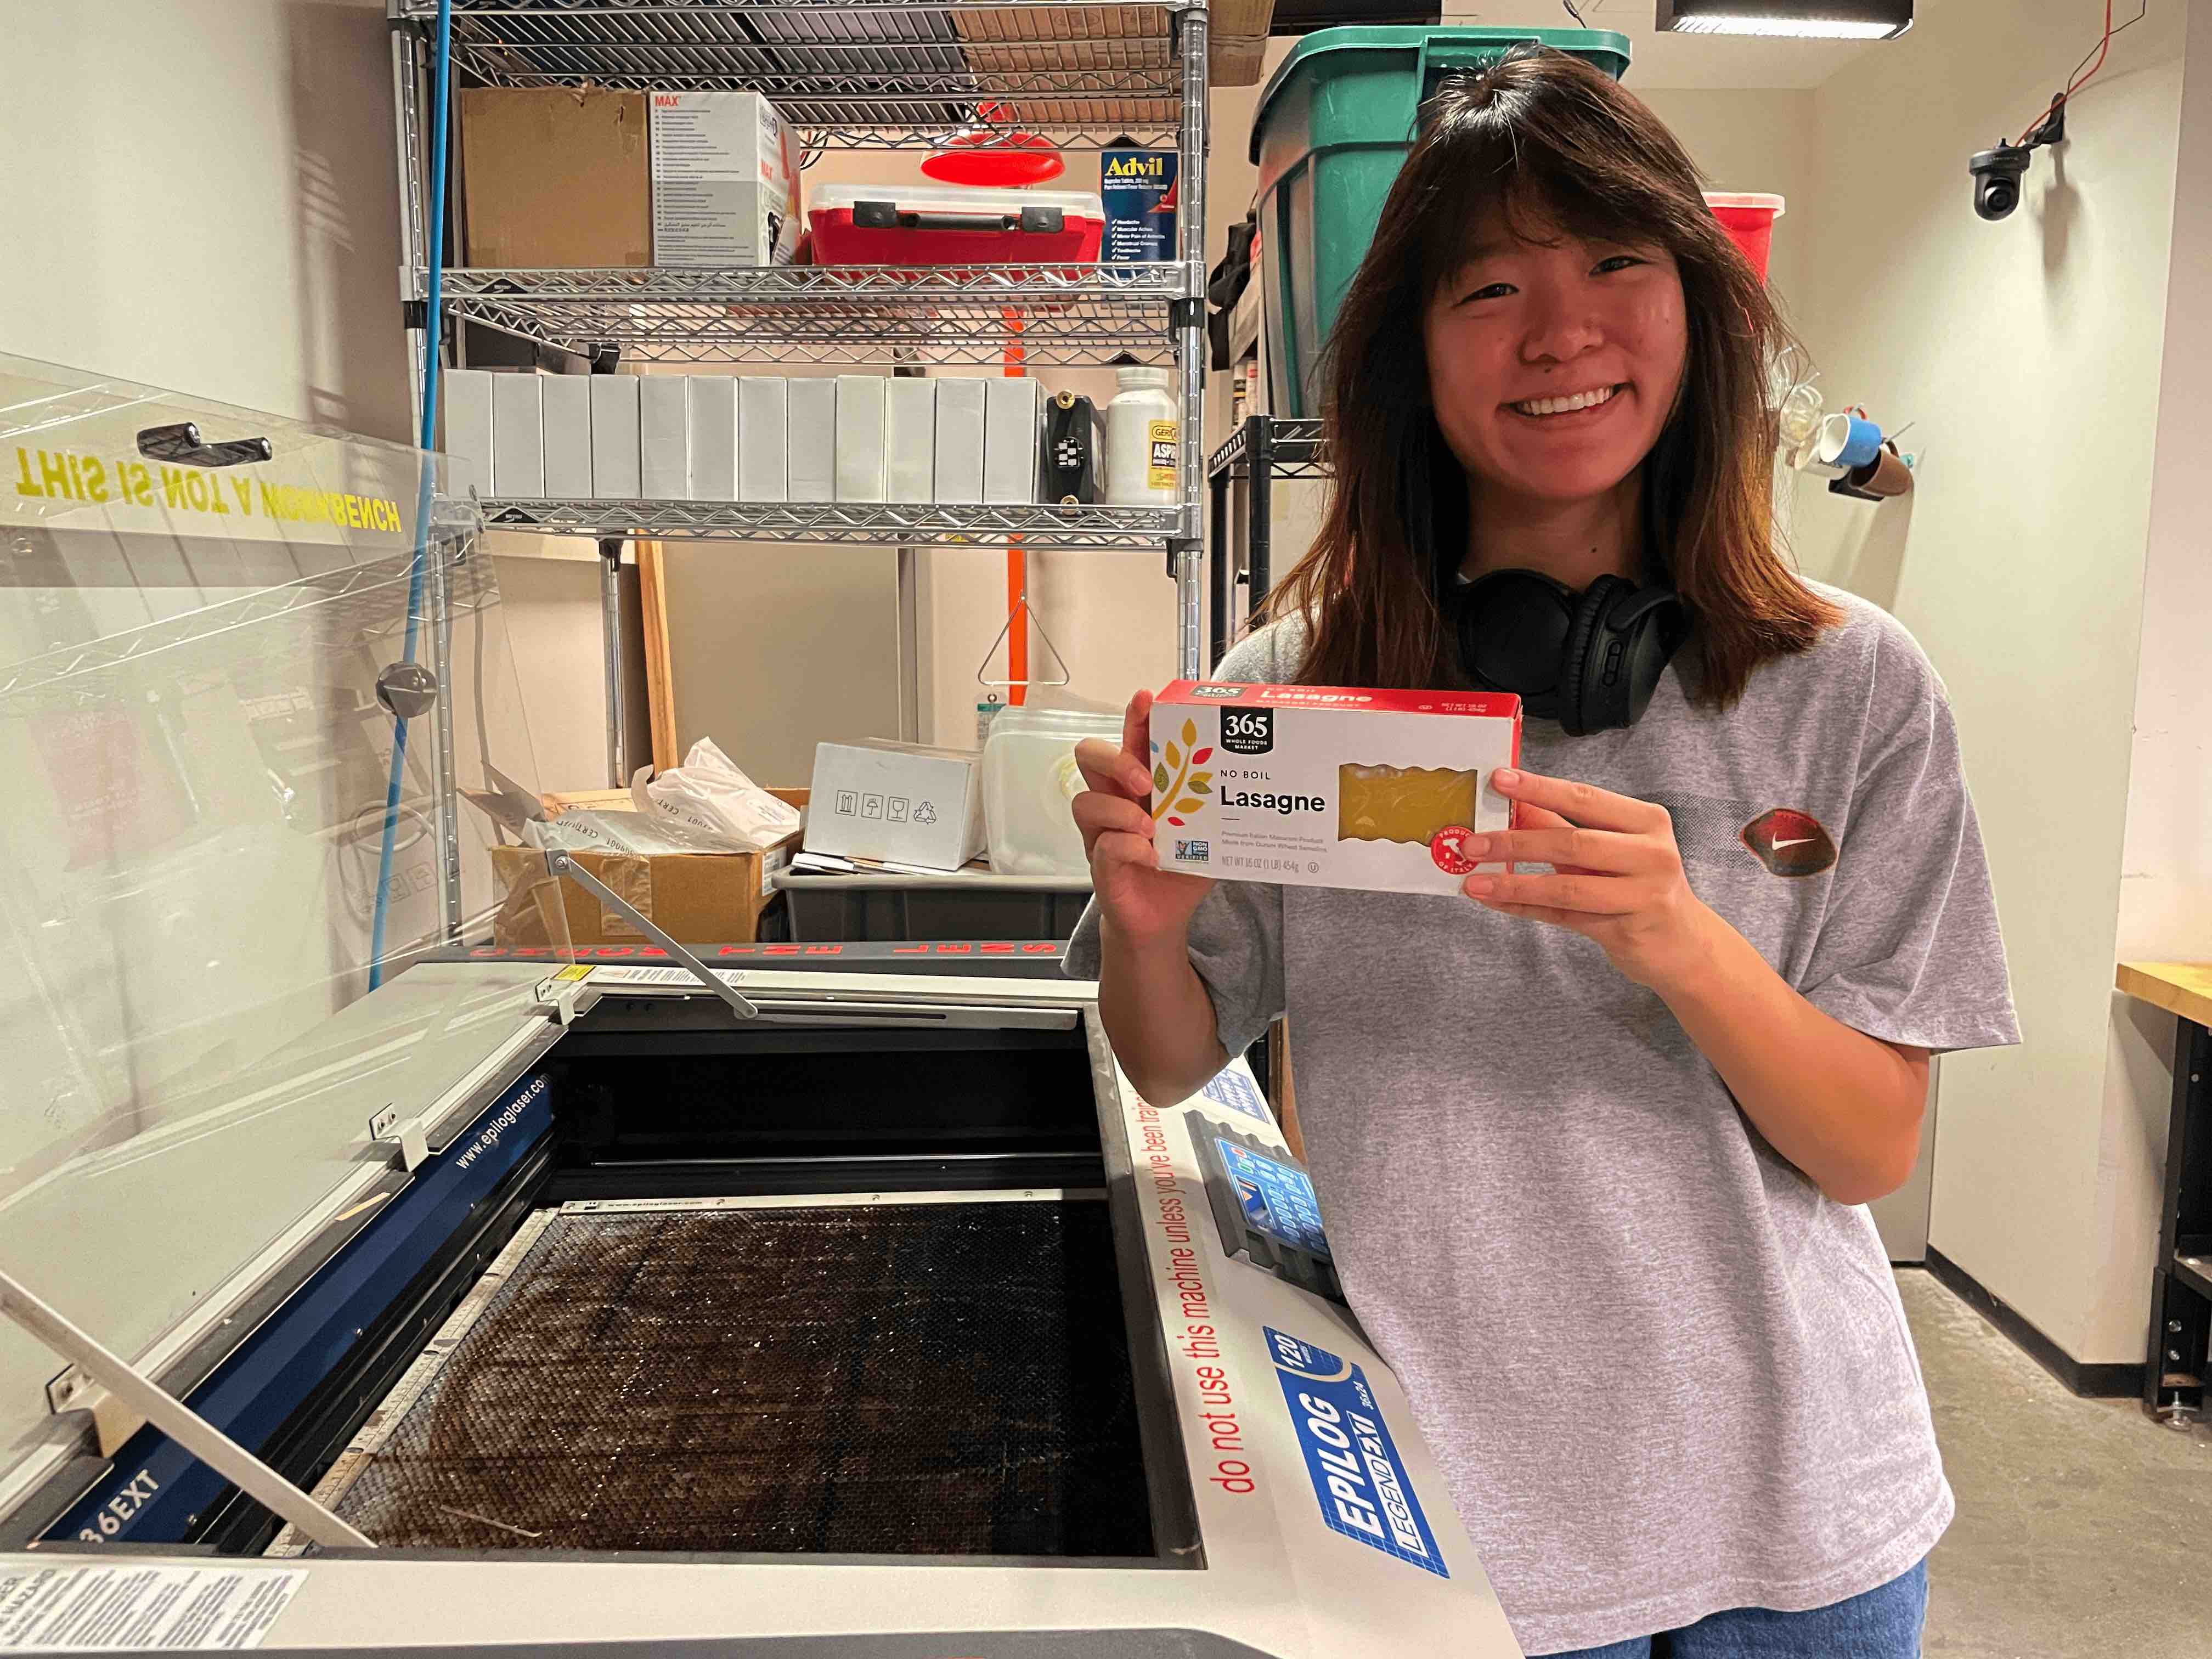
The idea behind my project is a riff on the classic highschool engineering challenge "The Spaghetti Bridge". The tl;dr creating a bridge made of uncooked spaghetti. Why? I love pasta (in fact, I spent a month perfecting a carbonara and cacio e pepe). I also wanted to play with the printer settings to learn how to change the machine characteristics based on different materials. I drew inspiration from this existing laser-cut pasta project.
To start, I looked into existing bridge kits, and came across this bridge (made by a toy company, Roliff). I then started with a simple Notability sketch of my pieces (a much more simplified version inspired by Roliff).
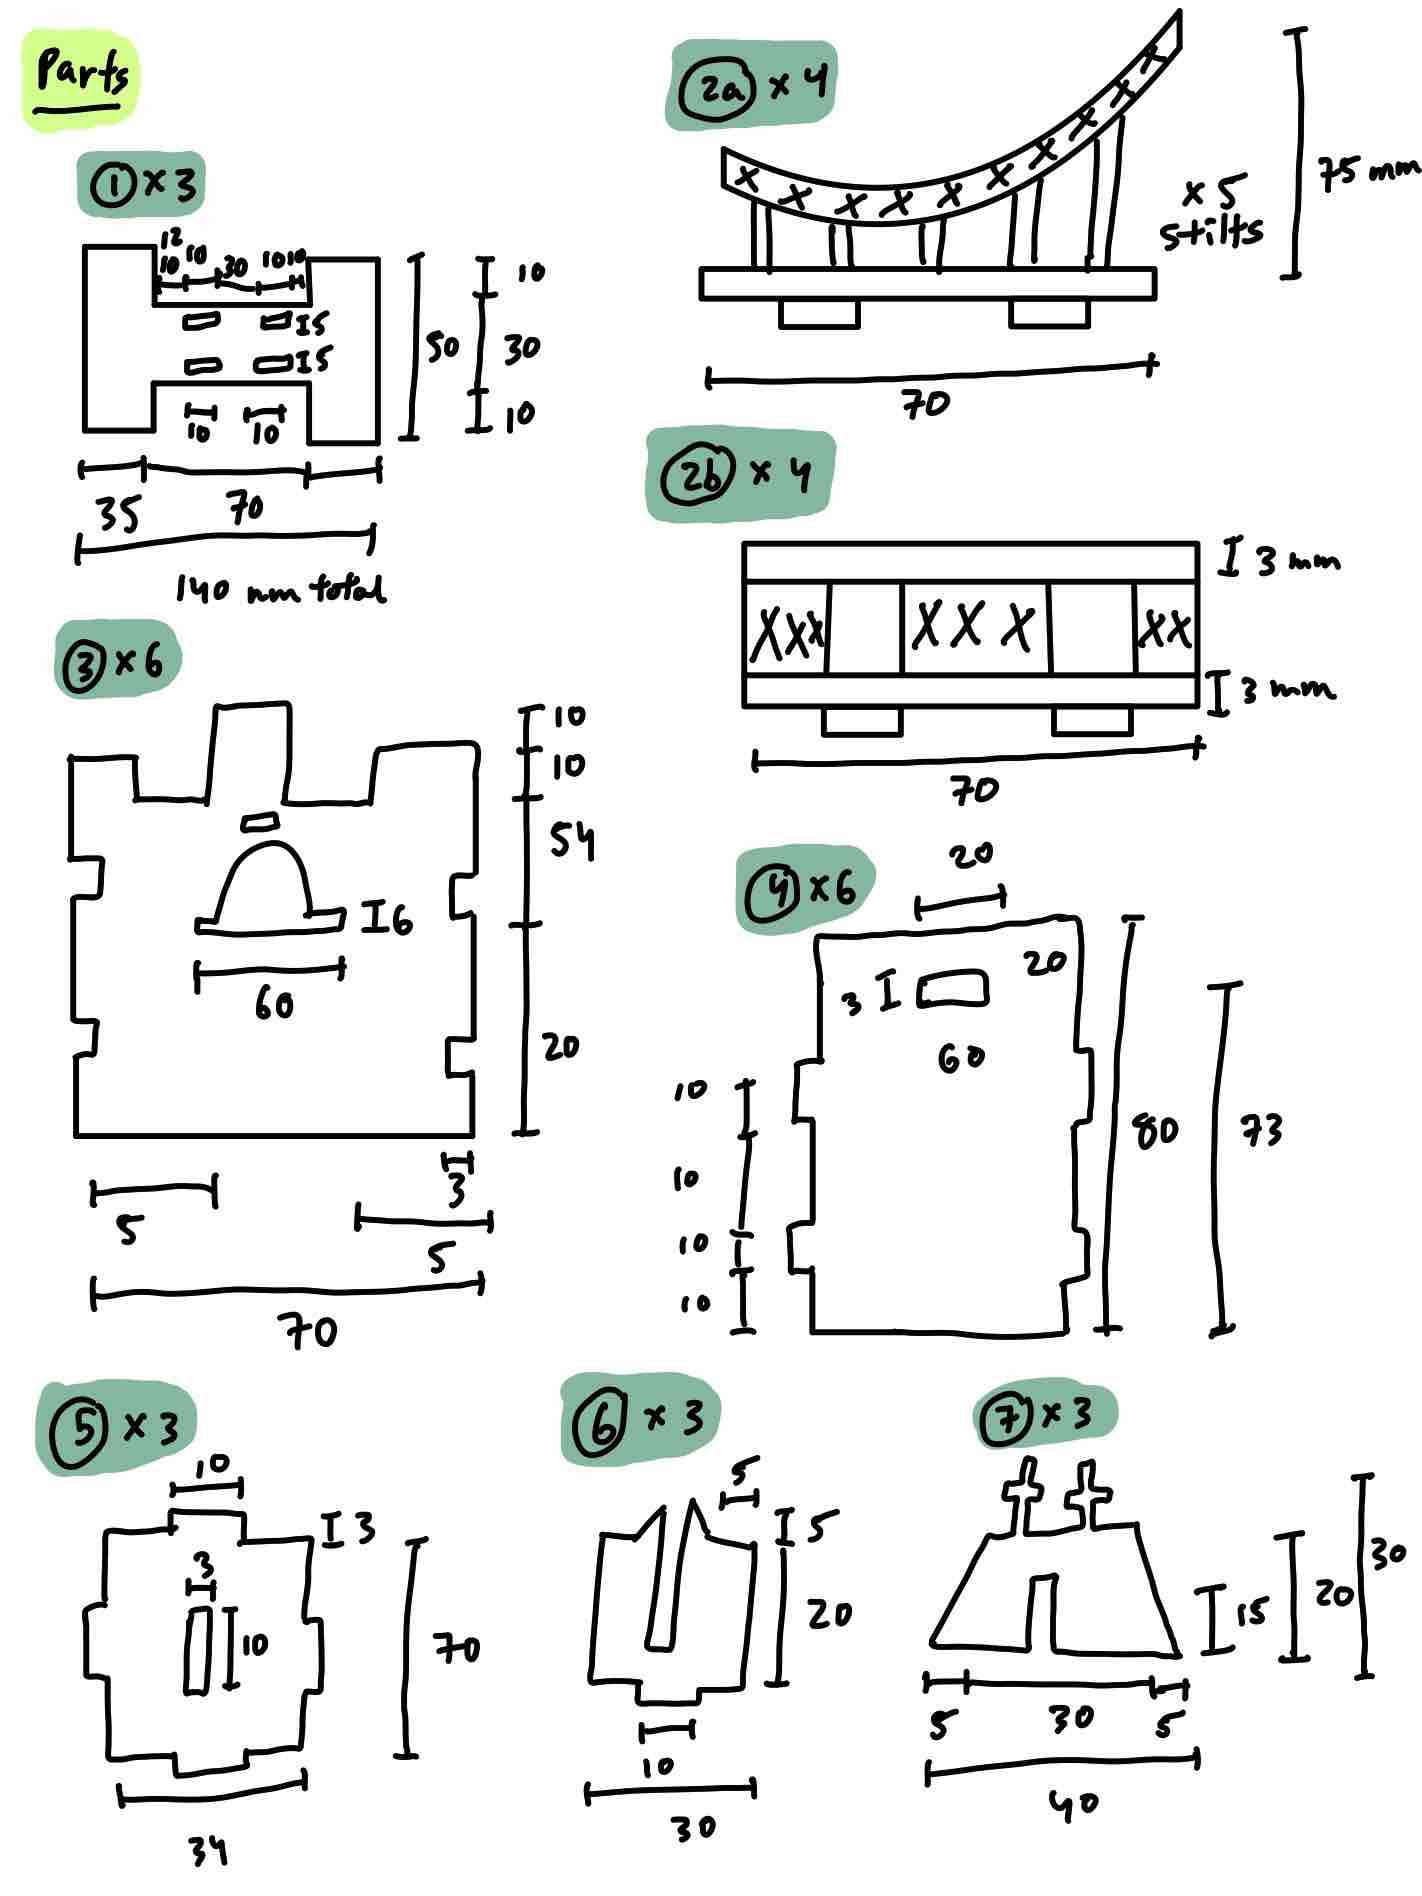
From there, it was a blitz of fun in CAD. I created a total of eight parts (as shown in the sketch's naming convention above). I was able to really play around with some techniques I was unfamiliar with before (e.g. mirroring, patterning, lots of constraints and symmetry) to parametrize the design. For example, for pieces 2a and 2b which represent the railings of the bridge, this was all done using patterning and coincidental points. I found the ability to create variables in Fusion360 to be incredibly helpful. All the pieces use press-fit construction.
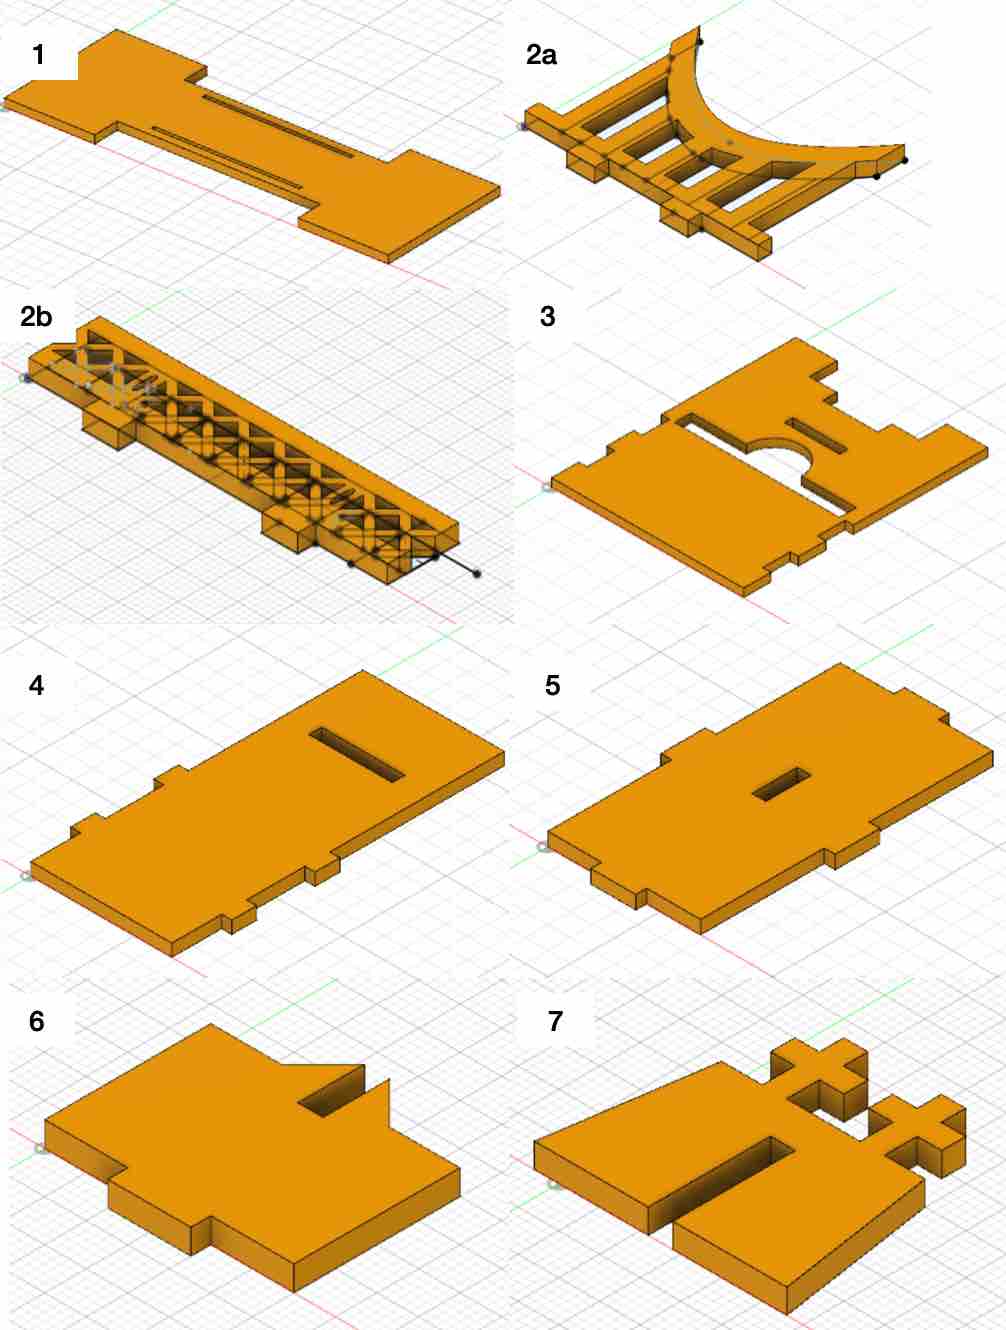
Next was going from the more or less 2D CAD pieces (although each sketch was extruded to represent lasagna) into a full, 3D assembly where I could verify the press-fit construction. This was great fun because I was able to work with joints in Fusion360 for the first time. From there, I adjusted some of my press-fit holds.

After finishing the CAD, I started laser-cutting. The first step was to determine which cut settings would be able to most effectively slice through the lasagna sheets. I decided on the setting of (2, 50, 250) because I wanted to scale down the power comparatively to the cardboard recommendation. This worked beautifully. Throughout the laser-cutting process, I was trained by Tom on the second laser-cutter (the Epilog), where I found that the appropriate setting could be found again by scaling down the cardboard recommendation's power by one-half (resulting in 30% speed, 40% power, 300 Hz). To test these settings, I initially cut a small square to verify the cut.
The age-old complaint when it comes to going from your design to its prototype is "But it fit in CAD..." Boy was that true for me. Almost every piece had to be adjusted, especially since I estimated a 3 mm thickness for my lasagna sheets, but after using an electronic caliper in lab, I learned that the thickness was much closer to 1 - 1.25 mm.
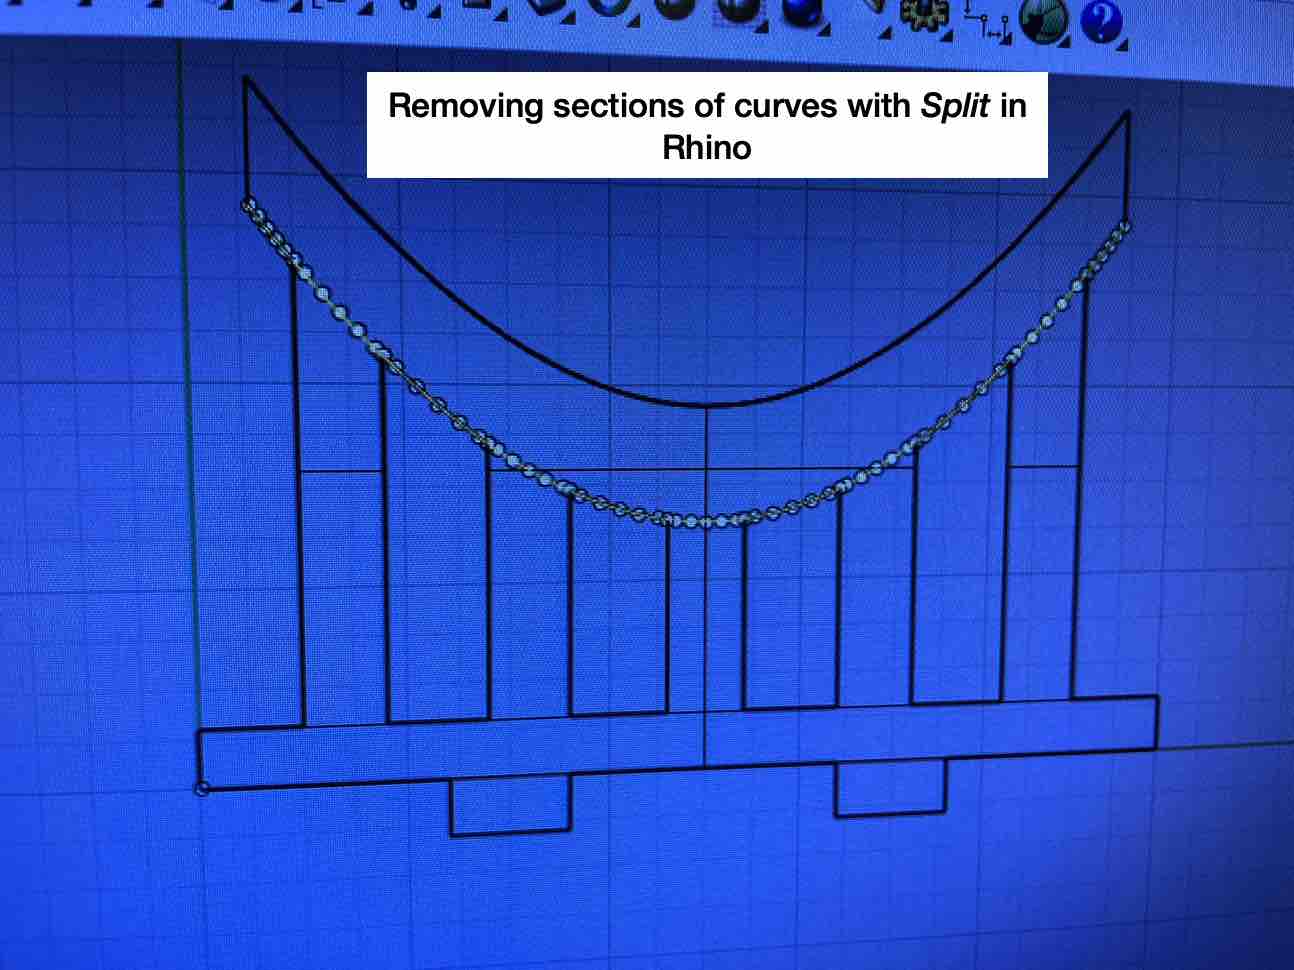
Another interesting problem that appeared was importing the .dxf files into CorelDraw, which proved troublesome for some pieces such as 2a, where construction lines and helper curves would appear and could not be easily removed. These additional lines needed to be removed otherwise they would be vector-cut and overall edit, reduce, or deform the piece. Tom showed me a great hack around this, which was to first import the .dxf file into Rhino. In Rhino, I could then go in and use the "Split" function to remove unwanted lines, then "Join" to create one (more) continuous sketch, where possible. After this process, I would then convert the sketch into an Adobe Illustrator file, maintaining the sketch geometry. Finally, this .ai file would be imported into CorelDraw without issues. Although somewhat of a convoluted, tedious process, this worked wonders for many of my parts that used lots of helper lines.
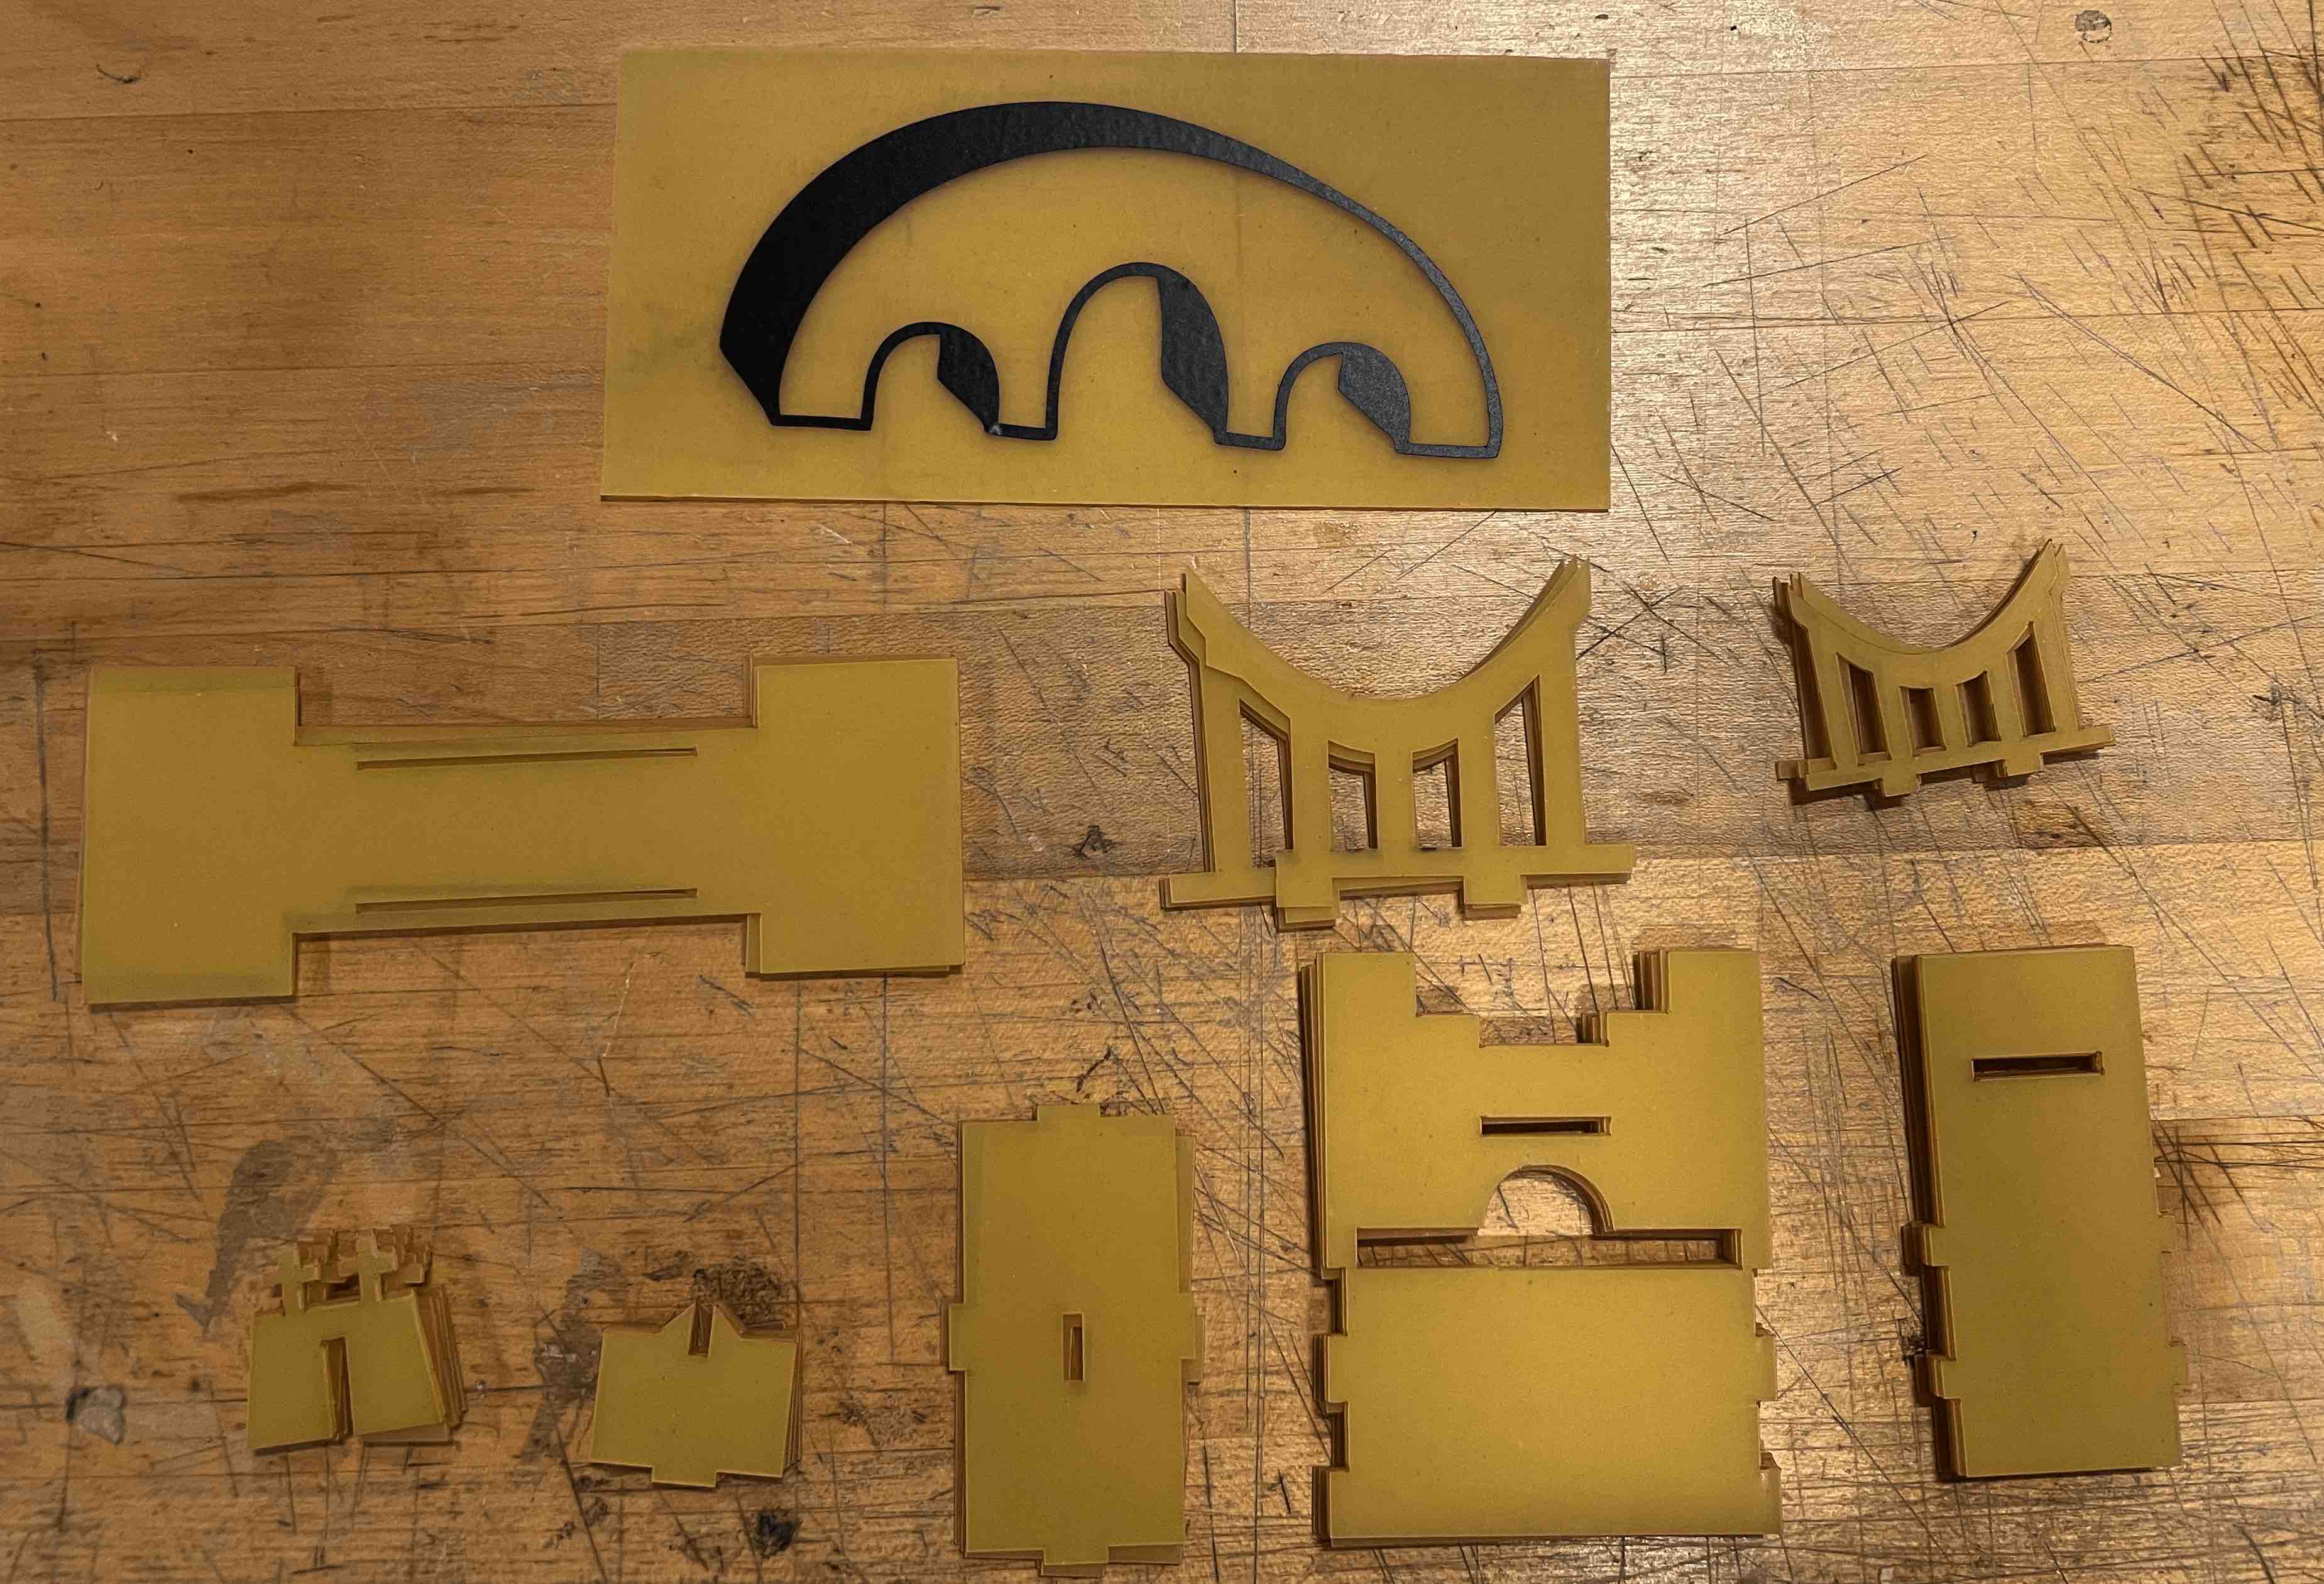
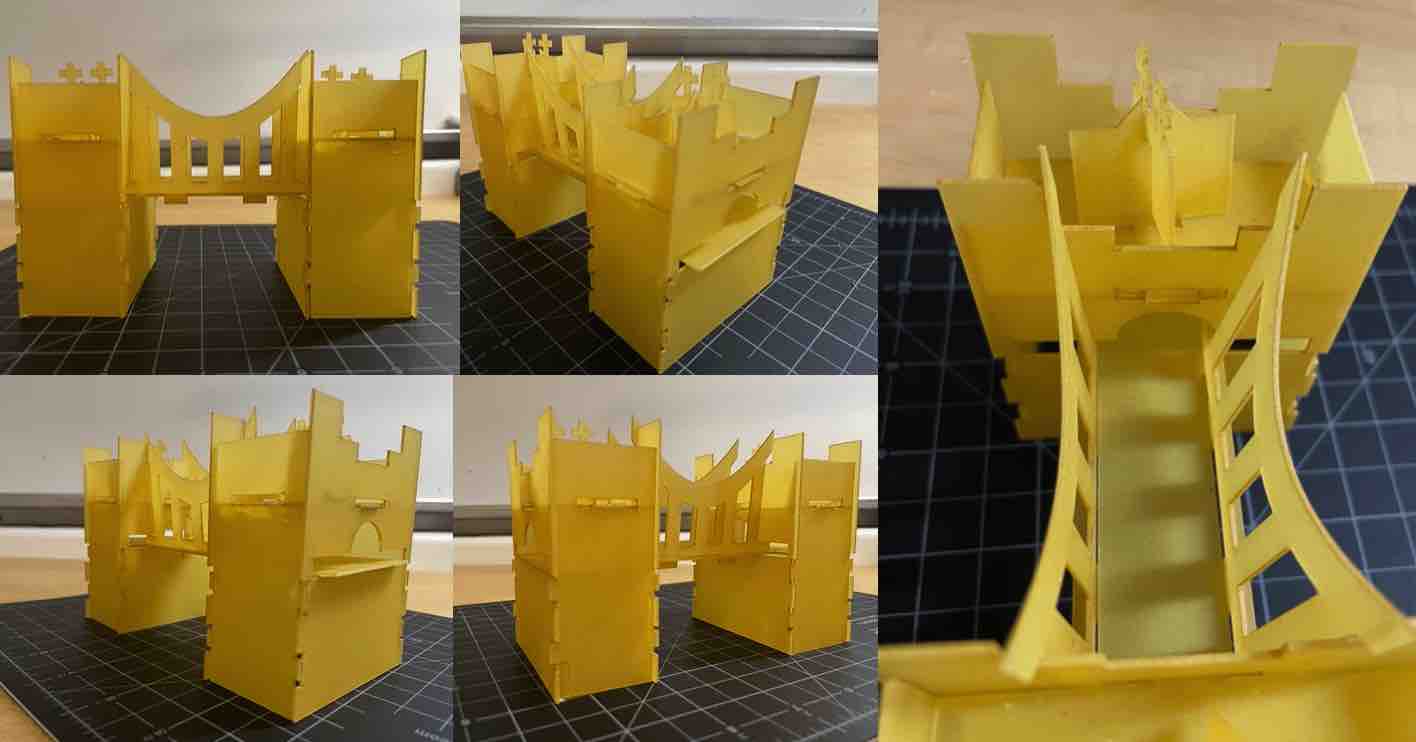
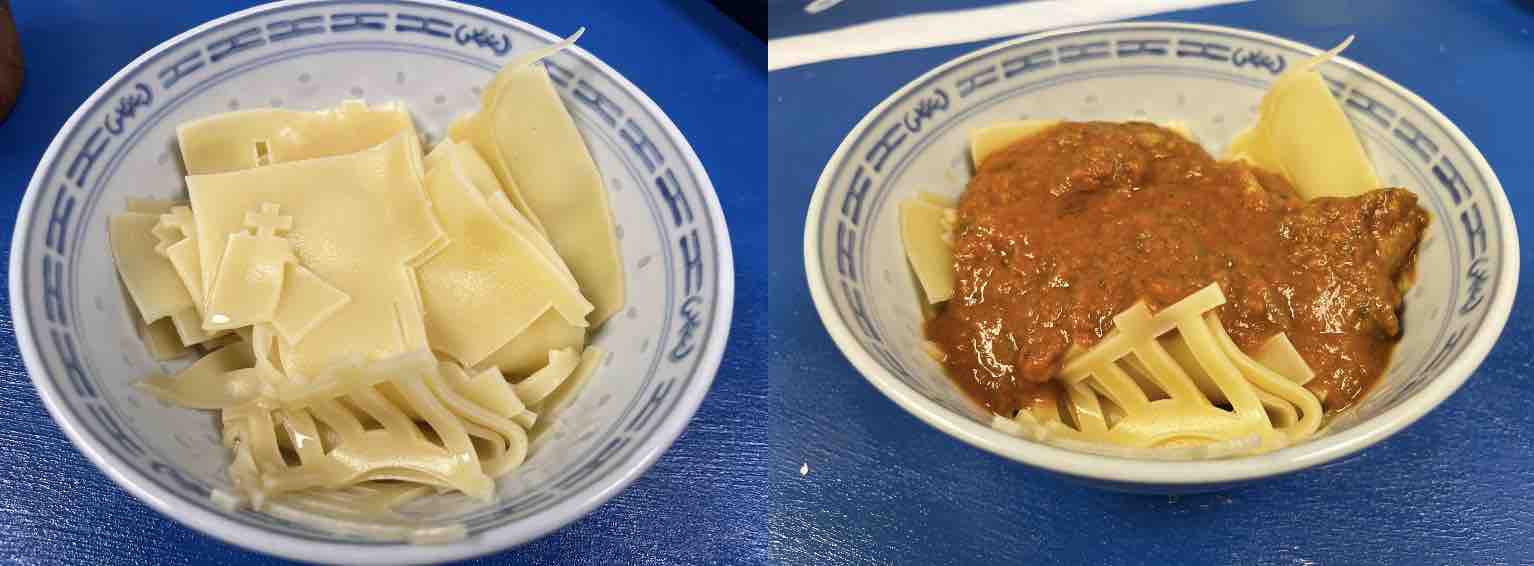
Next, the assembly! I created a set of 2D pieces that constructed a bridge, as shown below.
Finally, the ultimate demo -- taste! I cooked the bridge with a lamb masala sauce (leftovers). The sauce was great , however, the main issue was that the pasta tasted burnt from the laser-cutter.
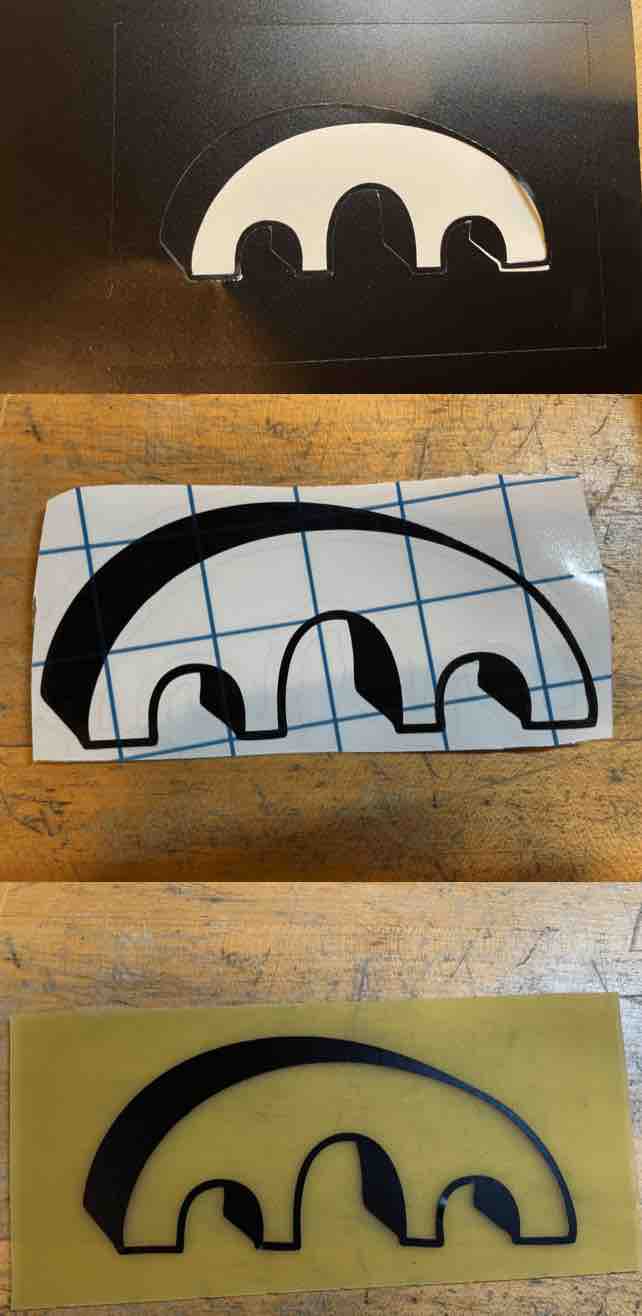
To tie my construction kit together, I wanted to vinyl cut a simple bridge design and place the sticker onto a lasagna sheet (like a logo!). I first found a black and white drawing online.
Then, I used CorelDraw to leave only black and transparent in the drawing, which was relatively straightforward since the sketch was already black and white. Measuring the dimensions of the lasagna, I then loaded an appropriately sized black vinyl sheet into the machine.
The most challenging part of this process was getting the sticker to stay on the lasagna sheet after transfer. Pasta has grooves (which allow for sauce stickage during cooking) but makes placing adhesives very difficult. I ended up just smoothing over the sticker several times to maintain.