(Group) Review the safety data sheets for each of your molding and casting materials
(Individual) Design a mold around the stock and tooling that you'll be using
Mill it and use it to cast parts.
(Group) Review the safety data sheets for each of your molding and casting materials
(Individual) Design a mold around the stock and tooling that you'll be using
Mill it and use it to cast parts.
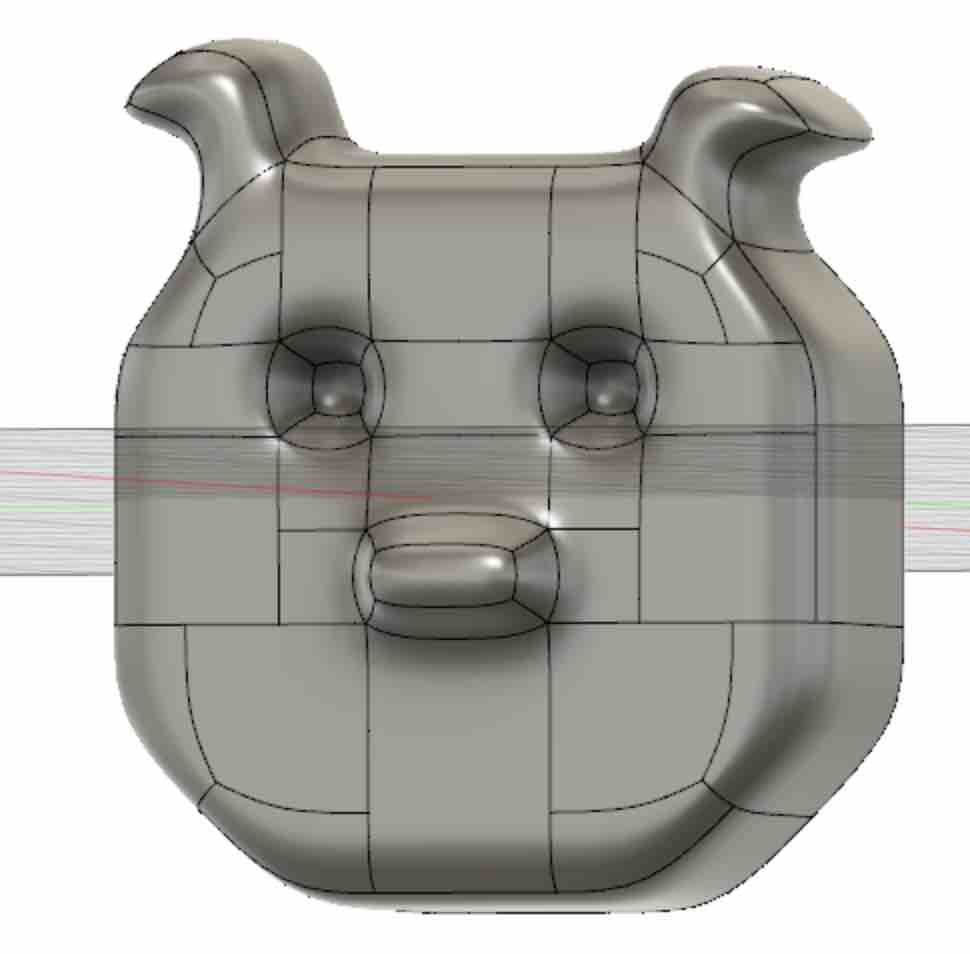
This week, since we were designing molds, I wanted to learn more about sculpting using 3D CAD tools, specifically Fusion360 since this was the software I was using previously. I learned about the mesh functions and creating form. It's a really nifty tool to be able to deform and edit forms easily. The main limitation was my own artistic skill. In order to create more detail with the model, I had to really subdivide existing meshes and add edges in order to get fine detail. Furthermore, each time I added edges in one part of the model, it would unexpectedly deform another part of the model by pulling it in a somewhat sporadic direction.
Overall, I created a simple bear head:
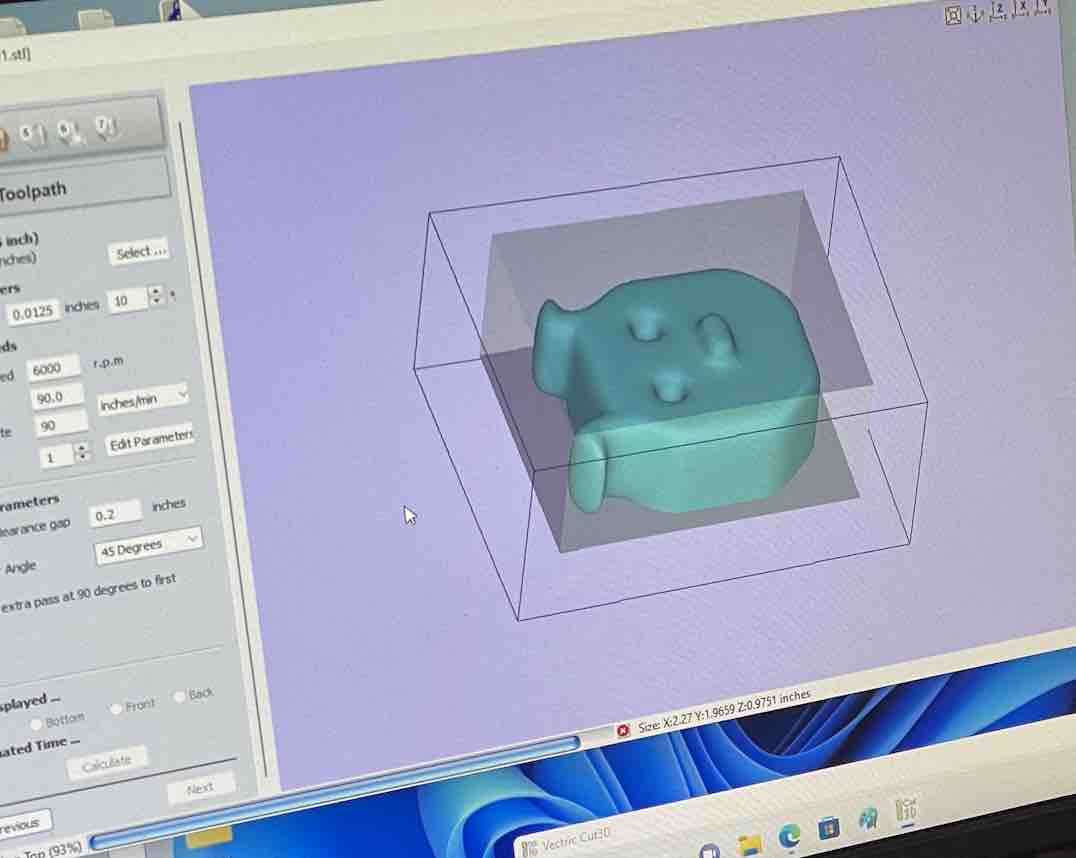
Next, John and I began working on the toolpath using the Vectric Cut3D software. Using a 0.125" ball end mill (I chose this part because my bear didn't need to press fit into anything, i.e. there was no functionality besides aesthetic, so I prioritized using a end mill that is able to smooth out better and grab fine geometry better).
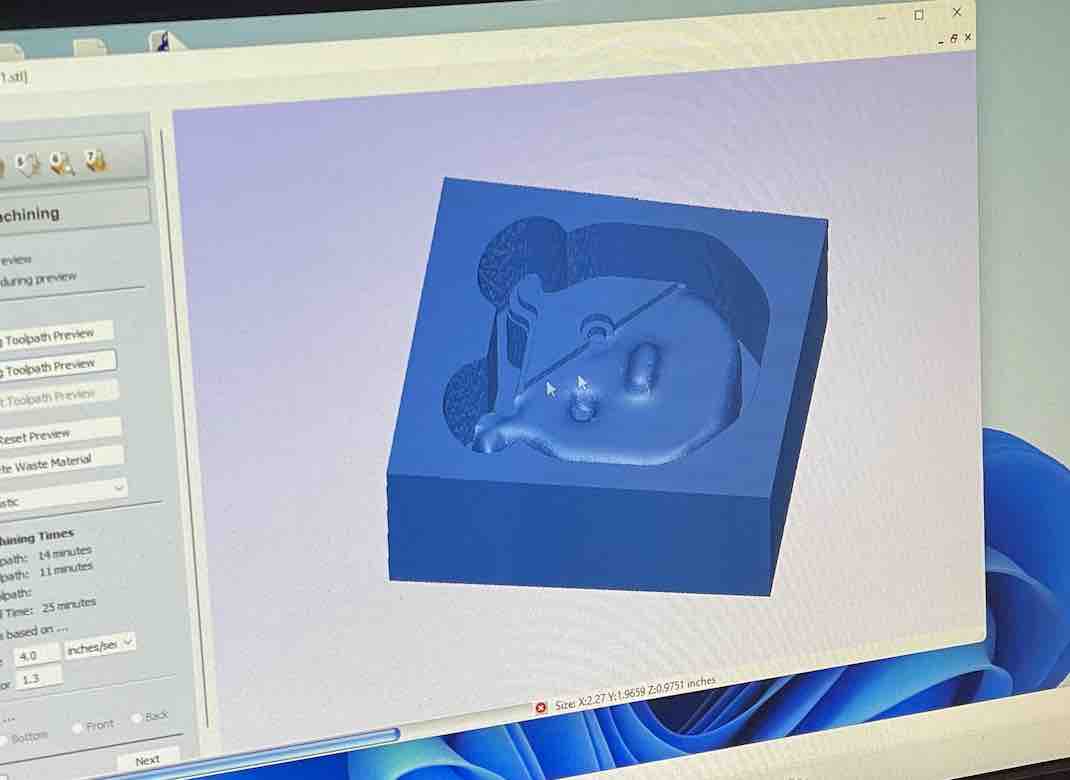
Shown below is (in order) the bear in a 3.5 x 2 x 1.5" block, the roughing toolpath, and the finishing toolpath:
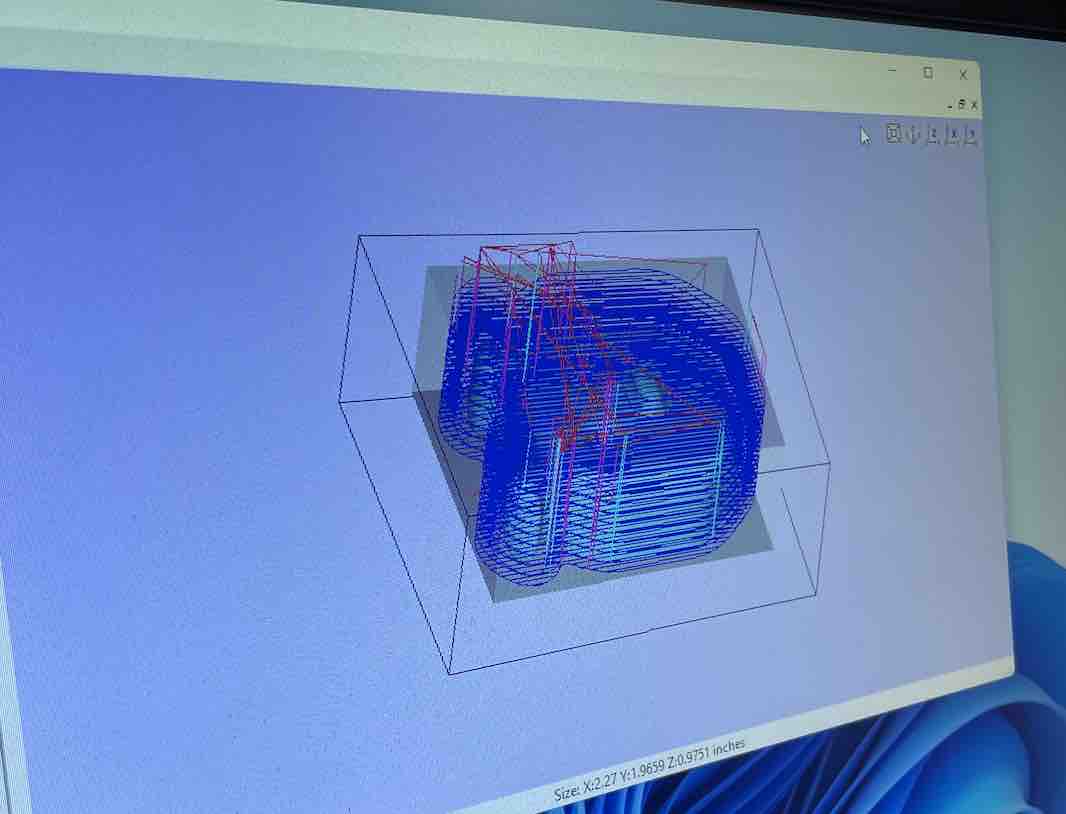
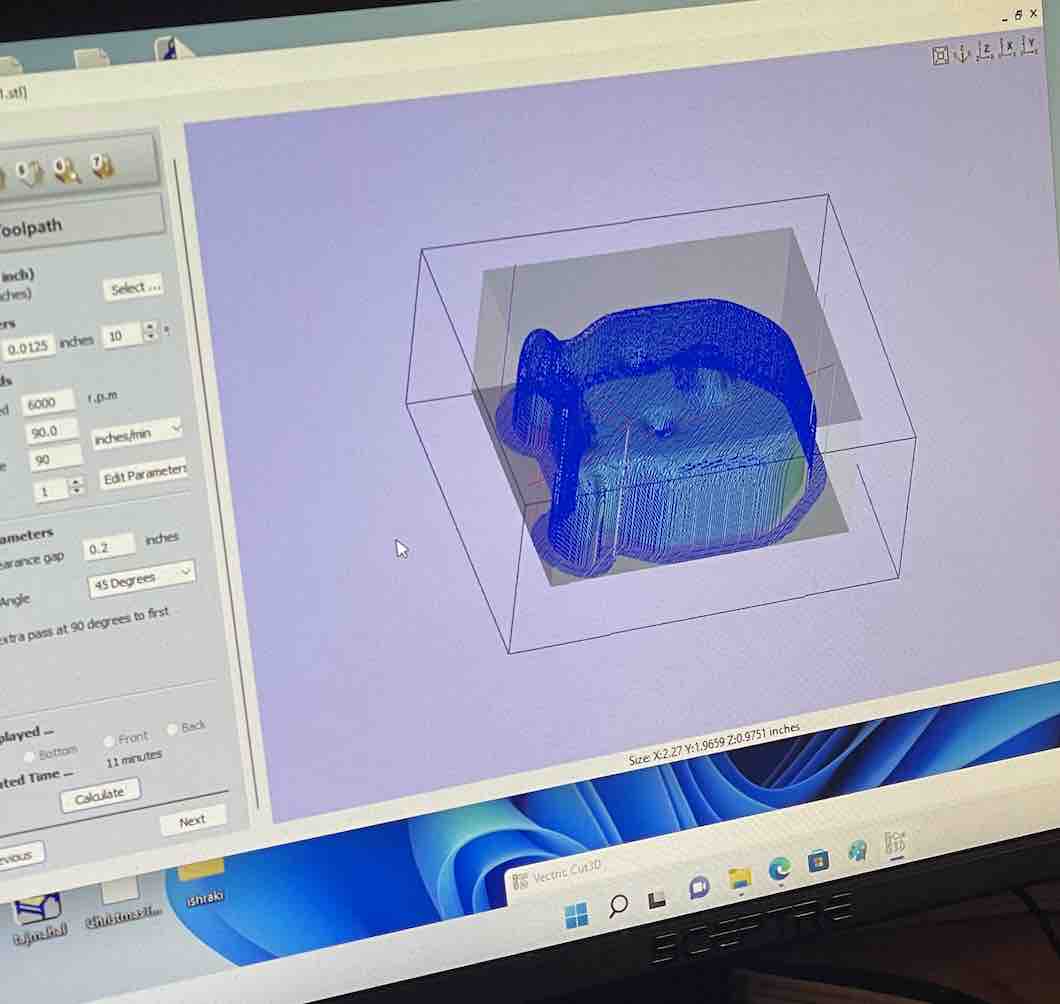
Below is part of the roughing toolpath simulation:
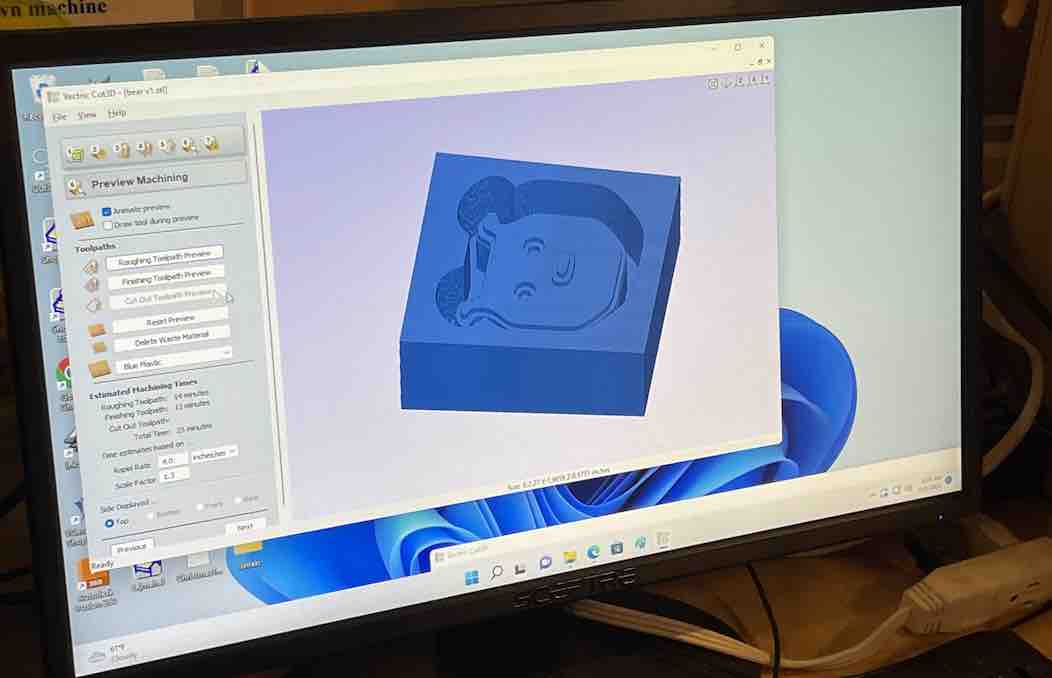
Below is part of the finishing toolpath simulation:
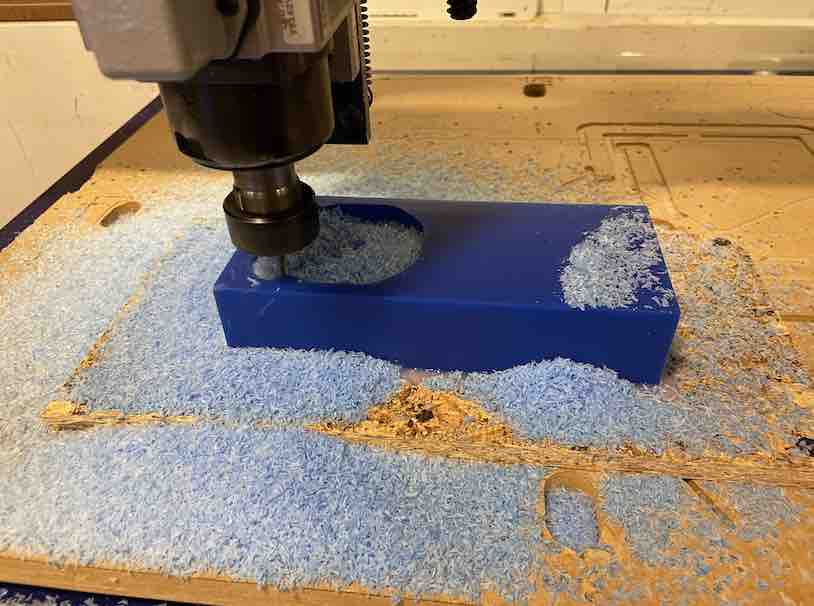
I then secured the wax piece using hot glue to a piece of OSB, and John helped me drill the piece onto the sacrificial layer of the 3 axis milling machine. We calibrated the X, Y, Z axes and then began with the cutting process, which took around 50 minutes.
Lots of wax shavings accumulated during the cutting process:
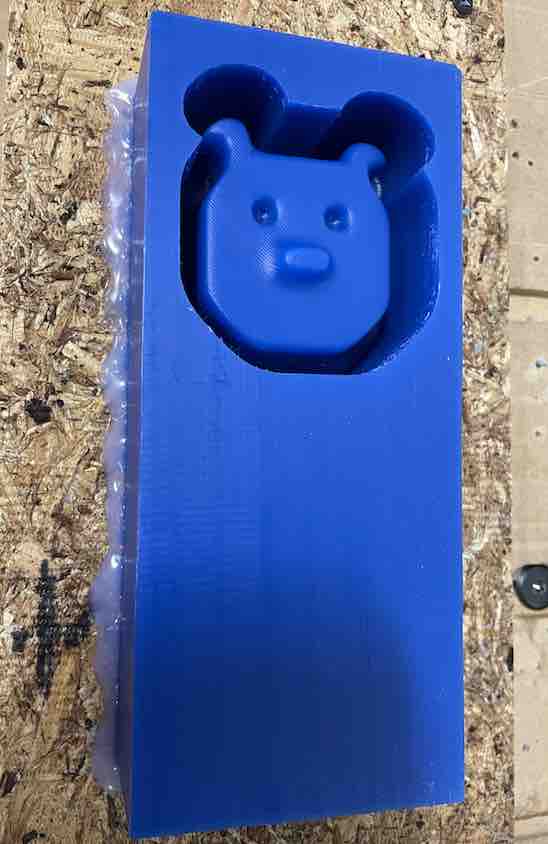
Shown below is the milled wax piece:
The next step was using the sculpted wax to cost a mold using Oomoo. This process involved taking a 1:1 ratio (by volume) of parts A and B of the Oomoo, then mixing before using for 3 minutes. The total pot life was 15 minutes which meant that casting needed to be done relatively quickly.
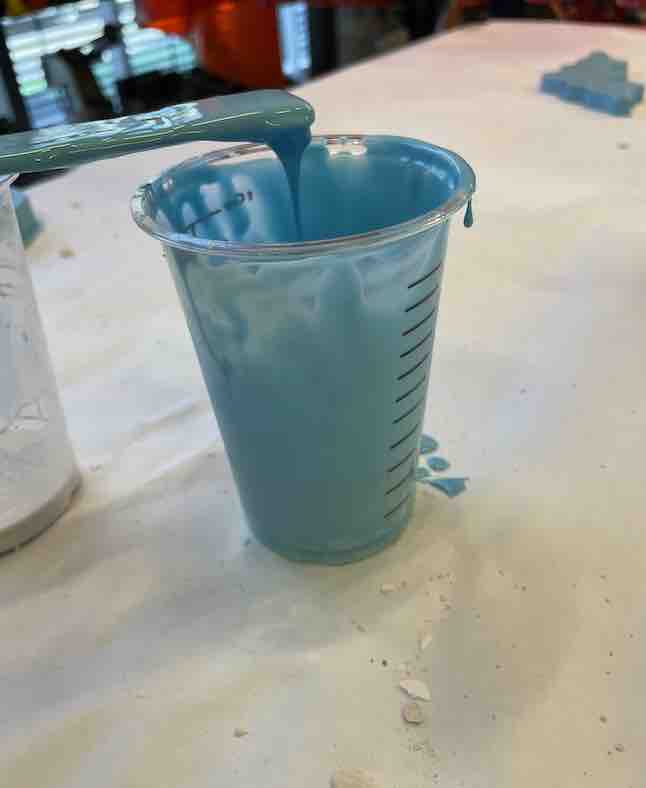
In order to get out any undesirable air pockets and bubbles, I lightly tapped the wax and mold to manually "de-gas".

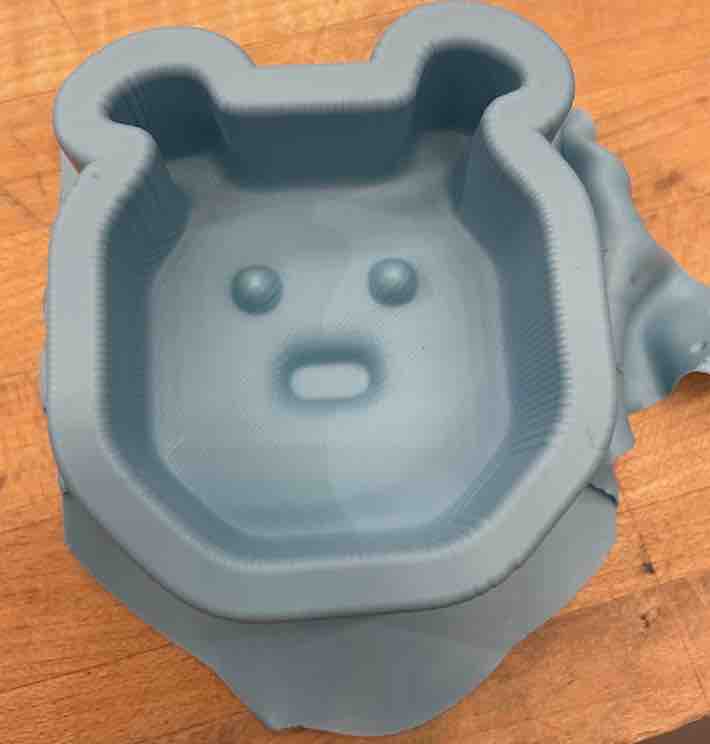
This was the Ooomoo mold -- it took around 1 hour and 30 minutes to be able to pop out.
The next step was to use this new Oomoo silicone mold to then create a drystone piece. This process involved taking a 18-20 H20: 100 powder ratio (by weight). I decided to use the electric scale instead of "the island method" (we were taught both methods during our casting training) since I was more confident with this approach.
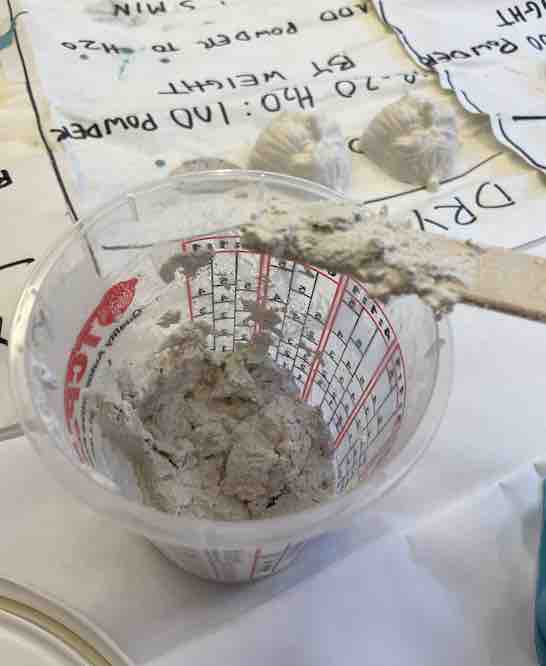
I added the powder to the H20, waited 1-3 minutes, and then mixed for an additional 2-4 minutes.
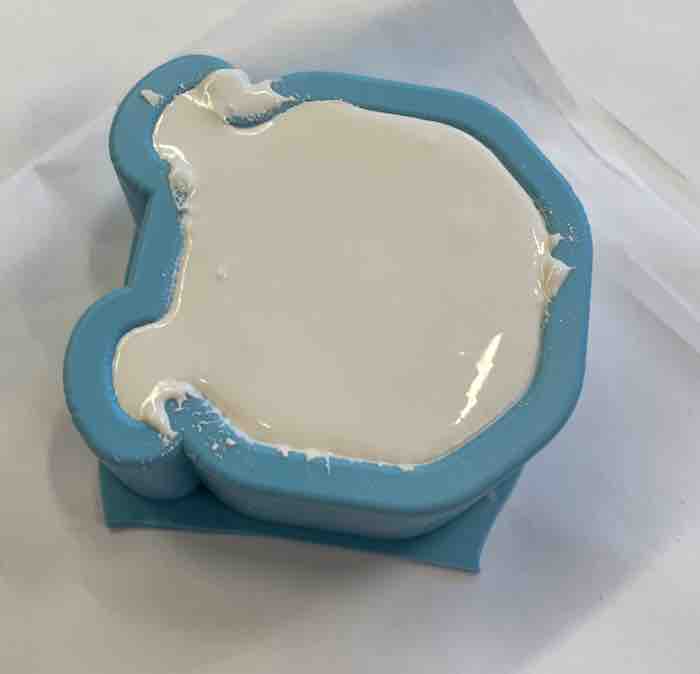
This was the drystone piece -- it took around 30 minutes to be able to pop out.
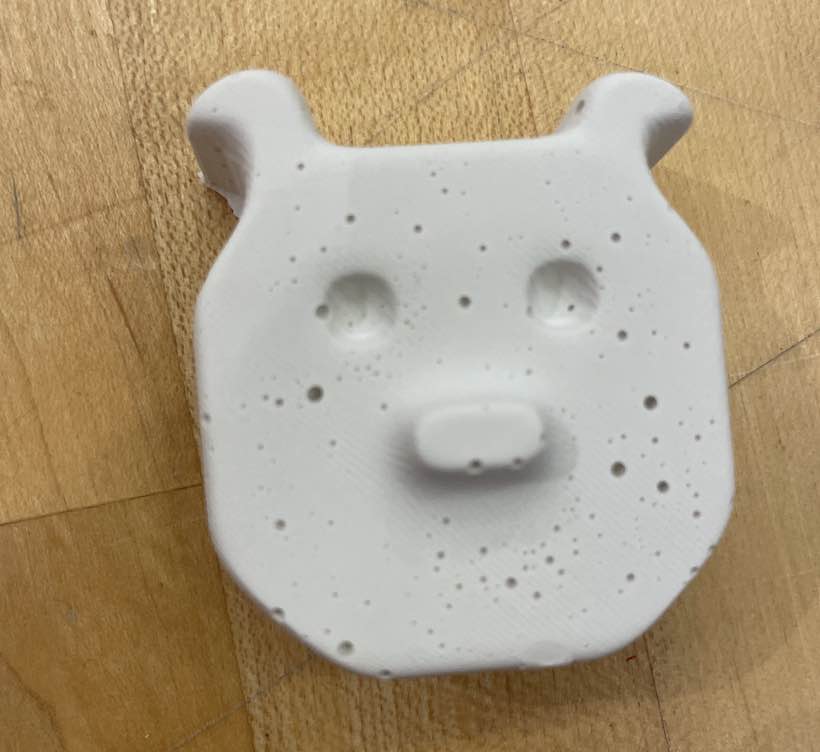
I forgot to tap out the air bubbles so there's lots of gas trapped at the bottom of the mold -- next time, I will be more mindful of this.