(Individual) write an application that interfaces a user with
an input &/or output device that you made
(Individual) write an application that interfaces a user with
an input &/or output device that you made
The motivation for this week was to create an interface for my final project which will be a sketching machine (inspired very heavily by the amazing machine made by the EECS section during machine week). I wanted to create a nice, stylized website where users could put in relevant parameters (in my case, the bed size in mm for the x,y dimensions, and the picture that they want to vectorize) and send it to another script which would do the work (thus modularizing) of extracting coordinates from pixels.
This is a useful diagram that demonstrates the architecture that I was using:
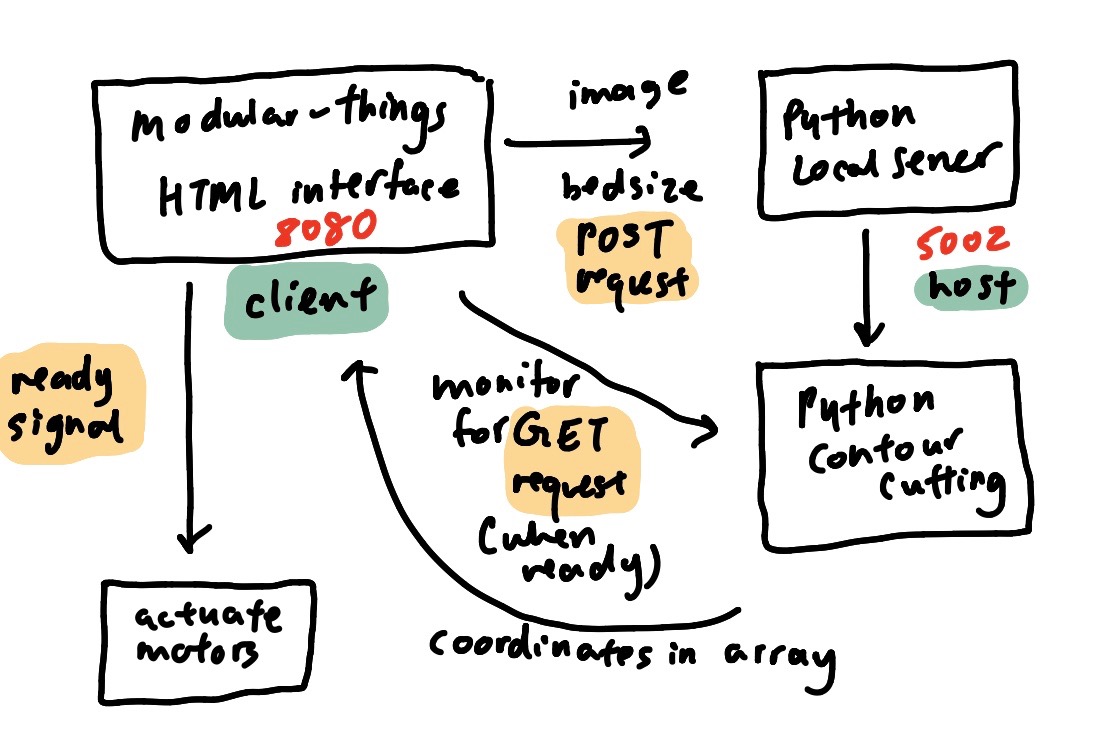
Essentially, on the node js side (through modular things), I could put in HTML and create a stylized interface. This would be a client of a local Python server (basically, when you run the code, you becoming a client of the 5002 local server). Then, when the user is ready to send over the inputted data, they press a button which then creates a POST request to the local server, which is a host to all clients. Through the python script, either by importing another python script or within the same file, it would parse through the POSTed data and then perform contour cutting. Next, the modular_things Node JS interface would monitor the responses to a GET request and when coordinates are available in the form of an array, it can then actuate the motors and draw.
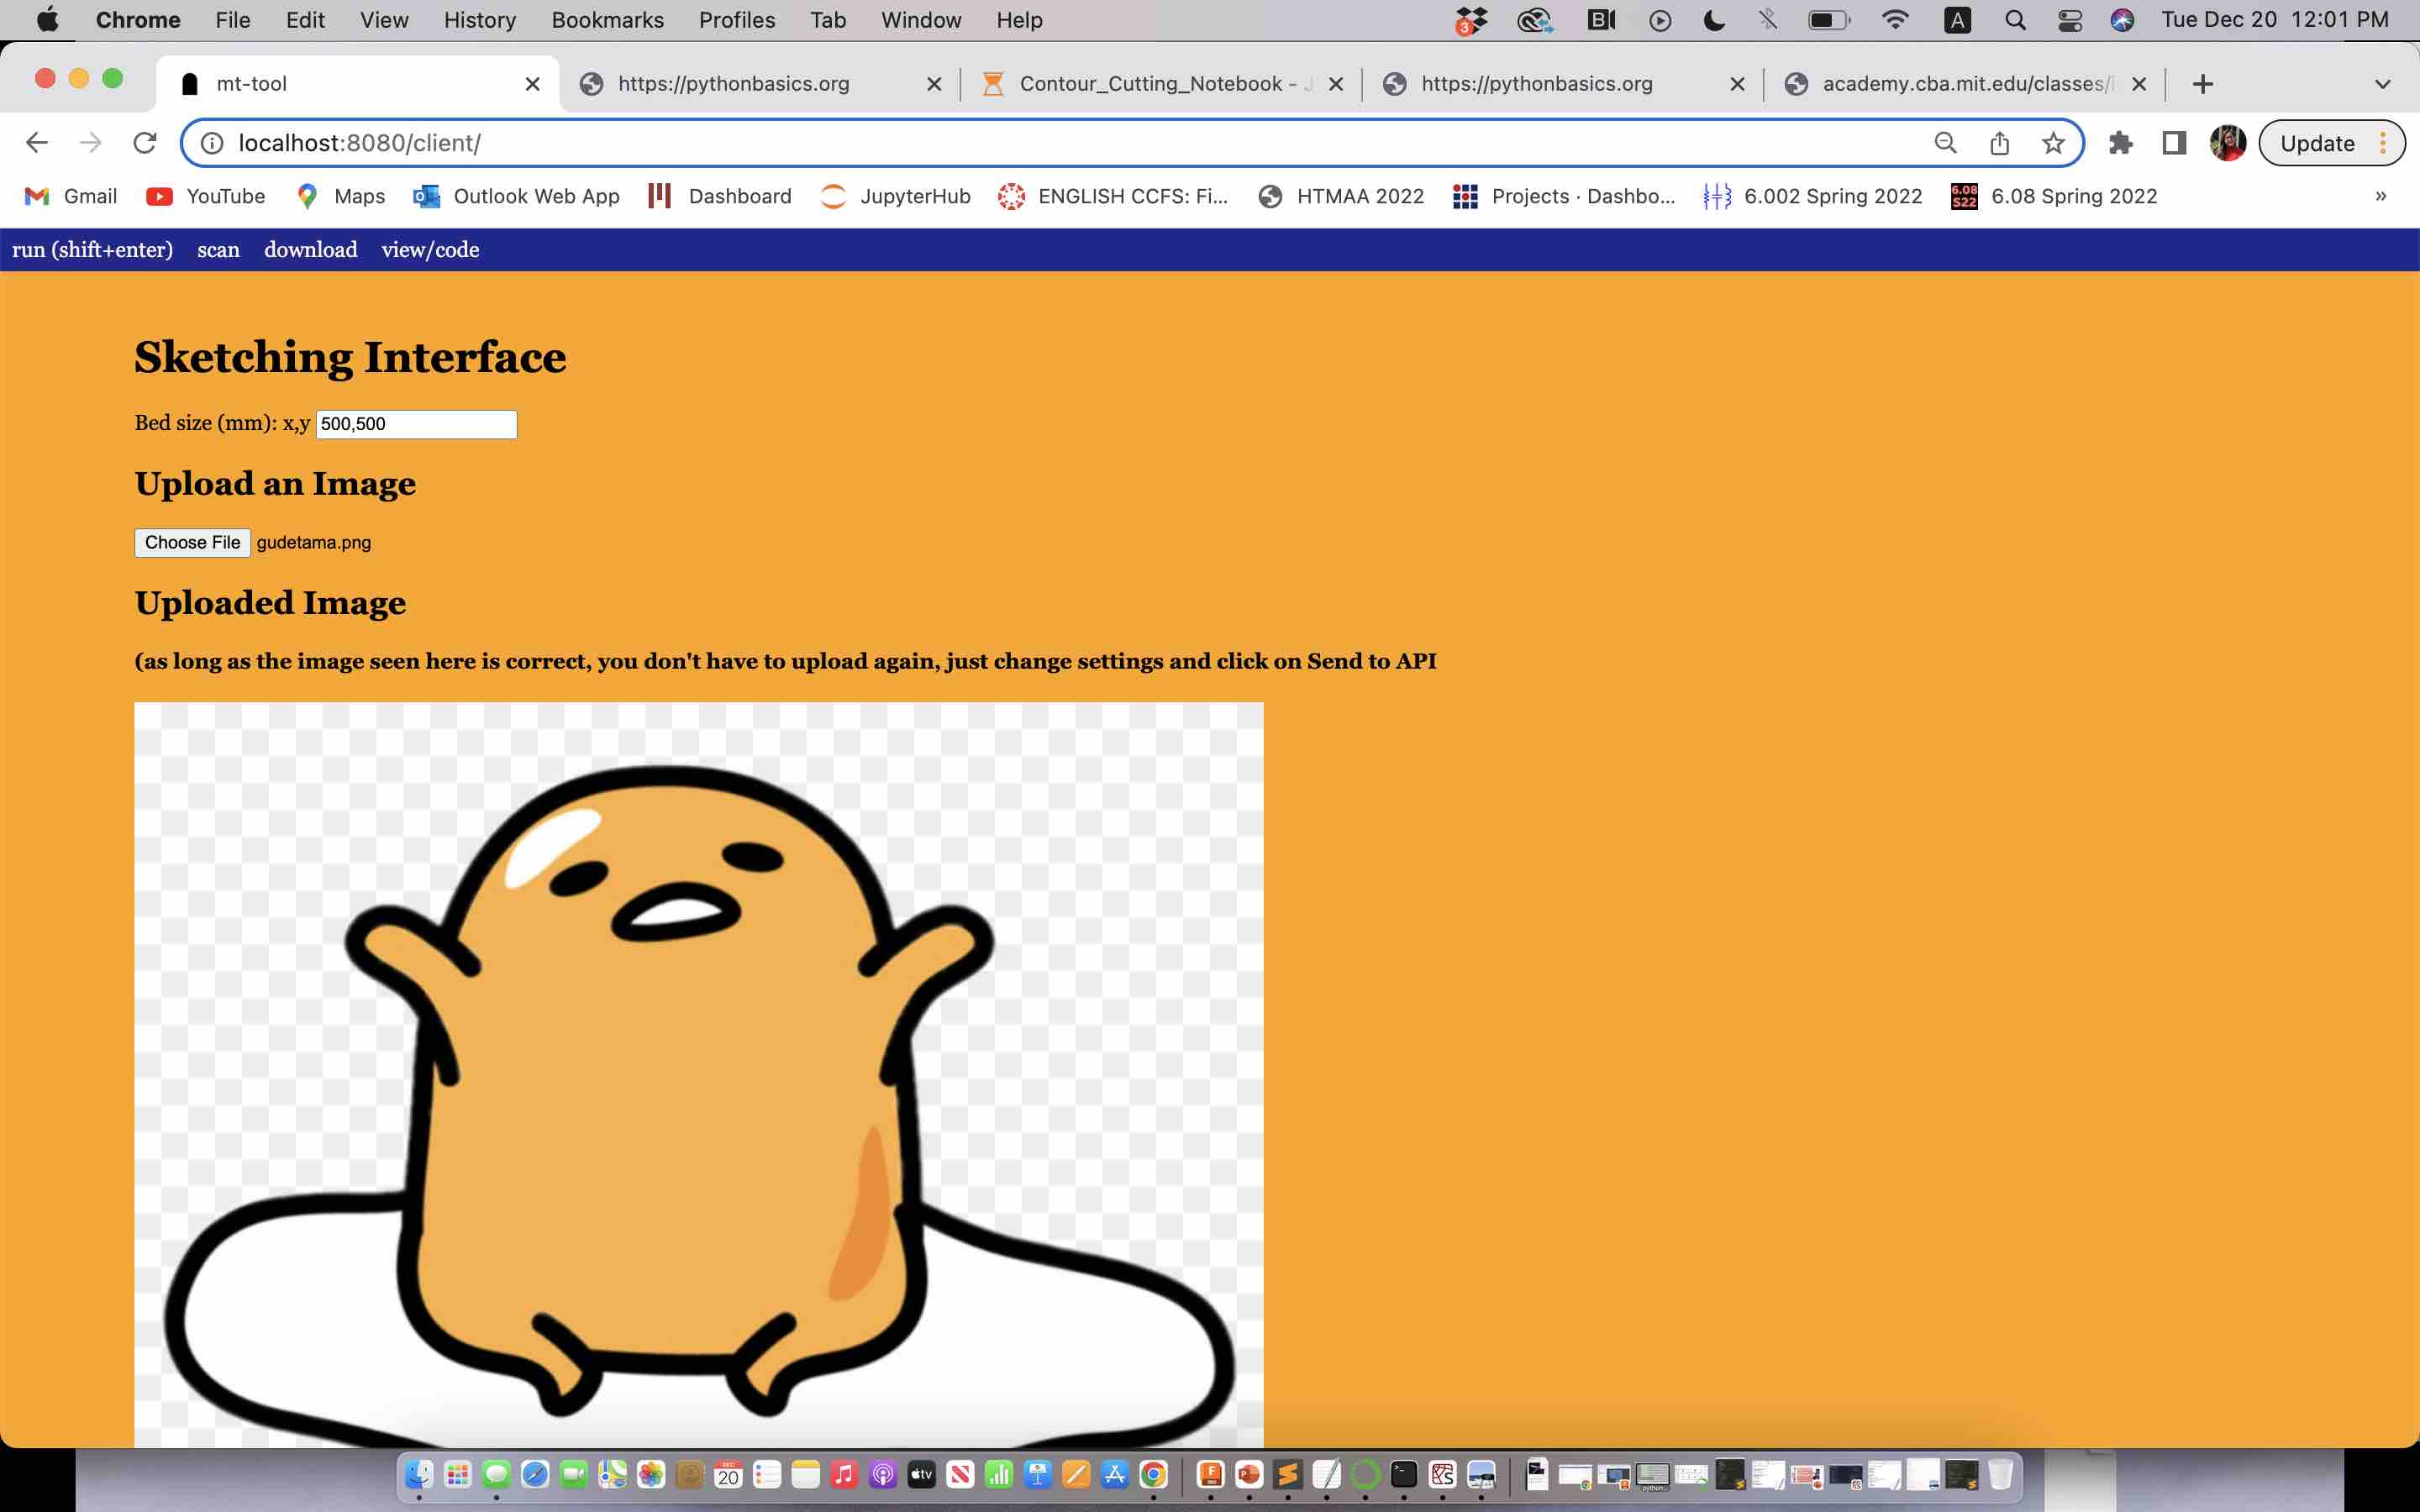
On the node JS side, the code was rather simple. Thanks to help from the EECS team, I was able to get a good idea of how to encode the HTML. I did some simple styling (fonts, container, image displays), and then for the sketching interface added tags for inputs such as "uploaded-image" and id="BED_SIZE_MM" so that I could then reference them later in the code.
This is a picture of the HTML interface:
For monitoring changes to the input of the node JS, I basically jsut added Event Listeners in which when there were changes to the file input field, I refreshed the file and the reader. Finally, when the user pressed send on the button, this would trigger the addEventListener whcih listened for a "click" and trigger the creation of a FormData variable.
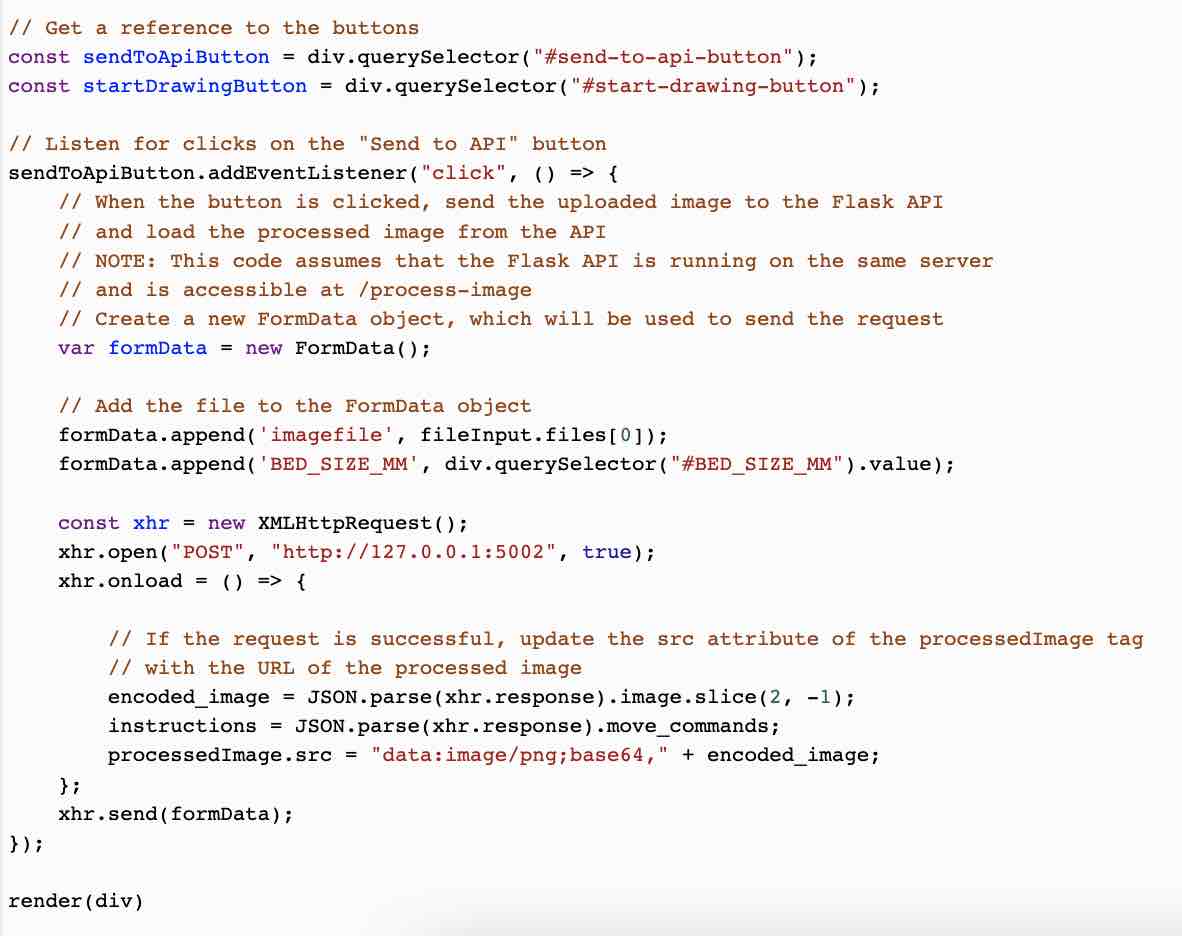
This is a picture of the HTML code:

This is a picture of an event listener (specifically for POSTing):
On the python side, I first set up a localhost on serverPort 5002. Then, by creating a class called MyServer using a BaseHTTPRequestHandler, I could create functions like do_GET and do_POST, which are built into the library I imported.

Within do_GET, I could create an example web server (with very simple html styling and essentially just a paragraph that wrote 'This is an example web server.') and also print onto the console "Hi, get request just received" and inform when a client had connected.
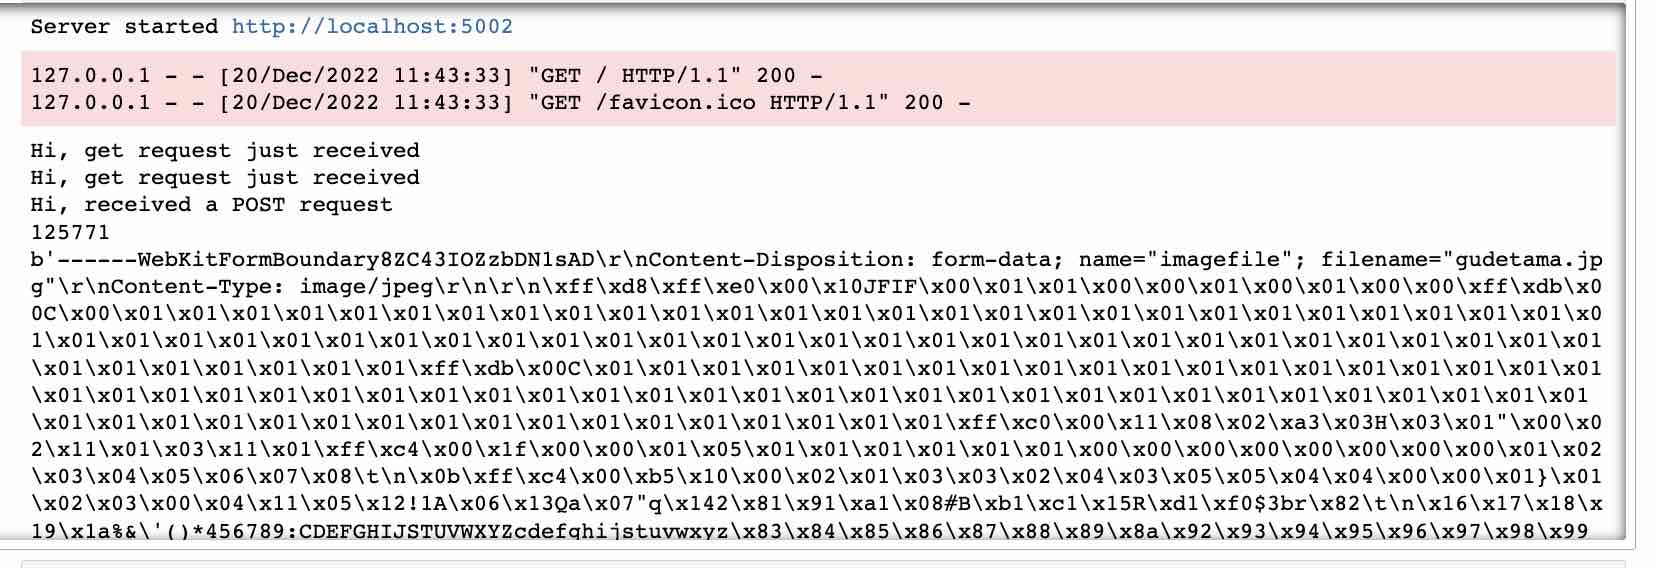
Within do_POST, I could listen to the file that was sent over and send over the content_len and the post_body. This was an interesting challenge because when I pressed the 'send to Python' button, you could tell that the image data was encoded in Bytes, which meant that still lots of parsing needed to be done before it could be sent over to the motor.
This week was a great introduction for me on how to create an HTML client-server interface. The next steps would be to work on parsing the data and possibly trying out websockets since there were lots of modules involved in this HTTP approach.