This week, I wanted to work with inflatables -- ultimately, at some point in the future, I want to buy all the materials necessary to build a bouncy castle! The first step, though, is to make a proof of concept project. For my proof of concept, I wanted to make an inflatable man with waving arms (much like the ones seen outside of car dealerships). The design of these inflatable men is simple: a cylinder with an open top and arms connected (also open) so that when a powerful windblower is used, air will circulate through then out, creating a moving up and down action.
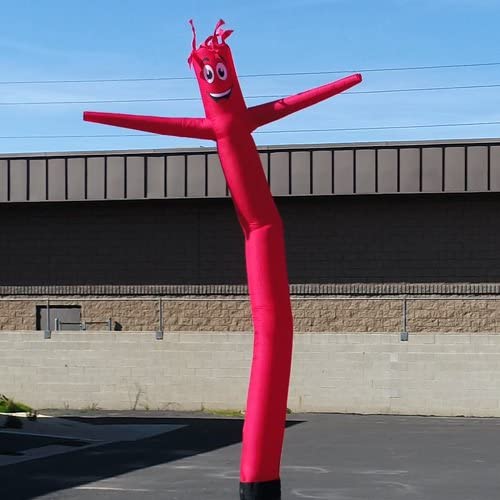
This is a good picture of what I modeled this week's assignment off of:
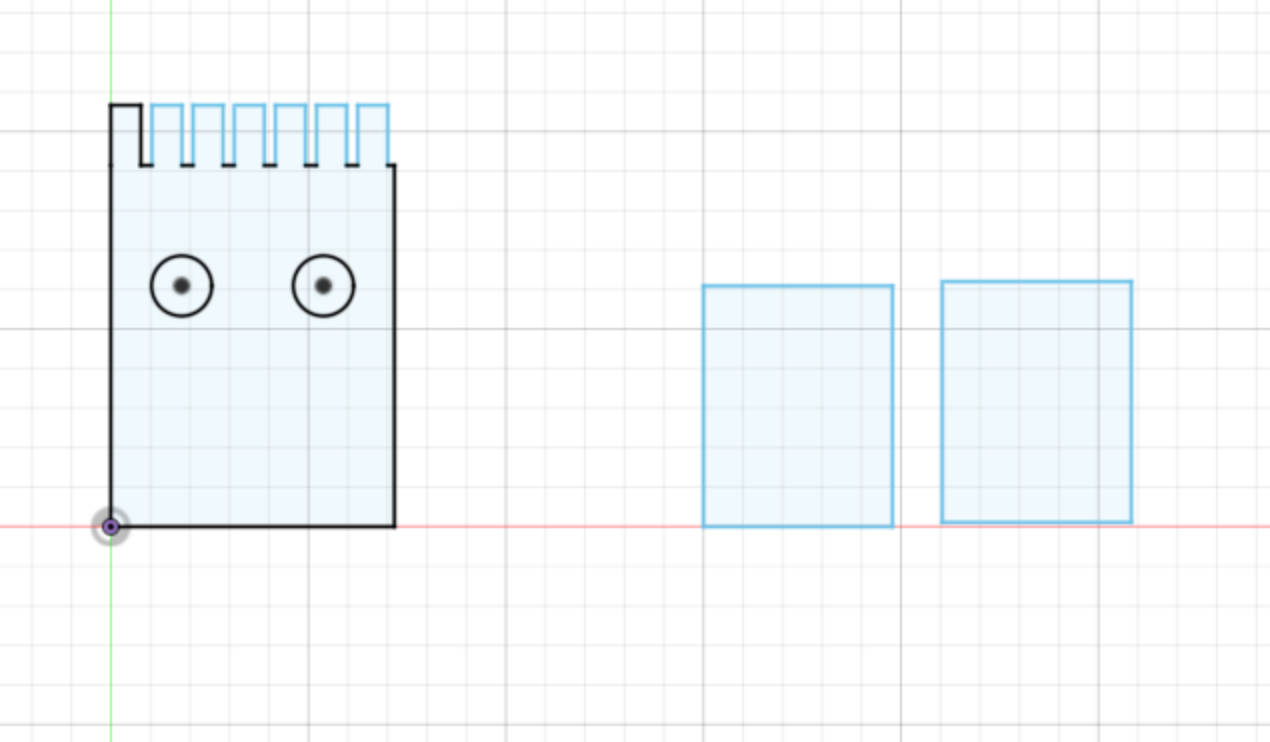
Here is the 2D sketch that I used to get started. I created a cylindrical base (with rectangles on the top in a pattern to create a crown), as well as holes for the arms. The arms were also cylinders that were easy to model.
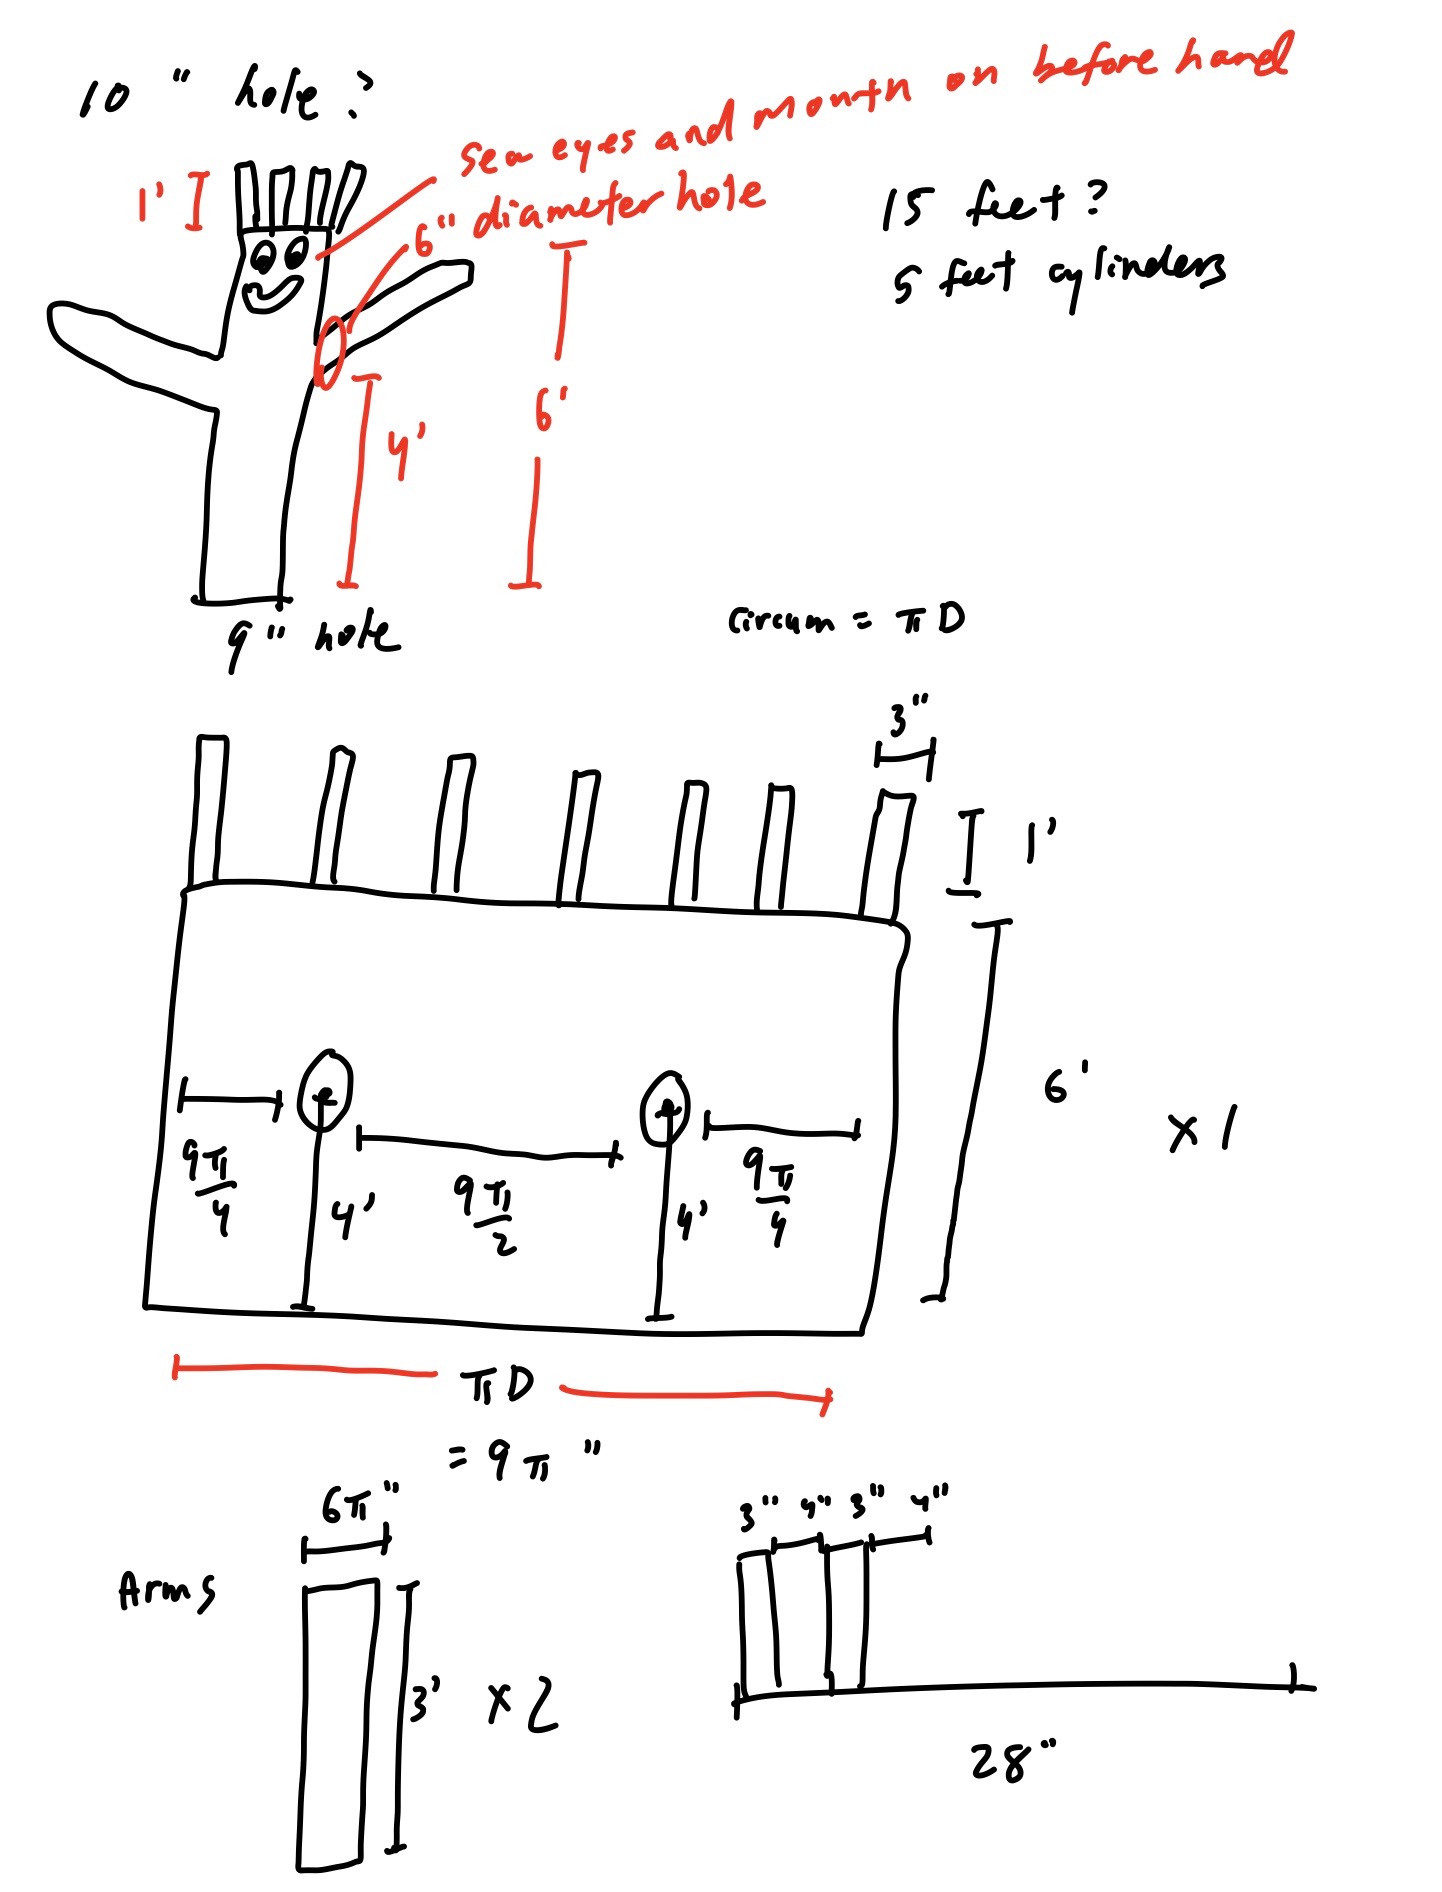
I then used Fusion360 to create a sketch of this. I decided against creating a full 3D model and then using an explode feature or the sheet metal unwrapping feature because my design was simple enough that I could understand the geometry with just a planar 2D sketch.
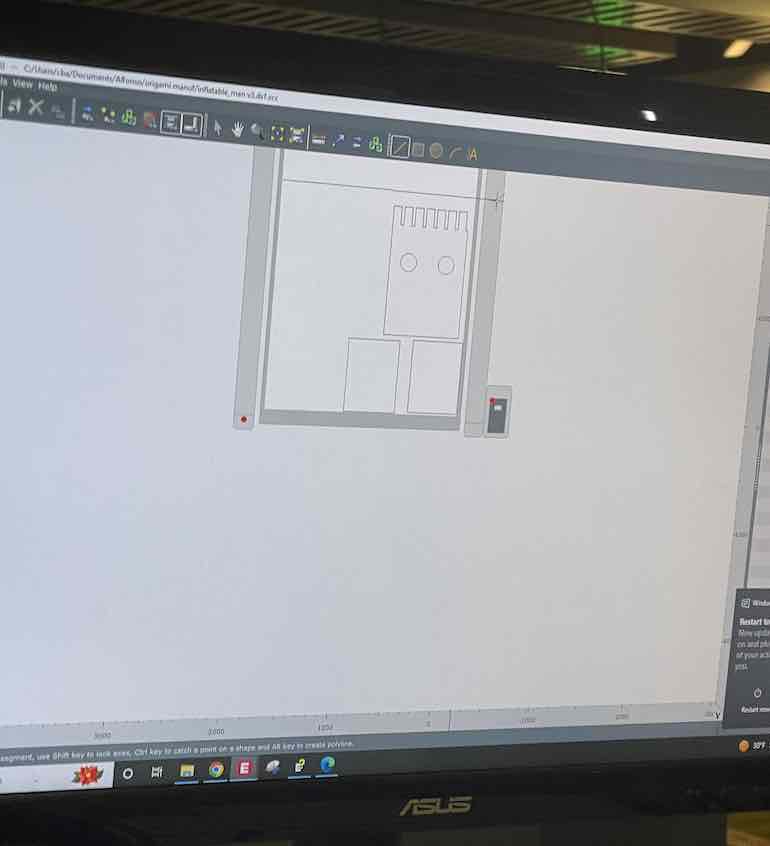
Alonso then helped me load my design into the cutter program. Here is a picture of the program/monitor:
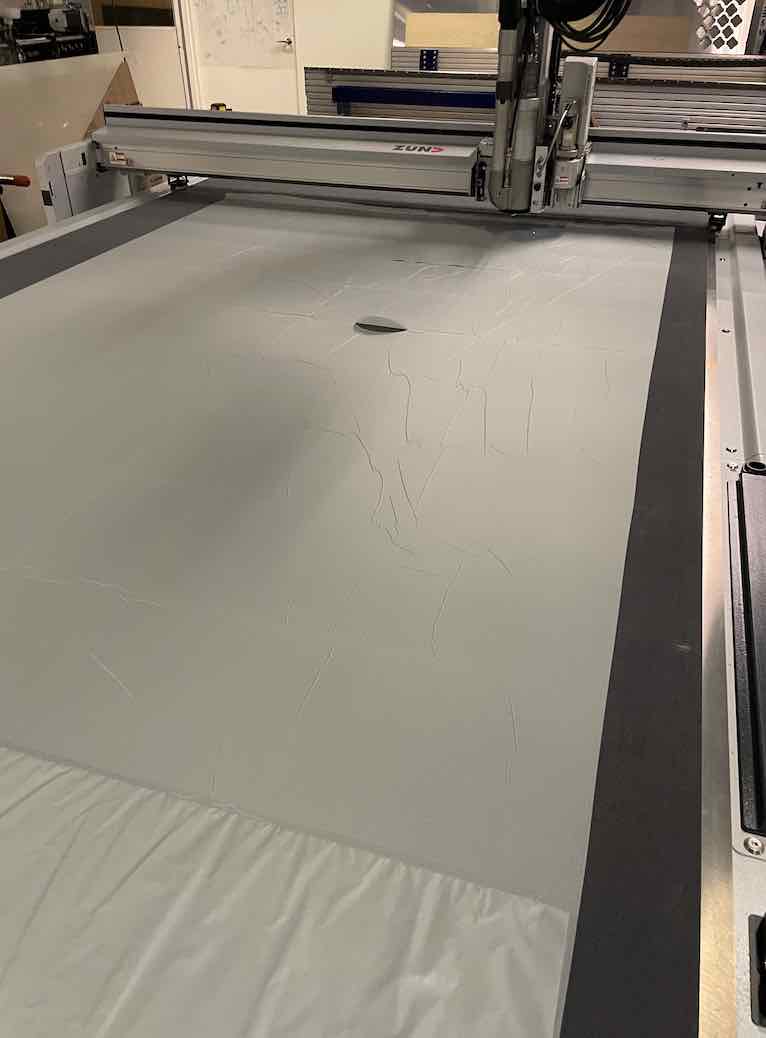
A massive cutting machine then cut my pieces. I had to scale down from a 6 foot form to a 3 foot form, per Alonso's suggestion:
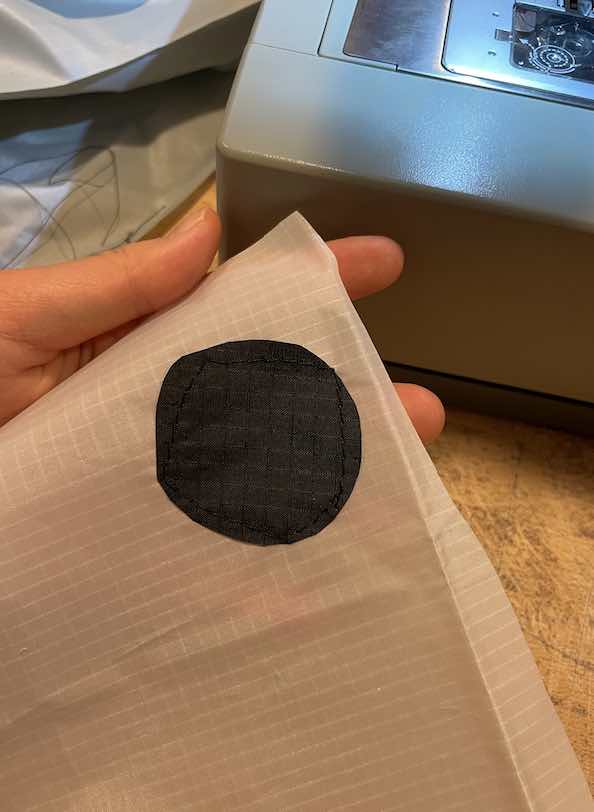
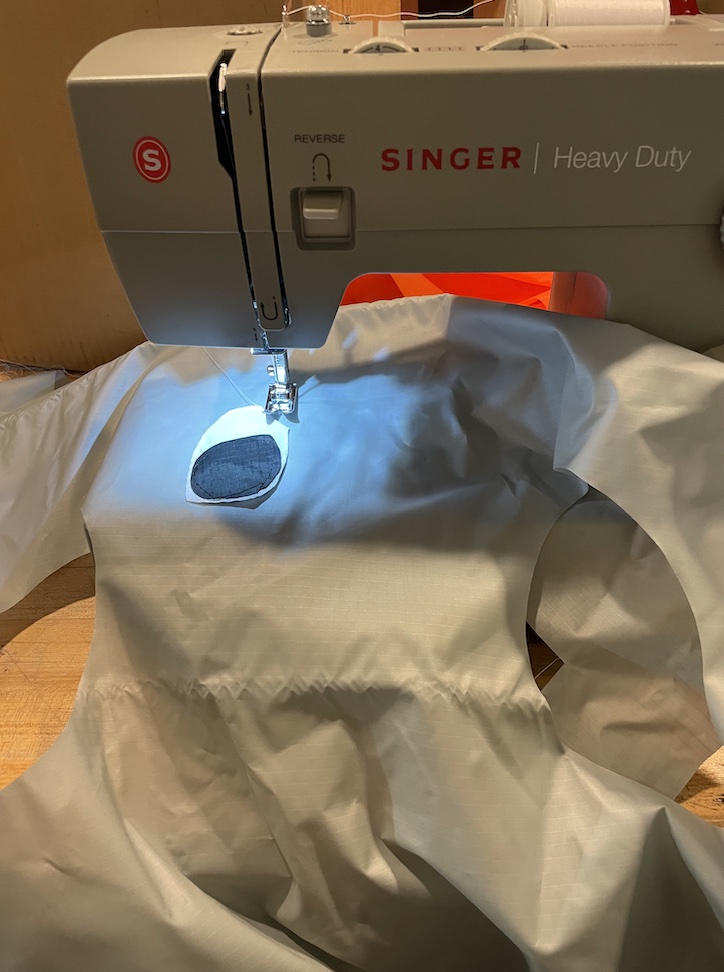
Then began the sewing! I wanted to have features in my inflatable man (notably, two eyes), so I began by first sewing on black pupils (using black fabric and sewing with black thread). Here is a picture of the eye sew:
Here is a picture of the back of the eye sew:
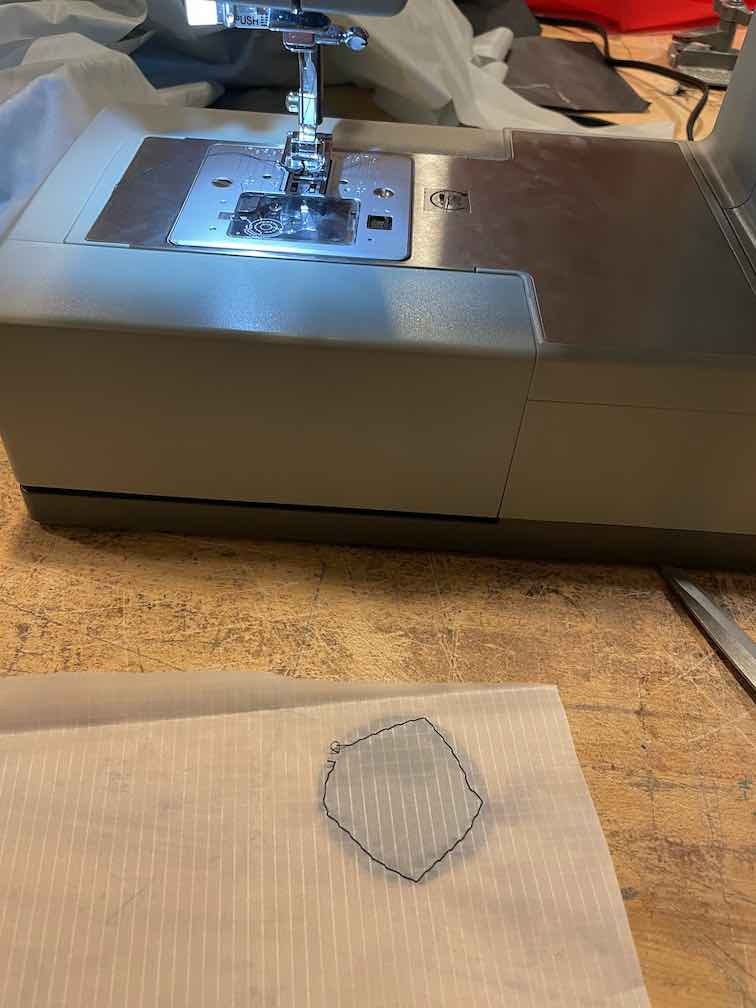
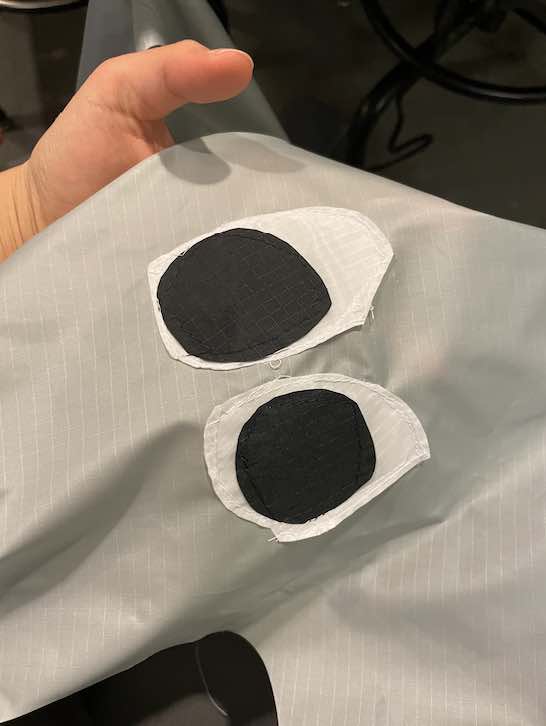
Next, I had to sew the patches of white around the pupil (the eye). I wanted to use two layers of fabric for this, so I folded the white fabric and used white thread to secure it into a little oval flap, shown here:
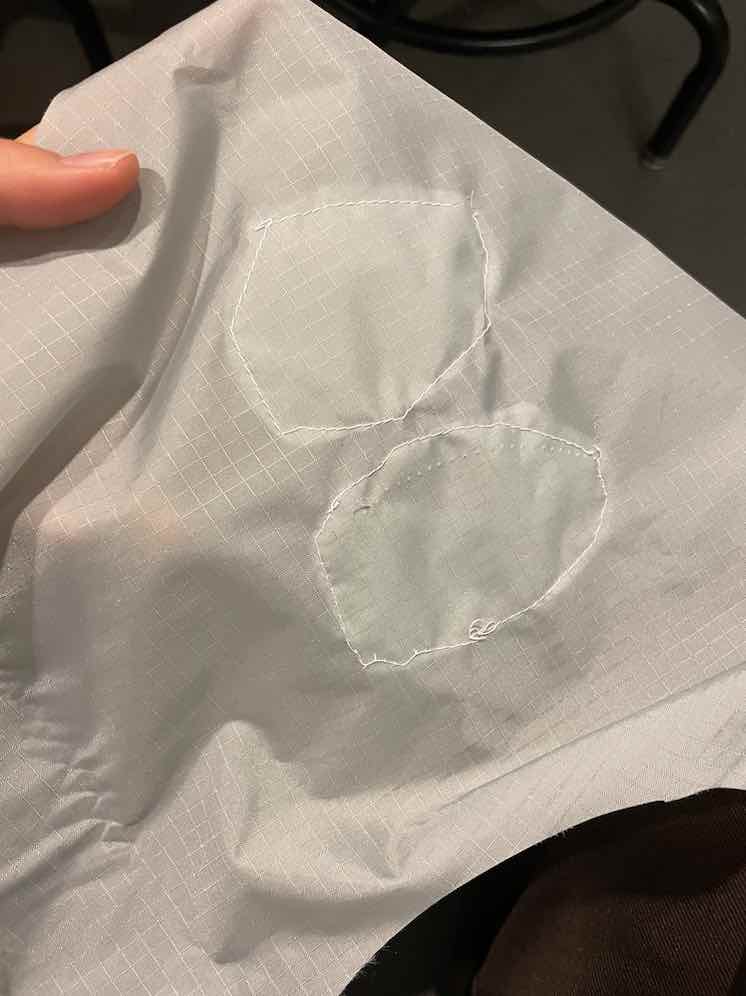
Then, I sewed the eyes onto the cut out grey fabric which made up the body of the inflatable man (named Derrick). This was a surprisingly difficult process because there was so much nylon fabric that fabric kept on bunching up (at one point, I had to rethread the machine because it came undone. At another point, I had to reattach the stopper because it came loose/unclipped itself):
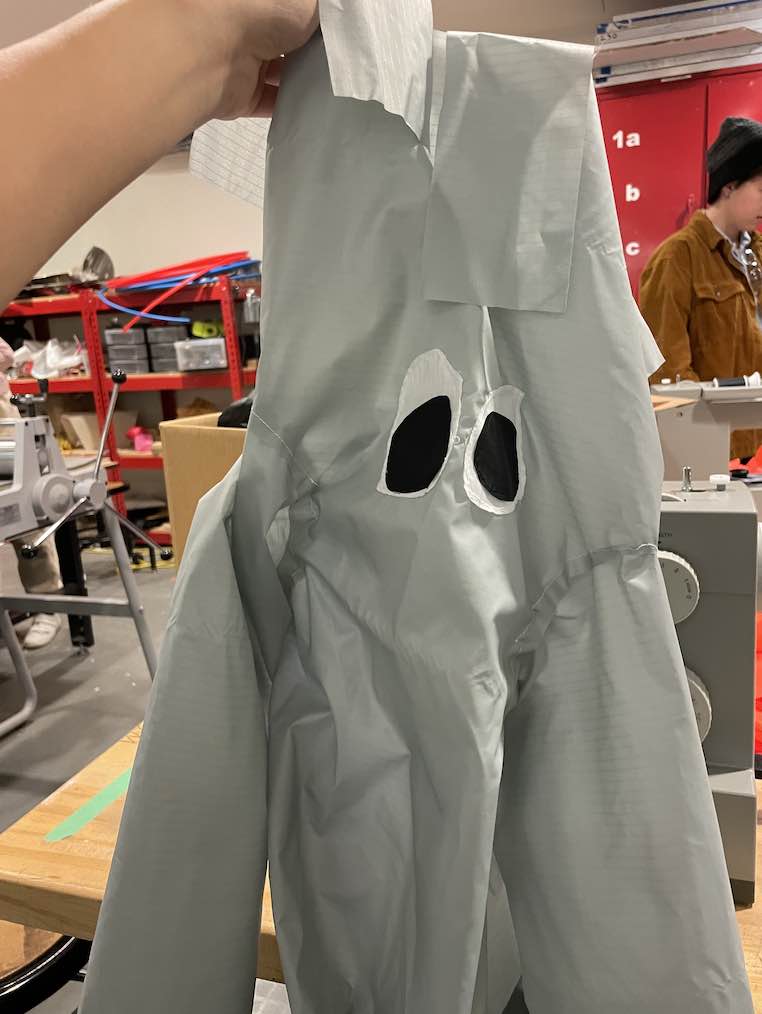
Here is what the grey body of Derrick looked like with the eyes attached:
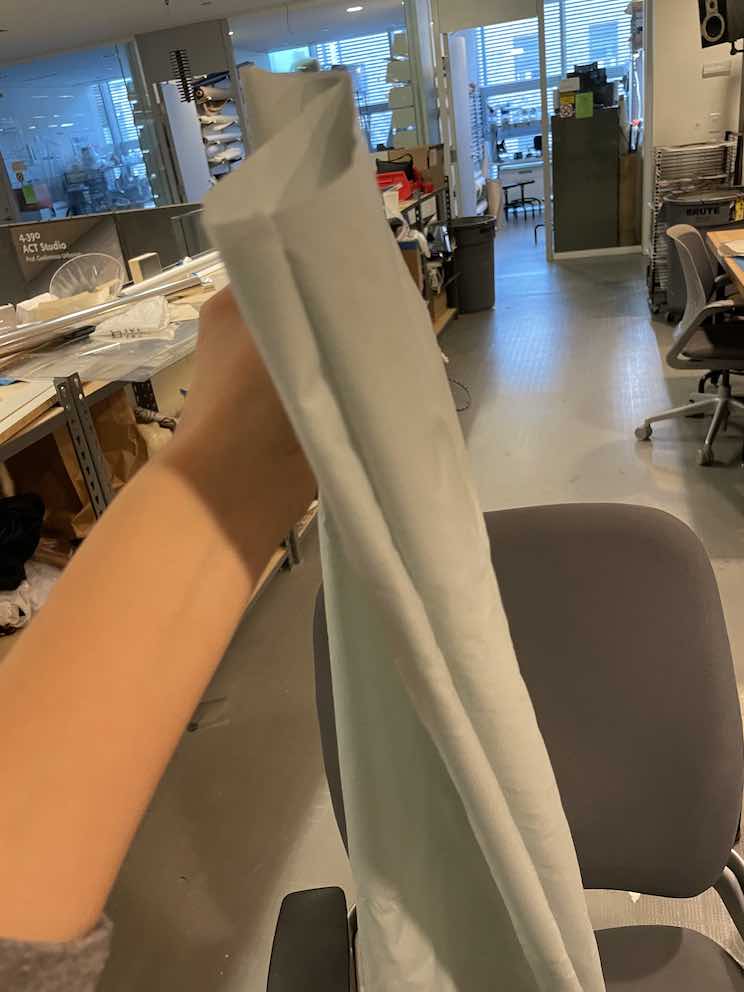
Next, I sewed together each of the two arms. Since I wanted the smoother side of the fabric to show on the outside, I did a stitch on the inside. Then, I turned the fabric inside out:
The trickiest sewing job by far of this process was to sew the arms onto Derrick's body, since they were three different pieces of fabric. This was difficult mostly because the stitch was circular, meaning that I need to very intentionally (and be very focused while doing so...) turn two peices of fabric simultaneously. There was so much fabric that it was very easy to bunch up accidentally:
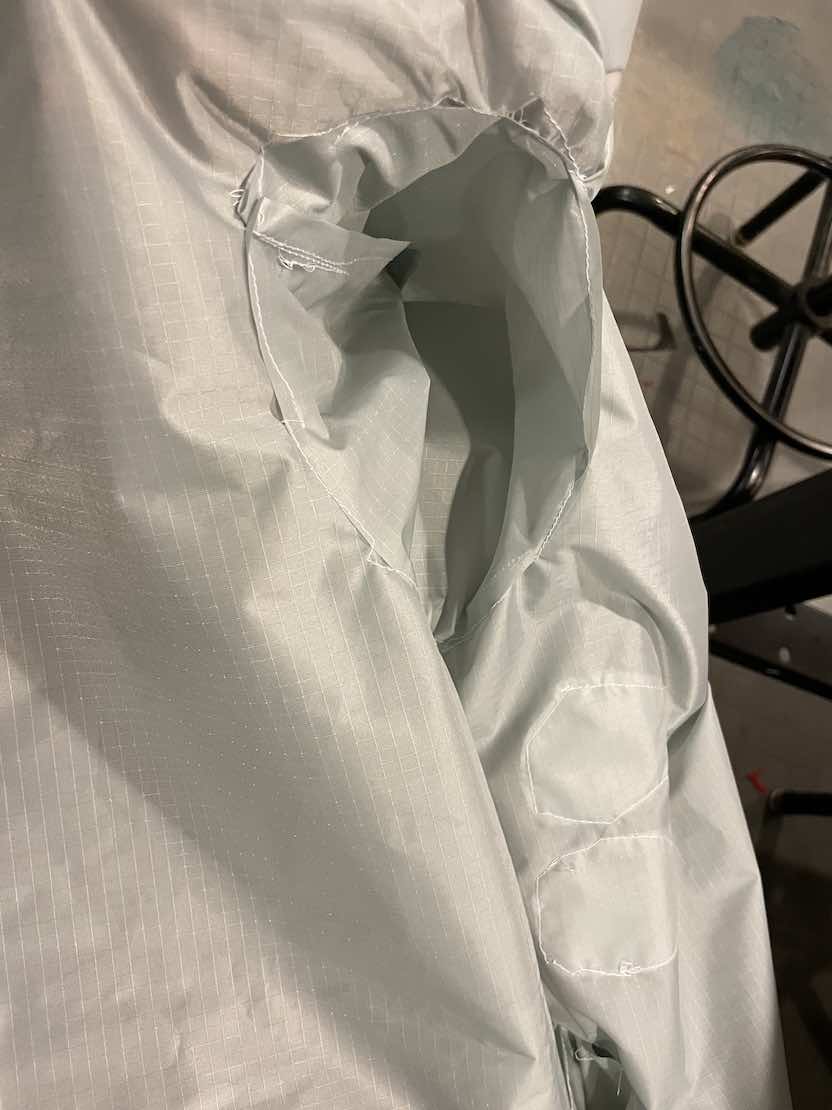
Here is what Derrick looked like with his arms attached to his body (how cute!):
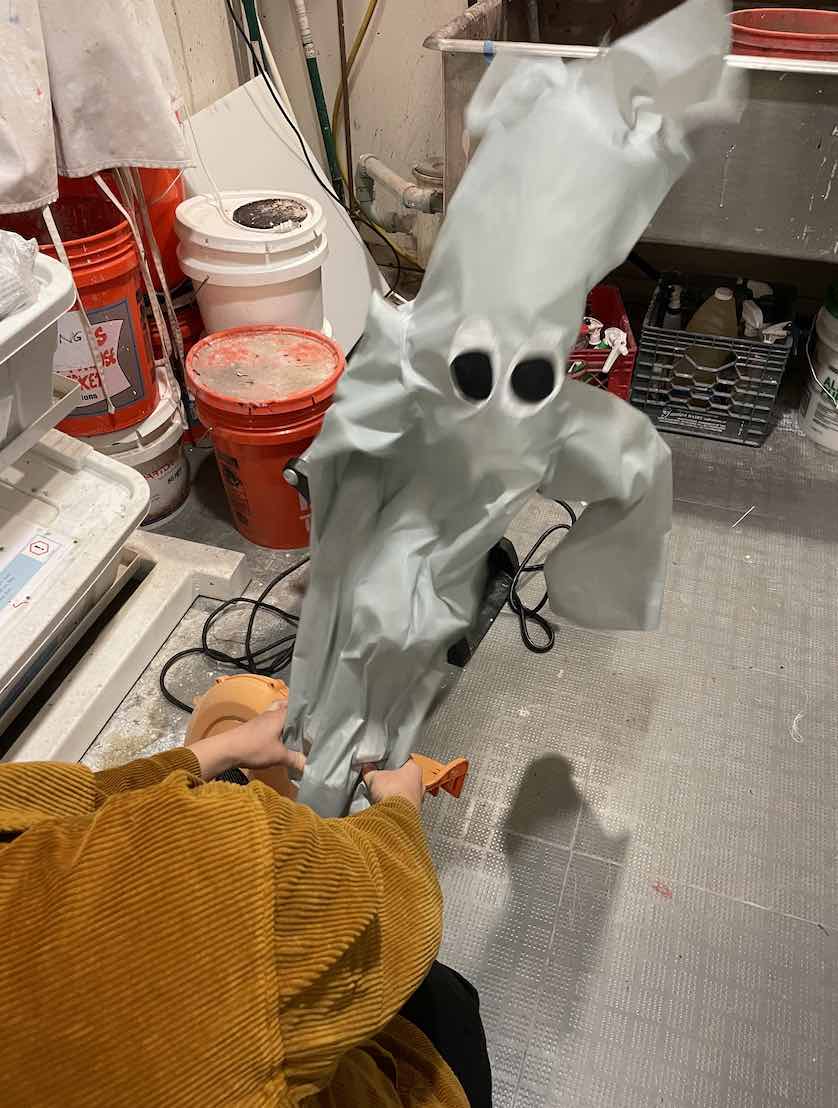
Here is Derrick inflated by a large blower (around 10" in diameter and secured by some fabric tied around the base of the blower). In the future, I would take more care into ensuring that his arms were pointed up and not down. Because of this accident, his arms were not blown up and no air really circulated into them, making them appear limp:
All in all, I really enjoyed this week's assignment and introduction to Inflatables. I most definitely want to do an inflatables project in the future (a bouncy castle!). Thank you to Miana and Alfonso for the wonderful support!