Week 1
Cutting Stuff
The challenge was to make a modular design kit out of cardboard.
I want to make something that I can use in a few iterations. In this case, ideally it would be a set of 3 lampshades.
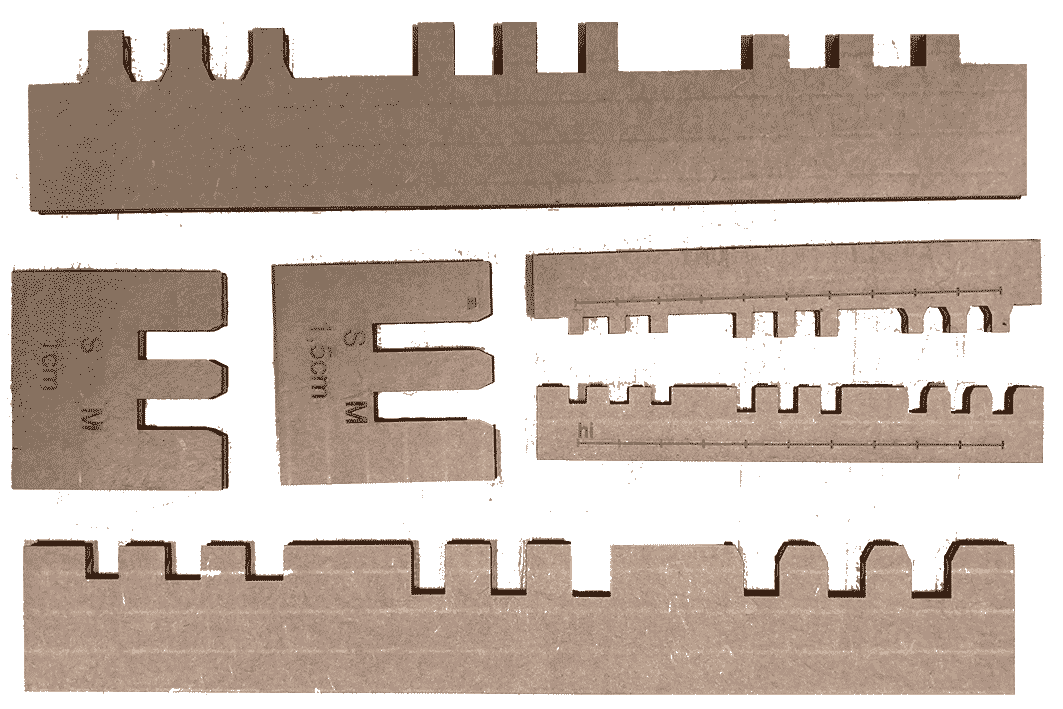 Some kerf and joint tests
First, I am testing the material. What joints work? I found that joints a bit tighter than the thickness of the cardboard (4.2 mm) worked best. The kerf was quite variable due to the material being bendy and having a different distance from the laser over its surface, but in ideal circumstances measured around 0.125 mm. Taking his into account, a kerf of 3.8 mm with a slight chamfer worked best.
 Tool screenshot
I wanted to make a tool that allows me to make a round lamp or candle shape, where I can select the number of vertical compontents. I want the parts to be straight with a noisy blob that loops. That means the blob changes for every component, but the last one is almost similar to the first one. I wrote it with javascript and p5.js, with an canvas to SVG library. Check out a current version here.
let components = 32 // amounts of shades
let length = 490 // length of a component in mm
let depth = 20 // minimum depth
let curveDepth = 100 // depth of the curve in mm
let fullSize = false // will it happen over full length?
I wanted to be able to edit the amount of components as well as having control over where the blob happens (over just a part, or over the full length of the object). I also want to be able to set the depth of the curve.
let y1 = length/4 + cos( n/components * TWO_PI )*length/4
let y2 = length/4*3 + cos( n/components * TWO_PI )*length/4
vertex(depth, y1)

bezierVertex(
	depth + curveDepth / 2 +
	noise( cos(n/components*TWO_PI) )*curveDepth,
	y1 + noise( cos(n/components*TWO_PI) )*(y2-y1),

	depth+curveDepth/2-cos(n/components/TWO_PI)*curveDepth/2,
	y1 + noise(sin(n/components*TWO_PI))*(y2-y1),

	depth, y2 // anchor points
	)

vertex(depth, length)
I used some PI and noise functions to make the blob. in the shape. Then I put the entire shape in a function that I ran for each of the parts with a for loop.
function drawTheComponent(n) {
fill(255)
beginShape();
vertex(0, 0);
vertex(depth, 0)
let y1 = length/4 + cos( n/components * TWO_PI )*length/4
let y2 = length/4*3 + cos( n/components * TWO_PI )*length/4
vertex(depth, y1)
bezierVertex(
	depth+curveDepth/2+noise(
	cos(n/components*TWO_PI) )*curveDepth,
	y1 + noise( cos(n/components*TWO_PI) ) *(y2-y1),
	depth+curveDepth/2+-cos(n/components/TWO_PI)*curveDepth/2,
	y1 + noise(sin(n/components*TWO_PI))  *(y2-y1),
	depth, y2
	)
vertex(depth, length)

vertex(0, length)
endShape(CLOSE);
}
This allows me to change the shape over a whole length, change the depth and the length of the components, and still get a different shape for each form.
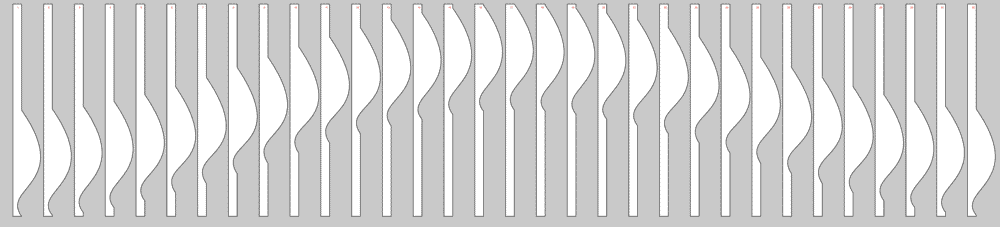
 64 parts with a blob over the full height
 16 super blobbly parts
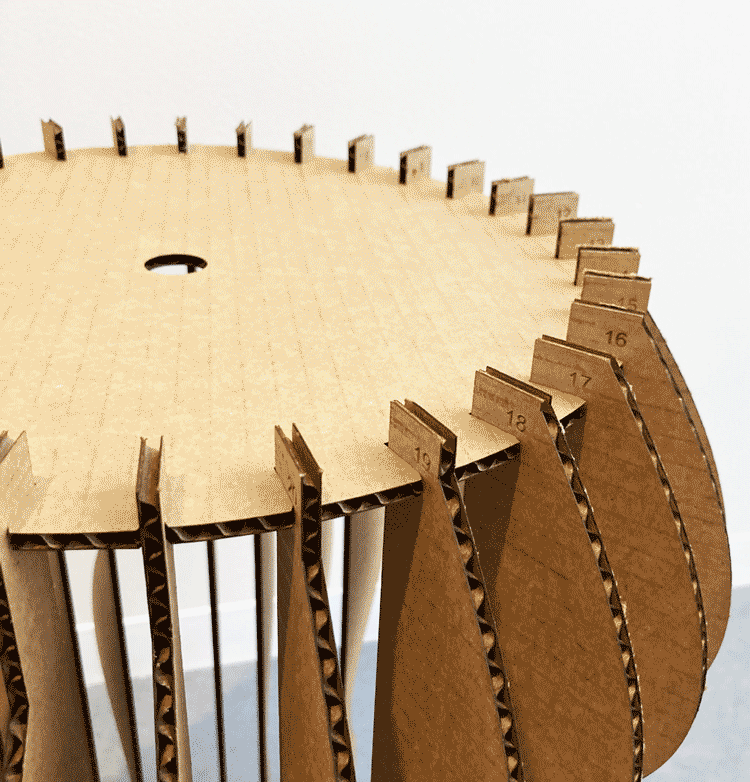
Finally, I also added some numbers in red on each of the shapes. The red color can be used in the laser cutter as a different type of cut, raster (or as I know it, engraving). Since the idea of the shape is a procedural order, it's handy to know which shape goes where – unless you want to be totally chaotic and put them in any order. It's a kit so you're allowed to do what you want!
 Little red numbers for engraving
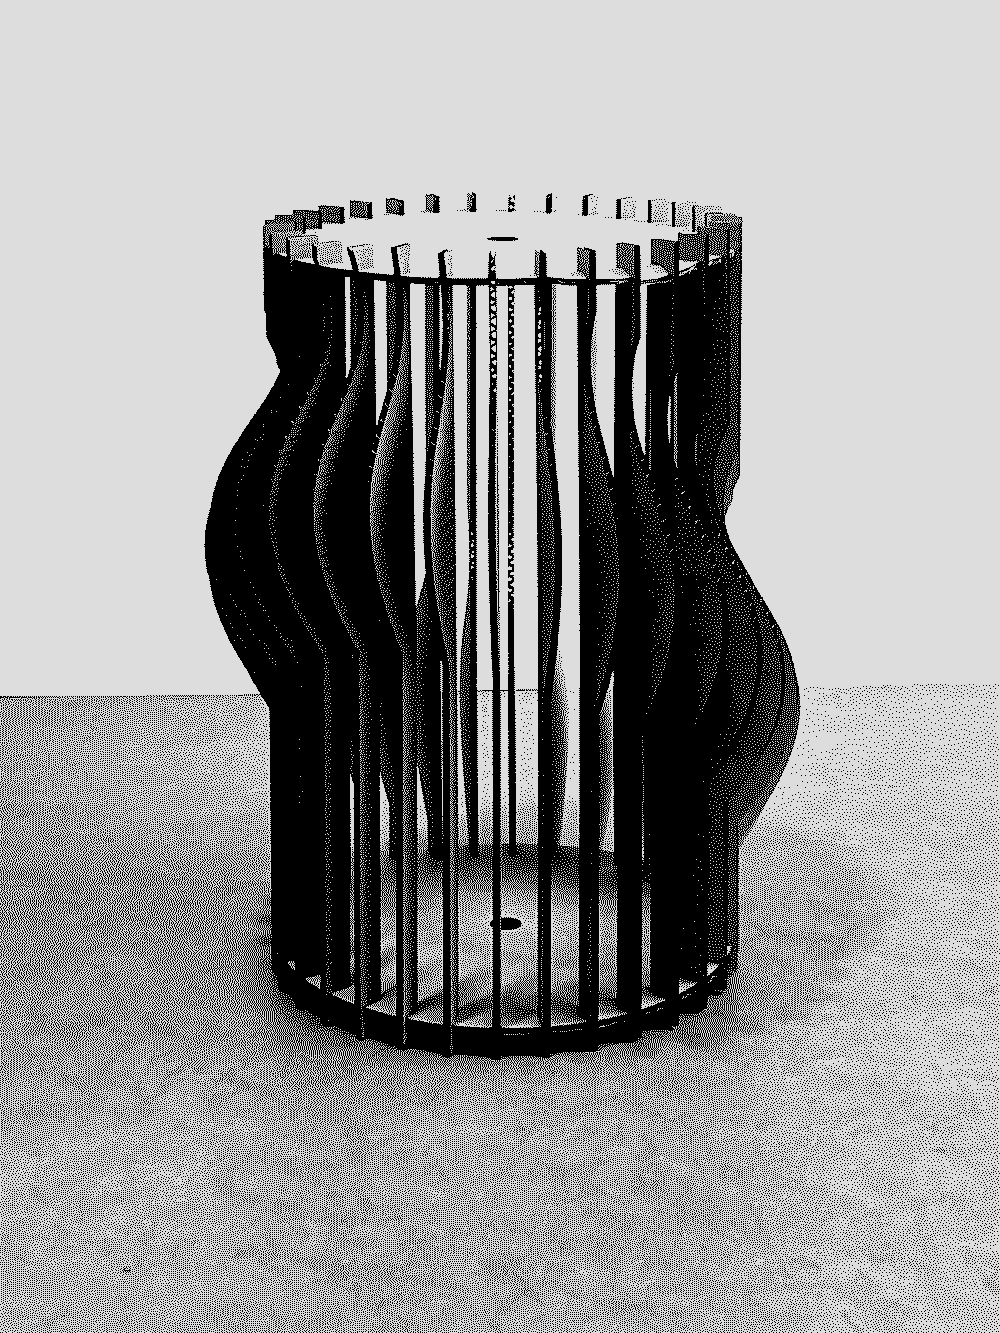
After cutting a few things over, I made one big piece as a proof-of-concept.
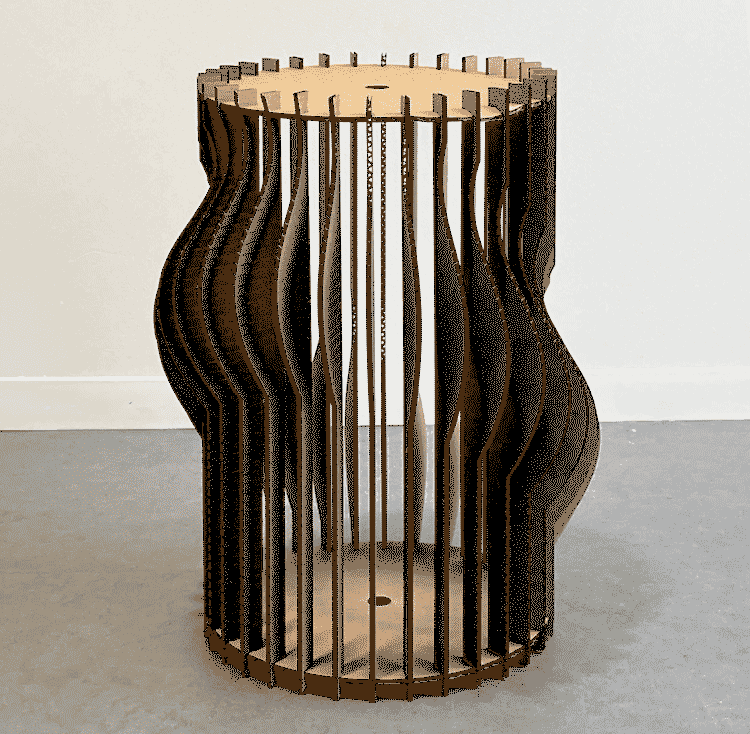
 Lampshade and its details
When I do it again, I would make a pinned joint hole in each of the shapes, so that they only fit on one vertical position in the horizontal kerf. I don't have a lamp yet that I can put in (I just moved), but that will also redefine the type of hole in the top.
 Lampshade!