Tools: Prusa Mini, Formlabs Form 3+, Artec Leo, PrusaSlicer, PreForm, Solidworks
3D Printing Design Rules
This week, we learned all about 3D printing and scanning technologies. On this page, I am documenting the fabrication methods, tools and printers used, modeling , slicing & printing processes.
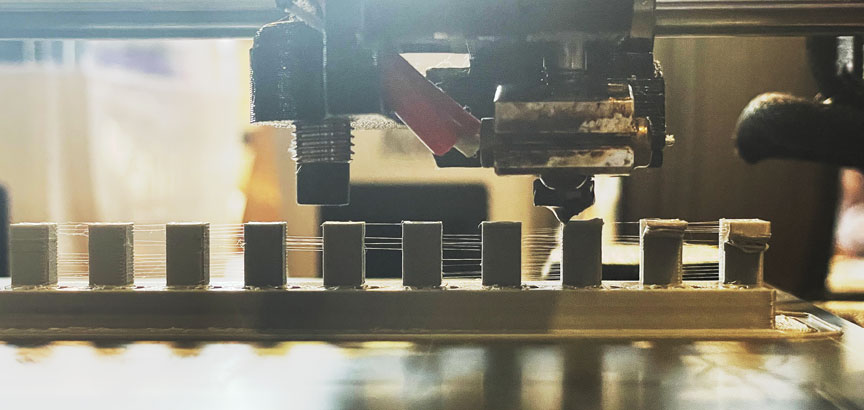
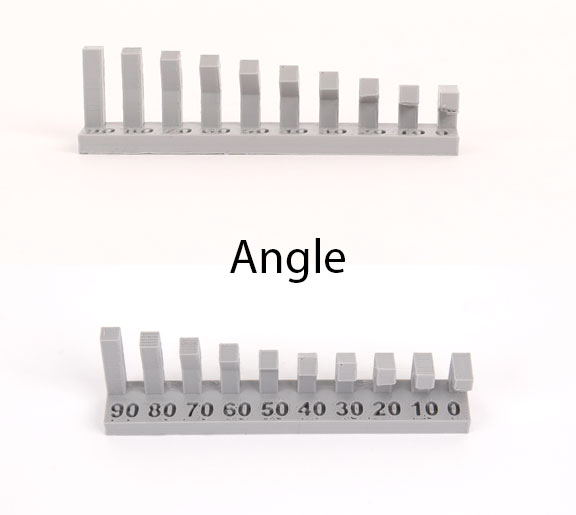
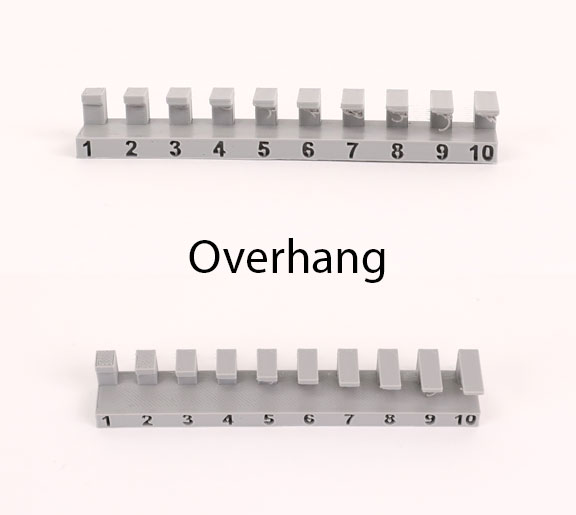
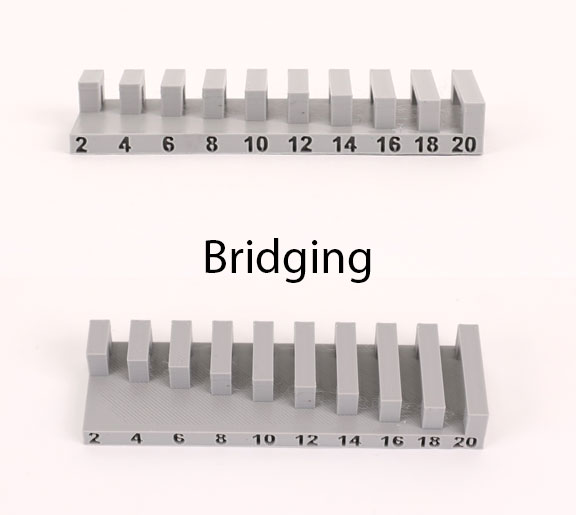
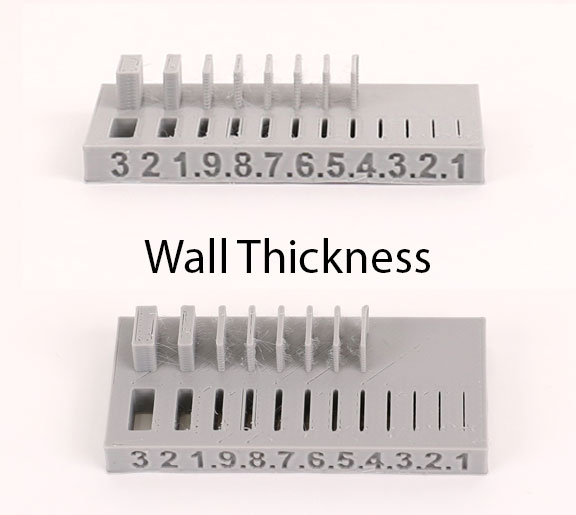
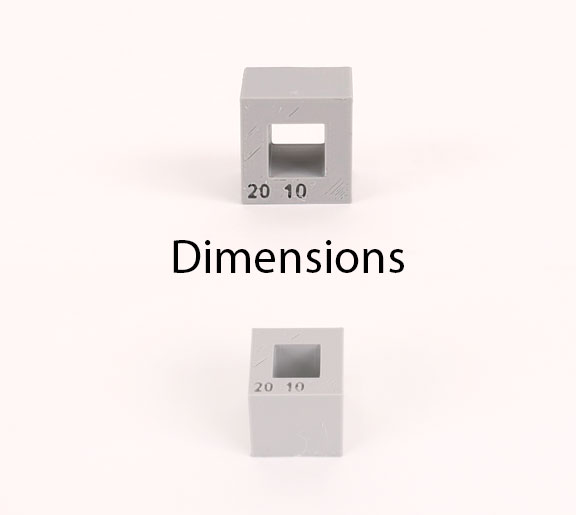
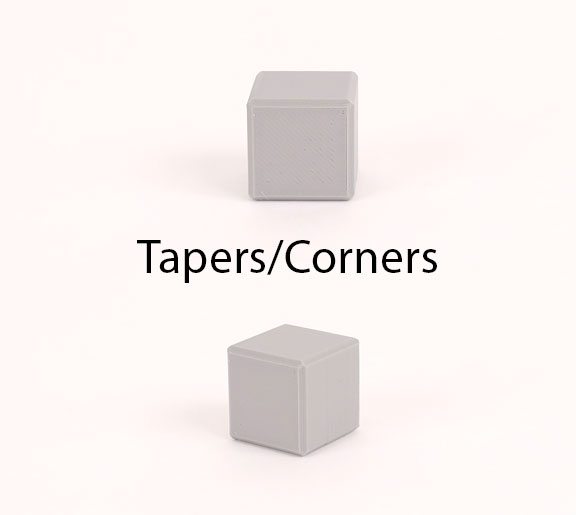
For this week's group assignment, we had to characterize/test the design rules for our 3D printer. We decided to go with a Prusa Mini that we have in our lab with a Prusament PLA as a filament. The Prusa Mini is a type of fused deposition modeling (FDM) printers. We collectively printed a few test prints that each can characterize a different aspect of the Prusa printer. The results of these test prints can be seen below. We were failry pleased witht the capabilites of the Prusa Mini.
3D Printing (FDM)
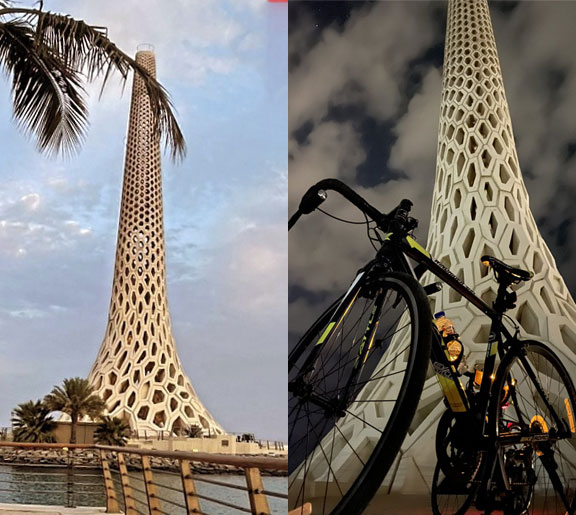
For our individual assignment this week, we had to design and 3D print an object that could not be made subtractively. I wanted 3D microfluidic channels embedded in a cubic structure. However, I determined that using an SLA printer would be a better option for this structure. Thus, to practice on the FDM Prusa printer, I decided to print a complex structure that I did not design but is meaningful to me. I chose to print the KAUST Beacon, a contemporary lighthouse at King Abdullah University of Science and Technology (KAUST), my alma mater. The beautiful structure comprises 187 individually cast amorphous hexagonal concrete blocks, each weighing up to 18 tonnes (more info can be found here). The photos on the right were taken during my commute rides to campus.
“The University shall be a beacon for peace, hope, and reconciliation and shall serve the people of the Kingdom and benefit all the peoples of the world."
-King Abdullah bin Abdulaziz Al Saud, 1924 – 2015

Prusa Mini
For the design, I downloaded the CAD files Tayyab Mubeen modeled and generously shared with the world here. I used the PrusaSlicer software to slice the design and transferred it via an SD card to the printer. I used an infill of 20% and layer height of .15 mm
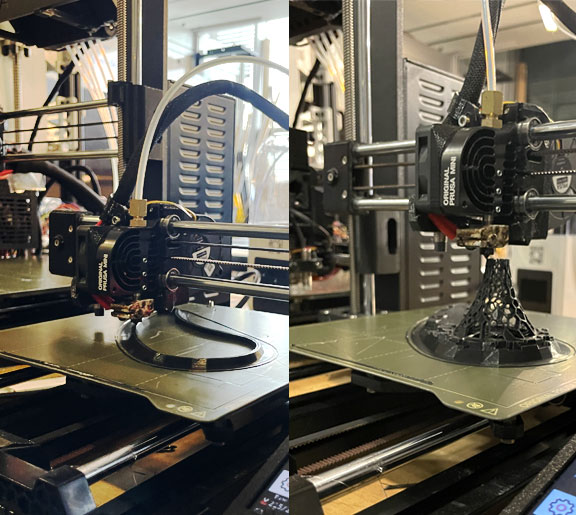
The Prusa Mini in Action
TThe photos on the right show the Prusa mini printer while printing the structure at two different time points. The total print took around 4 hours to be completed. I did face some issues and failures that I will discuss below
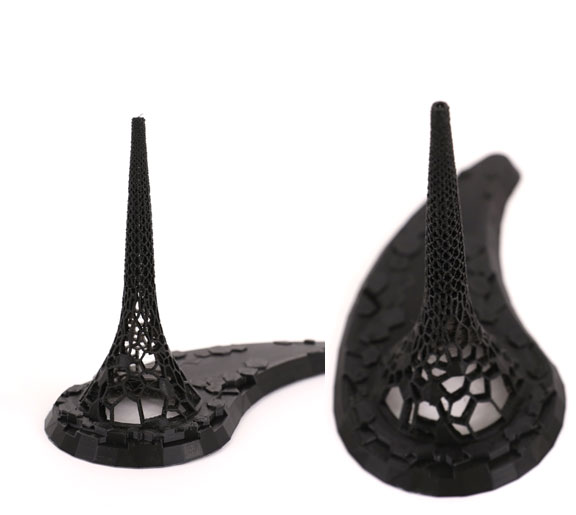
KAUST Beacon (Printed)
After a couple of trials, the printed structure came out beautifully, and I will keep it as a desk decor to remind me of the five beautiful years I had during my graduate school journey at KAUST :)
Failures (FDM)
While printing with the Prusa, I faced a few issues highlighted below. The first issue is that I noticed that the first layer was not smooth. I adjusted two things here. First, I ran z calibration and adjusted it since I noticed the nozzle was too close to the bed. Additionally, I lowered the nozzle temperature from 215 to 205 degrees celsius. These two seemed to have solved the first layer roughness issue.
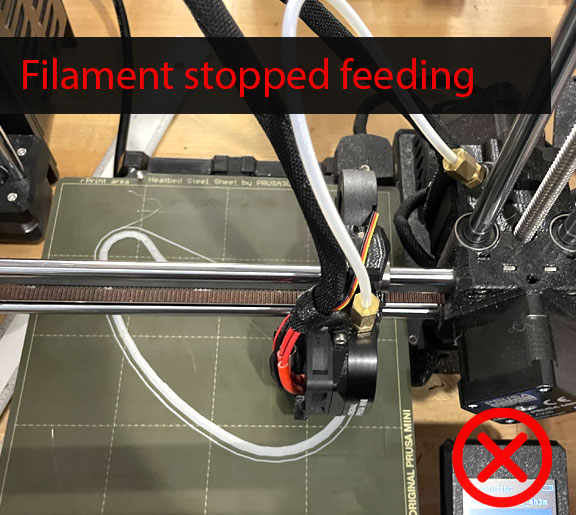
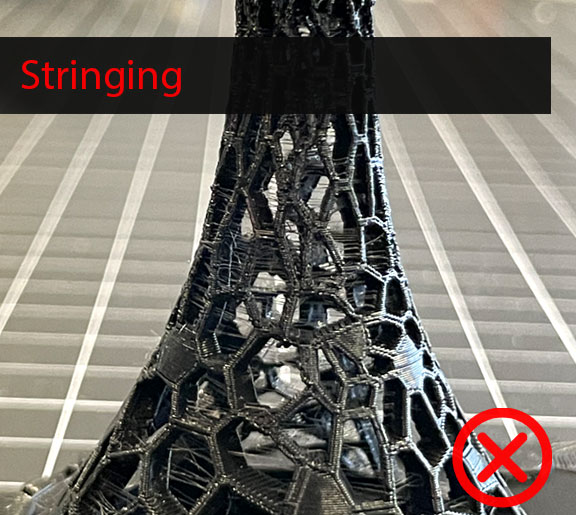
Another issue I faced that was quite annoying was that the filament would stop feeding into the nozzle at some point during the print. This issue actually happened three times, and I realized that it was due to breakage that occurred in the filament. I suspected this could be due to the fact that this is an old PLA filament that might have been laying in the lab for a long time, which might have become very brittle due to moisture and environmental exposure. I decided to change the filament to another PLA (the black), and this issue was resolved, and the new filament was not breaking. The final print had some stringing issues, as can be seen in the photo below; there are hairy bits of PLA in between the hexagonal concrete blocks. After a little bit of searching, I found that decreasing the nozzle temp by 5 – 10°C should help. Another quick solution would be to use a heat gun that will melt the strings, and the printed object should remain undamaged. I plan to use this solution and see how it comes out.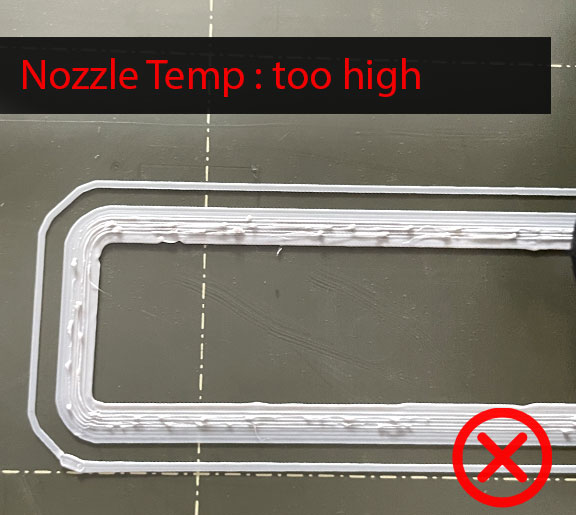
3D Microfluidics !
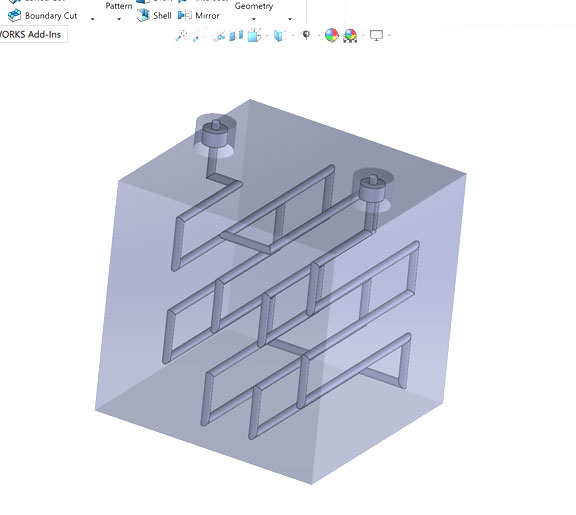
For my design, I decided to model a 3D microfluidics channel that is embedded within a cubic structure. I have fabricated many microfluidics devcies before, but there were all using conventional lithography/laser machining casting processes where I would creat a mold first and then cast my elastomeric polymer into it. Realizing the limitation of such methods, I though exploring 3D printing for microfluidics will not only makee the fabrication process easier but also enable the creation of truly three-dimensional microfluidic structures that are challenging, if not impossible, to make with conventional methods.
As seen from the model, my structure consists of the channel as well as one inlet and one outlet
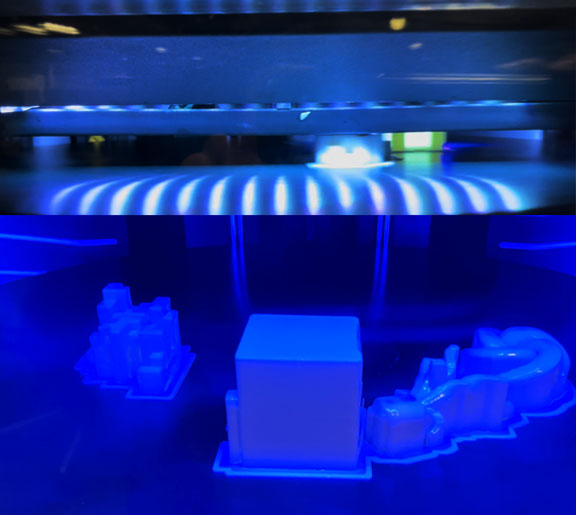
3D Printing (SLA)
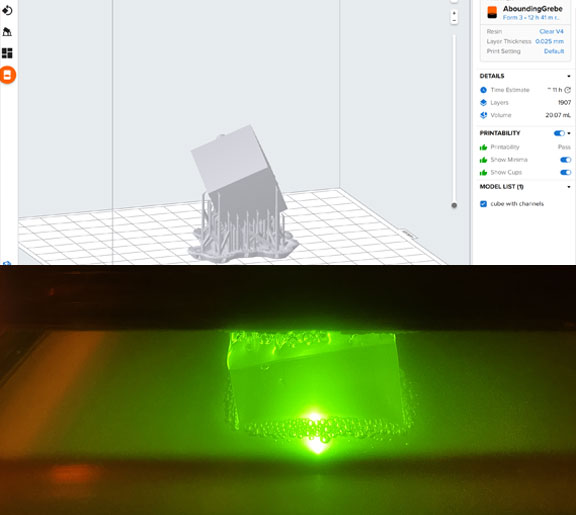
I decided to use Formlabs Form 3+, a stereolithography (SLA) type of printer with a clear Fromlabs resin as shown on the right.
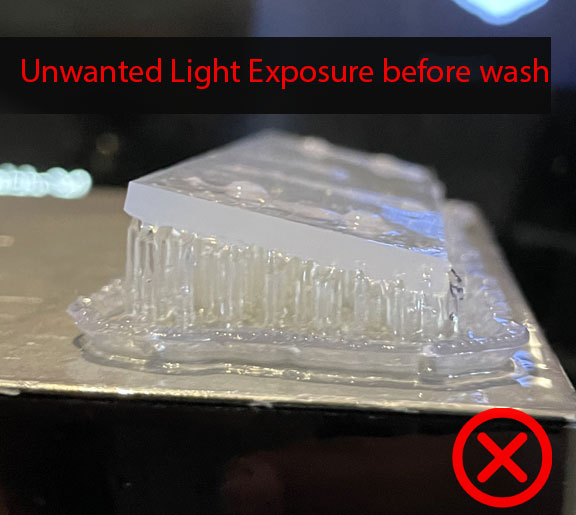
Failures (SLA)
I faced on major issue with this print, which was completely clogged channels. You can see on the left photo below that although the channels had 800 micron of diameter, they were still not observed
I I believe cleaning was the critical step here , I highlighted some of the potential causes below I am currently re-printing this structure and will be more careful with the cleaning step for the new print.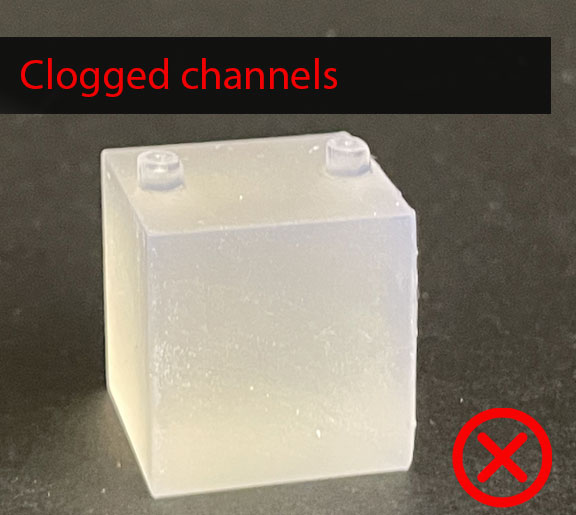

Stratasys J55
Additionally, I sent the same design to Tom to print it with the CBA J55 printer. Tom told me cleaning might take a long time, but we will see how it goes; the results are pending...
3D Scanning
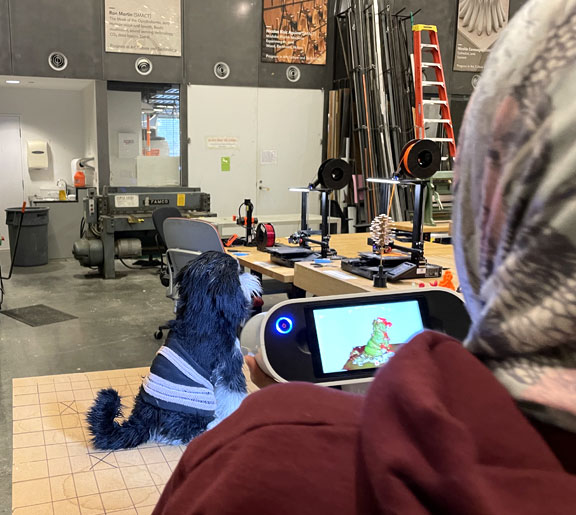
For 3D Scanning, we used Artec Leo 3D scanner. I decided to scan one of our TAs, Professor , the fluffy pupper of Jack Forman!
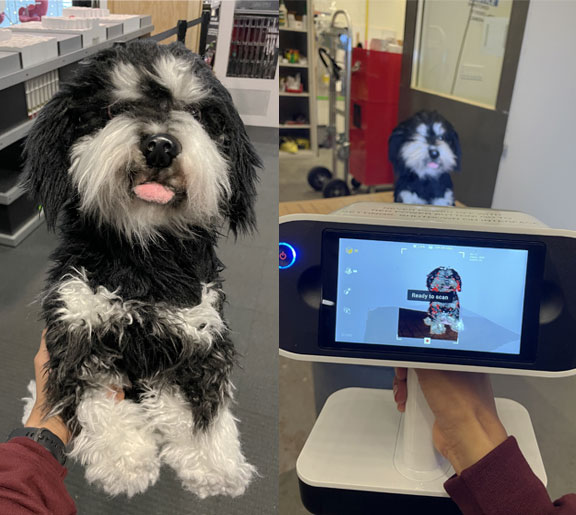
Scanning Professor
Jack had a stuffed animal version of professor for a demo of one of his recent papers, so I used it since I figured it would be easier to scan than professor herself!
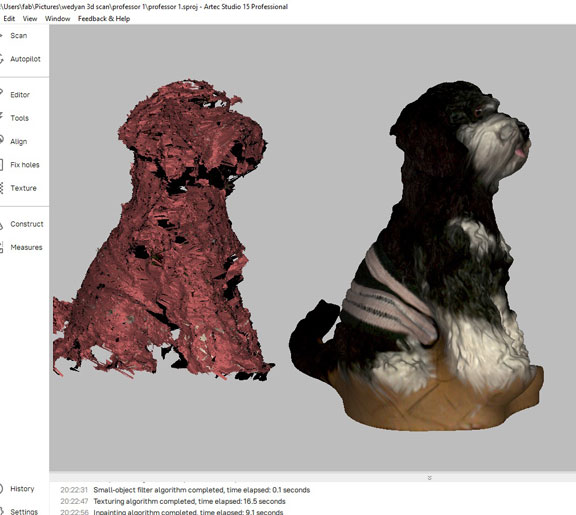
Rendering
I used Artec Leo software to process and render the scan, luckly, I did not have any bad frames and rendring was a scucess
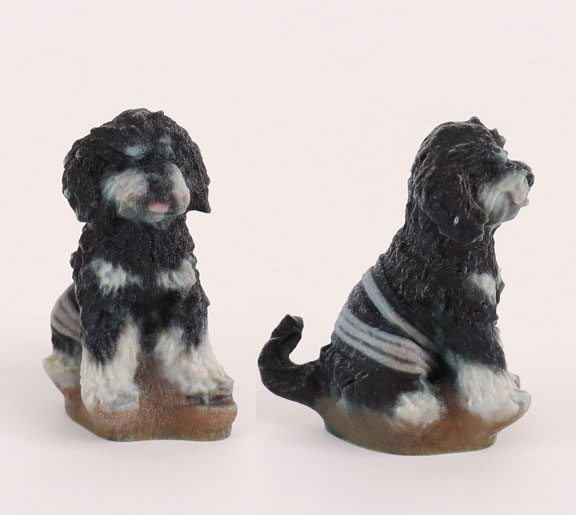
Prtining the 3D Scanned Professor
I exported and printed the 3D scanned model with the J55, it came out pretty good!
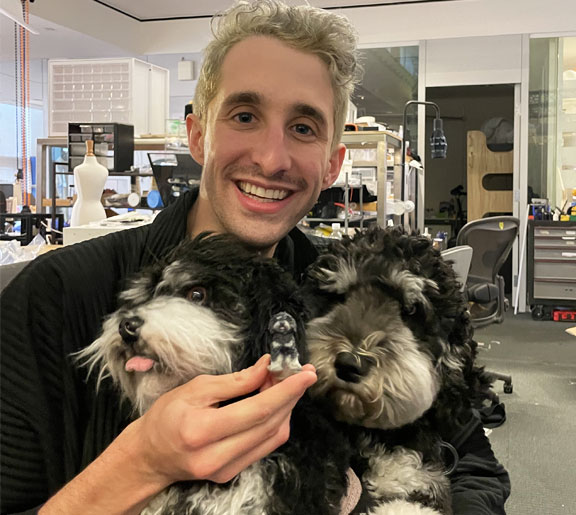
Happy TAs
Too many professors in one photo !