Tools: Adobe Illustrator, V-Carve Pro, ShopBot
Make Something BIG!
This week's assignment was to make something big using the ShopBot CNC router machine. Given my background, I am pretty comfortable working with machines that make small things (nano/micro) range but not machines that make big objects. Since it was my first time working with a large CNC machine, and the heads-up we had Neils gave us about how critical time will be this week, I decided to build something that is simple but funcational!
We recieved training by Tom and John on how to use the ShopBot CNC router as well as on how to use the V-Crave software to generate the toolpath the machine will follow to make the cuts!
Make something you NEED !
Since I am playing it safe and designing something minimal, I decided to make something I currently need. Therefore, one suitable object for this assignment that would be useful for me is an adjustable laptop stand desk!
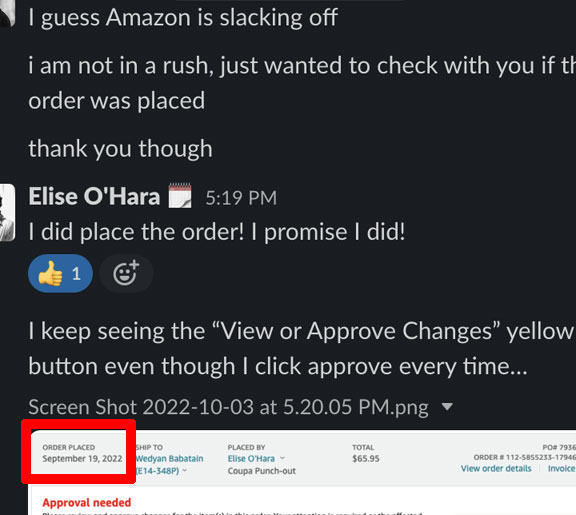
Given that I have just joined the Media lab, I ordered a couple of things for my office, and one of them was a laptop stand. However, for some reason or another, I never get that order even though our admin had placed it a month ago!!! ( see a screenshot of my conversation with her on the right!) So, since Amazon seems to have forgotten about my order, I decided to wait no more and make my own laptop stand and make it adjustable!
Adjustable Standing Desk converter- Desing
Now that I know what I want to build, I went ahead and designed the main parts of my adjustable standing desk converter. I got my inspiration from multiple designs online, such as this one and this one .
The design consists mainly of the following four parts:
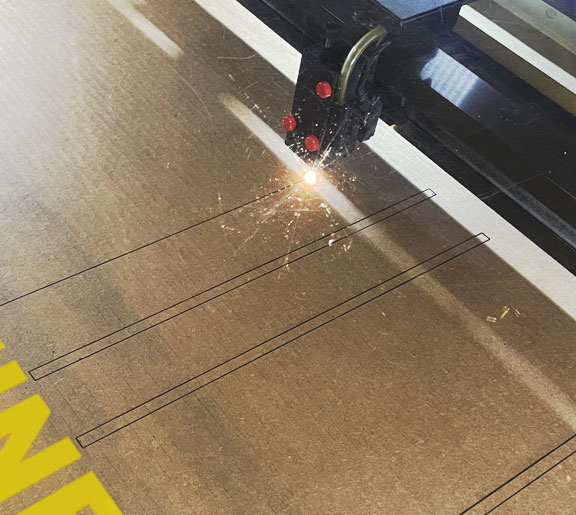
Cardboard Model- Laser Cutting
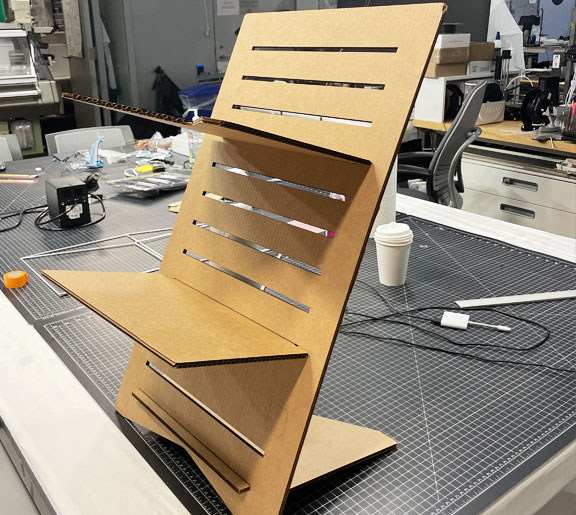
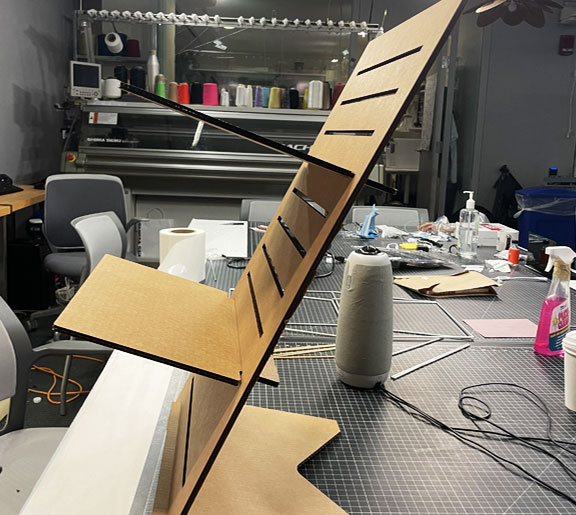
After I was done with designing the parts, I decided to make a version from cardboard using the Co2 laser cutter to make sure it was practical and had the appropriate dimensions. After cutting and assembly, I athouhg it looks good overall. The only thing I did not like is that it is tilted more than it should be, but I thought it was because cardboard is quite light and doesn't hold itself well. However, I figured with a thick double layer of plywood, it would stand more upright, so I decided to move forward with the design.
Tool Path Generation using V-Carve Pro
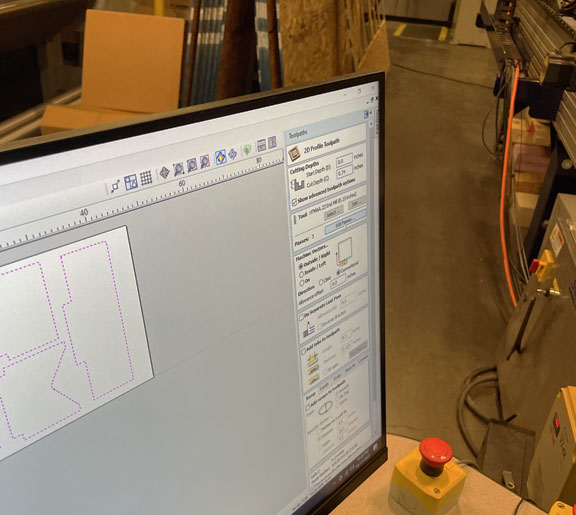
In order to load my design into the ShopBot machine computer, I exported my design files from Adobe Illustrator into a dxf format. Then, John helped me develop and generate the toolpath using V-Carve software. I needed to add multiple tabs in the cutting tool path in order in order to hold the job in place during machining
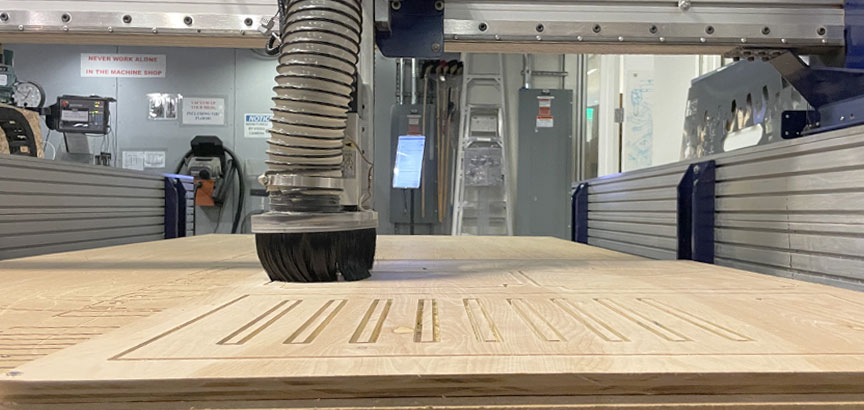
ShopBot in Action !
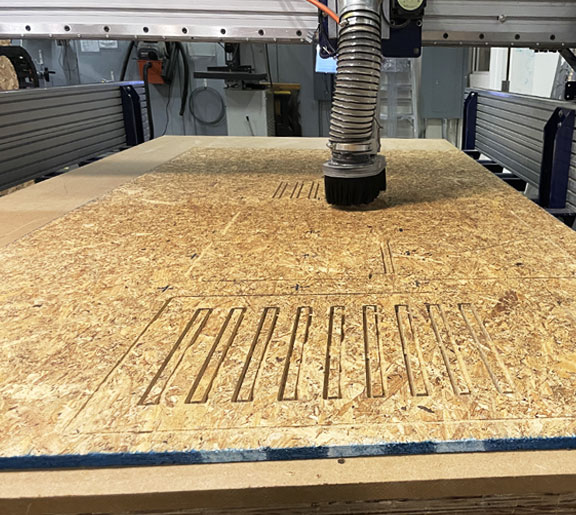
After fixing down the OSB board on the bed with screws, I started the machining job with great help from John since I was a little scared of the big machine. Although I wanted to cut my parts with a nice sheet of plywood, I decided to go with OSB first as a test.
Cutting with Oriented Strand Board (OSB)
TI initially designed the parts to be cut from a plywood sheet of 1.8 mm in thickness. However, for OSB, I needed to double the layer used to make the assembled part more sturdy. I believe going with one sheet of OSB (around 1.14 mm thick) will be too weak for my design to hold itself when a laptop is fixed on top of it!
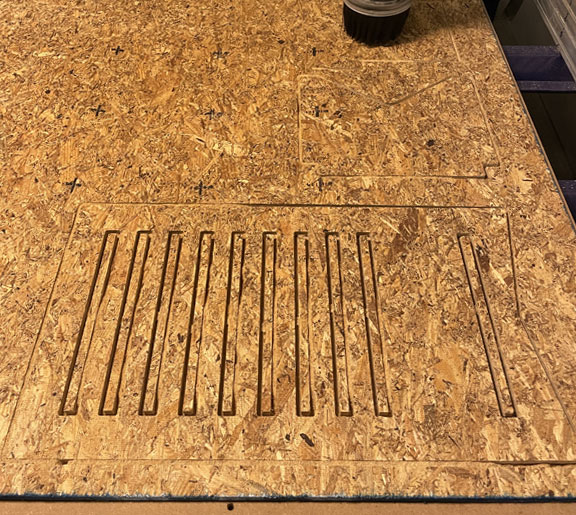
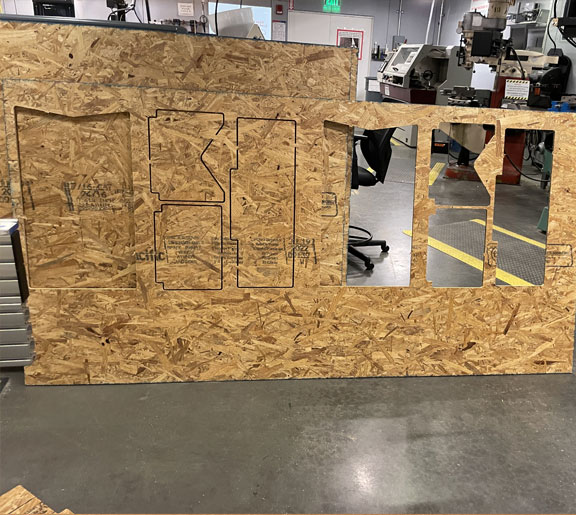
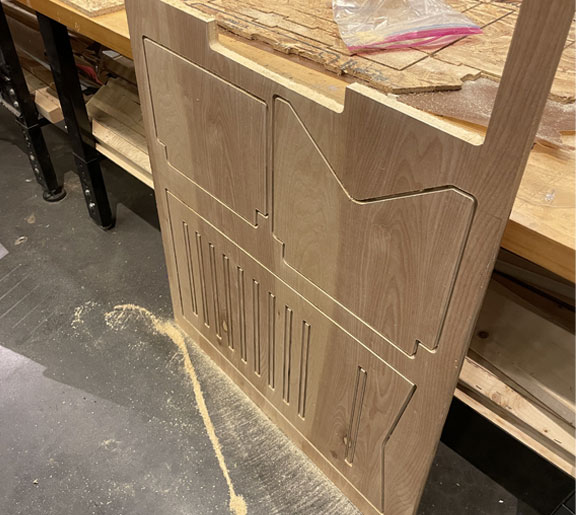
As seen below, I was able to cut 2x of all my pars in one sheet of OSB, which was convenient!
After I removed the supporting tabs, I was able to smoothly insert the parts into each other to make the final assembled desk.
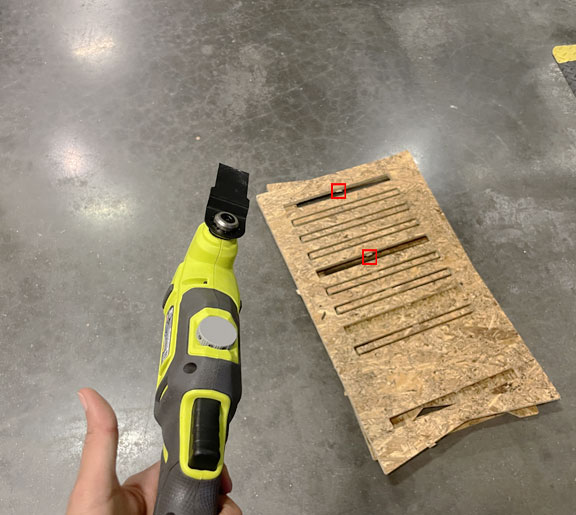
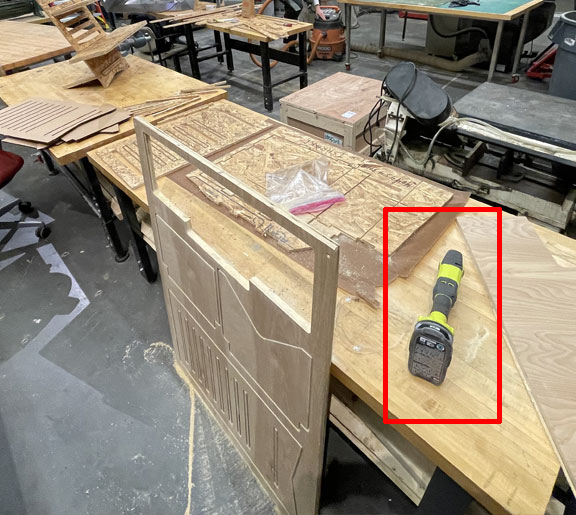
Removing Tabs
The photo on the right shows my favorite tool of the week! John gave me this tool to trim the tabs off my parts. It worked great for me and was so convenient to use to have excellent clean parts!
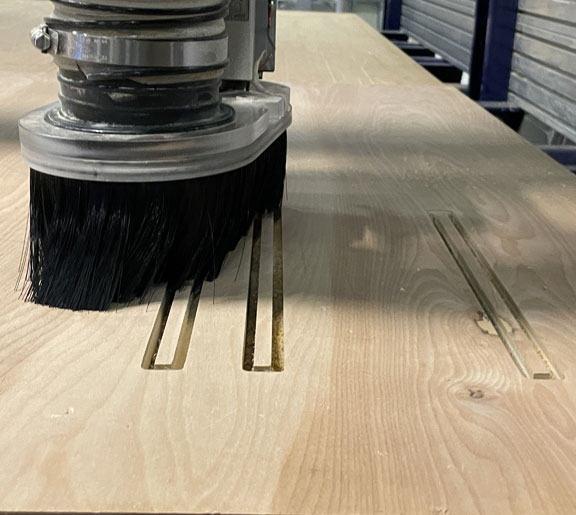
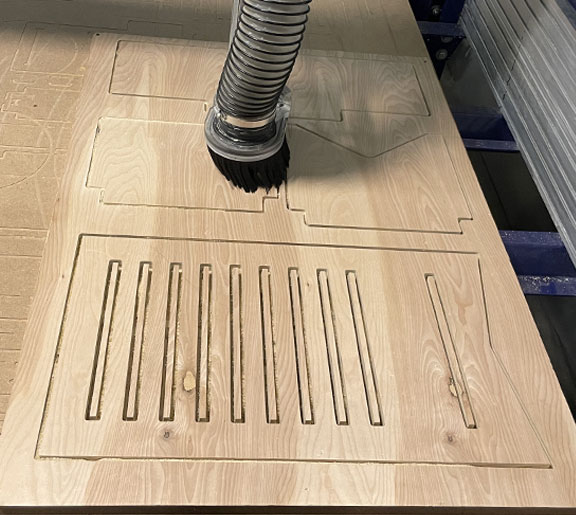
Cutting with Plywood!
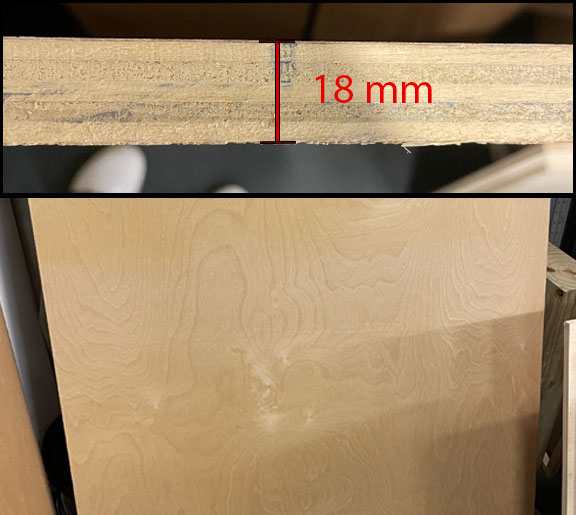
As the supplied OSB is not that great, I wanted the final structure to be made out of plywood with a more excellent surface finish. Luckily, I found a piece of birch plywood with a thickness of 18mm in our lab that was not being used. I was really excited to see it; however, it was only one single 120 x 80 cm piece. This was a big challenge and meant I had to use it strategically.
I generated a new tool path since the material thickness had changed. As you can see in the photo below, my parts barely just fit the plywood sheet I had.
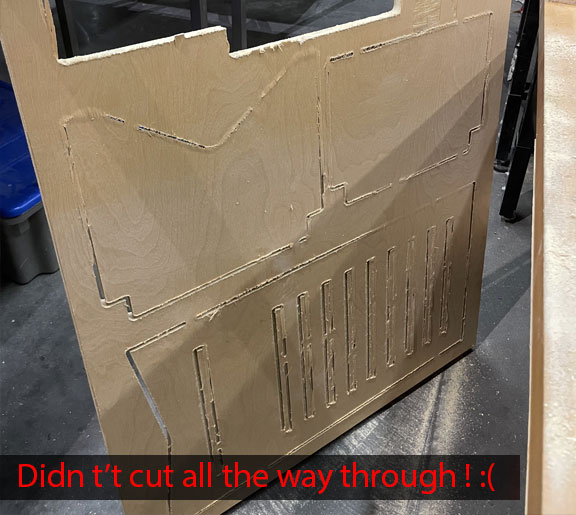
Issues !
After the cut was over, and I removed the board, I realized the machine did not cut all the way through. So I should have probably increased the cut depth a little more. It was still acceptable for the most part. I just needed to do some post-processing ,
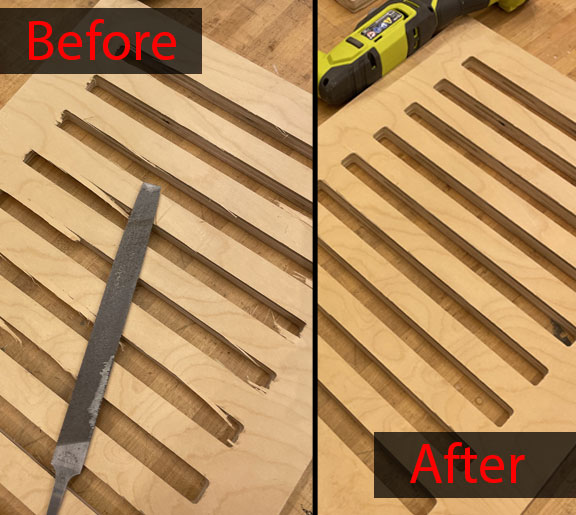
Filing Sharp Edges
In order to smoothen some of the edges due to the partially incomplete back cut, I used a file tool that worked wonders and removed sharp edges nicely. You can see the difference before and after filing the sharp edges on the right photo.
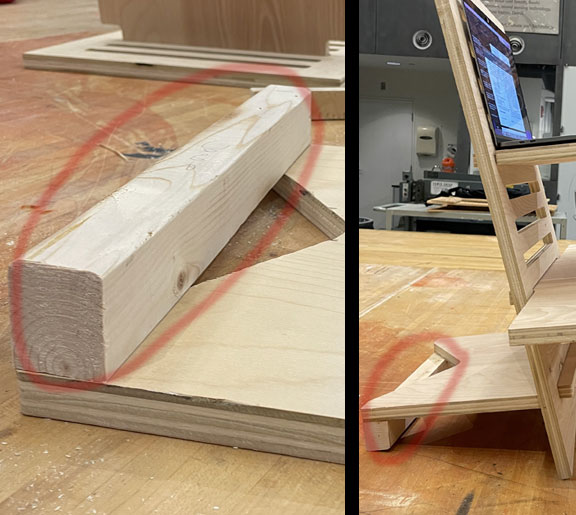
Adding a heel
After looking at the assembled stand, I noticed that the stand is still a little bit tilted and not as upright as I would like it to be. Unfortunately, since I was limited to only that single piece of wood, there was no way for me to fix this issue with a new design and a new cut. Thus, I decided to go with a more straightforward solution: adding a piece of wood at the bottom of the base part to act as a heel and adjust the tilt issue. I was able to cut a piece of wood with a rectangular cross-section we have in the CBS shop with a hand jigsaw. After that, I used wood glue to fix it securely to the bottom of the base. The photos on the left shows how it looks and how it makes a difference in the upright po
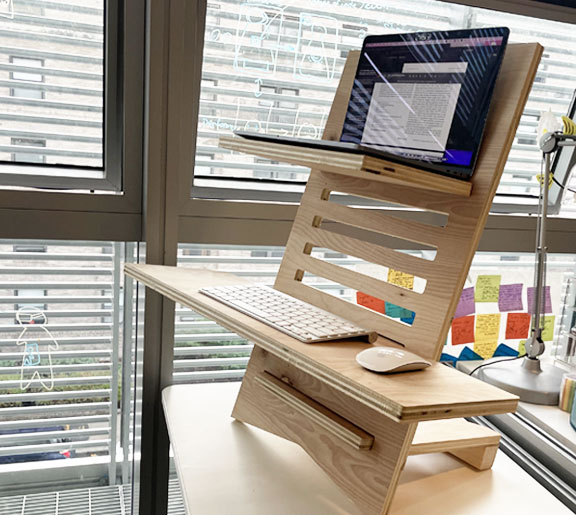
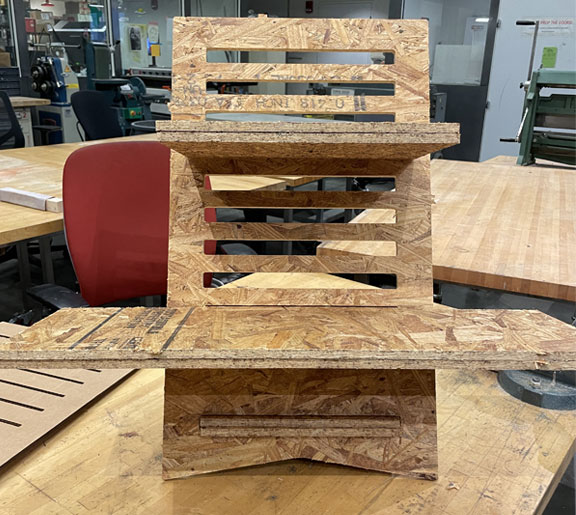
Final Assembled Standing Desk
The photo on the right shows the final assembled adjustable laptop stand in my office. I really like how it turned out! It is also quite sturdy.
I am definitely going to be using it, and I can finally stop bothering Elise and asking if my lost package has arrived ! LOL!