Week 5,
Ideation Phase: The assignment for this week was to make something big. Naturally, it took me seven days to accept that I could not make a hammock stand
with OSB and so I ended up starting this assignment very late. Once I had been properly convinced there was no feasible way to make a sturdy structure from OSB by Chris (wood shop instructor) + Anthony (EECS head TA), I finally caved and decided
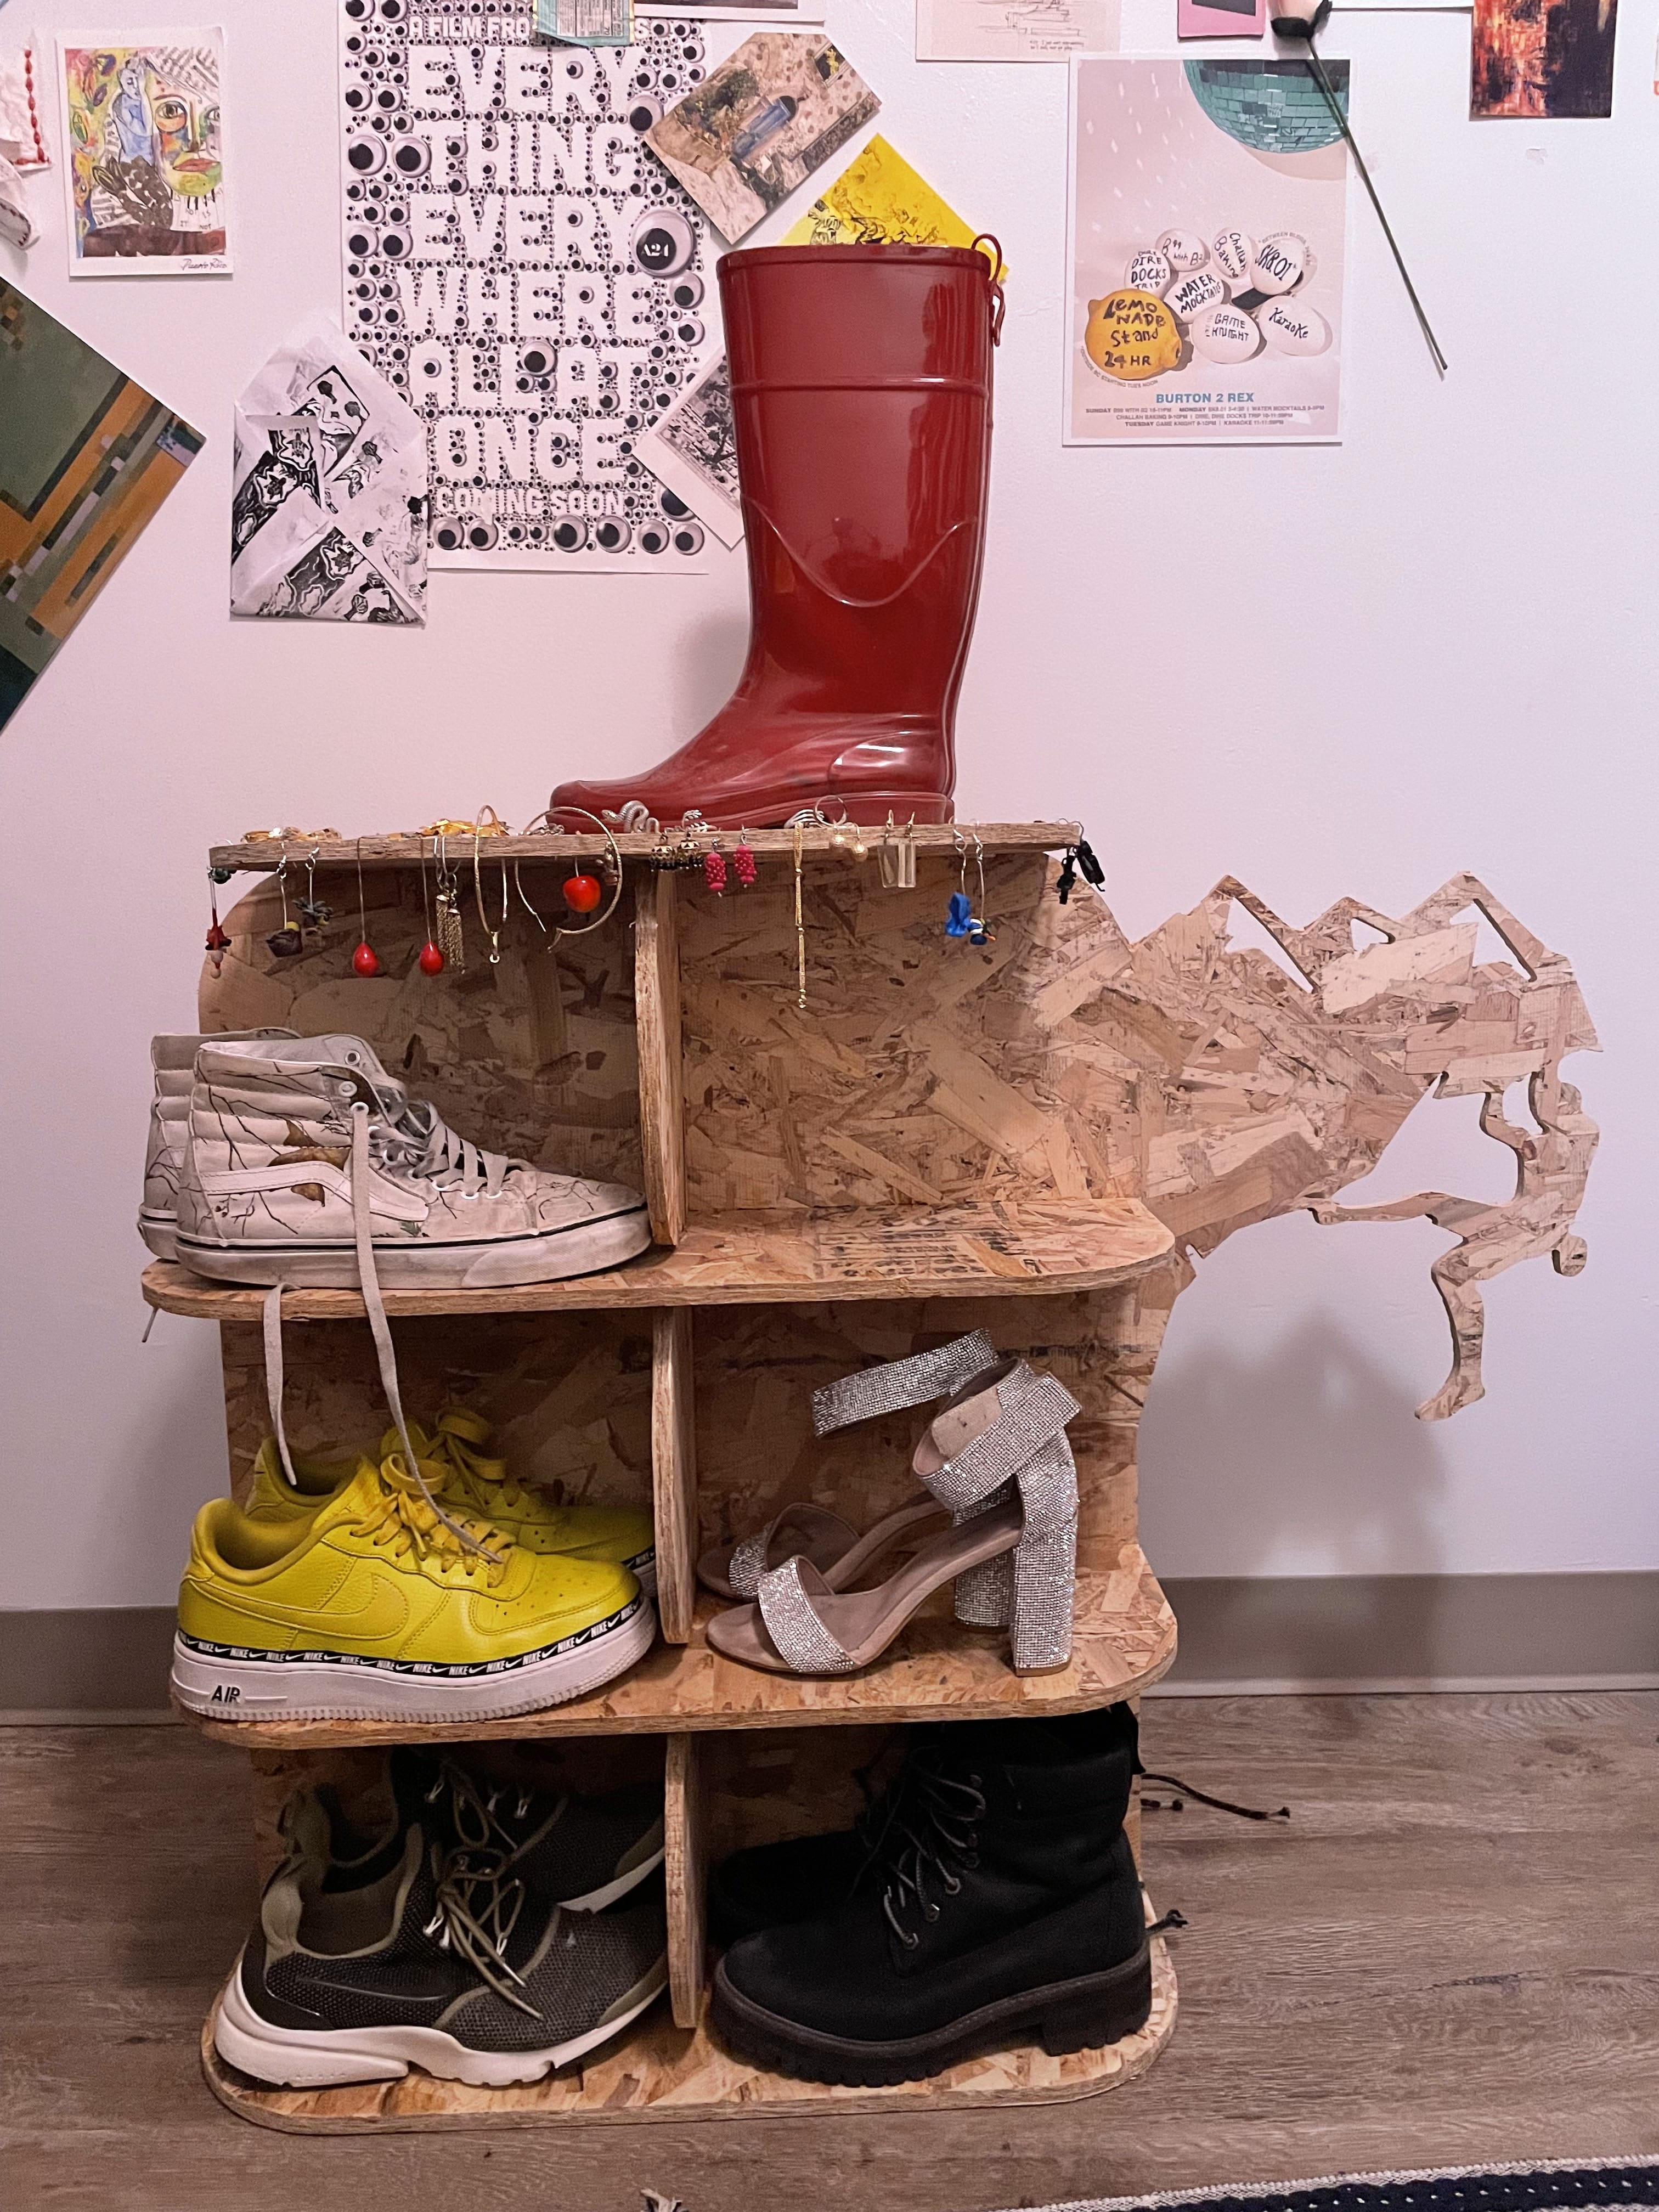
to make a shoe rack instead to tidy up my dorm room. I have about 13 pairs of shoes, so I ended up designing a shoe rack with 3 levels that could hold up to 4 shoes and a top level that my tall rain boots would be able to sit on. From my hammock
ideation phase, I'd thought of designing something very mountainous so because of this, I incorporated that into my shoe rack design with an internet found climbing DXF that I imported into my design. To add to the functionality of the rack,
I included holes along the sides of the topmost level to hang my earrings on!
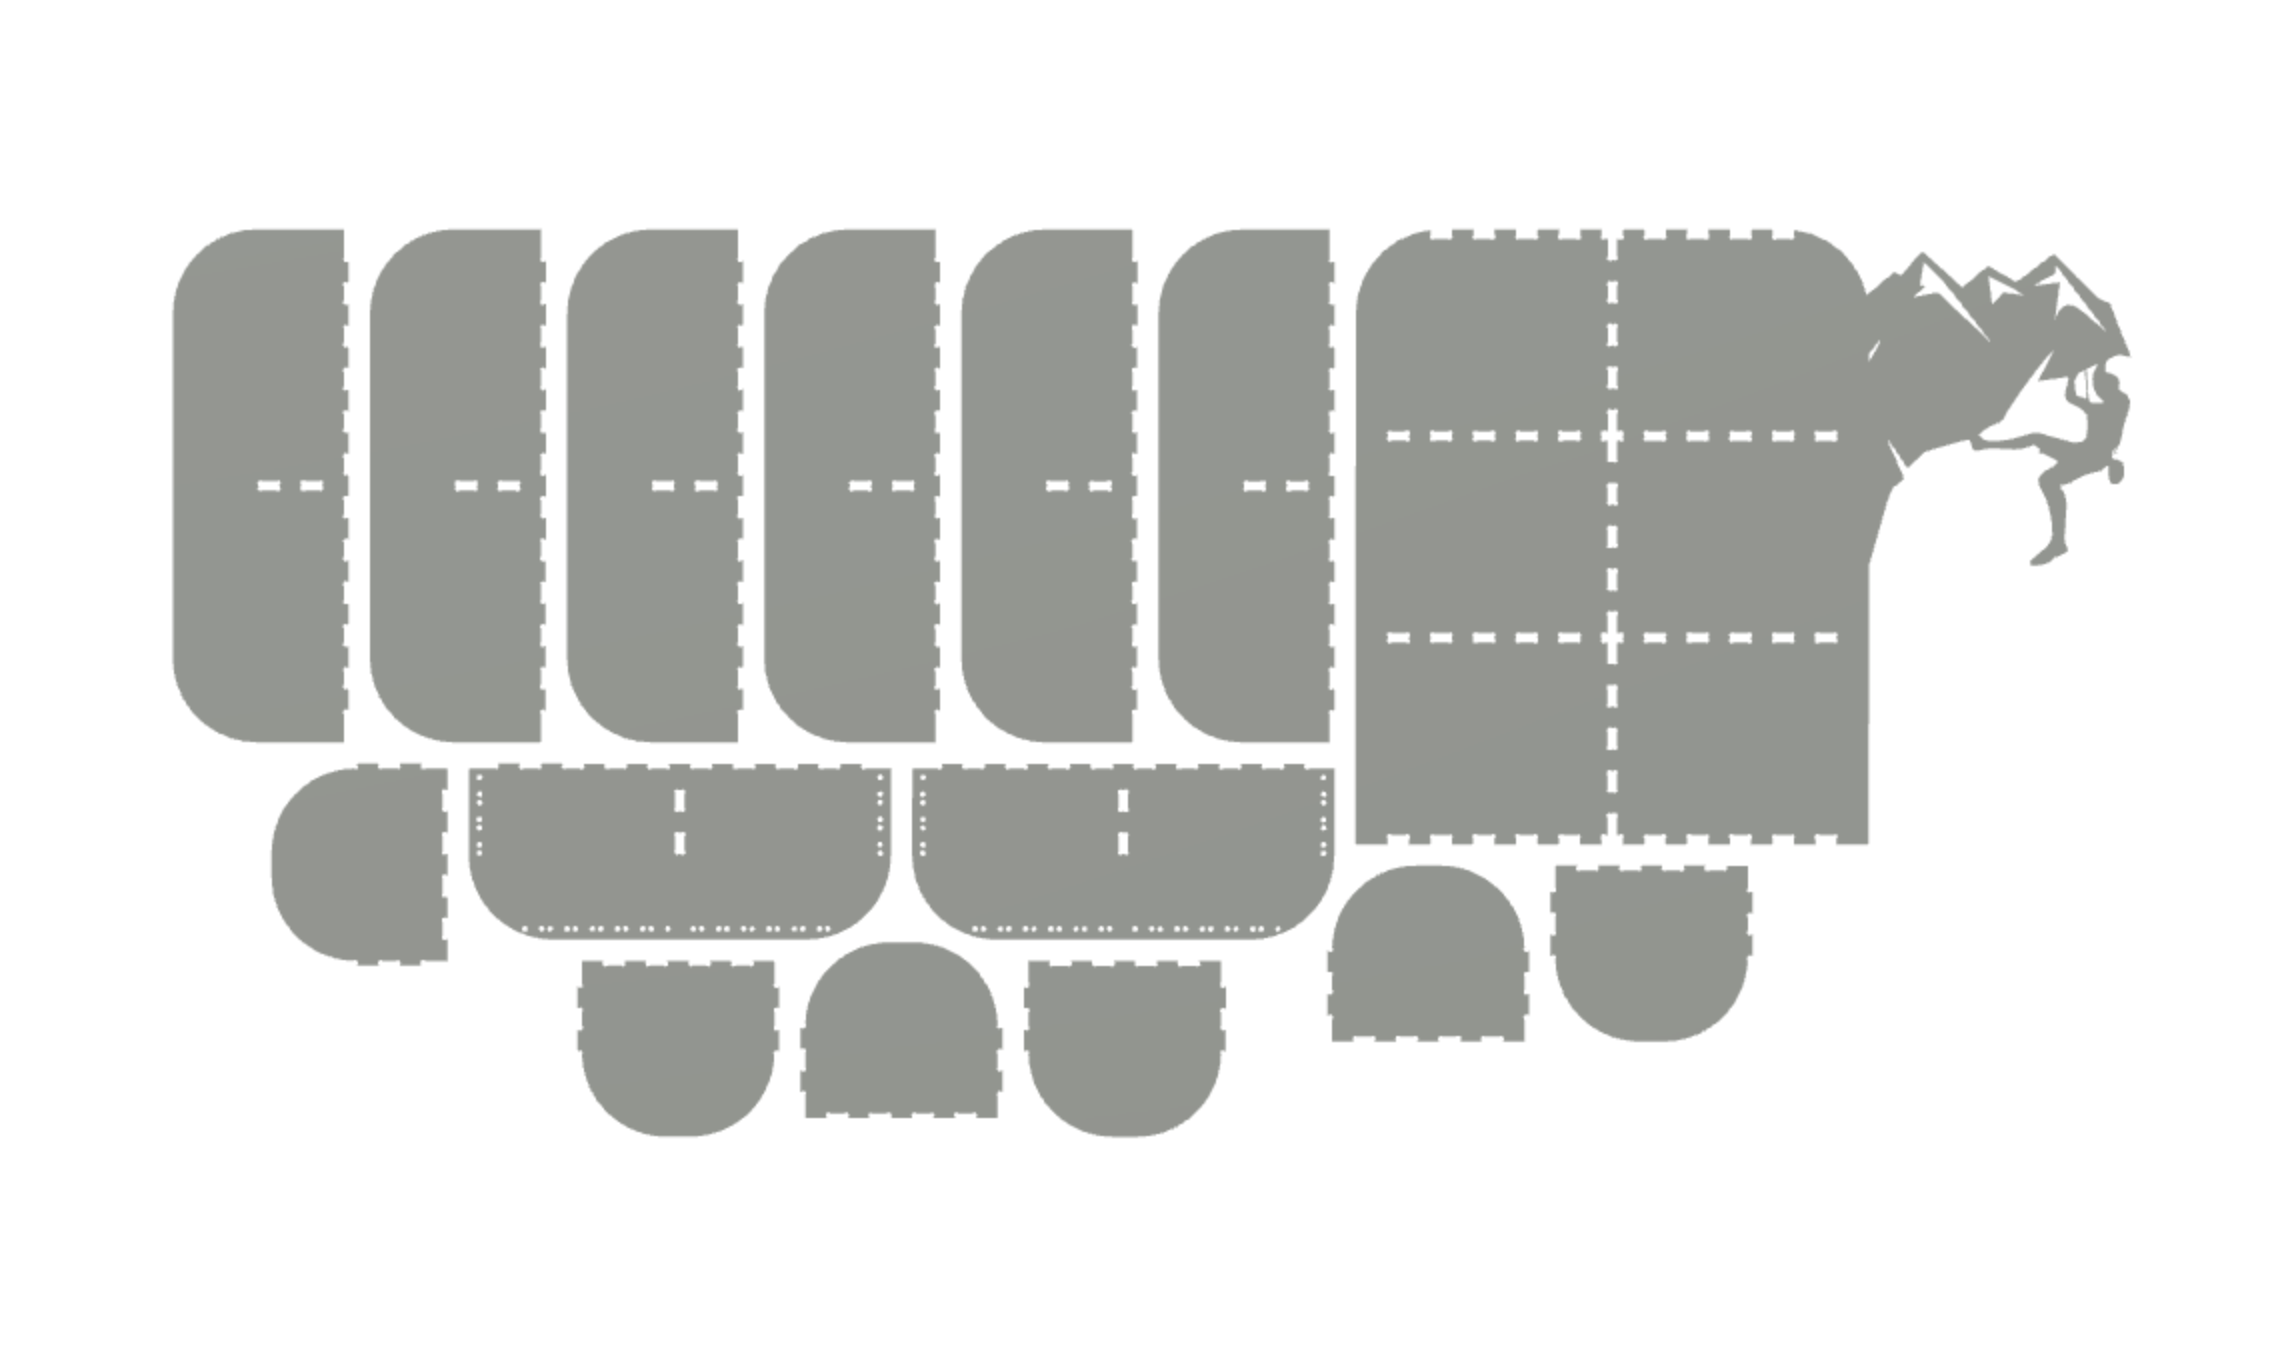
CAD-ding my shoe rack didn't take that long which I'm quite happy about as I'm getting better at Fusion 360. To account for the tool diameter of the CNC mill, I added dogbones to all my internal corners when making slots and joints for all my
pieces (using Nifty Dogbone). I also incorporated 3 tabbed parts for my joints as Anthony had recommended that in his recitation.
After I was done with the Design, I used the Manufacturing tab in Fusion to lay out my design in a flat plane that accounted for the overall dimension of the OSB board I'd be using and added a 1 inch frame for each
object so there would be space around each piece, since I had some wood space left over. Finally, once the pieces were arranged, I made a sketch projection of the arrangement and saved it as a DXF. It was then time for the mill.
Execution Phase : Since Anthony had already cleaned up stuff for the CNC week, he recommended I go to the Arch Wood Shop. I'm pretty familiar with the wood
shop at this point, simply because of the other class I'm taking: 4.031. When I came in, I uploaded my files to MasterCam. Luckily, most of the CNC settings had already been set from a previous project. All I needed to do was set the tool paths.
For the outline of my pieces, I wanted the tool to cut on the outside of my lines as I don't want to lose wood. For my internal cuts, such as the earring holes and joint slots, I needed the tool path to cut on the inside of my lines. To do this,
I edited my file in Rhino and put my internal cuts on a separate layer. Then, when I uploaded that file to MasterCam, I was able to set different toolpaths for each layer. When toolpaths were done and I looked at the simulation to make sure nothing seemed wonky, I exported the GCode and took it to the CNC. After a cute 15 minutes of watching it cut through wood, I was left with these pieces:
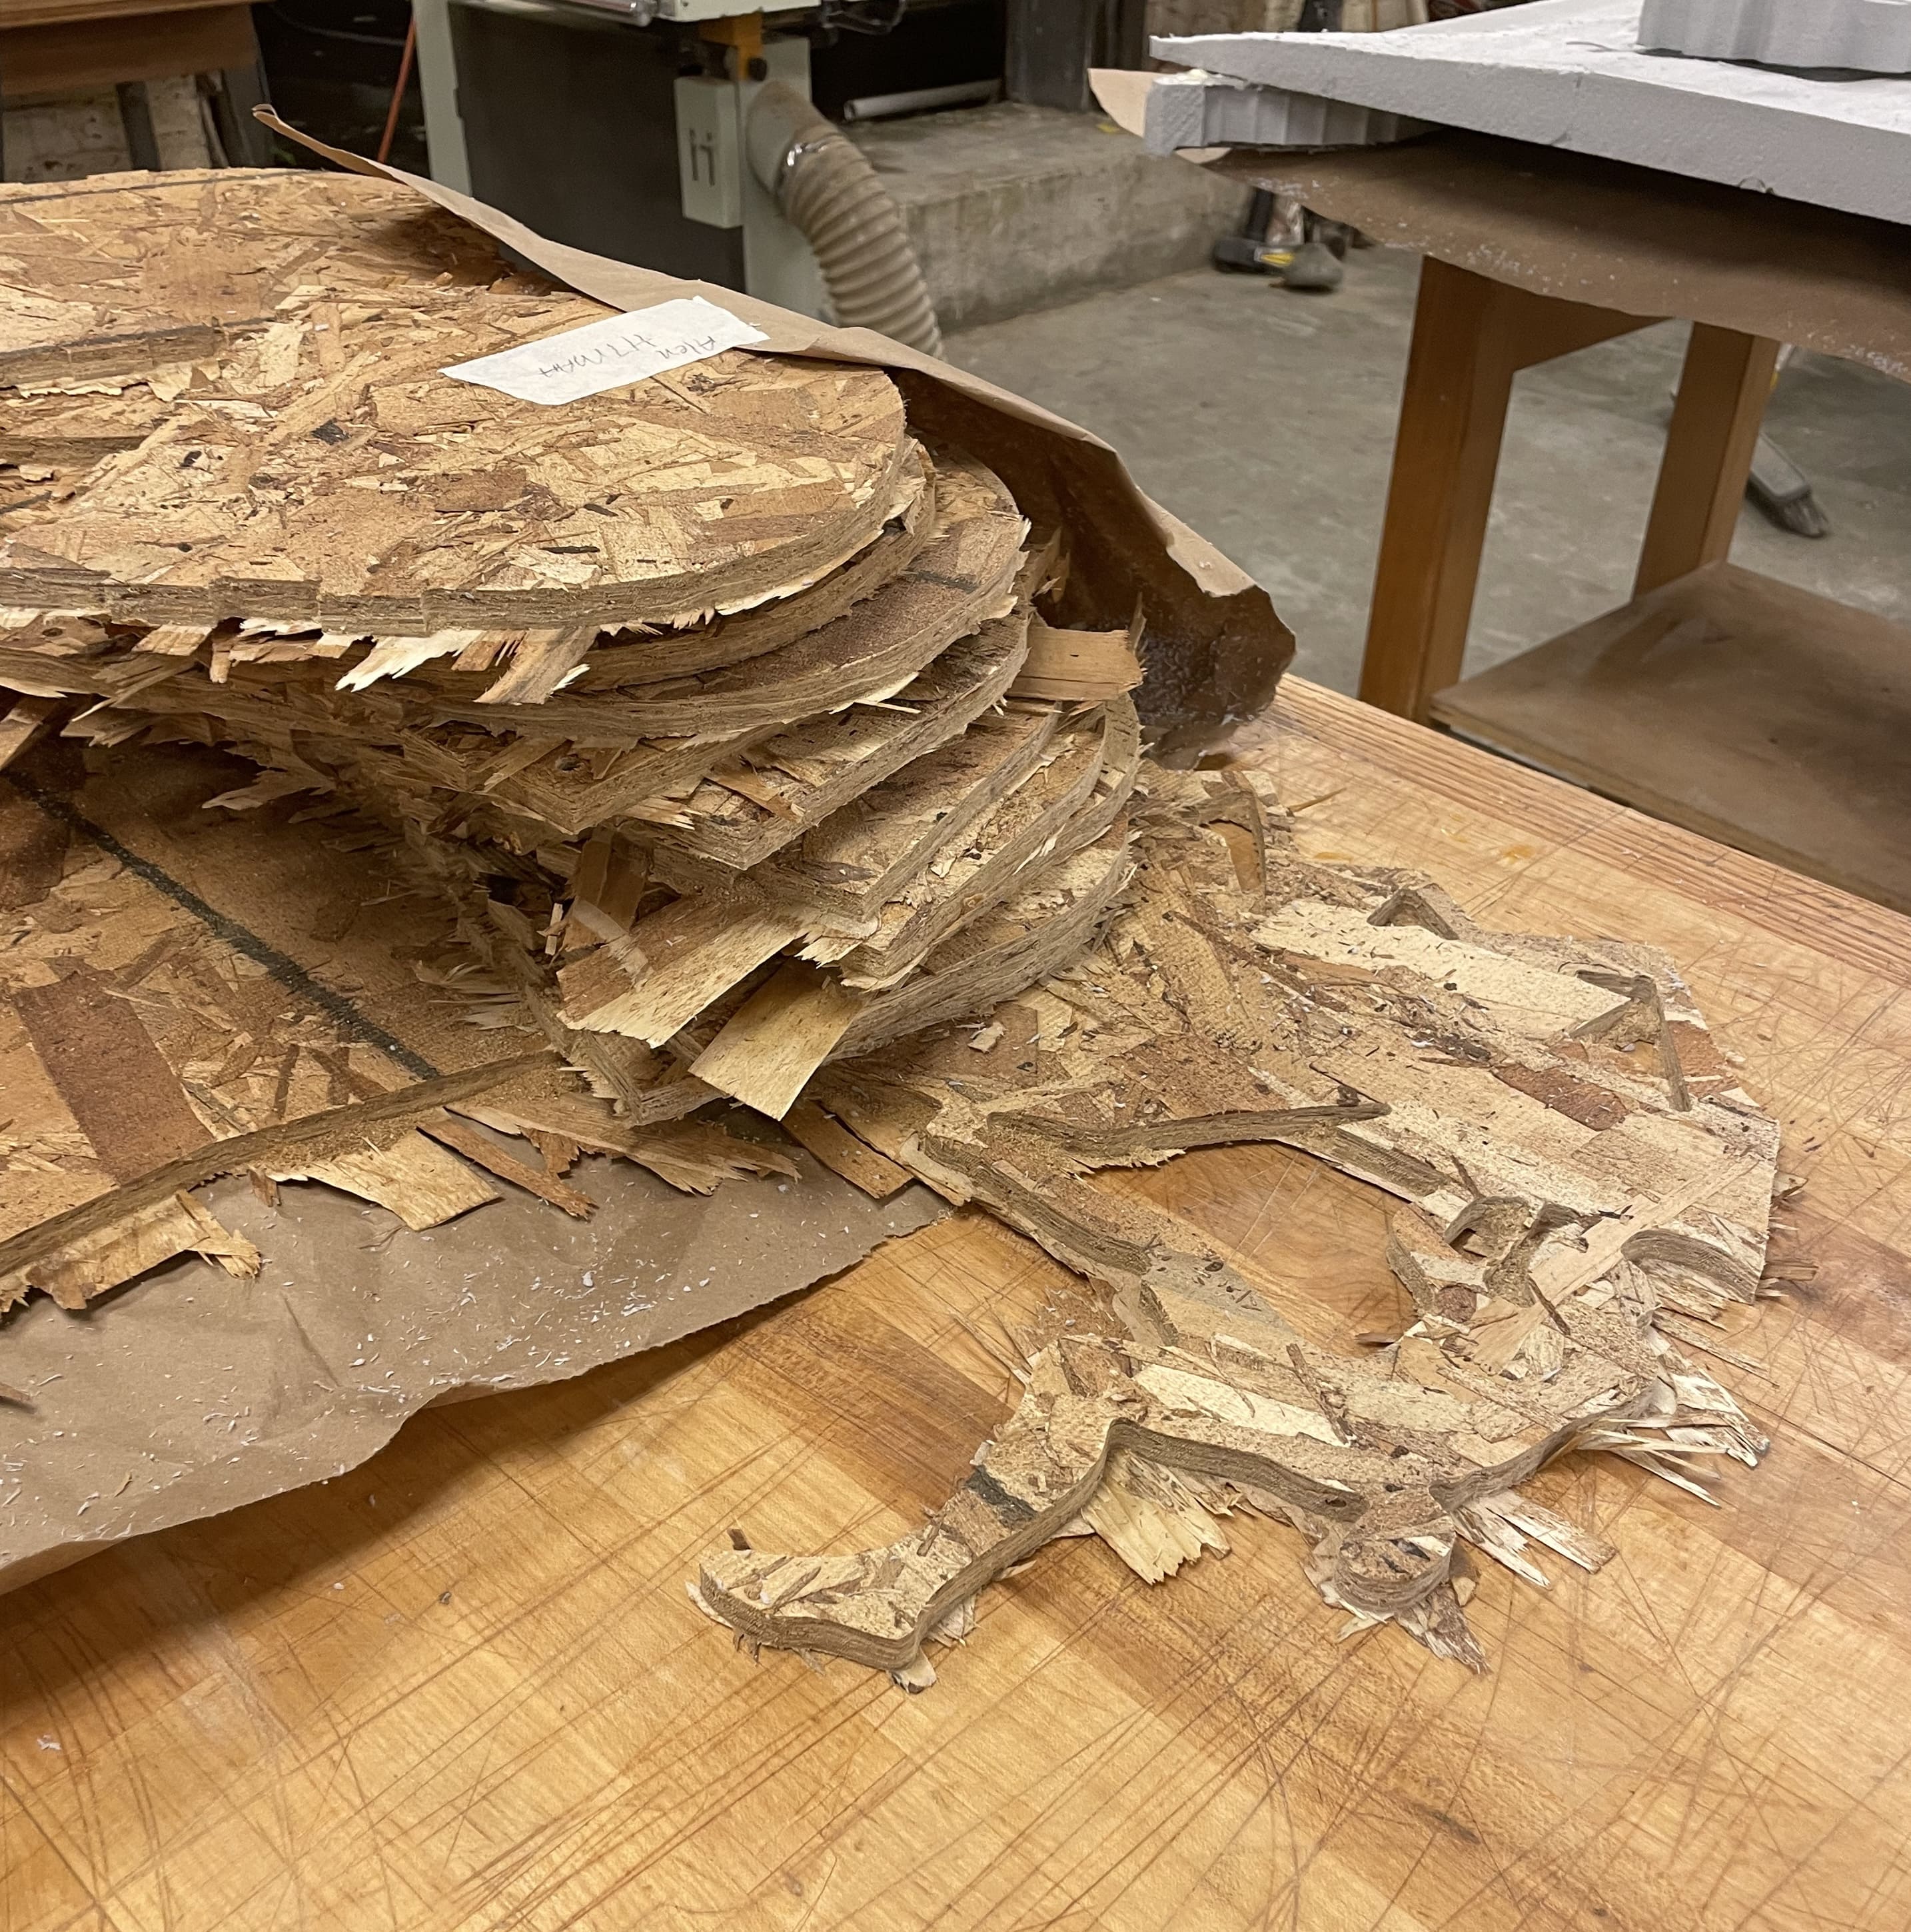
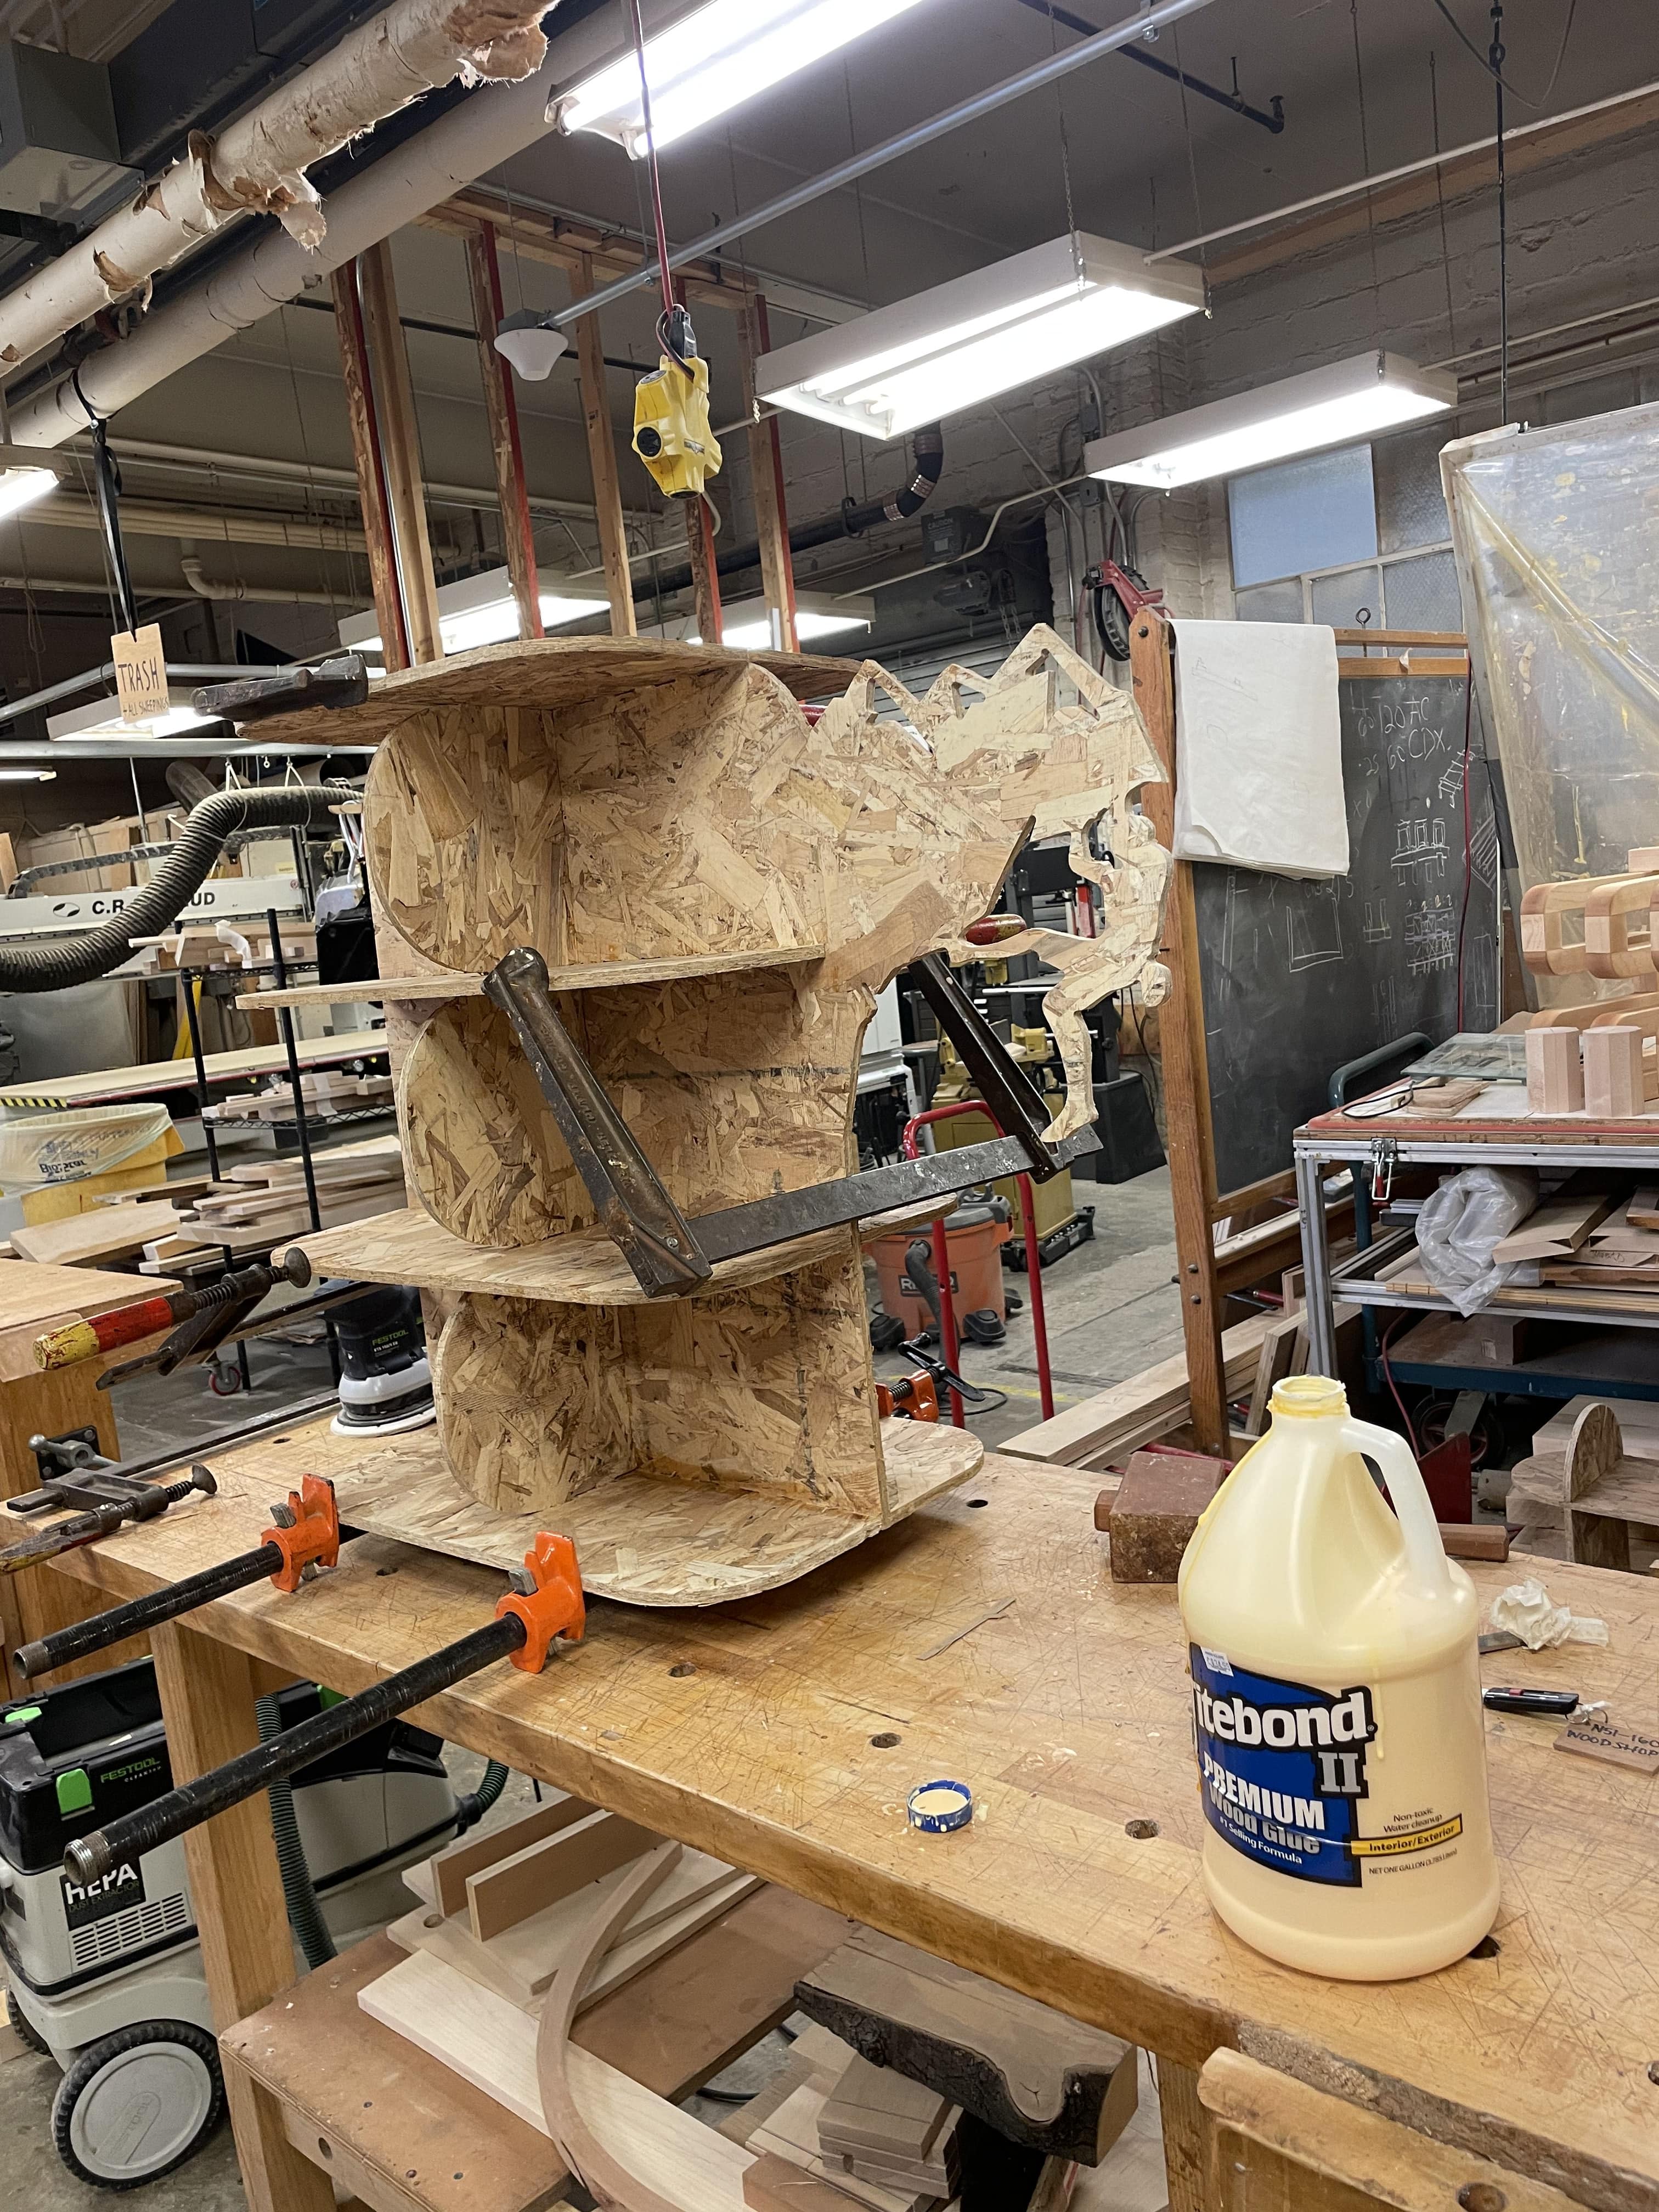
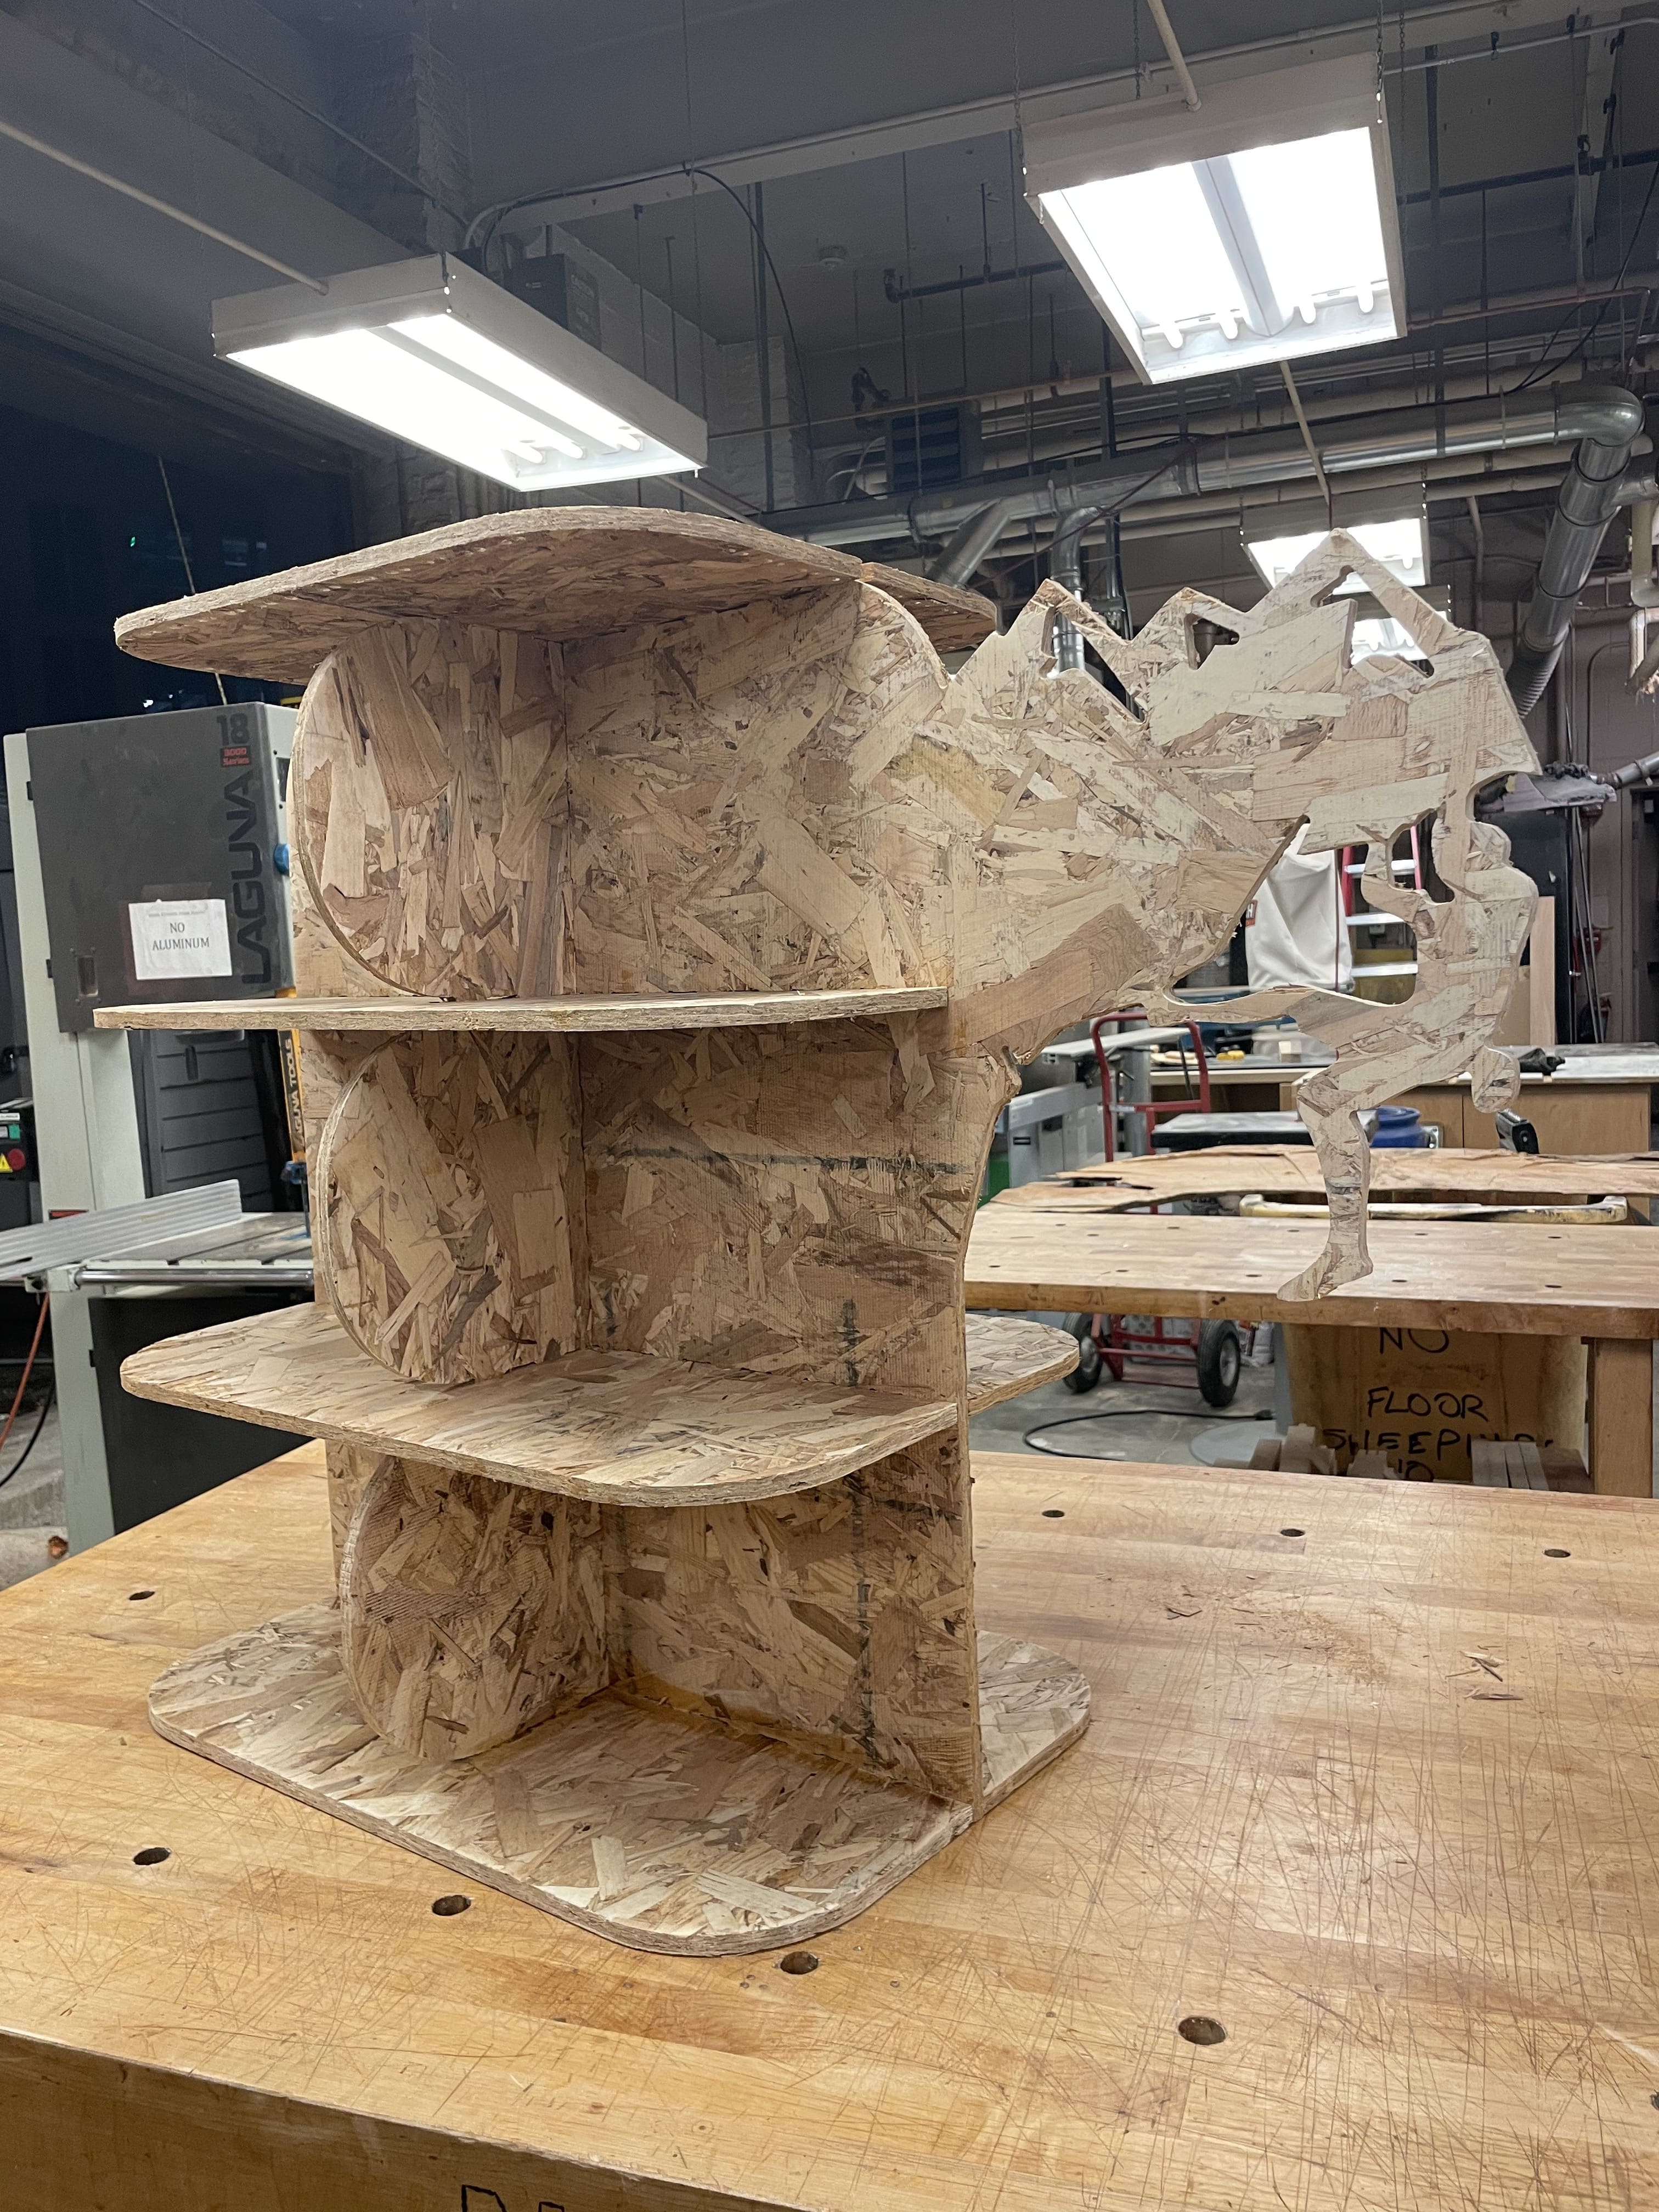
As you can see, they needed a lot of cleaning up. Luckily, with the help of a chisel, a rasp, and a sandblaster, I was able to clean up each piece to have no uneven or fraying edges. From there, I worked from the bottom-up, fitting the pieces
together using the dogbone joints with the help of some wood glue. I clamped the piece up to the best of my ability and left it there to dry.
Final Product:
I came back about 4 hours later to collect my shoe rack from the woodshop which is definitely a sign of impatience as wood glue takes 24 hours to set. Since I was already 2 weeks behind, I just wanted to be done with this assignment. After a
long and tumultous journey back to my dorm, as I carried my heavy + potentially fragile shoe rack, I set up my shoe-rack in my room!
- Alex