For my final project, I wanted to make something that would actually be of use to me later on. So, I decided to make a lamp that has some sort of cute shape.
Initial Sketching/Brainstorming
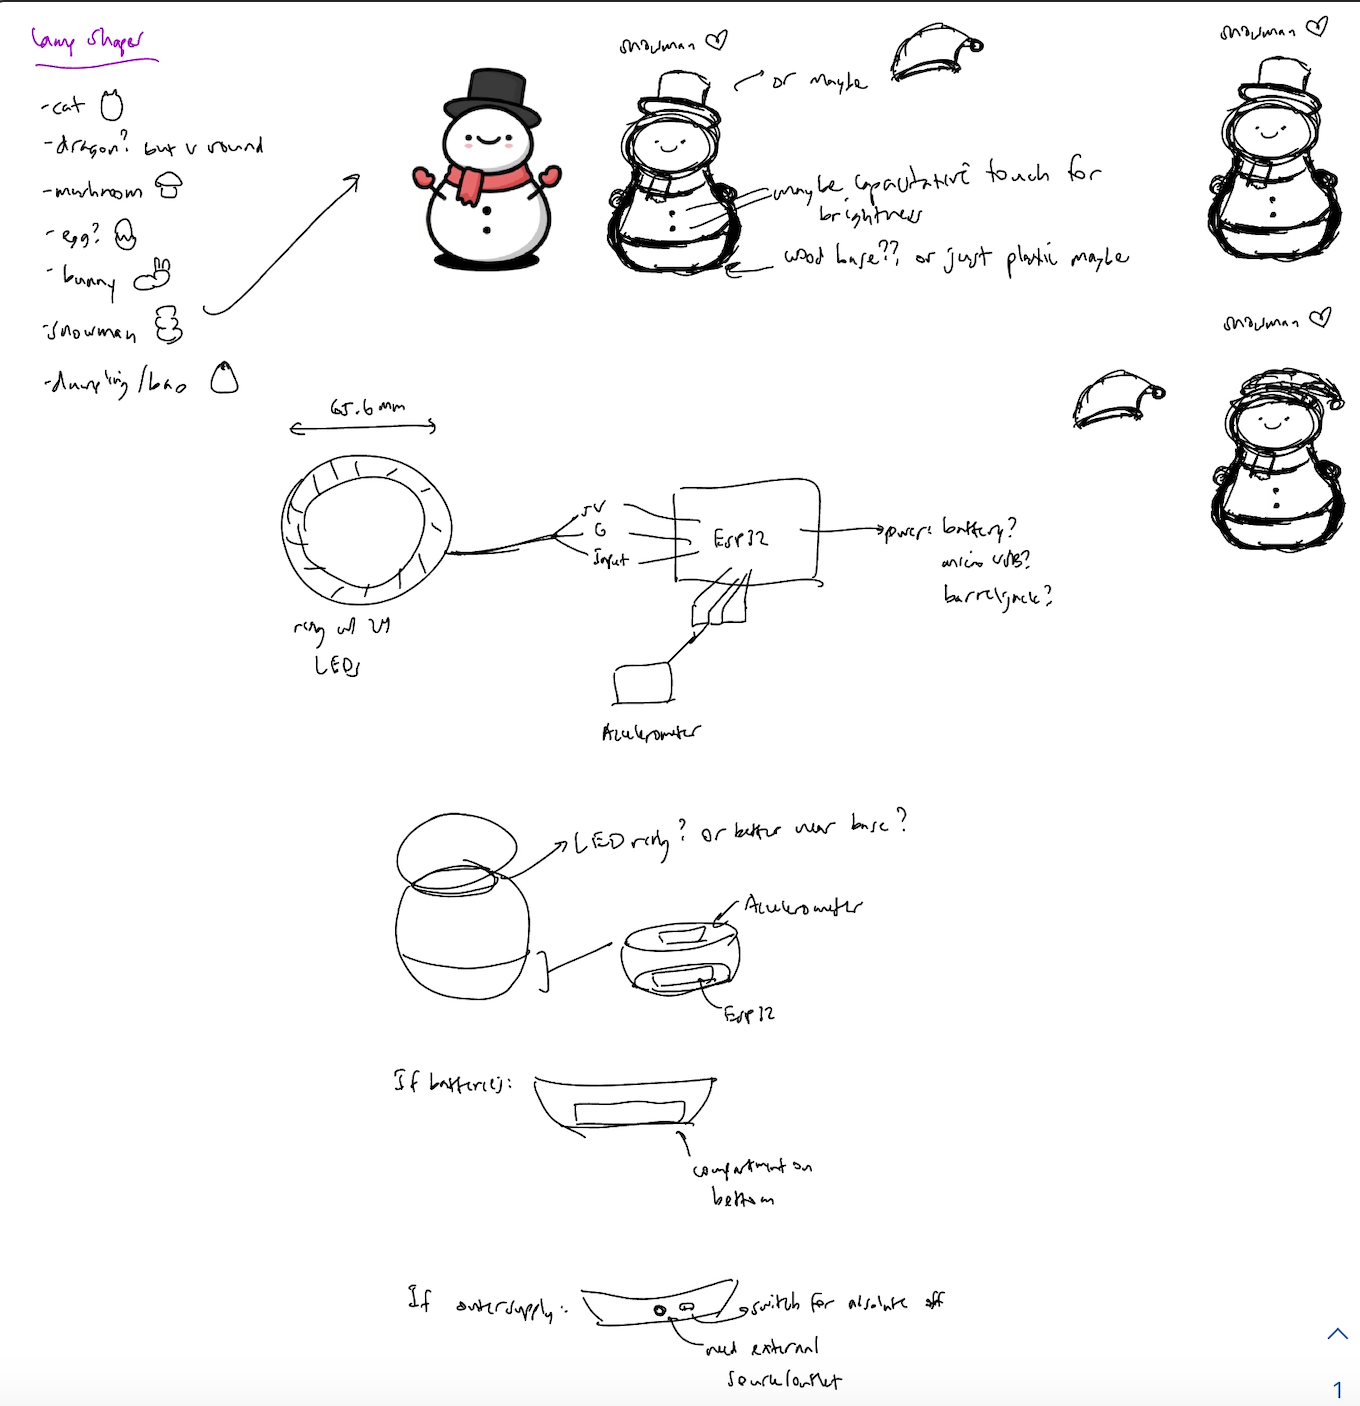
I had seen some examples of previous final projects that had been lamps. Some had implemented auto-adjusting the brightness level depending on external lighting, and had used capacitative touch to control the lamp. I decided I wanted to be able to control my lamp by using some combination of tapping controls. I think I had either seen or owned a lamp that worked like that at some point before. With this general idea, I started to sketch and brainstorm. I ended up picking a snowman, since I like the snow.
These were the initial features I intended for my snowman.
Features:
- the lamp can be turned on by firmly tapping the lamp anywhere (using an accelerometer as an input device)
- the lamp can then be tapped to cycle to colors and/or brightnesses
- alternatively, a separate button can be used to change brightness while tapping can be used to cycle through colors, or vice versa
- app-controllable
- off switch that's not necessarily an on switch
- possibly an auto-turn off feature (ie. turn off after 30 mins)
Steps:
- 3D print lamp shape
- likely will be using white plastic material, can post-process and cover in 2-part epoxy to make it look nice and smooth
- if this isn't satisfactory, can consider molding and casting
- create a base - either also out of plastic, or with wood
- program and wire LED system (will likely be using neopixels for rgb)
- different colors
- different brightnesses
- create web-app interface to control lighting
With that, I started my project, honestly quite stressed about getting it done in time.
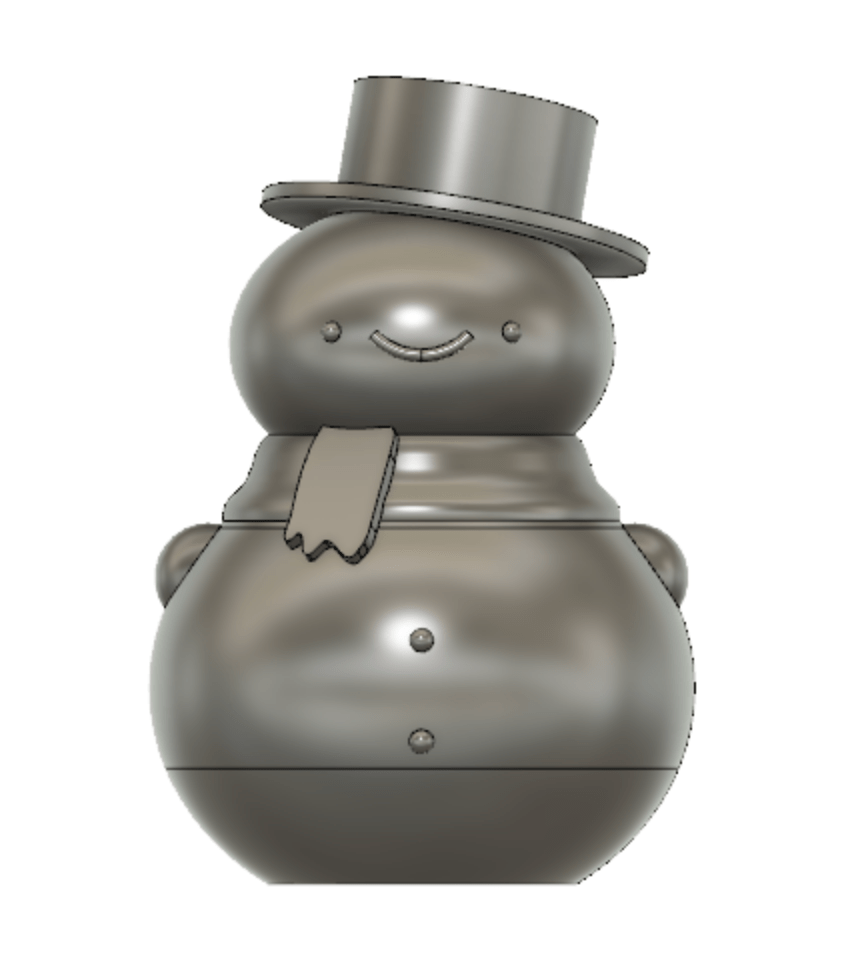
Snowman CAD:
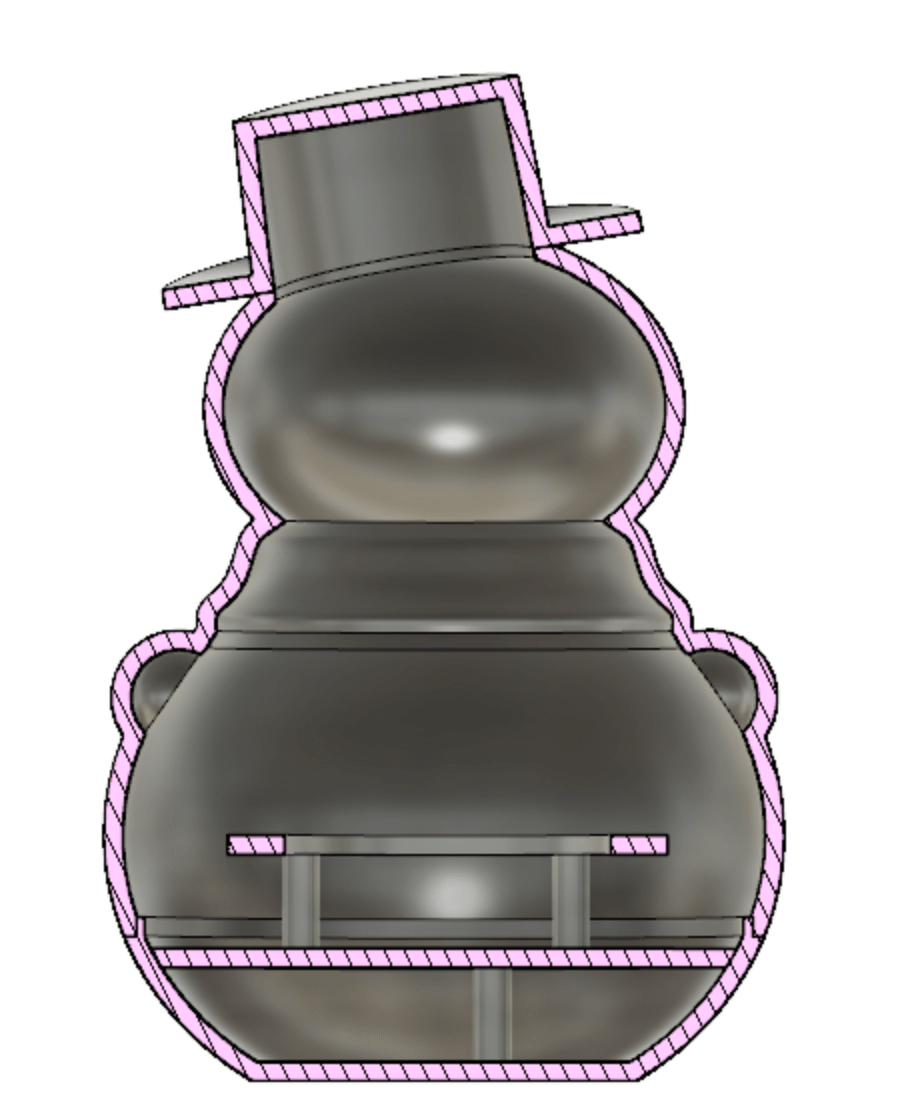
Outer Shell
I started my CAD by designing the outer shell of the snowman. I did so by creating a solid body first, and then creating a shell. I then scaled the snowman down to the size I wanted it to be. One problem I ran into here was that when I scaled the snowman down, the shell thickness also went down even though I had a value set in the parameters. Thus, I had to play around with the parameter value and manually measure the thickness until it was what I wanted. I honestly wasn't sure how thick the shell should be, so I aimed to make it between 3-4 mm thick.
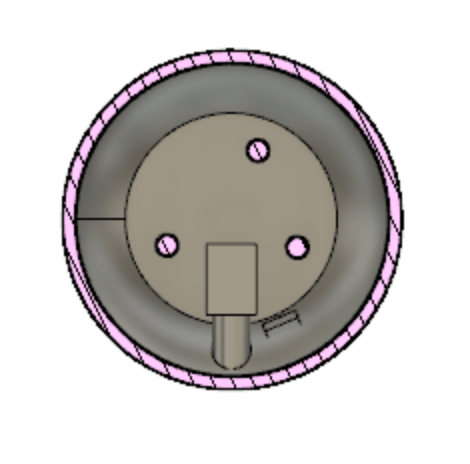
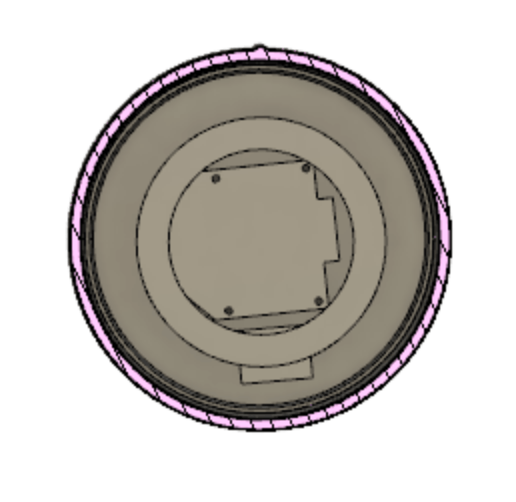
Inner Components
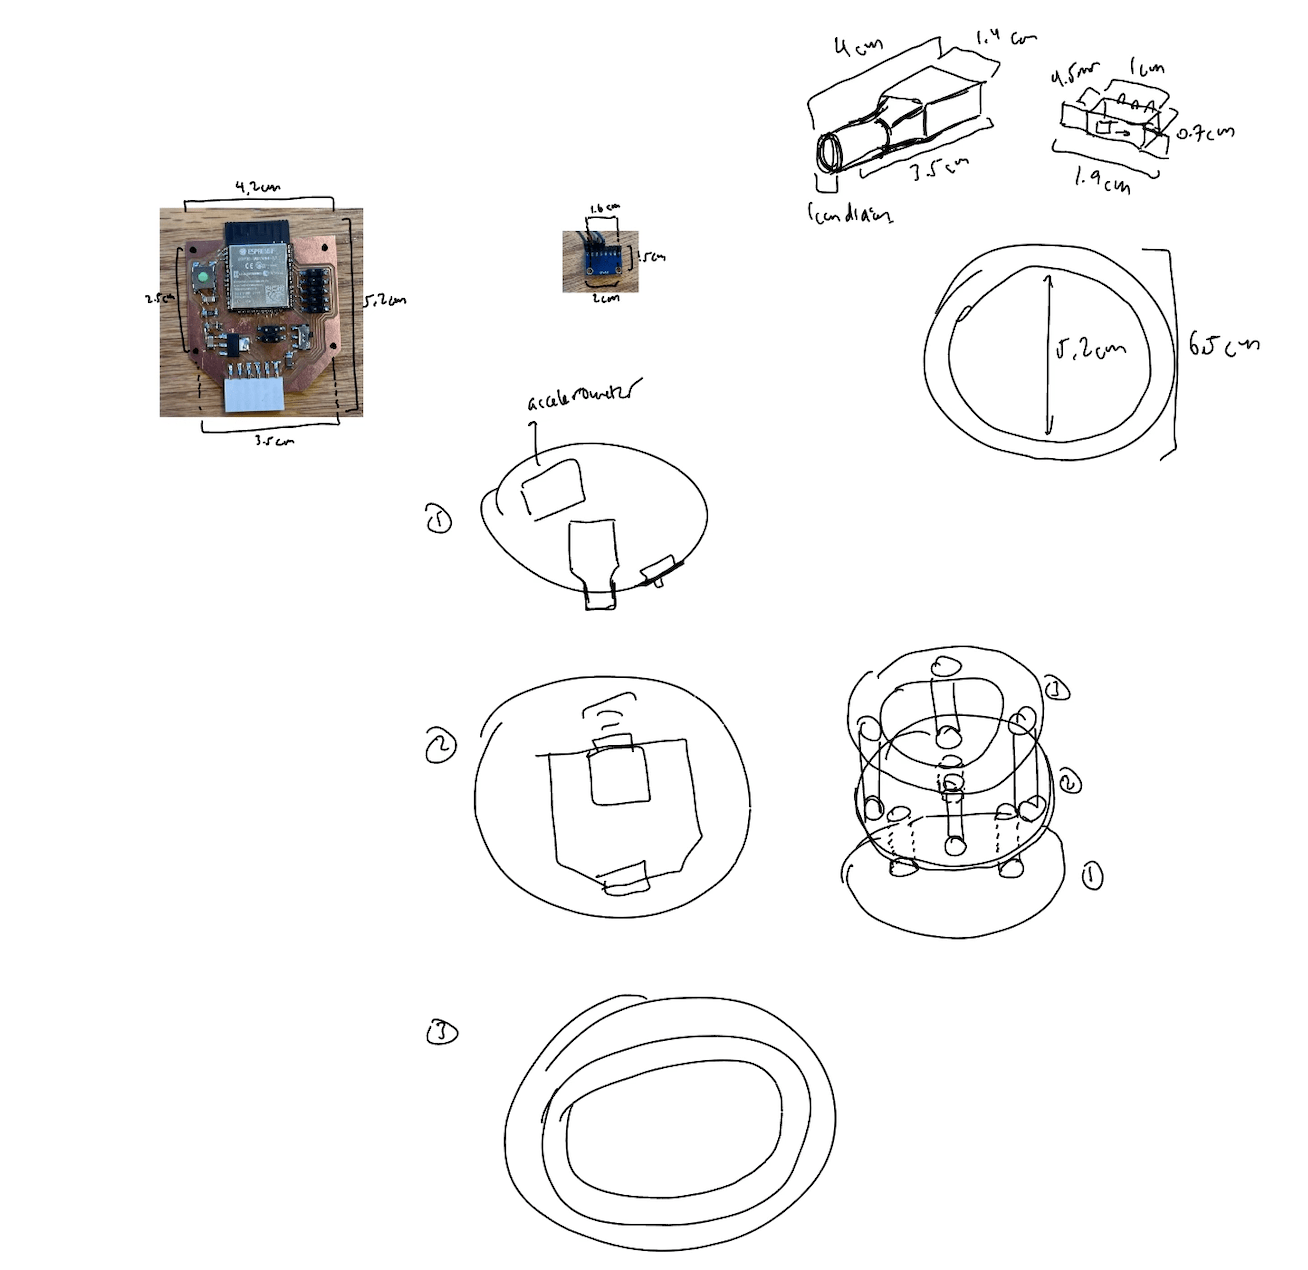
The next thing I needed to do after having the outer shell was figuring out the arrangement of everything inside the snowman. The components inside would include my ESP32 breakout board, the accelerometer, a barrel jack, a switch, and the LED ring. This would obviously cover a decent amount of area, so I decided to have them span across many levels. The first level, the base of the snowman, would just have the barrel jack and the switch. The next level would have the ESP32 and the accelerometer, and the third level (just a ring platform) would hold the LED (see sketch below).
I realized that for this task, I would need to have pretty good measurements. I also realized that I would need holes in my board in order to secure it to the snowman. So, I took a drill and drilled four holes into my ESP32 board (after testing it on scrap board to make sure the board wouldn't break). I tried to make the holes as even as possible, but it was difficult to make it exact.
Then, I took measurements of the different dimensions of the parts I had and wrote them all down.
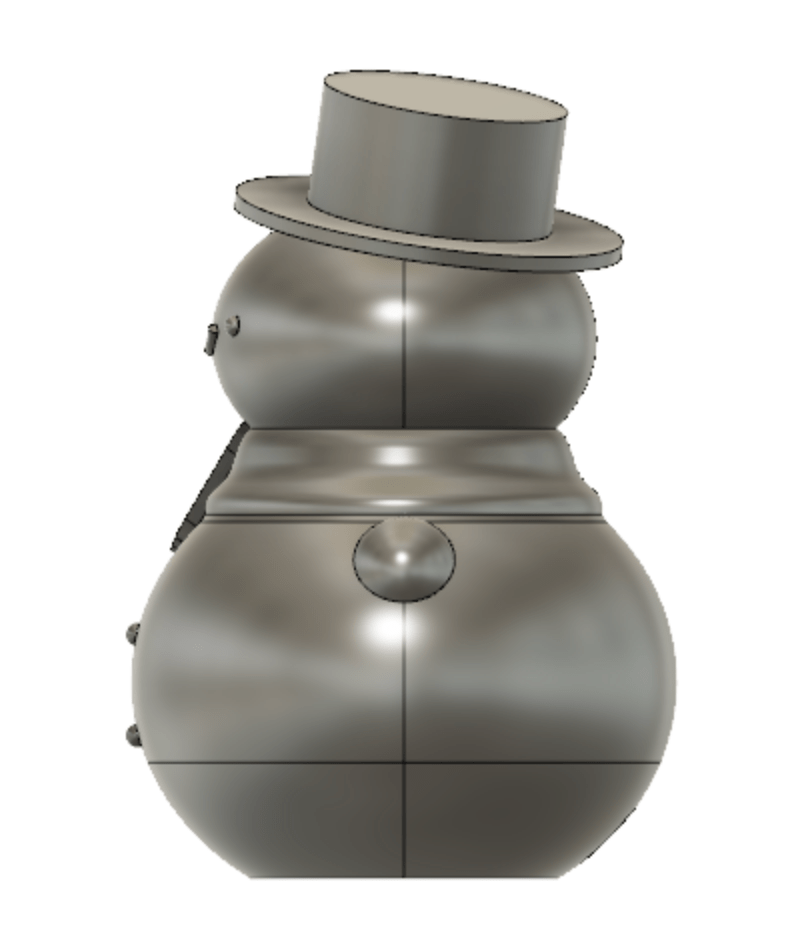
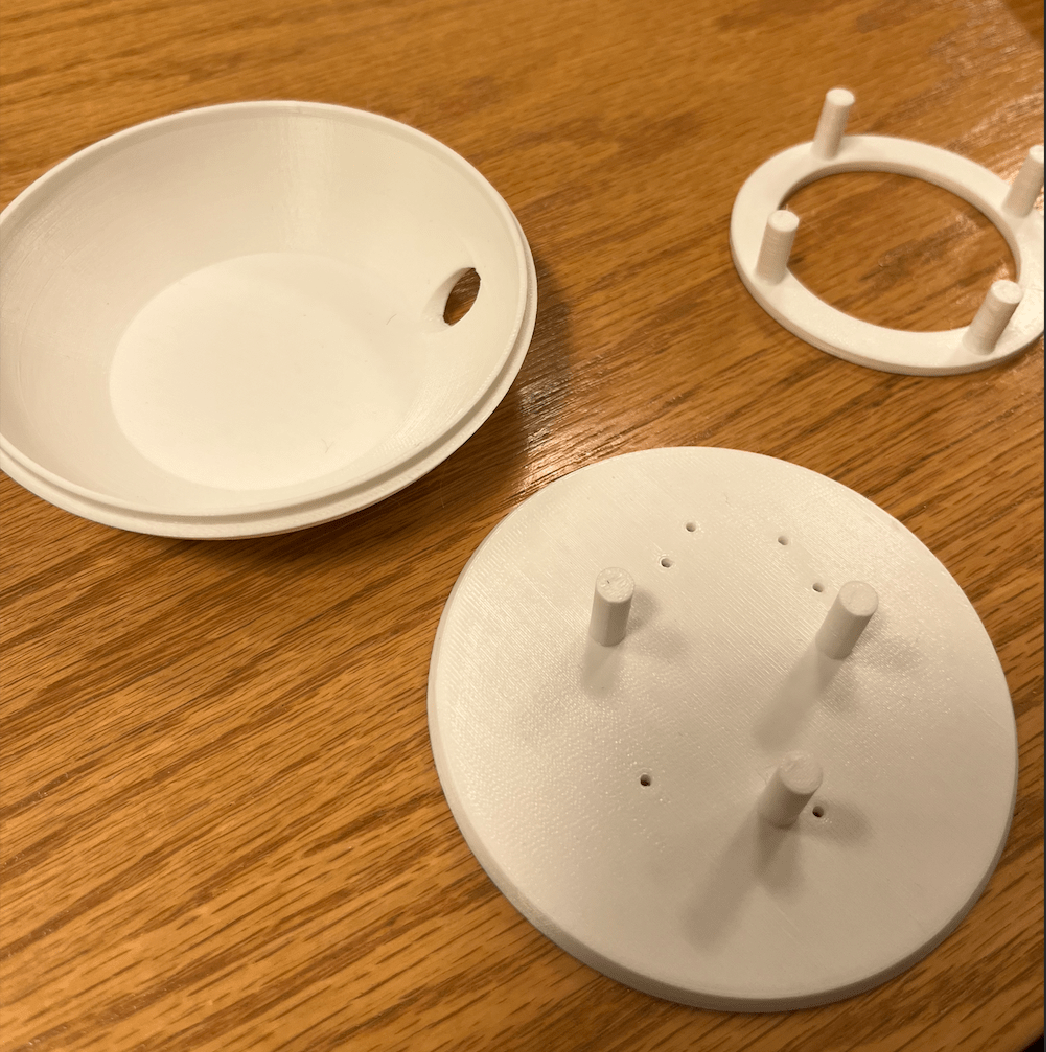
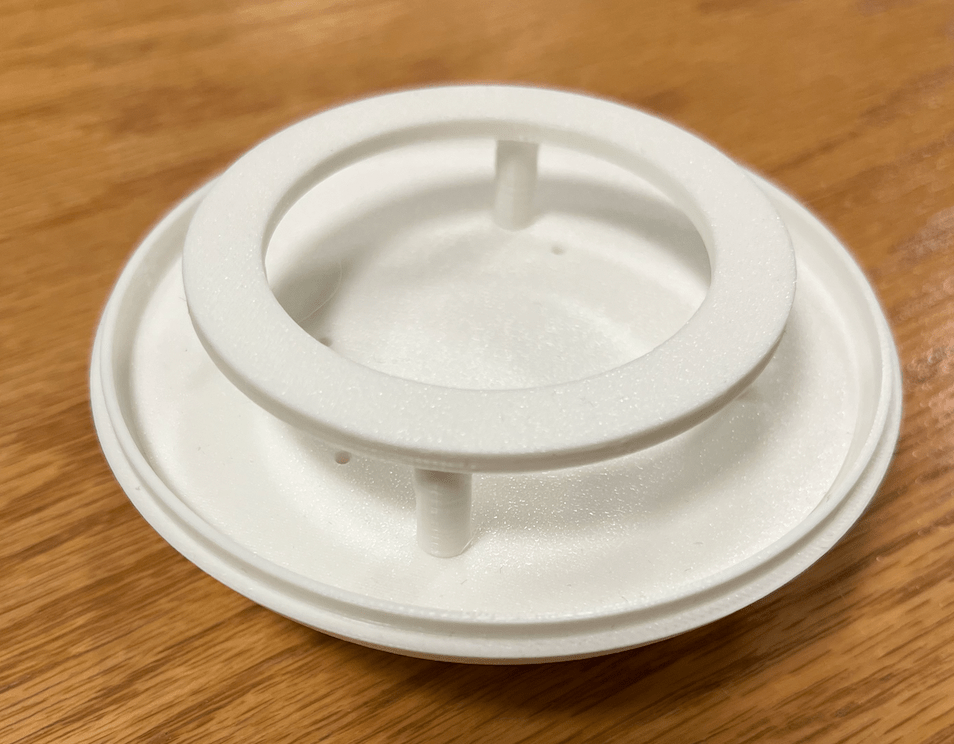
I used rough shapes to represent the different items. Then, for the ESP32 board and the accelerometer, because I needed to know where to put the holes into the platform, I took pictures of the boards, uploaded them as canvases, and then projected and extruded the holes so they would match hopefully exactly. With the boards, I also accounted for giving them additional space on top for the wires. The last thing I did was separate the top from the base, and I added a groove onto the base so that the top part would fit on and be somewhat held in place.
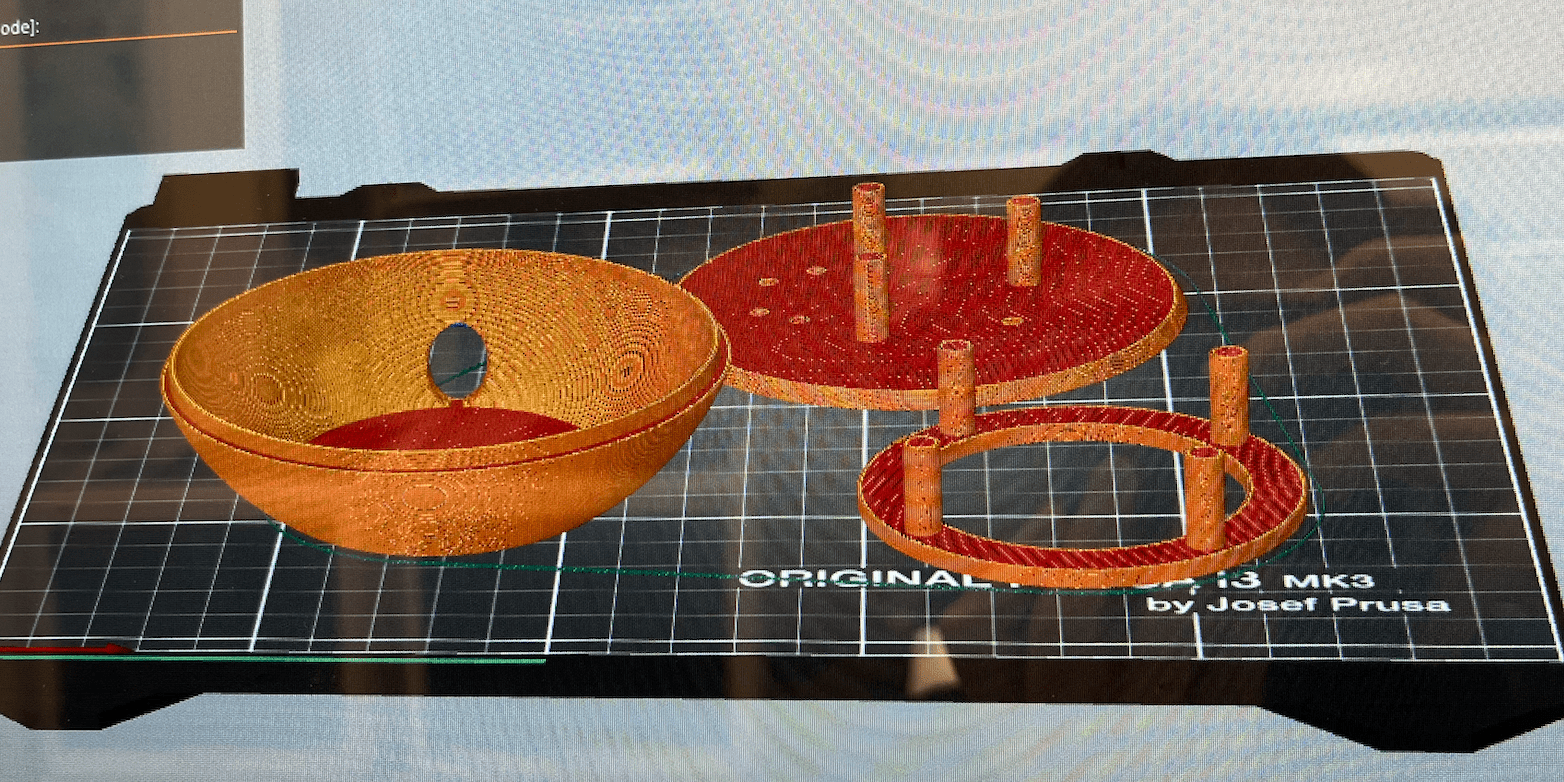
Combined
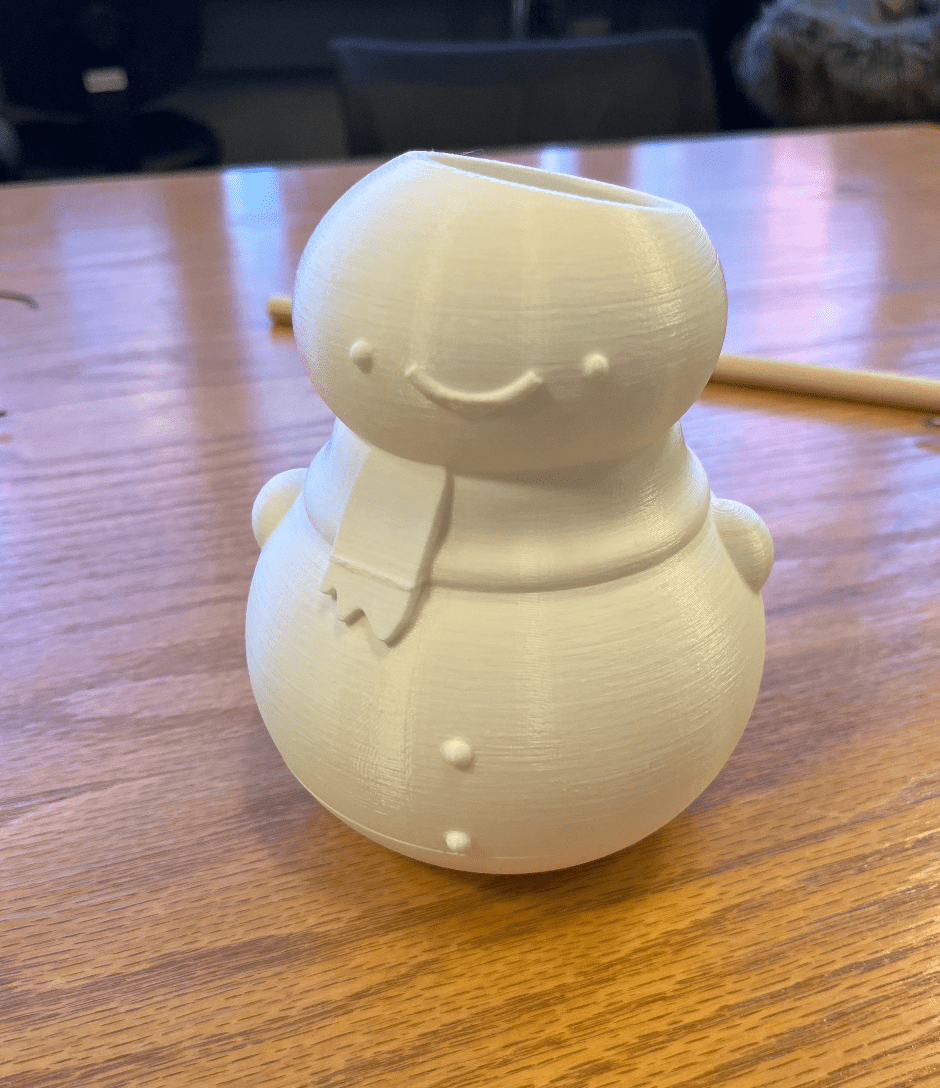
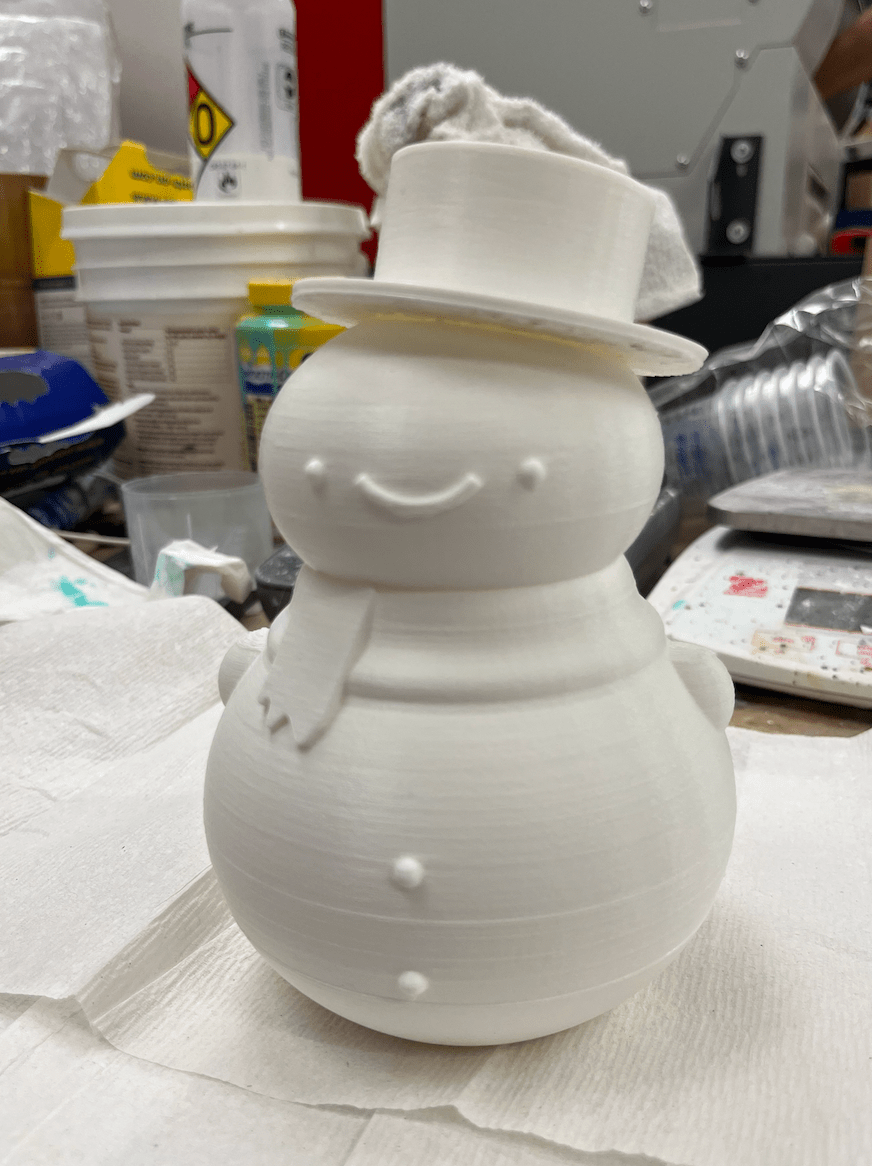
Once my CAD was complete, I started printing on the Prusa. Anthony suggested that I print the hat detached from the rest of the body. I also printed the two raised platforms inside the snowman separately. Because there were so many individual parts, I couldn't print all at once. I started first with the base and the parts inside the snowman, so I could start assembling first (since the top would just sit on top of everything).
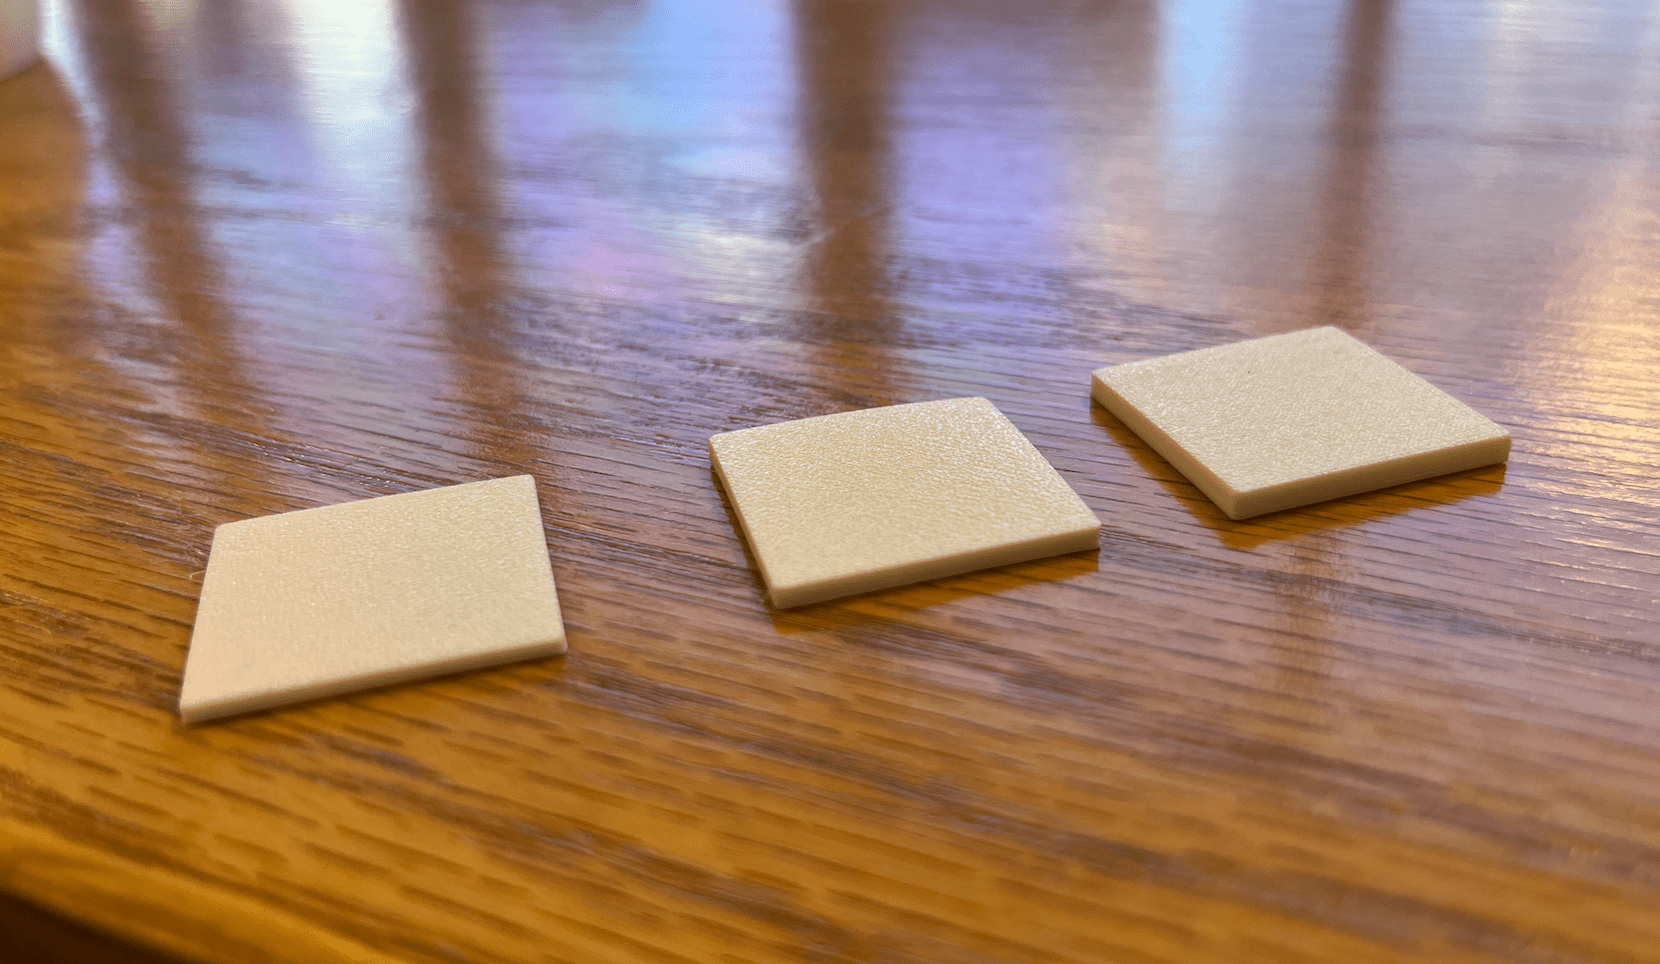
The first time I put everything together and shined a light through, I noticed that the pattern was a bit splotchy, due to the infill in the printed parts. I ended up doing a small bench test with printed squares of different thicknesses but with 100% infill (so there wouldn't be a weird pattern) to help me choose the best thickness that would be strong enough but also thin enough for light to pass through. This ended up being 2mm thick, so I remodeled the top of the snowman to adjust for this new thickness. I kept the bottom of the snowman unchanged for time's sake, because I would otherwise have needed to reattach all of the parts.
Electronics:
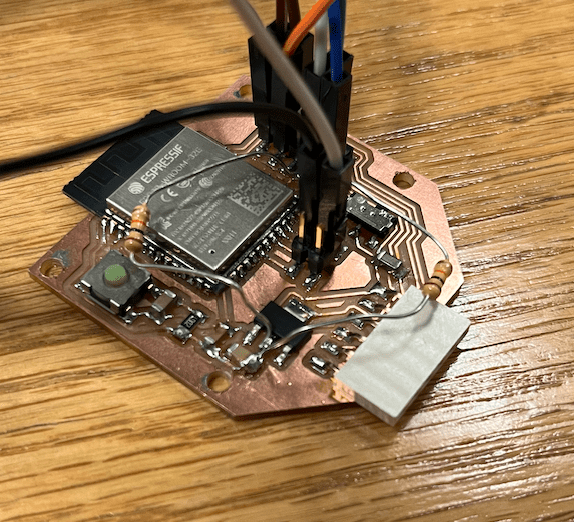
For the electronics of the lamp, I used a board that I had designed, milled and stuffed during a previous week's assignment - specifically the ESP32 board. I would have used my own accelerometer board as well, however I had been unable to get it to work (as mentioned in the input-devices assignment), and Anthony also could not figure out what was wrong.
I started bit by bit and first made sure each individual part was working.
The first thing I did was attach the accelerometer. I had previously used it with my SAMD21E breakout board, however since I wanted to have Wifi capabilities and would need the ESP32 anyways, I decided to try to connect the accelerometer to that. The ESP32 had default SDA/SCL pins, but I didn't connect both of them to header pins, so I just manually defined other pins. I had to then solder on two 10k resistors to pull up the SDA/SCL. Thankfully, once everything was attached, the accelerometer worked on the first try!
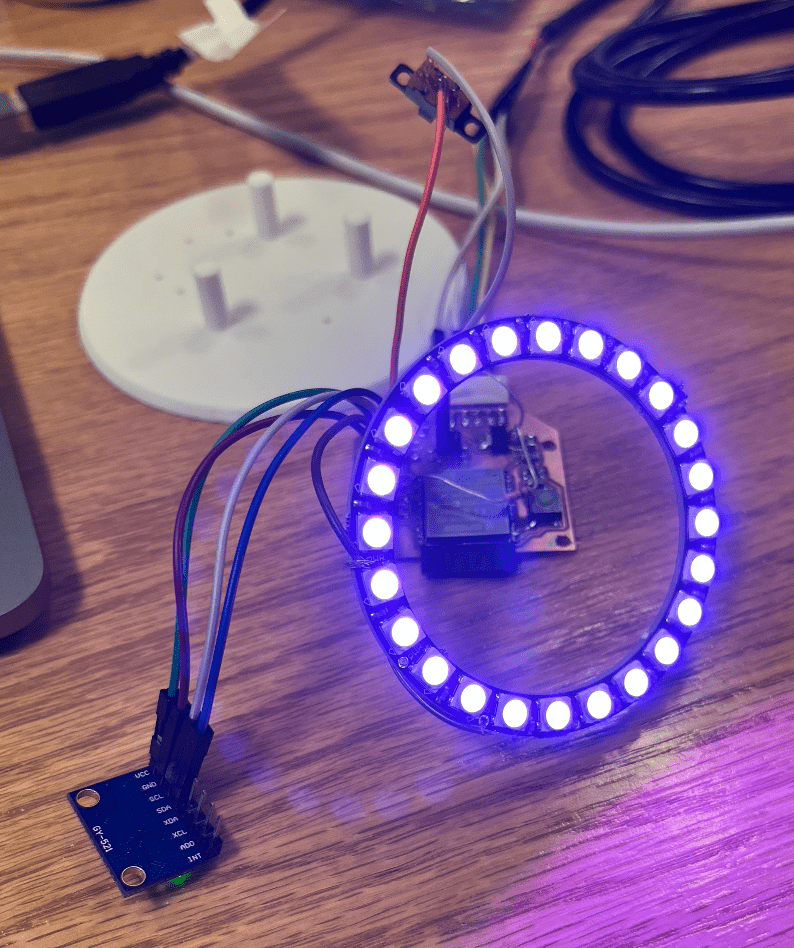
Next, I tested the LED ring to make sure the connections were right and it worked. I downloaded the Adafruit Neopixel library and ran some sample code and made the LED ring purple.
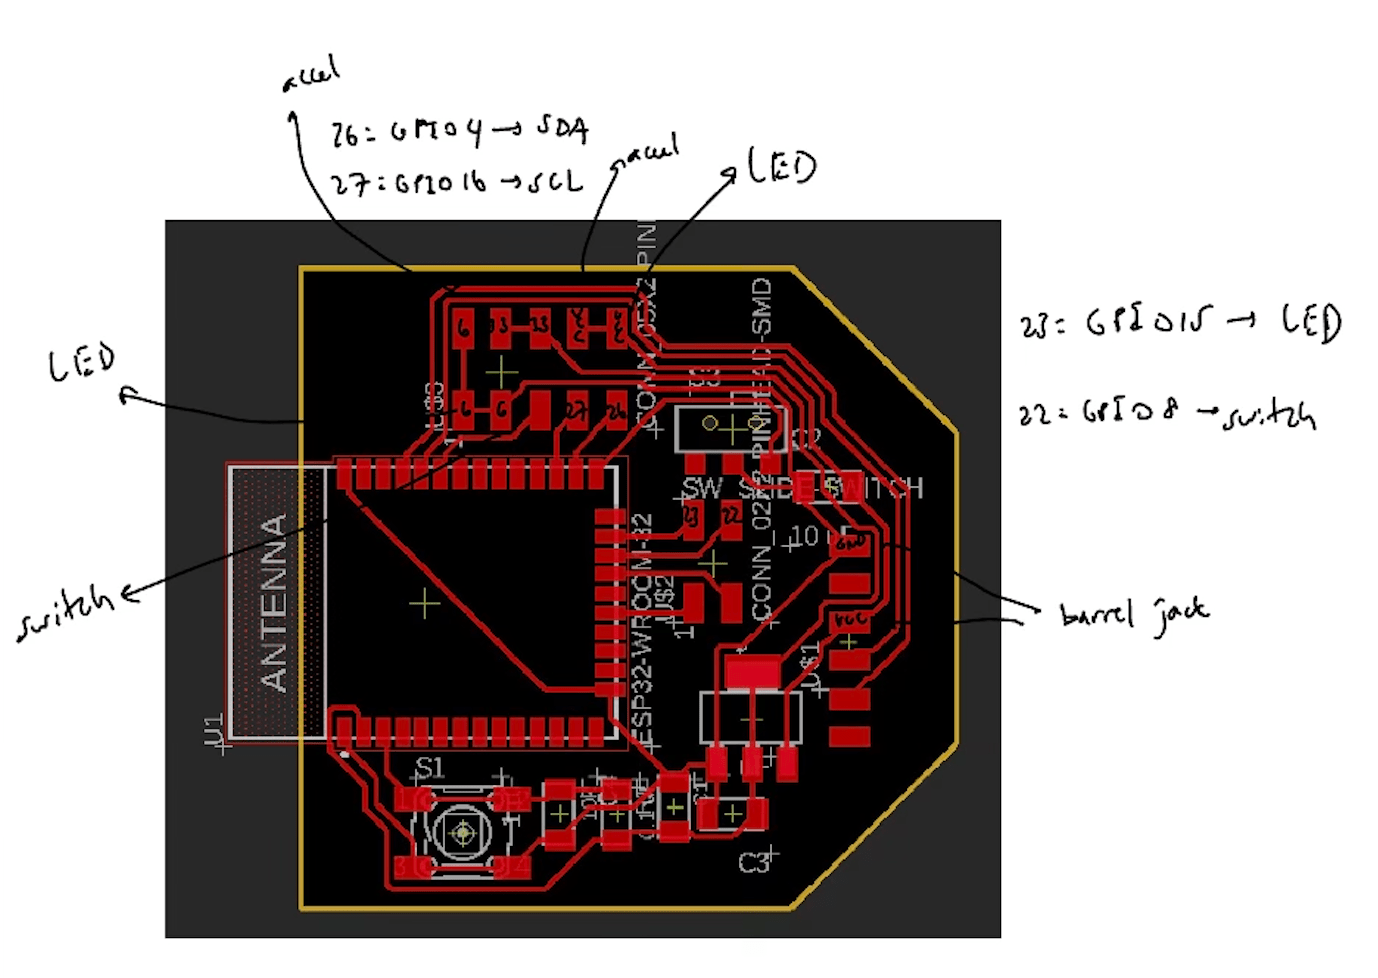
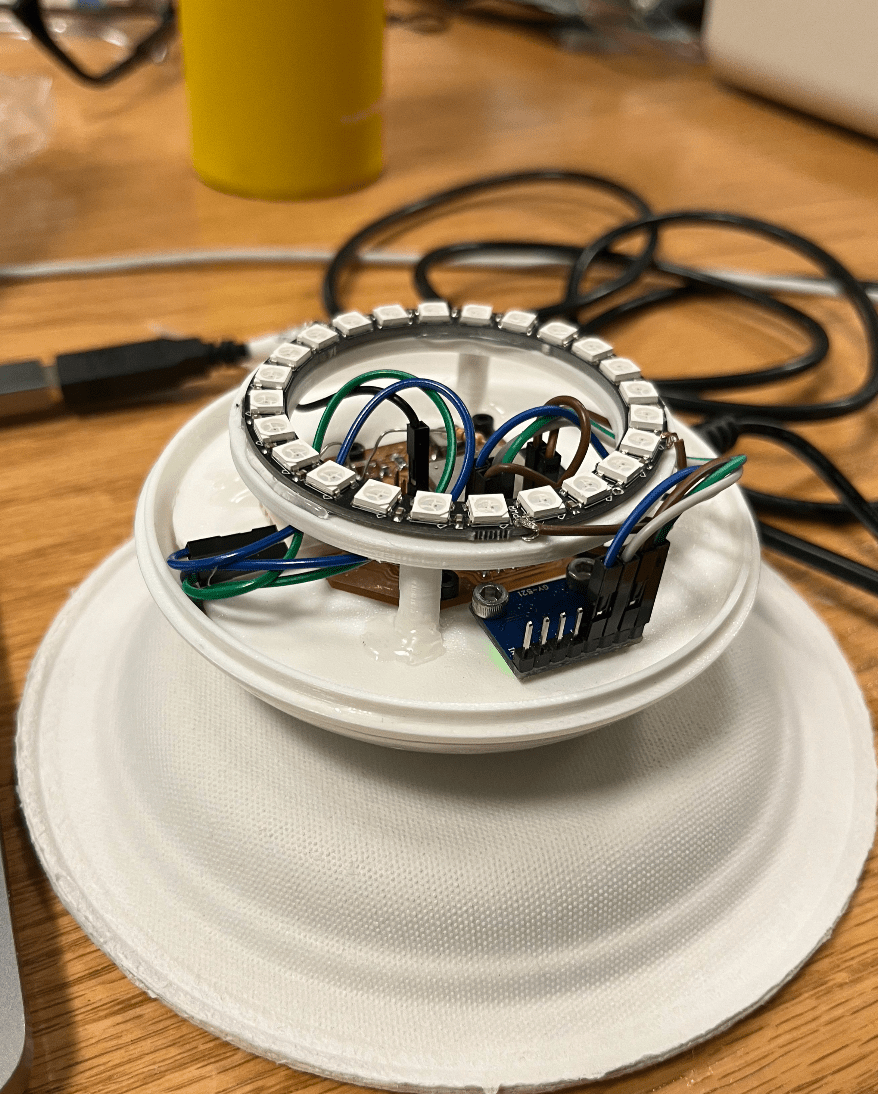
After this, I attached all of my parts (except for the barrel jack) with wires to the ESP32 breakout board. I wasn't sure at first if I had enough of the pins that I needed (ie. ground, power, etc.) so I first mapped things out a bit. This also helped me keep track of what was supposed to connect to what.
Now, with the accelerometer and the LEDs individually working, I put them together for a simple task. I was able to make the LED ring turn on and off by tapping the accelerometer. This was a relief to me, because I now knew that at the very least I would be able to have a lamp that turned on and off with tapping.
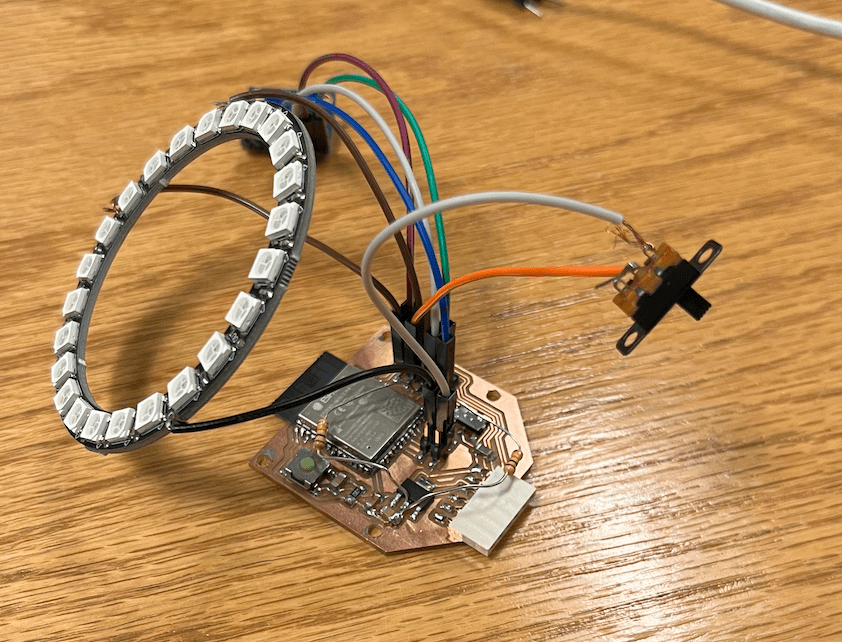
Now that I had all of the previously developed components individually working, I started putting it all together.
Double Tap On/Off
The first control I worked on was to implement a double tap control to turn the light on and off. I had a threshold value for what would could as a tap, looking at only the z-axis, and I included considerations that would allow me to effectively debounce the accelerometer. "Taps" within a certain time interval wouldn't count as actual taps, since these would likely be from residual bouncing.
Single Tap Brightness Change
The next control I implemented was using a single tap to cycle the brightness between three different levels. This required me to change my double-tap code a little bit such that a double-tap wouldn't first change the brightness due to the first single tap reading, and then turn the lamp off.
The video below shows a first basic implementation of these two controls!
Shake to Color Change
The last physical control I implemented was shaking the snowman/tapping the side to change the color. I did it first with just switching between two colors. For this, I looked at the X and Y accelerometer values instead of the Z. It took some playing around with the thresholds and controlling for noise, but I managed to get it to work with everything else.
After this, I coded it so that the snowman would cycle between a series of different colors with each shake/side tap. It was actually quite difficult to determine the best RGB values for each color I wanted, because the theoretical colors for a lot of the RGB values didn't actually turn out as they should have on the LED ring.
I later attached the hat, and tried to tap through that, which required me to fine-tune the threshold values and other values a bit more.
Wireless Control via Webserver:
For my lamp, I wanted to be able to control it with my devices as well. For this, I used the ESP32 Wifi capabilities. I first tested out the very basic version of a webserver I had working for an LED attachment from a previous week's assignment. I changed the code so it would work with my LED ring.
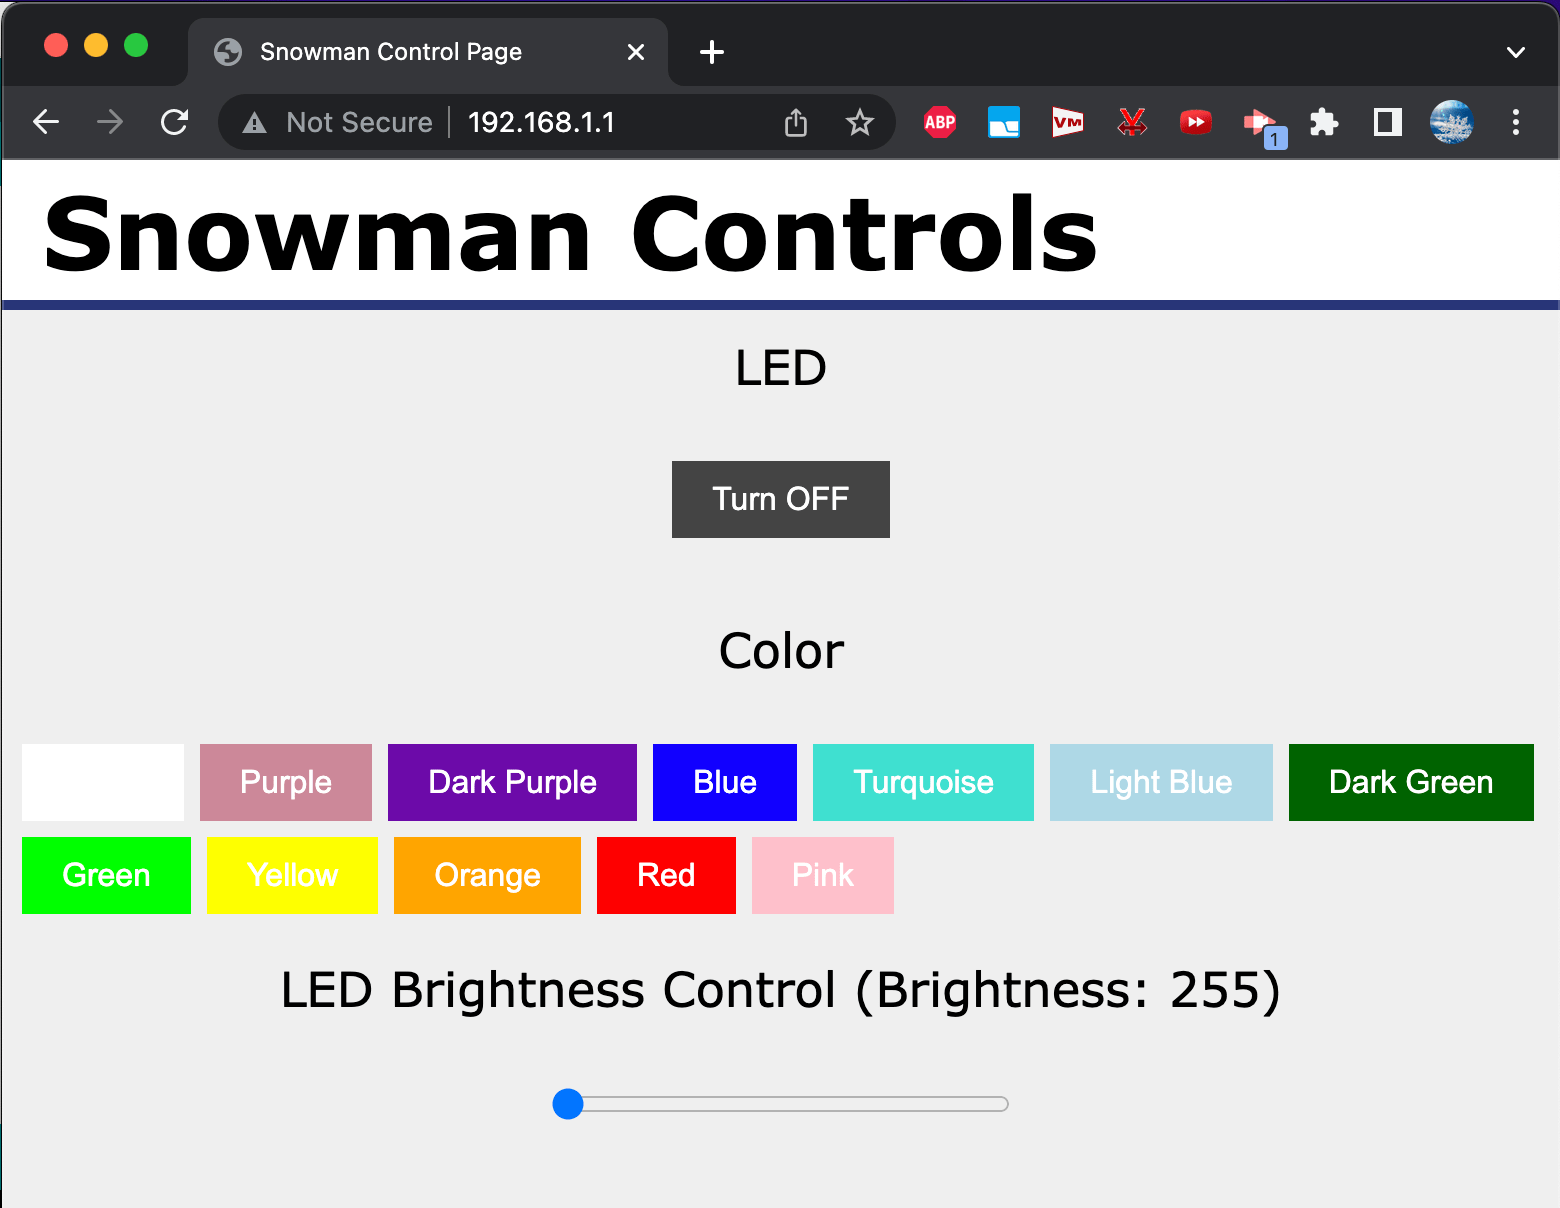
Once that was confirmed, and I had all of my physical controls working for my snowman, I then moved on to work on the webserver. With my webserver, I am able to turn the lamp on and off, and also select the color I want the lamp to be, and change the brightness with a slider switch. The server is served by a network created by the ESP32 - named "Do You Wanna Build" (password: aSnowman).
Assembly:
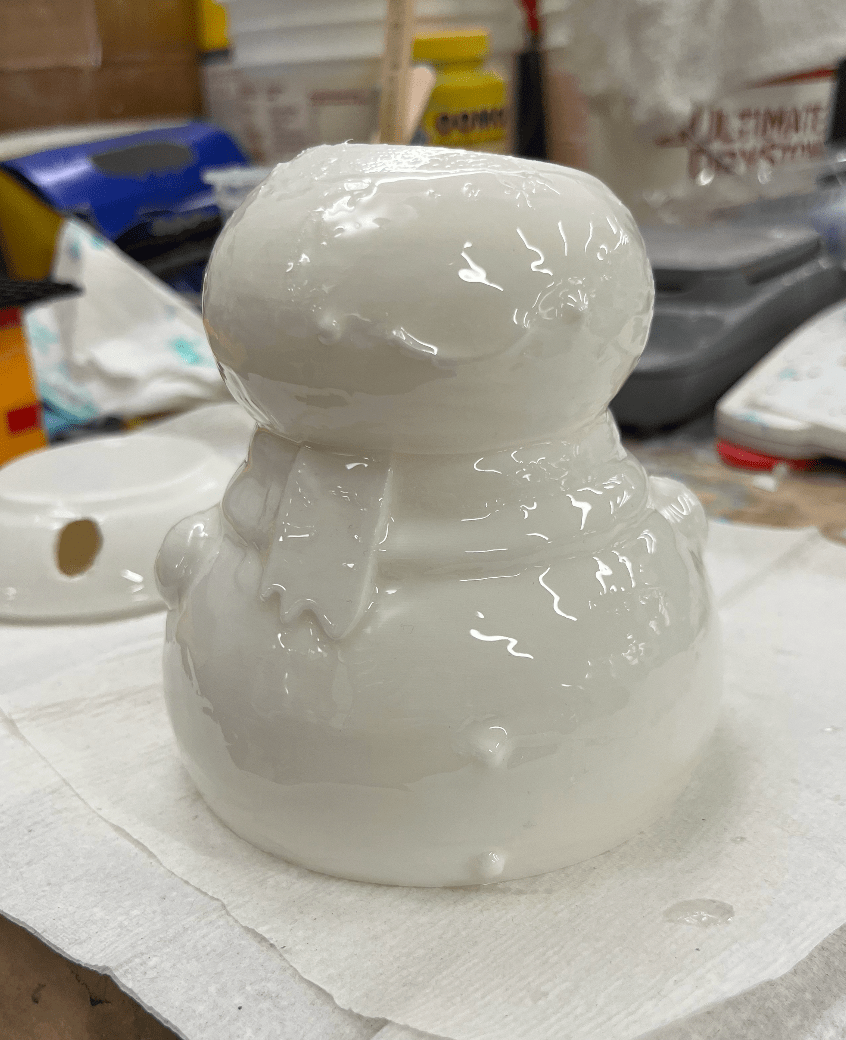
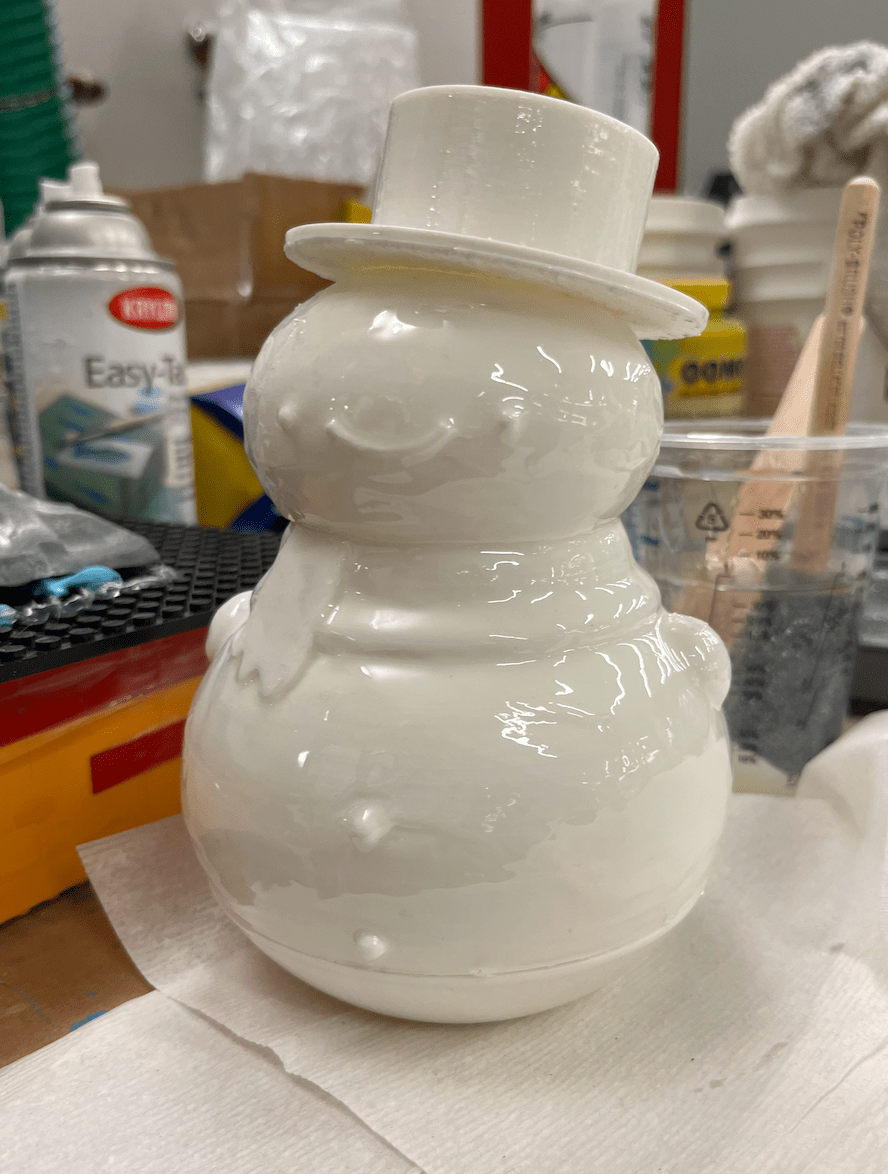
Now, I had all my parts there and ready to be put together! Before actually attaching anything to the snowman, however, I first tried to coat it with a layer of epoxy (XTC-3D from Smooth-On) so that it would have a more smooth finish. Unfortunately, it wasn't a complete success. The first time, I took a bit too long to coat all of my parts and didn't realize. I started with the base and the hat, so as I was coating the snowman top, the epoxy began to heat up and harden. This resulted in some lumps on the front of the snowman's face :(. I then tried again with more epoxy, covering the lumpy parts and trying to smooth it out. In the end, it wasn't the worst, but there are some visibly uneven surfaces. I didn't have time to redo it though so I left it as was - it gave a bit of a melting look, and I guess it was also true to the fact that snowmen don't usually have smooth surfaces either.
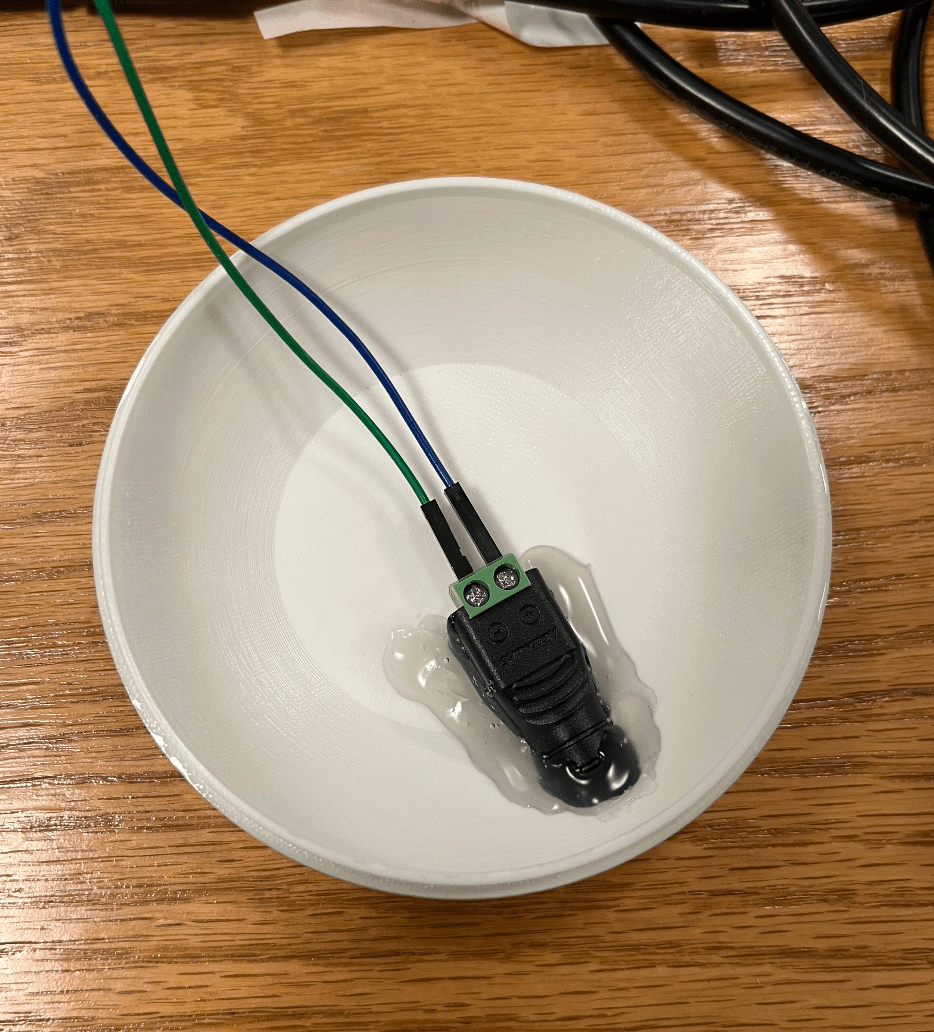
Then, I glued the barrel jack in.
Next, I glued all of the parts and the insert into the base. I had sanded down the side of the insert so there would be a gap for the wires to pass through from the bottom.
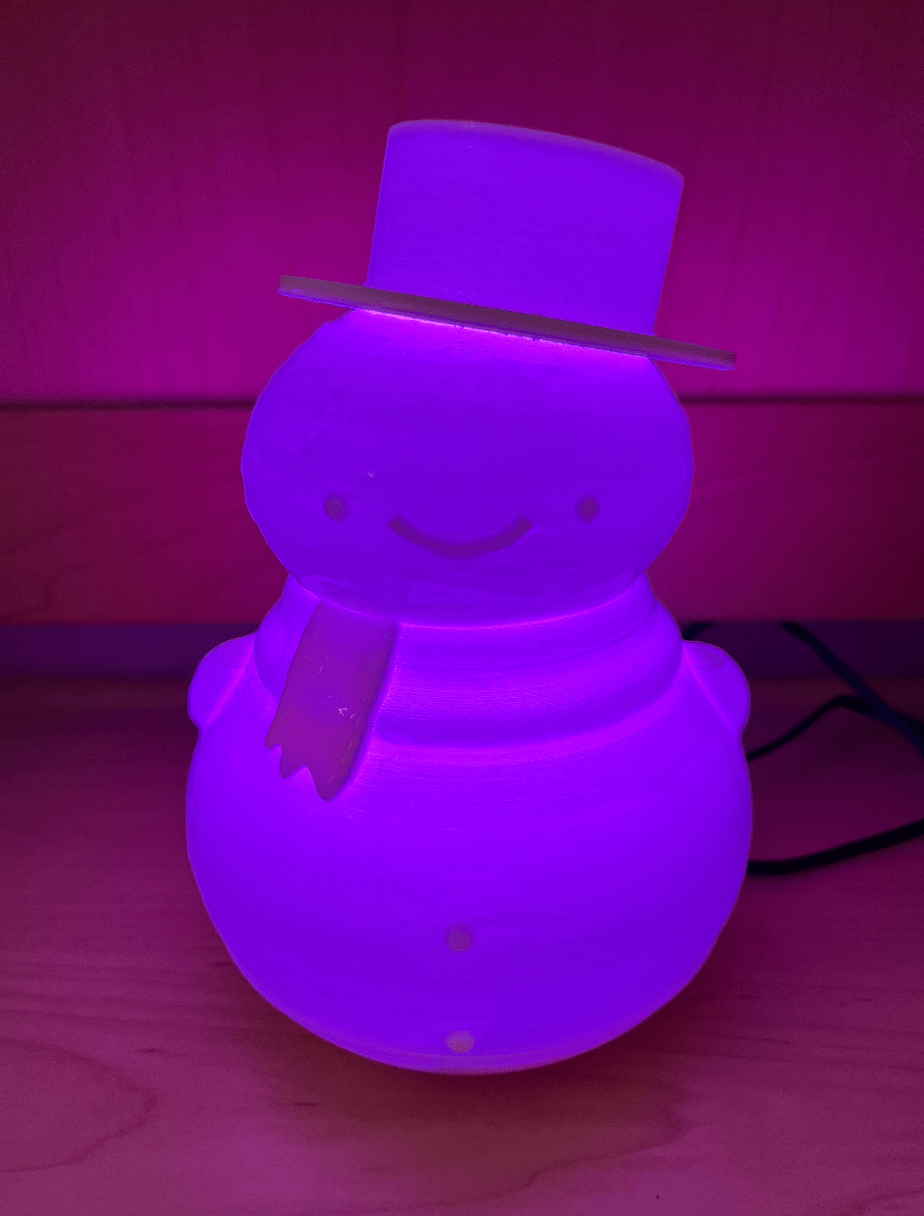
And with that, my snowman was complete! Meet my purple snowman :)
Materials, Components, and Costs
The majority of the materials used were all from EDS. The one part I ordered externally was the LED ring. Below is a ball-park estimate of the components and costs for the parts of my snowman.
- LED ring: $7.00
- MPU6050 accelerometer: $6.50
- 5V 3A power supply: $8.00
- ESP32: $0.16
- 4 capacitors: $0.80
- 2 10k resistors: $1.20
- 10k resistor flat piece: $0.07
- Voltage regulator: $0.50
- Slide switch: $0.40
- 10-pin header: $0.30
- 6-pin female connector: $0.50
- Miscellaneous: $5 Total cost: around $30.00
Evaluation
My evaluation of my final project was dependent on how well I was able to fulfill my original goals for the project, as well as how well I was able to get the features to work. Overall, I would say that my final project was fairly successful. Of the original features, I met almost all of them, including all of the most important ones. I originally wanted to include a switch that could be used to turn the lamp off so it wouldn't respond to accidental bumps, but I ended up deciding that the switch wasn't necessary, because I could just unplug the lamp if I wanted it off. Additionally, the threshold values I use make it so that a slight bump likely won't turn it on, especially because two taps would be required. The auto-off feature is something I can implement later, with more time.
Additionally, I was able to get the controls to work fairly consistently - double tap to turn on/off, single tap to cycle through 3 brightnesses, and shake/side tap to cycle through colors. I would say, though, that it might take a person a bit of time to figure out the best methods to tap and stuff to get the best responses. It's still a little bit finicky at times, but I think that is inevitable given the nature of the controls. I'm also quite happy with the look of how it turned out!
Obviously, the lamp isn't close to perfect. There were a lot of things I had to make do with due to the constrained timeline I had to work on the lamp. Here are some of the things I would have done had I had more time, and that I hope to do with my project next semester to make it better:
- reprint the snowman base and insert as well so the shell is 2mm thick, and the top will fit more snugly on the base
- reprint the hat with a longer lip so it will fit and stay better on the snowman's head
- more successfully apply epoxy onto the surface
- include additional lighting features, like a mode to cycle through all of the colors
- work on making the webserver more pretty
Topics Covered:
- Week 0: Computer-Aided Design
- Week 2: Electronics Production
- Week 3: 3D Scanning and Printing
- Week 4: Electronics Design
- Week 6: Embedded Programming
- Week 8: Input Devices
- Week 9: Output Devices
- Week 10: Networking and Communications
- Week 11: Interface and Application Programming