3D Scanning and Printing
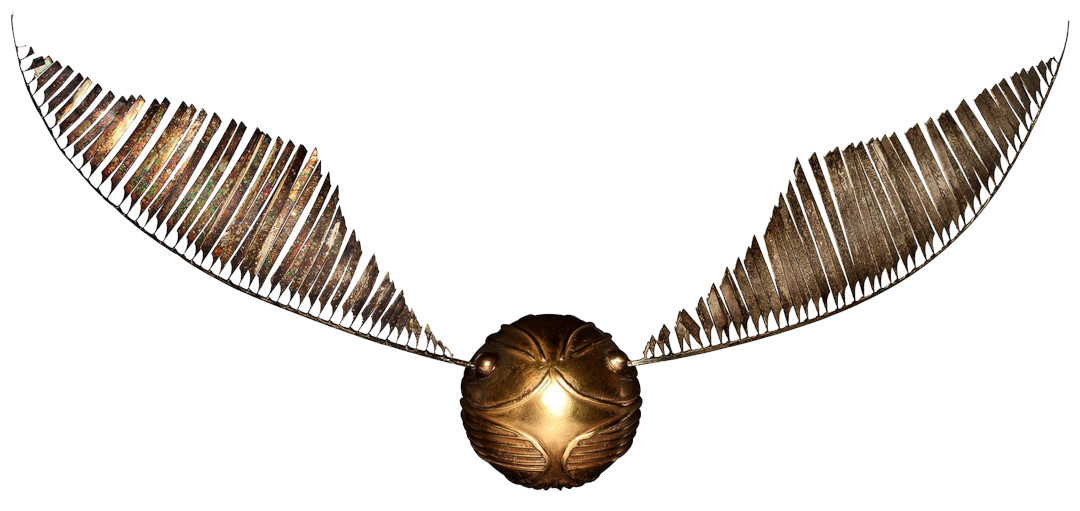
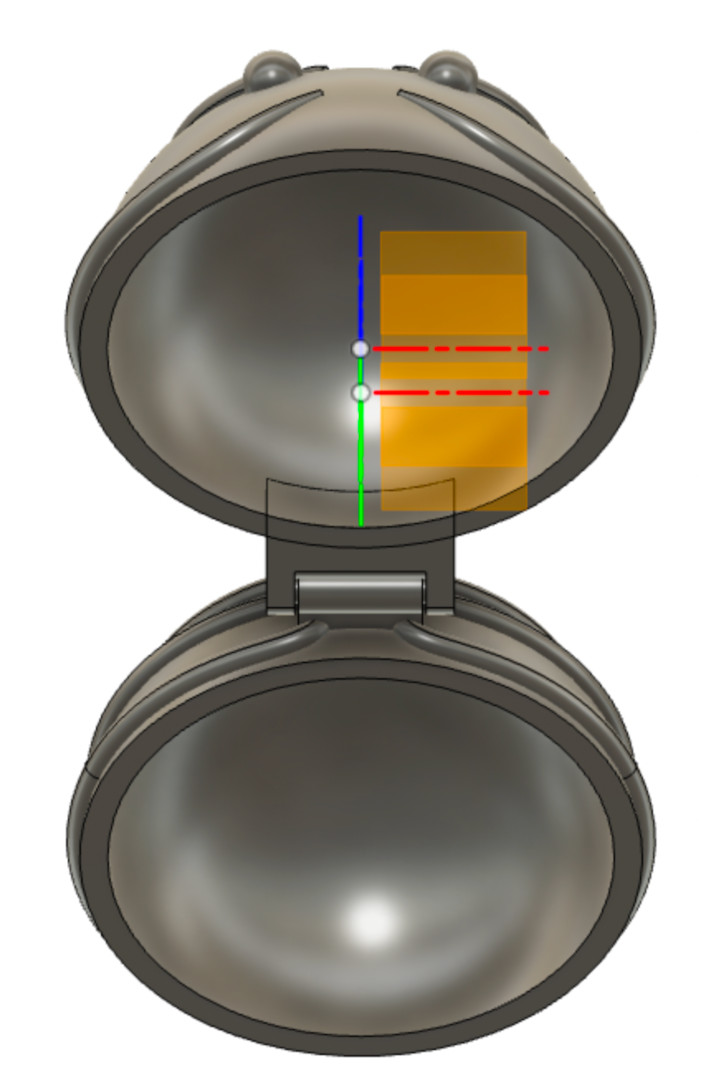
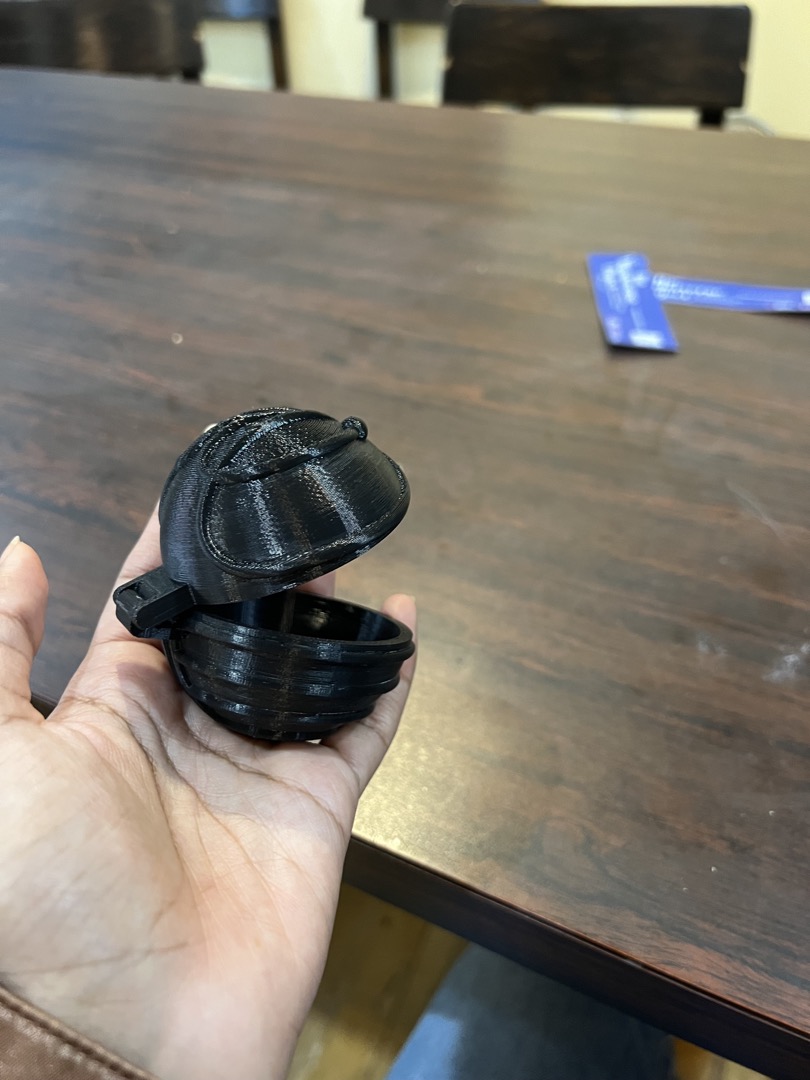
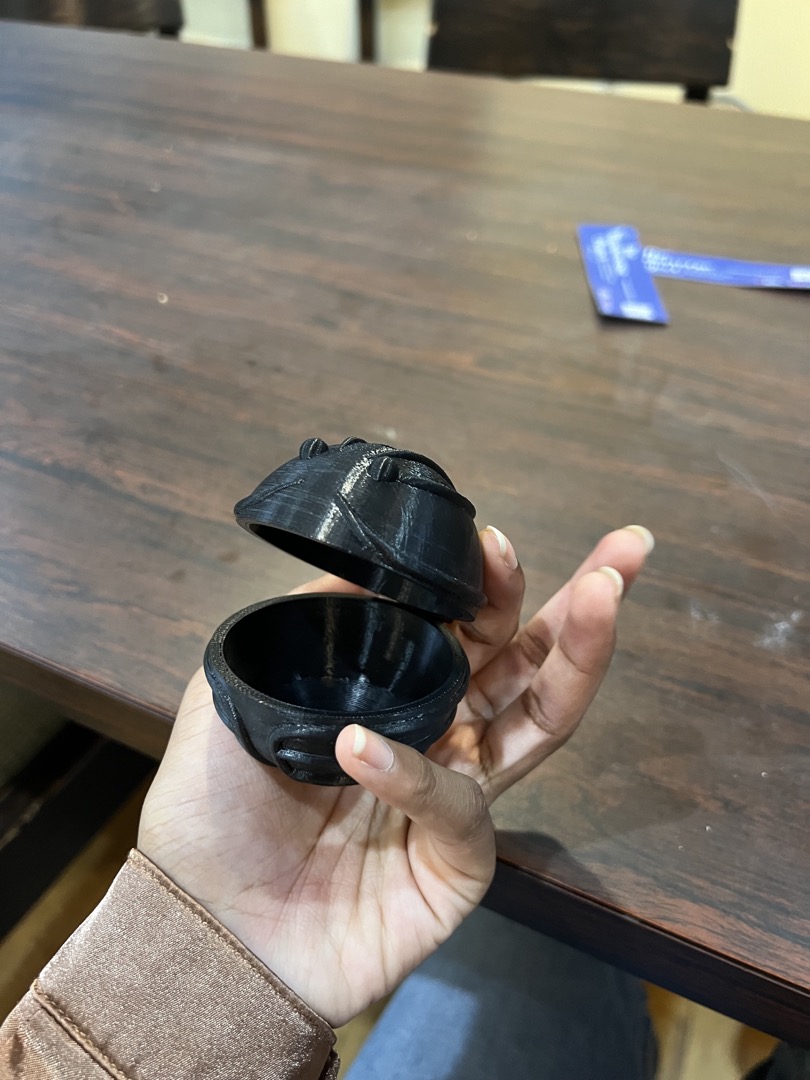
This week I chose to CAD and 3D print the snitch from Harry Potter. I also wanted to make it
as accurate to the books/movies as possible which means that it had to be able to open. So I
made the inside hollow and added a print in place hinge so it can open and close.
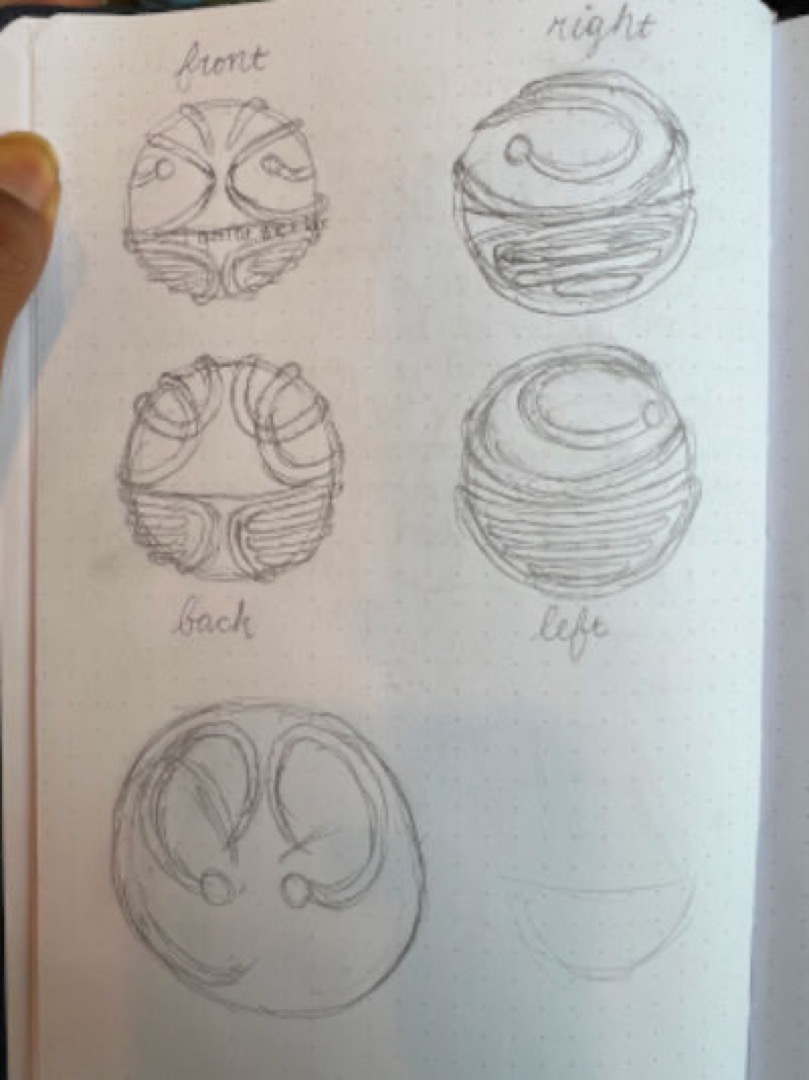
 I started off my design process by sketching all the point of views of the snitch. I did the
right and left side profile. Turns out there aren't 360 degree views of a snitch on the internet
so I had to use images I could find and piece together what it looks like. I may have taken a
few artistic liberties with the design but I was working with limited material.
I started off my design process by sketching all the point of views of the snitch. I did the
right and left side profile. Turns out there aren't 360 degree views of a snitch on the internet
so I had to use images I could find and piece together what it looks like. I may have taken a
few artistic liberties with the design but I was working with limited material.
Fusion 360
Once I had the sketches I could start CADding the snitch. It became obvious very fast that I was
way in over my head with the CAD. Creating the hemispheres would be easy but the design on top
of the spheres surface would be very hard to do.
First Attempt - 2D Sketching and Projection
I searched online a lot for techniques to create designs on spheres and found one that used 2D
sketches. The basic idea was the following:
- Create an offset plane that was tangent to the top of the hemishpere. This is done by
starting with a plane at the bottom and offsetting it by the radius of the hemishpere.
-
Make a sketch on the offset plane and draw whatever you design is on it. I used splines
to recreate the top of the snitch design.
-
Create another sketch on the same offset plane. We will be using this sketch to project
the last step's sketch onto the hemisphere. Press the "p" key, select the previous step's
sketch, and the sphere as the body to project onto.
-
Loft the sketch.
The result was very unimpressive. It looked like a spider was pressed onto the top of a hemisphere
which was very much not what I wanted. I realized that this was because a projection from the top
of the sphere was not going to be able to wrap around the sides of the hemisphere like I wanted.
Second Attempt - 3D Sketching, Lofting, and Sweeping
At this point I was questioning whether this CAD project was a little too ambitious for my skill
level. It was clear I needed to sketch in 3D but I had no idea how to do that. But now I was married
to the idea of 3D printing a snitch so I decided to give it one more shot and ask for help from
someone with far more experience.
My friend Diane Li (shout out to her because before her I was clueless and hopelessly lost) helped me
figure out the techniques to get a tangent plane on a side of a hemisphere and then project onto the
hemisphere.
The first step of my final design was getting a tangent plane to the hemisphere. This would enable me to
draw a sketch on the side instead of the top. The issue was Fusion 360 doesn't allow users to make
tangent planes on it's curved surface. So Diane's hack was to create a fake object and make a tangent
plane to that. So we created a ring in the middle of the hempisphere using two circles and extruding
symmetrically.
Then we created a plane on the side of the hemisphere by making one tangential to the ring. We angled
it at 60 degrees to the plane at the bottom of the hemishpere. Once I had a plane, I could create a
sketch on it.
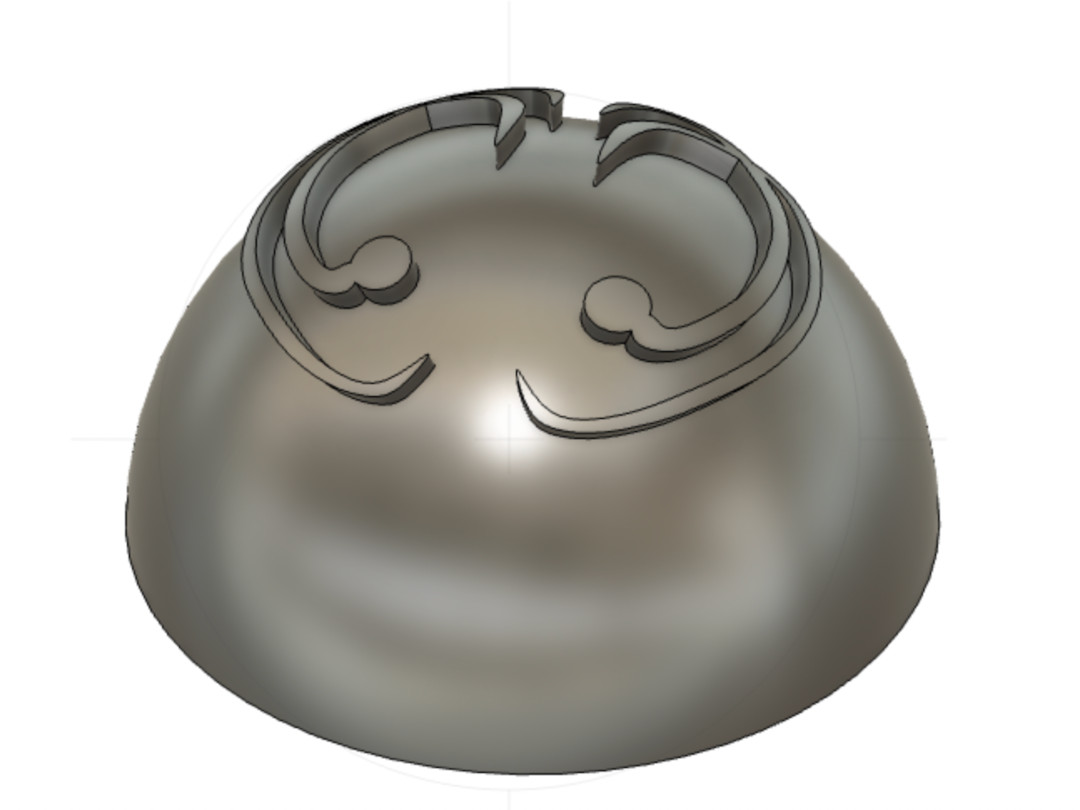
To create the design seen on the snitch in Harry Potter, I decided to use splines. After finishing the
first curve of the design, I projected the sketch onto the hemispehere. This allowed me to see how the
design would look on the hemisphere.
The projection did not look like what I wanted the design to look like at all. This is when we started
to do 3D sketching. When you click "m" and then a point on a sketch you can move it however you want even
when you are not in sketch mode. This is what I did to adjust the sketch points until the projection
looked like how I wanted it to.
Once I was finished with the first curve and satisfied with the projection onto the hemispehere, I shifted
to lofting. I created a plane along the spline path at the first point, last point, and a point close to
the end of the spline. At the plane on the first point I drew a circle with a radius of 3mm. At the second
plane (plane at part near the end of the spline), I also drew a circle with a radius of 3mm. At the last
plane (plane at end point), I drew a very small circle with a radius of around 0.74mm. Then I lofted from
the first, to the second, to the last circle along the spline. This creates a beautiful curve that tapers
at the end.
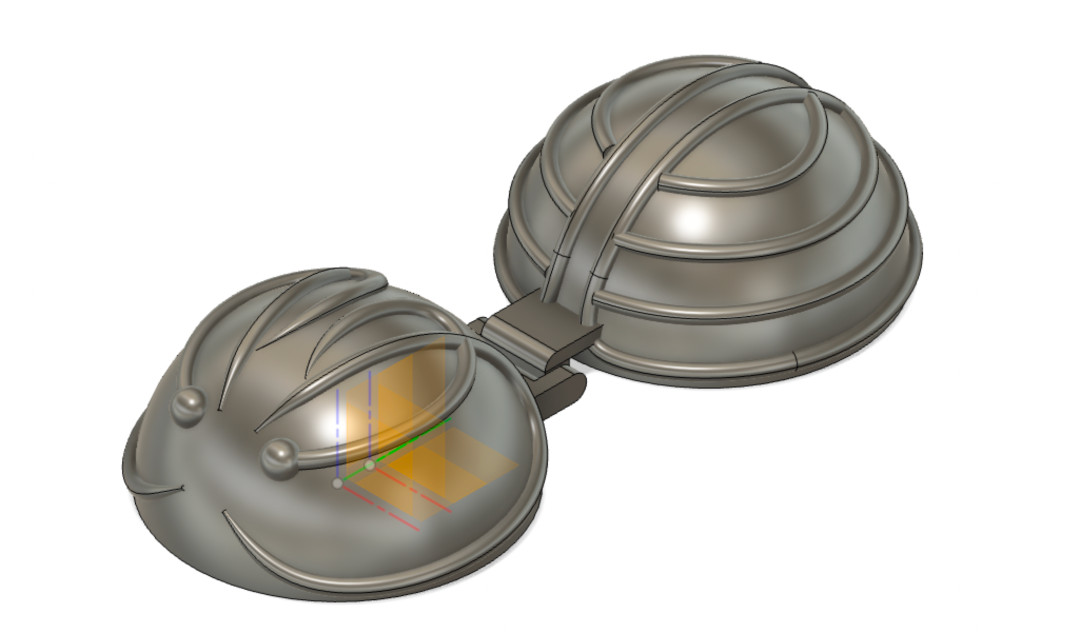
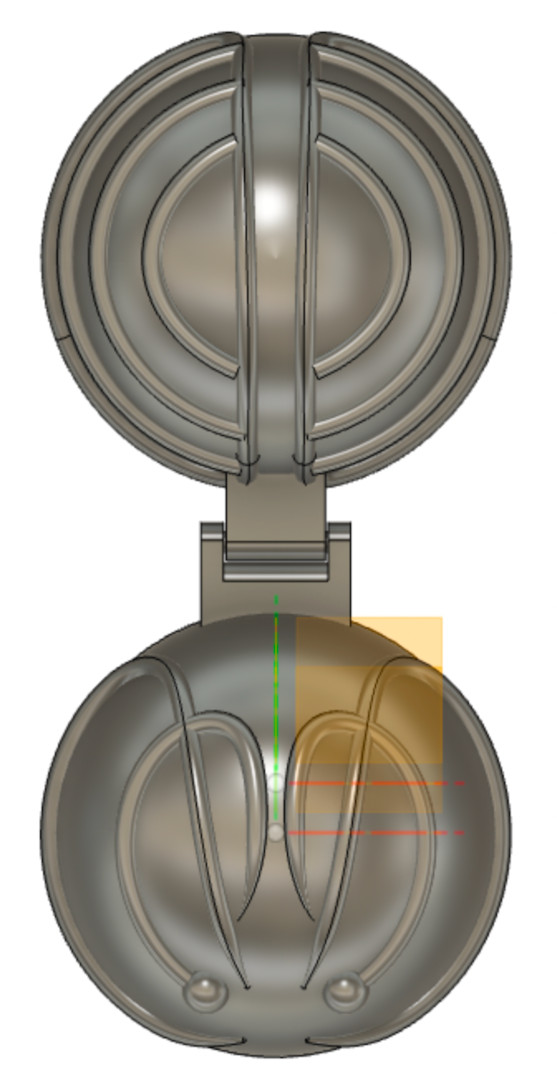
After creating the first curve I had to create the little ball thing that the snitch's wings come out of.
I created a plan on the face of the loft from the first point and drew and arc with a radius of around 6mm
and connected the two ends with a line to create a half circle. Then I revolved the whole sketch 360 degrees
to create sphere. This completed the first part of the design.
The second part of the design was...
Final CAD
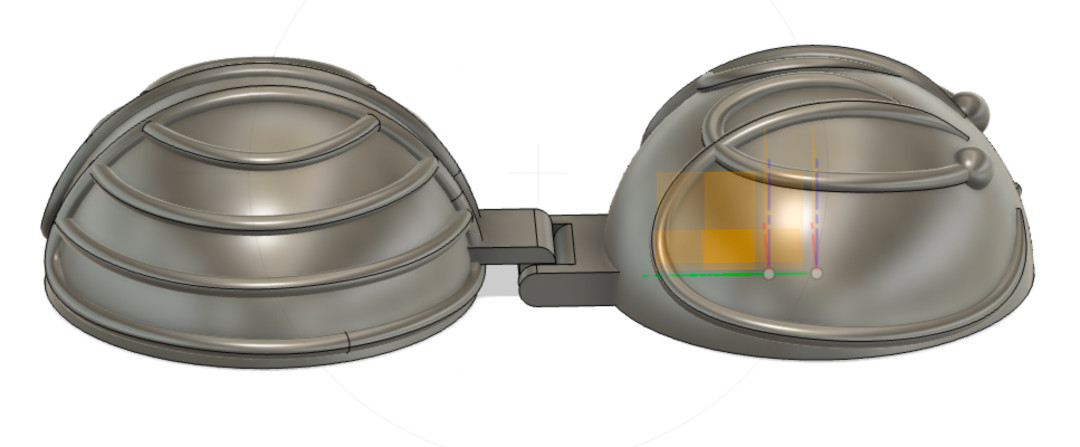
Final Results
3d scan
I attempted to 3d scan a tiny easel but it came out really weird.
Fusion 360
Once I had the sketches I could start CADding the snitch. It became obvious very fast that I was way in over my head with the CAD. Creating the hemispheres would be easy but the design on top of the spheres surface would be very hard to do.First Attempt - 2D Sketching and Projection
I searched online a lot for techniques to create designs on spheres and found one that used 2D sketches. The basic idea was the following:- Create an offset plane that was tangent to the top of the hemishpere. This is done by starting with a plane at the bottom and offsetting it by the radius of the hemishpere.
- Make a sketch on the offset plane and draw whatever you design is on it. I used splines to recreate the top of the snitch design.
- Create another sketch on the same offset plane. We will be using this sketch to project the last step's sketch onto the hemisphere. Press the "p" key, select the previous step's sketch, and the sphere as the body to project onto.
- Loft the sketch.
Second Attempt - 3D Sketching, Lofting, and Sweeping
At this point I was questioning whether this CAD project was a little too ambitious for my skill
level. It was clear I needed to sketch in 3D but I had no idea how to do that. But now I was married
to the idea of 3D printing a snitch so I decided to give it one more shot and ask for help from
someone with far more experience.
My friend Diane Li (shout out to her because before her I was clueless and hopelessly lost) helped me
figure out the techniques to get a tangent plane on a side of a hemisphere and then project onto the
hemisphere.
The first step of my final design was getting a tangent plane to the hemisphere. This would enable me to
draw a sketch on the side instead of the top. The issue was Fusion 360 doesn't allow users to make
tangent planes on it's curved surface. So Diane's hack was to create a fake object and make a tangent
plane to that. So we created a ring in the middle of the hempisphere using two circles and extruding
symmetrically.
Then we created a plane on the side of the hemisphere by making one tangential to the ring. We angled
it at 60 degrees to the plane at the bottom of the hemishpere. Once I had a plane, I could create a
sketch on it.
To create the design seen on the snitch in Harry Potter, I decided to use splines. After finishing the
first curve of the design, I projected the sketch onto the hemispehere. This allowed me to see how the
design would look on the hemisphere.
The projection did not look like what I wanted the design to look like at all. This is when we started
to do 3D sketching. When you click "m" and then a point on a sketch you can move it however you want even
when you are not in sketch mode. This is what I did to adjust the sketch points until the projection
looked like how I wanted it to.
Once I was finished with the first curve and satisfied with the projection onto the hemispehere, I shifted
to lofting. I created a plane along the spline path at the first point, last point, and a point close to
the end of the spline. At the plane on the first point I drew a circle with a radius of 3mm. At the second
plane (plane at part near the end of the spline), I also drew a circle with a radius of 3mm. At the last
plane (plane at end point), I drew a very small circle with a radius of around 0.74mm. Then I lofted from
the first, to the second, to the last circle along the spline. This creates a beautiful curve that tapers
at the end.
After creating the first curve I had to create the little ball thing that the snitch's wings come out of.
I created a plan on the face of the loft from the first point and drew and arc with a radius of around 6mm
and connected the two ends with a line to create a half circle. Then I revolved the whole sketch 360 degrees
to create sphere. This completed the first part of the design.
The second part of the design was...