3D Designing, Scanning, and Printing
3D Printing
I designed a small part that cannot be made subtractively, using a mill, lathe, or even a chisel. It has two loops nested inside each other, which is very difficult to machine but still possible. To make the part impossible to make subtractively, I added walls on the corners of the part that prevent access to the two loops.
Original model (I'm 3D, drag me around!)
With corners removed for clarity
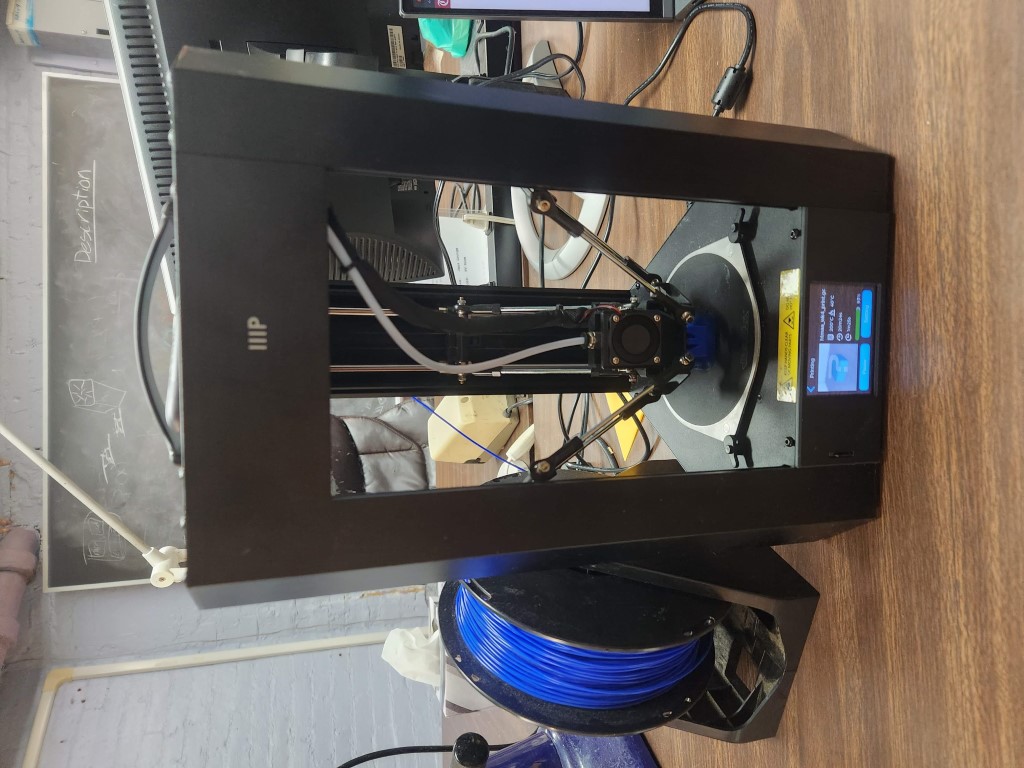
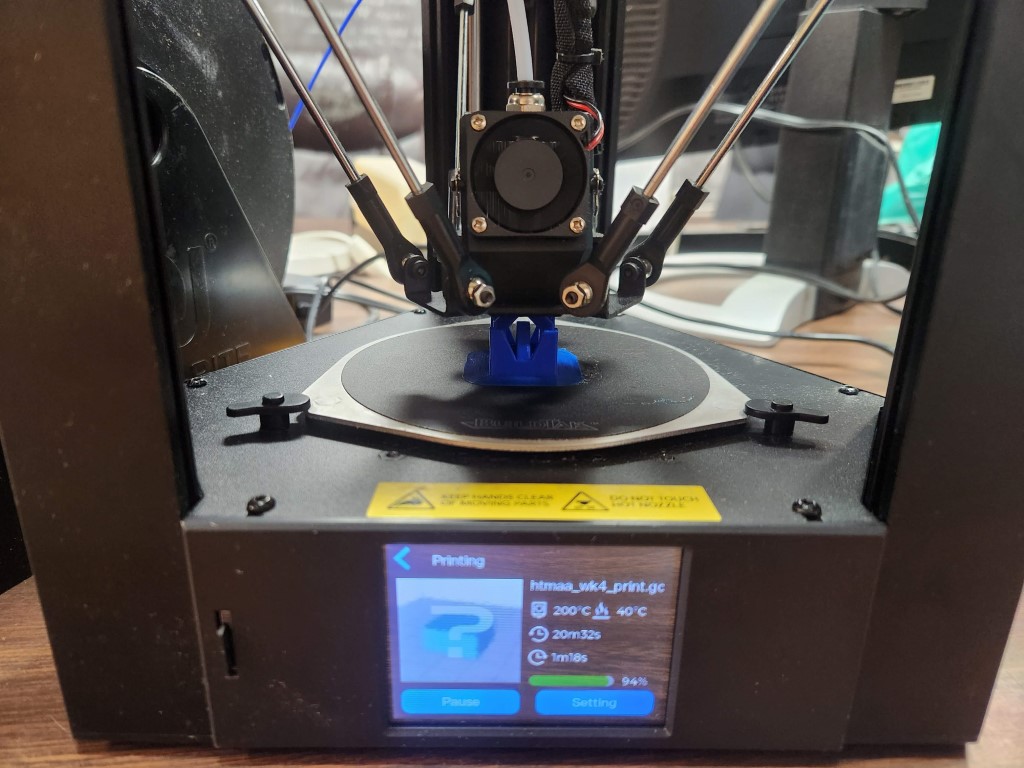
I then 3D-printed the part on my personal printer, a Monoprice MP Mini Delta printer. It's a filament printer that uses an unconventional delta drive, meaning instead of being controlled via an x/y/z axis, the printer is suspended by three control arms who are moved up and down, controlling the position of the print head. This technique is faster than conventional x/y/z printers because there's less moving mass -- the delta printer ditches the heavy x/y stepper motors and axes, meaning the only moving thing is the print head. This is evidenced by the fact the print only took 20 minutes, with good quality.
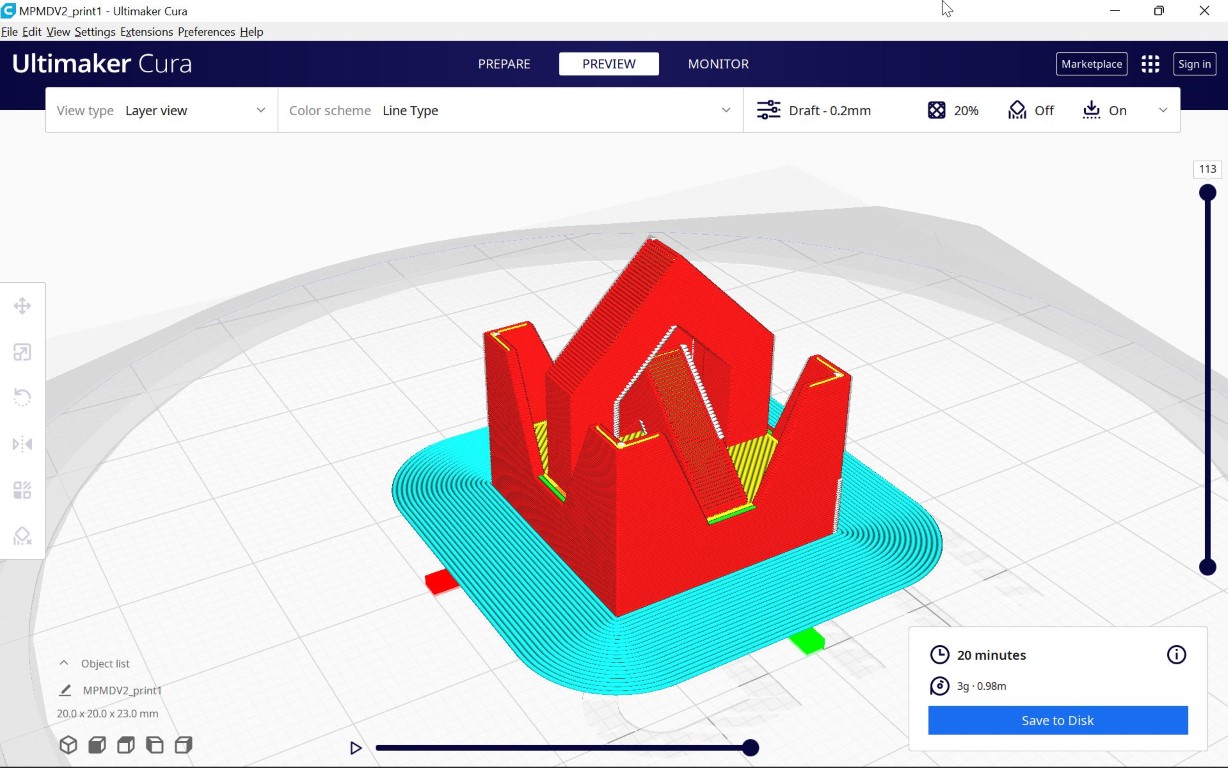
I prepared the part in Ultimaker Cura, slicing the part into 0.2mm layers. I used 20% infill to speed up the print time, as this is not a structural part. I printed the part on a raft, to ensure good build plate adhesion.
The print came out well. The only (very minor) defect is drooping plastic in the arches, which the printer had a hard time printing.
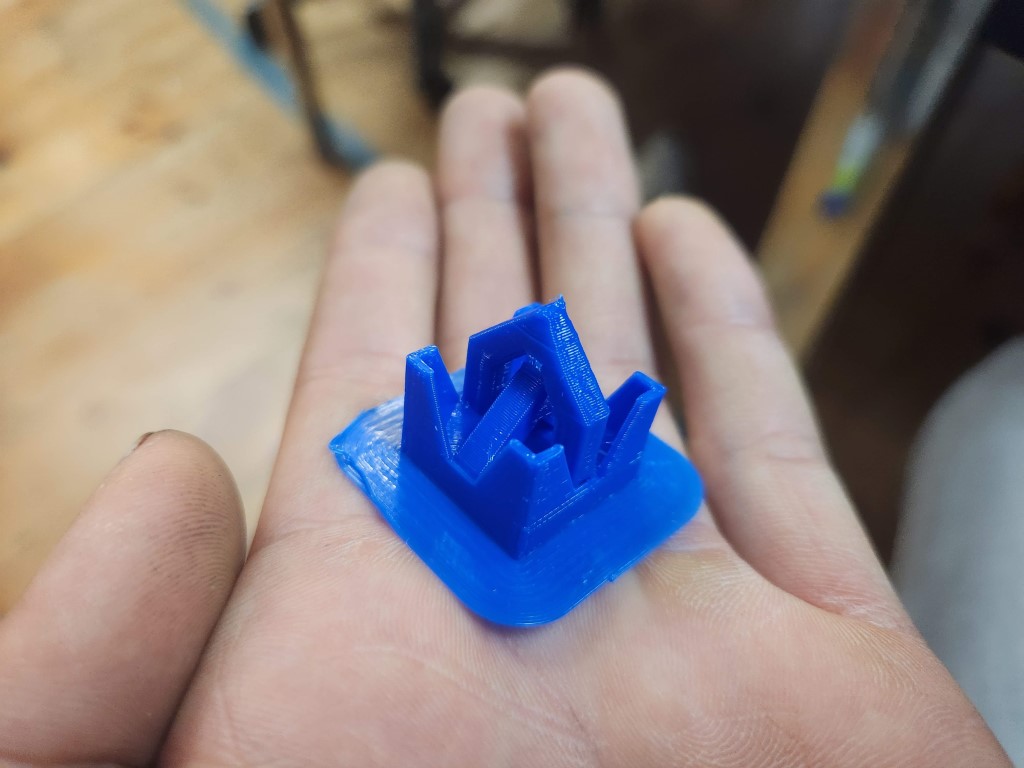
Printed part!

Some drooping on the top arch
3D Scanning
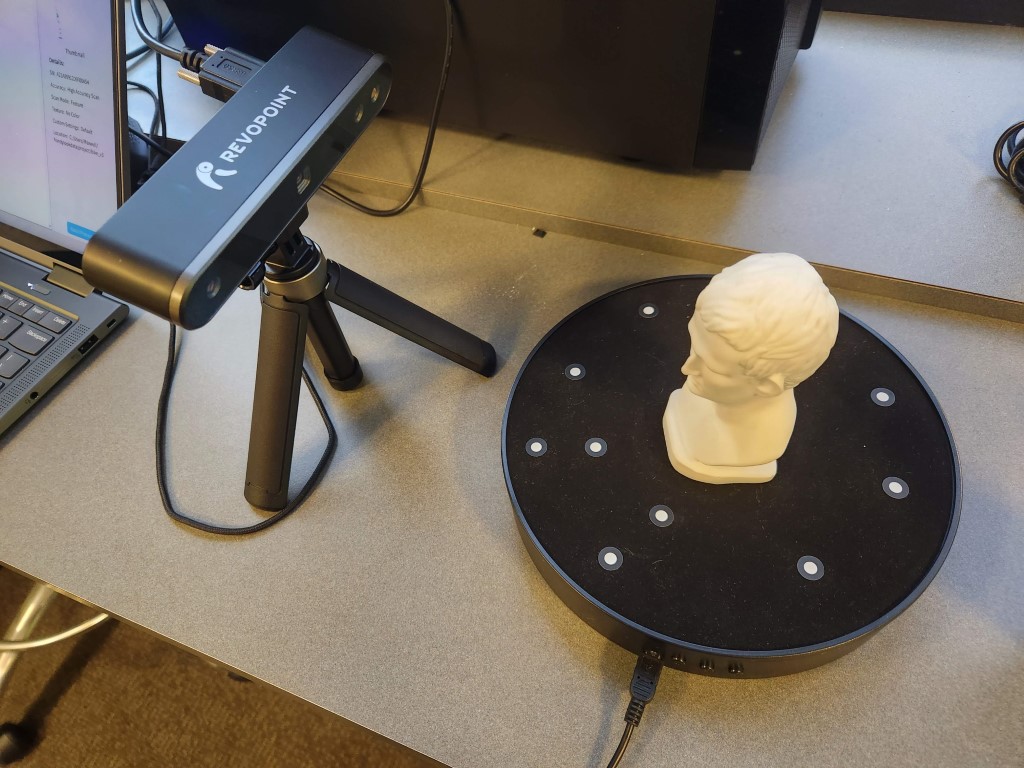
In class we explored a few different types of 3D scanning. The most basic is photogrammetry, where a lot of photos are taken of an object at different angles and computationally stitched together into a 3D model. The other technology uses a laser point cloud and measures the “time of flight” of each laser beam, or how long the laser takes to reflect off the object and reach the sensor. We used a laser point cloud scanner in class, specifically the Revo Point Pop 2 3D scanner.
The first thing I tried to scan was my bike, the one I’m using for the e-bike final project. It turns out that the bike is very shiny, which is a problem for scanning because shiny surfaces cause light to scatter in all directions, instead of bouncing back to the scanner. We tried covering the bike in talc powder (baby powder), but the powder wouldn’t stick very well. To try again, I ended up covering the bike in masking tape to make the bike more scan-friendly.
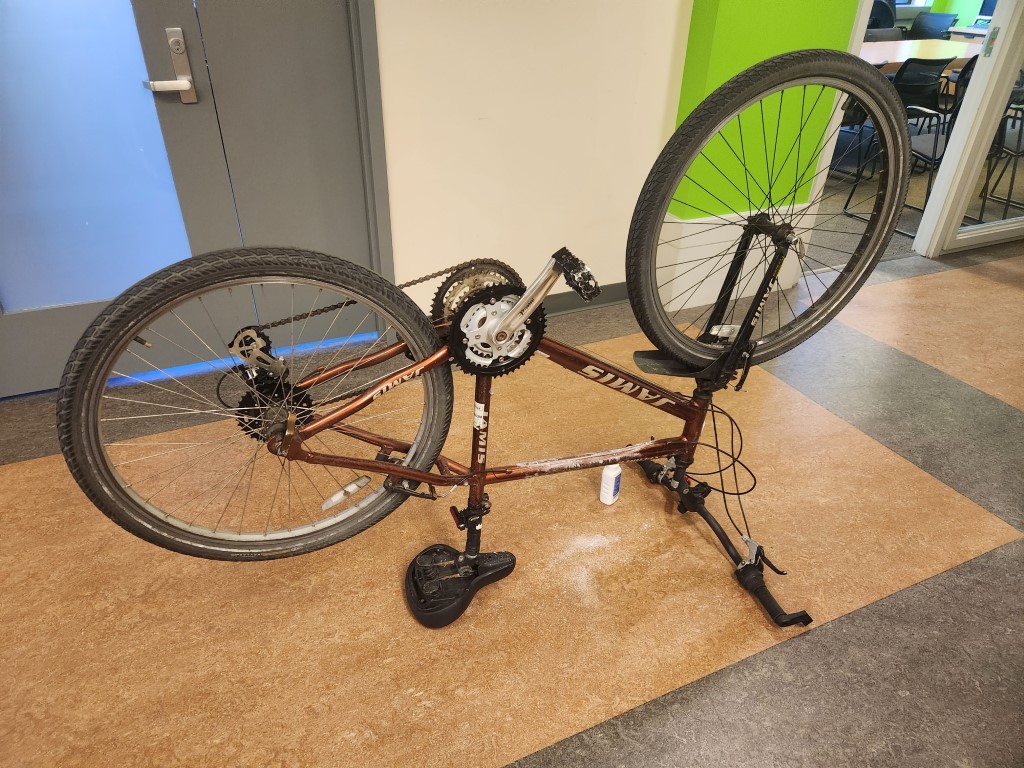
Untreated bike in its shiny glory
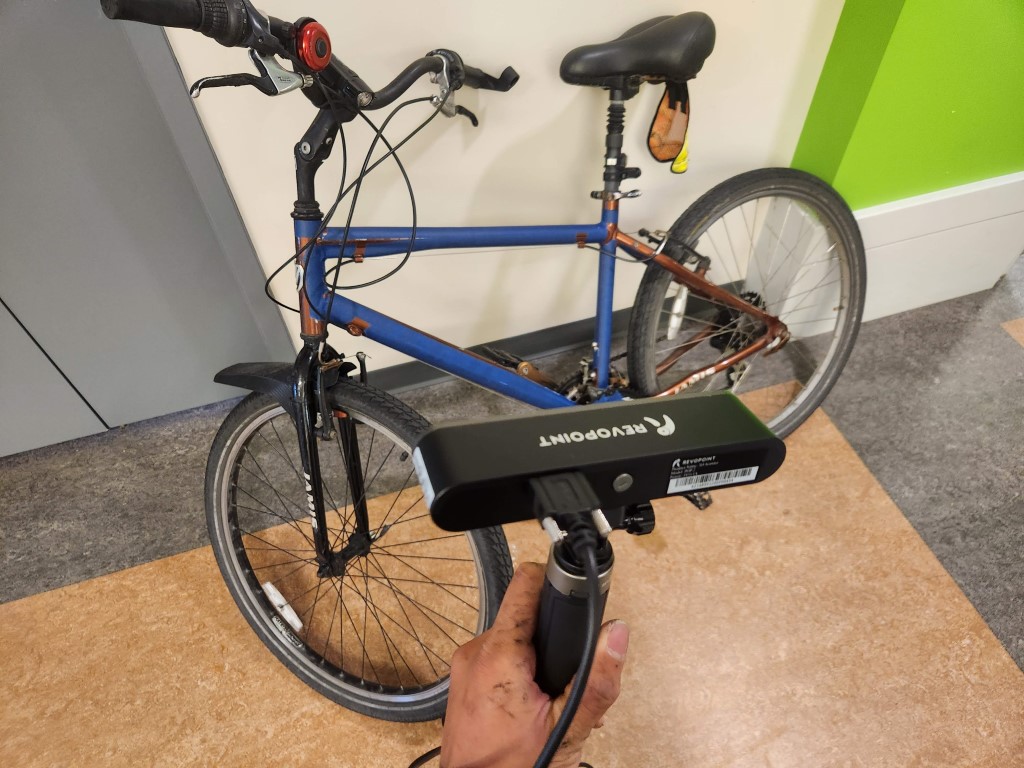
Taped-up bike
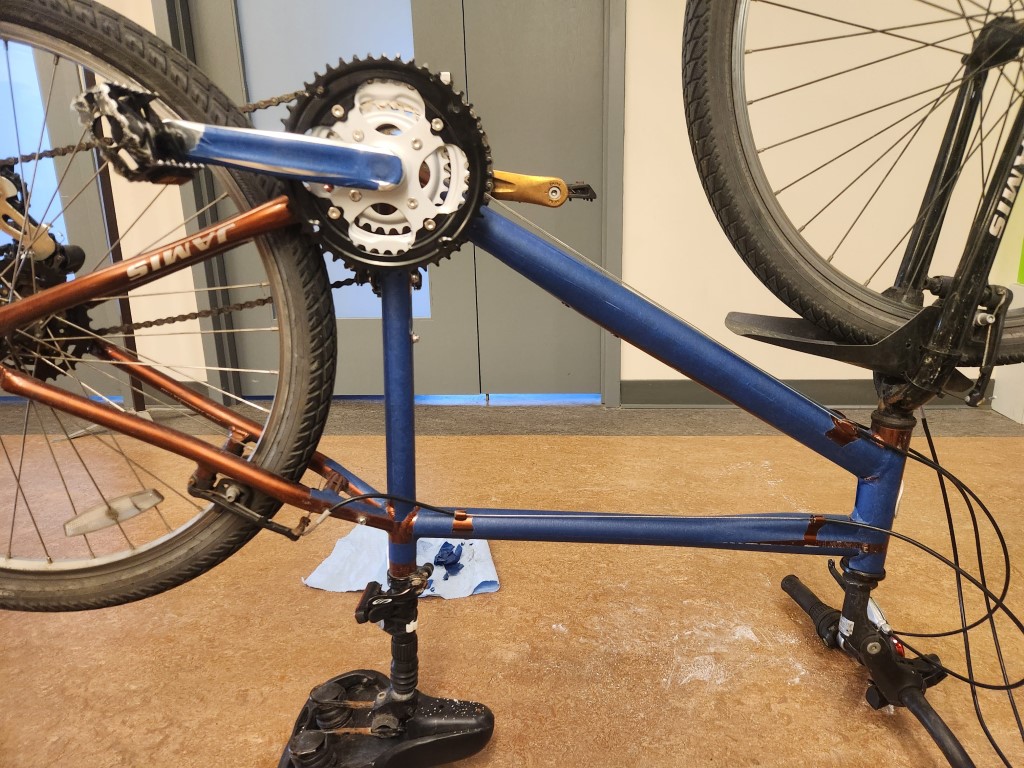
The Revo Point scanner picked up surfaces a lot better after taping up the bike, but still struggled on the shiny surfaces that I didn’t tape up like the crank. I had to put another layer of tape over the cranksets to help scan better.
That sounds great, except the Revo Point scanner could not track the bike frame very well. It would quickly lose track of the bike frame, producing very convoluted scans that definitely did not look like a bike frame. This is the closest I could get to scanning the bike frame.
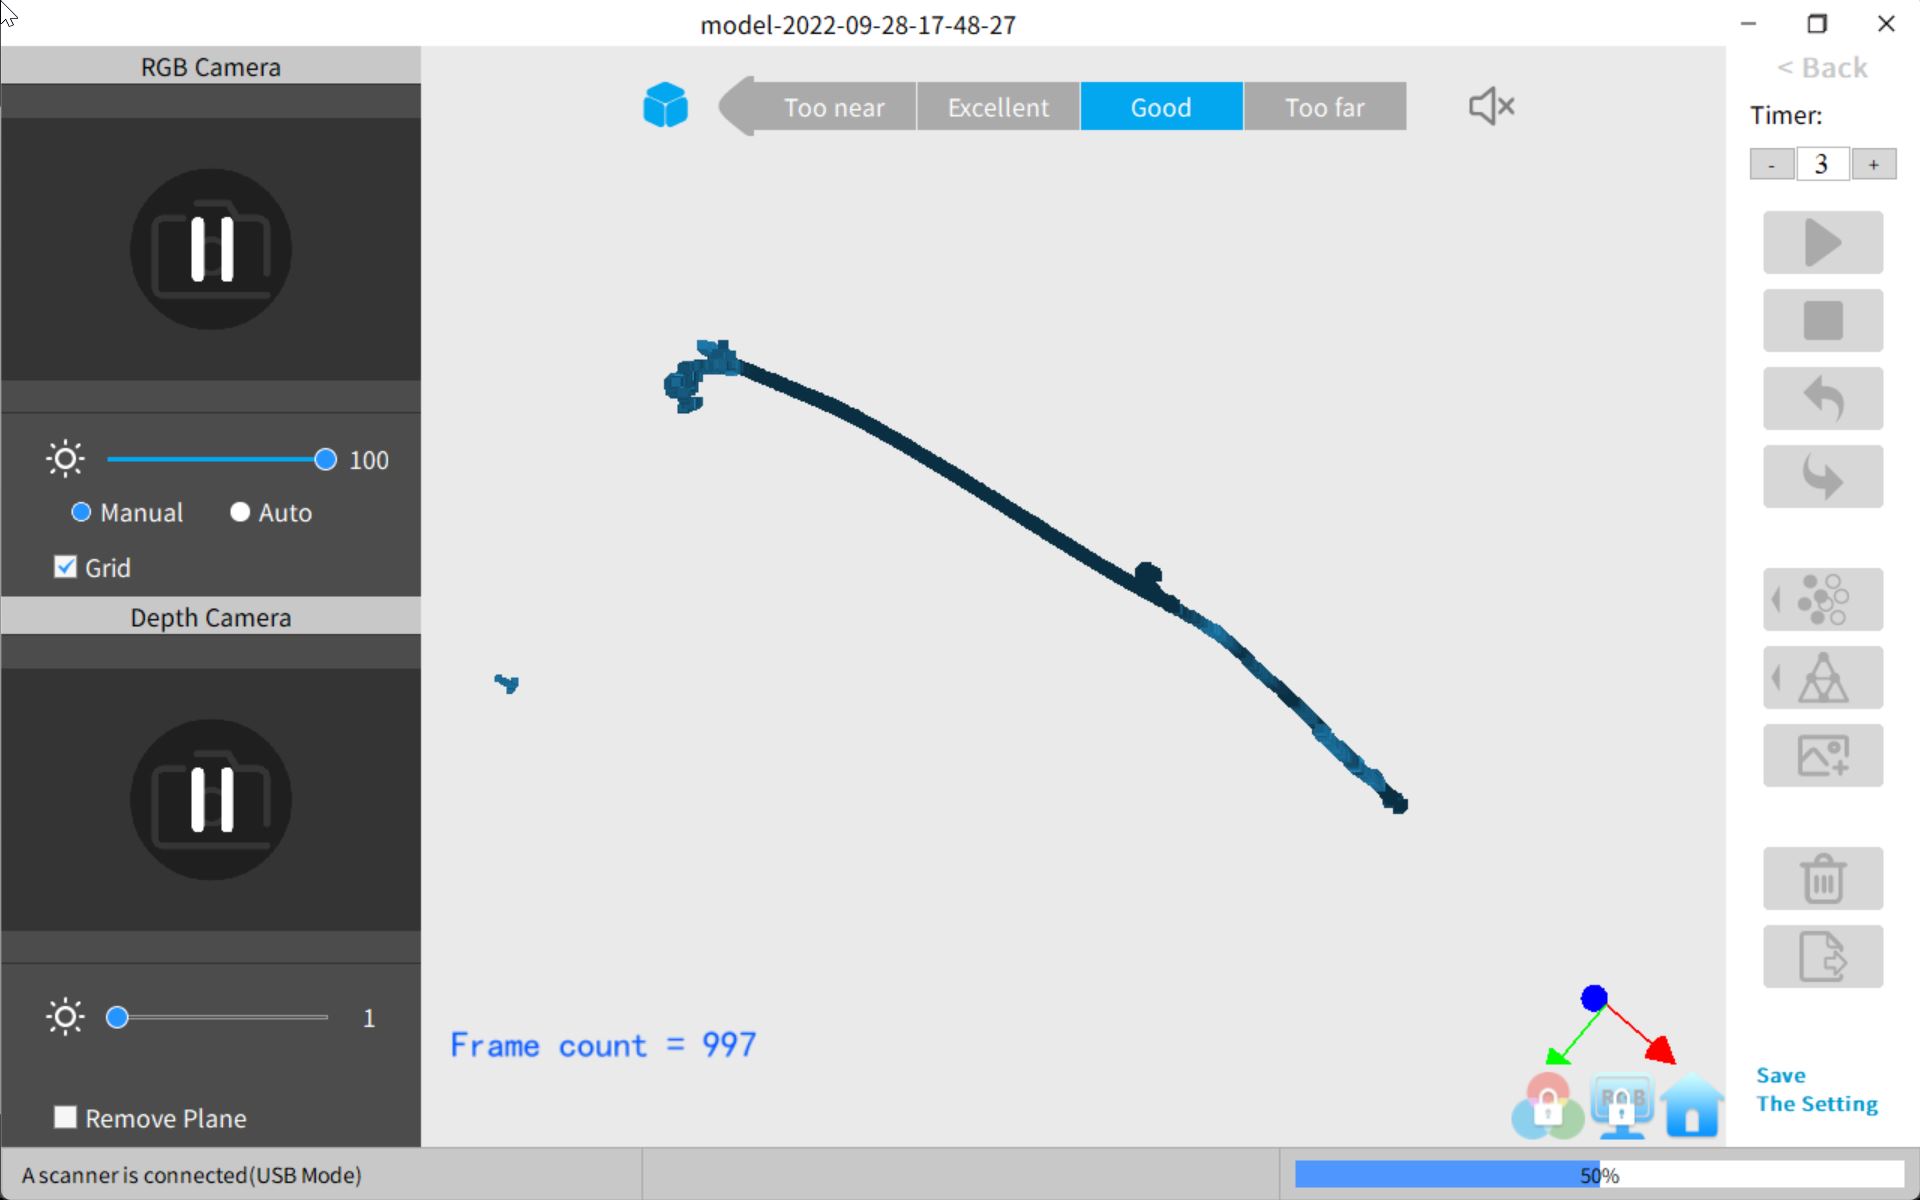
Failed scan. The bike is... not a tube
Instead, I tried something smaller. I tried scanning a small 3D-printed bust of (probably) someone important, this time putting the print on a turntable to automagically spin the bust for the scanner. The scan went a lot better this time -- I think the scanner is designed for smaller items like this bust, not larger items like my bike.
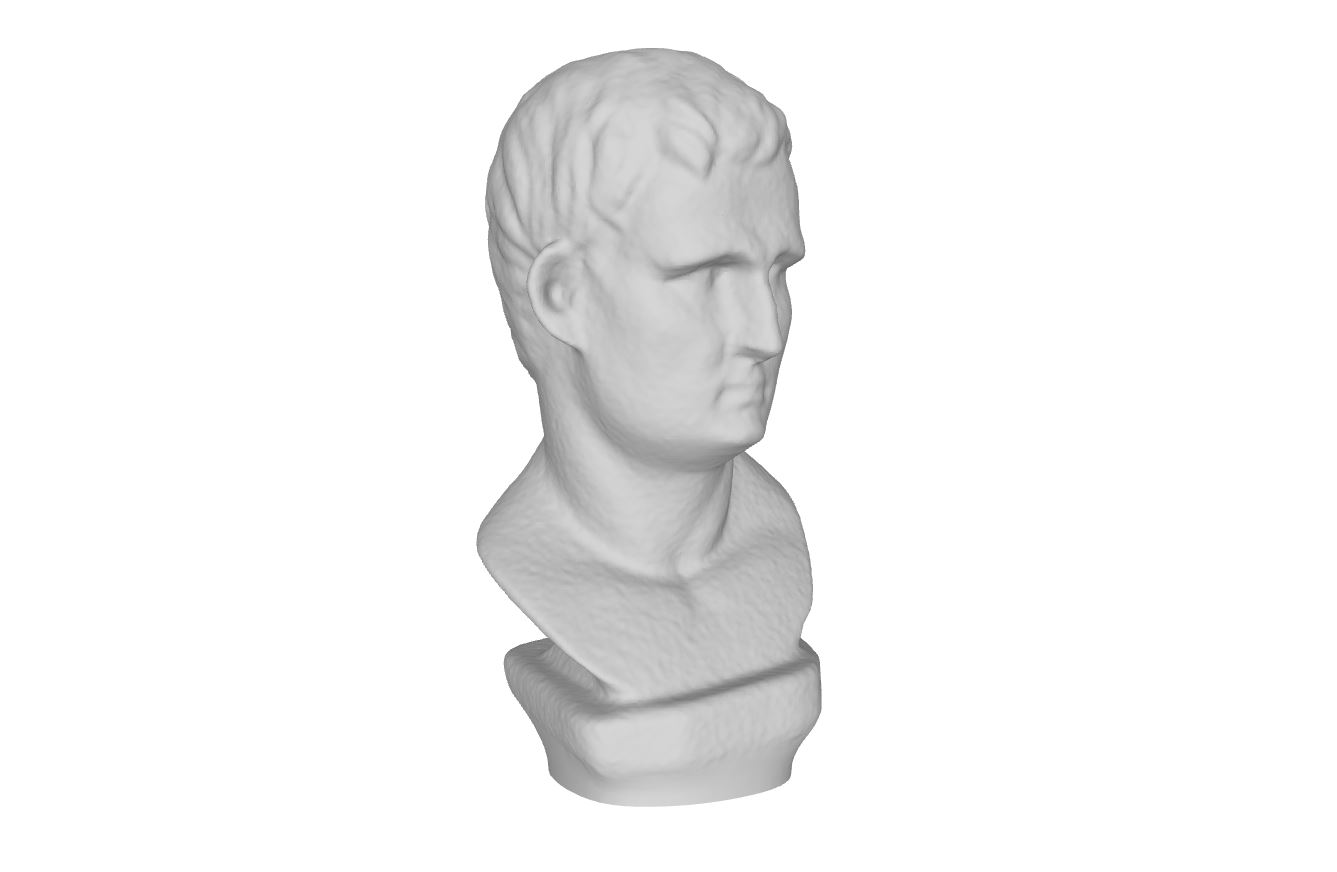
Scanned model