Designing, Molding and Casting Legos
For this week’s casting and molding project, I use a multistep process to repeatedly make the same part over and over again. First, I design the part in CAD; in my case I’m designing my own Lego pieces. Then, I machine a positive of the Lego piece out of a block of machinable wax. Then, I pour a silicone mold into the machinable wax. Finally, I pour “liquid rock” into the silicone mold, then the rock will solidify into the original part! The last step of this casting process can be repeated over and over again to produce more identical parts!
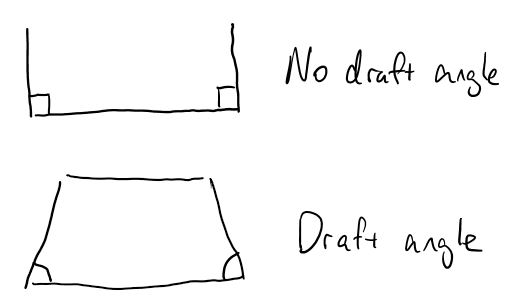
First, I designed a Lego piece in OnShape. At first, following conventional manufacturing protocol, I put draft angles on all the surfaces. Instead of having perfect 90 degree angles, surfaces are sloped a few degrees. This way, removing the parts from the mold is a lot easier. Real-world Lego bricks do not have perfect right angles on the walls; the draft angle on the walls helps manufacturability.
Additionally, I had to design the tolerances such that the Legos fit together snugly. I designed a roughly 1/1000 in offset between the peg (on top of the brick) and the socket (on bottom of the brick). There’s a very small region where a part will fit snugly, between fitting loosely and not fitting at all.
3D view of Lego block, drag me around!
Part to Mold (of Mold)
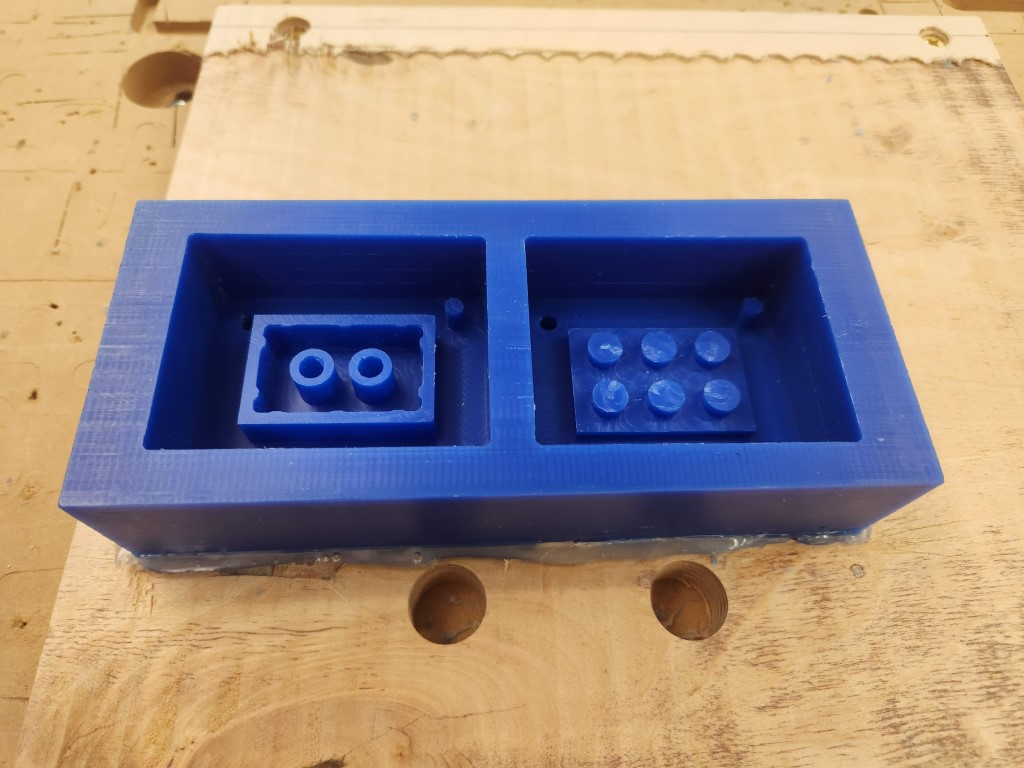
I then designed the wax mold, into which we’d pour the silicone negative mold, into which we’d pour the final part. To do this, I sliced the part into half and created two molds, for the two silicone molds. I encapsulated the whole thing in a large block.
I also added alignment pegs so that the silicone molds would line up nicely when producing a part. This way, there’s less likelihood of a “mold line” forming where the molds don’t line up.
3D view of Lego block mold mold (aka wax block), drag me around!
Milling the mold (of mold)
We machined the mold (of the mold) out of machinable wax on the AvidCNC router. One potential concern is that the walls of my Lego piece are only 3mm wide, so there’s a chance the router could break the walls with too much machining force.
Anthony helped set up the toolpaths/CAM in Fusion 360, then sent the resulting GCODE to the router. We milled with a 1/4” endmill first, then a 1/8” endmill for the small features. Twenty minutes or so later, the wax block was machined nicely. One issue is that the endmill marred the top of my Lego piece. Another issue is that internal corners cannot be machined perfectly, so the corners inside the piece were not perfectly sharp. These are cosmetic problems, as they don’t affect the mating surfaces on the top and the bottom.

Making the Mold
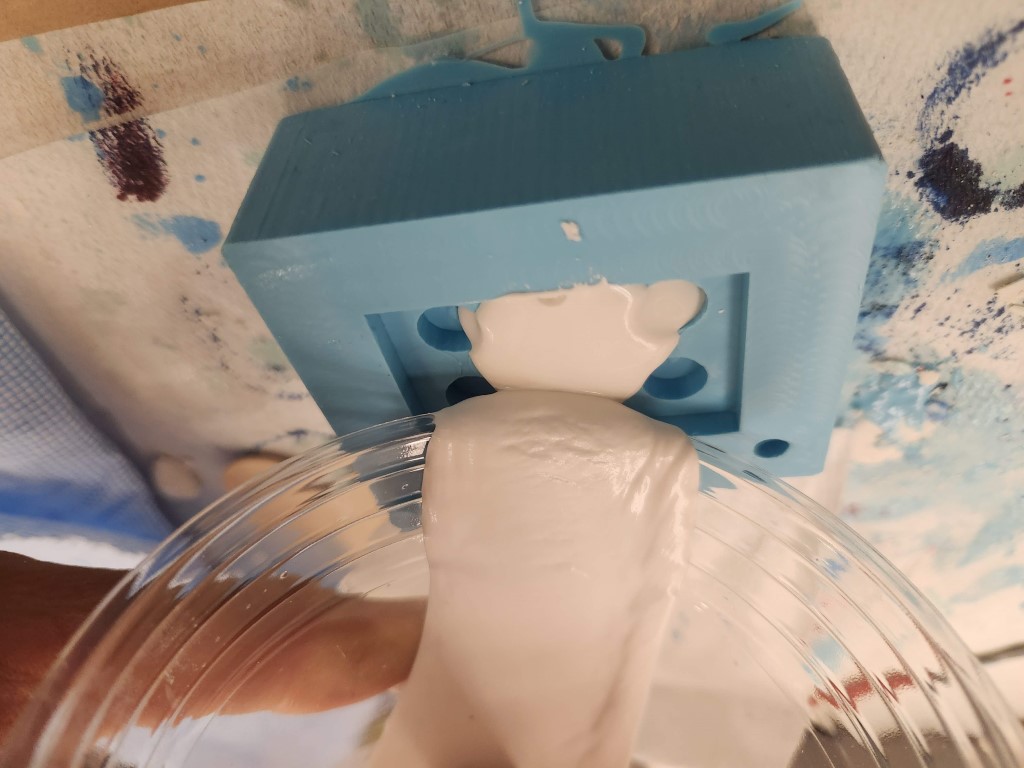
I made the mold out of silicone by pouring it into the wax block we just machined, then letting the silicone cure. I used Oomoo, a two-part silicone compound. First, I mixed the two parts evenly. Then, I slowly poured the silicone into the wax block, trying to avoid air bubbles that could ruin the cast. After pouring the silicone, I let it cure for two hours.
Bad mold. Notice the missing corners.
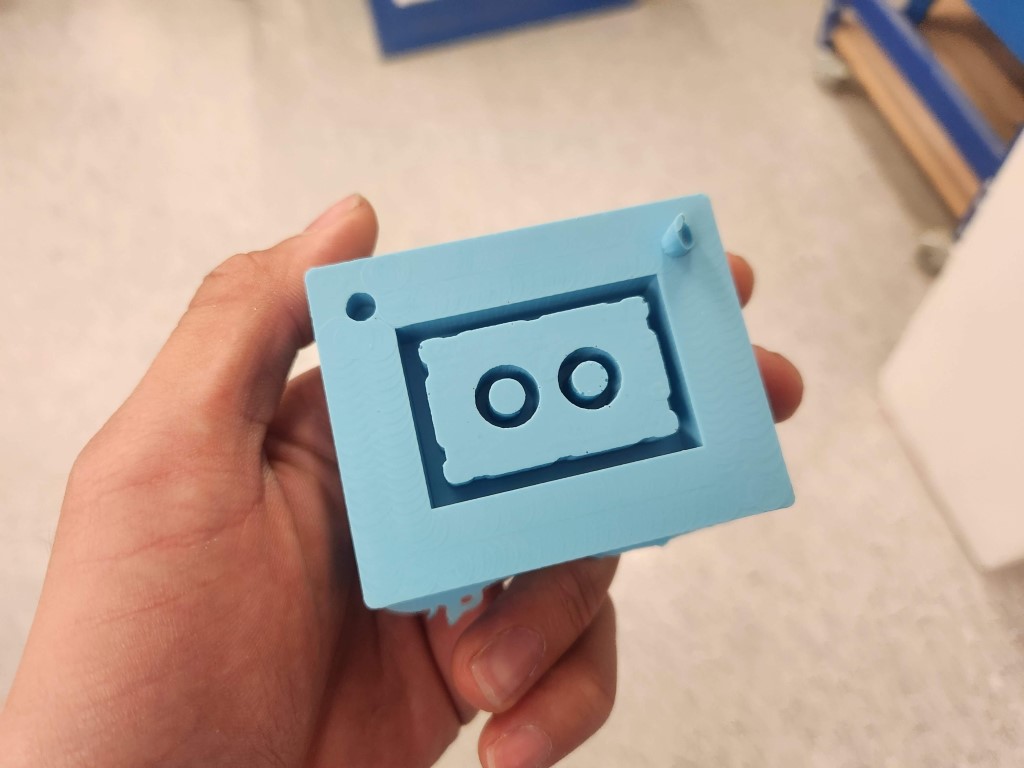
Good mold!
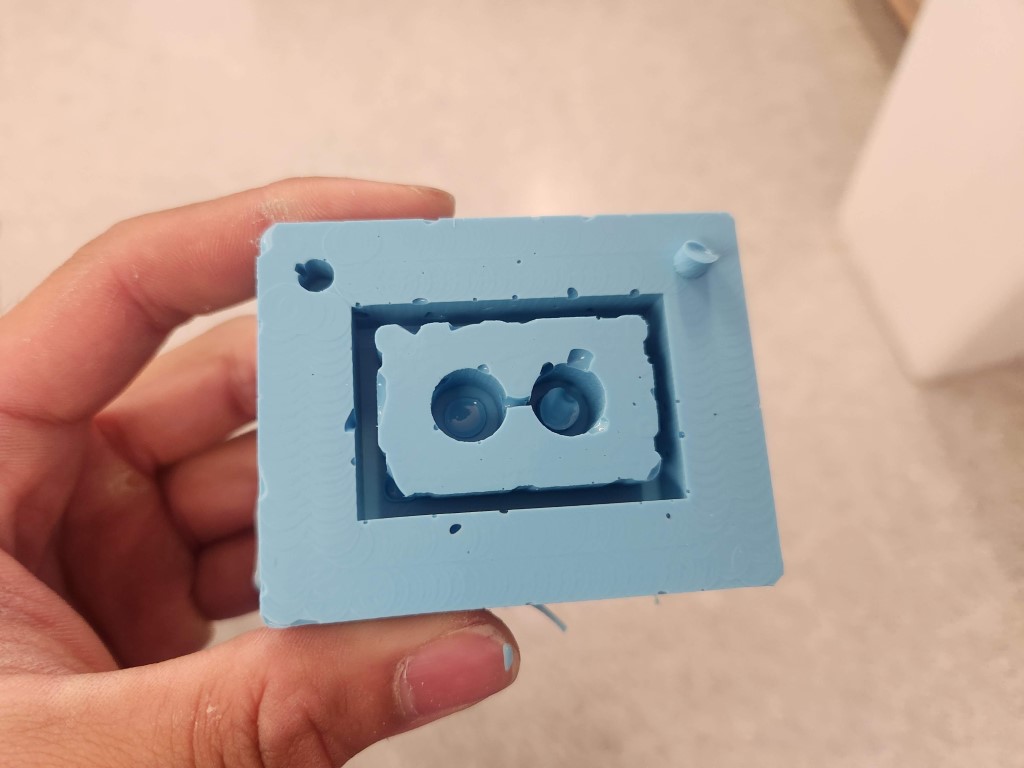
Pouring the Part into the Mold
I used the freshly-machined wax block to make the mold. I poured freshly mixed silicone/”Oomoo” into the wax block slowly, to avoid air bubbles forming, then let the mold solidify. My first attempt did not work, as the silicone had started solidifying when pouring into the other half of the mold. I tried again, this time working faster, and the mold worked a lot better! There were still air bubbles in the mold, but an acceptable amount this time around.
My first attempt did not come out well. I added too much water to the powder, so the final part didn’t have as much structural integrity as it normally should. In fact, it crumbled as I pulled it out of the mold. The second attempt, I used more powder in the mix.
My second attempt, I opened the part too early, before the Drystone had solidified. Instead of a nice, solid part, I got a liquidy goop that spilled out of the mold. My next attempt, I let the part sit overnight in the mold to cure.
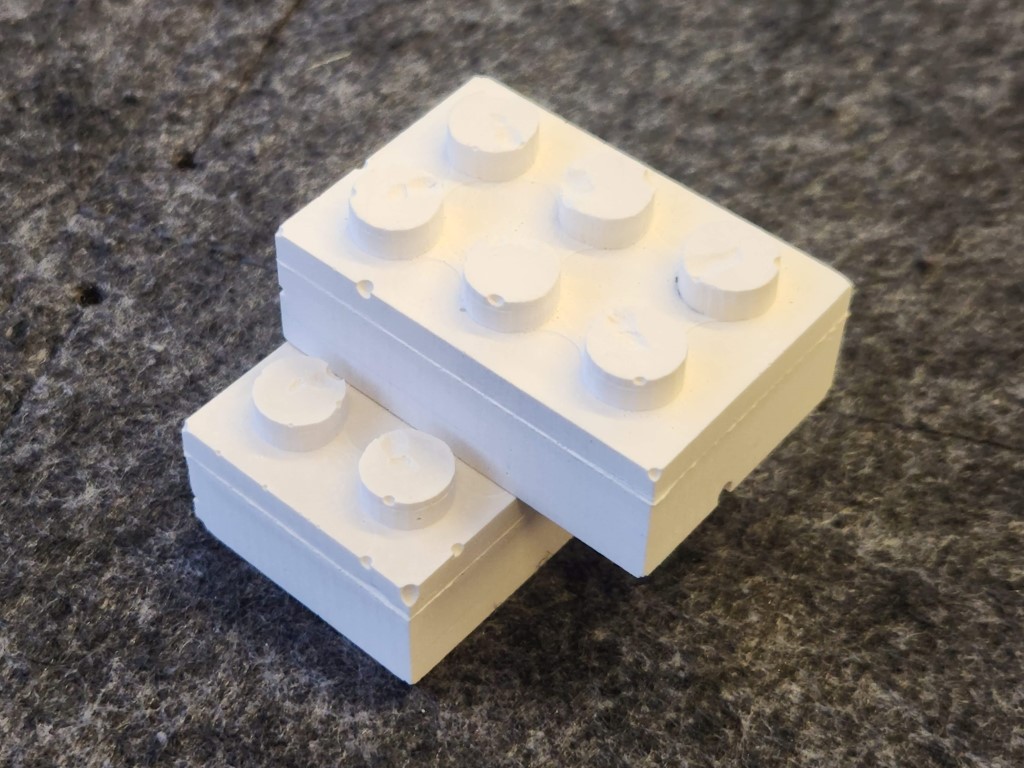
My third and fourth attempts produced nice, solid parts! They feel like stone and have a somewhat sandy feel to them. The Legos fit together, albeit with some wiggle room. When designing the part, I was expecting to need to design in a gap between the pegs at the top of the Lego and the socket at the bottom of the Lego. Turns out this “wiggle room” translated to the parts wiggling slightly in real life. Oh well, next time.
This really put into perspective the effort designing something as mundane as a Lego. We expect our parts to slide together perfectly and feel nice while doing so, without realizing the effort that goes into designing these features.