Week 5

This week’s goal was to make something BIG! So to make sure I built something useful, I went to my friends to see what type of big things they needed, and got a ton of suggestions, including a shoe rack, a computer stand, and (the one I ended up choosing) a shelf.
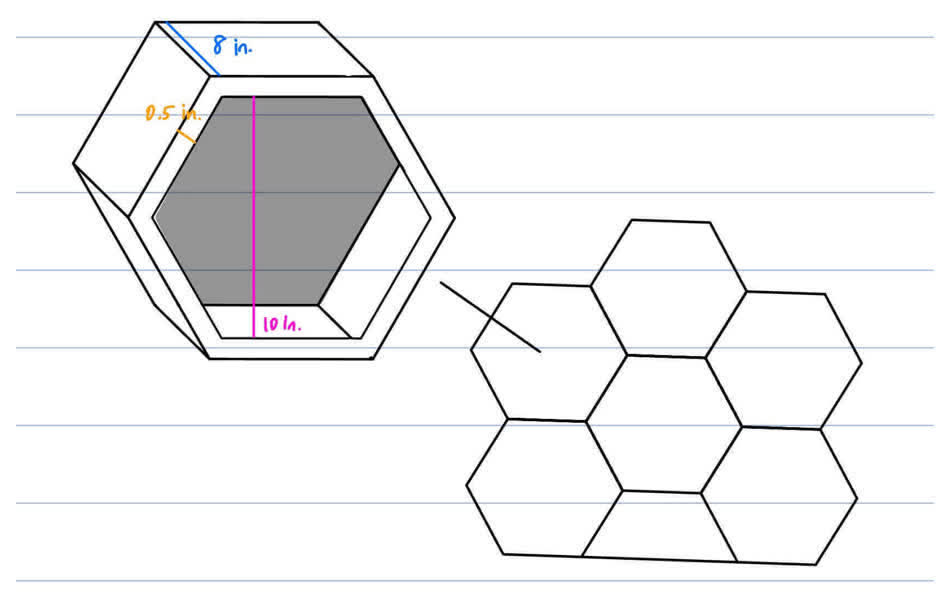
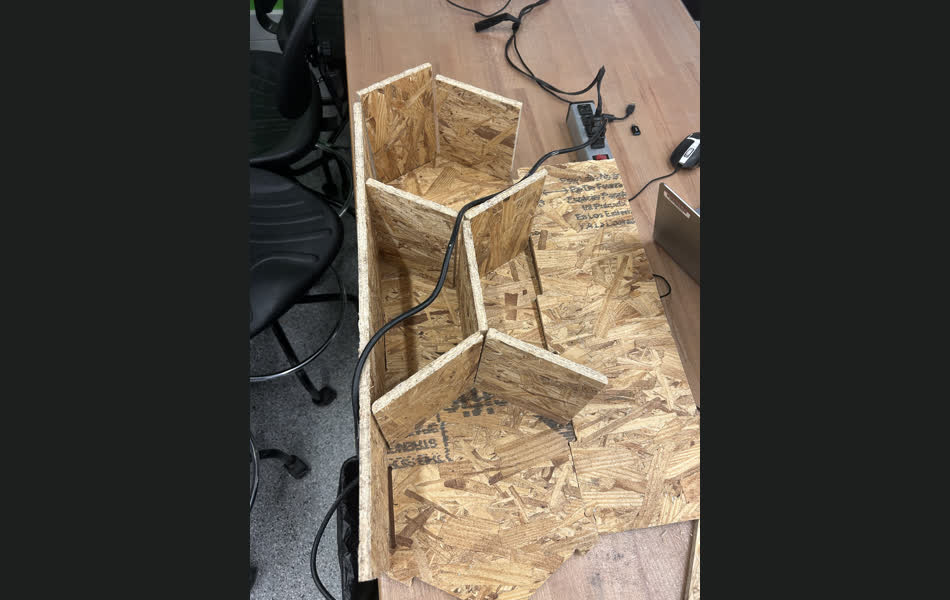
I wanted the shelf to have a unique design, that could also be modular, so a few of the constructed components could be stacked on top of each other, so I looked into some tessellation patterns. The one I ended up going with was a hexagonal + trapezoidal-based design.
I started with an idea that would print in planes, essentially it was the hexagonal structure displayed above, but we print out the slides of material and then glue them all together to construct the 3D structure.
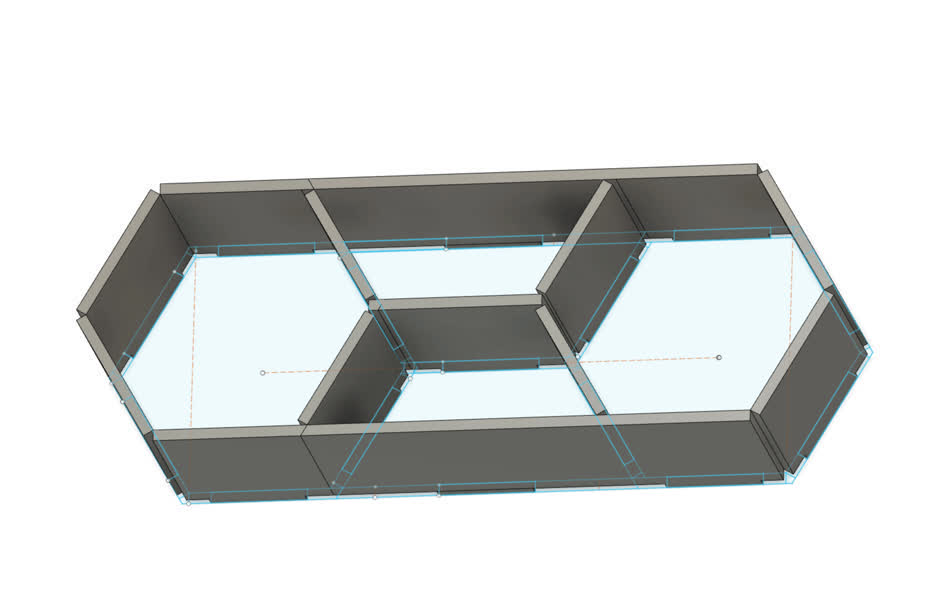
However, after talking about the design limitations of the material, and the amount of work that may result in subpar structural integrity, I decided to remodel the shelf to utilize a standard shelf joint design; this is in contrast to the aforementioned plane design.
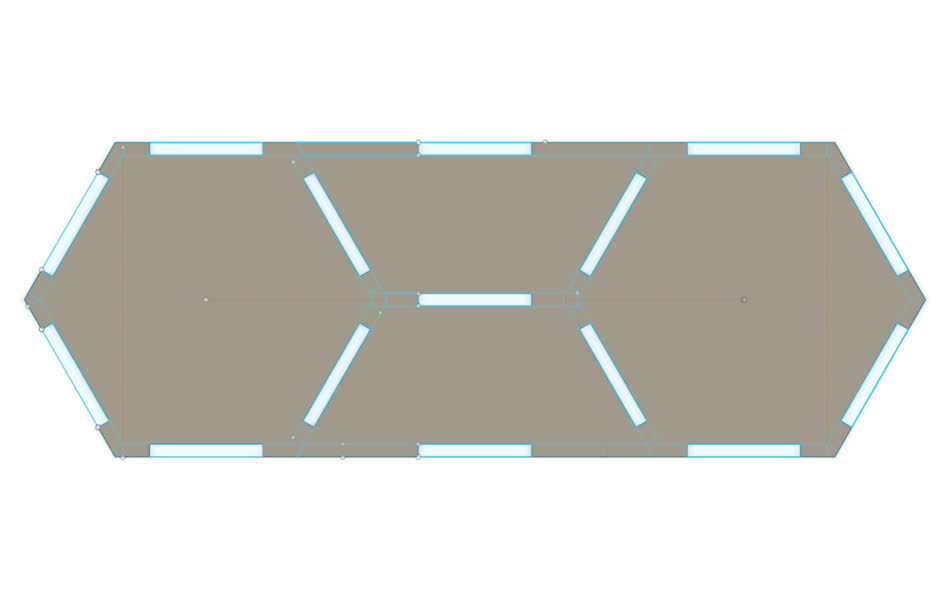
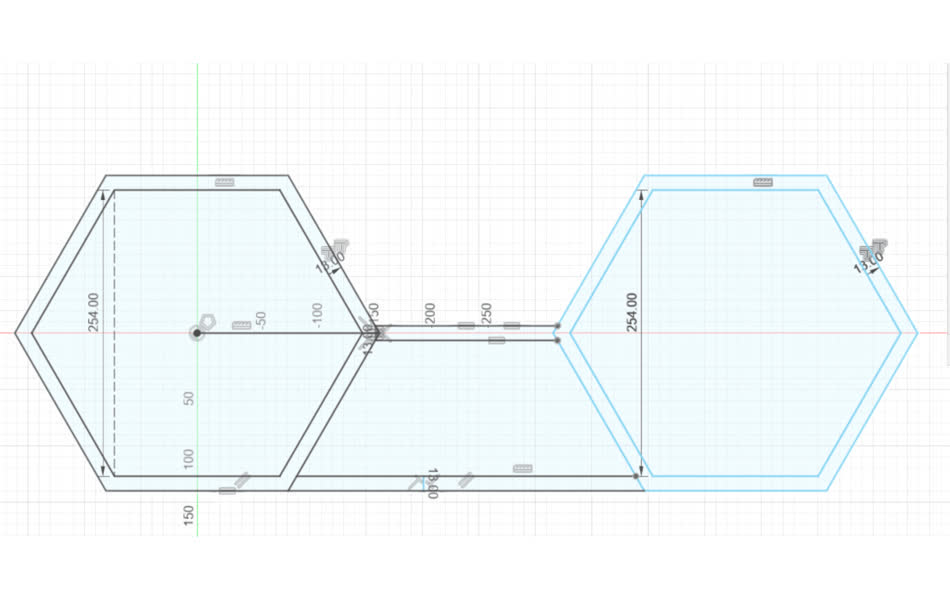
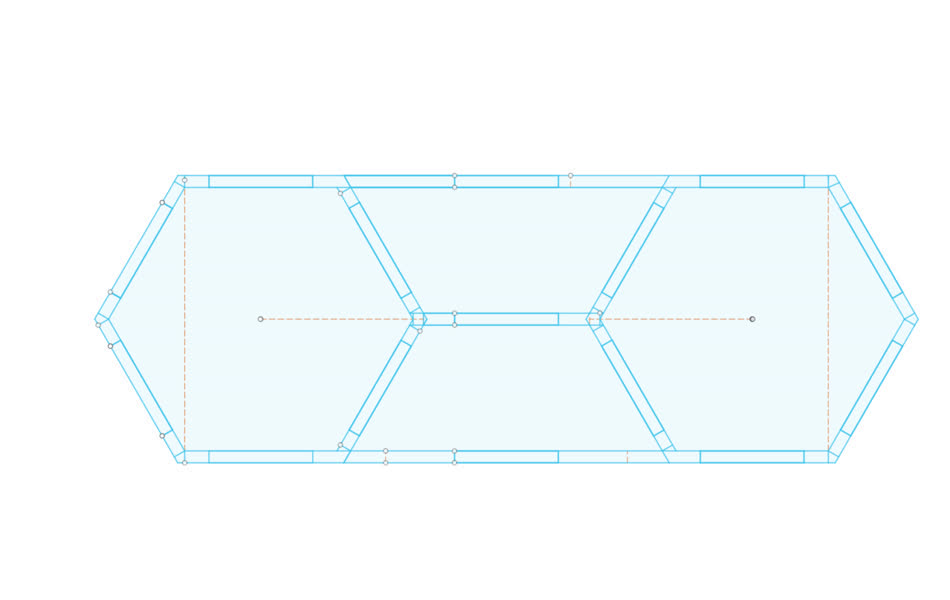
In developing this updated model, it was harder to CAD the model, as instead of simply slicing through a nice planar structure, I had to define joints and structures that would interlace with each other; also, this required parameterization in the actual calculation of the joints.
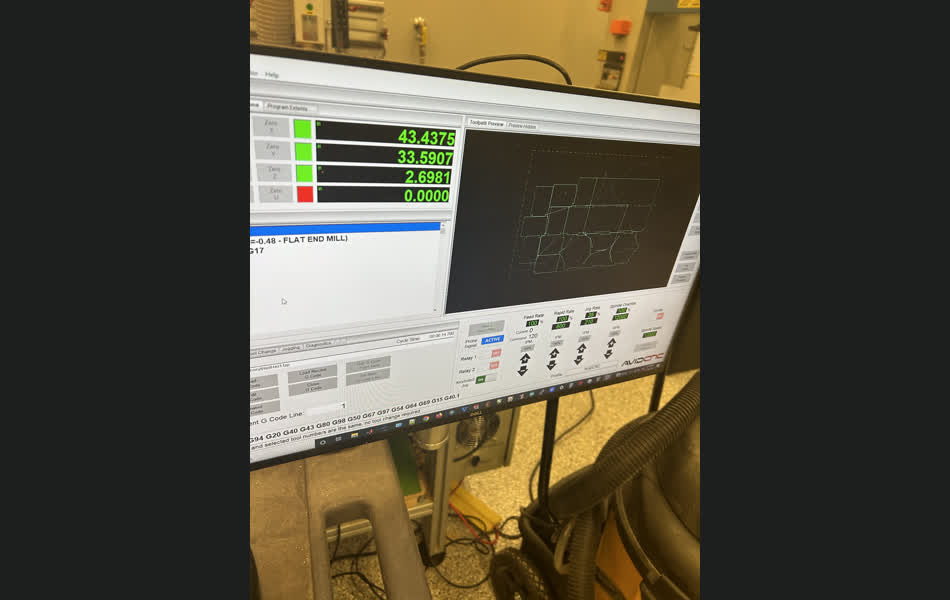
Once I had a design, I went to the shop and started the CAM process, which resulted in quite a few errors — it turns out that there were a few misalignments in my model + some weird extra lines, which resulted in the contours not working properly. Eventually, Anthony helped me iron out the defects, and we added tabs to make sure that the free pieces of wood would not fly out during machining.
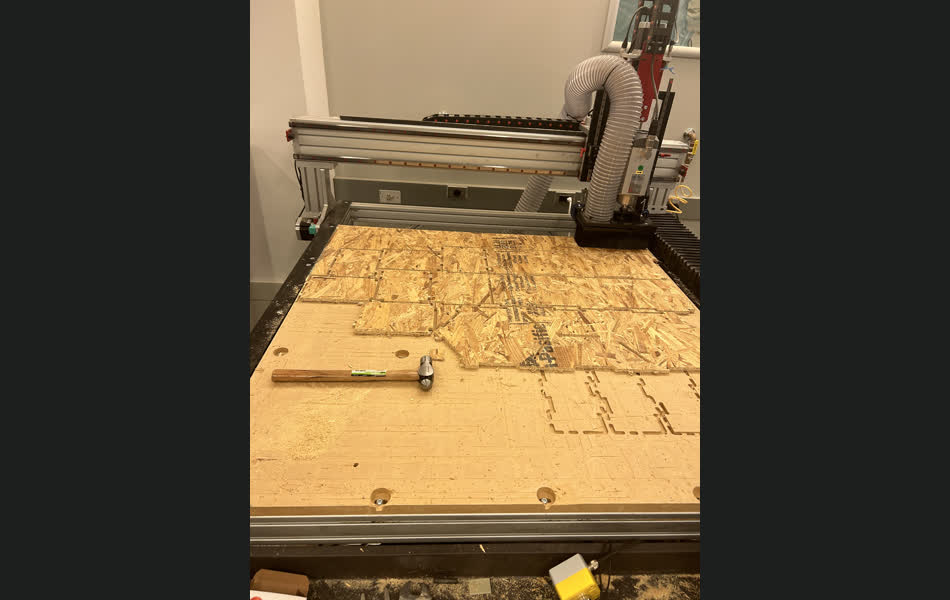
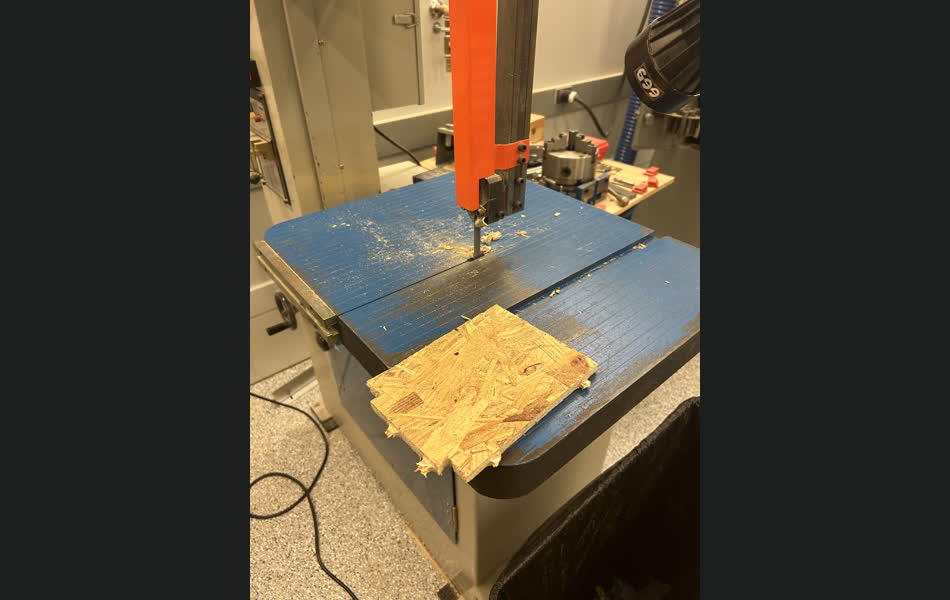
We started the machining process, which only took 5 minutes! Anthony said that this is because we’re only worrying about 2D for now, and not to get used to it. The machine quickly took care of the wood, and the hardest part of the entire project started: postprocesing. We used a crowbar and a hammer-block to get the pieces of — took a while to get used to, but eventually it all came off the weak plastic nails. I then used a bandsaw to remove the tabs that we placed to ensure structural stability.
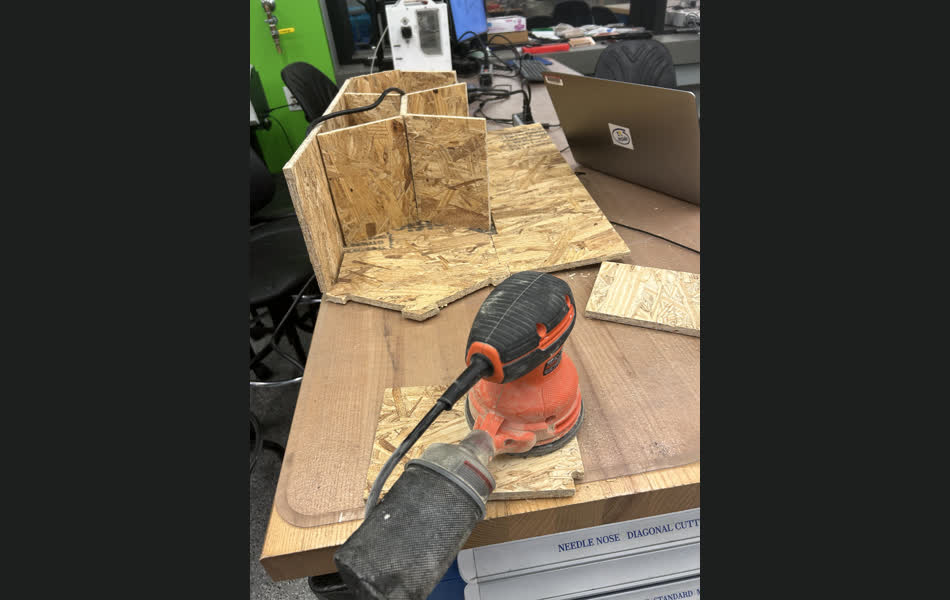
Next up was sanding, making sure all the weird splinters in the material didn’t hurt my friend when they tried to use the shelf. And finally, I glued together the entire contraption with wood glue, held everything together with clamps, and let it dry overnight.
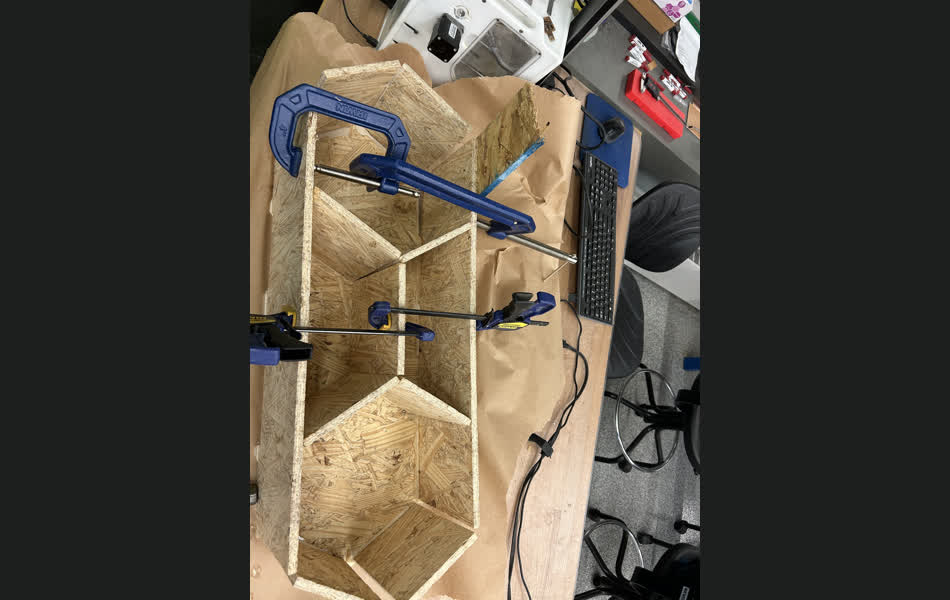
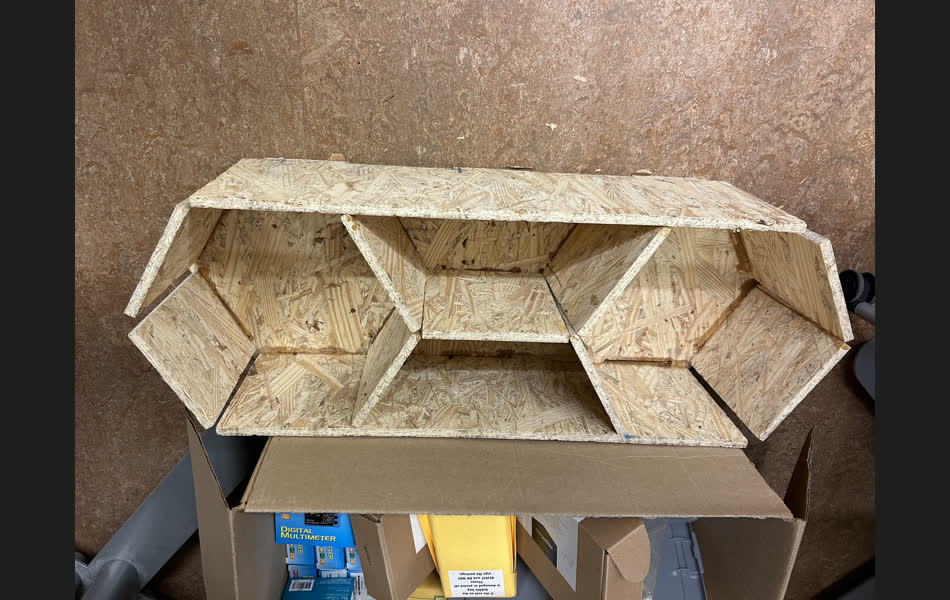
I'm really happy with how the shelf turned out, and I'm excited to see how it looks in my friend's room (though she did mention she might give it a layer of nice paint though :D)!