**[Raiphy Jerez's site](../index.md.html)**
Personal website for [MIT MAS.863/4.140/6.902(0)](https://fab.cba.mit.edu/classes/863.22/)
Week 1: model (raster, vector, 2D, 3D, render, animate, simulate, ...) a possible final project
Intro
=======================================
I built an electric skateboard. To me, it seems that there are many options for a beginner to choose: hundreds of different motors, decks, wheels, trucks, motor controllers etc. Well choices for most components. There seems to be a lack of choice in remote controller. So let’s fix that. Let’s make the ultimate remote control for E-Skateboards.
But let’s also make it useful for other applications.
Design requirements
======================================
The controller should be able to be operated with one hand. It should also be ambidextrous. I want something ergonomic, something one would be comfortable holding in one’s hand for extended periods of time. It should also be small enough to fit inside the pockets of regular pants. Maybe something around the size of a screwdriver handle (and held with more or less the same grip).
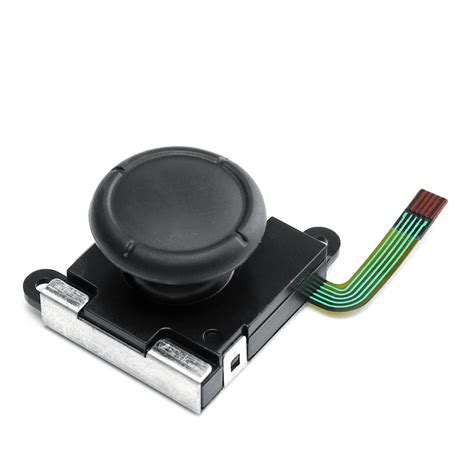
The controller needs at least one sort of analog input to work as a remote for E-Skateboards. I’m thinking a thumb-actuatable slider with a return-to-zero spring. But let’s go above the bare minimum. I can think of at least 2 other degrees of freedom my thumb can move it, and it would be a shame to not utilize them, so lets turn the slider into a joystick with a clicky button. I think I can use a replacement Nintendo Switch joystick for this. It’s small, cheap, has a clicky button and good range. Also it’s cheap.
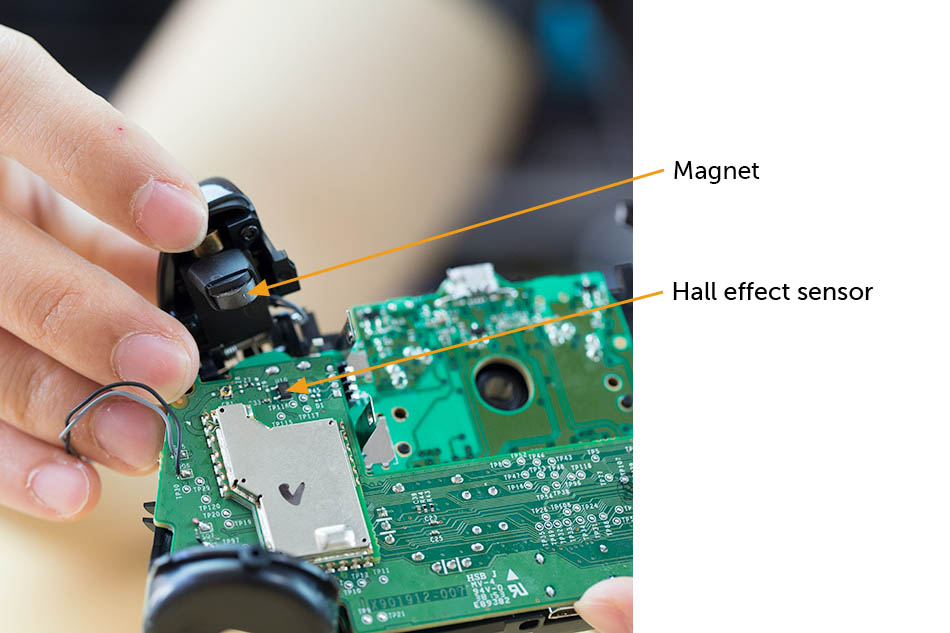
I also want some buttons accessible from the pointer and middle finger. But buttons are boring. It would be cooler to make them analog inputs. It I did that, I can still use them a regular digital buttons (either 1 or 0 by checking if the measured voltage is above or below a threshold in code). But I can also use them to control other things that require an analog control. I think in order to fit 2 buttons I’ll need to use a magnet/hall effect sensor to sense the position of the button instead of a potentiometer. This is what is used in the official Xbox One controller (see image below) I’ll worry about the specifics of that mechanism later.
I want to include a display on the controller. This will let me see how much battery is left on both the controller and also on the skateboard. I can also read other important metrics like speed and temperature of the motor. I think an rectangular OLED would look cool and be visible in direct sunlight.

It would also be a good idea to include an IMU in the controller. Later on I can implement features that do cool things based on the motion of the controller. One example that comes up is killing power/engaging brakes if the controller is dropped.
Sketch
======================================
With these considerations in mind, I opened my notebook to do some sketching.
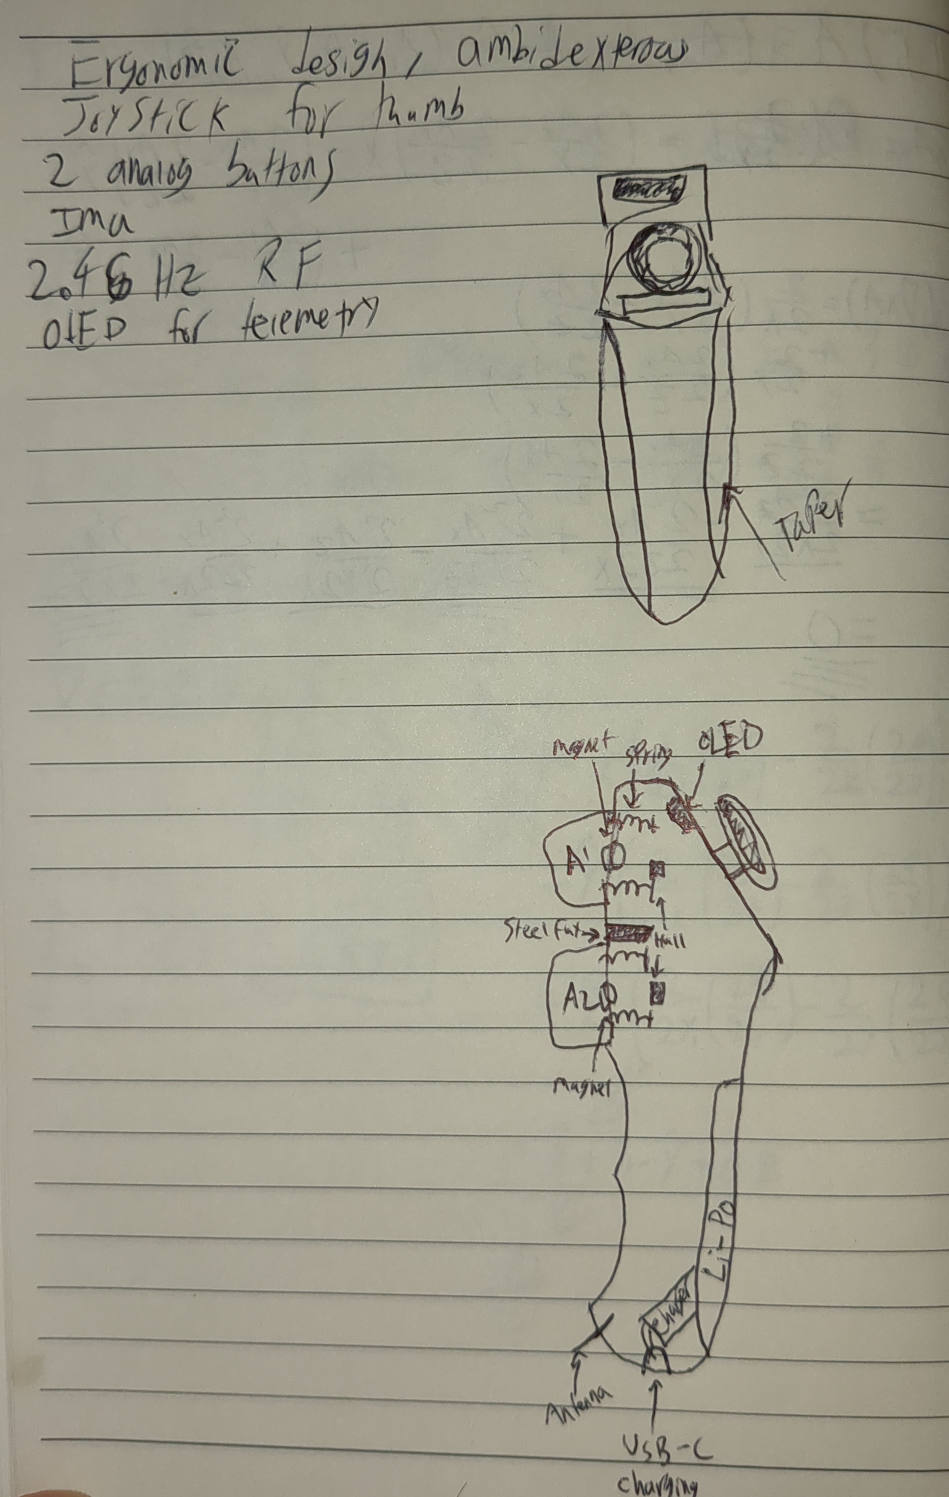
Notice how there are two boxes above and below the joystick. I initially thought to put the OLED below the stick, but then realized that it wouldn't be visible without taking your finger off the stick. So I placed it above the stick. The final design will most likely not put the OLED in either of these locations for one simple reason; it won't fit. The only way the OLED would fit on the device is on the side face. This presents a problem; If I put the OLED on the side, It will be visible when held with one hand, but it will be blocked when the device is held with the opposite hand. The solution: place 2 OLEDS, one on either side.
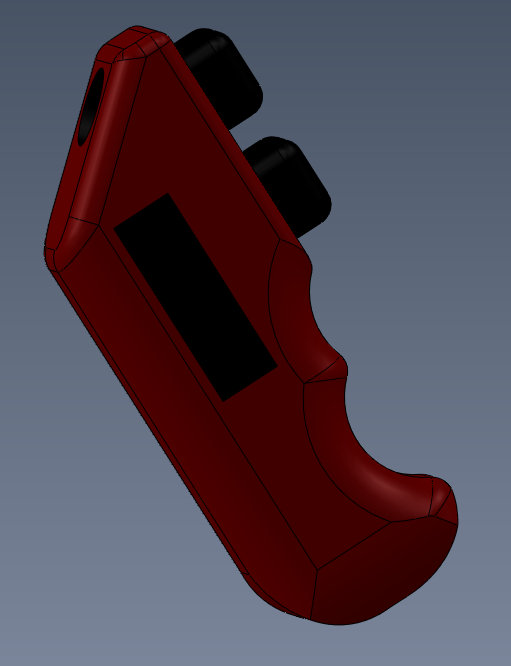
CAD
======================================
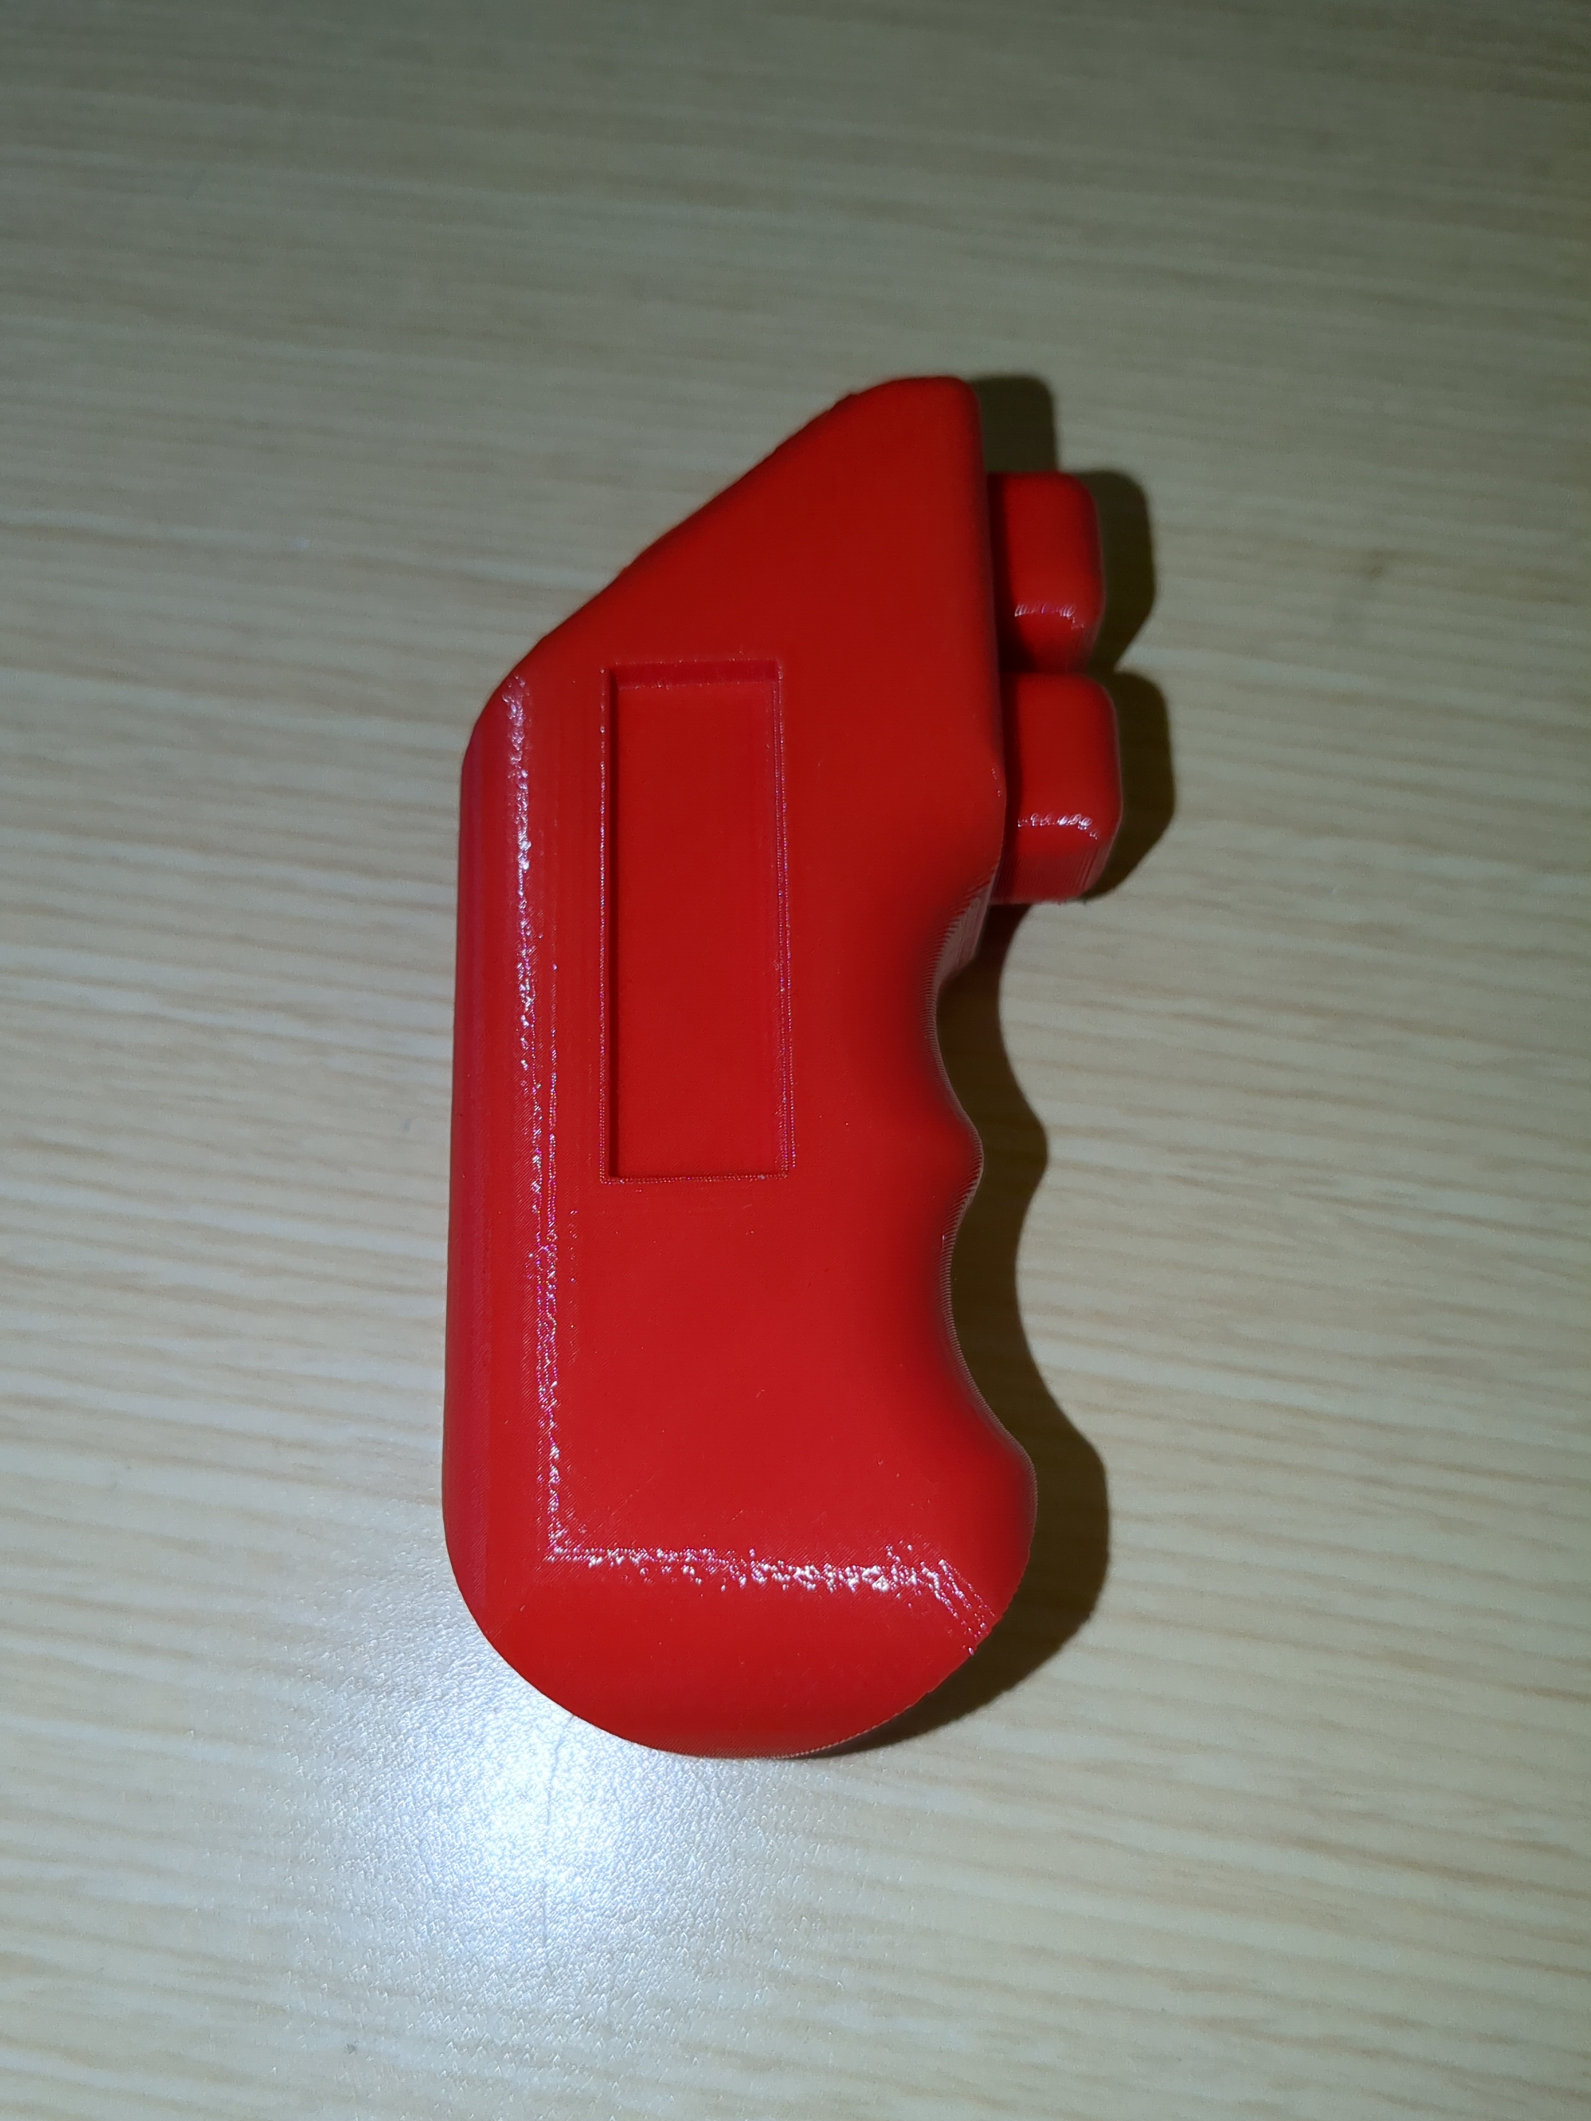
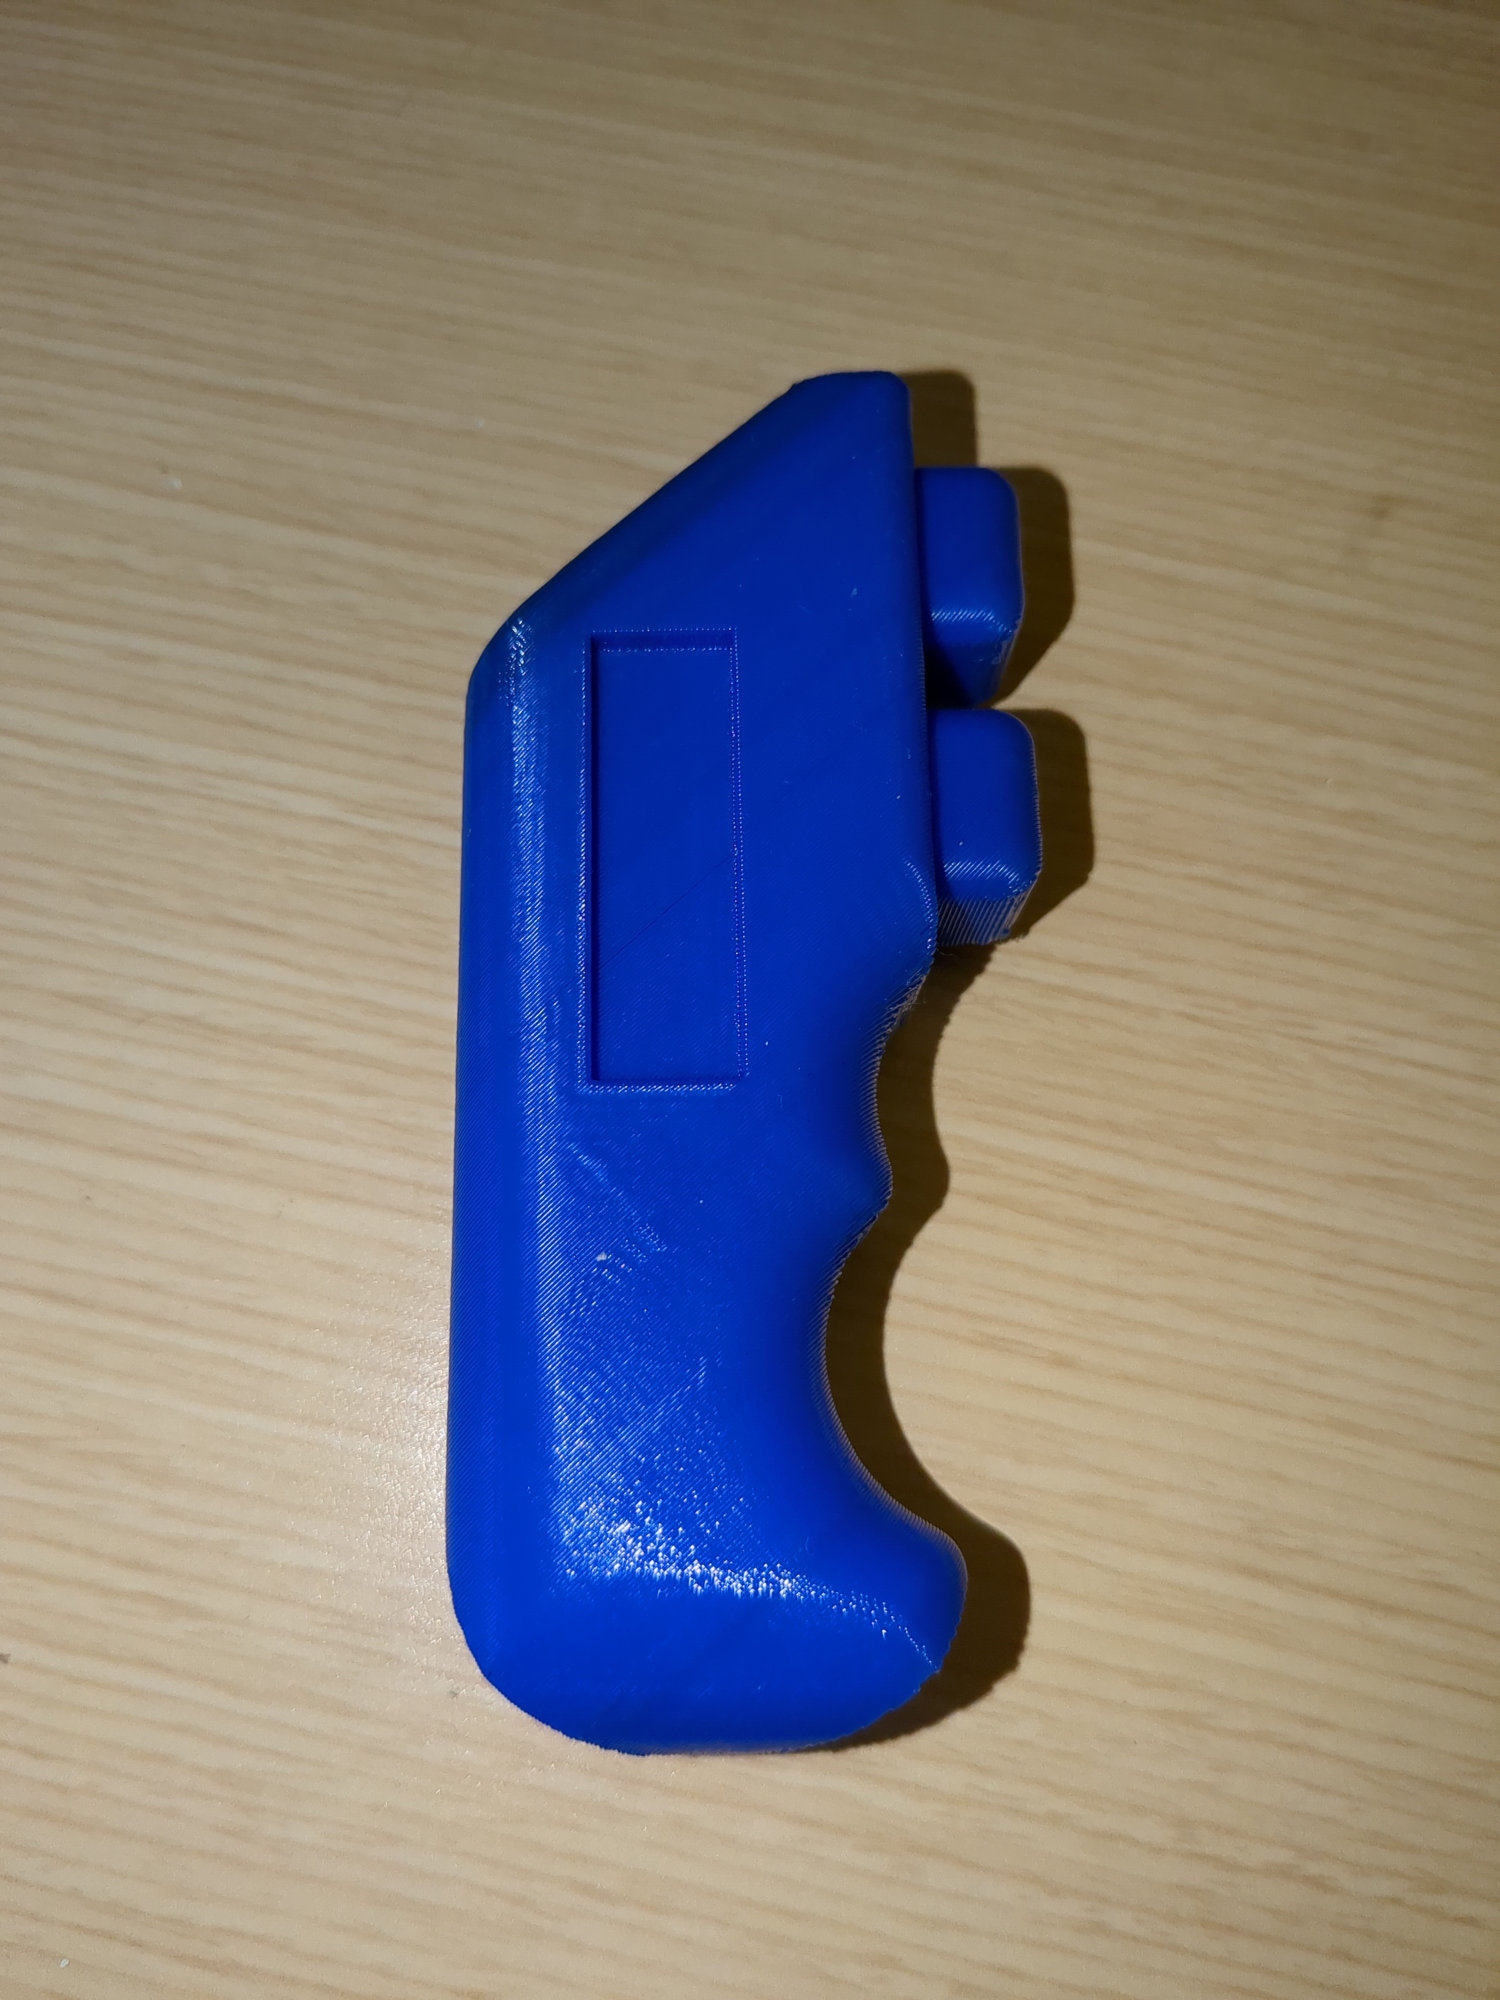
Drafting this up in Solidworks was oddly satisfying. I colored some of the faces hotrod red (to make it go faster). I think I'll call this project the redpill.
Parameters
----------------------------------------
I right when I started the CAD that I wasnt cracked enough to get the dimensions right the first time. This is why parametric CAD exists. Notice how the image above is labeled "version 3". Versions 1 and 2 were too small/ awkward to hold. I know this because I exported the CAD body as an STL and printed it on my 3D printer.