13 | Wildcard Week - Inflatables
Given the sheer number of ways there are to make things and the time constraint on the class, it’s not possible to actually make “everything”. For the last week, we all split up into different workshops to build something with a technique that there we unfortunally can’t give a whole week to. For this year the options were:
- AR & VR
- Composites
- Electrical Discharge Machining
- Embroidery
- Large Format Cutting, Folding, Creasing, Drawing
- Sheet Metal and Welding
- Waterjet Cutting
And the one I did Inflatables and Soft Robotics
This week is meant to be an easy week where you can focus on your final project, and honestly I could of made it that but I sort of got distracted with my inflatable idea. Introducing…
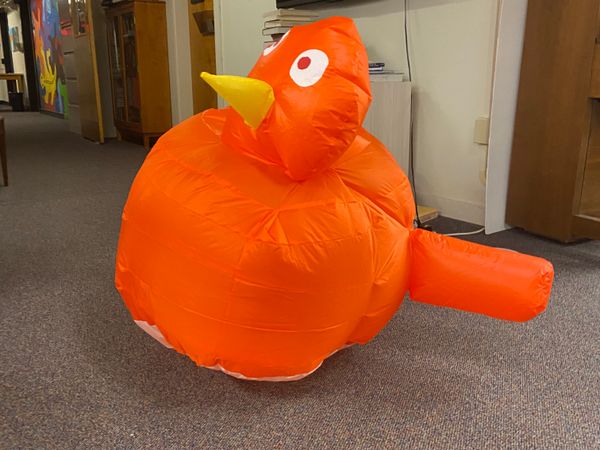
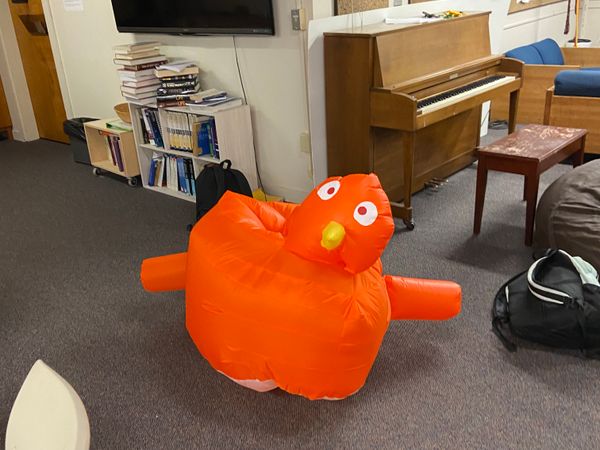
A giant orange inflatable buff pigeon
Ok, but why a giant orange inflatable buff pigeon.
I have this friend – Andi. He’s obsessed with pigeons. We went to New York for one Thanksgiving and after a while walking through New York City realised we’d lost him. After frantically retracing our steps we eventually found him fawing over how the pigeons. Apparantly they were are soooo different to South African pigeons. Anyway, it was his birthday a while ago and, well this semester has been a lot so I never got him a gift, and then I thought why not an inflatable gift.
Ok but what would a giant orange inflatable buff pigeon even look like? Well, have no fear Dall-E is here. This week we had a recitation on how to use AI for making, so I did that. It look a while to get right
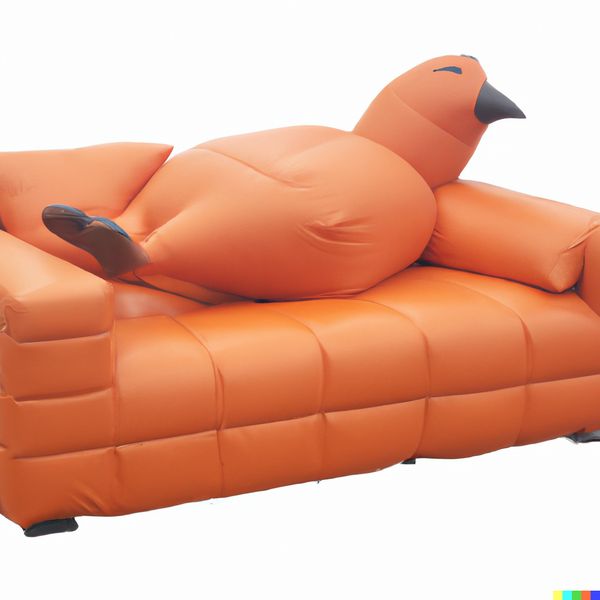
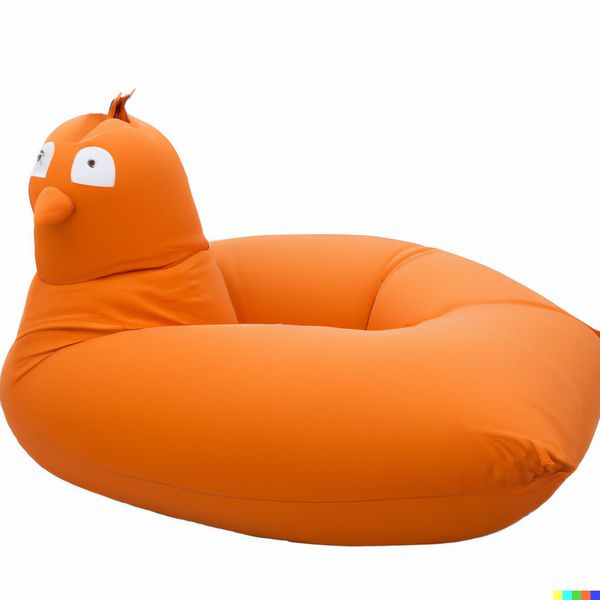
But eventually I got these two which I based my inflatable around.
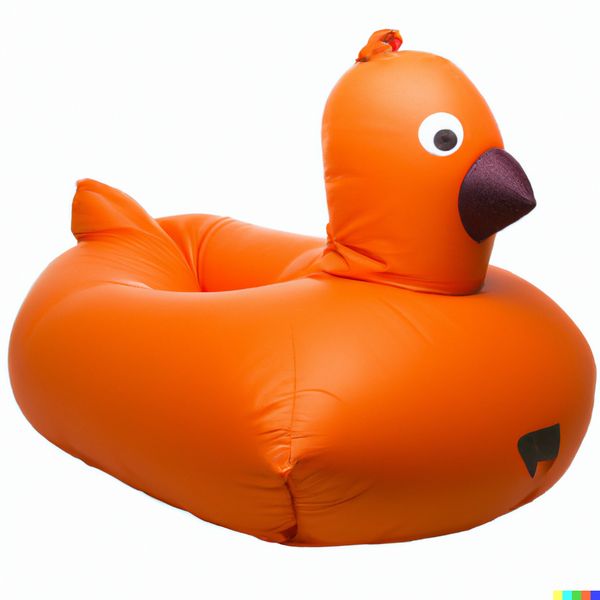
Specifically I wanted to
- Add creases to the fabric in front to create the impression of abs
- Have a head, beak, tail, and two strong arms
- Have a recess in the middle for someone to sit in.
Desiging in Fusion
So using Fusion is definetely not how inflatables are normally done (they’re usually more like stuffed animals where you design 2D sewing patterns in something like illustrator, etc), but Neil wanted us to learn sheet so here we are.
There’s no better way to put this but this was a pain
The basic flow for using sheet metal is supposed to be:
- Sketch your piece
- Flange it out
- Add bends / lofts / etc
- Click the Create flat pattern button and instantly get a flat pattern
Unfortunally, this just didn’t work. To begin I sketched two ellipses and lofted them together with the flange tool.
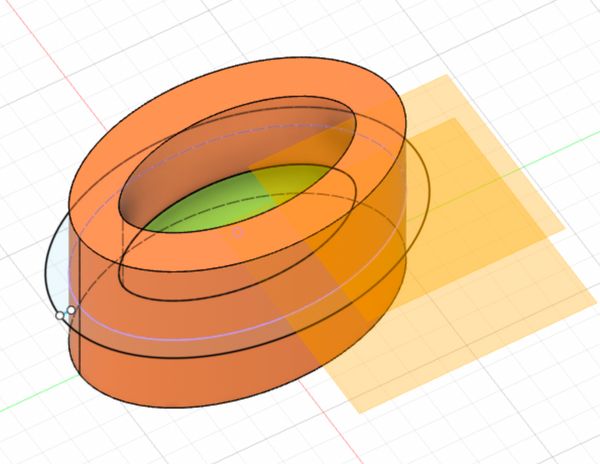
Then I tried to make a flat pattern.
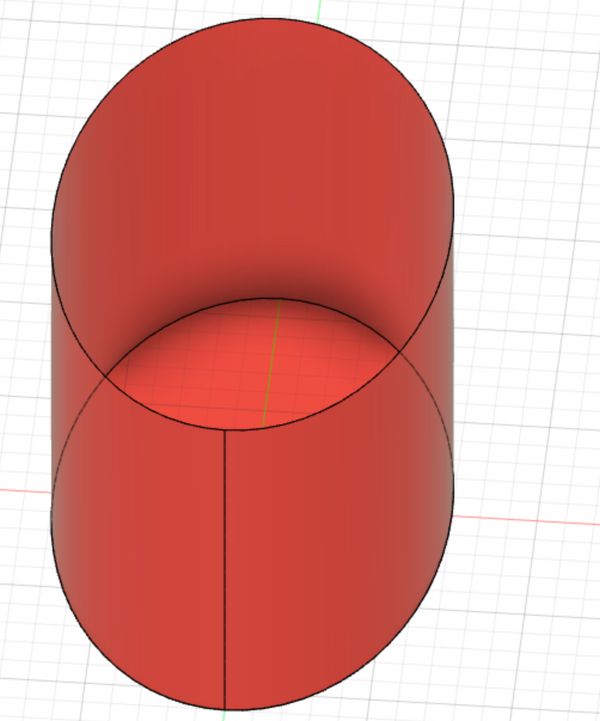
But it just came out 3D. Ok, but I forgot to include a gap in the ellipse so there’s no where that it can fold
So then I included a gap and still there was no luck. I unfortunally messed up my Fusion history so much that I’ve got no pictures so show of here, but I talked to Miana and we both couldn’t fix it.
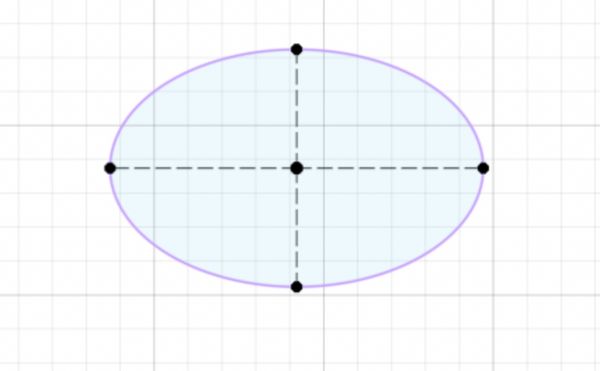
So, after trying the above and a lot more for a few hours, I eventually just took what I had made and started sketching 2D profiles.
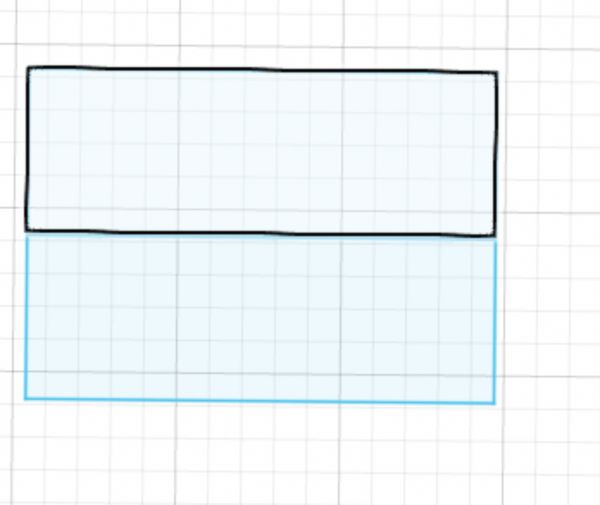
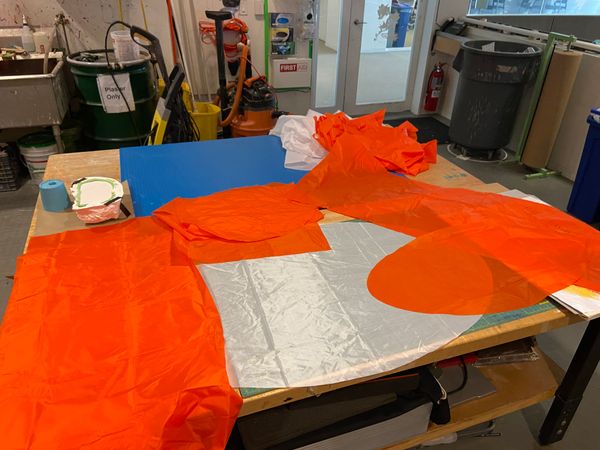
First was the base of the pigeon. For this I drew an ellipse of width 55cm and length 30cm
Then the body of the pigeon. This was going to be a rectangle which wrapped around the ellipse base and acted as wall. I calculated the cirfumerence of the ellipse with which would be sewed together to make the ellipse wall. I was space constrained since I only wanted to use orange
Next up was the head and arms. For the head I used the spline tool to draw which looked sort of head shaped, and for the arms I drew a rectangle attached to a circle. The rectangle will be wrapped around and sewn to the circle to give a buff arm impression.
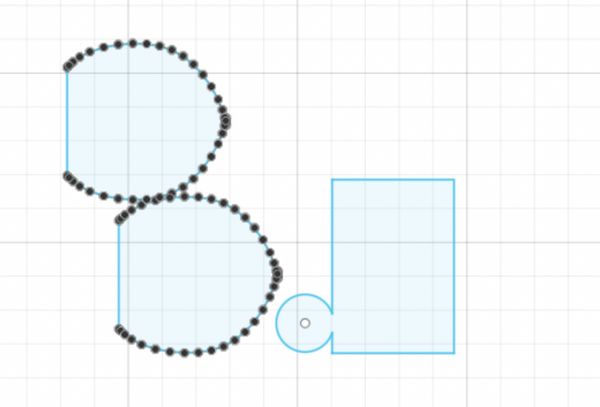
Then was the tail (just a rectangle with a square on the end), another arm, and also the top of the pigeon. I wanted to make a lip which would attach to a smaller inner ellipse wall. I copied by base ellipse and offset it inwards so I’d cut out both the lip and inner ellipse in one go.
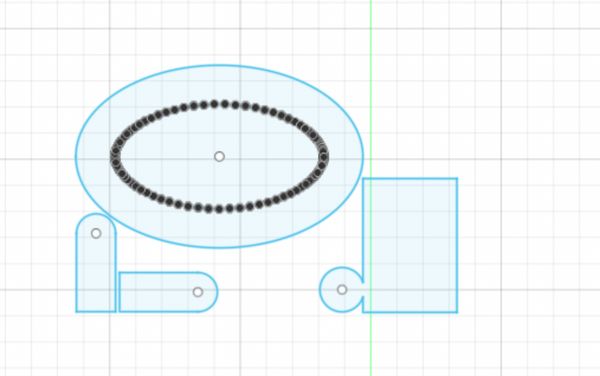
Finally, there was the wall for the inner ellipse. Exactly like before this was 2 rectangles
Cutting it on the Zund
Alfonso had offered to cut everything we make on the Zund, so I woke up super early on Tuesday (9am 😱) and headed to the Mars Lab, in the Media lab. The Zund is a flexible and precise gantry machine which has modular end effectors so can anything you would want to do in 2.5 axis. For our cases we just wanted to cut.
I exported all my sketches as DXFs, sent them to Alfonso and then he cut them. We had some slight concerns with the size of my fabrics. In my quest to make everything (bar the base and beak) orange I hadn’t left much clearance between the pieces and side (like ~1cm) but in the end in turns out all my measurements had been wrong which was great here since it left some extra room and everything ended up cutting great :)
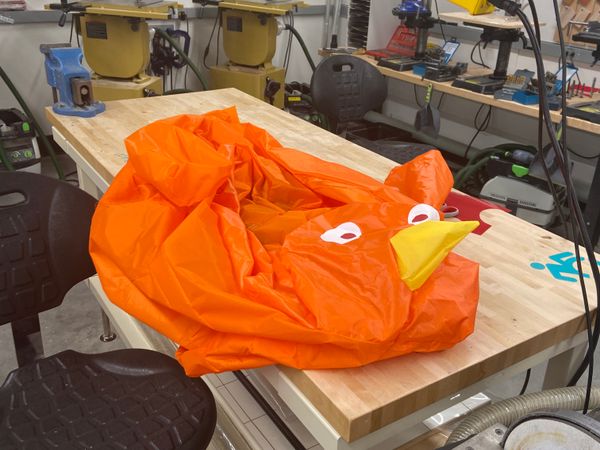
Sewing this together
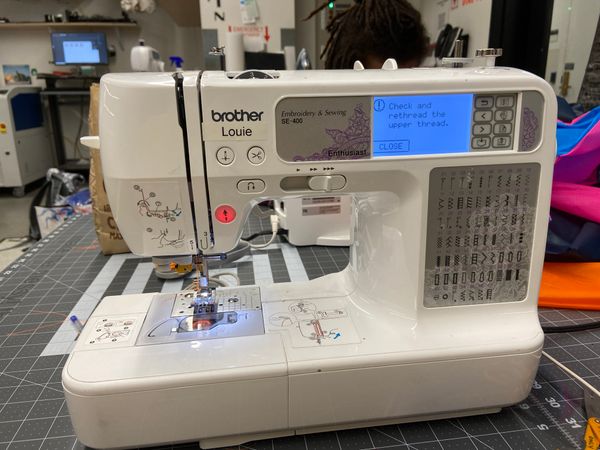
Yet again, this week thought we I do not know how to sew. We weren’t allowed sew in the Mars lab since we had missed the sewing training so instead migrated to Metropolis and started sewing there.
A lot of stuff went wrong so I’ll list them out here:
Refilling a bobbin
Keeping with the theme, I wanted to use orange thread. Since there was a lot of stuff my bobbin eventually ran out (actually it ran out twice), which meant I needed to refill it. Unfortunally, I set this up wrong the first time and we I told the machine to start spinning the thread slipped off the bobbin and wrapped around the underneath part. It wasn’t pretty but thankfully, I was able to take off the bobbin and easily cut the thread.
Sewed all the way around
For the abs my plan was to sew a crease on the front part. Unfortunally, I forgot about the just front part and sewed the crease all the way around. After asking Alayah and Dave Custer (a Metropolis Mentor) they suggested I use a sew ripper to get it out
Before this I had never used a seam ripper, and thought they were some magical tool which made removing seams super easy.
False.
Seam rippers are just tiny sharp edges which you can stick underneath a seam to try get it out, but it’s incredibly tedious. So I spend the next hour going in and out of my seams to remove it.
Orientation
Orientation with sewed pieces is hard. I sewed the beak onto the head first and then onto the body. Except the head came out backwards. Ok, I got my trusty seamripper, and took it off. And then sewed it back on in a different orientation. Yep, it was different. A different kind of backwards. So I called over Alayah, who gets this spatial stuff much better than me, and we eventually figured out which pieces had to be sewed together to get it to work right.
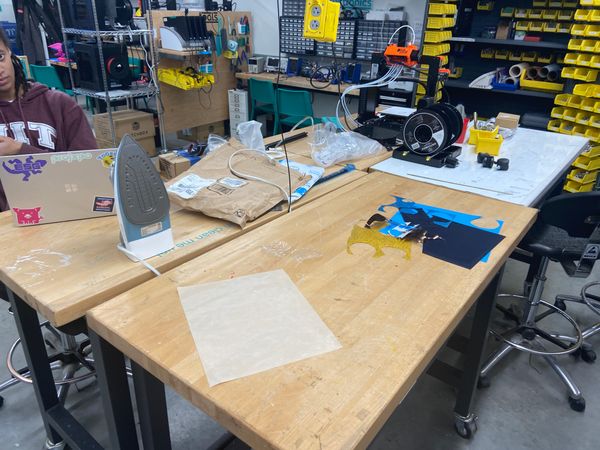
Vinyl cutting eyes
Once everything was made (a.k.a 8 hours later at 10pm) it was time to add on the eyes. I got some heat-on Vinyl from Edgerton, plugged in the iron and cut out white and red circles (technically pigeon eyes are usually orange, but I’d already used so much of that and sometimes the eyes are red so I’ll go with it). Then I placed the vinyl on (careful to have shiny side up), heated it with the iron and then removed the basic. Viola, the eyes
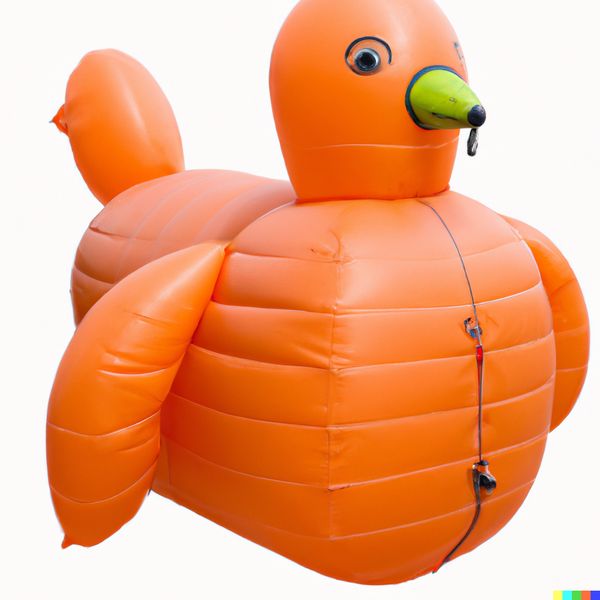
And finally, everything was ready to test
I got a hair dryer, plugged it into the back and voila