06 | Computer Controlled Machining
The idea
Before the week started my idea was to build a human-sized fire-hydrant. One of my friends is obsessed with fire hydrants and sends us all pictures of any "noteworthy" ones he passes. I'd mentally planned out what it would look like and it incorporated a ton of curved features. However, during lecture on Wednesday, Neil talked us through some of the properites of OSB and how it definetely isn't a bendable material.OSB has very specific material properties. It’s called the “sausage of wood” since it’s made from compressing left over wood strands and bonding them all together with adhesives. It’s cheap and great for large panels but it isn’t meant for some projects.
Like, it really shouldn’t be used to build a double decker couch. Yeah, I tried to build a double decker couch. If you’ve ever seen teh lego movie then you know what I’m talking about
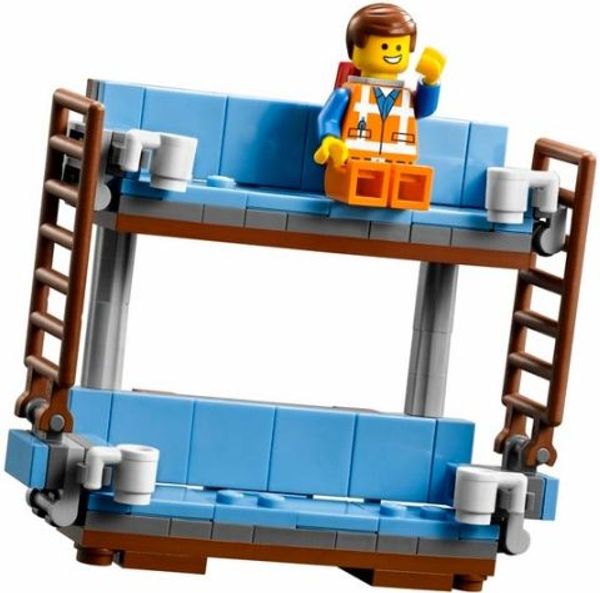
You get two couchs, place one over the other, and attach a ladder to the side. The Edgerton student centre was looking for a couch and one of the staff members jokingly suggested a double decker couch, so with Alayah from the architecture section we wanted to try build one.
We each had one sheet of around 96x47” OSB so we decided to each design our own couch, and then use 2x4 plywood beams for the support structure.
Designing the double decker couch
We first needed to figure out some dimensions. Edgerton has a couch already so we started measuring it's length and width and so how tall people were when they sat on it (to figure out the best height to loft the second couch at) and how far down their legs dangle
Then we planned our support structure. The couch on top was going to be really heavy, the combined weight of the OSB and a person. We estimated around 100lbs for OSB and 180lbs for the person. This weight would also not be distributed evenly. We’re both not far enough into 2.001 yet to do all the calculations required to use the minimum materials in the perfect position so decided to try overkill the support structure.
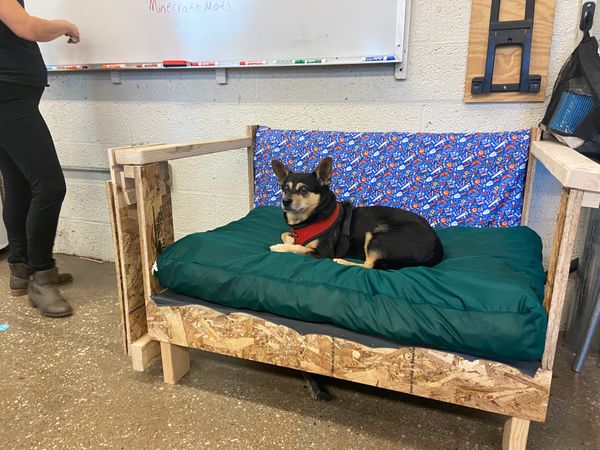
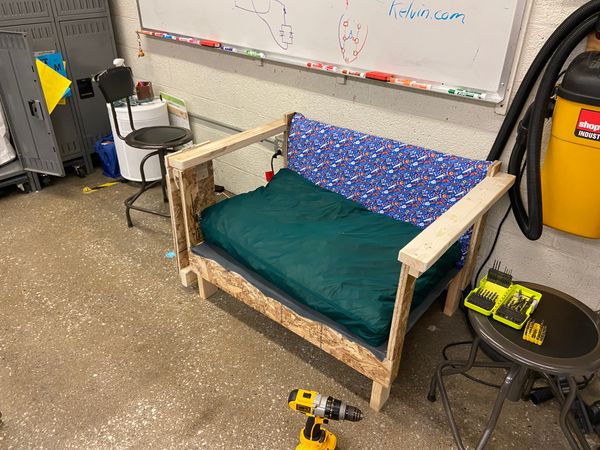
Alayah’s couch would be placed on the bottom. We included an estimated for how thick her cushion would be and decided the sitting height (height of couch above ground) would be 15in, the average male is 35in tall when sitting so we wanted to loft the second couch 60 in above the ground. The couch would be supported be 4 2x4 plywood beams on each side, with crossed beams at the sides and back and distribute the weight.
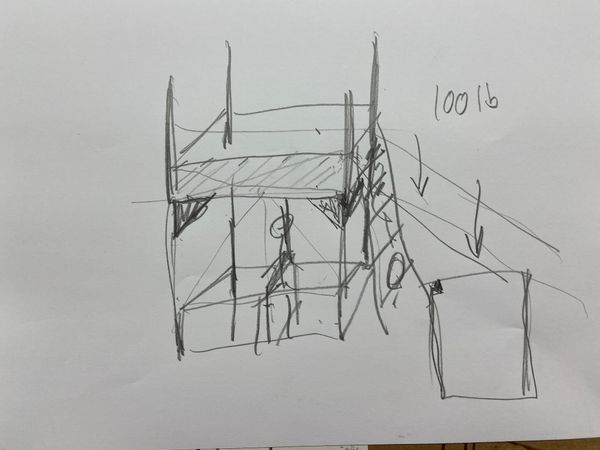
The top couch we decided would be less a couch and more a beanbag platform. Since it’d be lofted it wouldn’t need a support structure to raise it to sitting height and we decided it’s base needed to be a single piece of OSB to best support the beanbag.
Finally, after listening to Anthony at recitation and talking to a furniture maker in Metropolis (more below) we opted against joints. OSB falls apart if it’s put under stress, so finger-joints weren’t going to be safe.
Cadding the couch
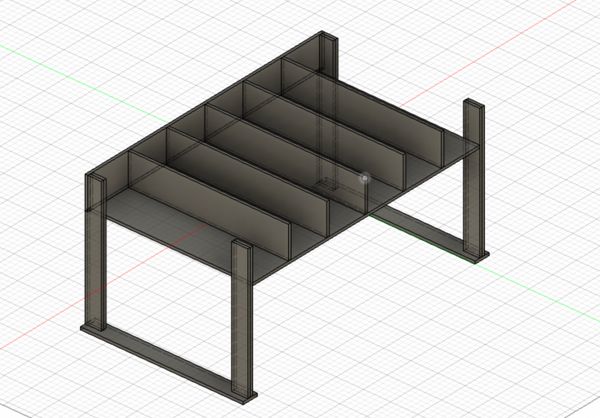
Cadding the couch went smoothly. I parameterized the dimensions so that I'd be able to play around with them when it came time to place everything on the board.Firstly, I made four support beams on each corner. I messed up here however by not thinking about what would be comfortable arm height, so they rise to 18in above the base which makes a funny sight of someone needing to have their arm angled upwards to use them.
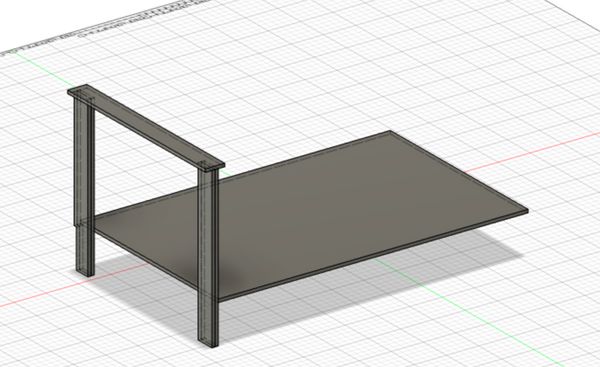
Then I placed 5 rectangular OSB pieces underneath the base to support the platform
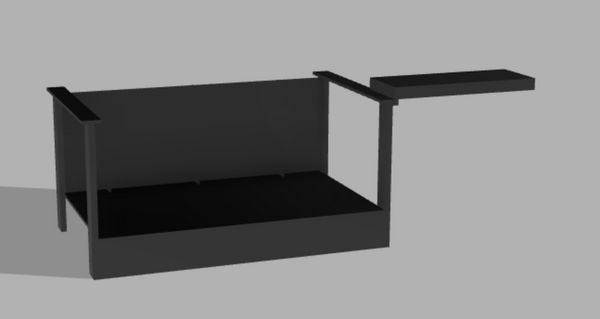
Finally, the point of the beanbag was that Alayah refuses to use her desk and insists the floor is better. So a beanbag on a platform is basically equivilent to the floor. To allow work to be done I wanted to incorporate a desk, so I cadded one consisting of two parts attached with a hinge that would rotate around a pin-joint at the side
Talking with a furniture maker
Once the couchs were designed we wanted to run them by someone for feedback, specifically if they thought it'd be safe.A new staff member, Lee Zamir, recentely joined Metropolis and he runs a personal furniture studio so we found him one day and went through everything.
First he explained what makes a chair comfortable:
The base should be between 17”-18” off the ground
The back should be angled at 20° from between 7” to 14” from the base
- This takes weight of the sitter’s back.
- In a couch you don’t have to worry about this as much since the back cushion deforms to match the sitter’s back shape.
The part of a chair’s back above 14” and below 7” should gently slope away from the back support to not have any hard bars which would dig into the sitter’s back.
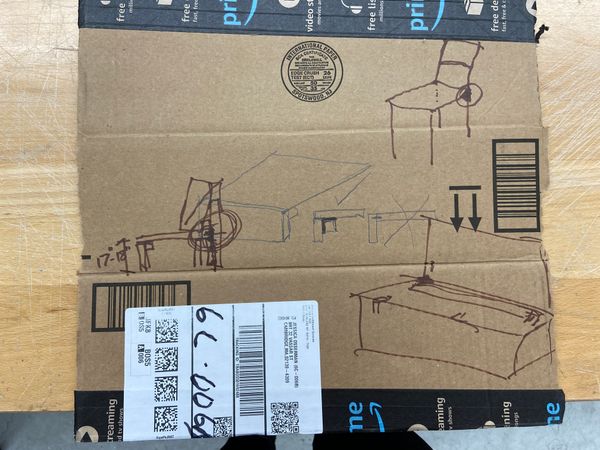
Drawing from Lee 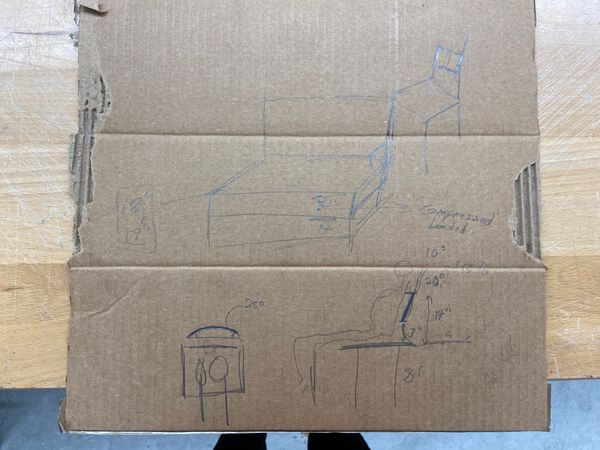
Drawing from Lee
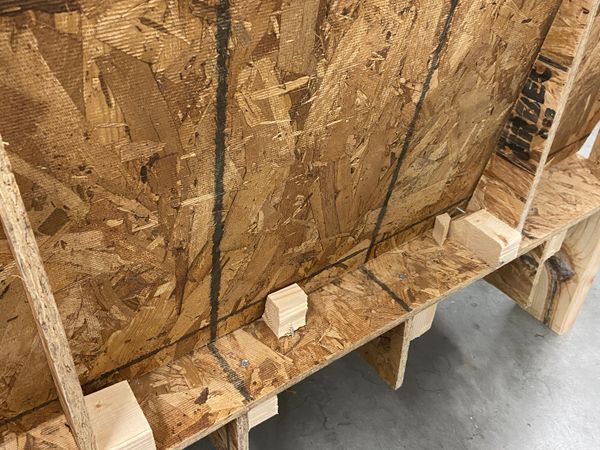
After, hearing all of these and making some comfort adjustments we talked about the structures safety. Lee recommended attaching triangular blocks at all the corners to distribute the uneven weight and agreed to avoid finer-joints.
Instead, he suggested glue blocks. This is where you place plywood blocks in between the OSB sheets and glue everything together. This, according to Lee, is a lot sturdier.
Everyone thinks we're going to decapiate someone
With Lee's stamp of approval we sent our CAD drawings off to Jen in the architecture shop on Monday. Within minutes she got back to us wondering about the lack of finger-joints. To explain we told her how we were going to make a double-decker couch. Frantically Jen replied, this time with more people cced, to warn against our "sketchy" and "very dangerous" project. She was understandable concerned about placing such a large weight above someone's head.“How deep is it?” - He asked
“30in” – I responded
“That’s too deep, a couch’s width should be around 20in”
“Also, what are the supports on the side”
“Armrests” - I said
“Those are too high, this won’t be a comfortable couch”
After just recieving those emails from Jen where she sounded terrified at what we were trying to do, I was confused about the sudden change of topic.
“So, so just to confirm you think it’s safe to build this?”
“Yes, definetely. Although glue blocks won’t work, glue sticks to OSB’s surface which will just flake off”
So now, we have three furnitues makers each giving us a different verdict about the safety of our structure and how we should put it together.
We contacted Jen again to get more information about finger joints where she explaiend why OSB was a poor material choice for this project
- OSB falls apart if it's stressed
- Any sort of joint (finger, screw, mortise / tenon style)will fray or splinter if there's stress placed on them
- It absorbs moisture easily, and swells like MDF if wet.
She told us that a double-decker couch wasn’t the right sort of project given the materials. After some thought, we agreeded.
Unfortunally, we had a 2.001 midterm the next day and this whole experience showed us that we really needed to study more. So we promised that we wouldn’t loft the two couchs but asekd if Jen could CAM it.
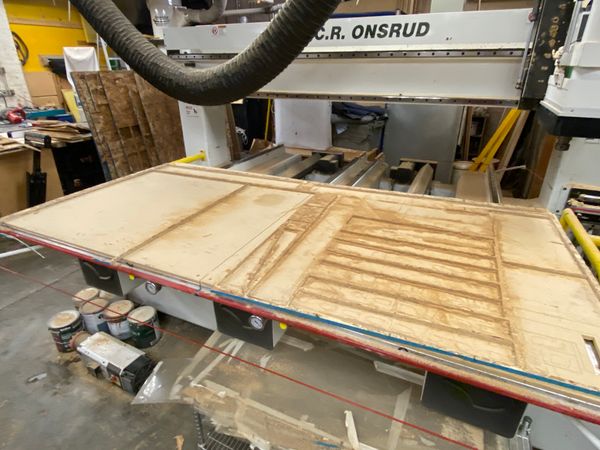
Cutting the couch
After leaving N51 on Monday we were a little dissapointed that we weren’t going to make our double decker couch but hopeful that the simplified two boring floor couchs woulnd’t take too long. We were wrong.
When we got to N51 on Monday we checked with Chris if he got our CAM – he did yay :) However, there were two people in front of us in the queue for the router. Chris said it’d take 45 minutes, so we waited.
The first job completed fine, however during the second person’s job there was a loud clanging sound and one of the endmills poped off. The endmill that did most of the cutting. The shop manager went frantically looking for a new one and after a tense 15 minutes finally found one.
This was the second time that day one of these endmills broke. The best reason for why was that the endmill was going too depth and the resulting torque was large enough to break it. We went back to our CAM and adjusted our plunge depth to have the router do two passes over every cut.
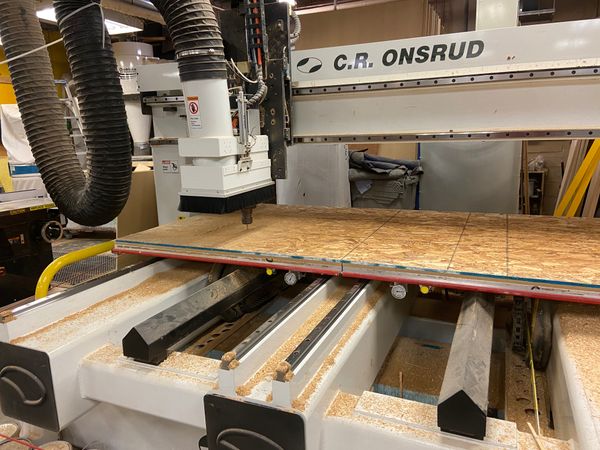
Eventually, it was our turn to cut. The Onsrud at N51 has a vaccum figure so all we had to do was to place our first OSB piece on the table and engage the vaccum. We did a test run of the job with the z-index set to 1, and when this looked fine ran the actual job.
Everything continued looking great, until I saw a small stream of water leak from under the router. Then 4 streams. Then a whole river. I looked behind the router and someone had left the tap on, it had filled the sink and now it was overflowing all over the shop.
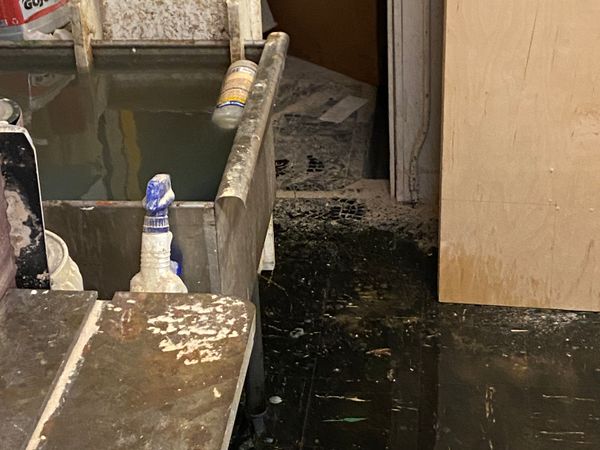
After frantically runnining to turn it off, everyone had noticed the water. We paused our job and started cleaning up the Great 2022 Flood of N51
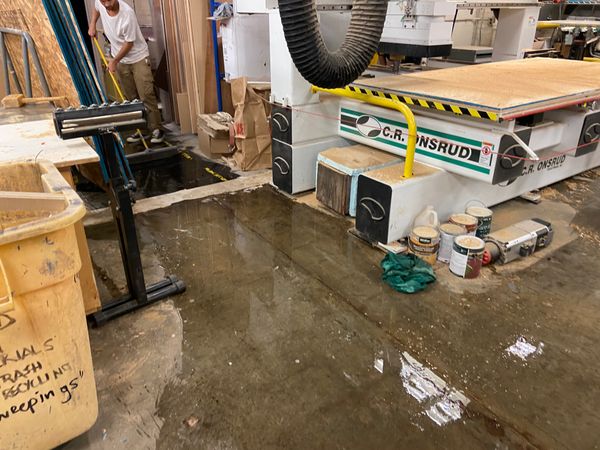
Once N51 was finally dry again we were able to complete Alayah’s couch. To get all the pieces we first got to use their massive vaccum to pick up all the dust.
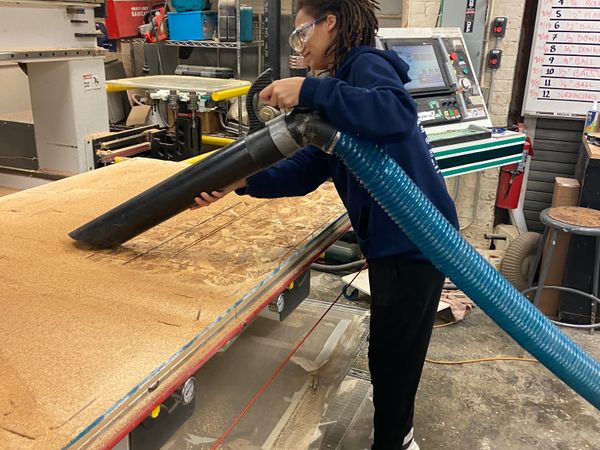
The onion skin unfortunally left a lot of jagged pieces on the side of the OSB so before I could use it, I needed to sand it down. First I put every piece on a belt sander and finished them with the surface sander.
By now it was 10pm and the Architecture shop was about to close, presenting a new problem – where to go now. I stacked all my pieces, wrapped them in cling-flim and then carried them from the Architecture shop to Metroplolis.
It was awful. My arms still hurt as I type this.
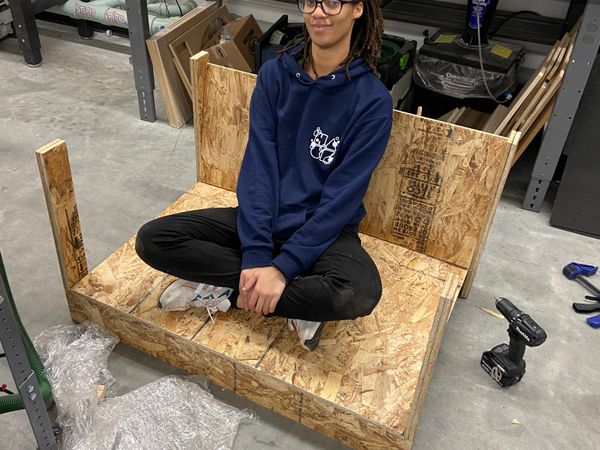
Building the couch
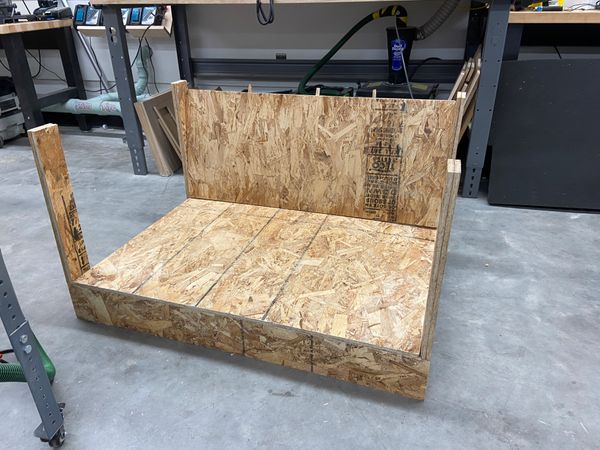
Fianlly, it was time to build the couch. For the glue-no-glue blocks we got a beam of plywood from Edgerton and cut it up on the table saw (I got to learn a new tool :)). I placed the different parts of my couch/platform together, put blocks in the corner, clamped everything together, and drilled. It took hours. Sometimes the screws would go in perfectly, undertimes I'd hear a rip as my glue block fell apart.I never wished more that I used finger joints.
Now I needed to test it
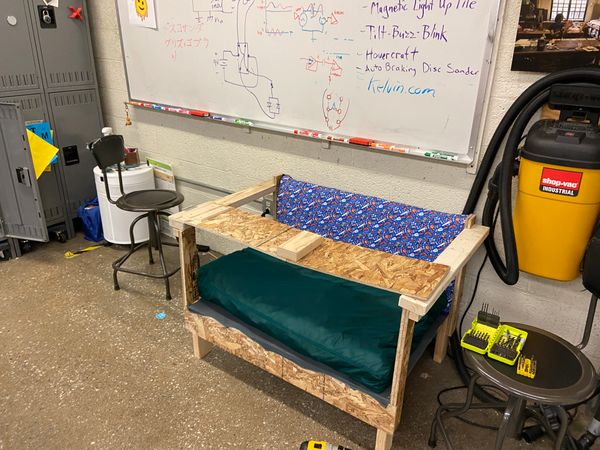
Where's the desk
Here’s future Richard (at least future from where the content above was written). I came back after class to get the desk working. I had gotten hinges from Edgerton Student Center so attached those to one of the arm rests and then on the opposite side of the same piece the other to connect the two arms.
This meant the desks opens up sort-of-weirdly
but it hangs nicely at the side. Well sort-of nicely I’ve been told it could also funciton as a nut-cracker in addition to being a desk. So yeah, don’t put you’re fingers anywhere near the gap.
Finishing the couch
Now that the couch was assembled the real hard part began. Finishing it.
Fixing the structural issues
First, I tried testing the couch. When I sat down – well sat is unfair. The couch was soo low I sort of fell down. I pressed my back against the back of the couch and hard a loud snap sound as the wood blocks all failed. Oh no!
Ok so there were two structural changes to make:
- I need to increase the height
- I need to reinforce the back
I was able to get a 2x4 wooden plank from the Edgerton student center which I cut into four pieces using a bandsaw to add to the height of my couch
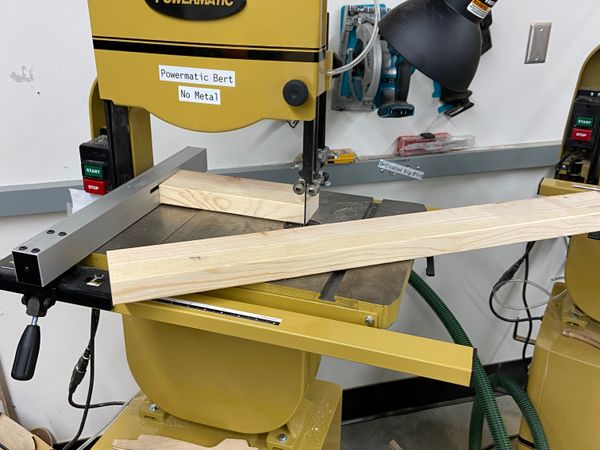
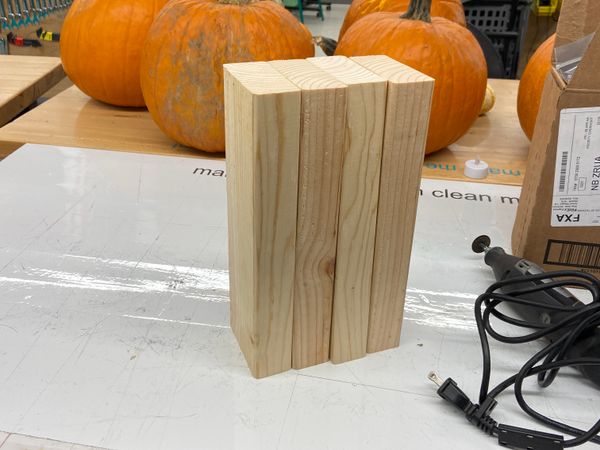
I attached these directly to the OSB using screws to maximize stability. Then I used the remaining part of the plank to cut out triangles to replace the triangles I had previously cut on the CNC router.

Adding a back
Honestly, the Edgerton Student Center is the MIT equivilent of the Harry Potter room of requirements. If you need something, you just have to go, ask for it, and someone inside has it. In my case I needed some sort of backing. Thankfully Edgerton had left over foam from somone’s project, which I repurposed for the back.
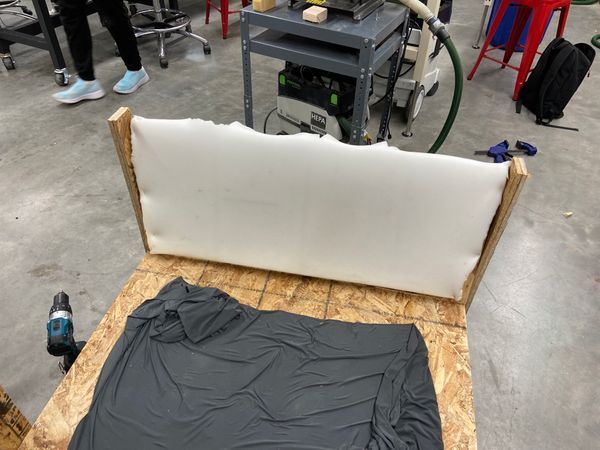
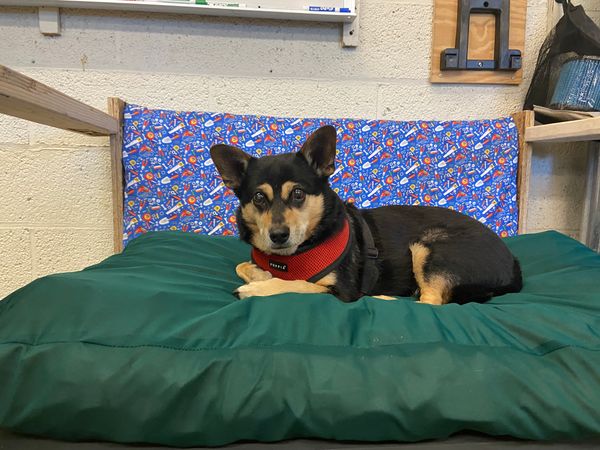
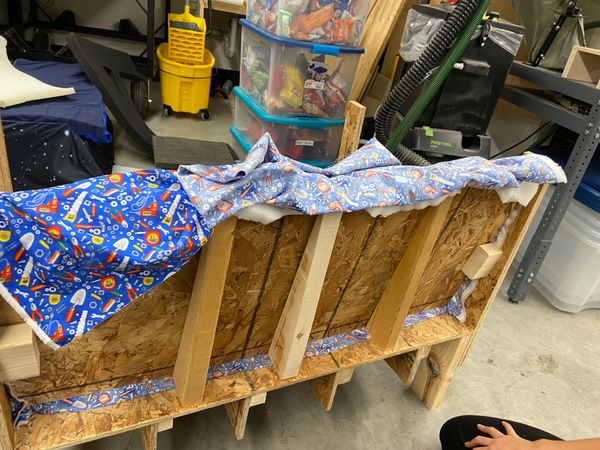
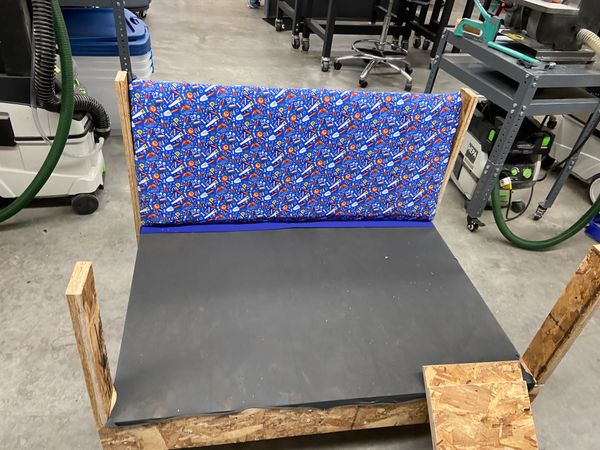
Then I got some fabric (again from Edgerton) and used a staple gun to attach this to the wood behind the couch and improve the couch’s looks over just plain OSB.
Wrapping it in mesh
At this point I wanted to protect myself from the sharp parts of the OSB in the base, so I covered it in a grey fabric again using the staple gun and lots of manuvering to hold the piece at each tight at each of the corners.
Yay, it’s starting to look passable
Making a beanbag
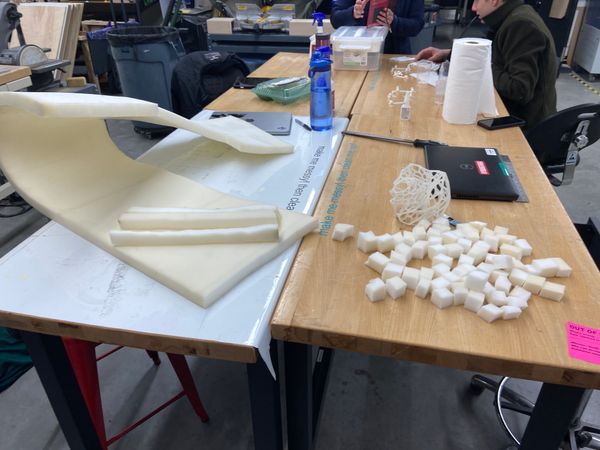
I’ve always wanted a beanbag but never had one so early on I decided that instead of having a traditional cushion my couch would have a beanbag.
After talking to some people and going on Amazon though, I realised bean bag padding is a little big expensive. Not too much, but I’m a broke college student.
So instead, back in the Edgerton Student Center I found someone’s old mattreess topper. It was a little bit disgusting to say the least, like there were haris, but it was free so what am I going to do.
I cut this up into tiny little cubes and placed them all in a bag.
Of course, not my actual bean bag. That I needed to sew. I got a free piece of green fabric, cut it into 6 sections (bottom, top, and then 4 sides) and sewed these all together. Then I cut a hole in one of the pieces from where I was able to pull out the outside of the cushion (since I sewed it inside out to make sure the seams were not visible) and sew on a zipper.
From there, I put all the cut up mattress cubes into the bag and the bean bag was made.
Finding it a home
Now, I had a working couch, and it was time to give it to Edgerton
At first everyone was a bit hestiant to use it but that all changed after it got the ultimate stamp of approval.