Week 11: Interface and Application Programming
This week, I made a proof of concept for my final project. I built an interface between my development board and a TouchDesigner custom program.
For my final project, I plan to control arrays of addressable LEDs through a TouchDesigner interface. The idea is to use sound to parameterize designs and communicate instruction to an ESP32 board wirelessly.
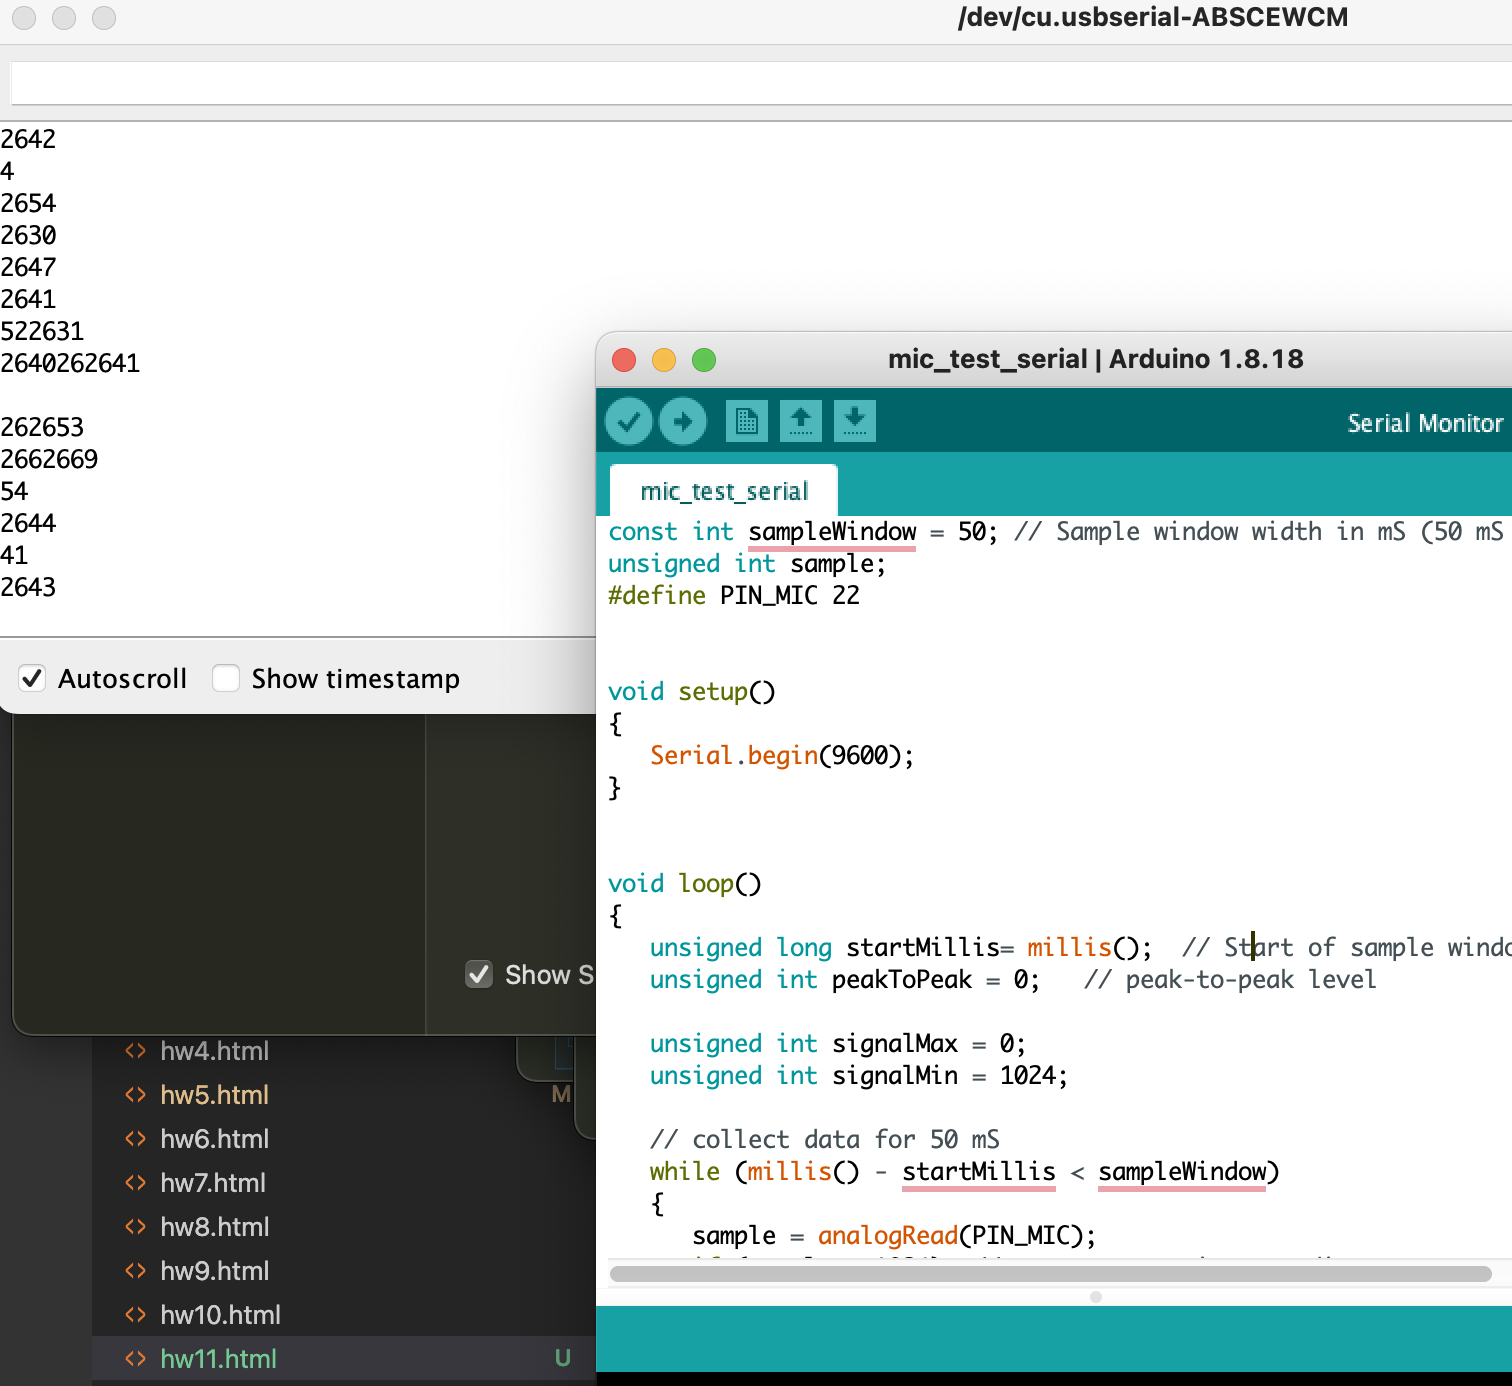
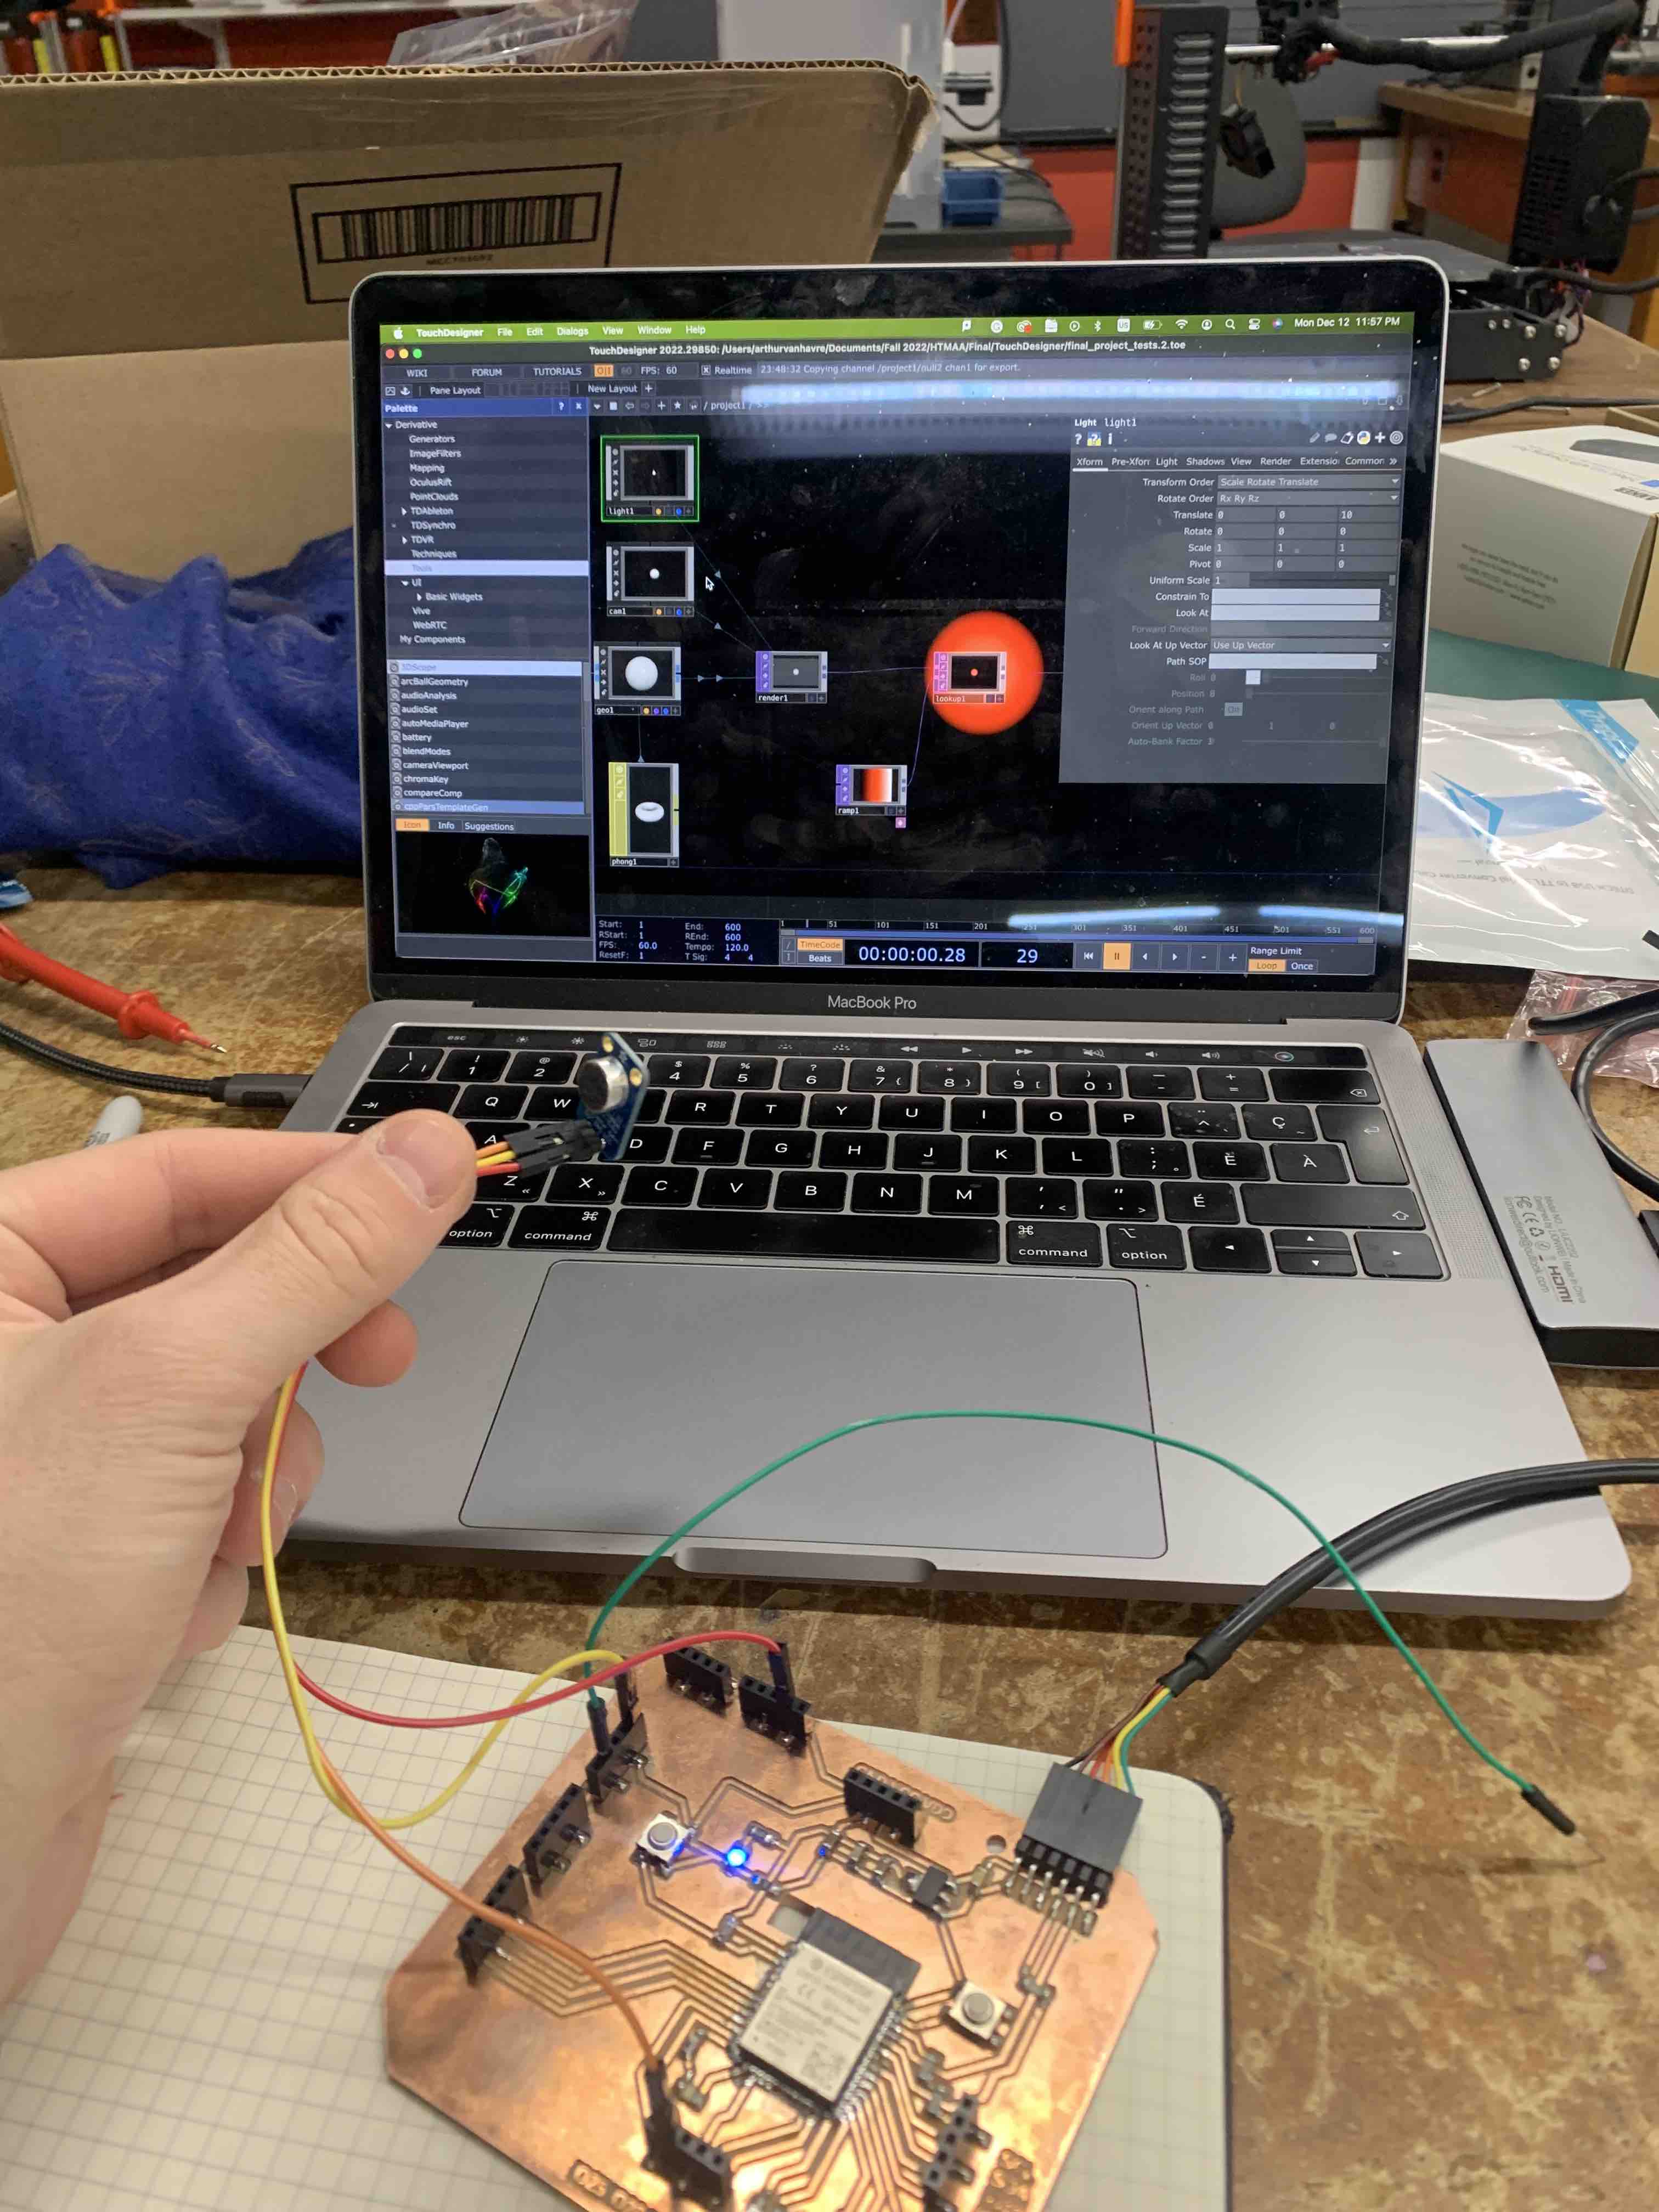
The first step was to set up the board. My goal was to interface the system through a wired serial connection. I based myself off of the sketch I had built for input week. I addapted it to the new ESP32 board and quickly had it running. I decided to do a straight serial write of microphone values and to do modifications in TouchDesigner. In the future, I might have to do some data processing in the arduino code; I will finalize this part in my final project.
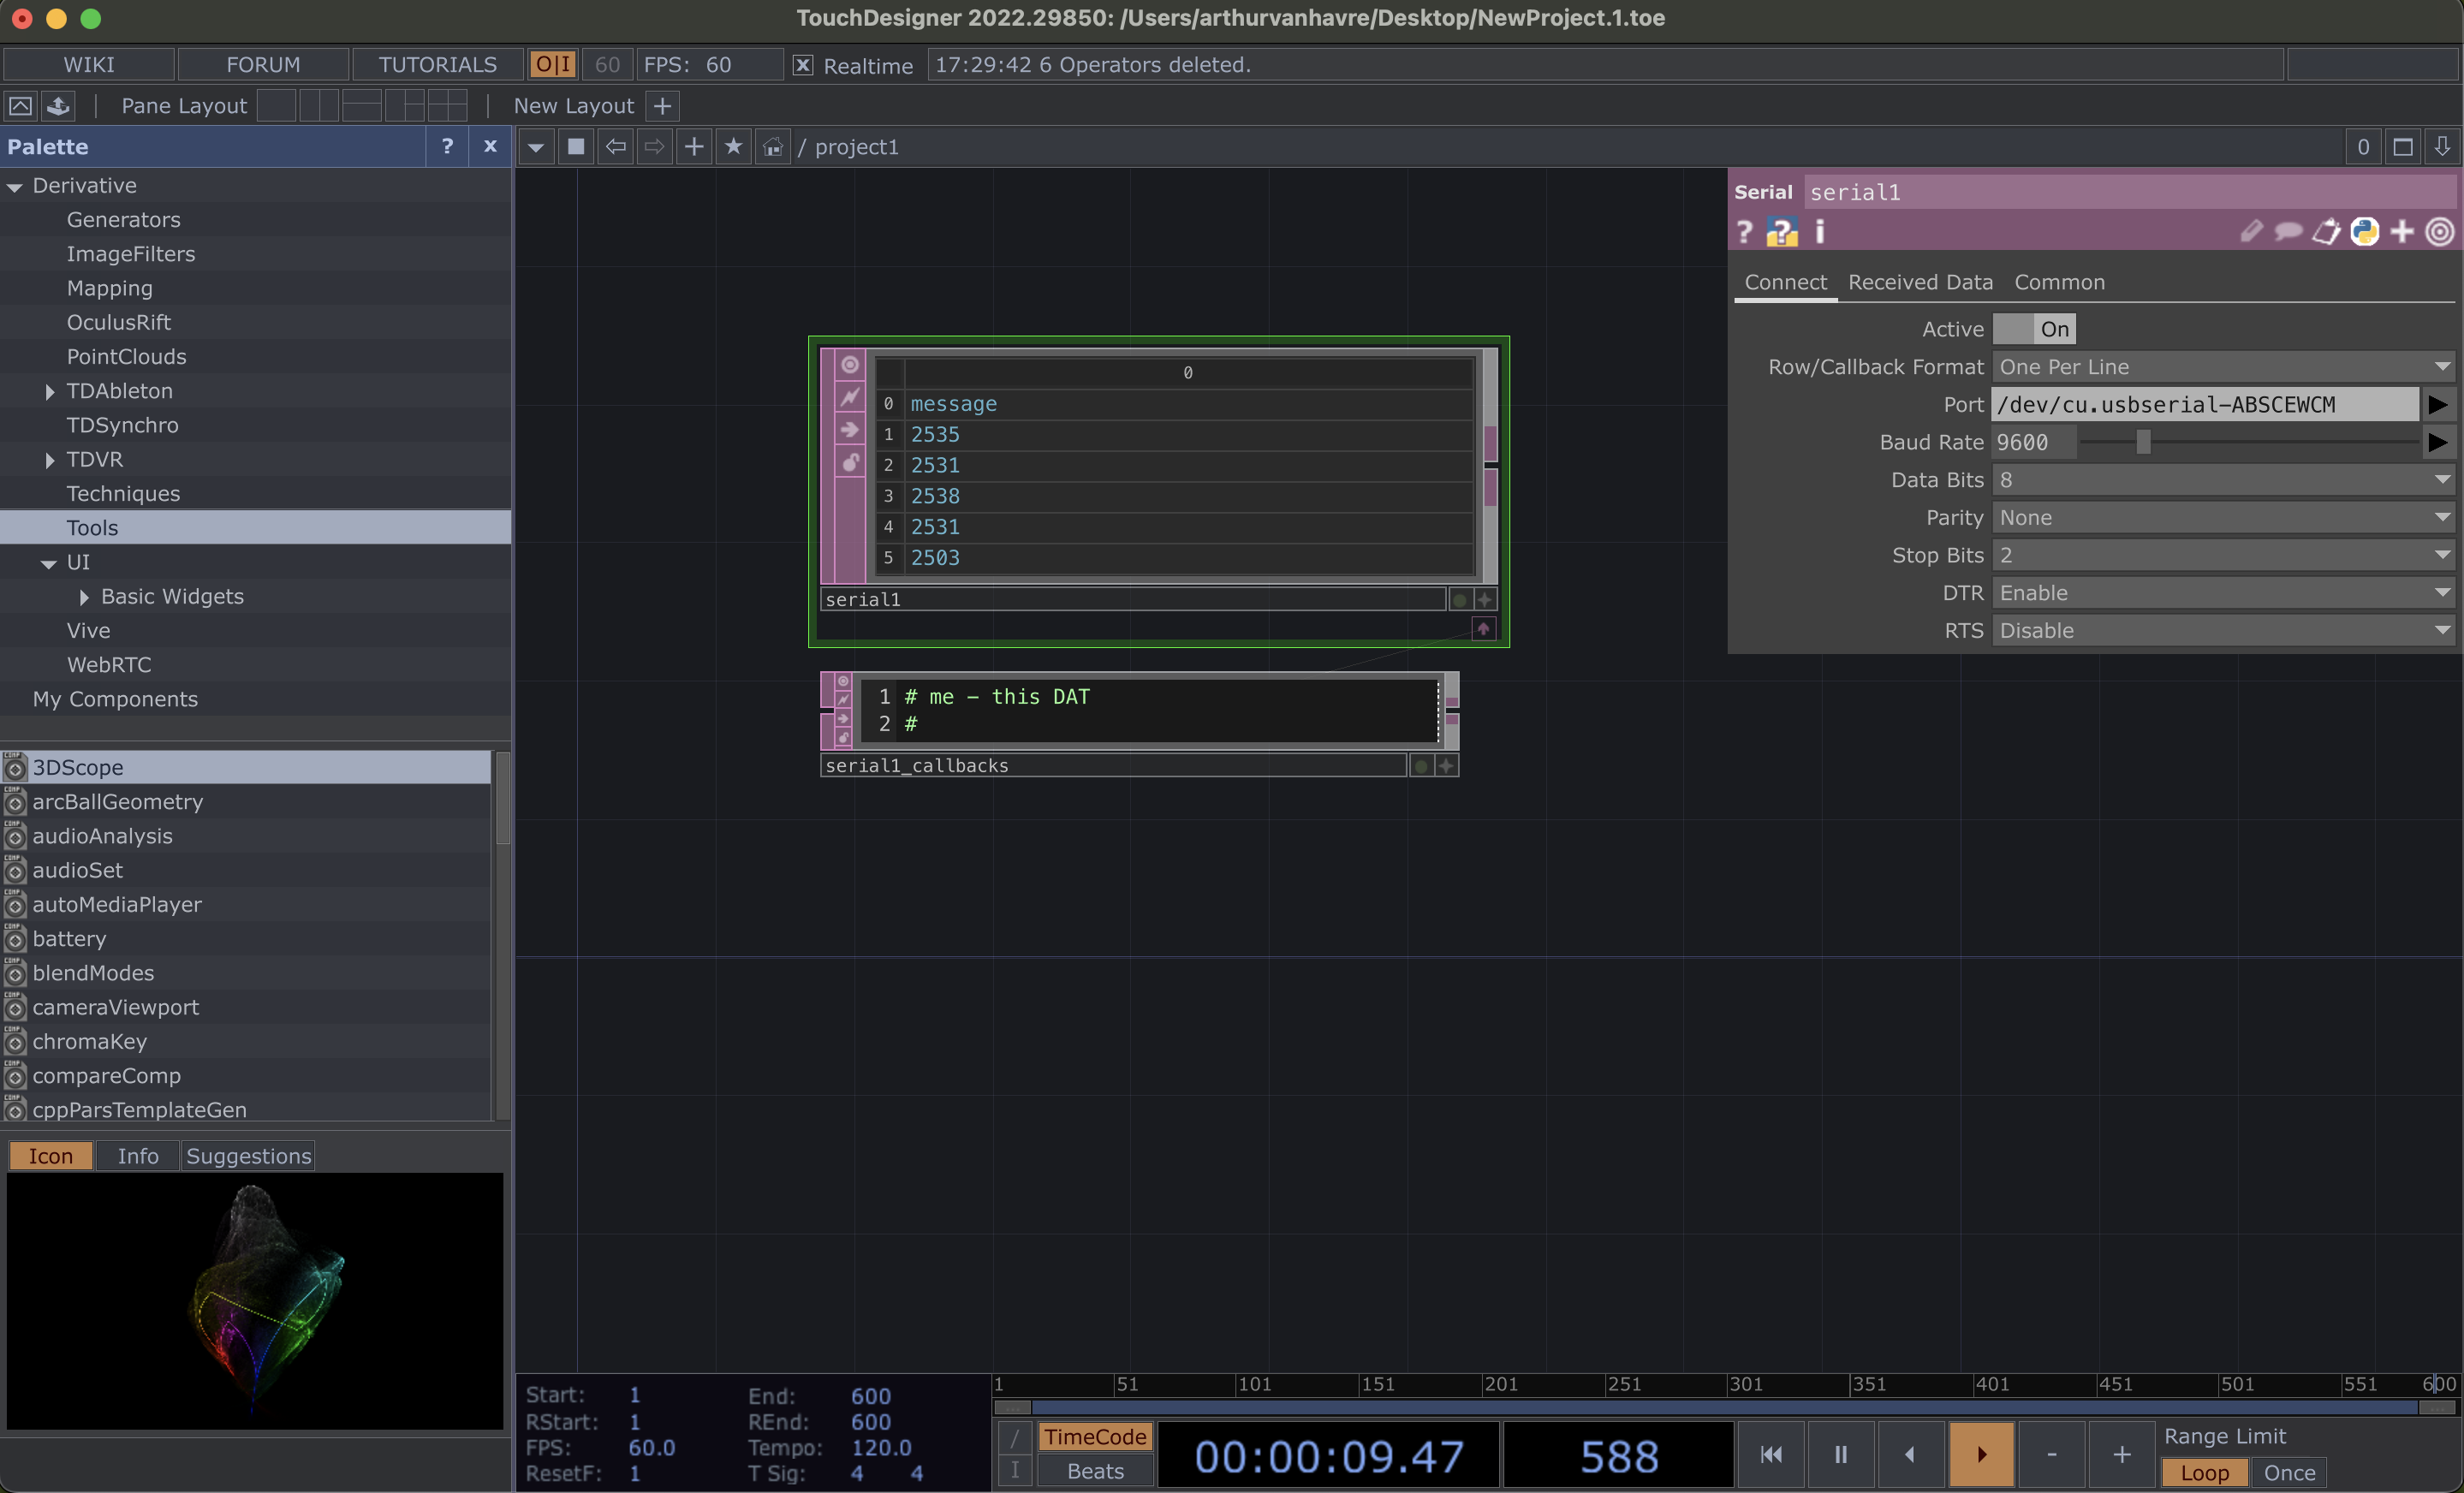
It was my first time using TouchDesigner and I was quite intimidated by the program. I had never used such a programming interface and was not sure I could do it. However, the process was quite straightforward. There are a few systems to understands, but it makes for an intuitive programming experience.
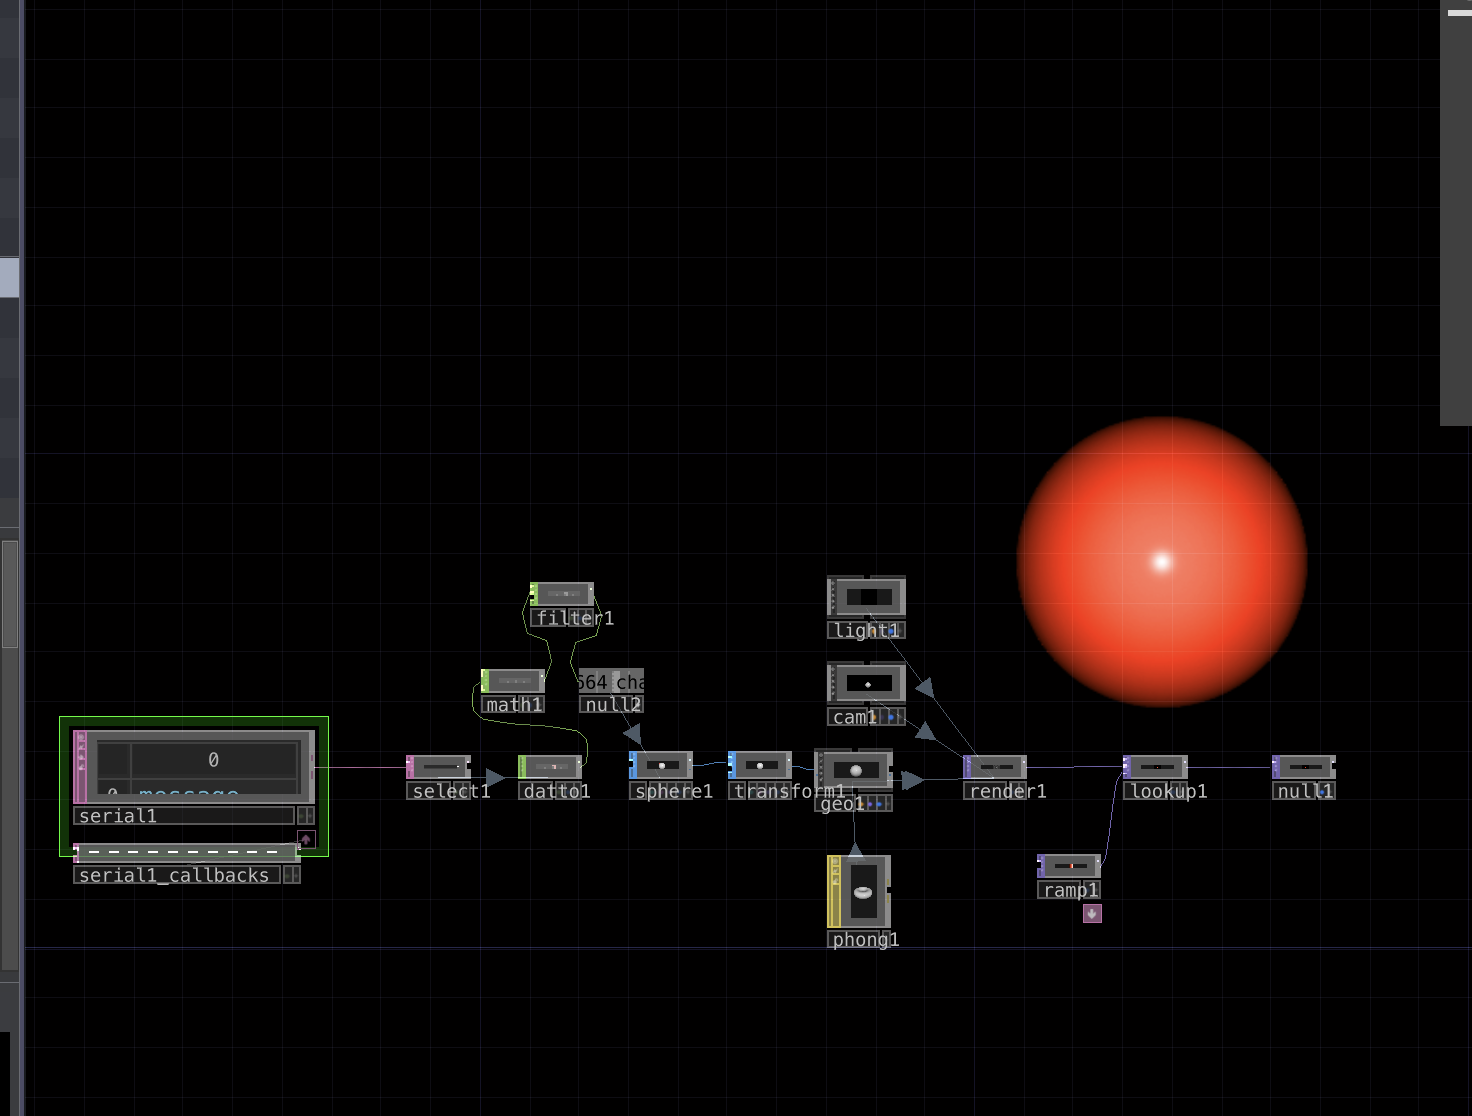
The program I built was able to respond to music pretty well. The below video shows how the system works together.
This proof of concept shows that I will be able to use analog inputs for my final project. Next steps are to test the output link from TouchDesigner to my board and to power LED strips.