Week 10

This week and to get myself oriented with the Fusion 360 for 3D design, I decided to make a cube. To get the parametrics for it, and then do the laser cutting using the cardboard. The process took 5 remakes of the design. I wanted one component to make the whole cube, I faced many challenges in making the design, and to create the cube.
I started by installeing Fusion 360 design software developed by Autodesk. The program is intuitive, and I learned the basics in a short amount of time *THANKS to Alfonso!* I started creating the sketch, which is the base of what we would project the 3D structure from. Also the sketch is what I will use for the laser cutting, as it is done in 2D.
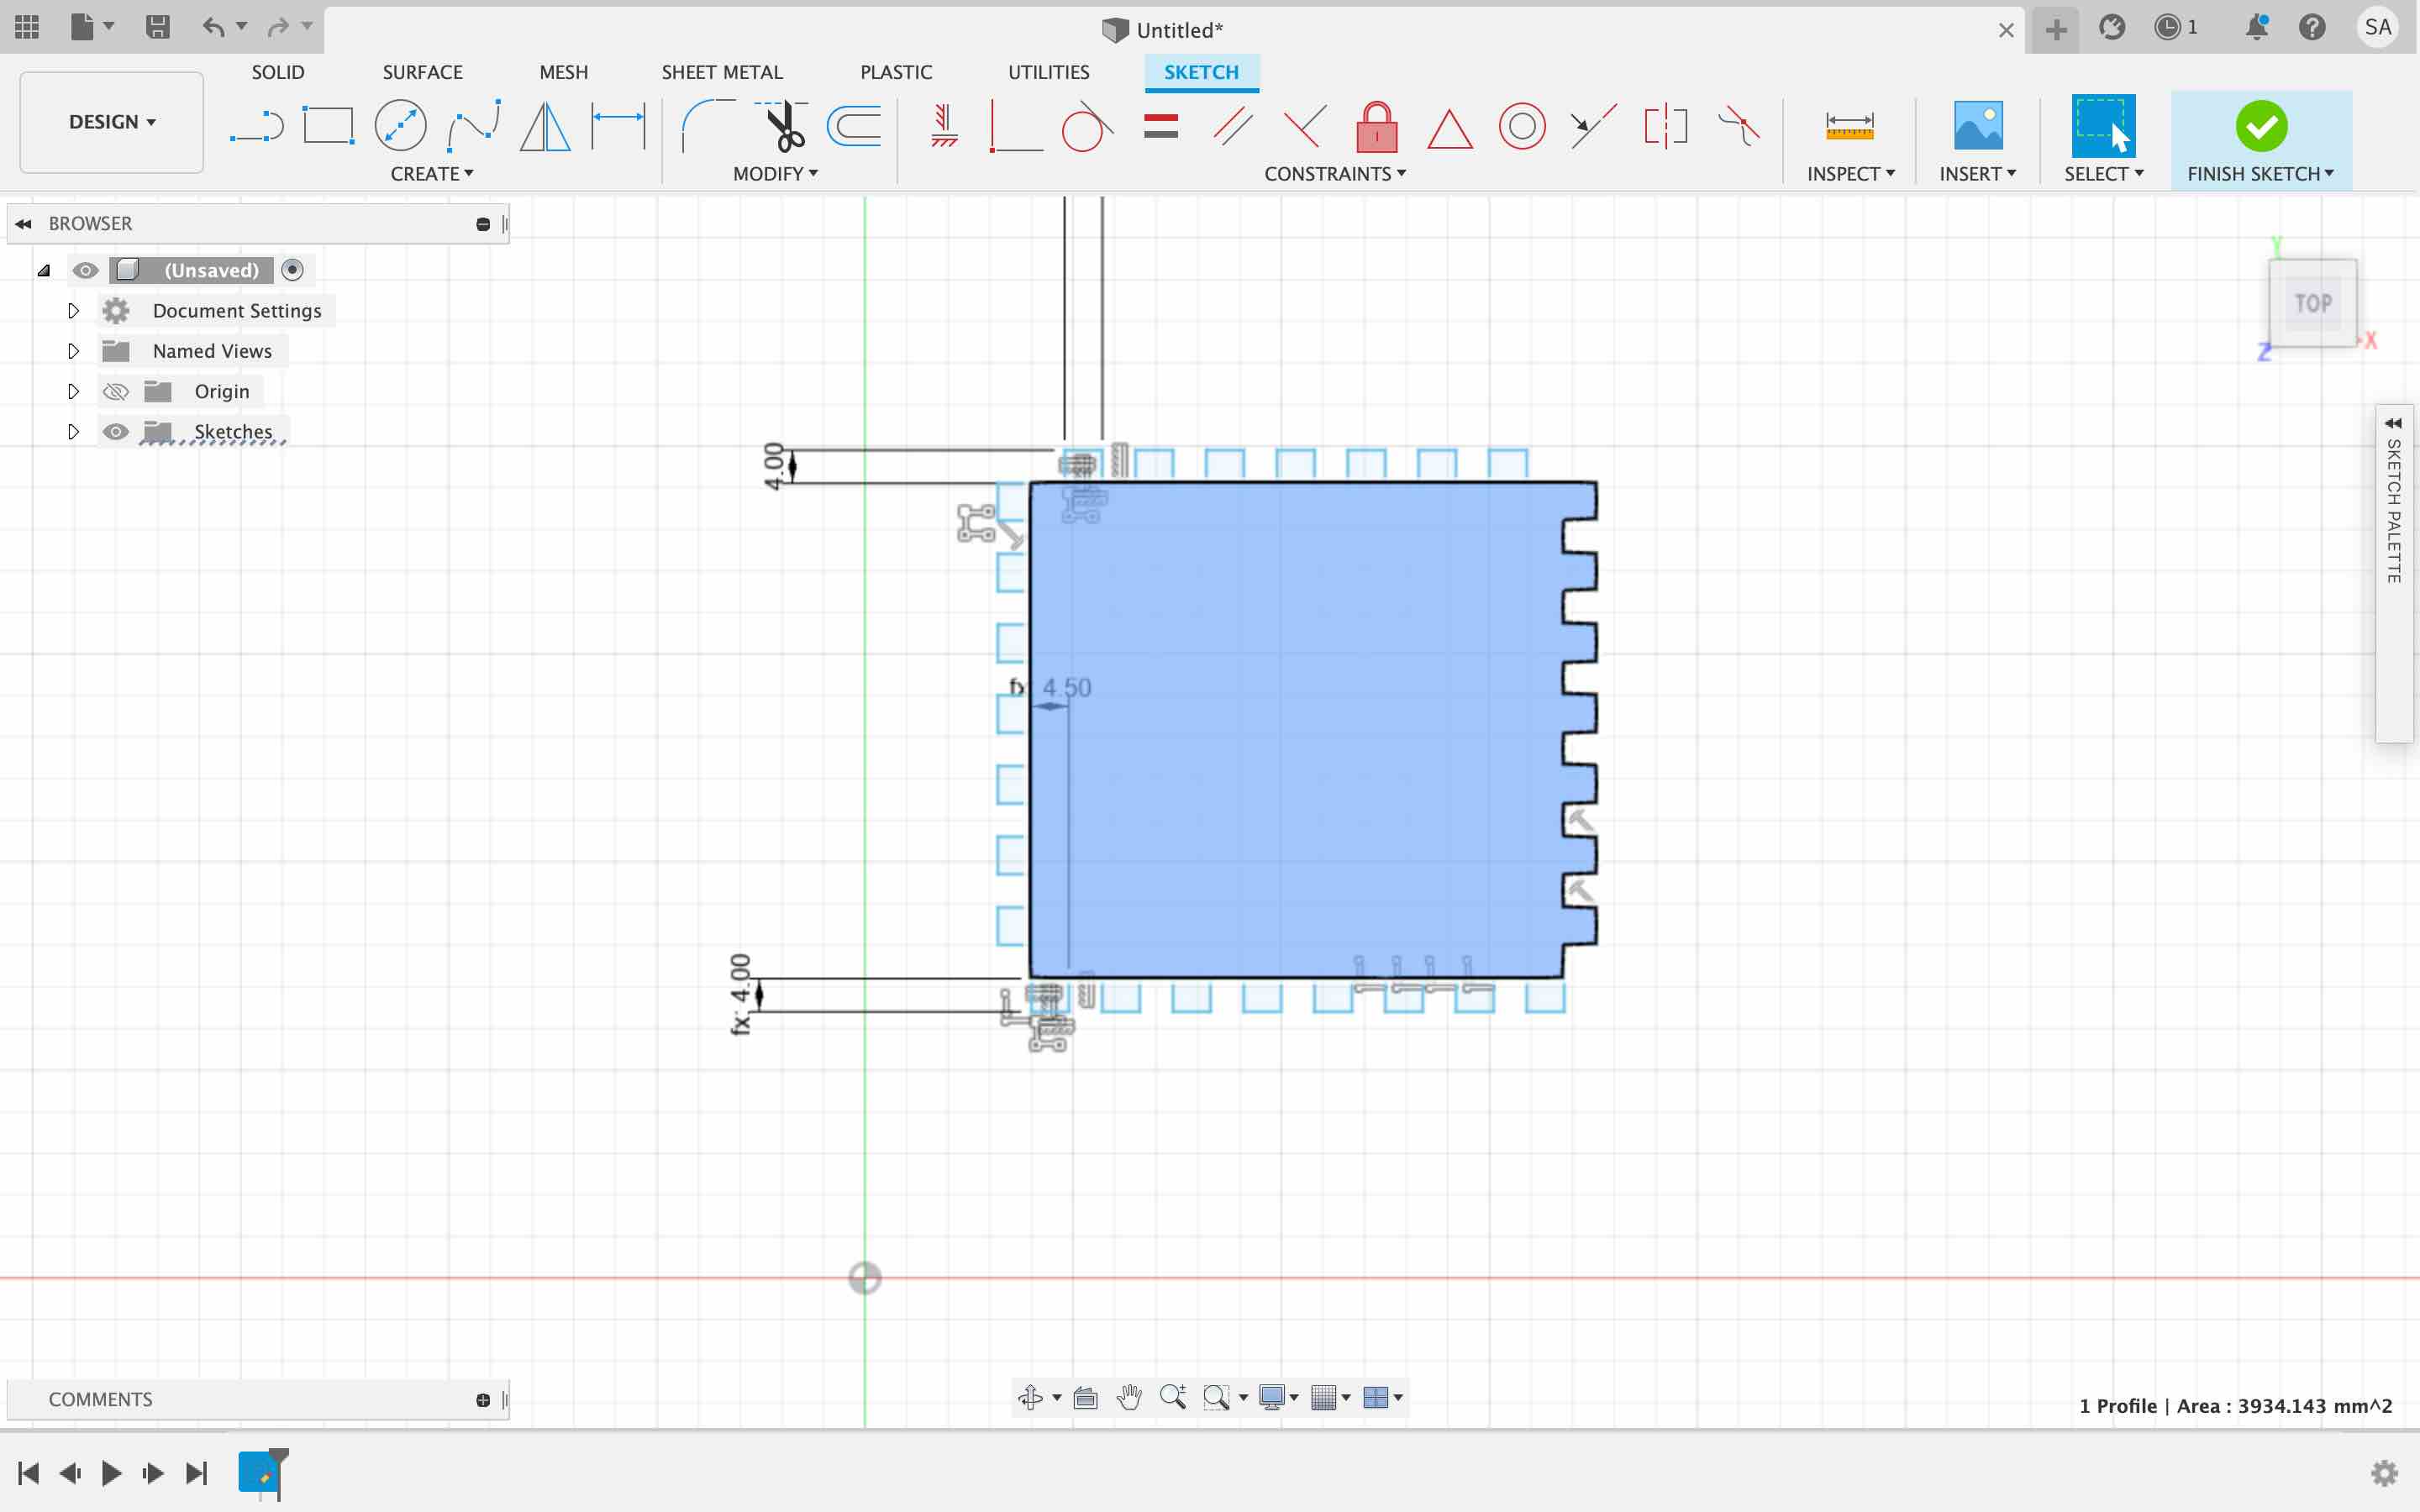
This is the initial sketch of my design where I started creating the projections and slots to be assembeled together and create the cube
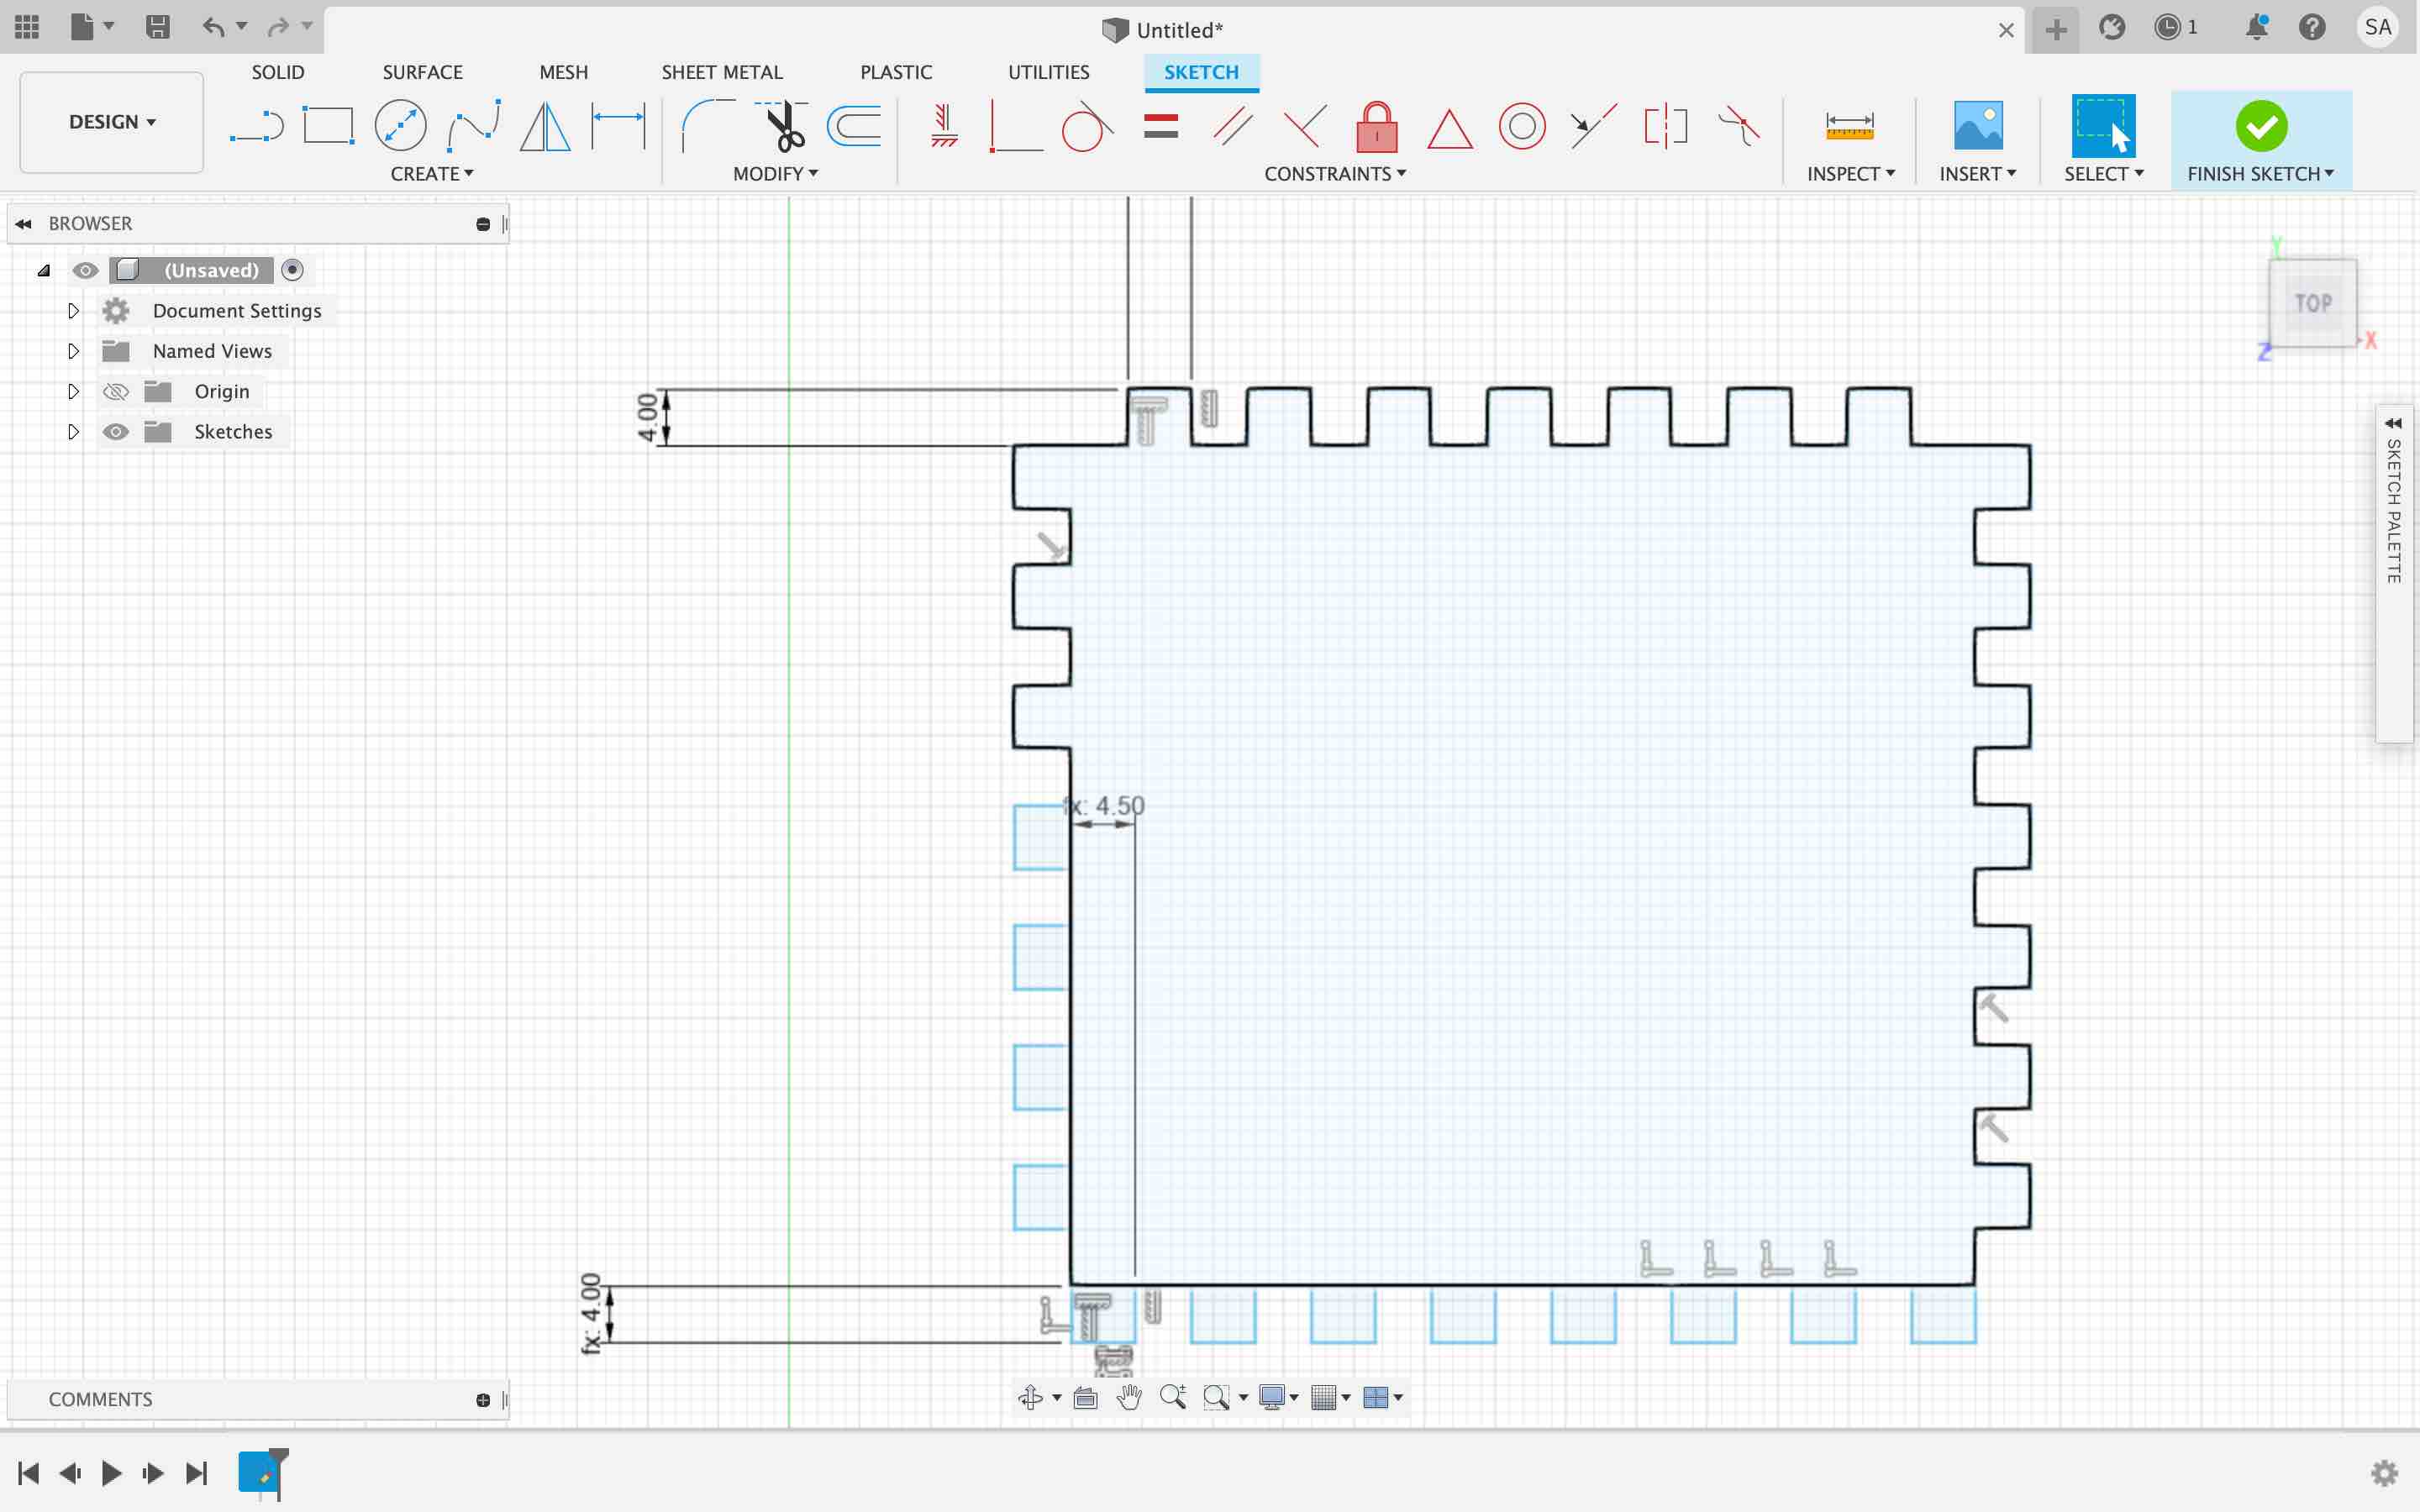
I continued by making the projections of my design.
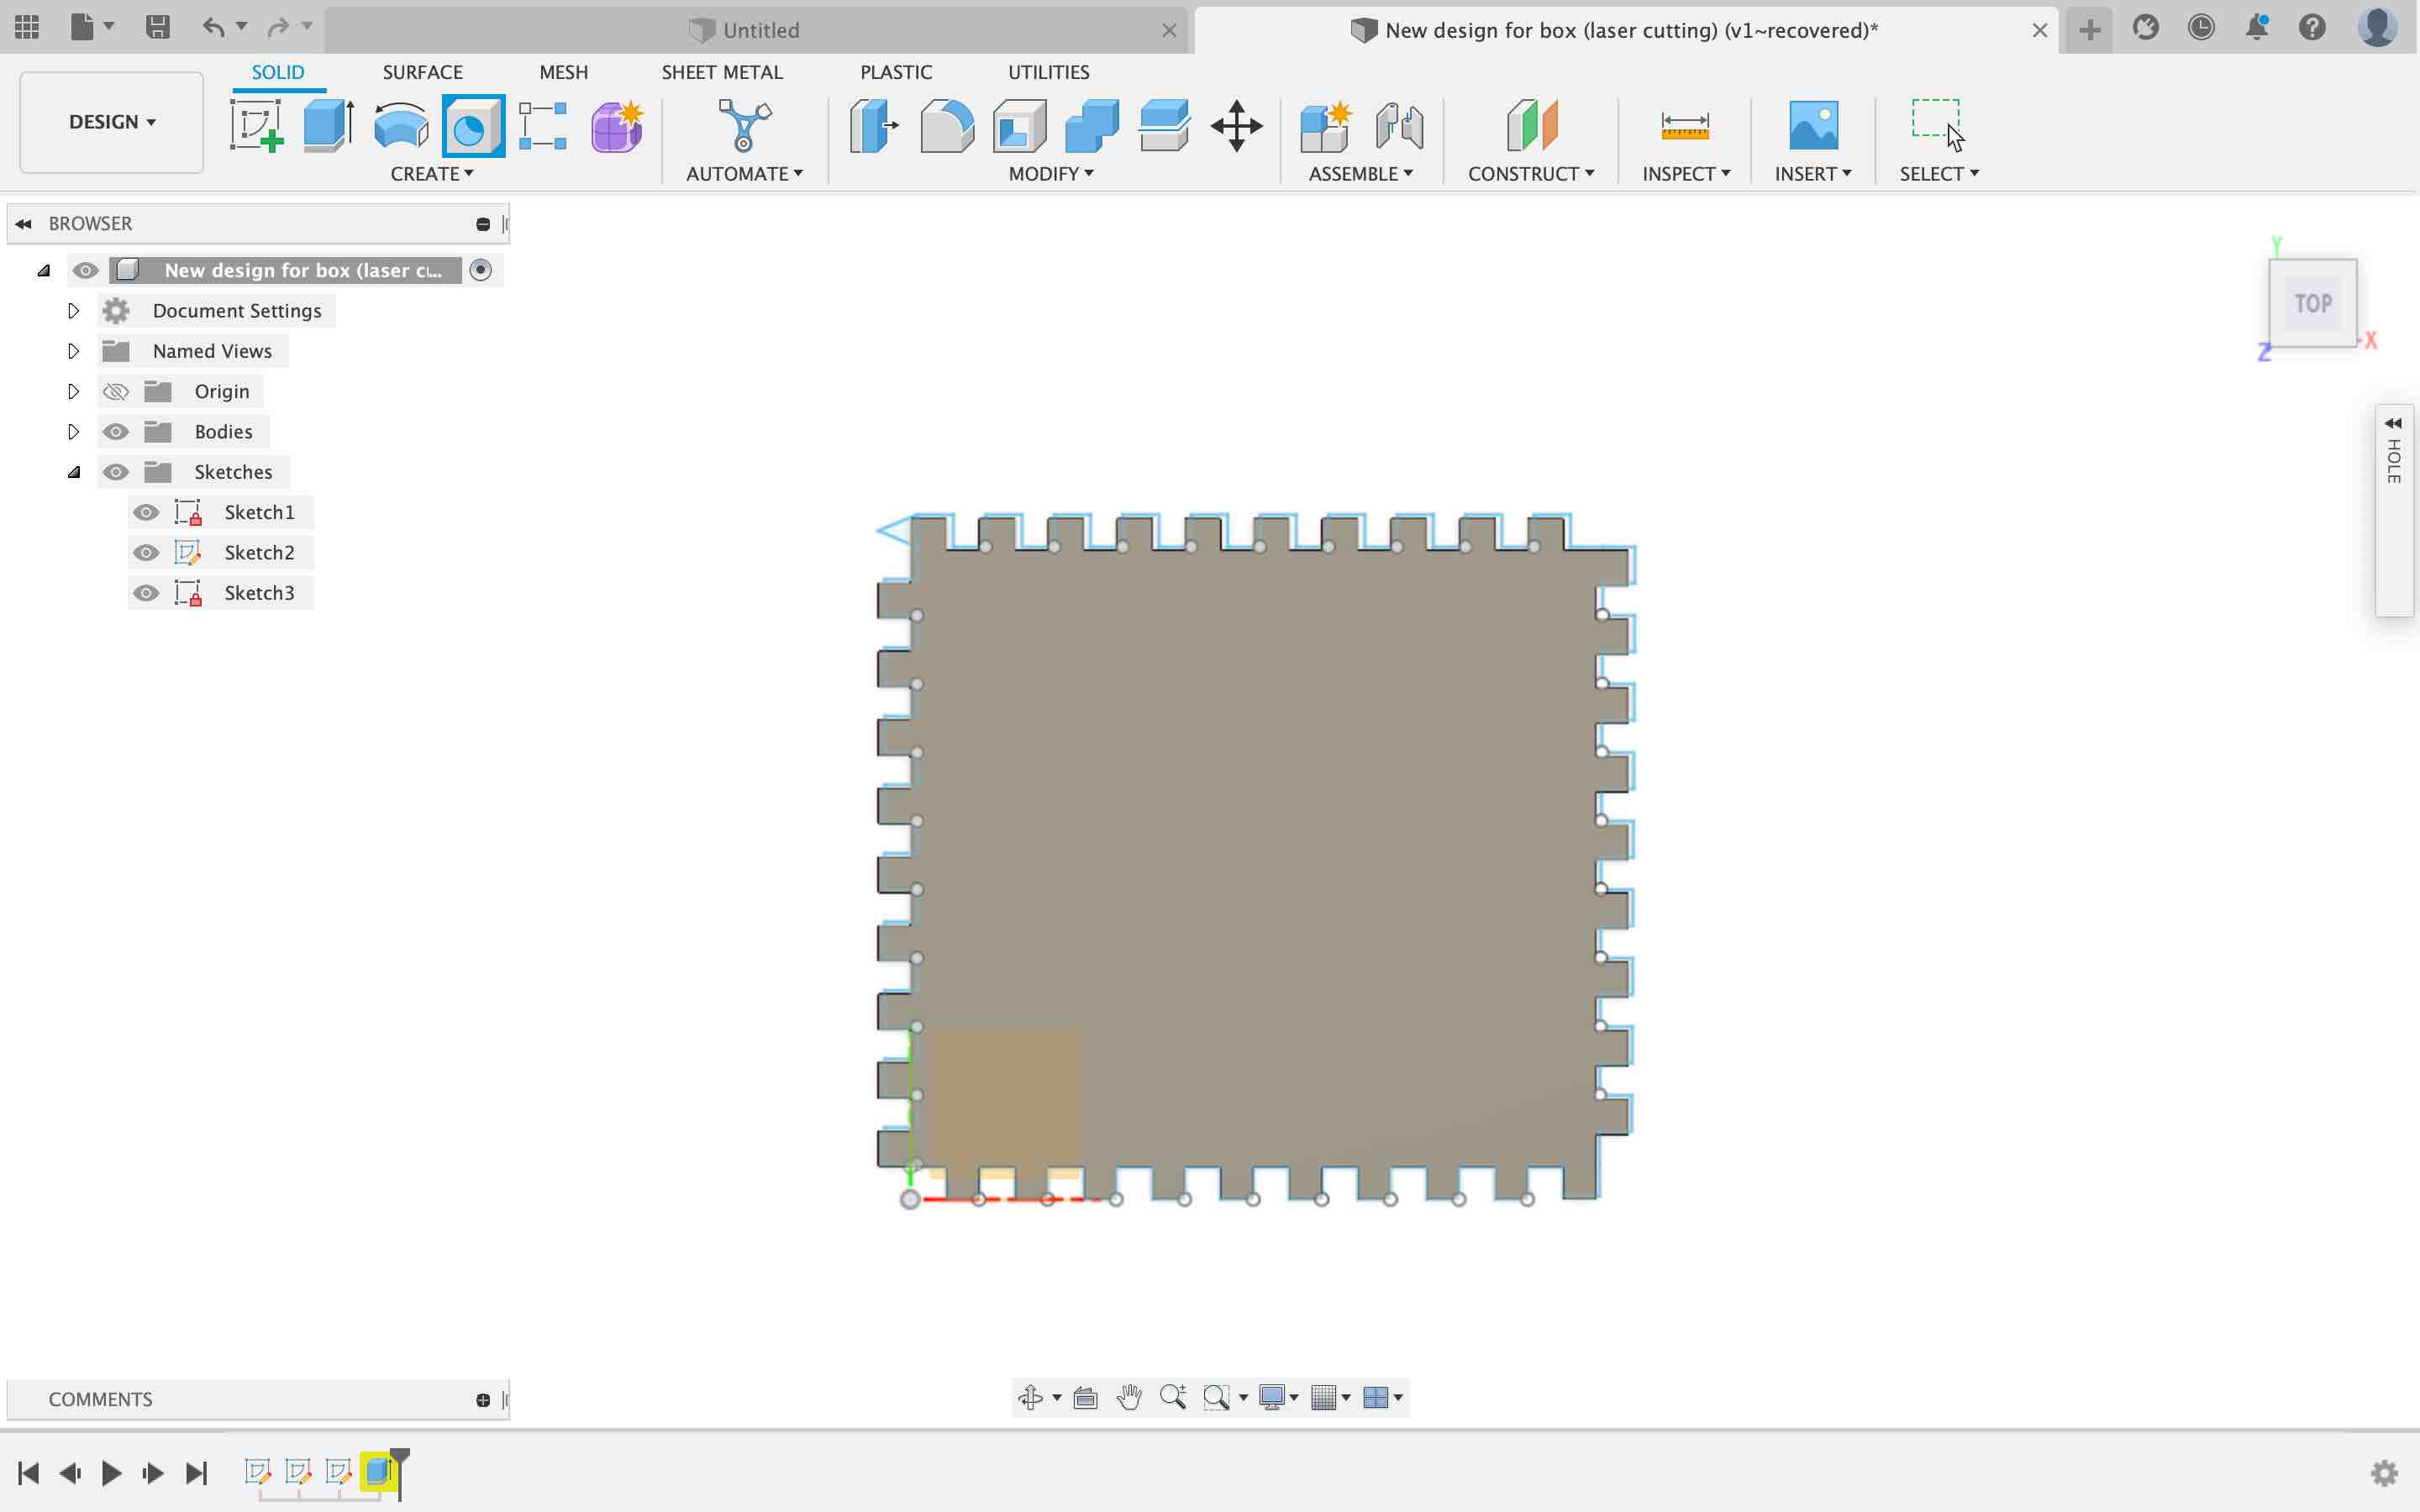
This is how the design looks at the end in 3D. It's still a process, because I need to create elements in my design to fill the corners when I assemble the cube. It's intersting how it got me to think in ways I have not looked at before, for the corners, and the way they get assembled.
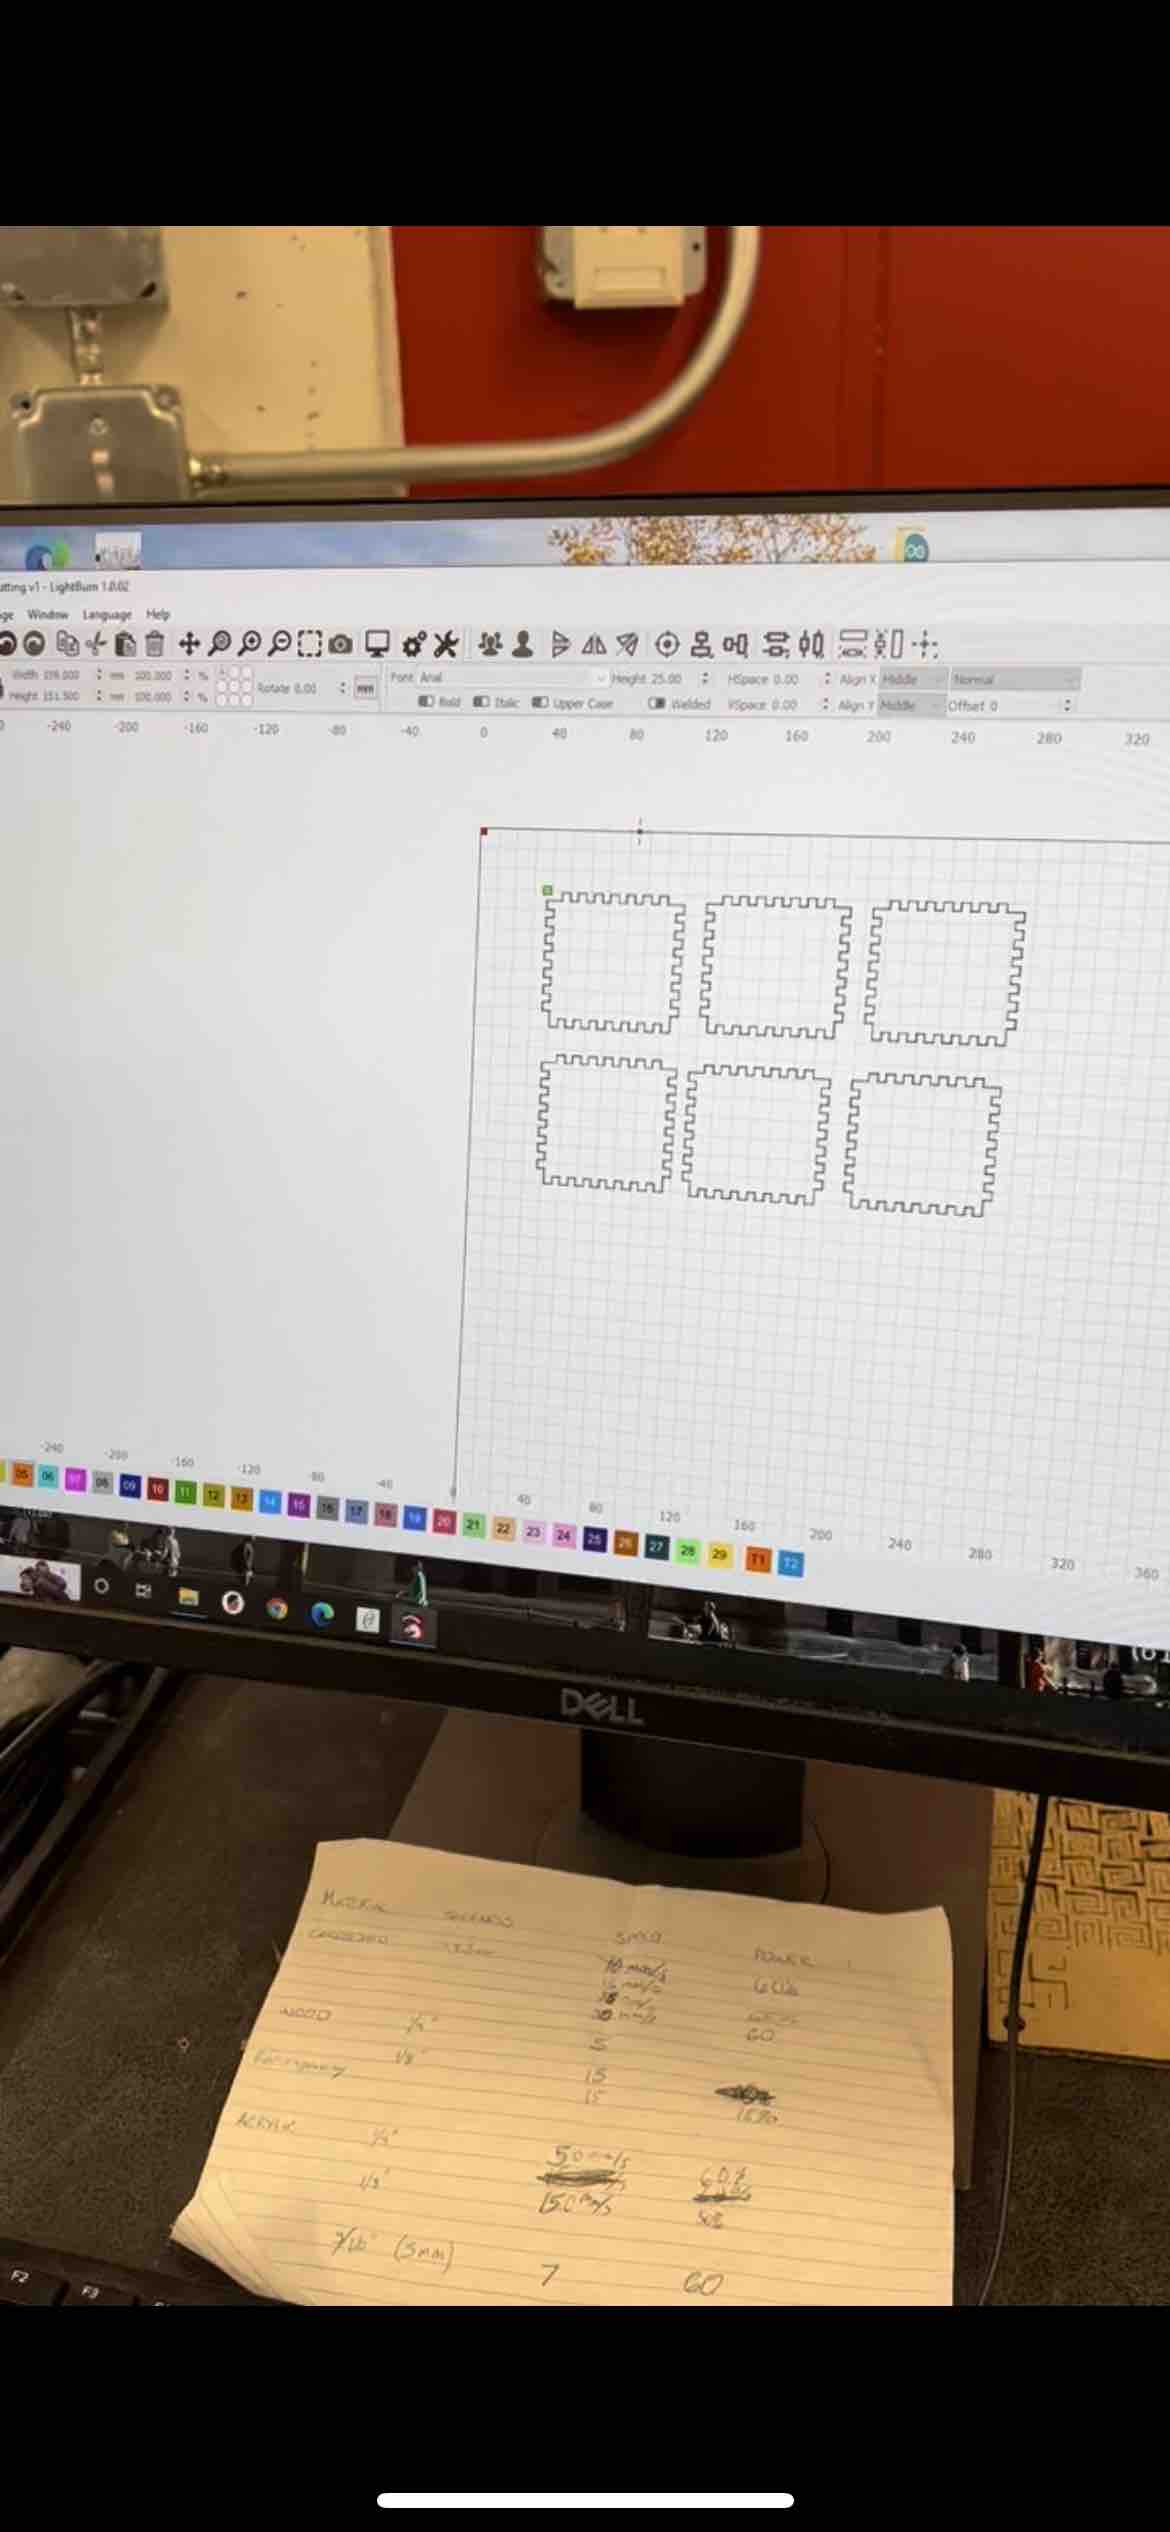
I transfered the design in 'dxf' format to cut it using the laser cutter. I opened the file in (Lightburn) program, and put 6 parts of the design to make the facings of the cube

This is the laser cutter at the lap that I used to cut my design.
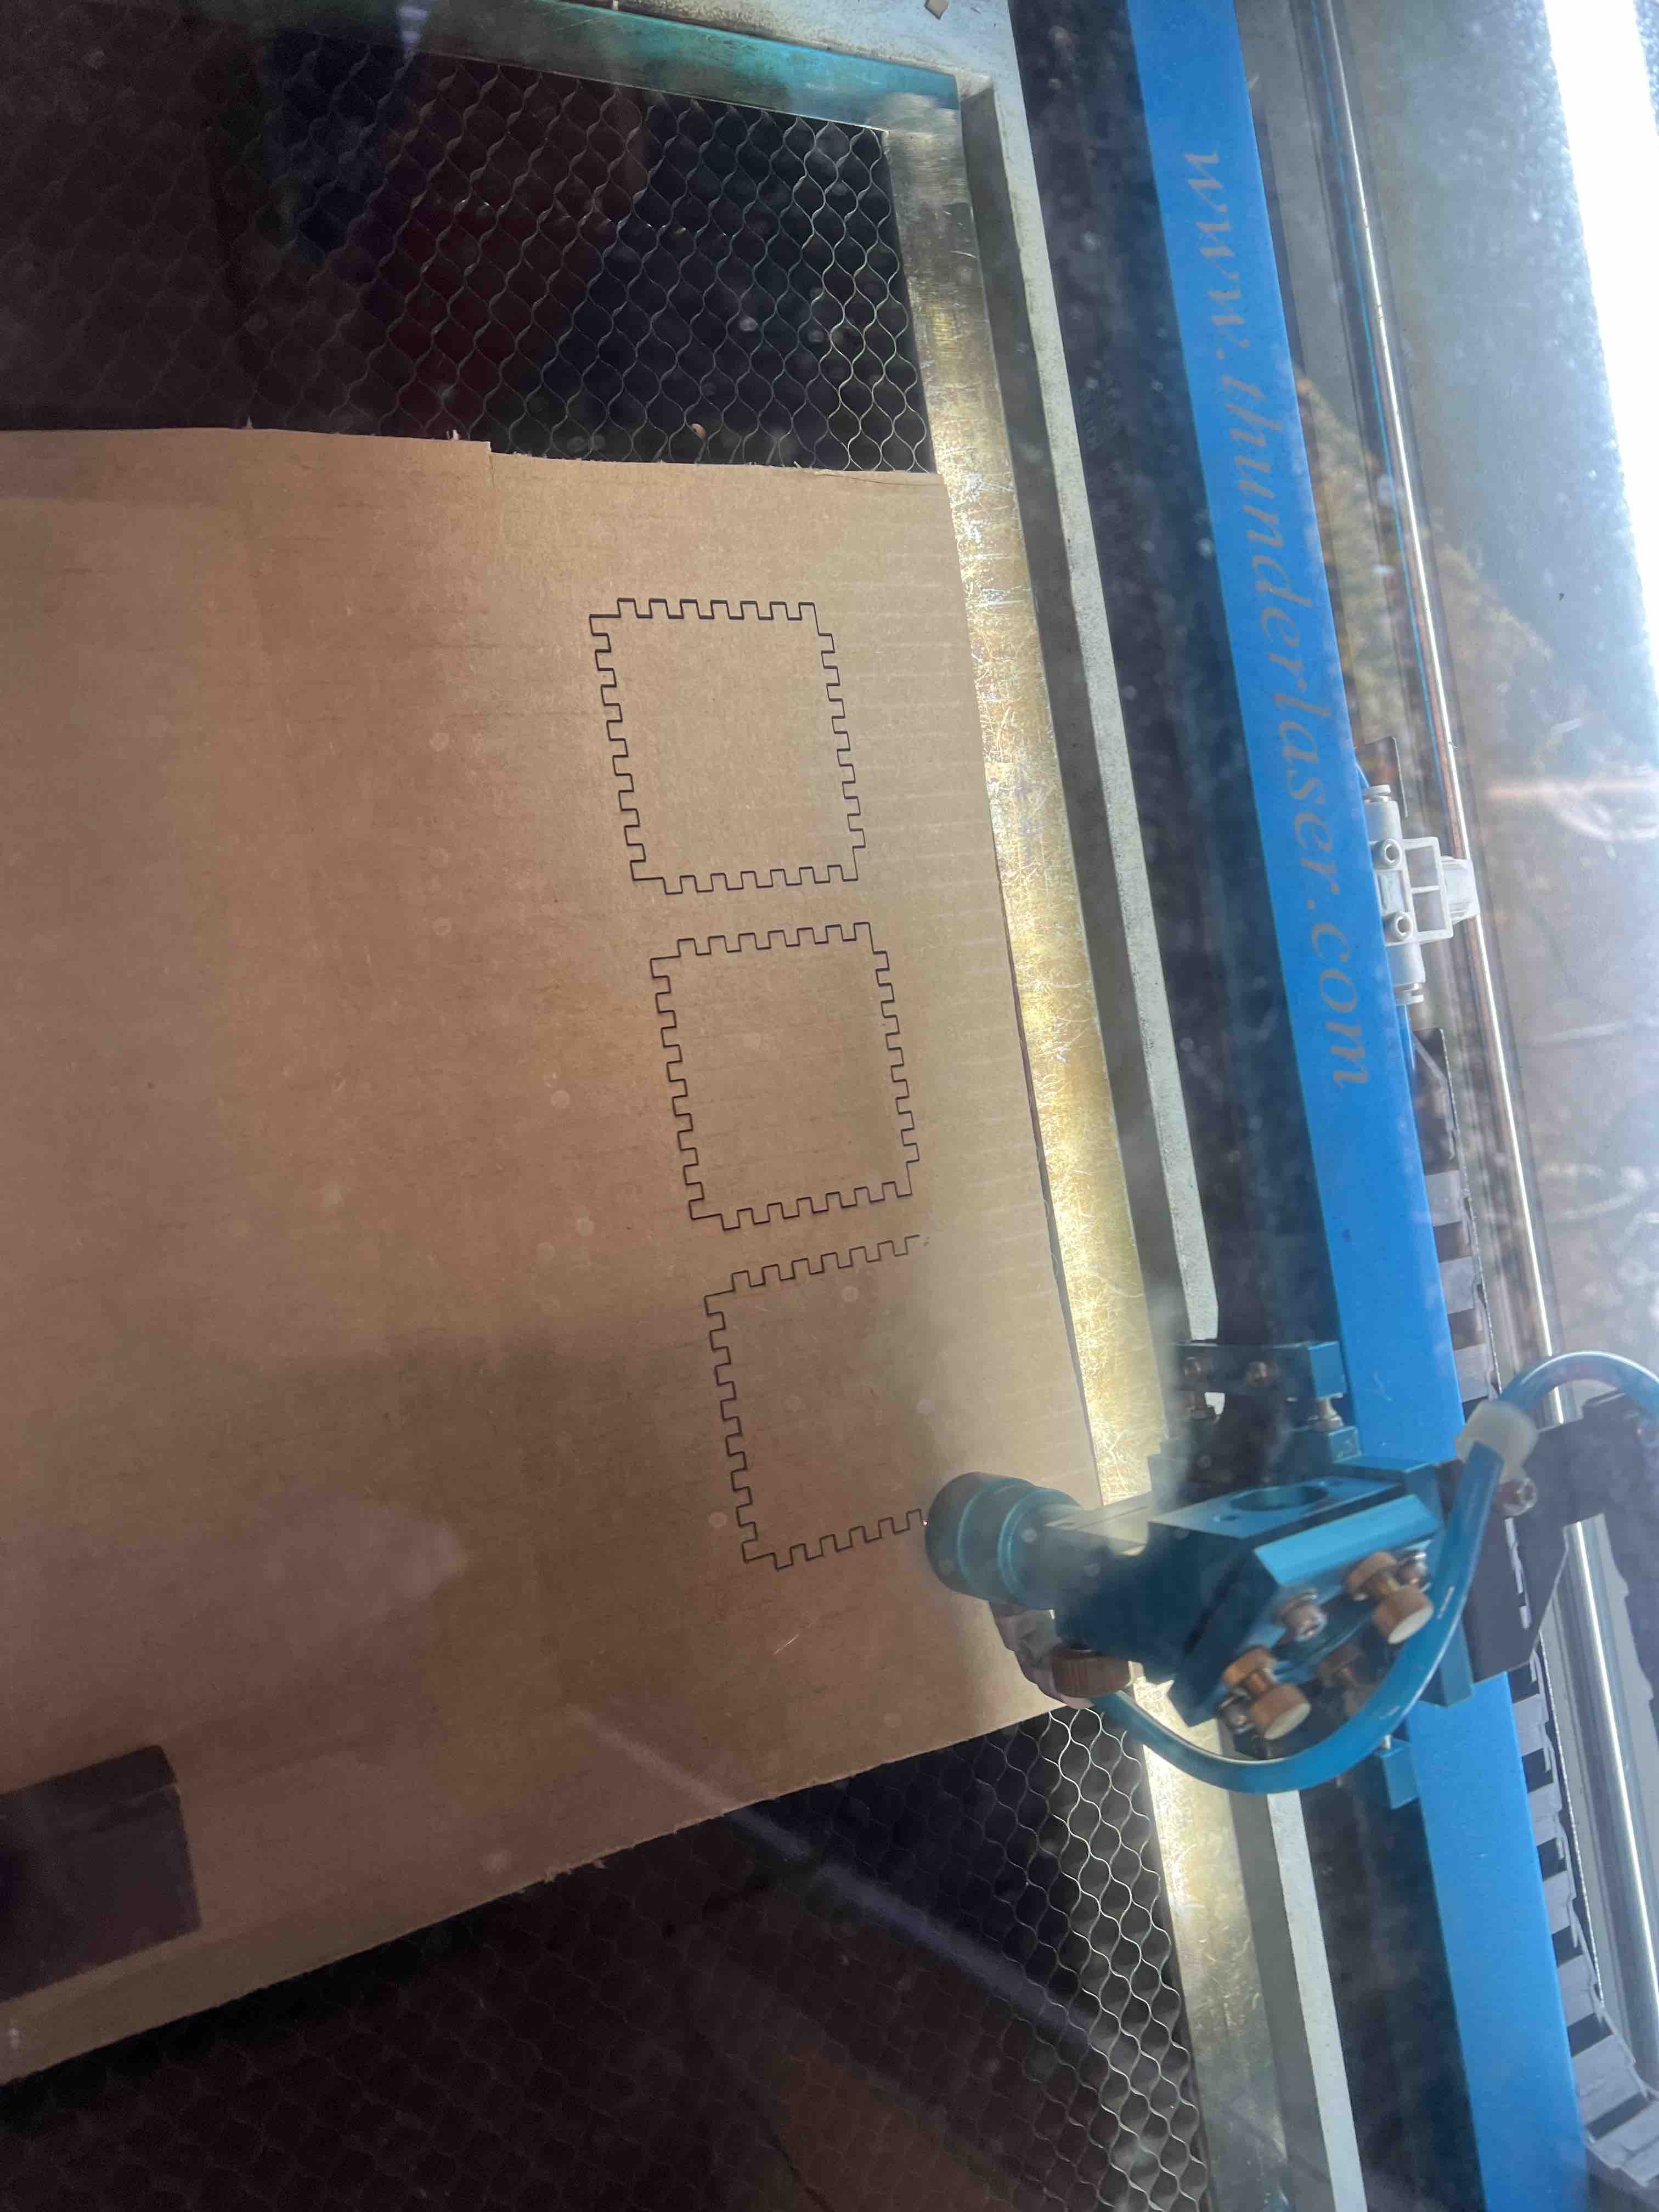
The laser cuttter cutting my design into the final shape. I used 20 "for speed" and 90 "for power". These settings we worked together in our group assignment to figure out the settings that are suitable for our laser cutter. It burns away the least of the cardboard material, and ensures a proper deep cut through the board.
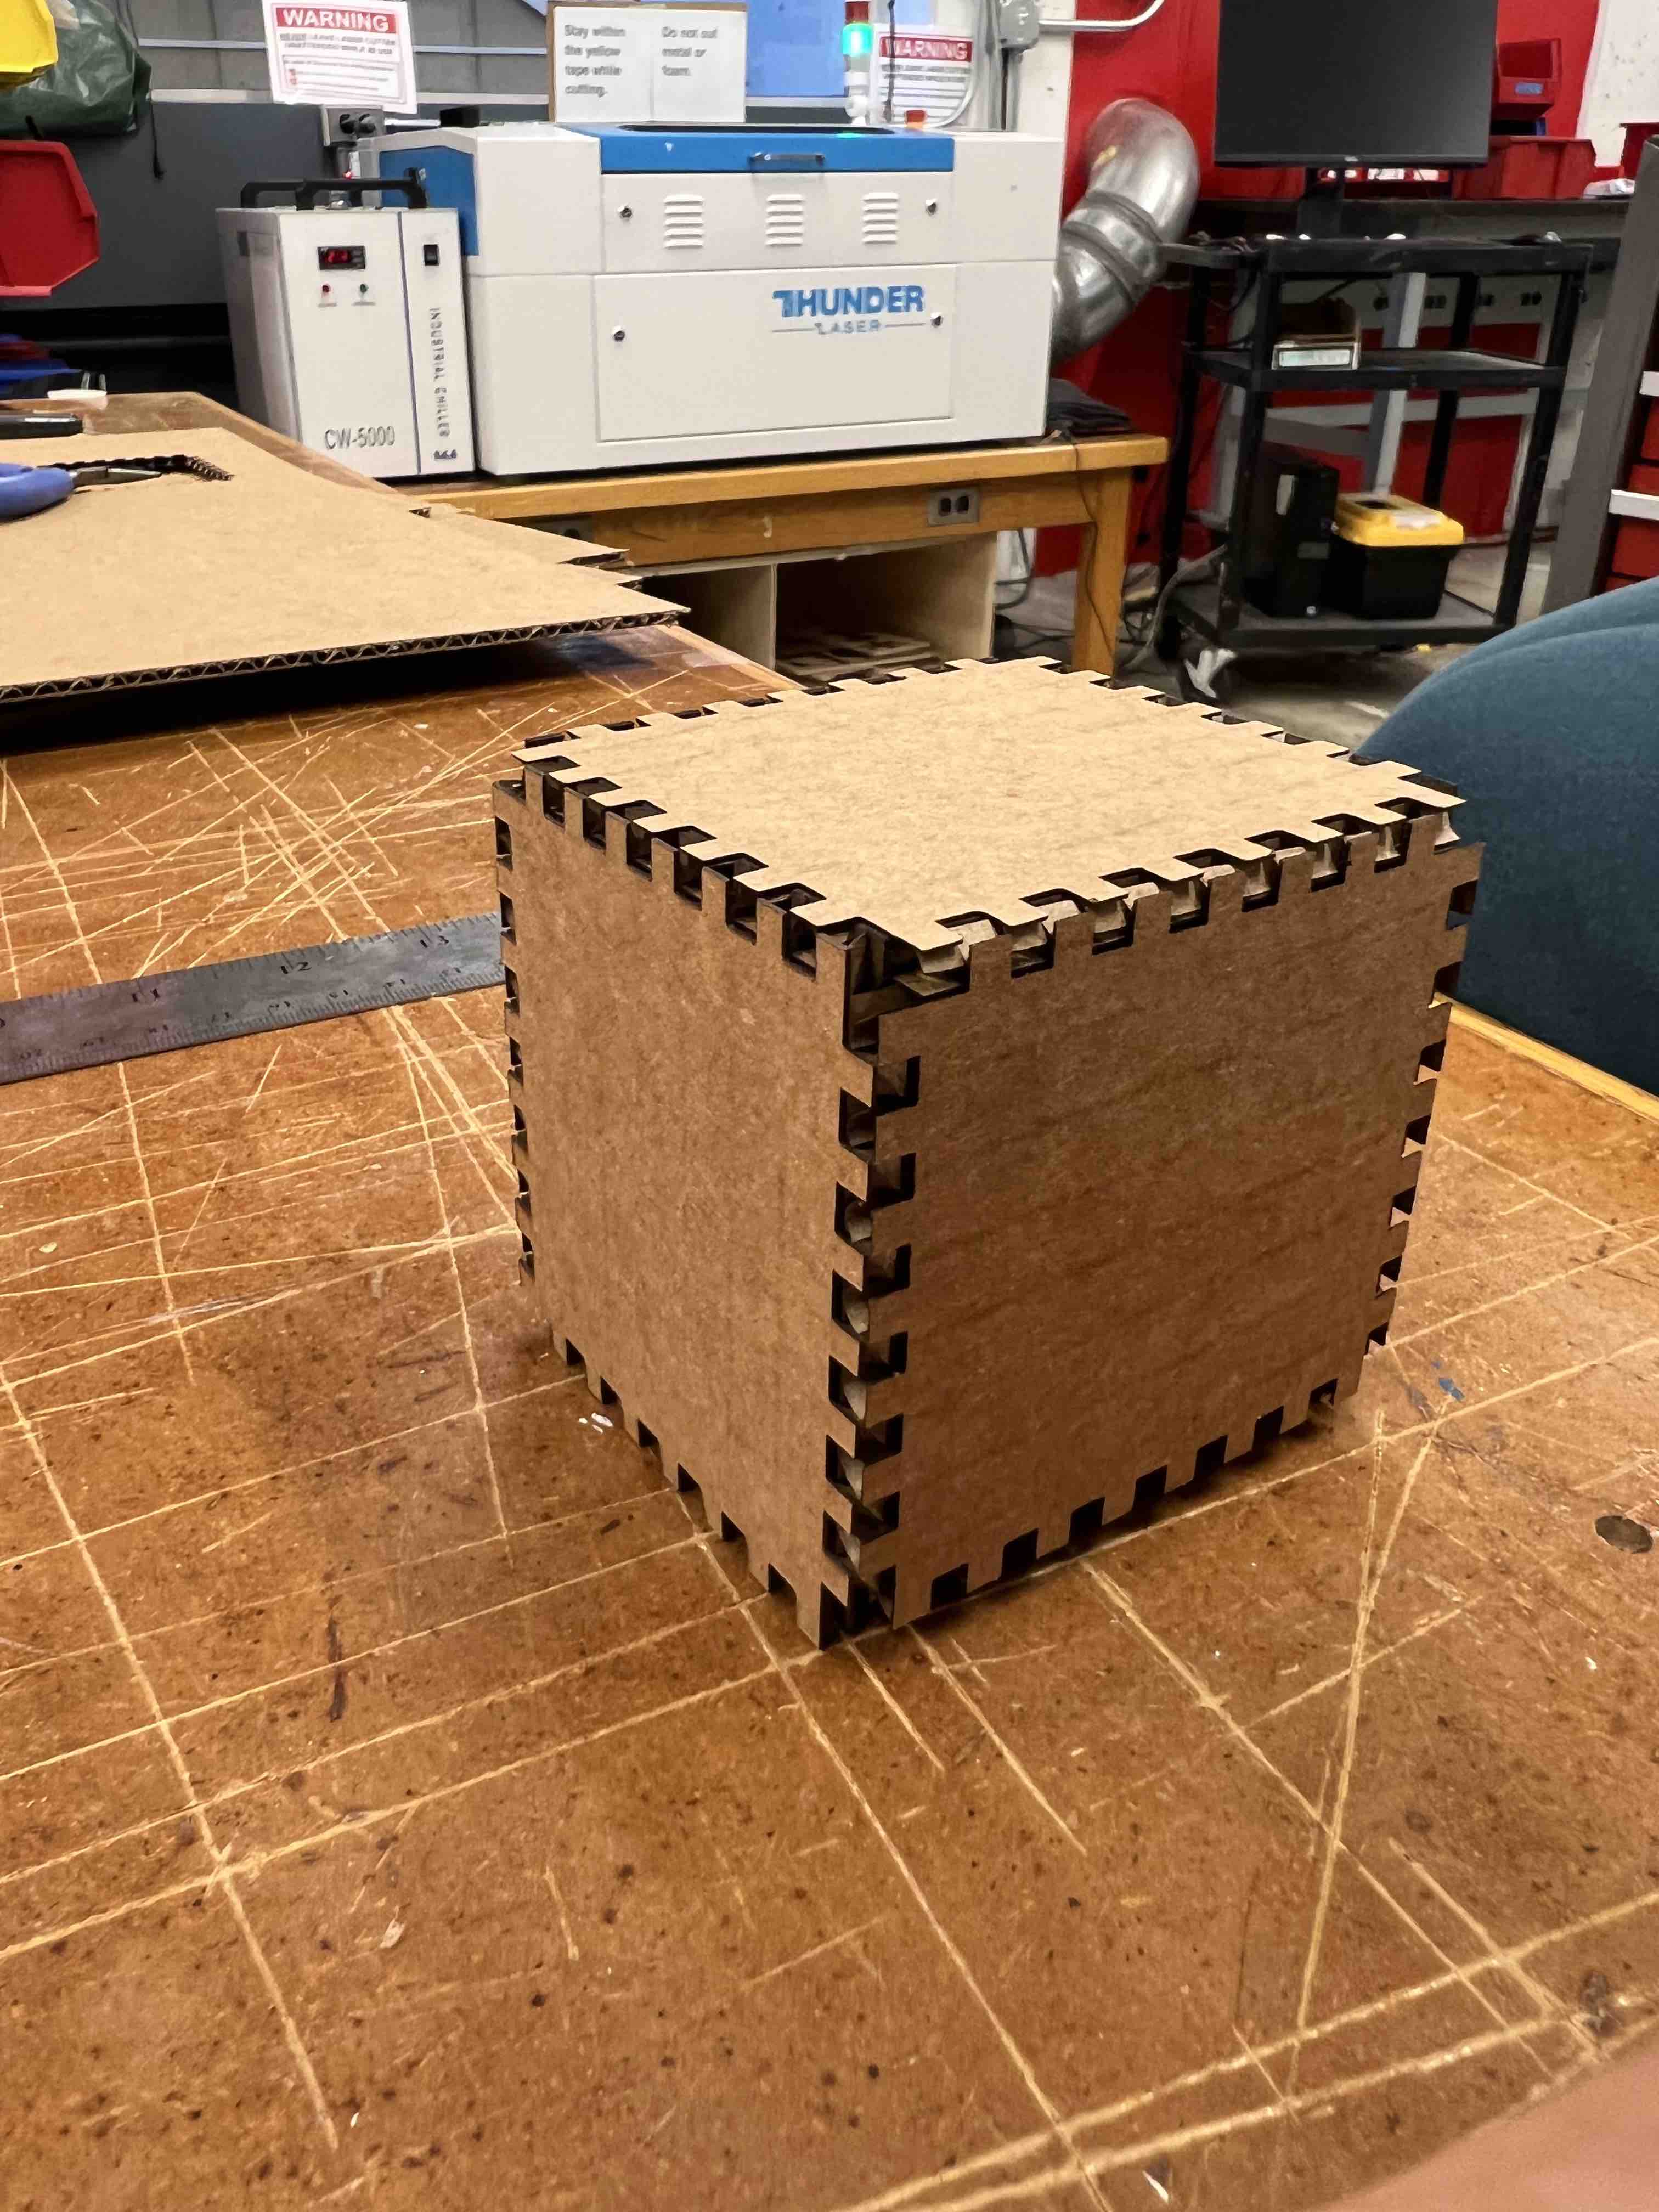
Final look of my cube after assembly. As you can see the corners are not filled as I would like them to. The cube can be assembeled and hold the shape.