Having an interface would be so beneficial for my final project, so I spent a good amount of time considering what would be the most practical way to have the interface be reachable. For the previous task, I had been using my phone's WiFi hotspot to connect to the internet, but I felt that it would not be the best idea to do so in perpetuity, as then I would always have to turn on my hotspot in order to have it connect to WiFi, and be able to connect to it. The second option was to have the esp32 act as a station and then I could connect to it through my phone by switching onto it. This seemed rather irritating, as switching on and off the MIT wifi can sometimes take a moment, making it an inconvenient way to connect with my project. Then, after speaking with Andy I learned that I could connect my esp32 to one of MIT's wifis that was built such that students could access it with a simple passkey.
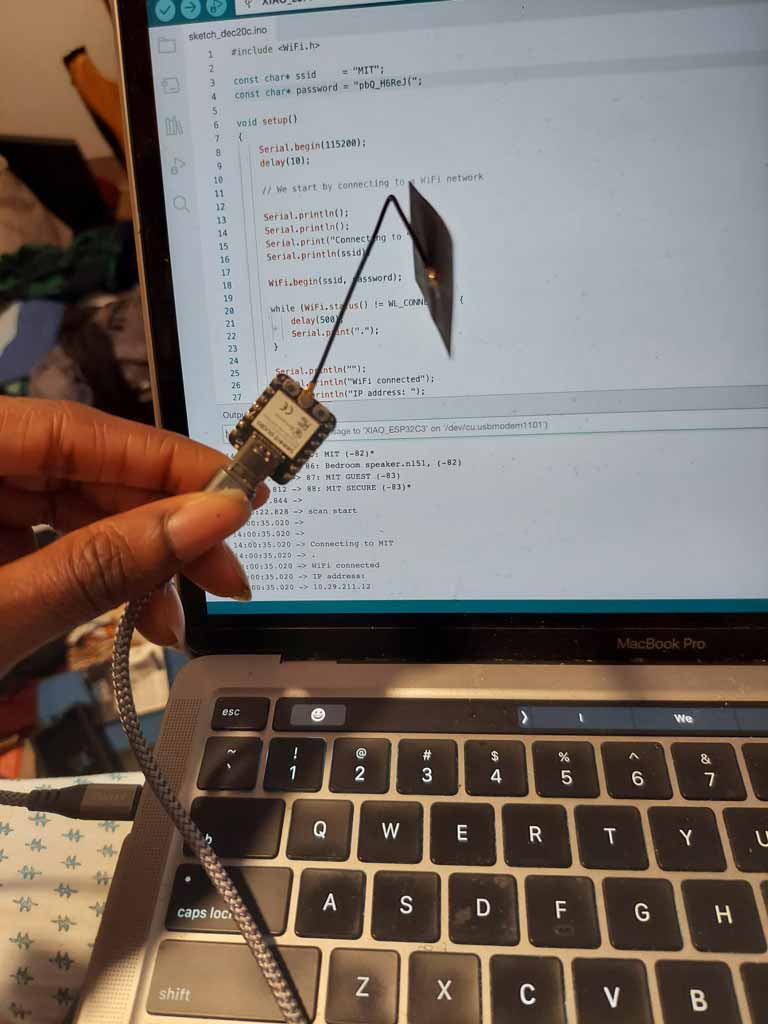
At first, I could not get it to work with this WiFi. I was worried it was because it was a 5 gHz wifi and the esp32 was better at connecting to 2.4 gHz wifis. As such, I started playing around with different ways that I could get the interface to work. One such idea was that I could have the project connect to my hotspot to get the time and start the clock, and then disconnect from wifi and start hosting its own station, where I could connect wirelessly and then send data to the esp32. I started playing around with my clock code again to make sure that this idea would work. However, I still felt that this would not be ideal as it would be irritating to switch on and off the esp32's wifi, and have to turn on my hotspot for things to work initially, especially as I was debugging. Then, upon visiting the seeed xiao esp32's website explaining how to connect the xiao to WiFi, I realized I was not using the antenna that the esp32 had come with. As soon as I attached that and tried connecting the esp32 to the MIT wifi using the sample code provided by seeed, it worked! Then, I went back to the first idea of being able to host a webserver via the wifi, as that way I could just visit the ip address from whatever device I had handy whenever I wanted and then easily turn the lights on or off.
The XIAO ESP32 connected to WiFi
Making the webserver
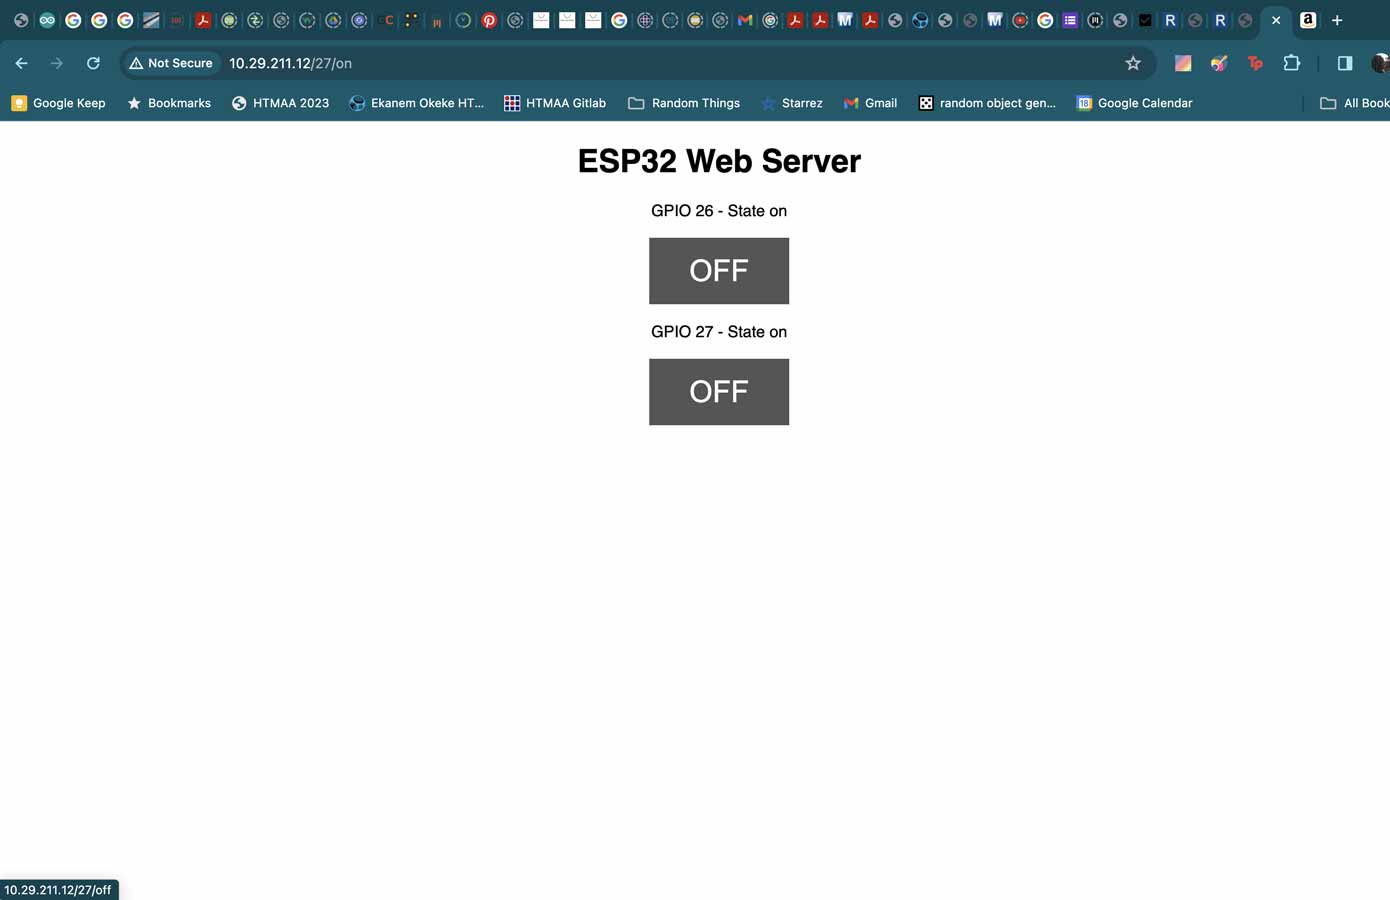
This site was incredibly useful for what I wanted to do this week. All that I needed from the webserver was something that would have a button where pressing the button would correspond to the XIAO ESP32 executing one other function. Looking at the information I was at first unsure whether it would work because I usually use a different MIT Wifi that requires more security, however, after running the sample code, I was still able to make it work.
Running the example webserver on the XIAO ESP32-C3
Then, it was time to look through the code and piece together the different purposes of the parts of the code to make it function the way I wanted. I removed any code that referred to GPIO27, as I only needed one button. Parts of the code were also confusing as lines that referred to the state being on were right next to lines referring to the state being off, by the nature of what the button does. I had to take a bit of care as I was reading to ensure I did not accidentally flip things (although this did happen a couple times). When things would stop working, I would quickly undo and started the practice of just commenting out the things that I did not thing I needed to see the changes that it would make.
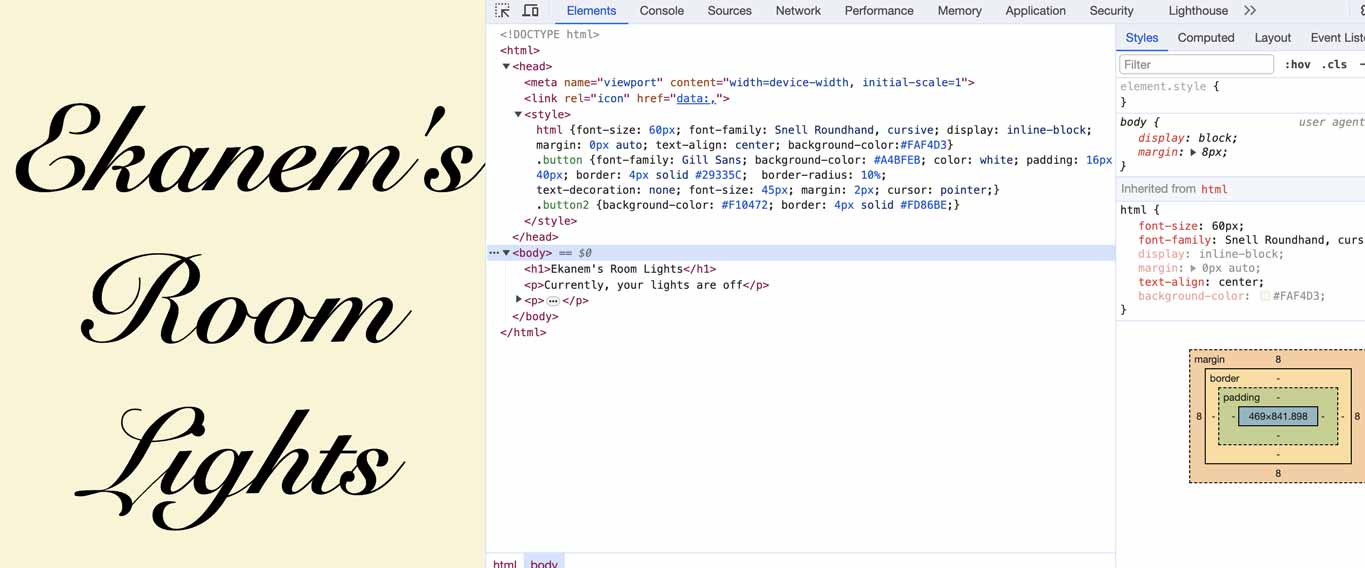
Editing the html
Once I got the html working, I implemented a couple changes to make the html prettier. I changed the fonts and styling of the buttons which was covered in the css part of the arduino file. One of my favourite websites for choosing colors is Coolors and I used it a lot to pick out the colors I wanted for site, and the webserver was done.
Editing the html of the webserver.
Implementing into Final Project
After sorting out all the code, I added it to the existing code for my final project and changed the functions so pressing the button would turn the lights off and on accordingly. I was able to do this by changing the variable for the output state to the variable that I had assigned for the output state, and then I changed the action assigned to each output state to be the functions that I had created for turning on and off the lights. Final video can be seen below.
As seen here, I'm just using my camera to show my environment as I access the webserver on my phone, and use it to turn the button on and off.