This week I decided on making embroidery patterns such that I could make my own MIT merch. MIT merch is generally very expensive and does not have that much variety, so if I could design and embroider my own, it would be pretty nice.
Designing the Embroidery
I have some embroidery experience and experience using Ink/Stitch, so making the patterns was relatively simple. First, I started by finding a high quality/vector image of the MIT logo. I was also debating making embroidery files for my name and department, as then I could make personalized merch. For the MIT logo, vectorizing was pretty simple, as I just drew rectangles that matched the sizing of the rectangles in the MIT logo. I then could put it directly into to Ink/Stitch, which would generate fill stitching for the rectangles. For the letters for my name and department, I wanted to make sure that the text would be satin stitched. In order to do that, I wrote out the text in Illustrator where I chose to use a heavier version of Futura, and turned the text into outlines. I then broke the paths where I felt that the stitching should diverge and added lines which Ink/Stitch could use as rails to determine the direction of the stitching across the letters. After that I was able to quickly preview the embroidery and make sure it looked right.
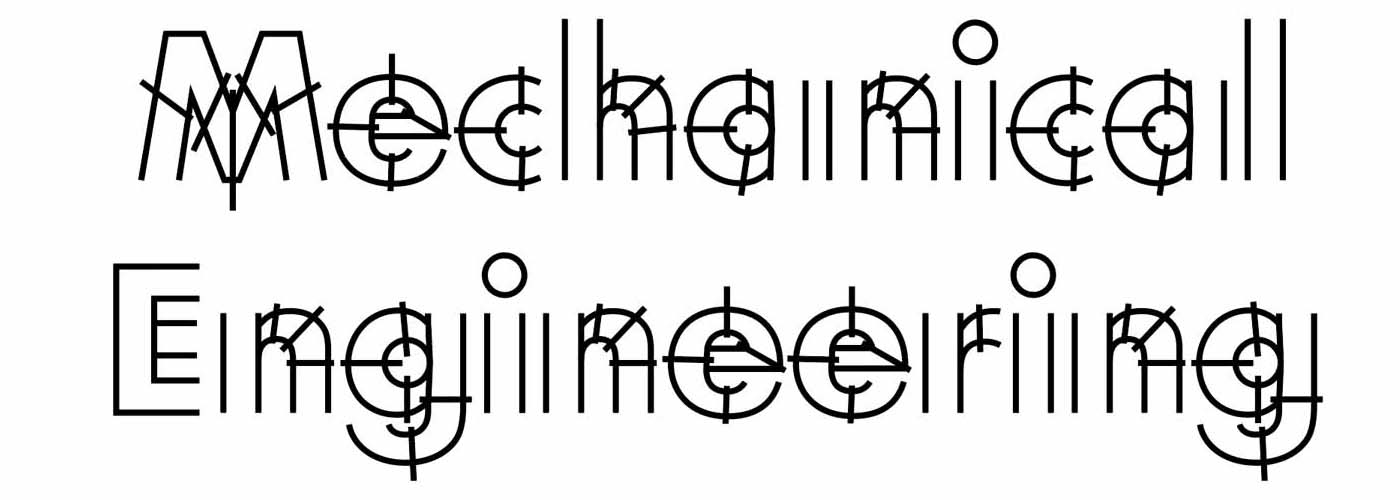
Satin Stitch Vector Pattern for Mechanical Engineering
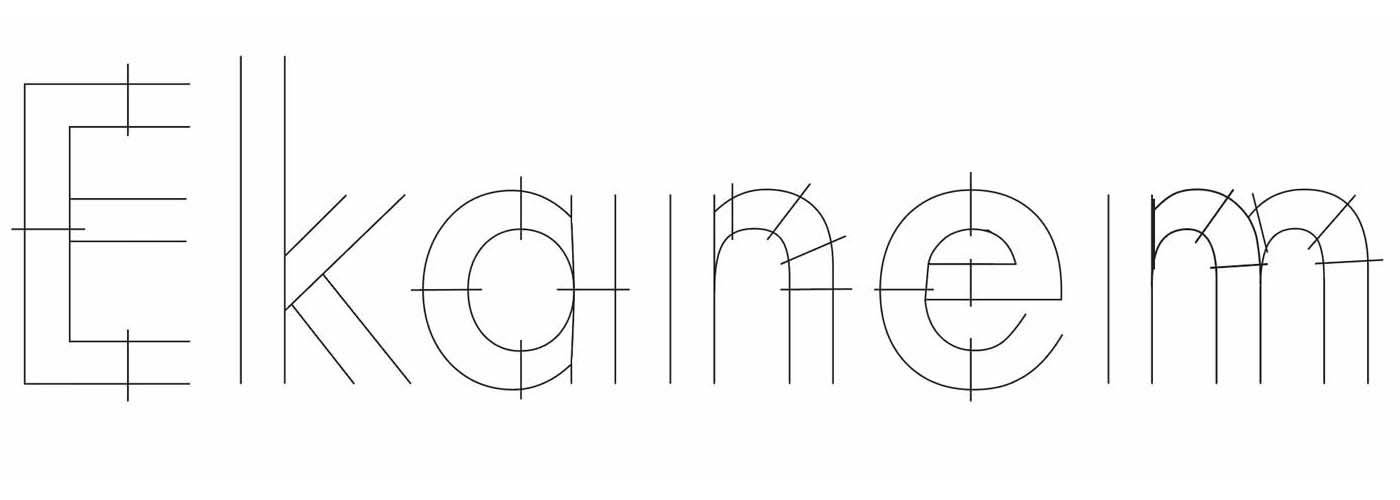
Satin Stitch Vector Pattern for Ekanem
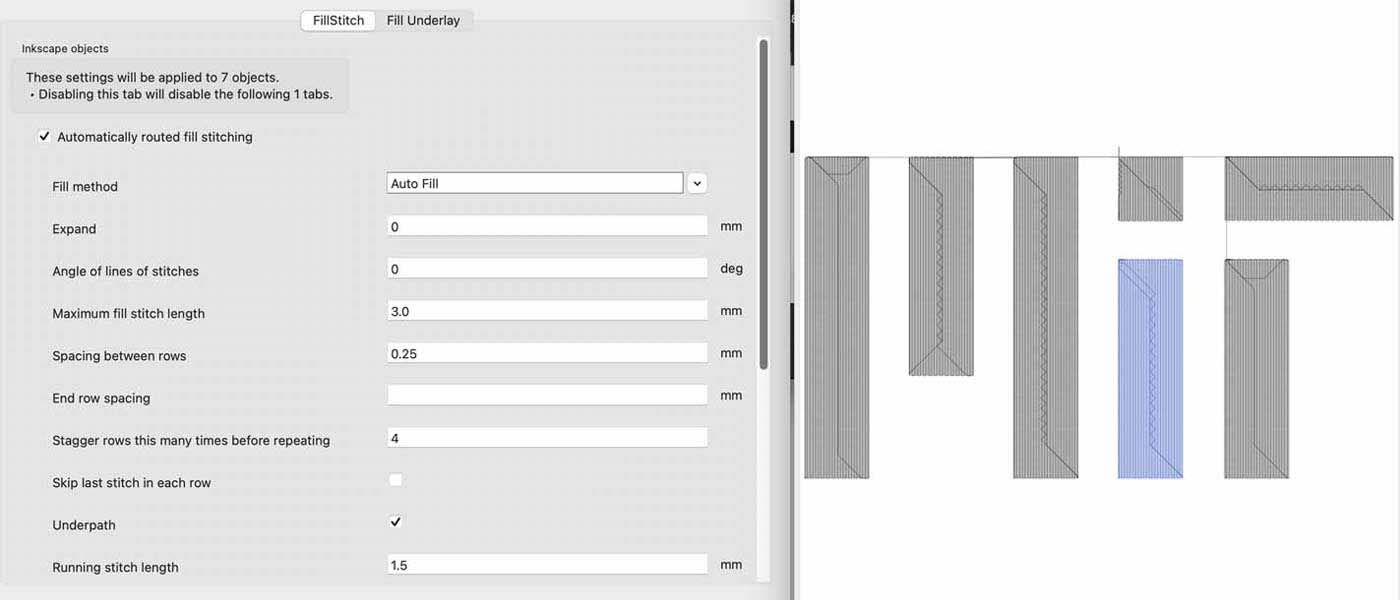
MIT Pattern Simulator
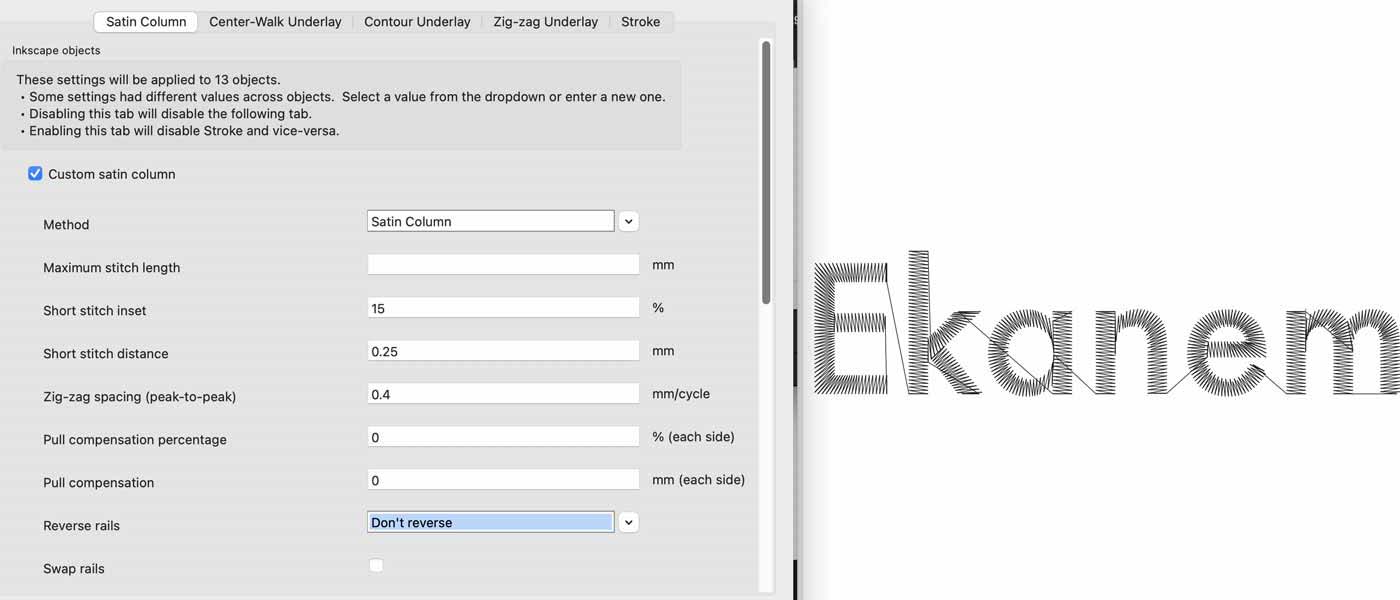
Ekanem Satin Stitch Pattern Simulator
As I was playing around in Ink/Stitch, I noticed that there had been an update when it could create gradients, so I made a small square to try that style out as well.
Additionally, here's some general notes to follow for creating embroidery files:
- when using a satin stitch, the rungs and path need to be merged together as a compound path
- the direction of the path (that the stitch goes along) may need to be reversed so that it travels
- the order of the embroidery the machine will perform will go from bottom to top according to the organization of the paths in the layers
- each set of rungs to be set to embroider as a satin stitch individually (even though it can be previewed as a group)
Other than that, I suggest checking out the youtube channel LowTechLinux as they explain how to use Ink/Stitch pretty well, and ways to troubleshoot as well.
Physically Embroidering
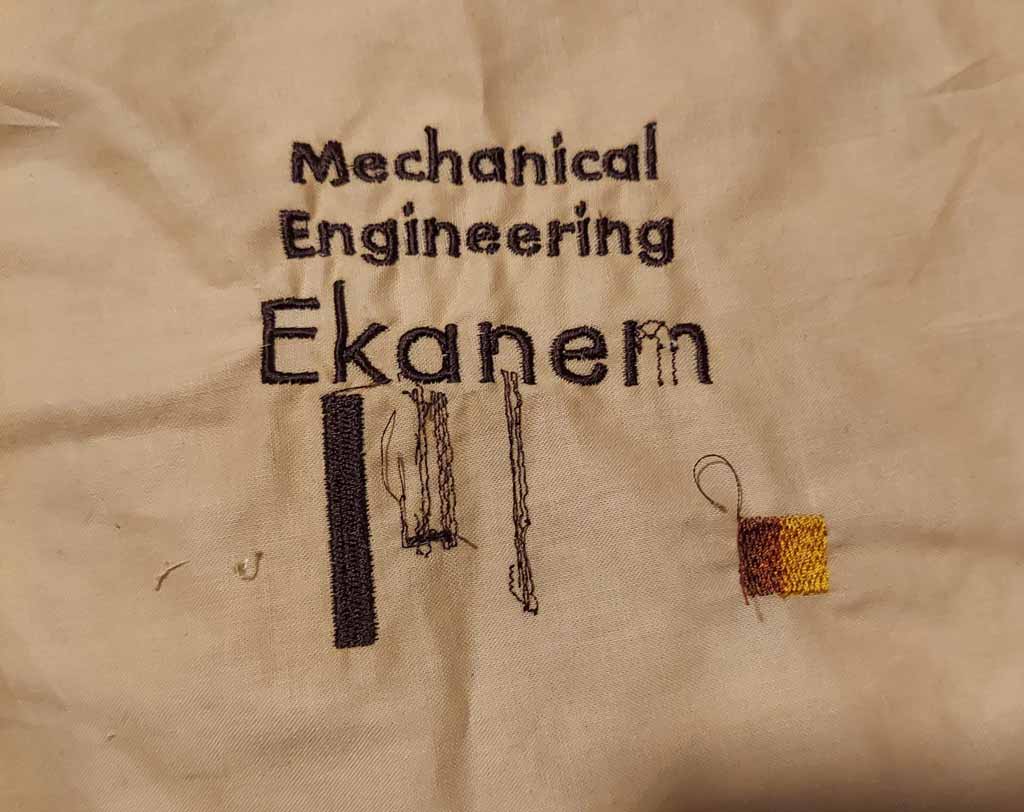
After this, I decided to test my patterns on some scrap fabric. At first I had some issues as after I replaced the bobbin, the embroidery machine just seemed to stop working. However, after troubleshooting further I realized I had not done a good job threading the thread through the tensioner. Once I fixed this, the machine worked right again, and the samples can be seen below. The sample of the gradient is on the bottom right - it didn't turn out as smooth as I expected, but I think that was likely because of the the thread colors I chose and the order that I embroidered them in.
I practiced the patterns on scrap material to make sure that everything would come out properly
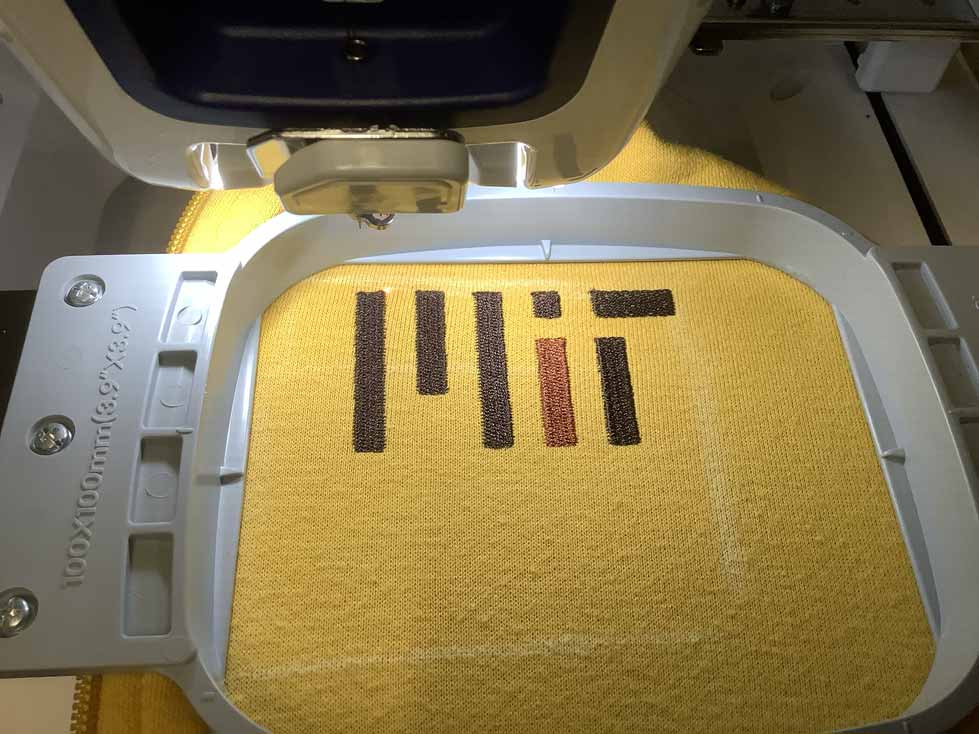
Once I'd tested the embroidery, I embroidered the MIT logo on a plain sweatshirt. Mission accomplished.