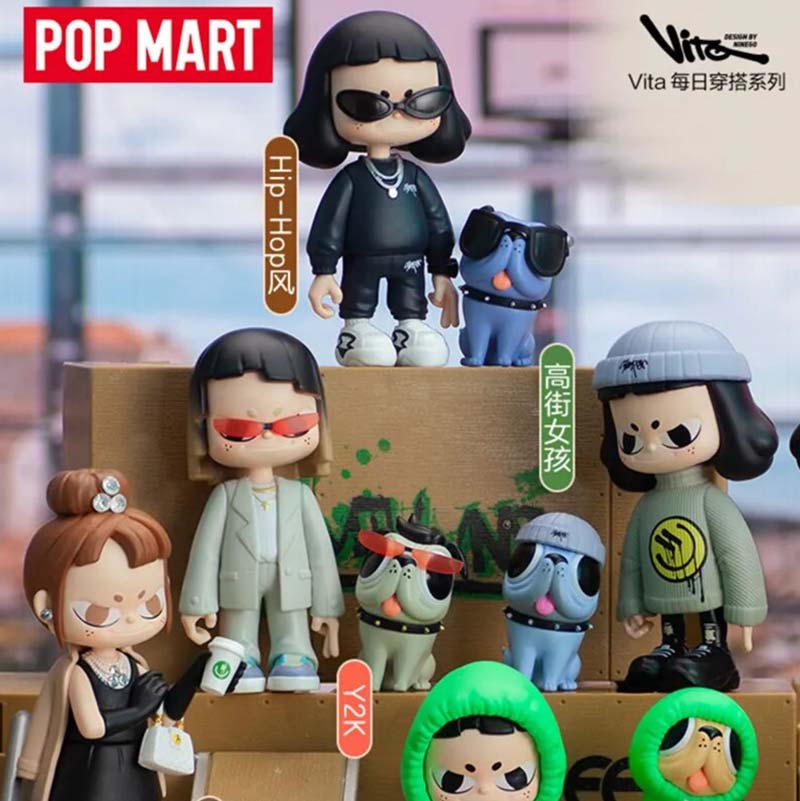
This week I planned on achieving one major goal of mine: Learn Blender! I've been fascinated with animation for years, and as a result I've always wanted to learn how to 3D model as part of that. As for what I planned to model in Blender, I planned to address a hobby of mine; I love Popmart mystery boxes and particularly this character Vita. The character has the most wonderfully devious smirk.
Vita Mystery Box
However, collecting these figurines is not really an option for me; I'd be giving in to my worst hoarding tendencies, and it's an expensive hobby as the likelihood of getting duplicate mystery boxes is relatively high after getting 2 or 3 boxes (don't check my math on that). However, if I could 3D print my own figurines, while I would be acting in my own interests as a hoarder, I would at least have minimal costs.
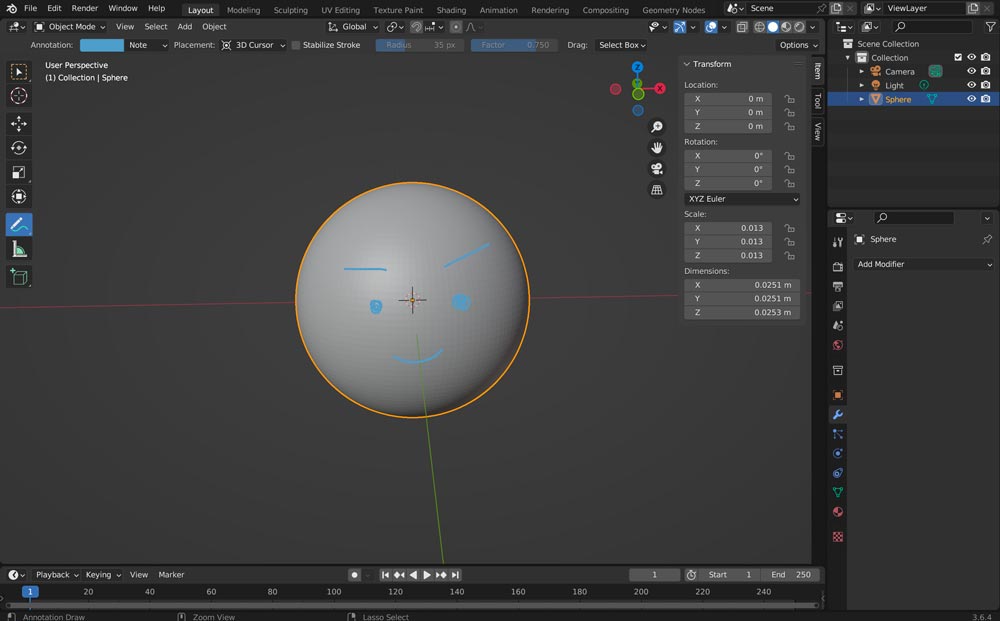
After being instructed on the basics of using Blender, particularly the merits and uses of Object mode, Sculpt mode and Edit mode by fellow student Bowen Wu, I started modeling the character. Although I had to continue googling and problem-solving as I completed the model, this tutorial was super helpful for getting a sense of the terminology, common tools and modifiers to use and the workflow of using Blender. Notably, there are two different common Blender workflows that I am aware of; using Edit mode to create meshes, and using Sculpt mode. The benefits of using Edit mode seemed to be that it was more analogous to CAD-ing; forms that could feasibly be modeled in CAD (but did not need to adhere to strict dimensions or anything) could easily be replicated in Edit mode. Everything else, you should try to sculpt. A real benefit of modeling in Blender instead of CAD is that you don't have to use operations with too much thought as to what they do and more so just in terms of how they affect your final model, similar to modeling out of actual clay. For the process of modeling the character, I broke the process into each separate part of her body, starting by modeling the head. As I was starting with barely anything in the model to refer to, I drew a face using the annotation tool on the model to keep track of where the front of the head was.
Starting head shape with annotated face
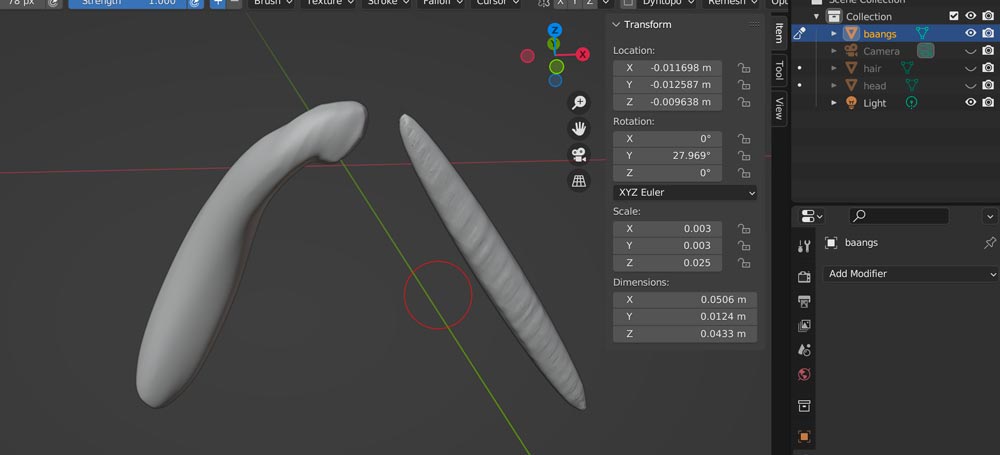
Inspired by a hairstyle that I saw online, I next started working on the hair to get a better sense of the directionality of the head. I started by adding bangs in the front, and first, I tried modeling it by making long rectangular prisms and sculpting but there, but after referring to this tutorial , I reattempted using mostly the editing mode.
Bubble braids reference hair I looked at
First attempt at bangs
Second attempt at bangs
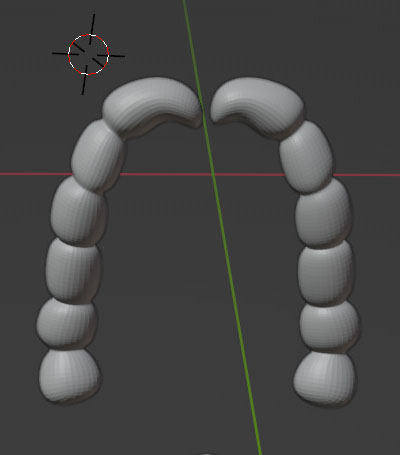
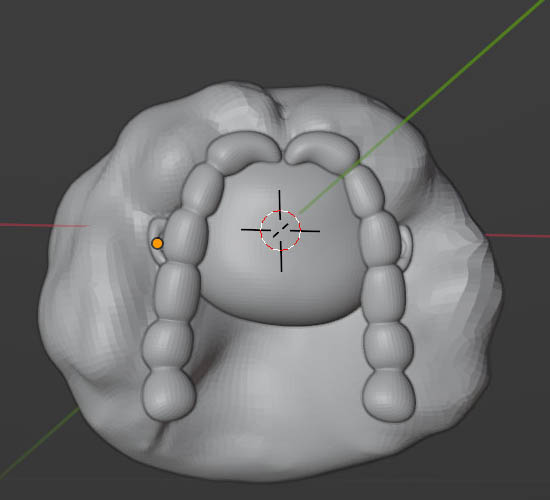
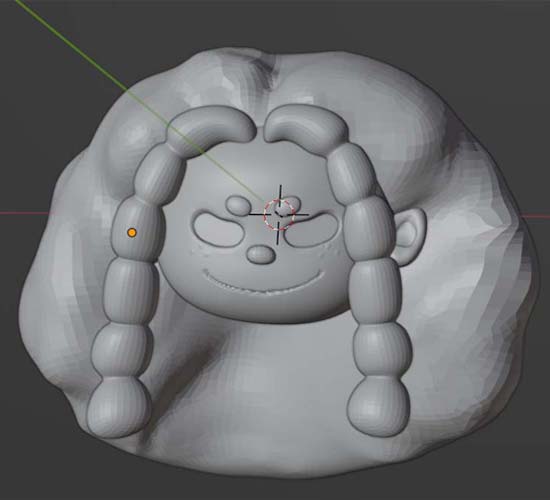
As I was creating the bangs, I created and refined the shape of the hair and the ears, as in order to create the aesthetic I wanted, as I needed to pay attention to the relationship between the elements. I then added the rest of the head, adding eyes, eyebrows and a smile.
Finished Hair
Fully Sculpted Head
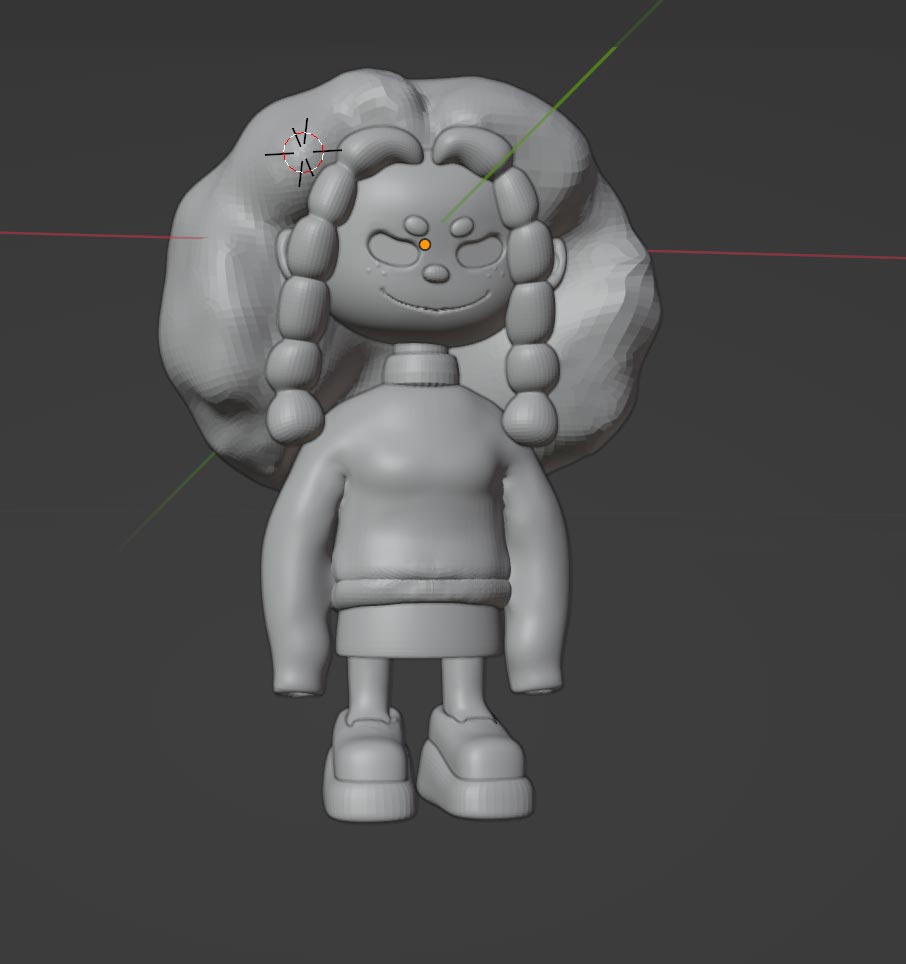
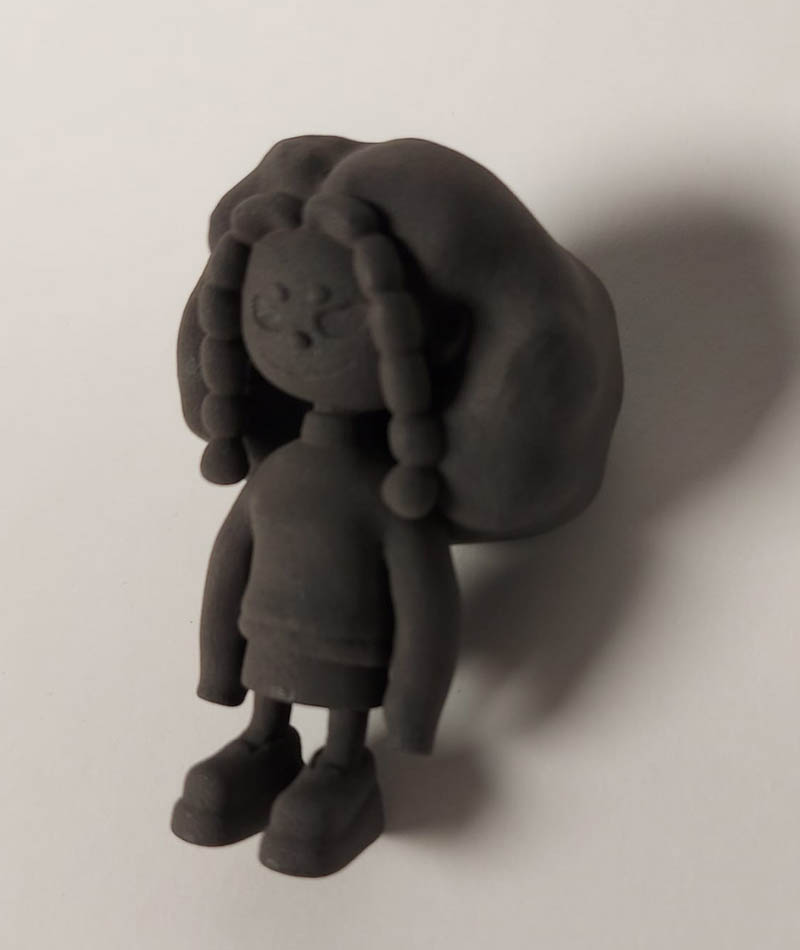
While I was originally considering stopping there for the sake of time, I was feeling an incredible sense of accomplishment working on the model, so I (terribly decision) decided to model the form in its entirety. This proved difficult, as it mandated that I increase the complexity of the model (making the model more likely to crash, which it did- in fact my entire computer crashed), and modeling the shoes in particular was incredibly difficult, because as it turns out I have a very vague idea of what shoes look like in 3D space.
Full Figurine
As a final note on Blender, here are some key takeaways:
- while it matters what artistic goal you are trying to achieve, if you are trying to make something more cartoonish, try to model as closely to your goal as you can in editing mode, and then use the sculpting mode to put in the finishing touches. - make sure to save *every time* before you remesh and subdivide the surface. Whenever you do these, you tend to add more geometry for the computer to compute, which makes it much more likely to crash as I learned firsthand. Blender does autosave, but not often enough to depend there being an autosave file that's recent enough for you to refer to it. - make sure to apply all transformations before going into sculpting mode. - when in doubt, try to find a reference image with multiple angles and/or try to find a tutorial for a similar model. Sometimes I would sit there and just toil away trying to make something, not knowing that I was making it needlessly complicated or that there were Blender tricks that I could have taken advantage of to make it easier for me to complete.
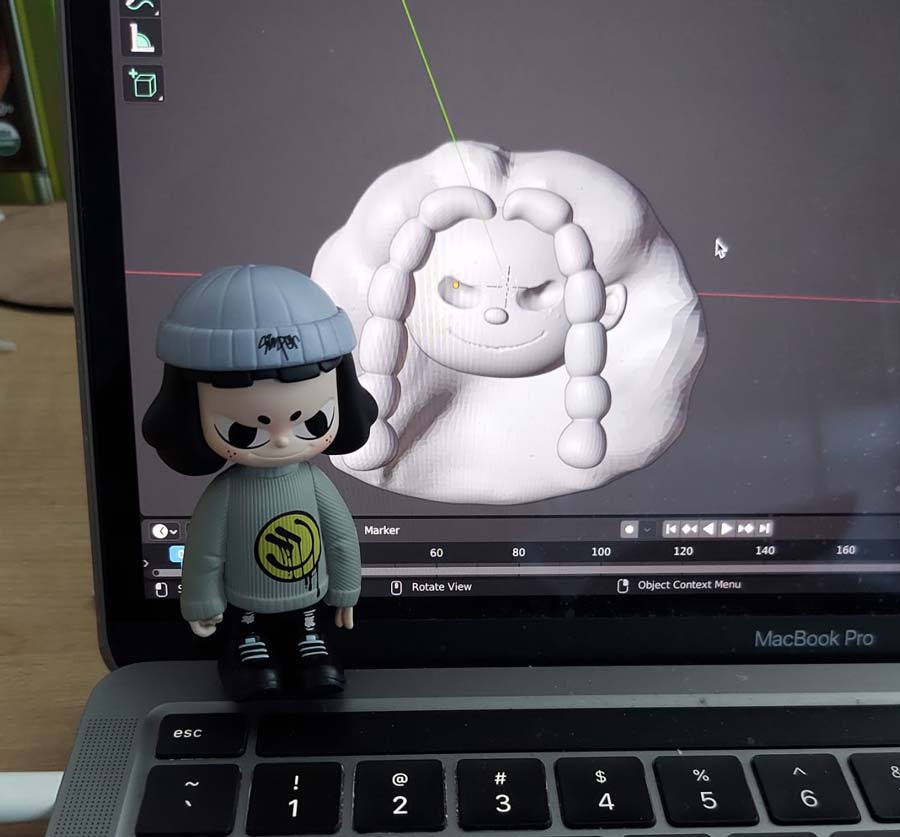
I looked at my figurine as I was modeling to try to get things to match
- I really need to get into the habit of using a mouse :' ) - Label all of your objects so they're easy to find in your "object tree"
3D Printing
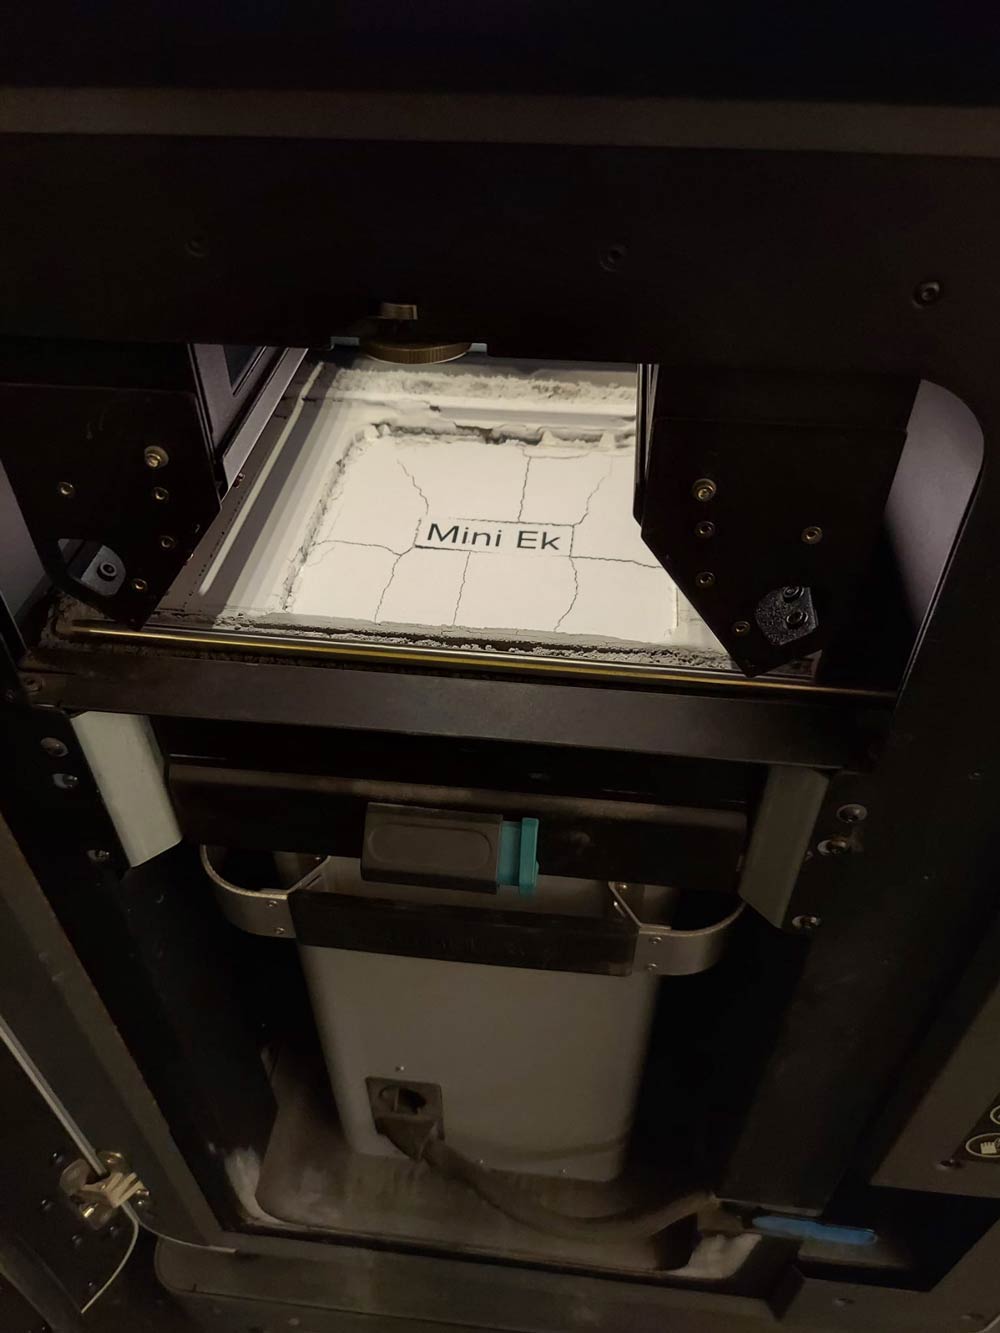
After finishing the 3D model, it was time to 3D print! Due to the size of all the minute details that I wanted to make include, I realized that it would make sense to try to use a really nice 3D printer that could include a very fine level of detail. Luckily, they have a Formlabs SLS printer in N52 that I was able to use. While I was unable to do the actual slicing myself because of the constraints of the makerspace and time constraints (who knew modeling an entire character from scratch in Blender could truly take so long?!). Exporting the Blender file as an stl for 3D printing also resulted in more trouble shooting, as moving the file to examine it in Meshmixer showed that there were parts where the normals of the mesh were reversed, particularly where I had mirrored parts. As per any kind of 3D printing, there was a lot of post-processing required, as the SLS printer releases your print in a bed of carbon nylon powder.
Bed of Powder
The post-processing is as follows: digging the piece out of the carbon nylon powder, and manually brushing off the powder.
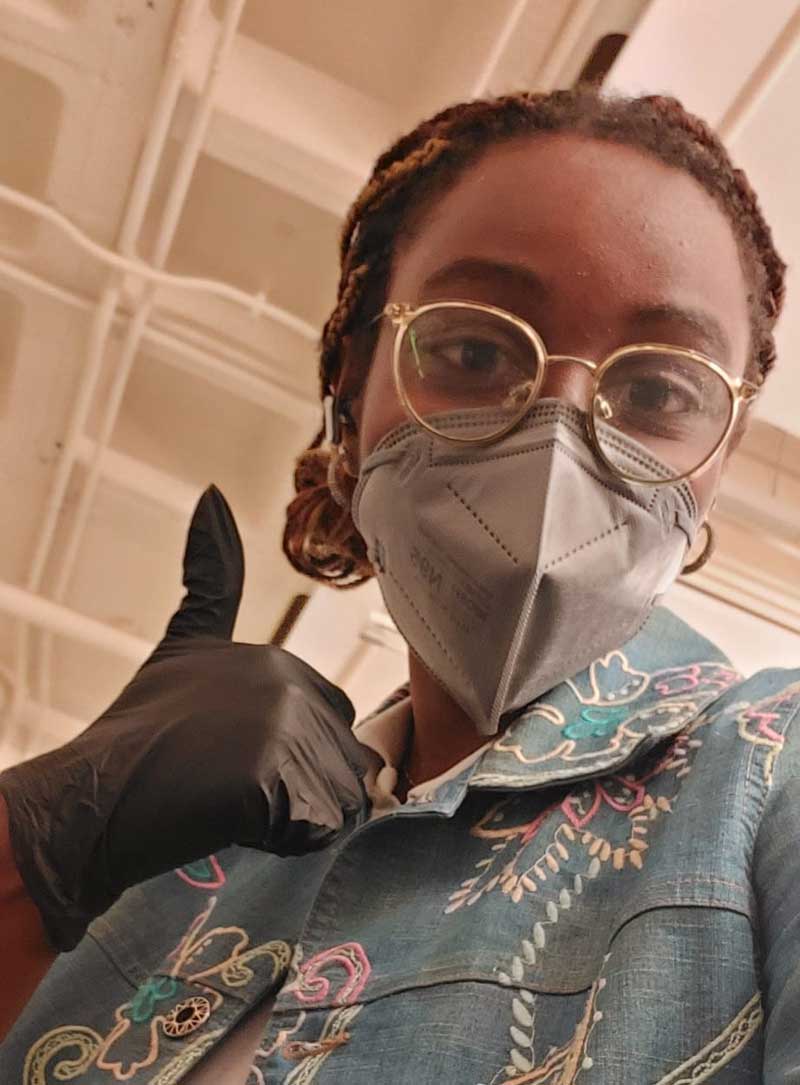
I made sure to wear the appropriate safety materials while I excavated!
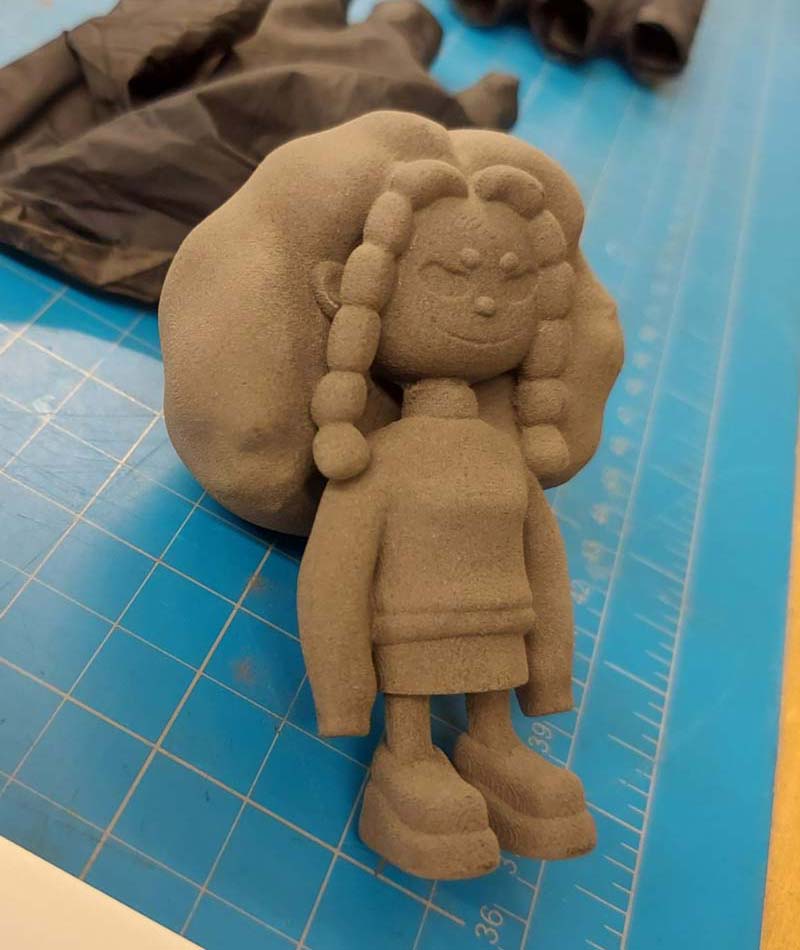
The part as partially excavated.
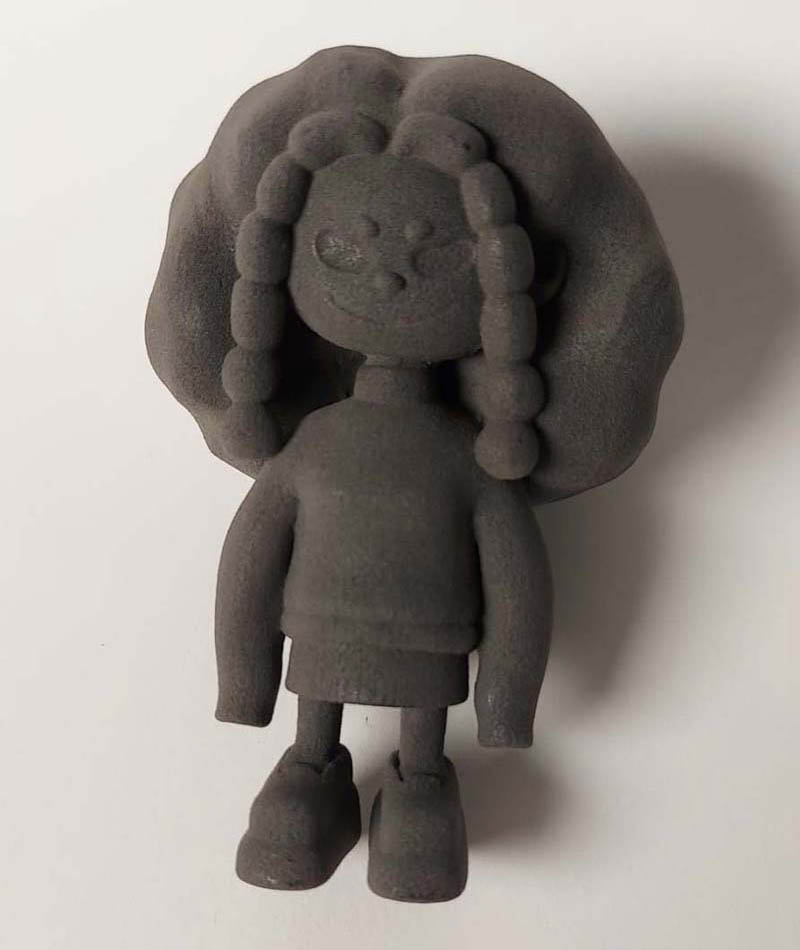
Normally it's suggested to sandblast the piece after you dig it out, but I was a bit nervous it would buff out the details, so I opted not to. I keep going back and forth in my head about it though, so I might decide to do that in the end. Here's the finished model! She can't stand because of the weight of the hair, but I don't mind that much. The freckles also didn't seem to come through in the print, but I don't mind - it's nice to know the limit to the detail that can be added for this kind of print. Also, documentation note: the blender file and the stl are both too large to put on the git, so I've linked the stl in my drive here.
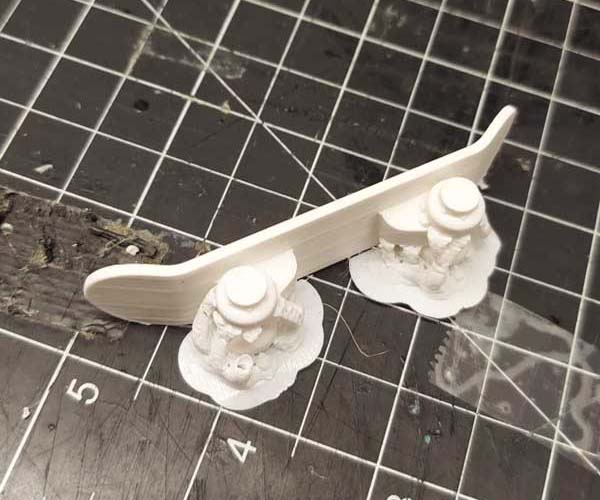
Skateboard
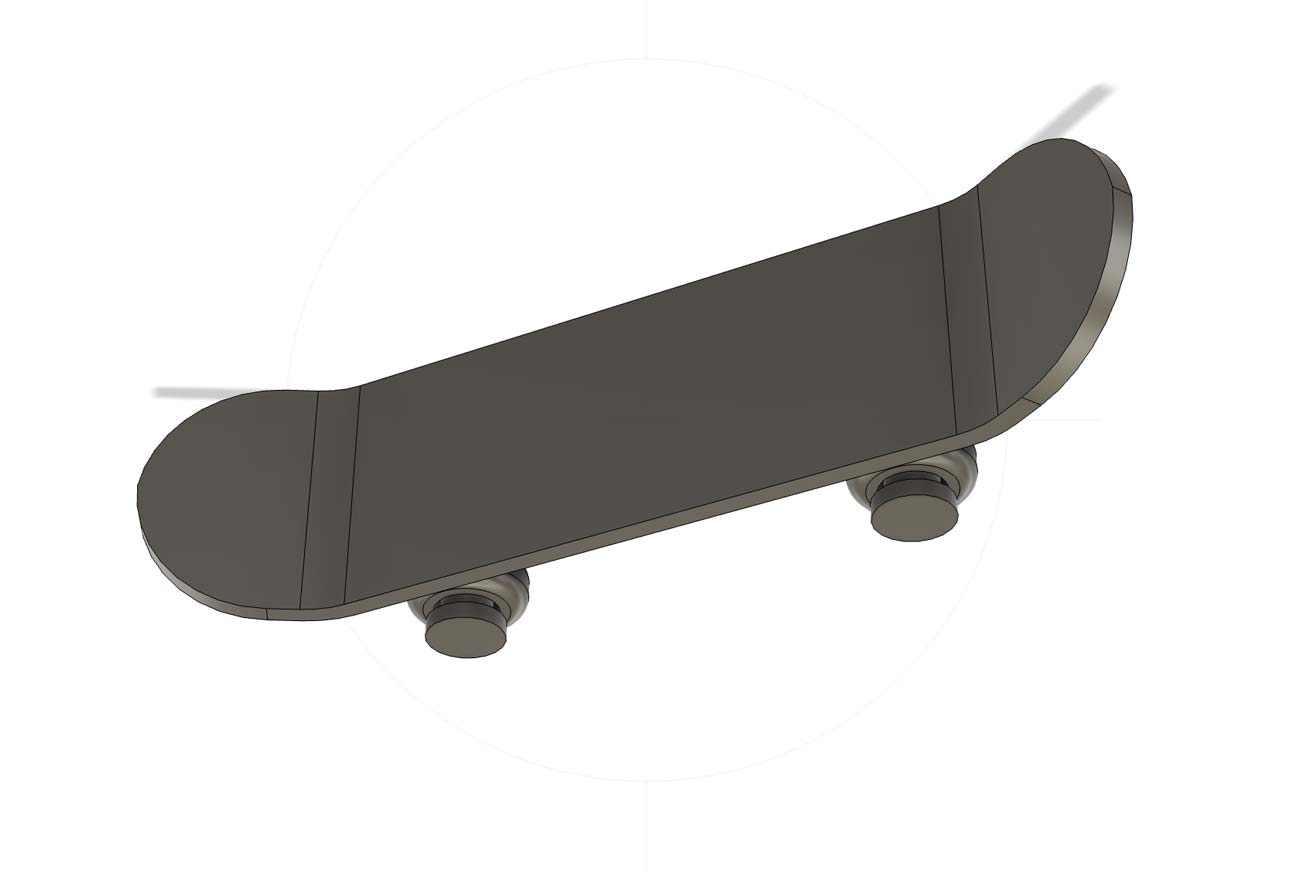
As a side little experiment, I cad-ed a small skateboard for the figurine to stand on.
Skateboard CAD
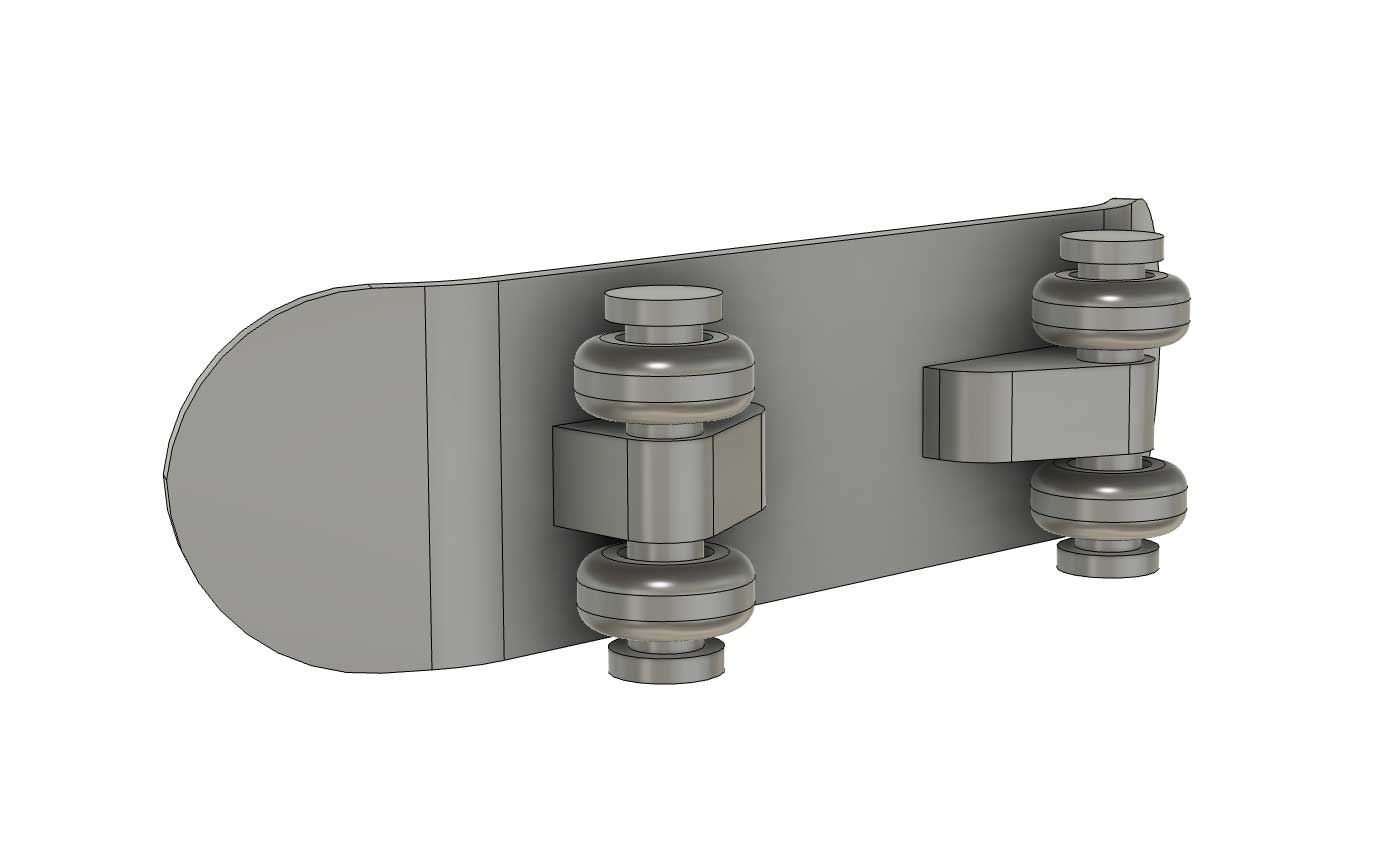
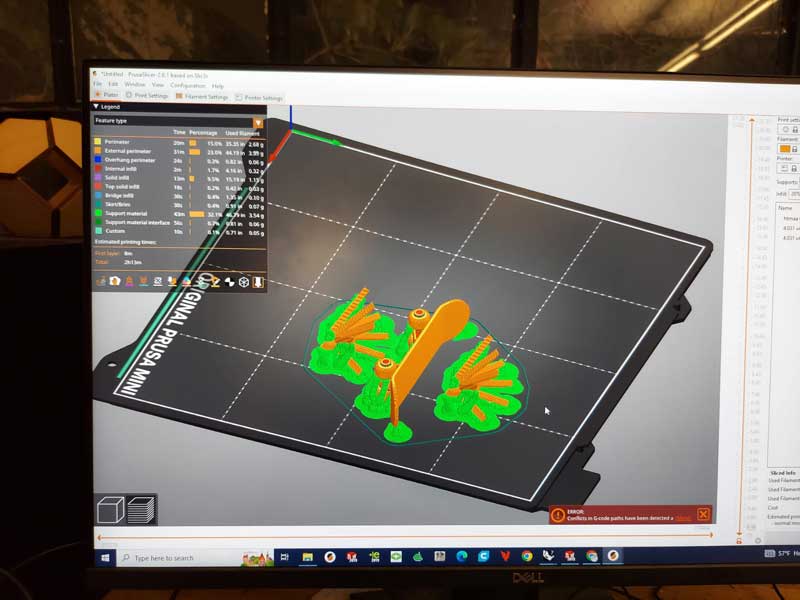
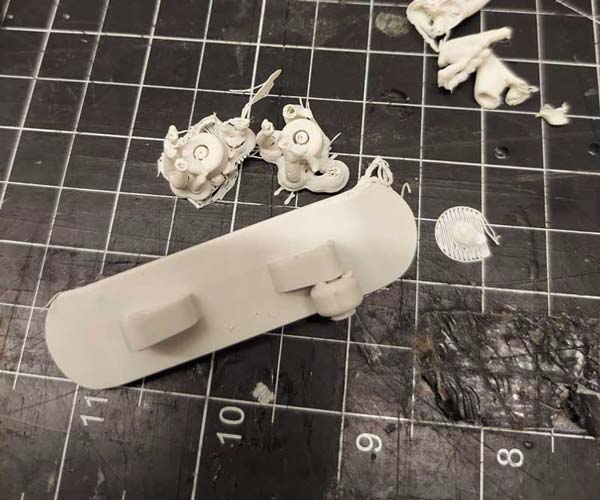
I tried 3D printing it multiple times in PLA on a Prusa Mini. I sliced it myself in Prusa Slicer and used tree supports for the overhangs. I actually designed it to need supports to help prevent the axle and wheel from merging together. I also decided it had to be 3D printed on its side in order to make sure that the axle and the wheels are circular, but this caused another issue because the layers of the axle were then parallel to the force that was applied to the axle by the wheels, which would cause it to shear relatively easily. As a result, although the print turned out okay, the axle would always break when I tried to remove the supports. I tried thickening the axle in the CAD, and I was glad to notice that the offset of the wheels was enough such that the wheels could rotate on the axle. Unfortunately, I was still unable to get the print as a whole to work, at that scale. My hypothesis is that I would likely need to use filament with better inter-layer adhesion (like Carbon-Nylon), scale the skateboard up or use a printing method (like printing in resin) that results in less directional weaknesses in order to get the print to work as I intended.
Skateboard on Slicer
Printed Skateboard in Supports
Broken Skateboard Print : (
3D Scanning
Over the summer, I got a lot of 3D scanning experience (shout-out to the Australian Institute of Sport!) with a pretty fancy scanner, so it was interesting to try a photogrammetry app for this class this week. I used the app "Polycam", and I found a cute sculpture (origin unknown) in N52, and used the studio space in N52 to scan it. The scan turned out pretty good! It took pretty little time. I'm not sure how useful this would be just because this doesn't give me any actual geometry, but it was fun to see!