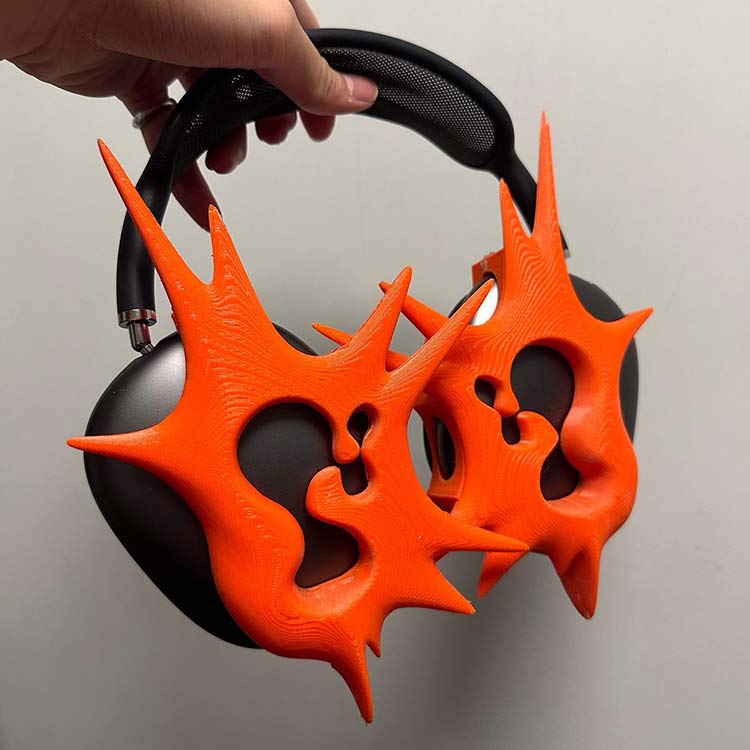
This week I am super inspired by this artist Offgod (aka Drew Mok). I mainly came across his work making sculptures that fit on over-ear headphones, and so I would like to try my hand at making my own.
Offgod's Headphone Sculpture
I think that molding and casting would do well in this circumstance because then I could get really nice surface finishes, and I could cast it in rubber such that the fit of the sculpture on the headphones would have some wiggle room. Some considerations I would like to make as I am making the headphone sculpture is that I want the headphones to still be able to function and operate normally, and for it to not affect the comfort of the user too much. This means that they should be able to not prod into the person when they hang around someone's neck, or prevent someone from wearing their glasses comfortably with them on.
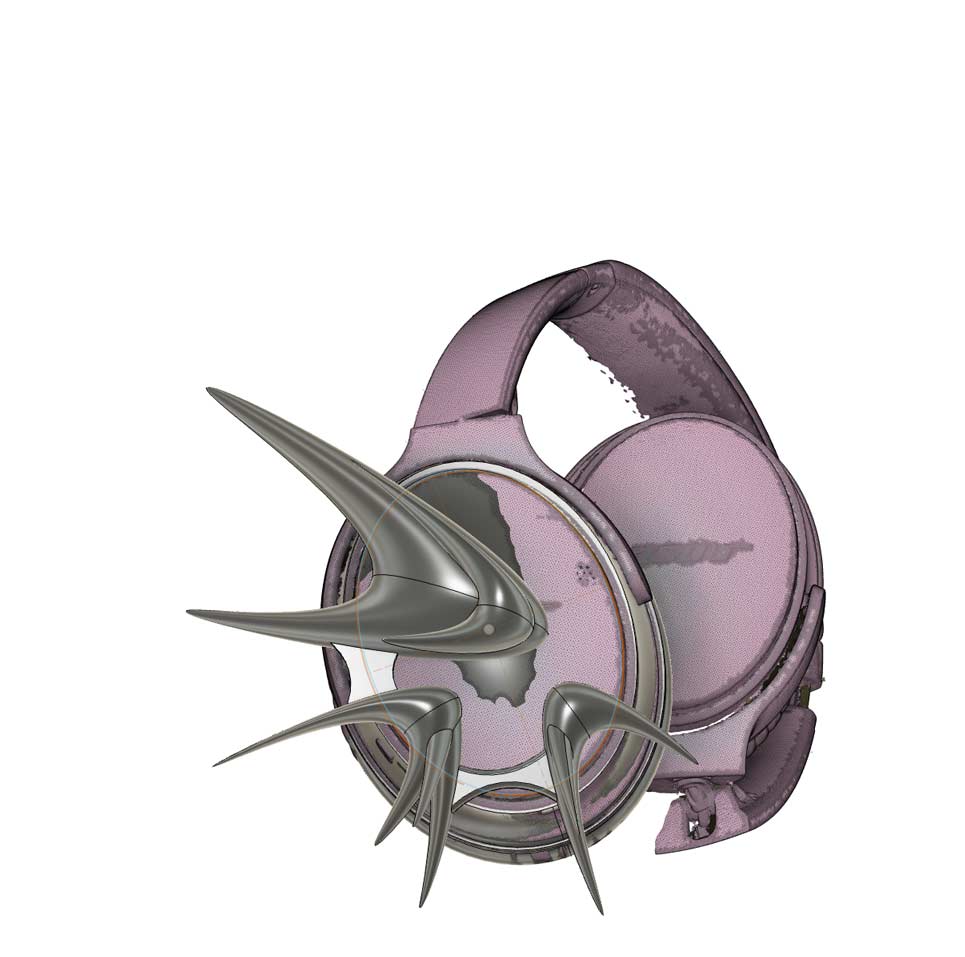
In order to model this accurately, I took a 3D scan of the pair of headphones I planned to model the attachments for. I really wanted the attachments to be able to be attached without the use of glue so that they were custom to the model of headphones, similarly to how Offgod does it. I also decided to model the main/artistic part of the headphones in Rhino because I wanted to get better practice using Rhino, and I know that Offgod has used Rhino to model them, so time to crack out my best Rhino skills (which to be clear, I have virtually none).
*Future Ekanem here, but what I ended up modeling was very much not something you could easily machine on a 3-axis mill so I just ended up spending over a week (multiple hours per day) on a solid model that will never see the light of day until I have time to 3D print it.* Jen telling me that it wasn't millable was literally the saddest moment of this semester so far.
My Headphone Attachment Model
As you can see above, there were a bunch of overhangs and thin pieces that not only were very difficult to translate into a sensible mold on the 3-axis mill, but it would also be really hard to ensure that they would be captured while casting, even if I had found a way to make a mold.
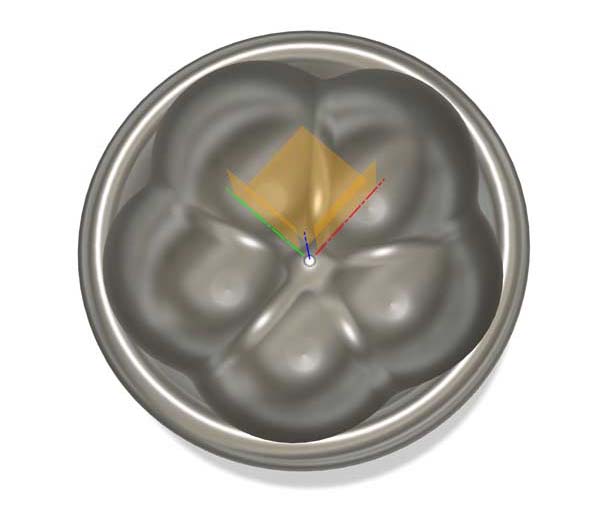
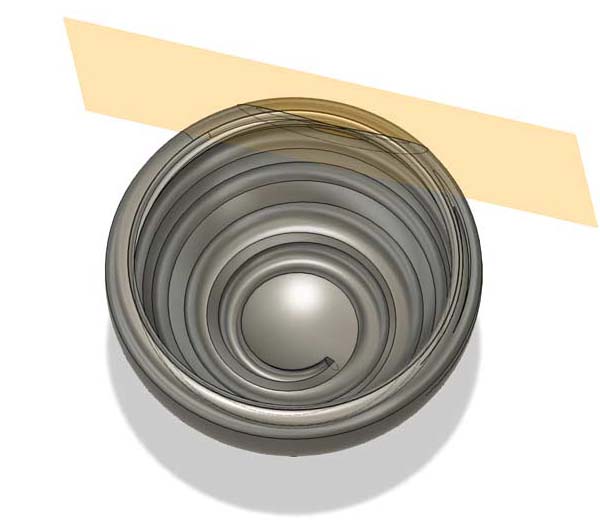
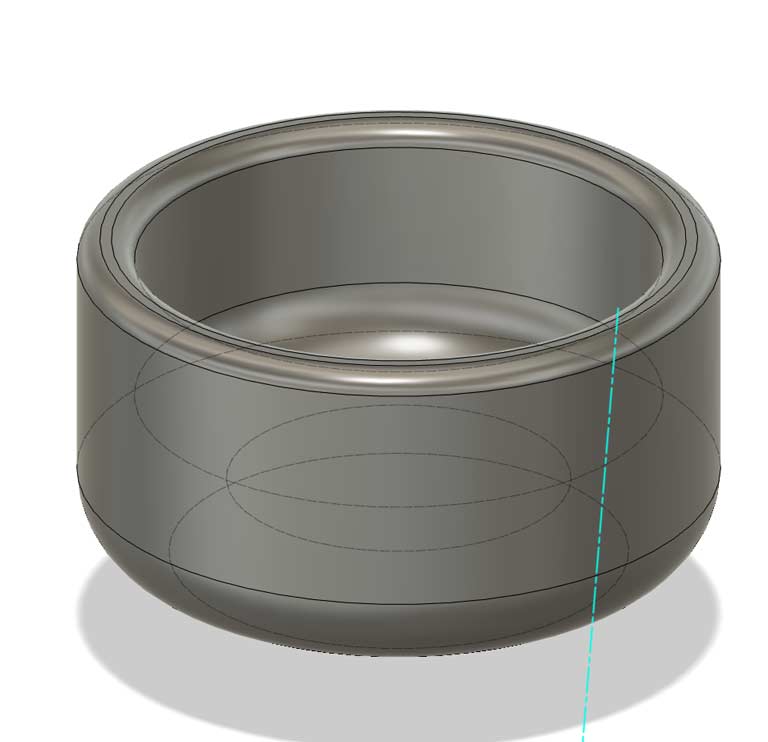
So after licking my wounds (and accepting the fact that I am currently too behind to make something as complicated as I wanted), I actually read the parameters for this assignment, where I realized I had much less molding volume available than I thought, and what I would have to make would have to fit in a 3in x 3in x 3in volume. I decided on molding a little cup I could put my jewelry in (particularly because I have a tendency to take off my earrings right when I'm about to sleep and the risk of me losing my earrings because I'm too lazy to put them back is relatively high). Design-wise, all it is is a cylinder with a cap on it and a bunch of fillets (which makes me sad but I actually have more ideas for milling casting projects now, so hopefully I can do that in the future and/or incorporate it into my final project or something). At first I still tried to make more complicated things with internal geometry, but I kept finding that it would either result in broken stls, or just looked weird. These tests can be seen below, where I tried to make a bowl with an internal spiral and then I made a bowl with sphere cutouts.
Bowl with sphere cutouts
Bowl with internal spiral
Ultimately, for the sake of time, maximizing the capacity of the bowl, and learning more about casting, I just went with the simple bowl.
CAD of Simple Bowl
Milling
Setting up the cup to be molded was a bit difficult, just because it was a bit hard to visualize, especially because the cup CAD was the positive, and when filling the wax cast with silicon, the silicon should be a negative. Thankfully, I worked through a lot of the set-up with Jen, so she was able to show me how the CAD would translate to CAD that could be given to the machine. In order to make the CAD work the object had to be shrunk a little to leave more space around the sides for the registration marks. Although I had put the positive in a volume of the size of the mold to double check that everything would fit, I had left things a bit tighter than Jen felt would dependably work.
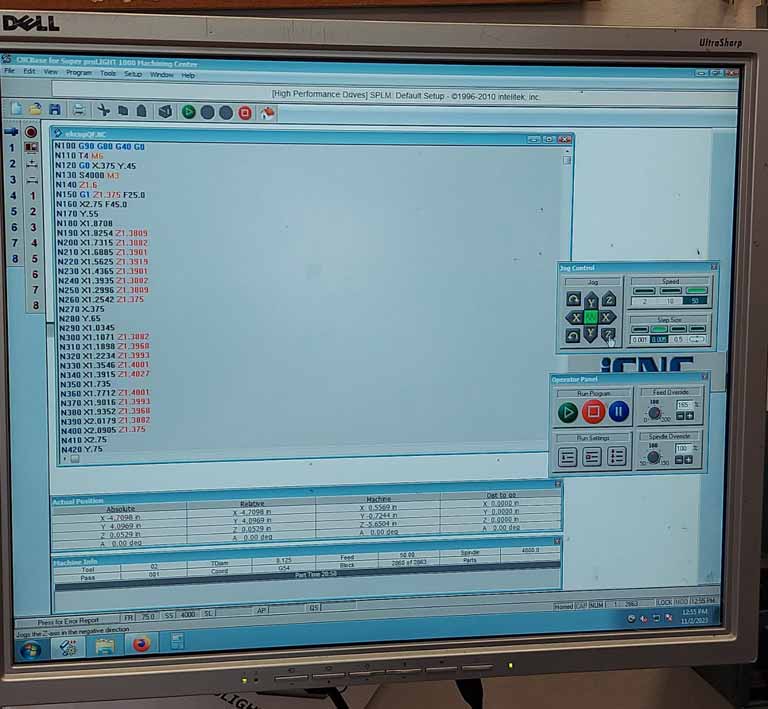
Jen then walked me through some of the elements of the toolpath that she made using Mastercam. The most important thing to consider is often the chip load, as that is what leads to tools being broken. This affects speed and feed rate. Jen was also able to use a radial toolpath with the rounded areas on my object, which in this case was the most efficient way to get a pretty good surface finish. Mastercam also allows you to look at and simulate what the individual toolpaths will do, which will tell you about what the surface finish will look like. An example can be seen below, with the Surface Rough Parallel.
Surface Rough Parallel Modeled in Mastercam
Mastercam then generates Gcode to give to the machine, using the toolpaths generated.
GCode in Mastercam
Now that the toolpaths were generated, after attaching the wax to the board, it was time to mill! Notably, because of the shape of my object, we were able to use the radial toolpath for a better surface because my object has some rather rounded areas.
Video of Milling
Mold after the first toolpath
As it was milling it started making weird sounds/not being accurate, so we ended up having to check through the toolpath setup and noticed that the spindle speed was incorrect. It was pretty lucky that we were there to check it, as after placing a shield over it, it isn't necessary to watch the milling. After fixing that and running the rest of the toolpaths, the work was complete!
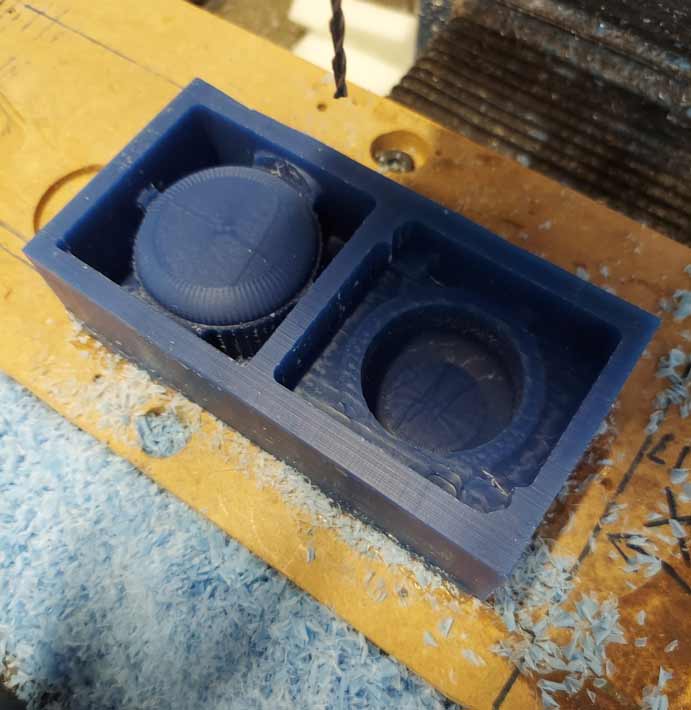
Finished Mold
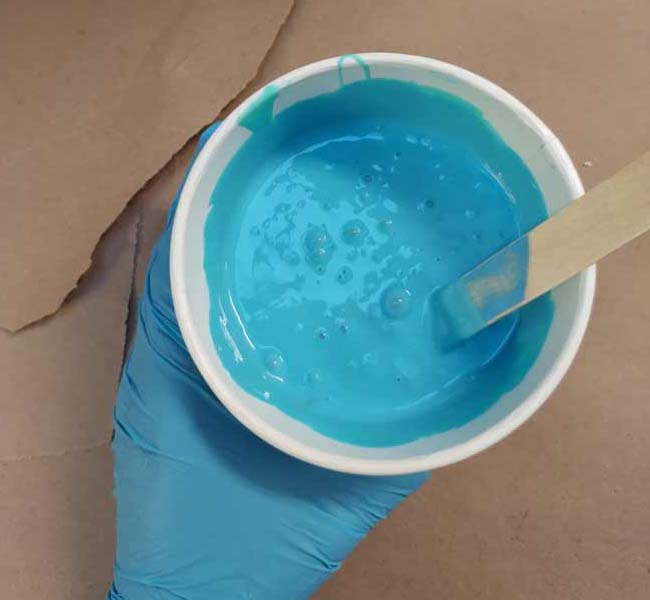
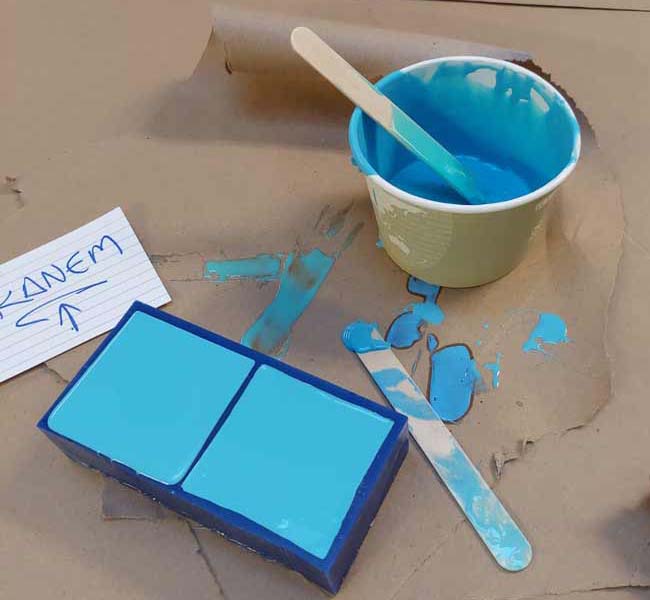
Mixing and pouring Oomoo
Jenn explained to me that even though the parts were about 1:1, the Oomoo was pretty forgiving, so I could just eyeball it. After making my best estimate, I poured the Part A and Part B and mixed. This was very different from my past experience where the I then poured it into the wax and let it sit for a couple hours (longer than needed).
Mixed Oomoo
Oomoo in mold
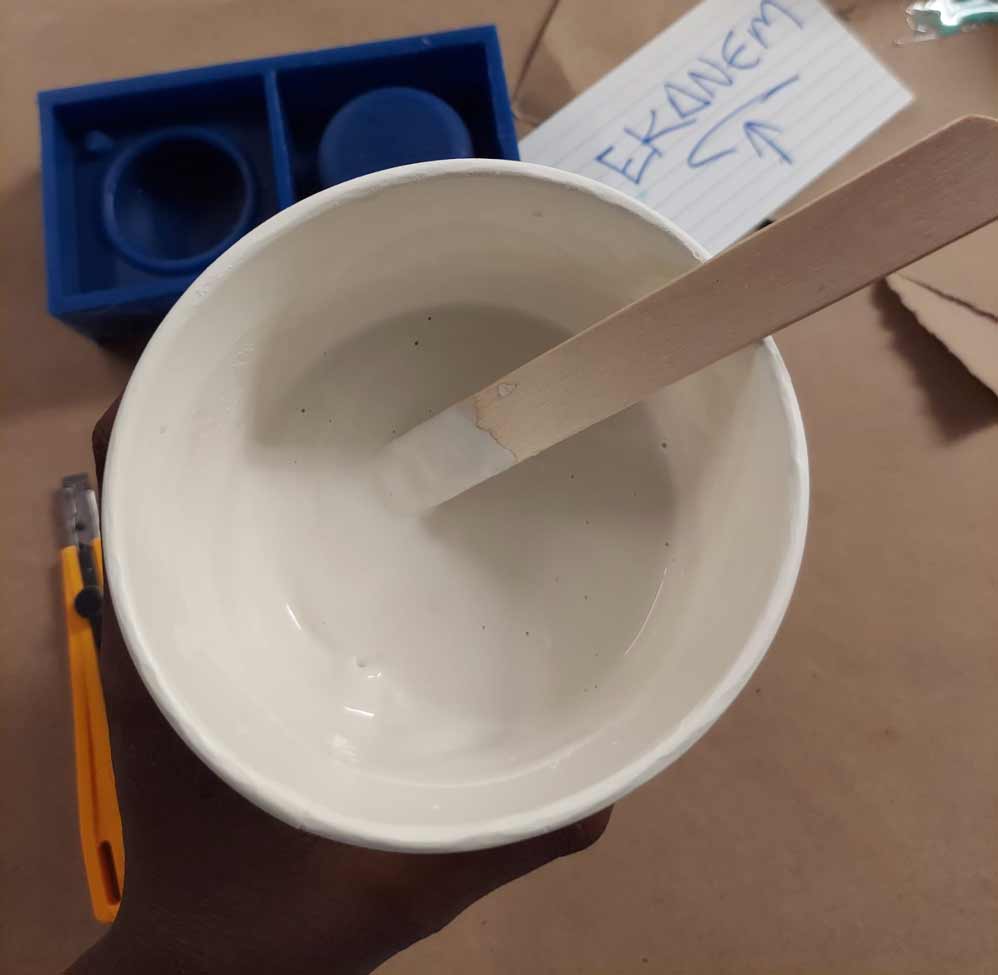
Mixing and pouring plaster
Lastly, it was time to actually cast the molds. it was a bit hard to remove but after a couple attempts I successfully removed the silicon from the wax. In hindsight, it was mainly difficult because the mold was thin in certain parts. I then cut a hole in the bottom using an X-acto knife, and mixed plaster and water together to make a light pancake batter mixture.
Plaster Mixture
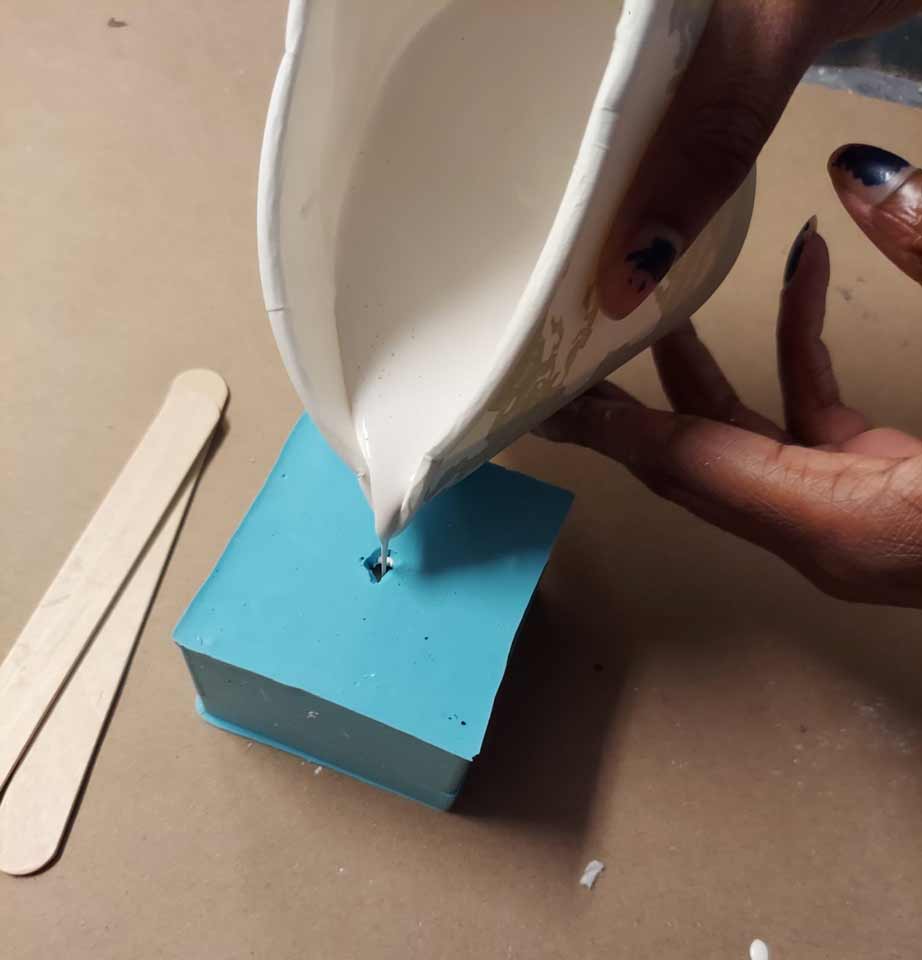
Pouring the plaster in the mold was pretty hard, as it kept collecting air bubbles. My best hypothesis for this difficulty was because of the tiny size of the hole, and the general thinness of the area that the plaster was attempting to fill. With the help of a TA, I developed a process of knocking at it as I was pouring which helped me be pretty sure that I was actually filling it with enough plaster. After it was full, I let it set for a couple hours.
Filling the mold with plaster
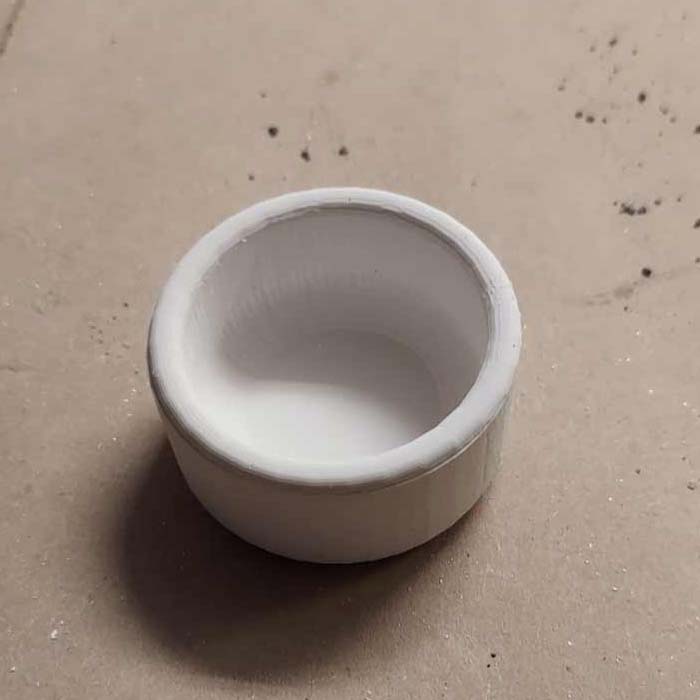
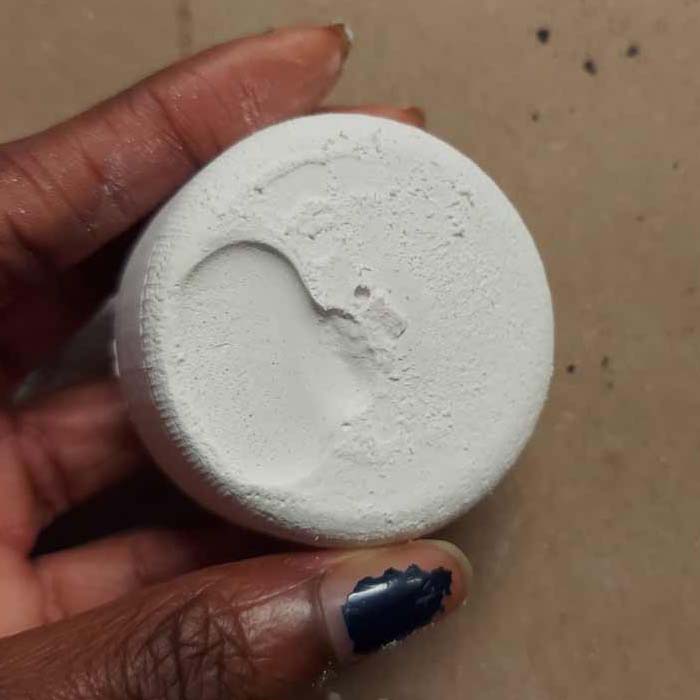
Upon opening up the mold, I noticed that the plaster was still a bit wet (which resolved itself upon letting the cup sit out and dry for a bit). Nevertheless, there were some imperfections with the cast (although it will function for my purposes); it was a little misaligned, and there was a big air bubble at the bottom that I had neglected to knock out. Altogether though, I was happy to complete the molding and casting process.