Our overall object was create a Nerf dart launcher that punished students as they walked into class. We tackled this by dividing the work into individual components, interfacing the components together, then coming together as a group and integrating the final system into a cohesive product. We were shocked at the results of our launcher and targettings system. We want to thank our wonderful TAs Anthony and Maya for their help. Additionally, recognizing our star players - team leads: Yohan, Ty, Vlada and Masara.
Our team came up with quite a few ideas.
Our next step was to come up with some idea of what the nerf gun was going to be and how it was going to adequately solve the project.
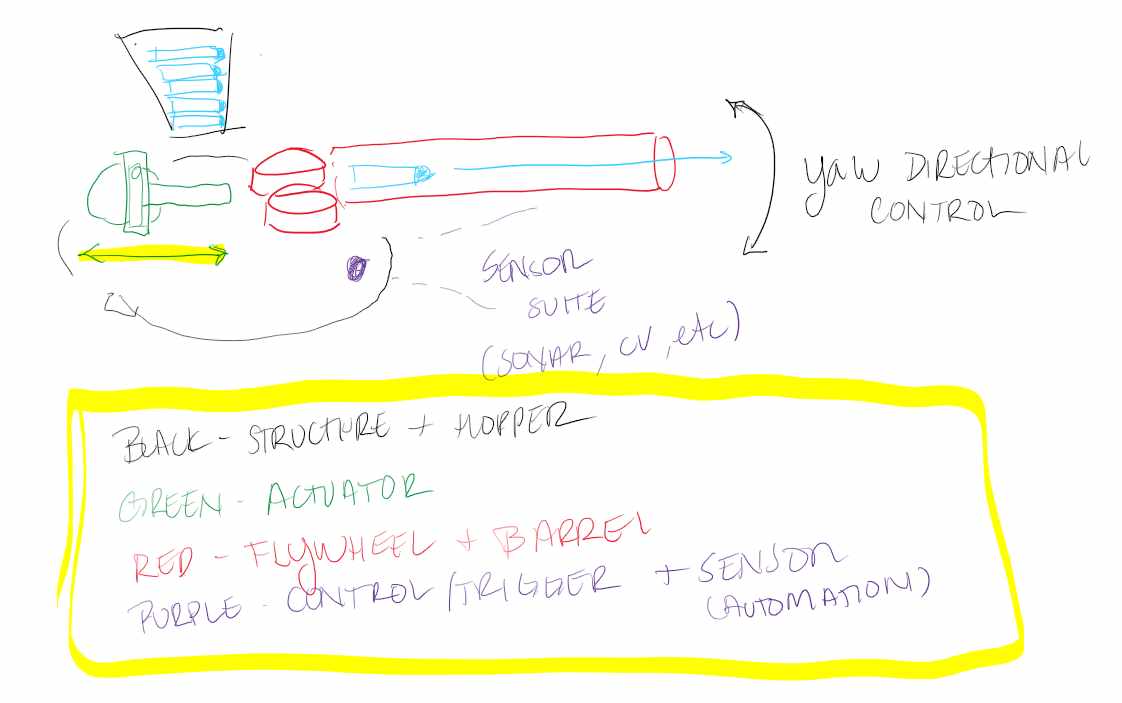
Sungi drew up a concept sketch to orient ourselves and an idea of what each team was going to do. At this point, we created generic ways to tackle the progblem. Sungi created a concept sketch taht involved various features. We constrained ourselves with the design limitation of making the formfactor "3D printable" using the Prusa/Bambu printers as our maximum dimensions.
Our next step was creating a schedule.
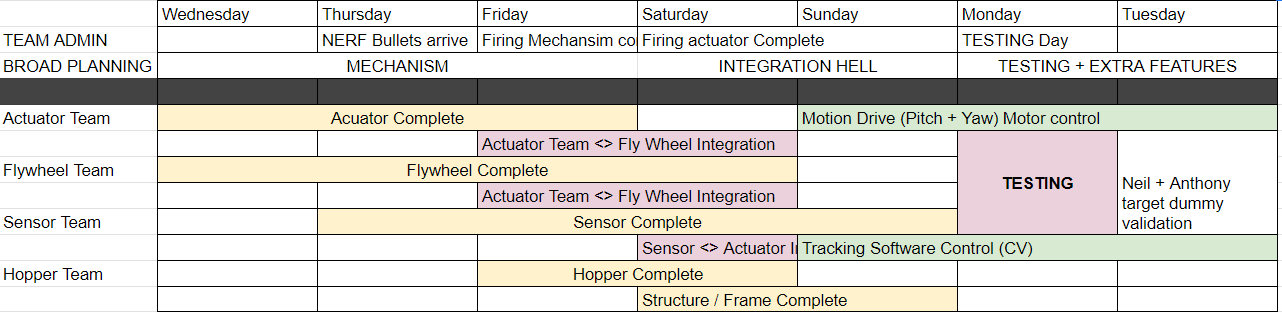
We created a generic schedule that focused on individual workstreams first, then pushed more and more integration. We identified 3 major interfacing points that would require multiple people from two or more teams to integrate.
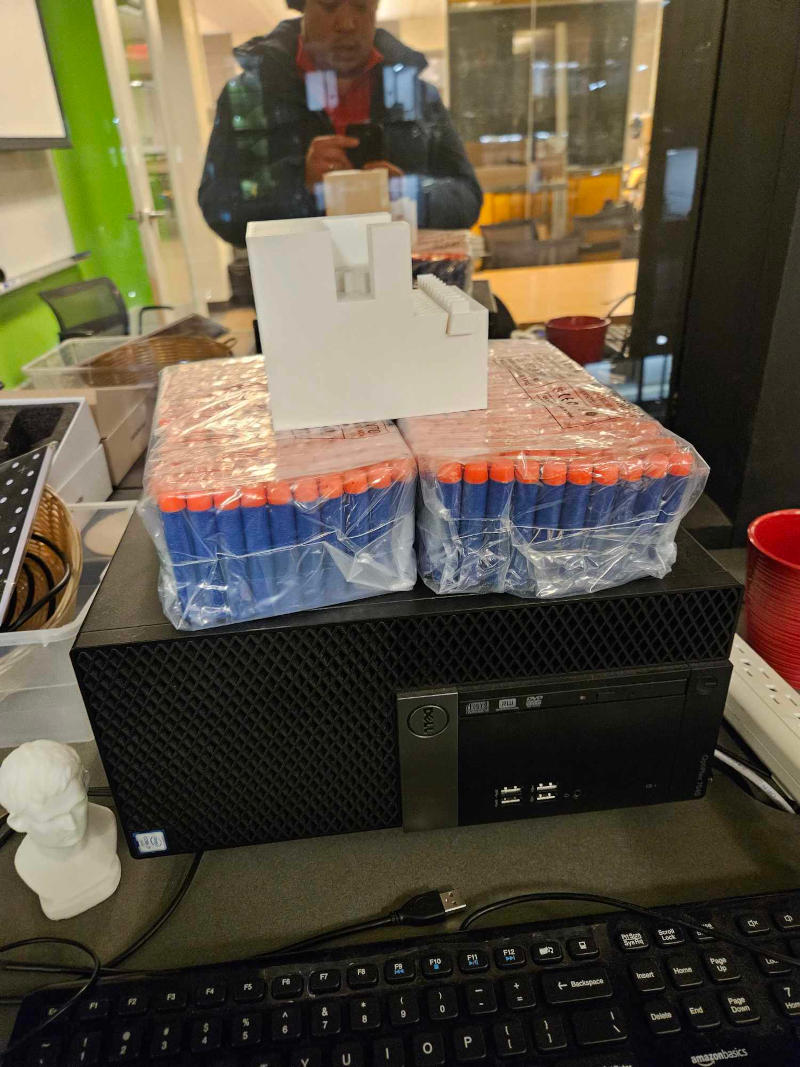
Before anything else had to happen, we needed our Nerf Darts. Here are two packs of 200 for a total of 400. If we assume that there are 10 students late every class, that means we can maximumally fire 40 rounds per student. #theGERSHENFORCER
We created the project based off the assumption we can leverage the aluminum extrusion in order to best create the structure to best support the launching mechanism. We focused on using the given wheels. Additionally, we utilized a 4cm x 4cm (M4) bolt pattern in order to create our interface. This would allow us to not worry about a bolt pattern with the Actuator team.
Here are some initial designs
Our voltages for our DC motors were super simple - they operated off two leads (positive and ground). In order to test the launcher, we tested voltage ranges from 3V to 7V. One of hypothesis that the bench test proved was that anything abouve 6-7V created too many vibrations for our structure to hold together. Additionally, we had irregular frequency vibrations in the range of 3-4V range. The speed was too slow so the imbalance of the wheels caused the entire launcher to violently shake. Our test showed that our optimal voltage control for our device should be in the ~4.5-5.5V range.
After a few tuning runs, we were able to get consistent pushes through the launcher! WE HAVE A NERF GUN!
The main reason that our actuator needed to be seperate from our launcher is because that the launcher requires time in order to reach speed. Therefore, our actuator mechansim must be built on a seperate motor/control system and loop. We utilized (a probably overbuilt) actuator system. This was specifically done on our 25kN servo motor. We utilized a rack and pinion gear system to drive the actuator. We left plenty of room in our actuator in order to best drive the bullet in our magazine.
We then made another iteration on this minimizing weight in order to reduce strain on our platform. We made a few lightening cuts as well as integrated our magazine/hopper (and integrated chamber).
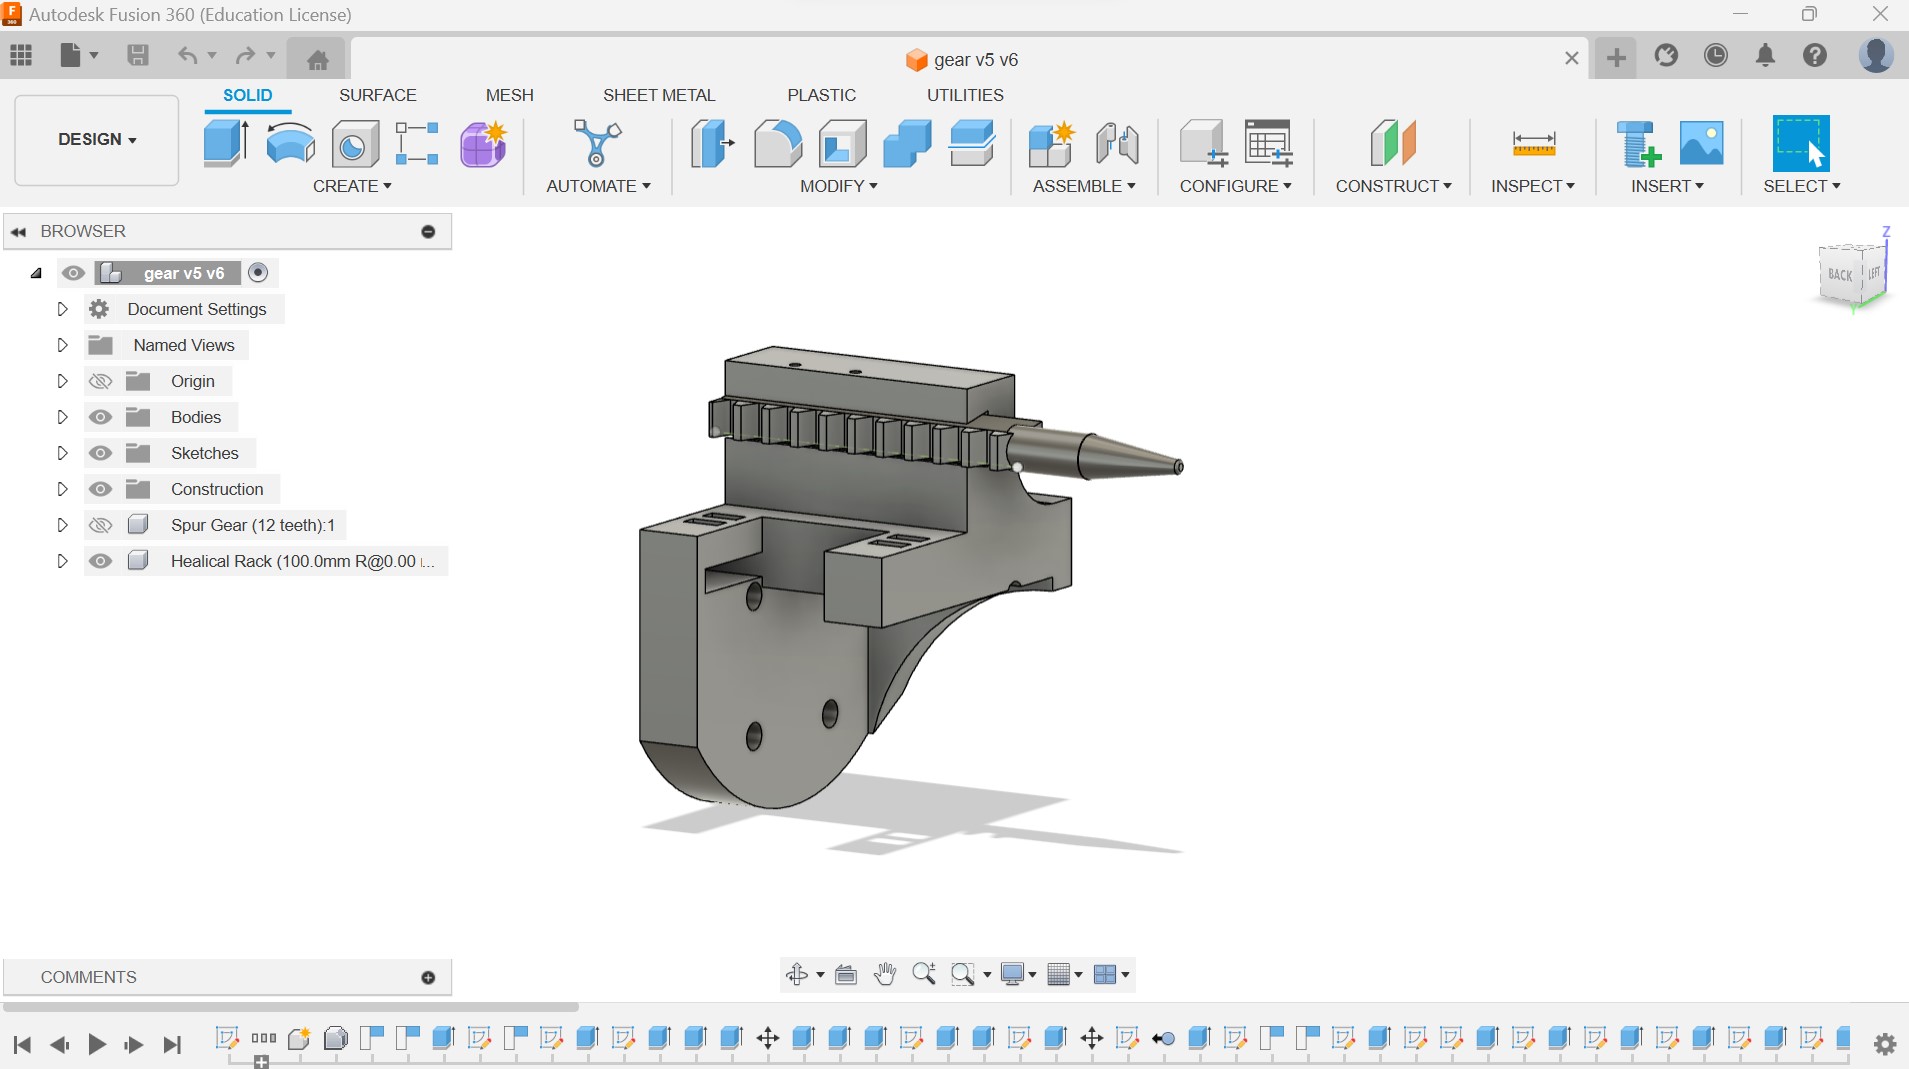
All of our parts on the actuator were either part of the motor kit or they were 3D printed out of PLA utilizing the range of printers available to the EDS shop and personal printers.
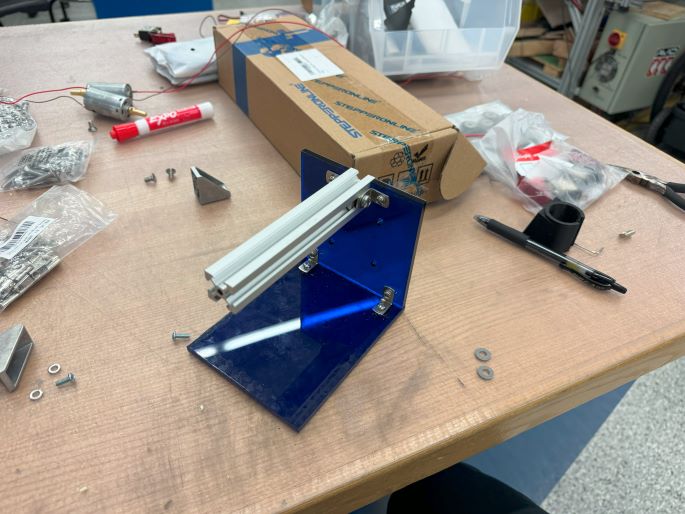
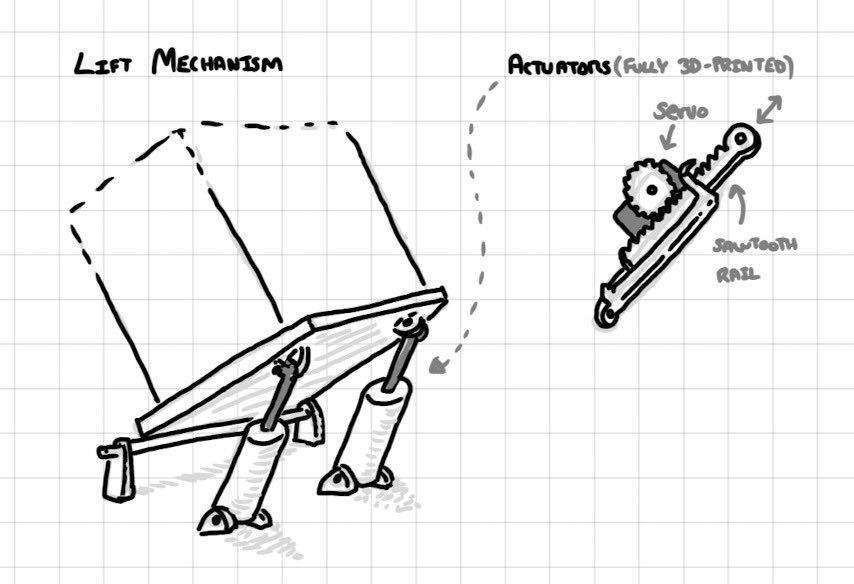
Out platform turned out of a few iterations. Firstly, we brainstormed out of creating a pitch mechansim utilizing two double lift mechansims. After realizing this was extremely complicative for no gain, we simplified the mechanism into a single liting servo. This will give us the desired pitch.
We then simplified this drawing and made the paltform out of acrylic. This allowed us to create a single-motor actuator (pinned) really quickly because it wouldnt force us to rely on a 3D printer for a larger, mostly flat platform. This was mostly our design.
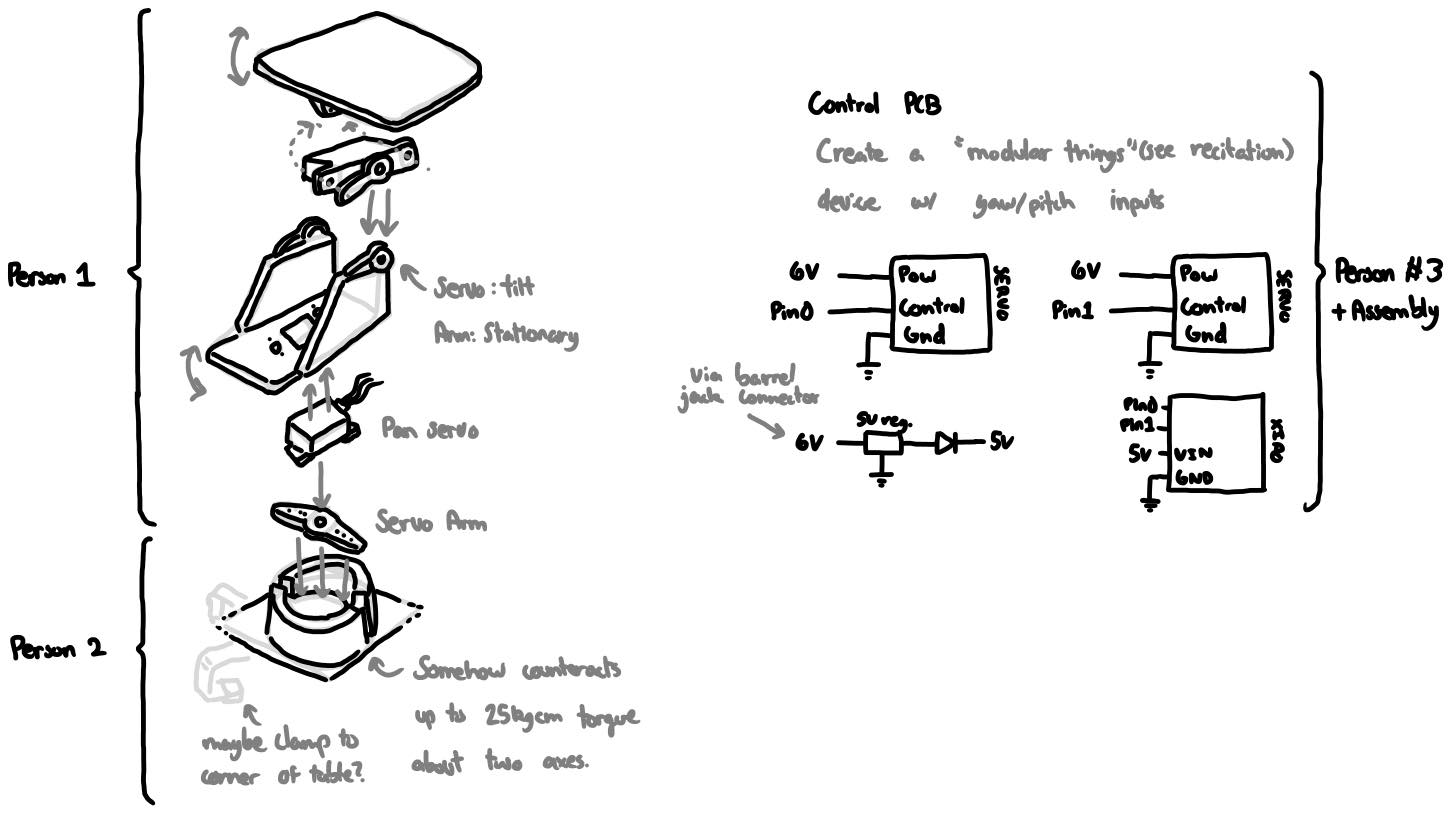
We CAD'ed up the rotating mechanism by creating a platform to mate with the given servo and the acrylic. This allowed us to control the yaw mechamism.
The first challeng in software was that we had to wait until most of the groups had already mostly had a sense of what they were accomplishing before we were able to begin. In this case, we we're mostly concerned about scope creep - where continious features would bog down the project and add additional requirements to our team that would need to finish towards the end.
We split our challenges into multiple requirements:
Our next job was to integrate all of the above - Detection >> Tracking >> Launcher Speed Up >> Actuator >> Next Target Sequence.
Jesus Created a custom board in order to maximize our ability to control multiple boards and outputs. We utilized laptop directly to process the "heavier" code - specifically the object recogniziong (CV) in order to timely acquire targets. The ESP boards controlled the rest of our motors and servos in order.
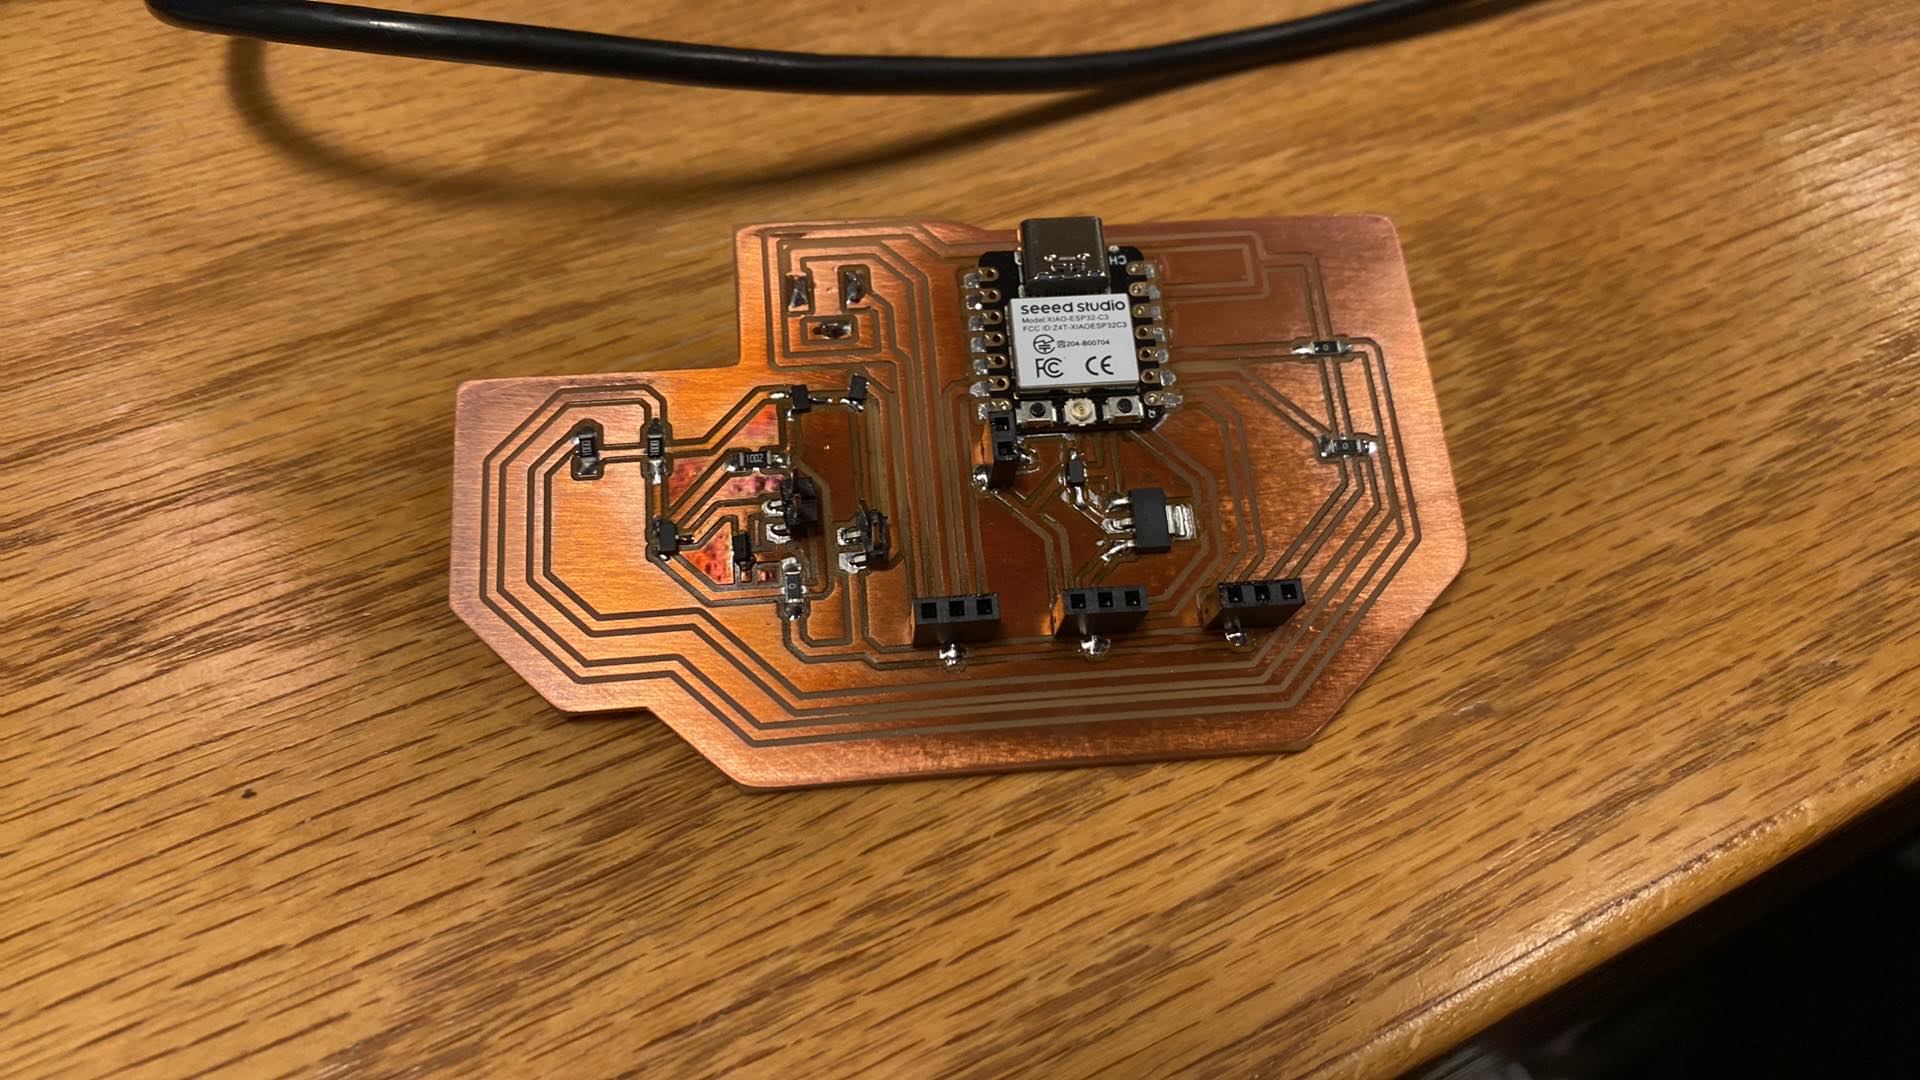
This board has all our components connected to it, which at first we thought would simplify integration and code, but we ended up running into difficulties with controlling all 3 servo motors at the same time. It took hours to get all motors running, and the problem ended up being weird bugs regarding the different pins of the ESP32C3 and controlling the servos. Even after getting all the servos to work at the same time, since our machine moved and turned a lot, and our initial board design consisted of surface mount connectors, the movement kept pulling out connectors. So, we decided on designning a new PCB, this time with throughput connectors. INSERT IMAGE OF NEW BOARD Since we're using video to track movements, we are also using the ESP32 CAM module, a camera that's connected through Wifi to our main ESP32C3 microcontroller. Once we had the camera connected, it was difficult to have the launcher follow the target on camera, since once the launcher would move the image would become blurry and the camera would have a hard time recognizing the same target. This ended up being our final product: INSERT VIDEO
To start our machine, we first connect our board to a laptop and we also connect our second power suply to an outlet. We then connect our laptop to the ESP32C3 Wifi network (from our main controller), and run the python script target.py on our computer. While this is happening, we make sure the camera is connected by making sure we have the correct IP address for it(sometimes the last number changes from a 2 to a 3). If all is working correctly, a video feed from the camera should pop up on the laptop and our machine will start shooting at our targets (labeled with a green circle on the camera feed).
Ultimately, machine week is a cool way to put a group together into the "storming" phase of group dynamics really quickly. Here are our team lessons learned: