September 11, 2024
What if you can send warmth to your long distance friend/partner?
September 13, 2024
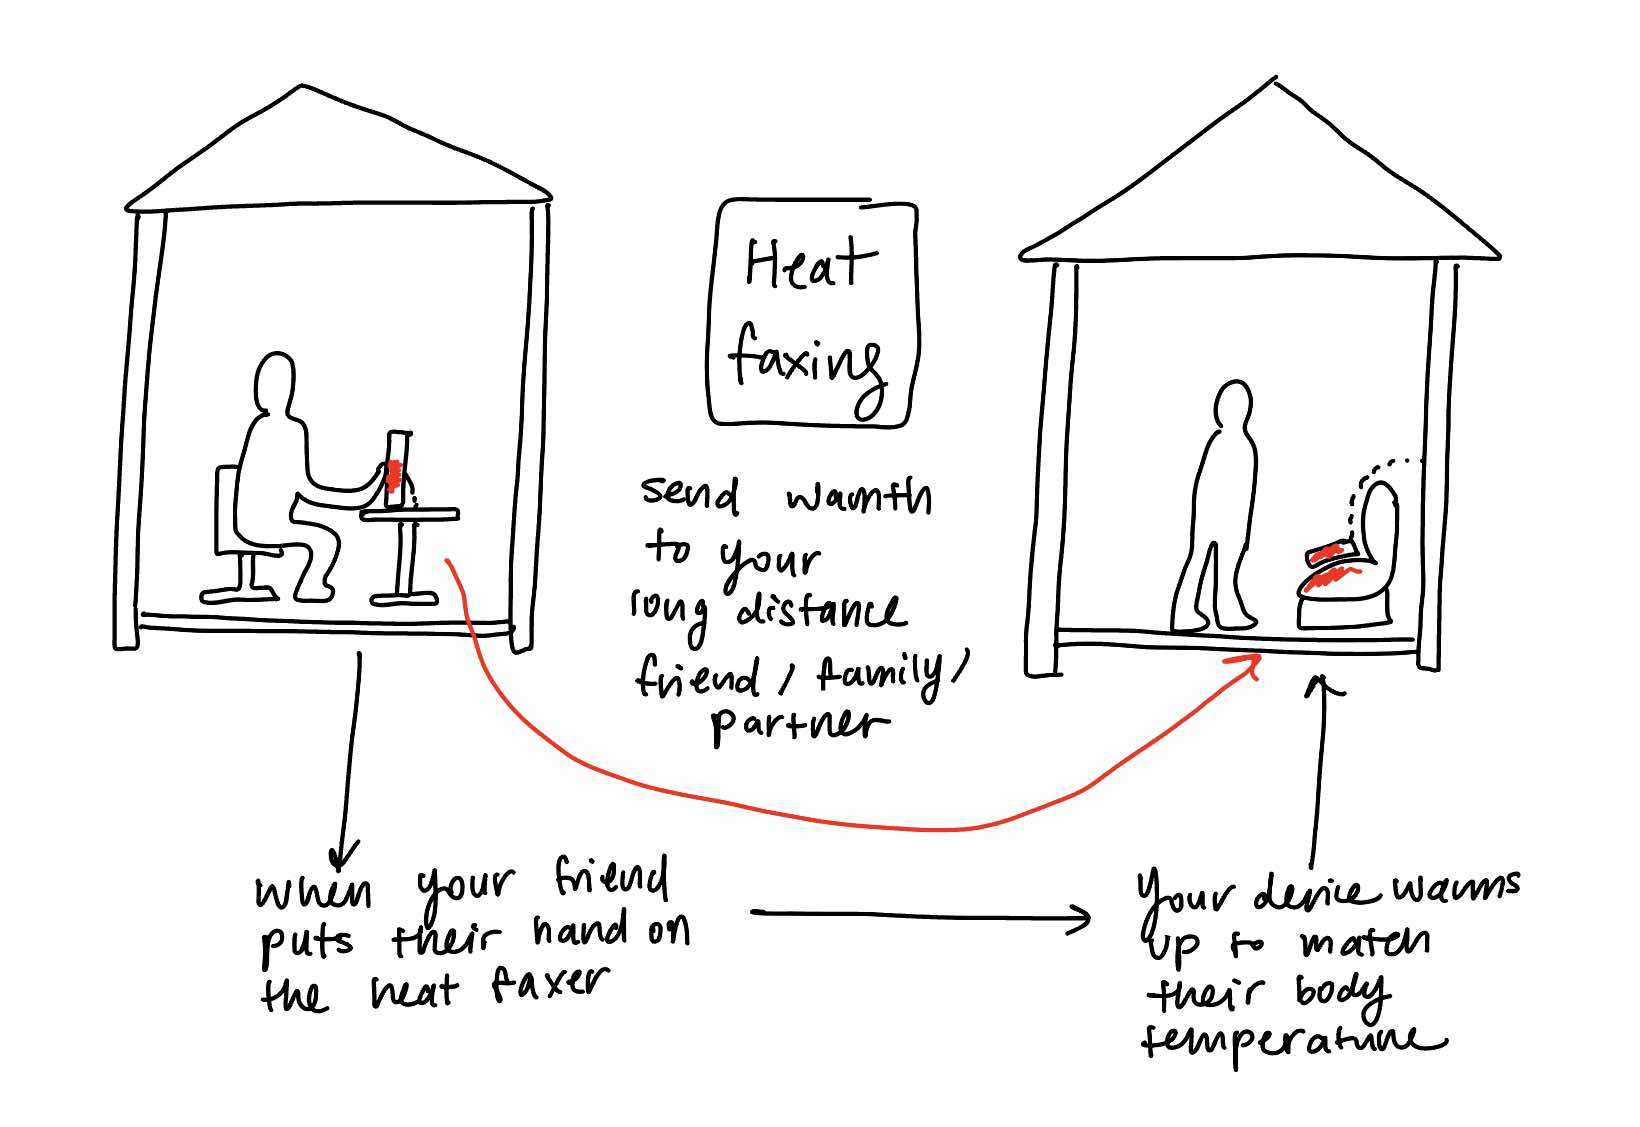
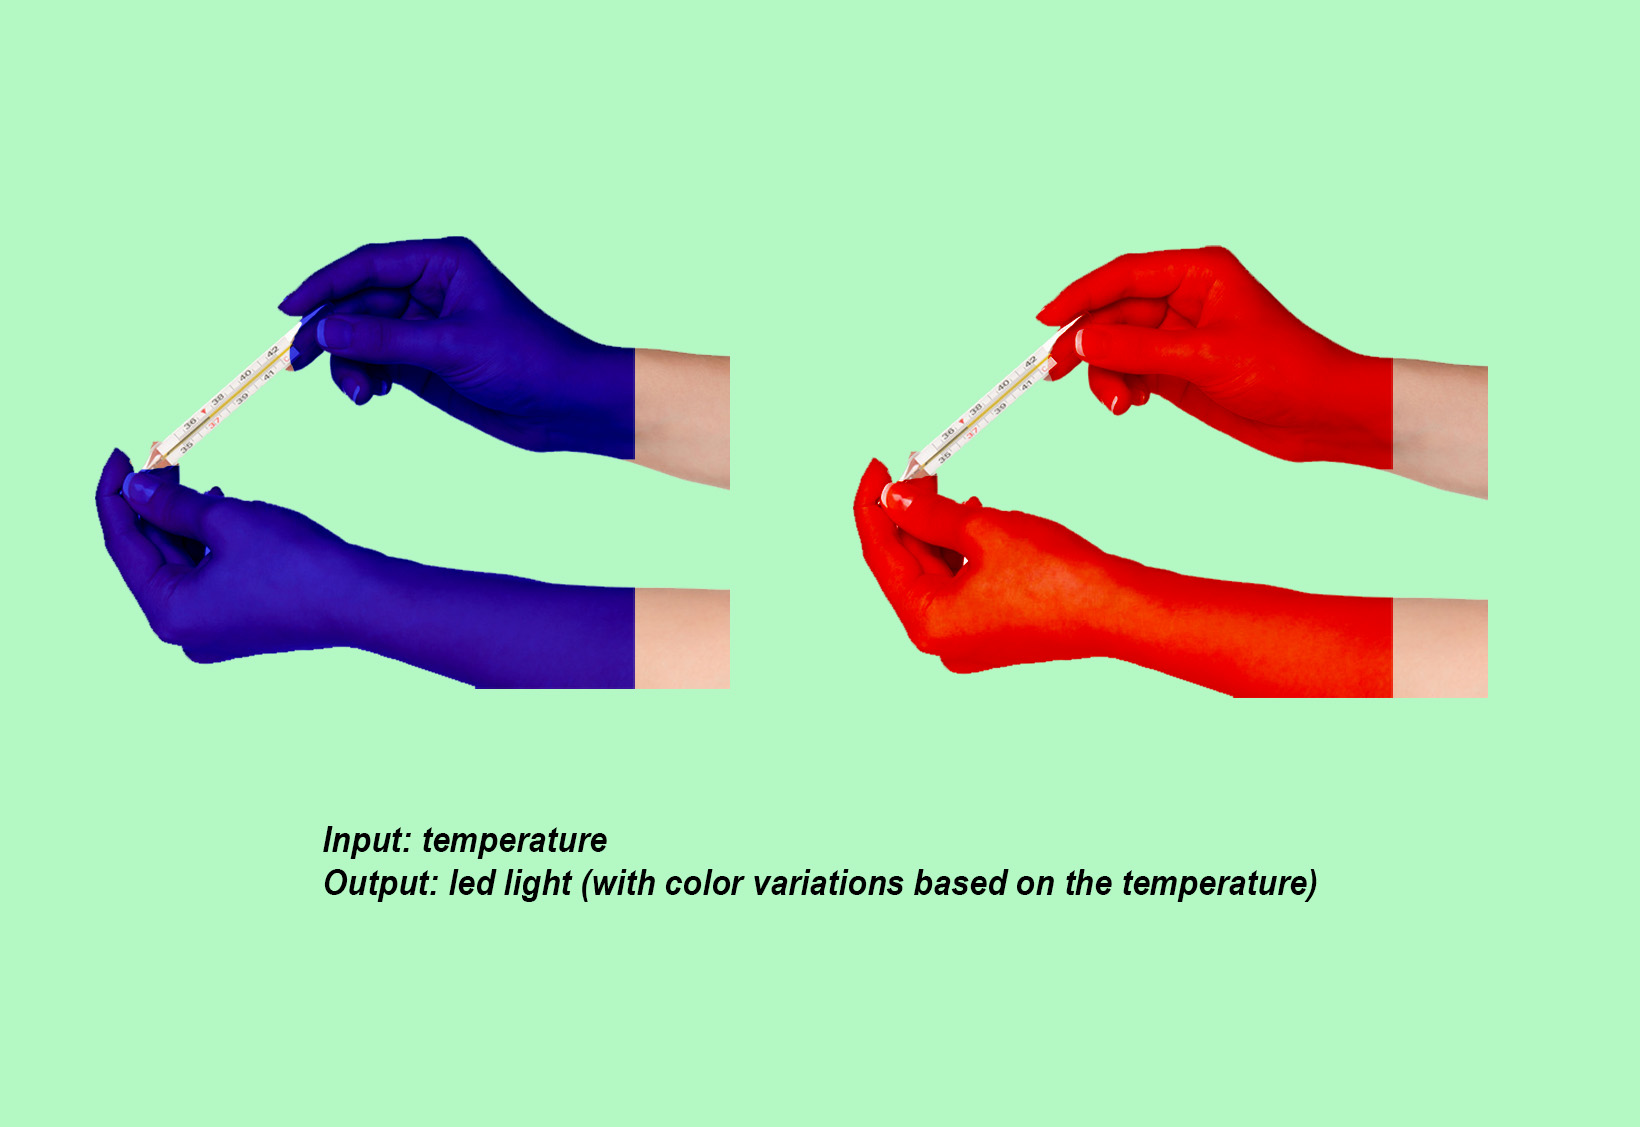
How would the interface for sending warmth be like?
This version is a quick sketch of a scenario where a person would send their hand temperature to their partner when it is in "send" mode and if the faxer is in "receive" mode, the partner's faxer will match the temperature. The second image is a version where the temperature also becomes visual by heat mapping.
I actually don't really like how it looks so static in this version. Should it be a doll that you hug? Should it be interacted with only the hands? Should the whole body be engaged?
It needs a friendly form
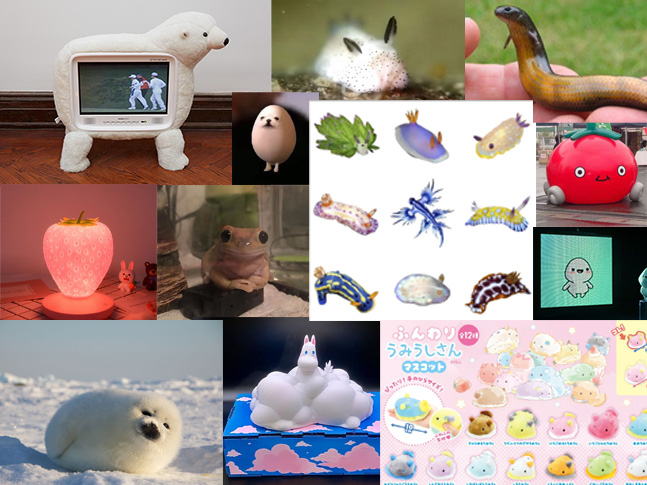
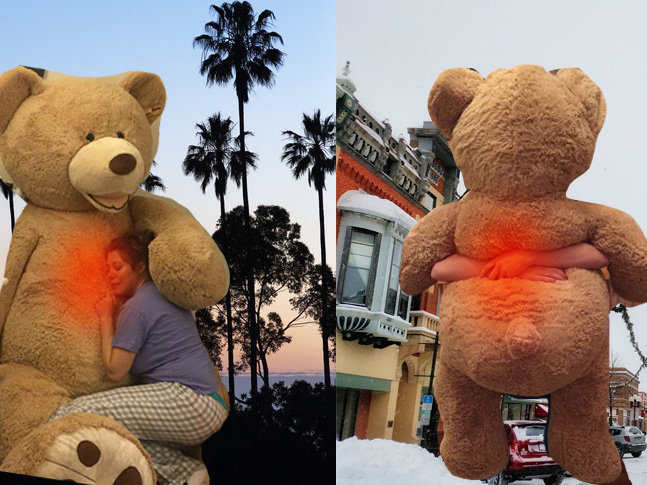
Went down the rabbit hole and collected a bunch of friendly forms. It seems like blobby forms that resemble baby animals seem to be most visually inviting.
September 20, 2024
September 23, 2024
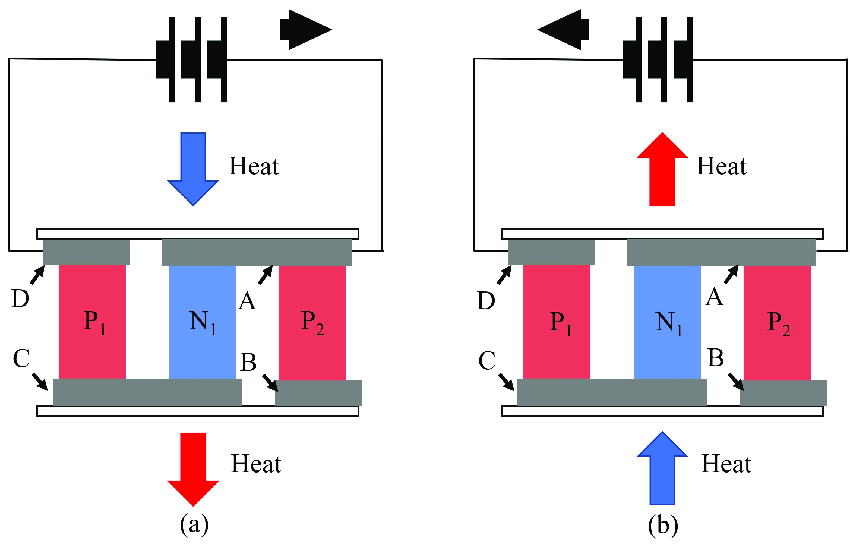
Studied a bit more about peltier module. Found this helpful diagram that illustrates how Peltier component is double sided and can change the cool/heat side by changing the direction of the current flow. Here is the link to the source.
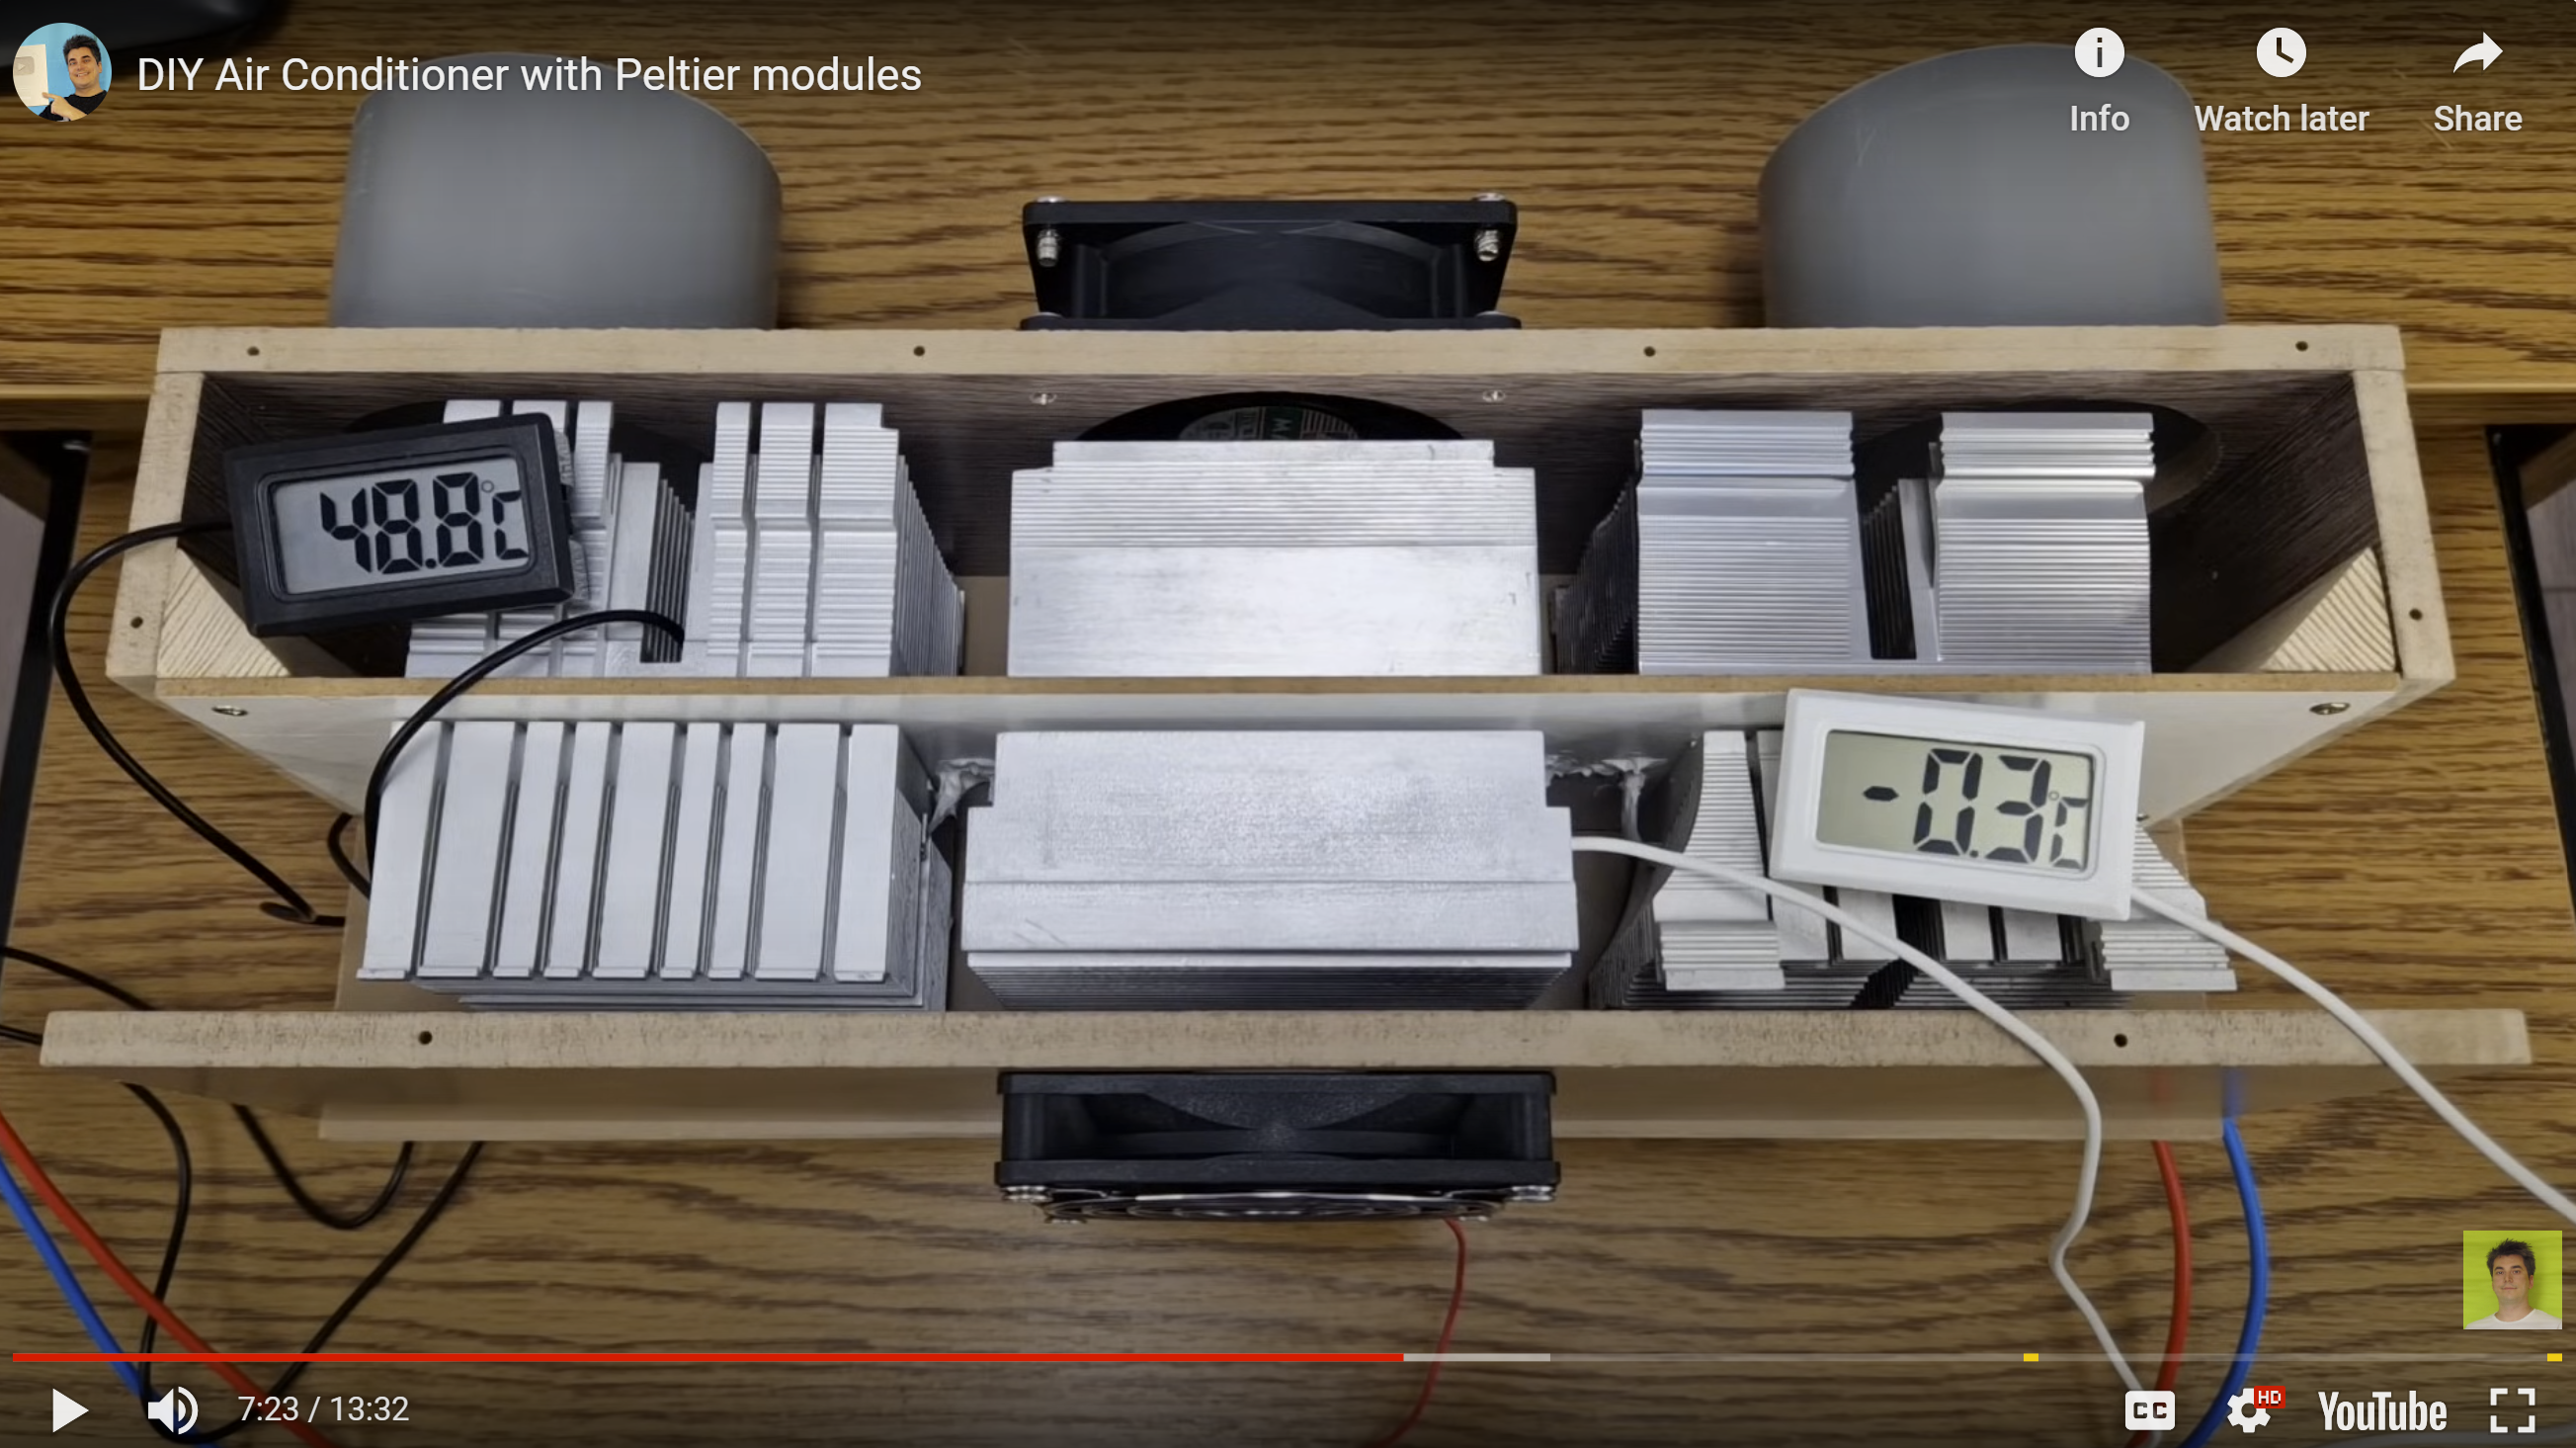
Interestingly, it seeemed like people have been attempted to make DIY AC using peltier modules. I found several youtube videos that uses petlier modules to make a window mount AC or a large surface cooler. (Interestingly, it seems like you can also make icecream with since it can reach below zero temperatre quickly with the cool side) Here is a link to the DIY AC made with peltier modules.
I realized I should probably start thinking:
1. what should I do with the cool side?
2. I might need a heat exchanger using liquid or solid medium to evenly distribute the warmth
I realized I should probably start thinking:
1. what should I do with the cool side?
2. I might need a heat exchanger using liquid or solid medium to evenly distribute the warmth
October 5, 2024
October 31, 2024
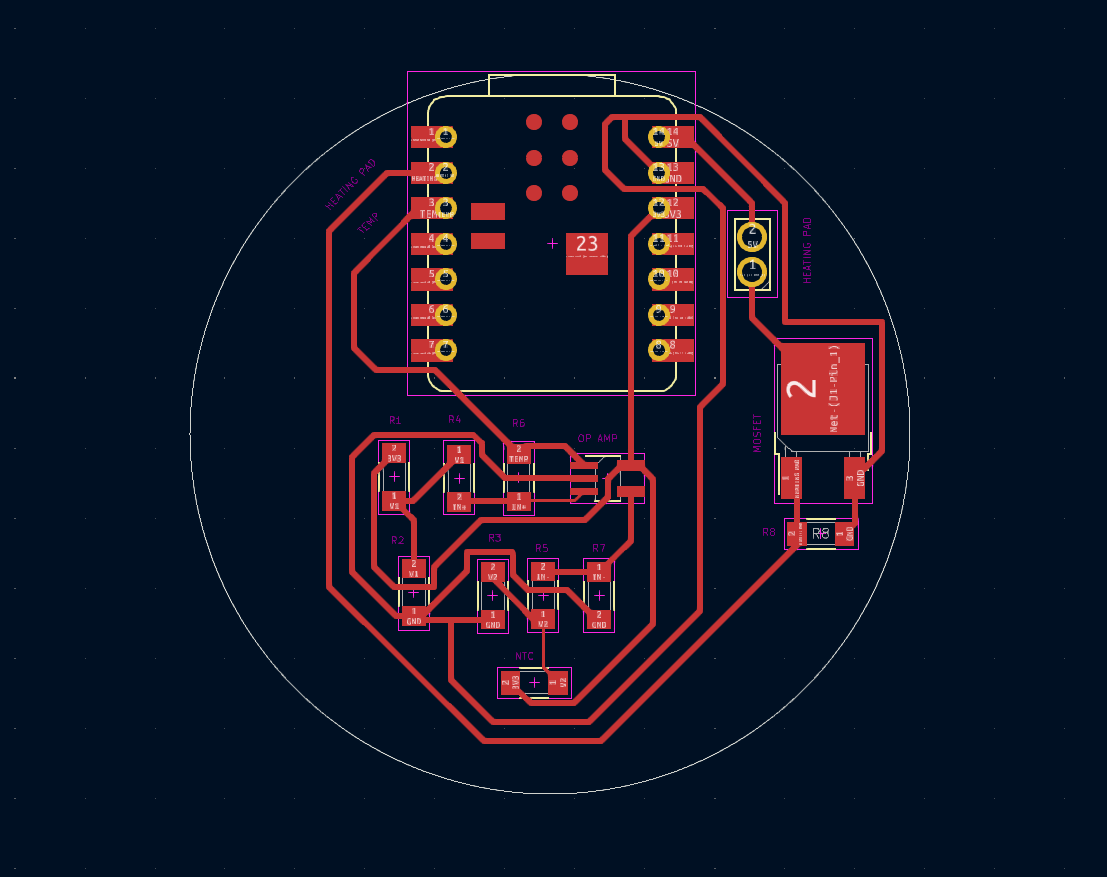
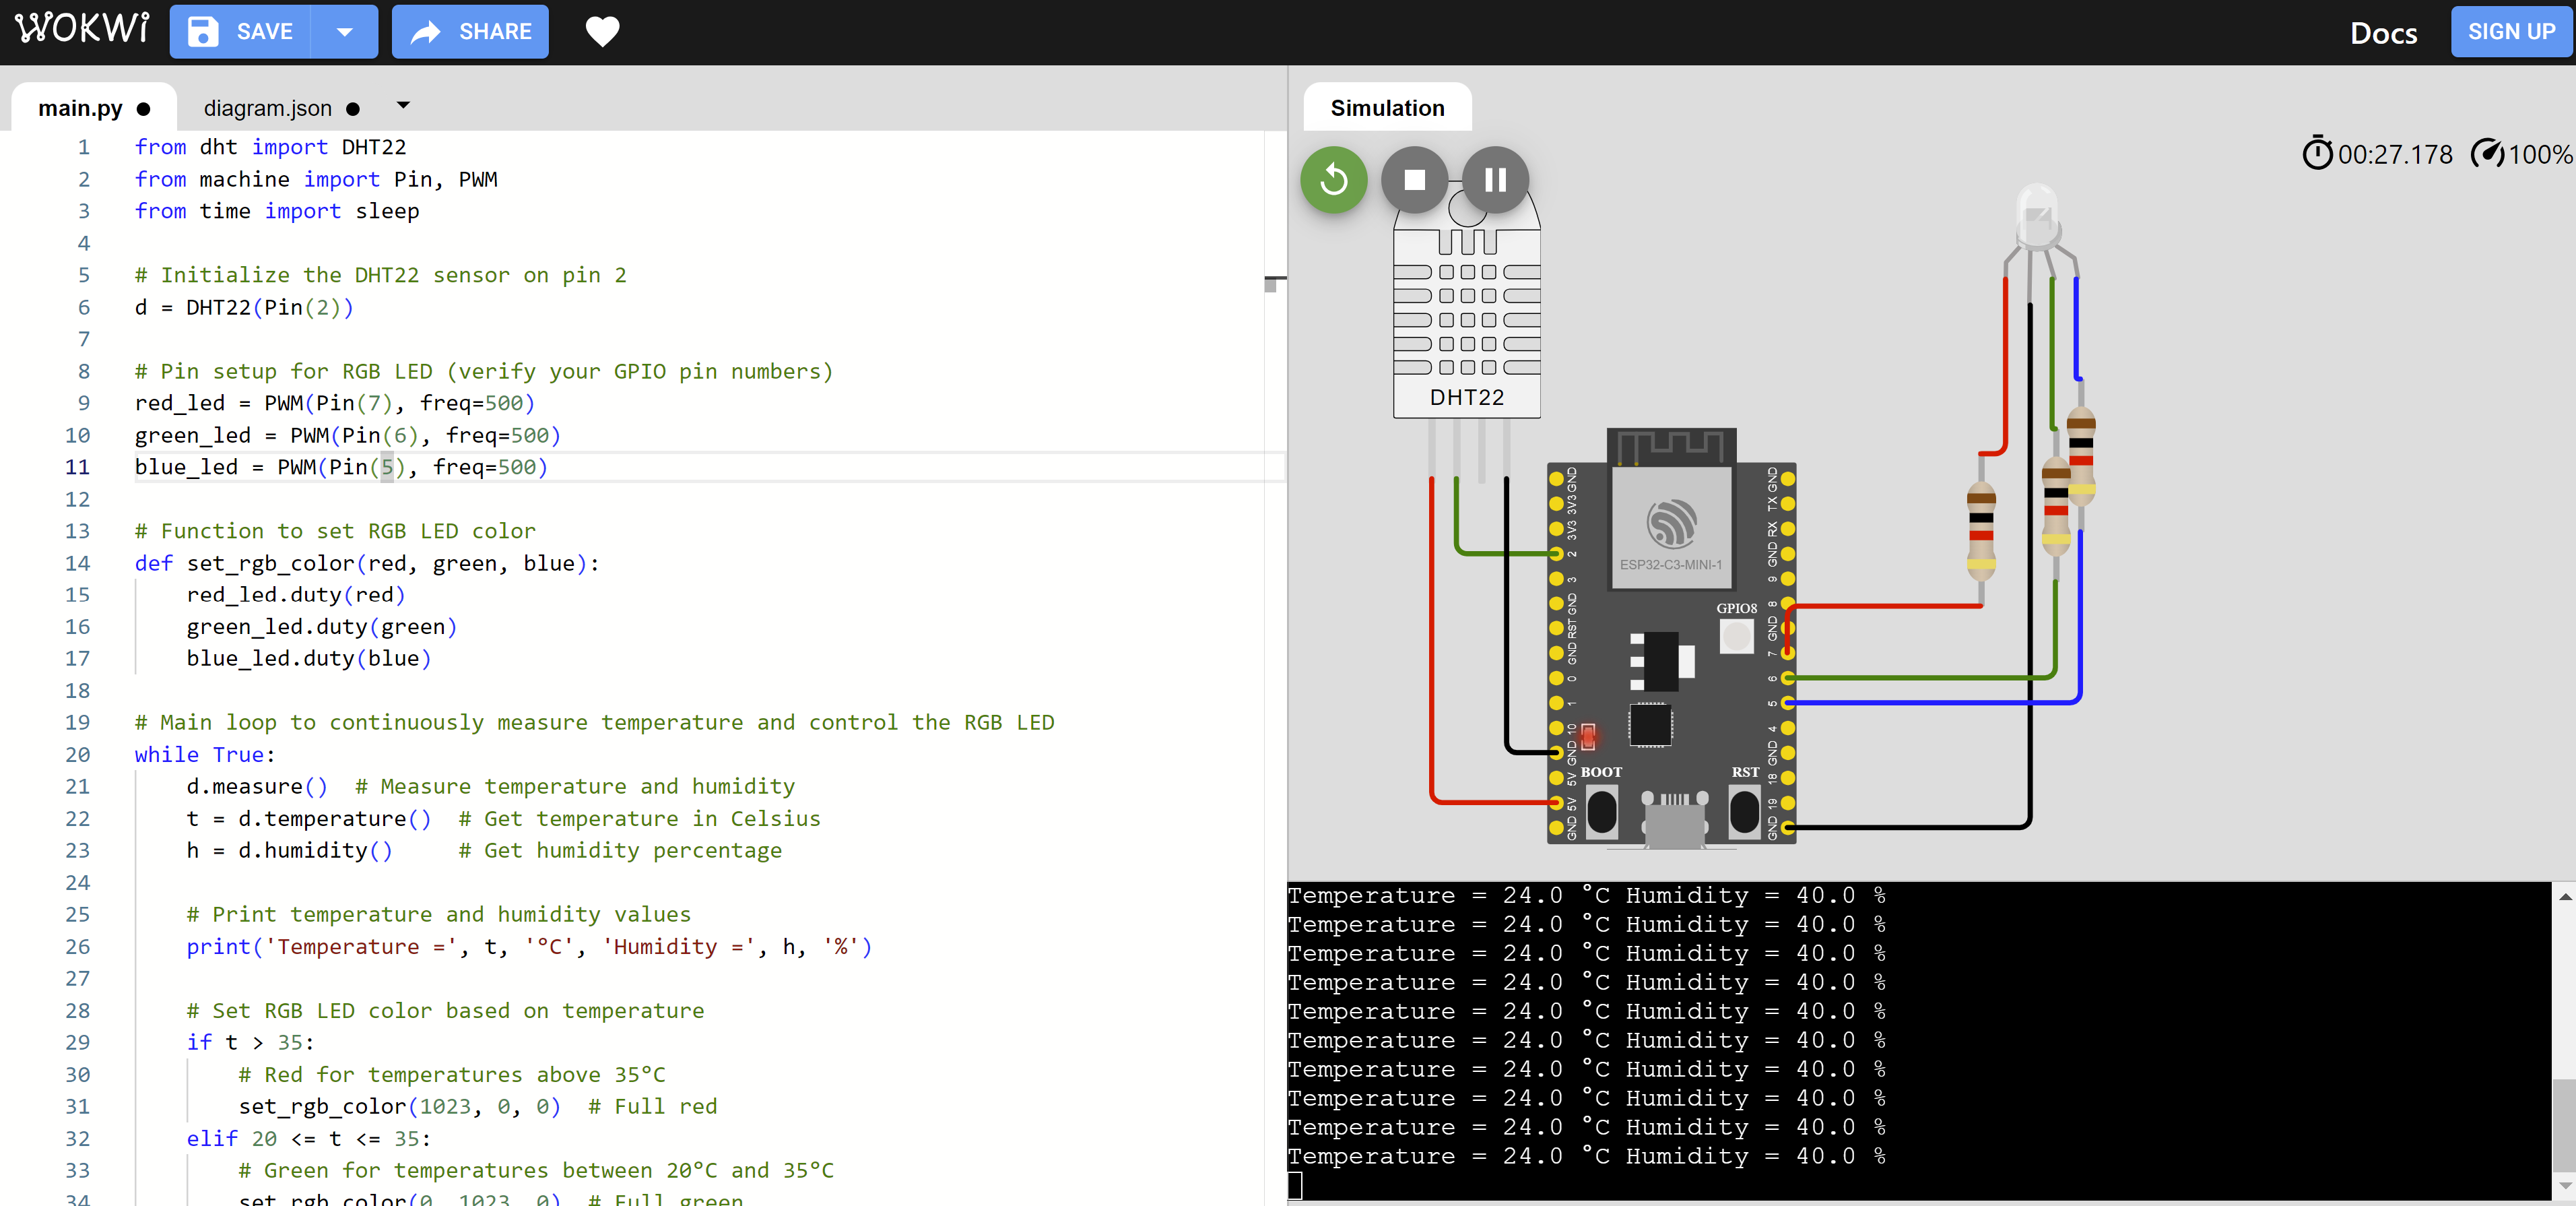
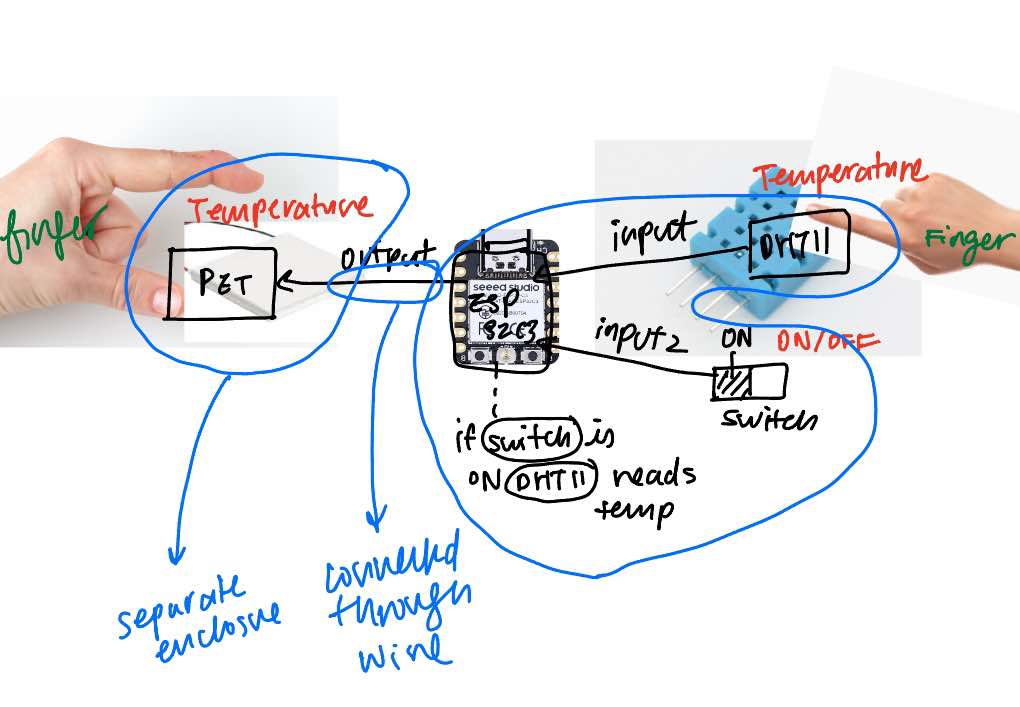
Used Week 9 exercise (output week) to figure out how to make temperature reading work.
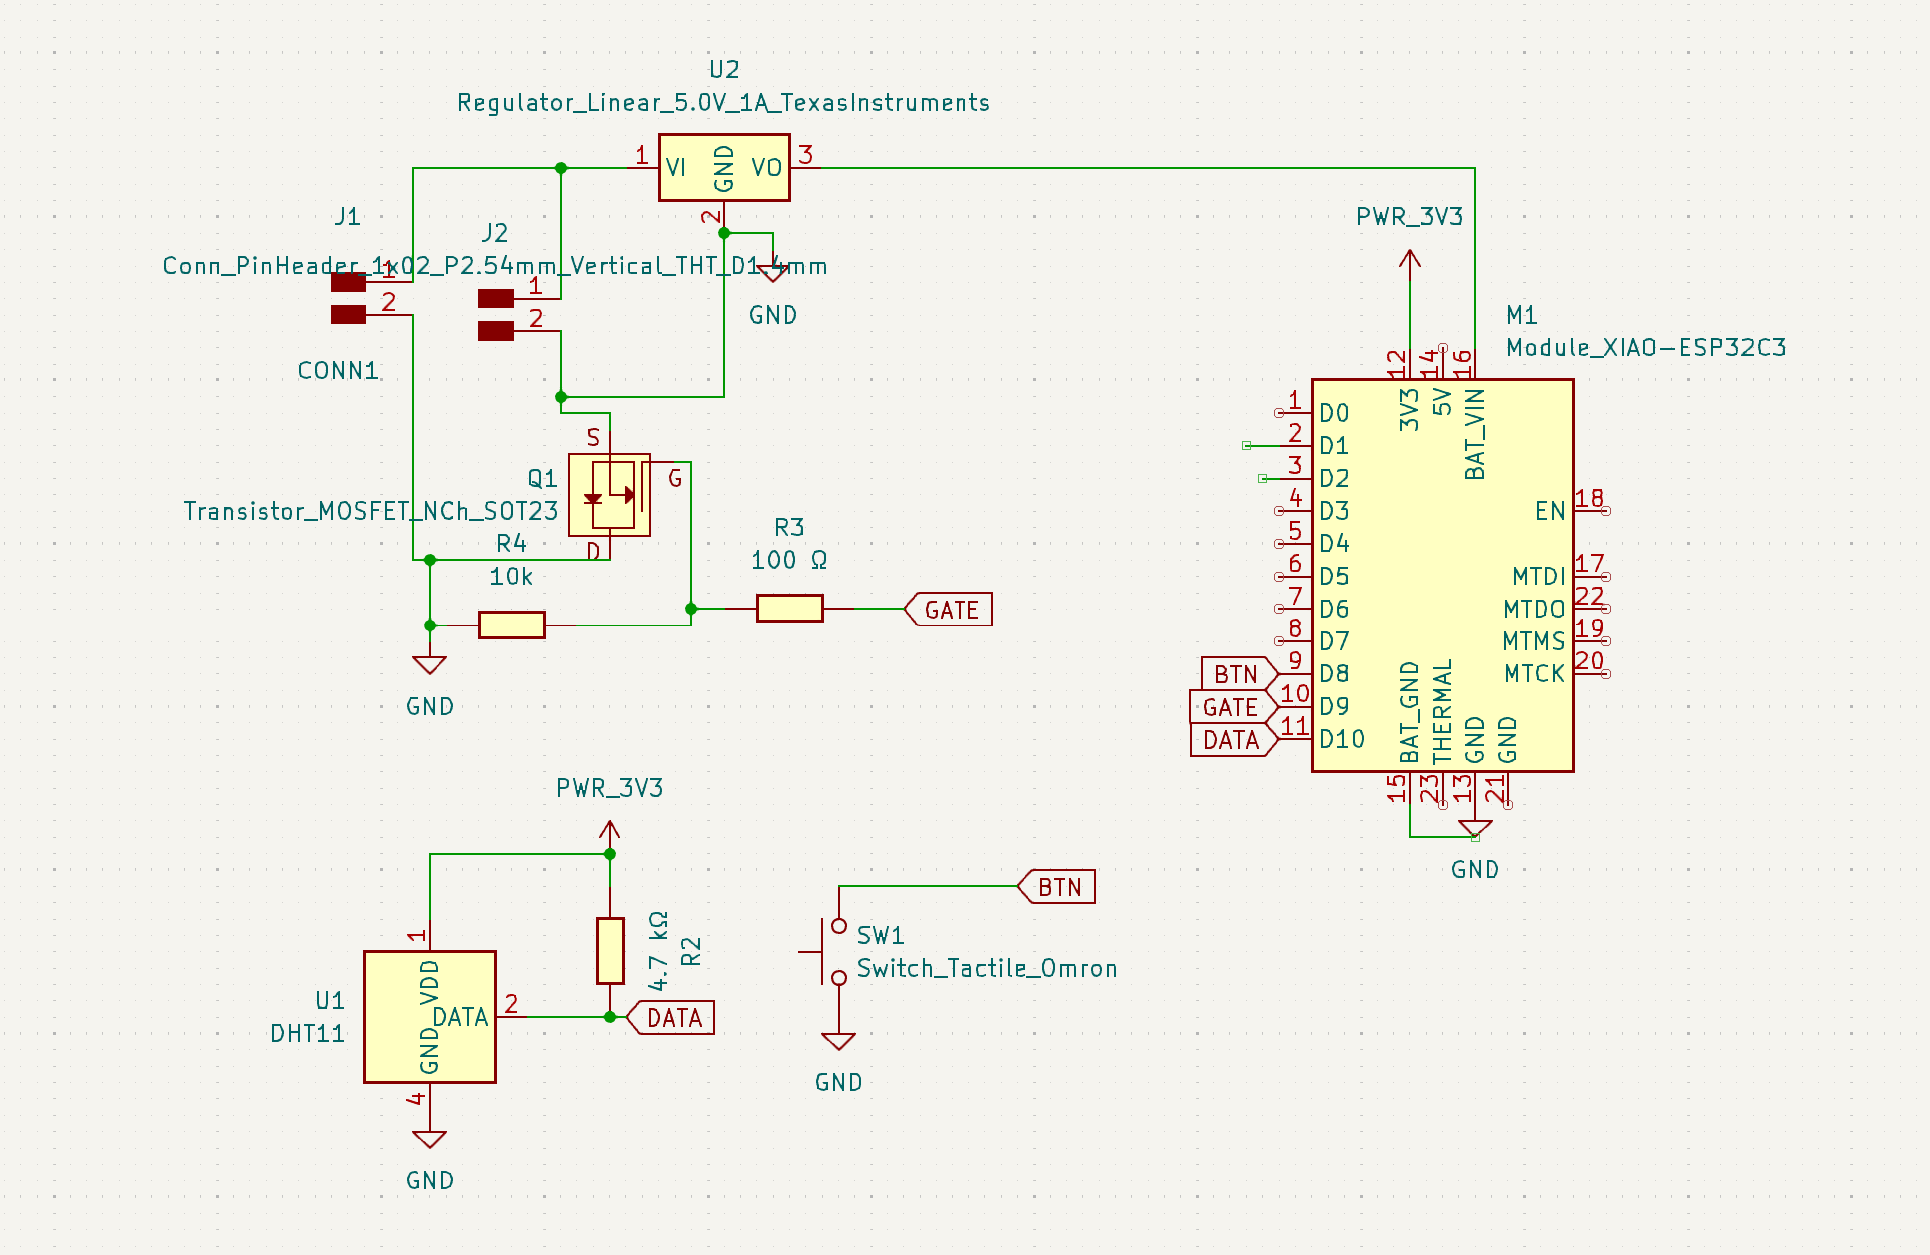
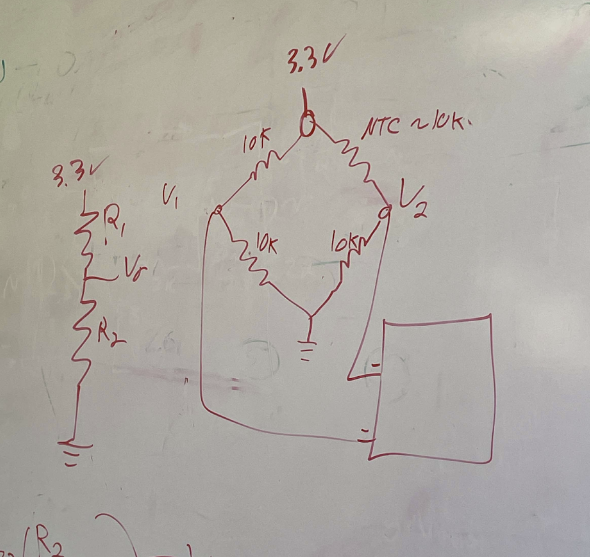
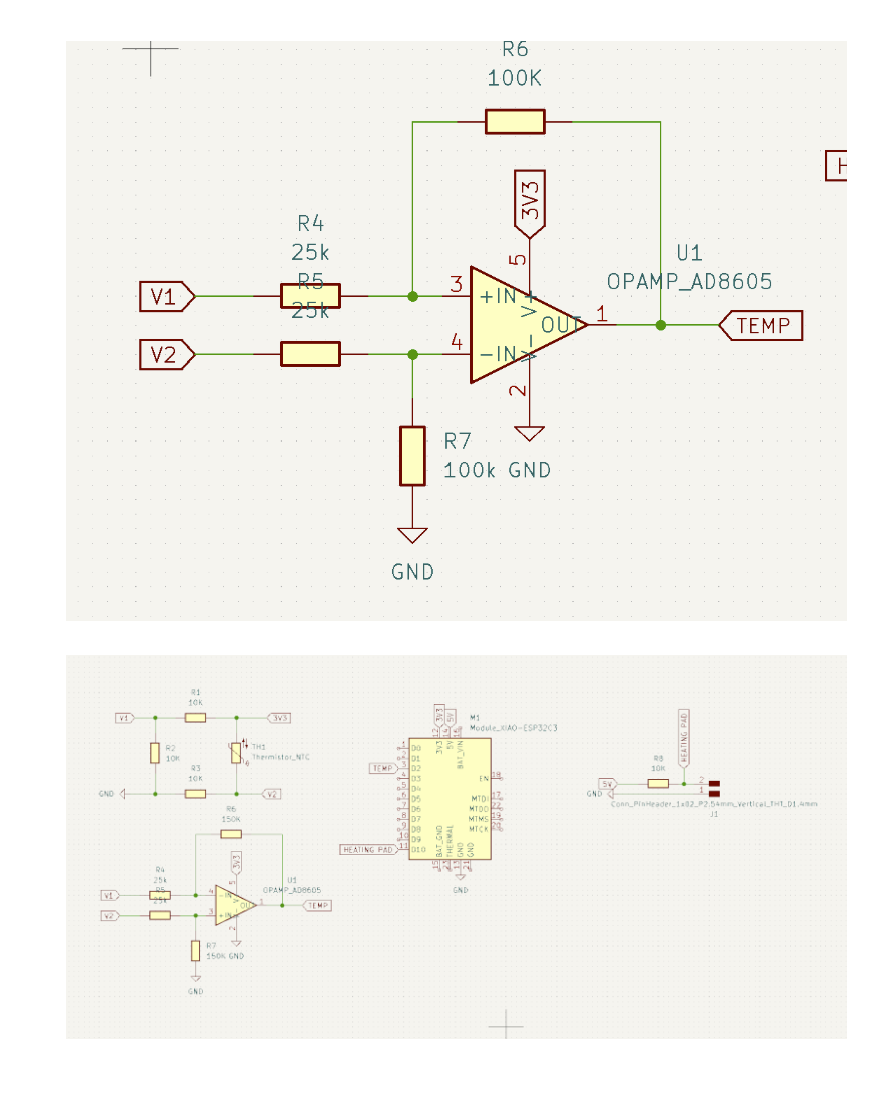
Neil recommended using differential ADC as a way to make temperature sensor data in NTC readable to microcontroller. Anthony helped me to figure out how to set up differential ADC through using wheatstone bridge and op amps. I was able to design a new board with differential ADC integrated.
I ran into issues while soldering op amps due to their incredibly tiny size. (check week 9's assignment to see damaged board)
October 31, 2024
Used Week 9I was able to remill the board and attempted to use differential ADC formual to convert the output data into room temperature, but the data that I read from Arduino IDE was constant (also very far from being a room temperature).
December 1, 2024
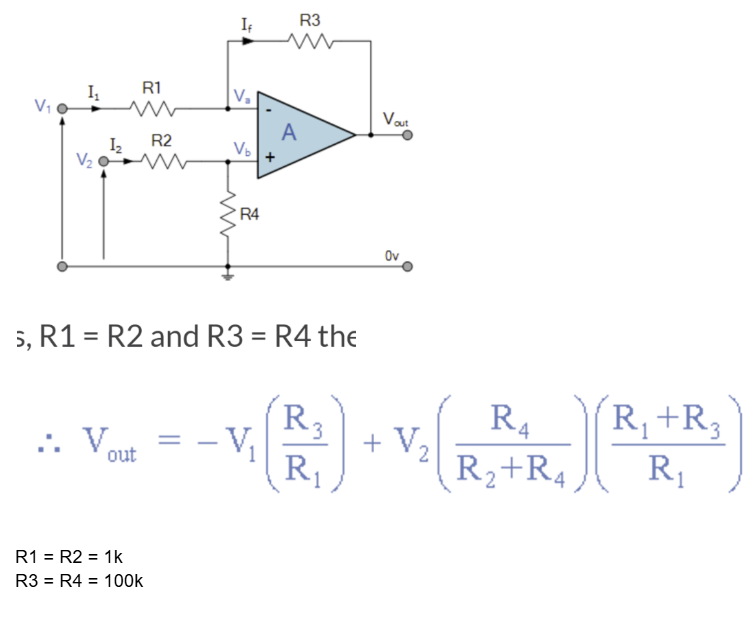
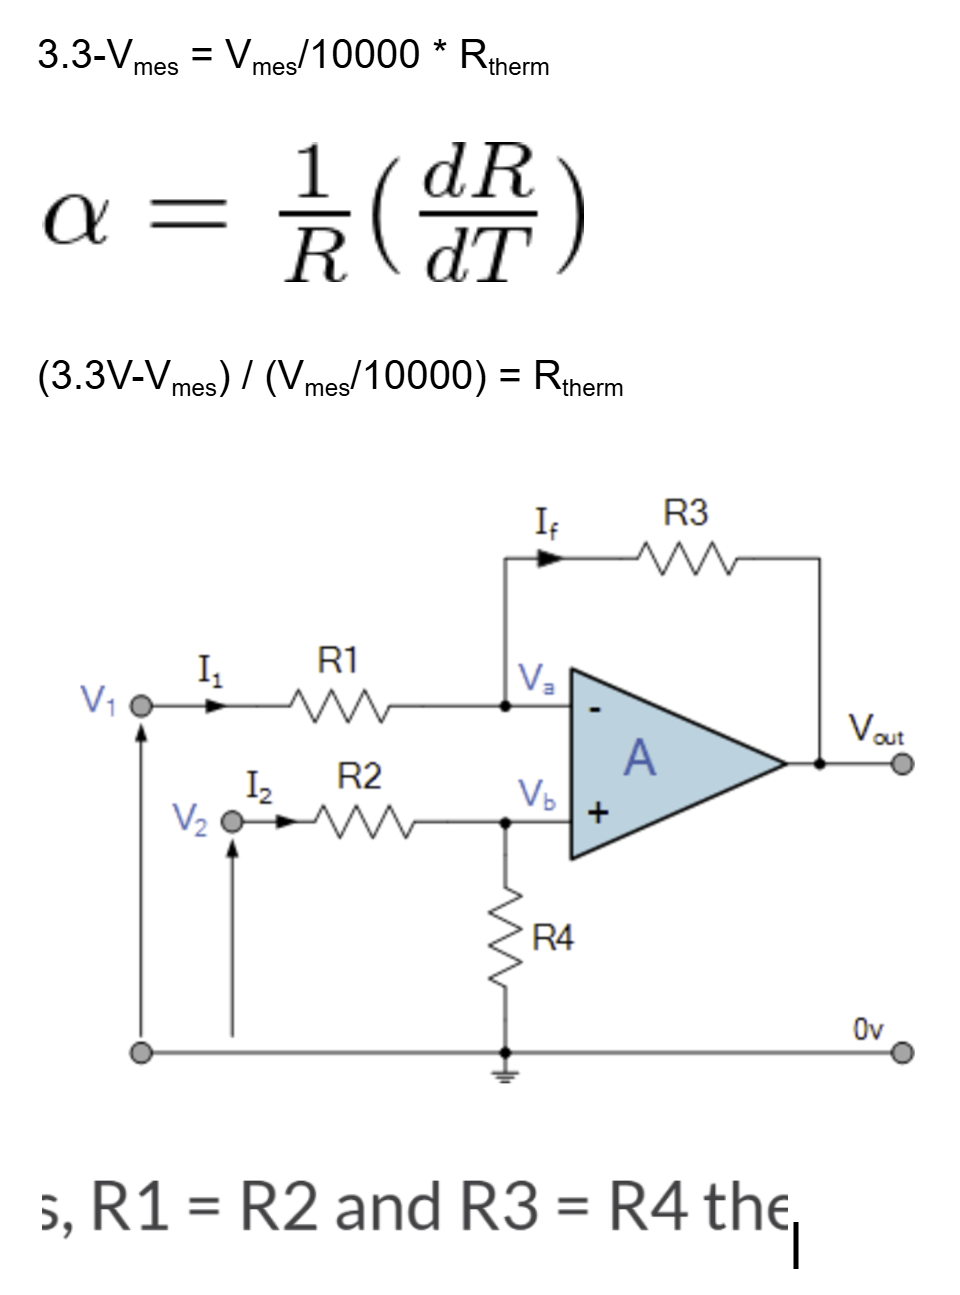
Found Quentin during offic hours and he pointed out the amount of currents for resistance might not be correct for the system.
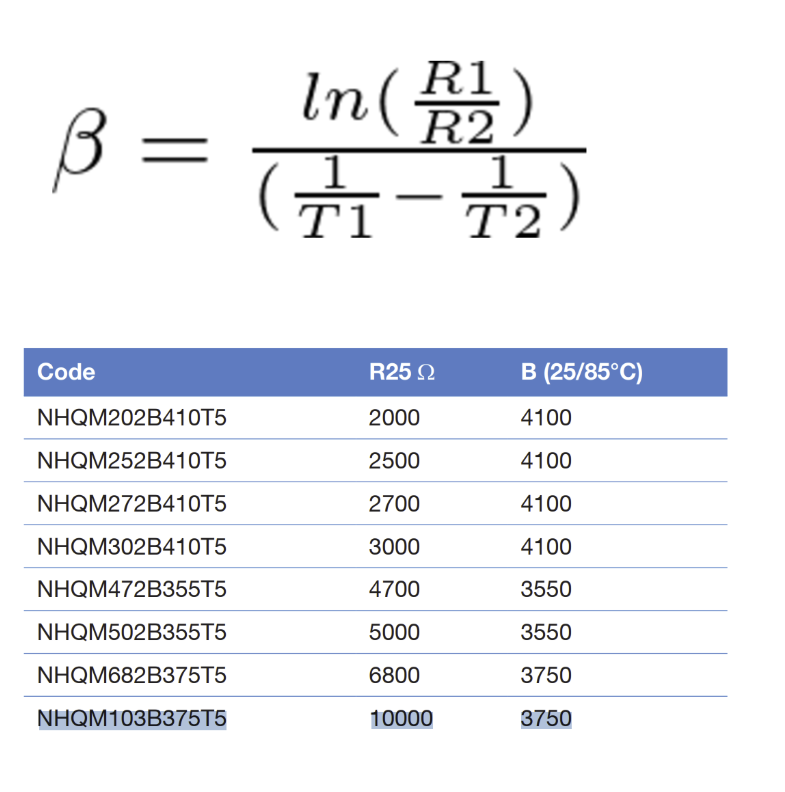
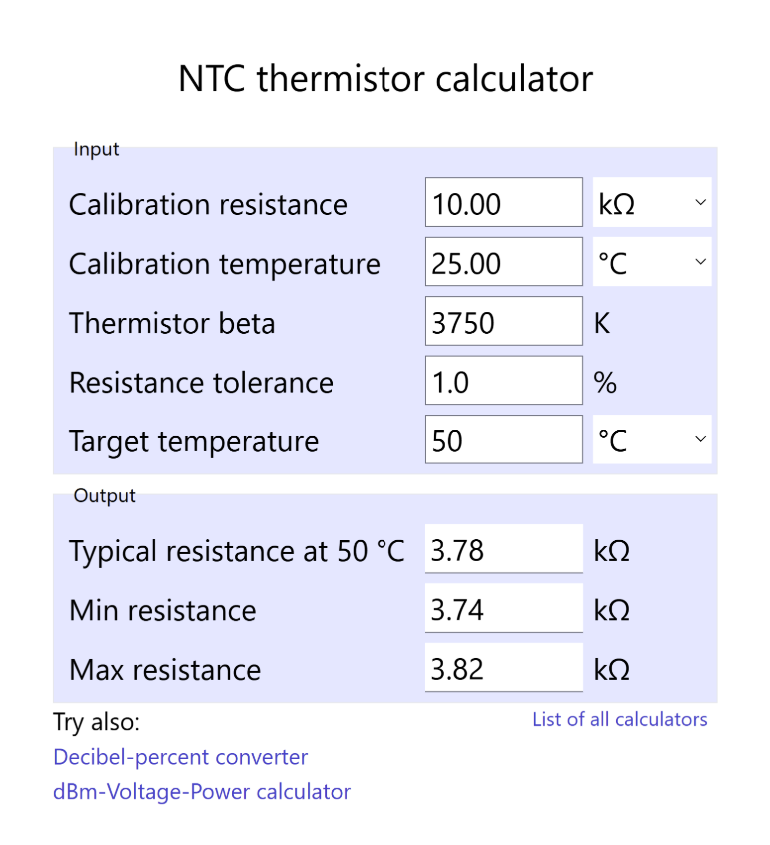
We went through caclculations together to figured out 24k and 150k (ignore the 25k) would work for wheatstone bridge for measuring things within body temperature range. Here are some formulas that we have used to get to 24k and 150k.
The values were updated and Quentin also helped to figure out how to integrate the math into the code. Board design wise, this was the most critical part of the system, so figuring this part out was a huge progress. HUGE thank you to Quentin.
The values were updated and Quentin also helped to figure out how to integrate the math into the code. Board design wise, this was the most critical part of the system, so figuring this part out was a huge progress. HUGE thank you to Quentin.
December 3rd, 2024
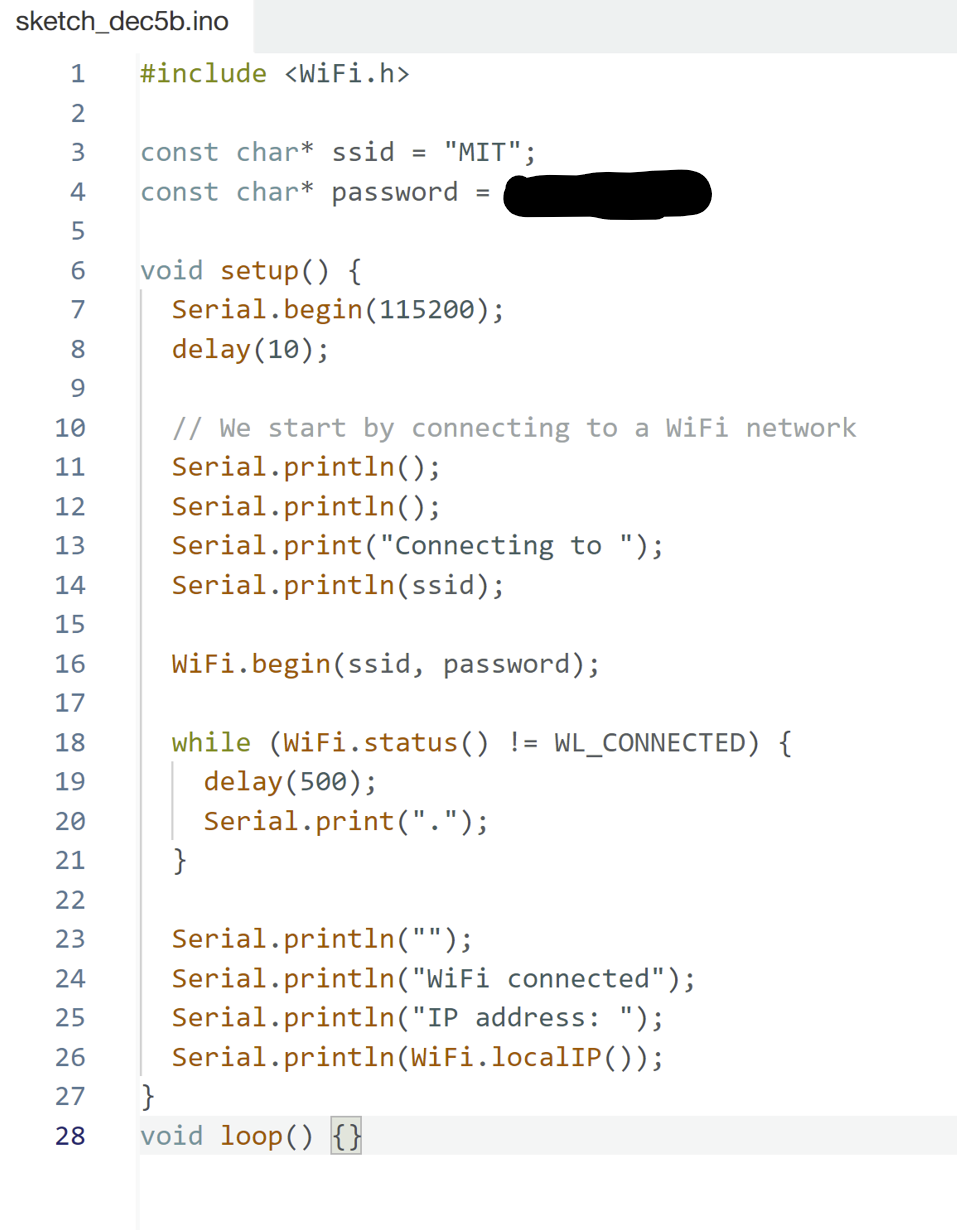
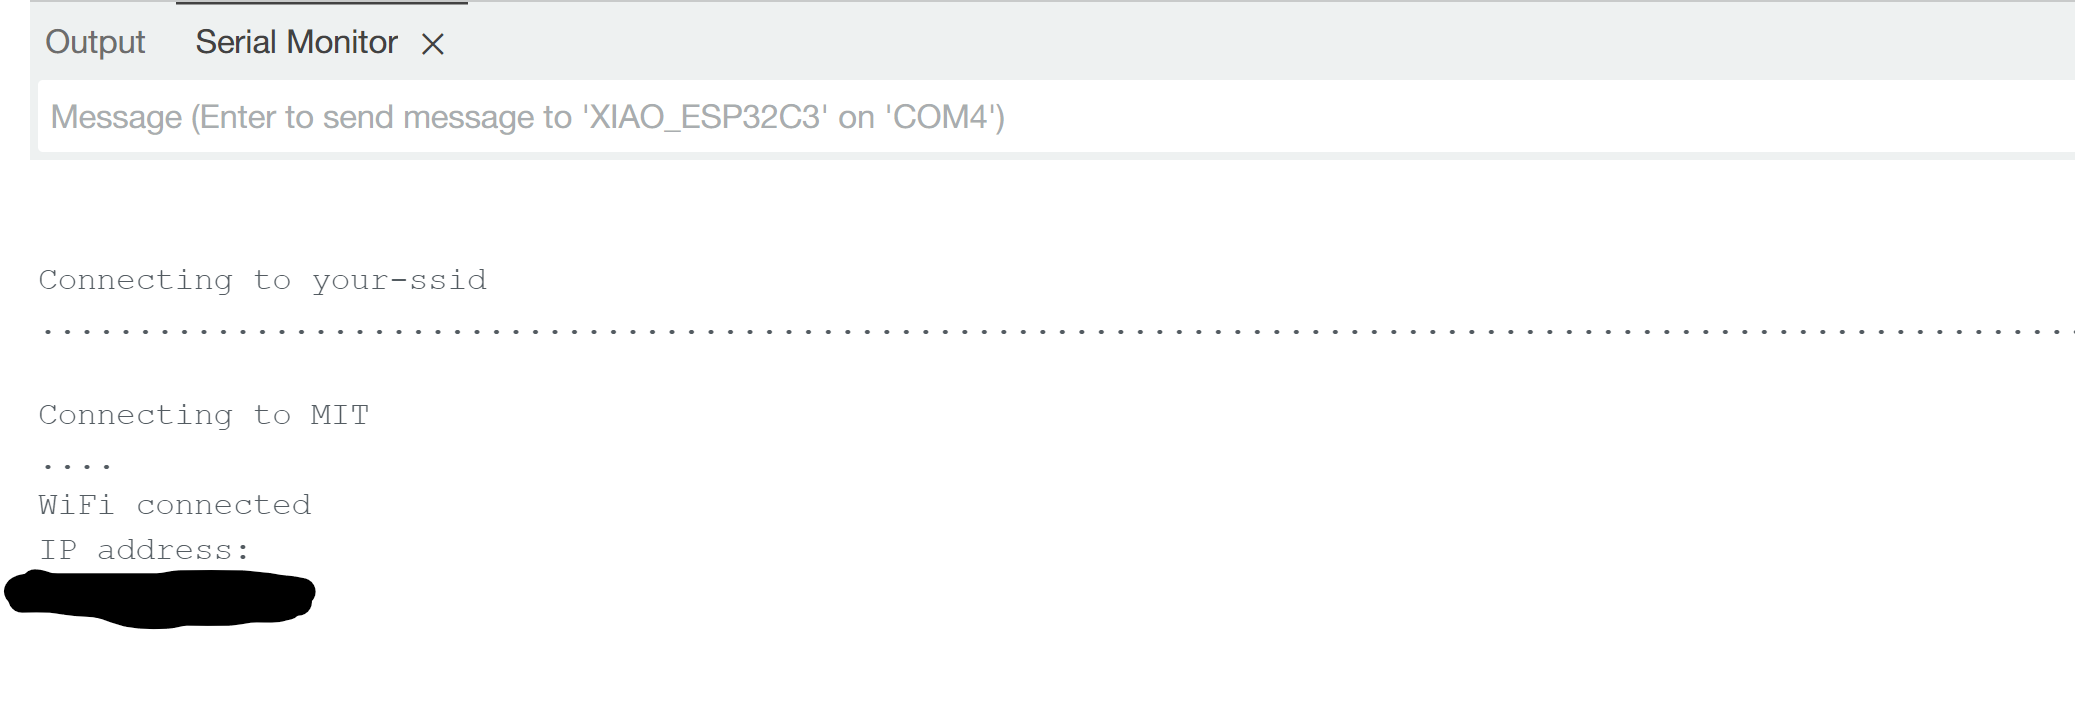
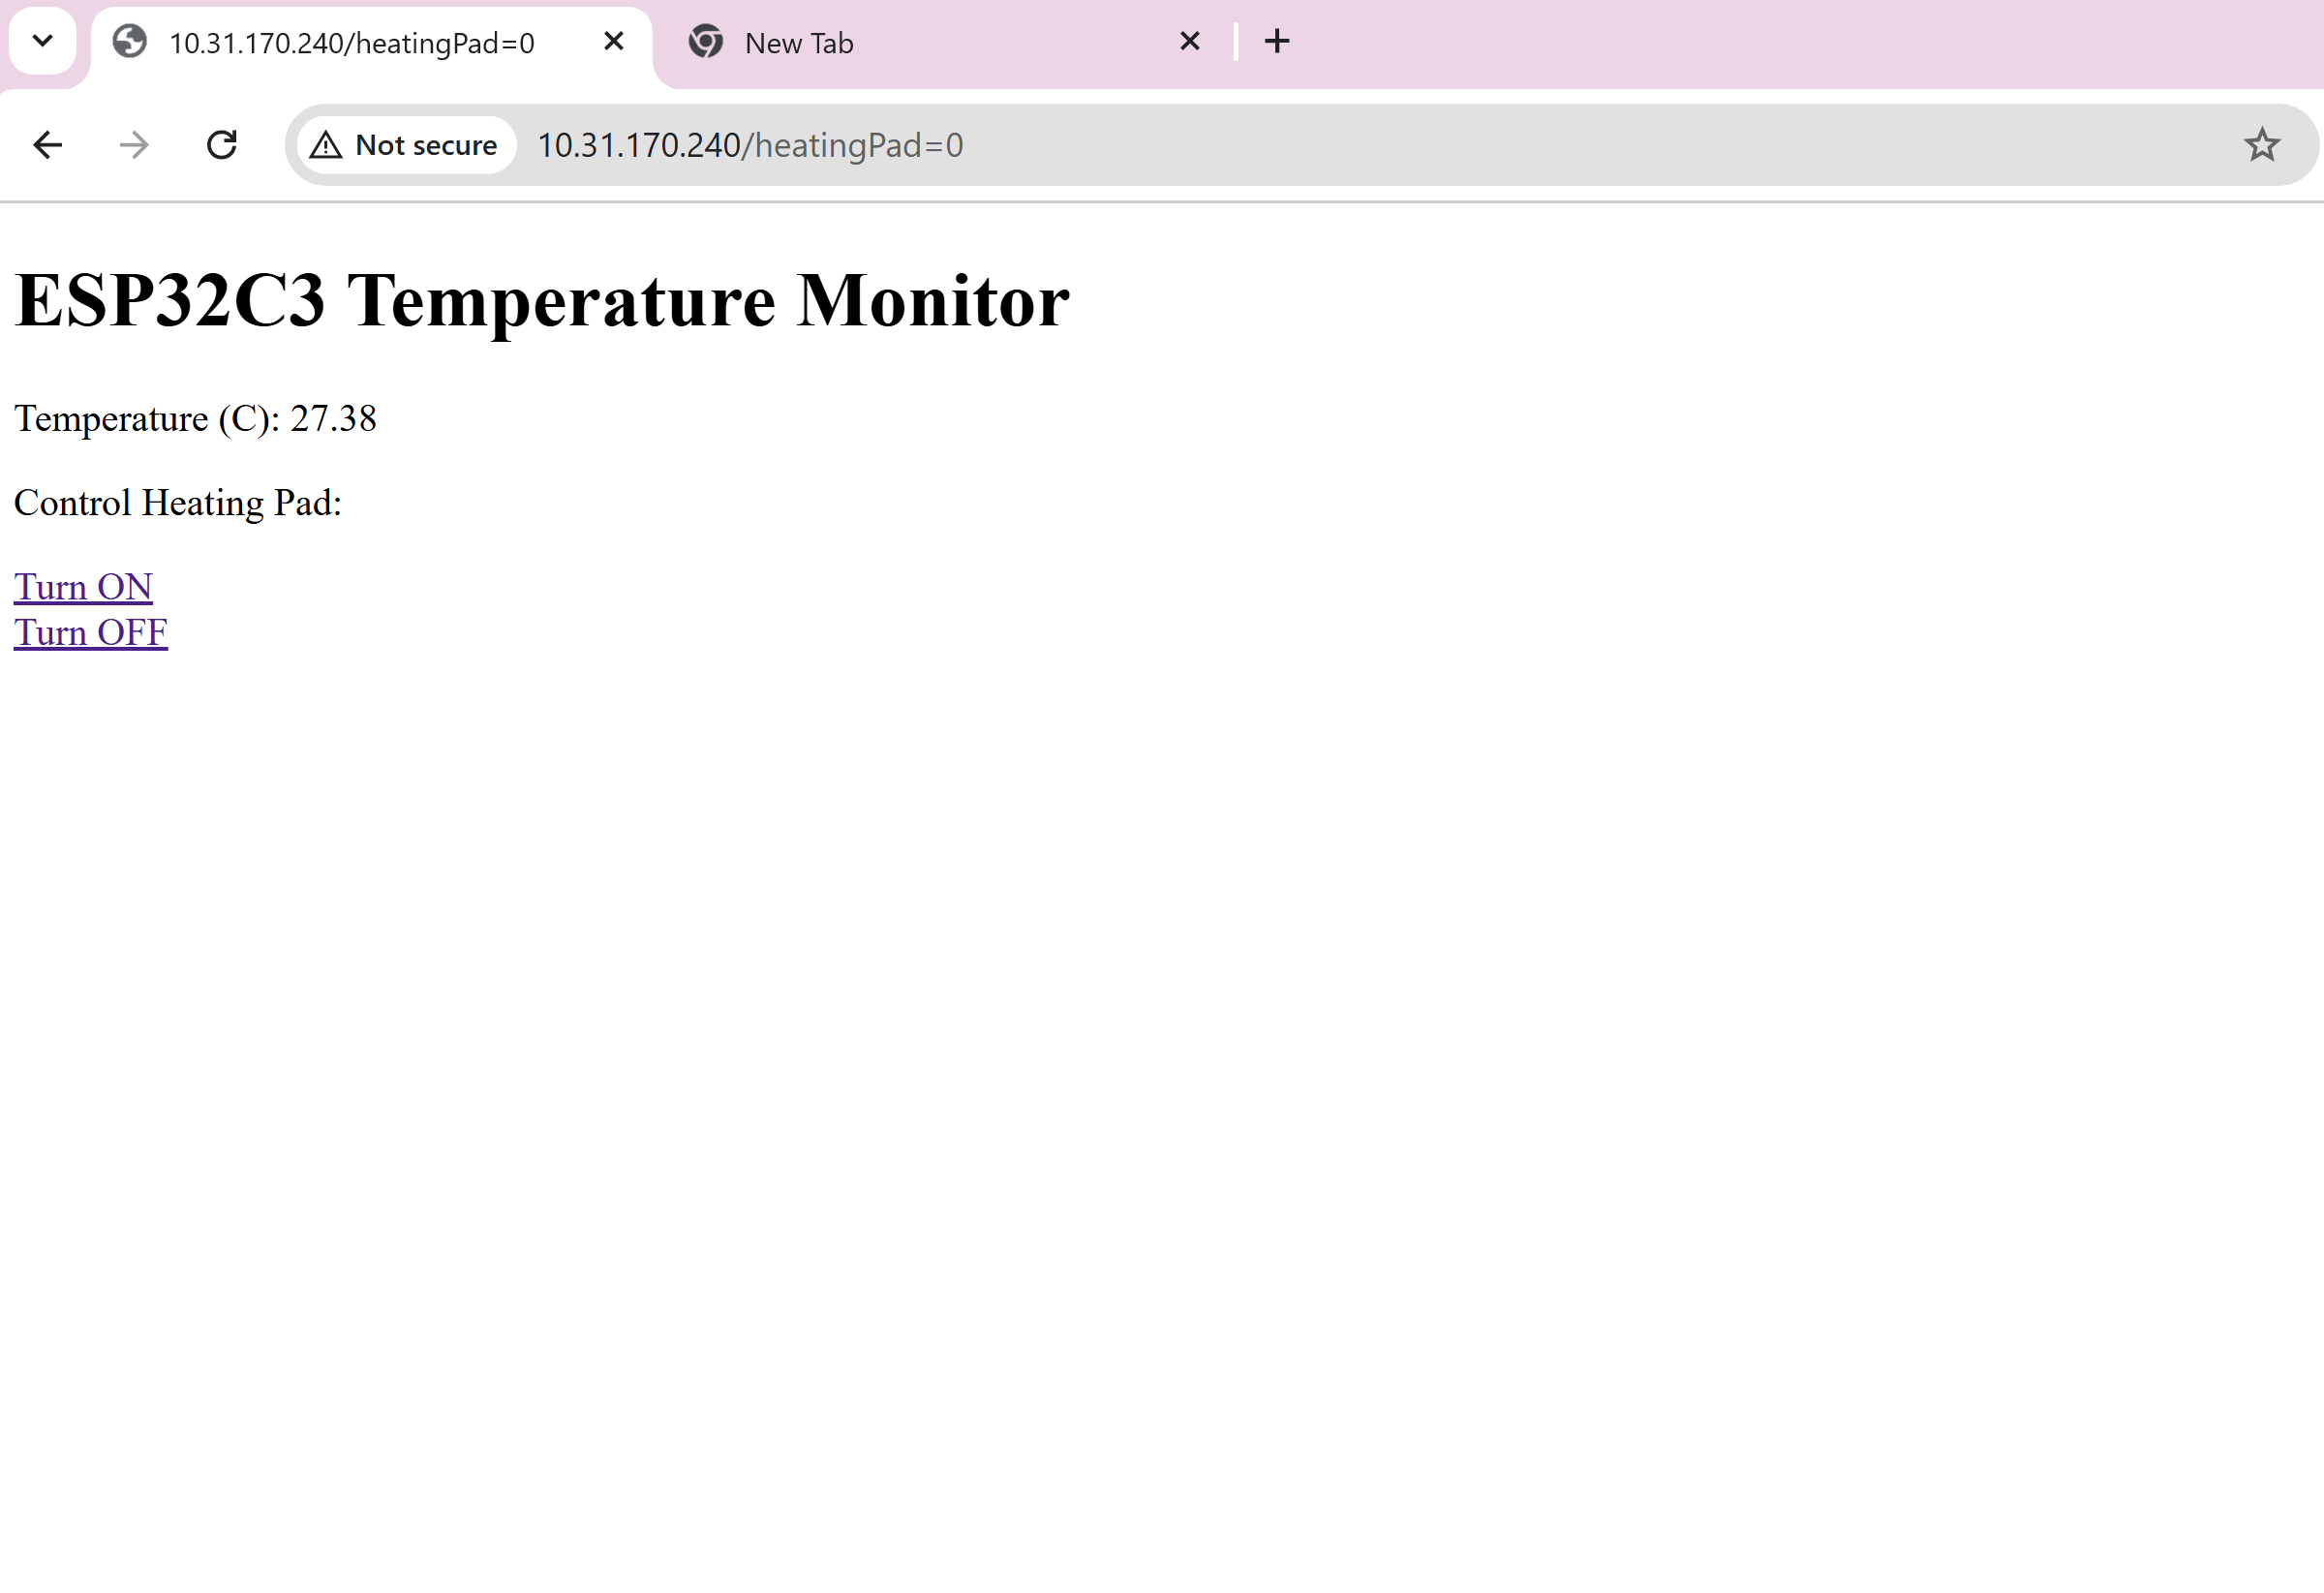
Used Networking week to figure out how to connect boards to the internet and build an interface using ip address.
I had some issues trying to connect to the wifi, and after a talk with anthony, I realized I completely ignored the part about esp32c3 that needs antenna to be attached.
December 4th, 2024
After getting rough draft of electronics, I was able to turn my focus back to designing casing and how people would interact with the "heater" part of the project.
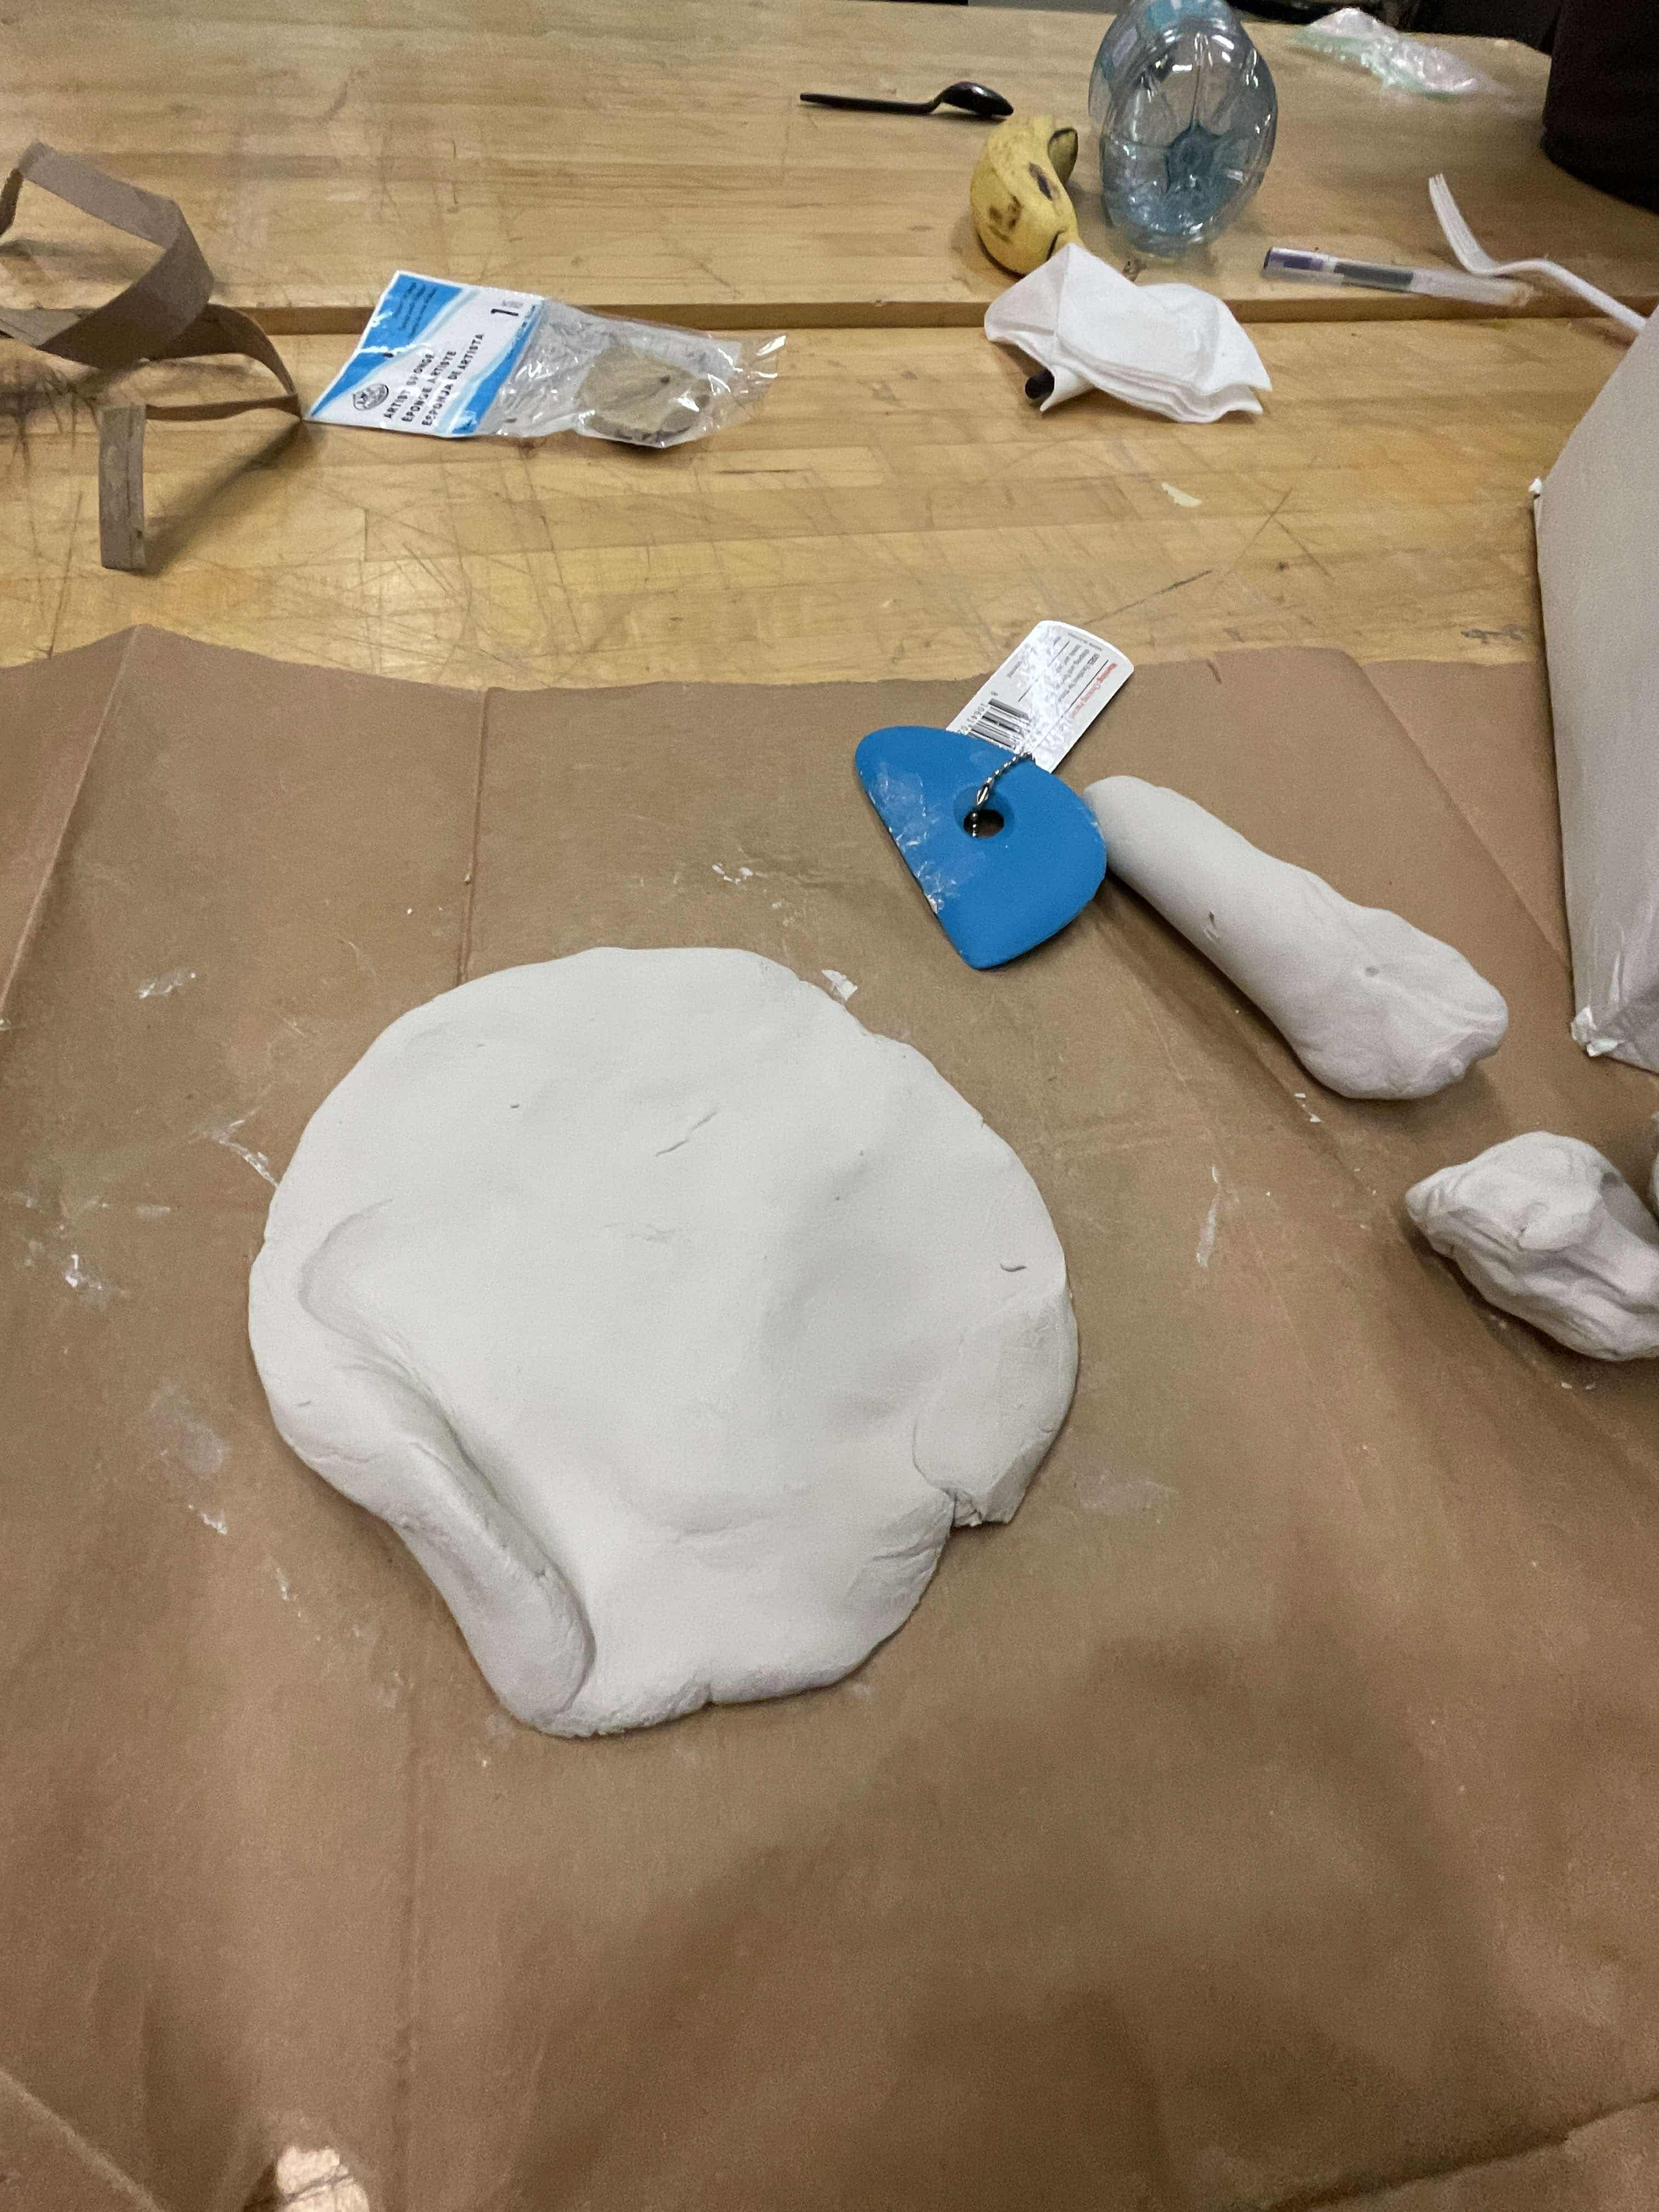
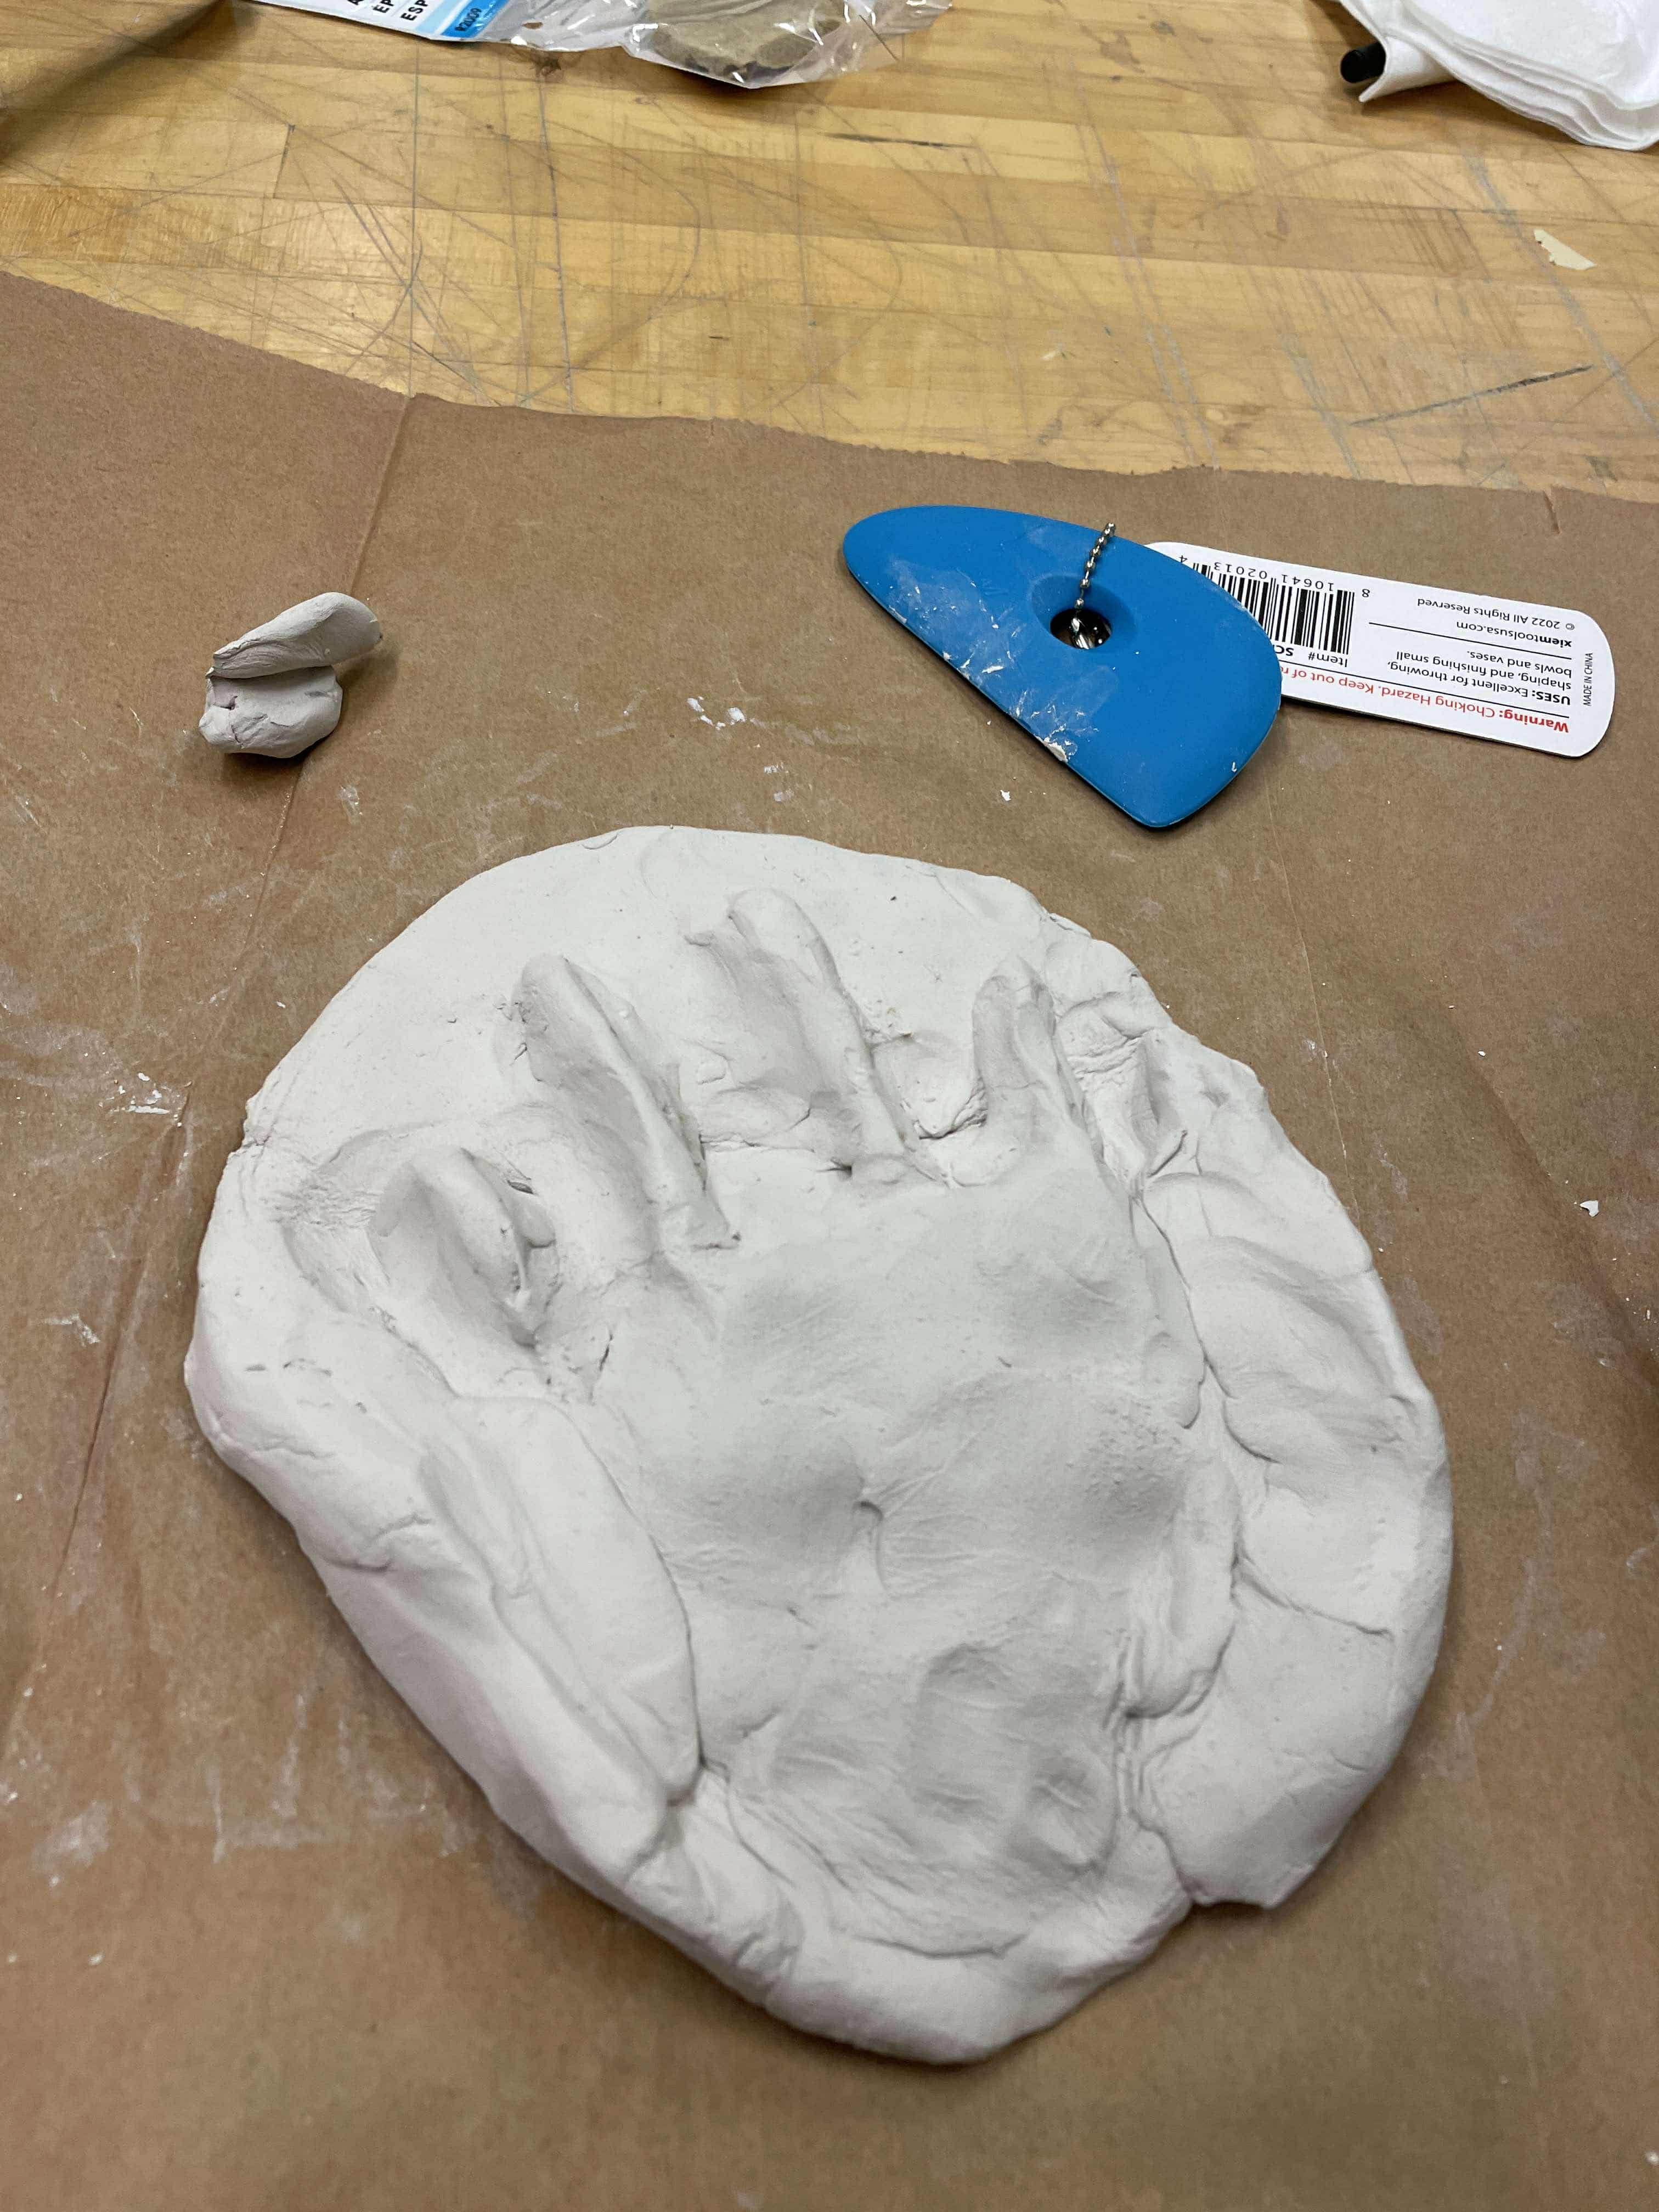
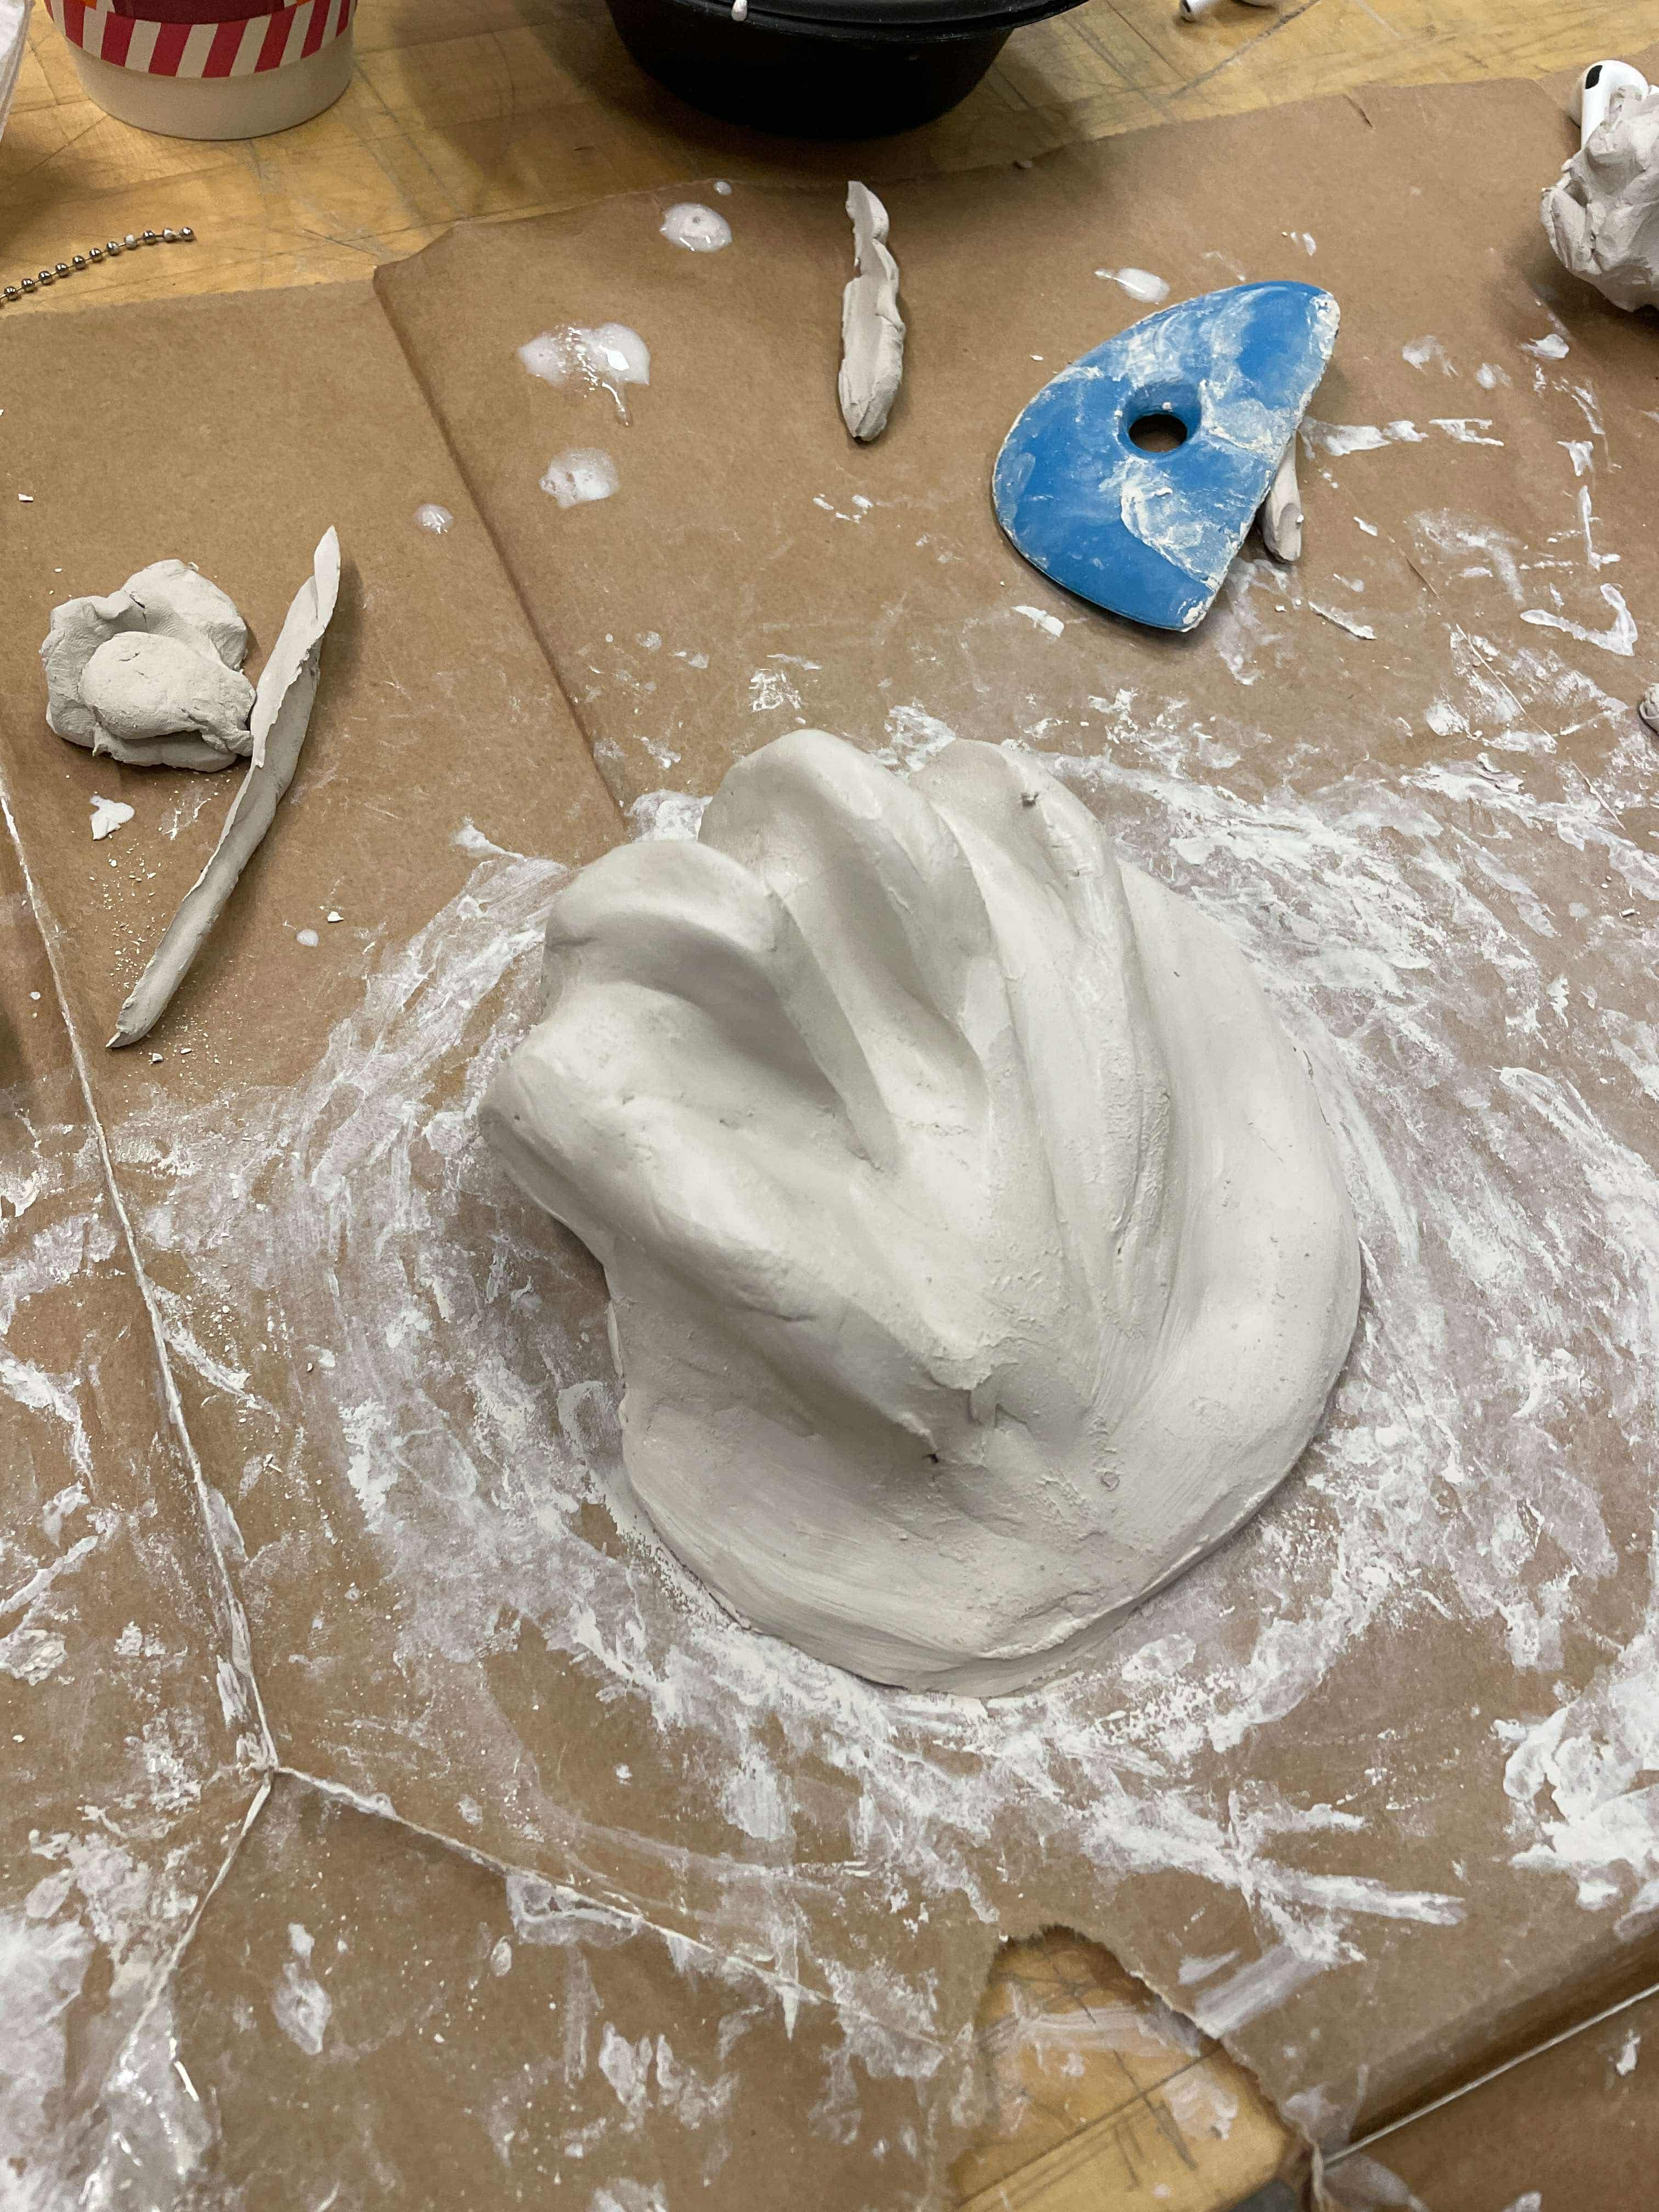
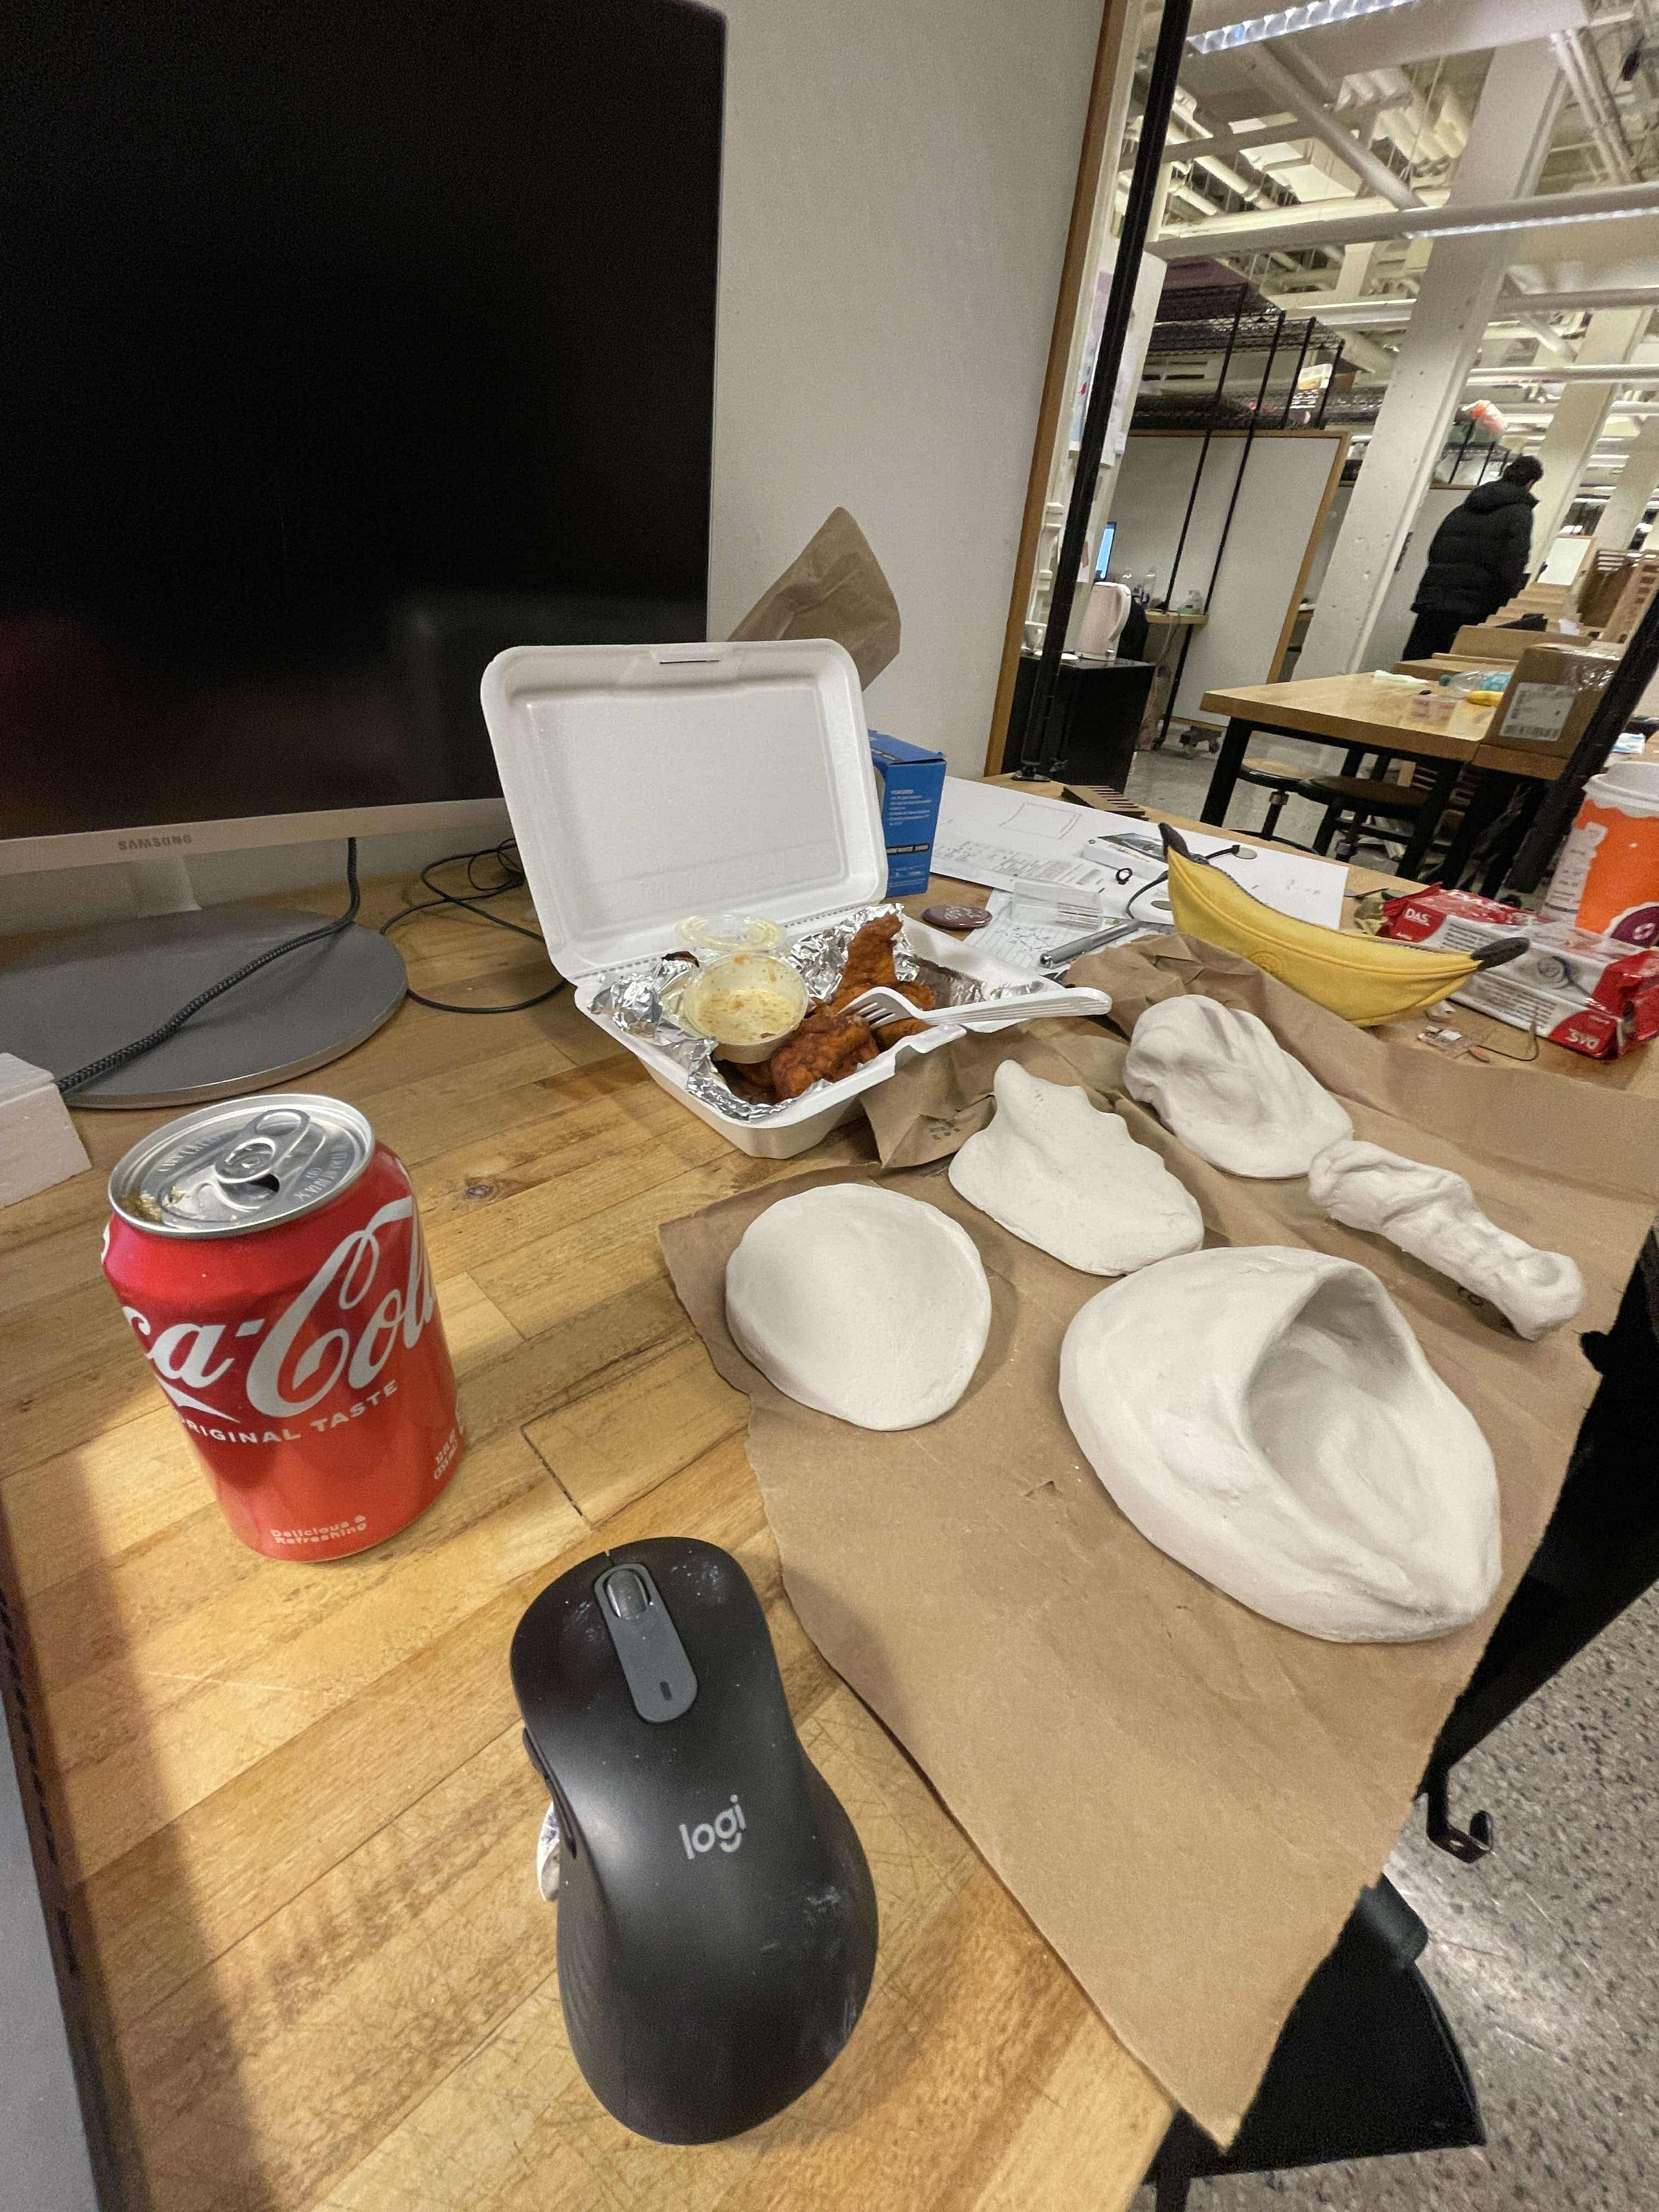
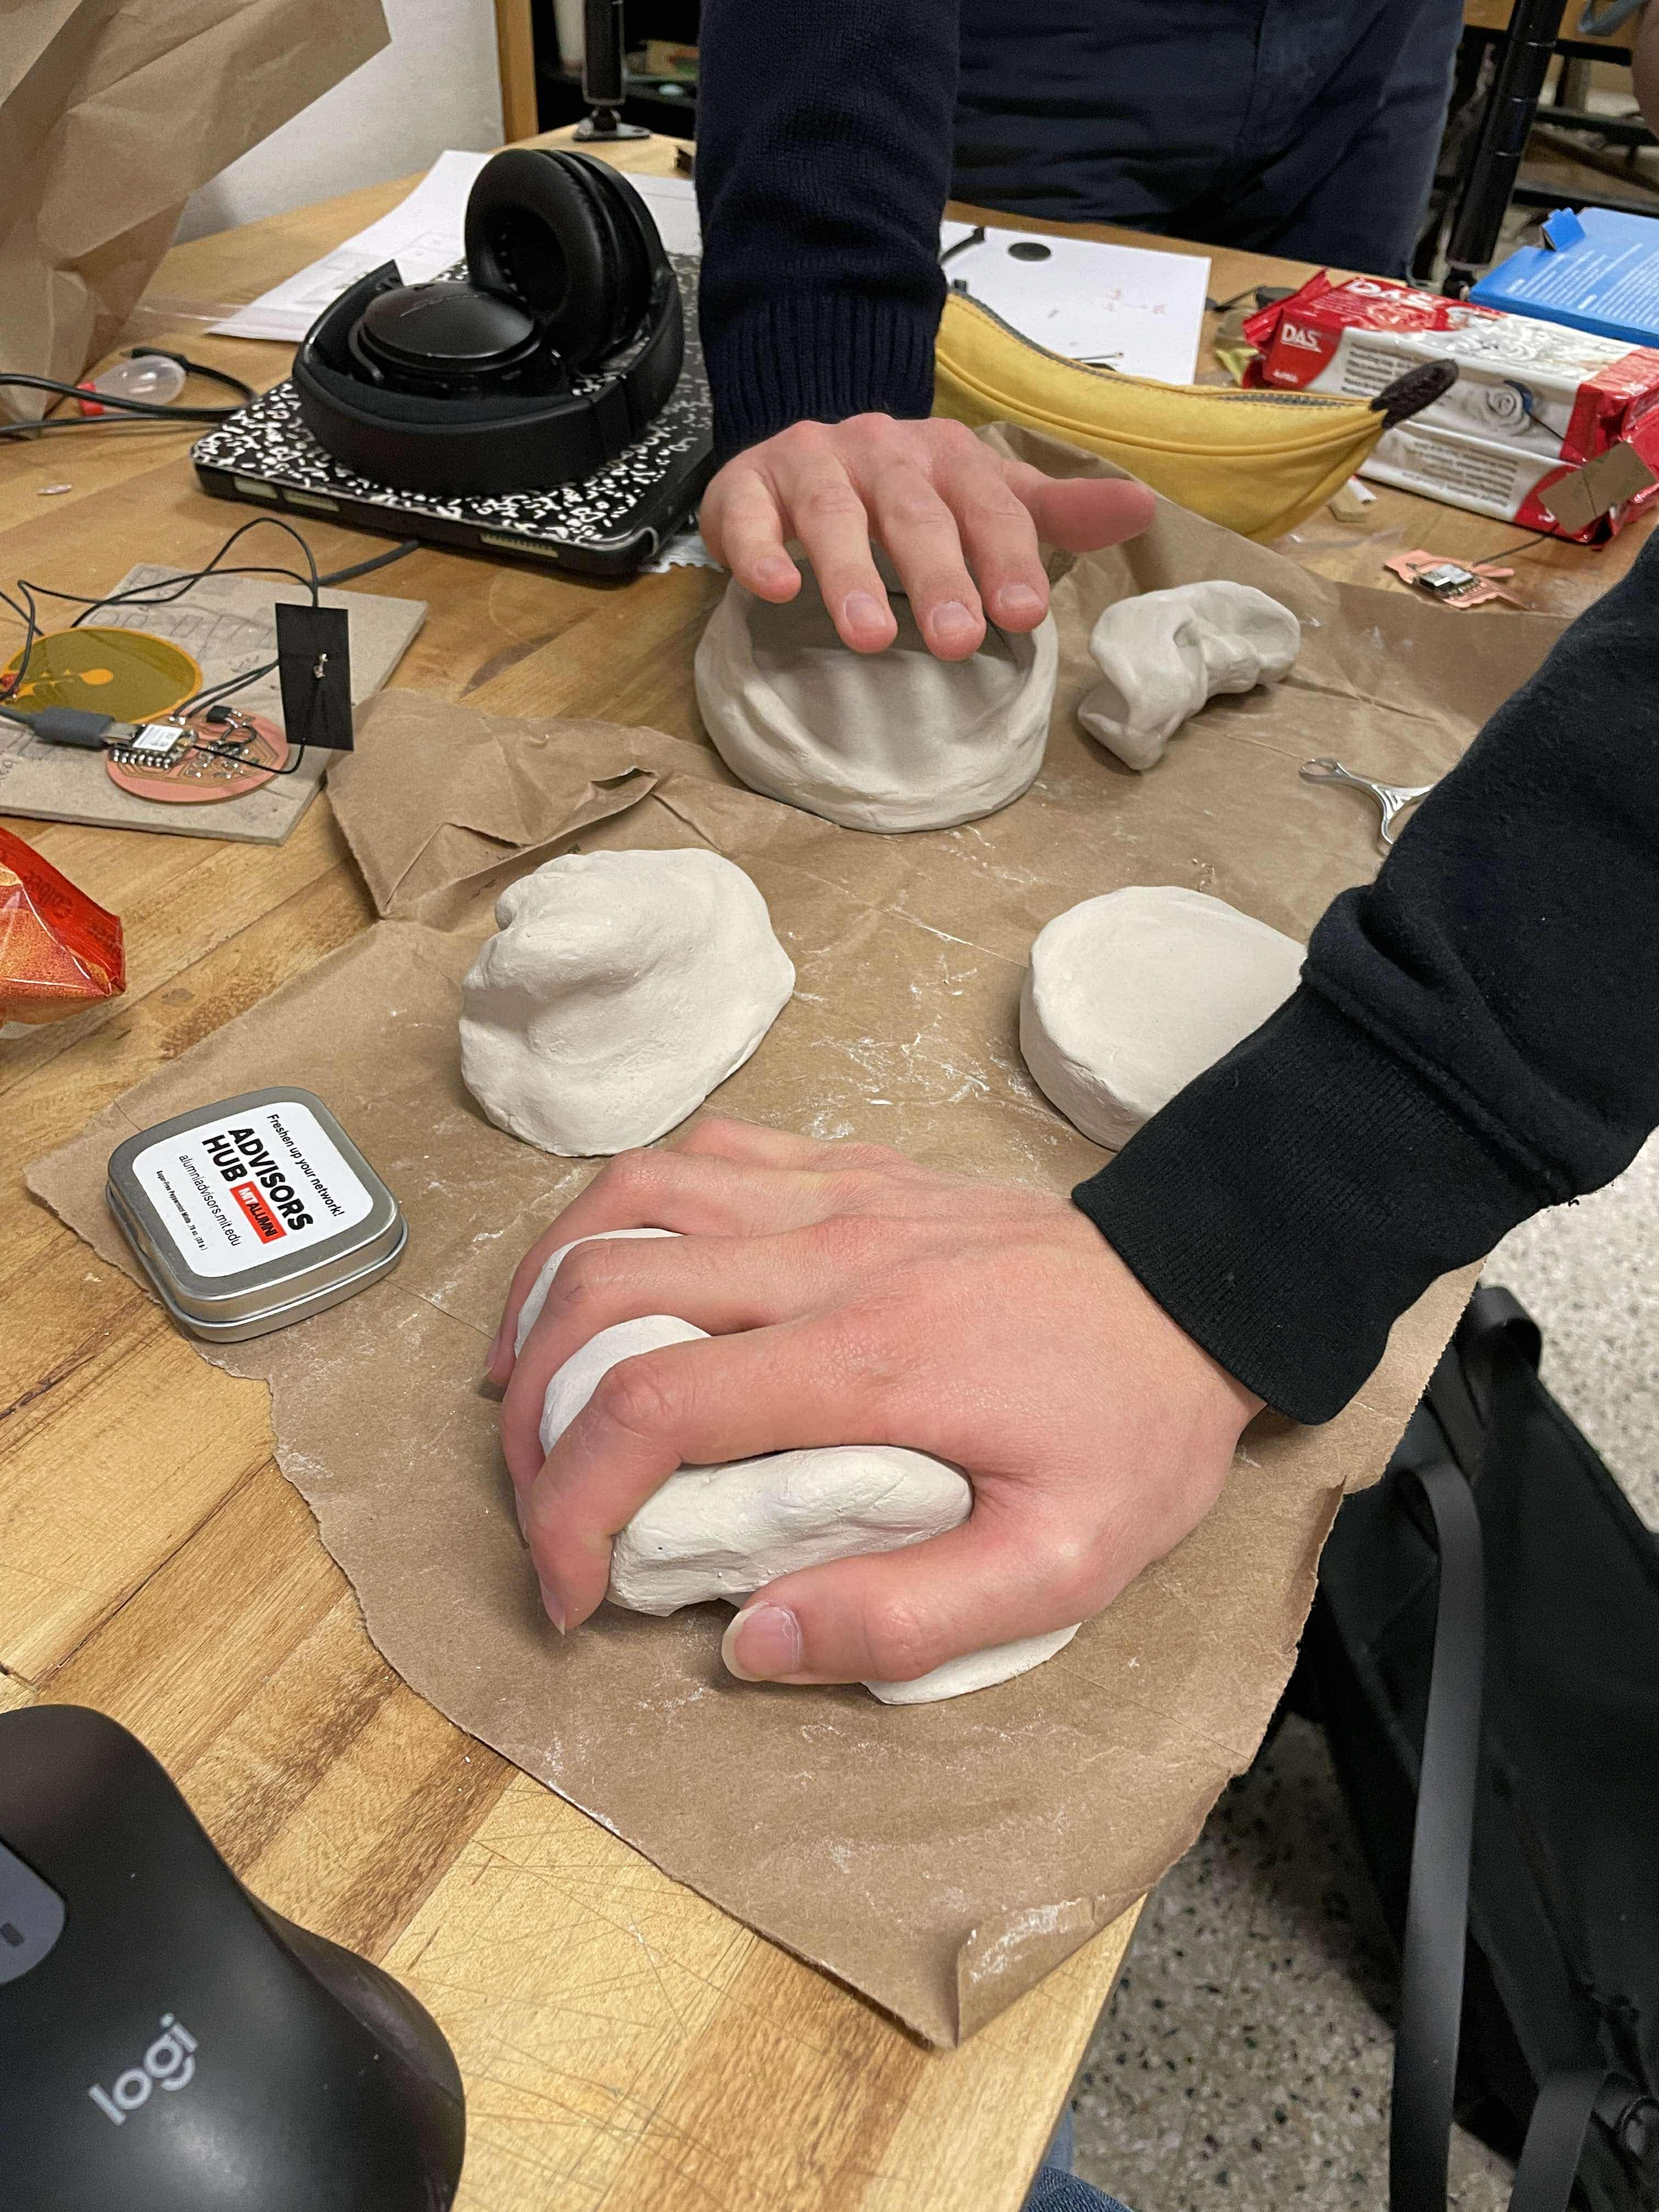
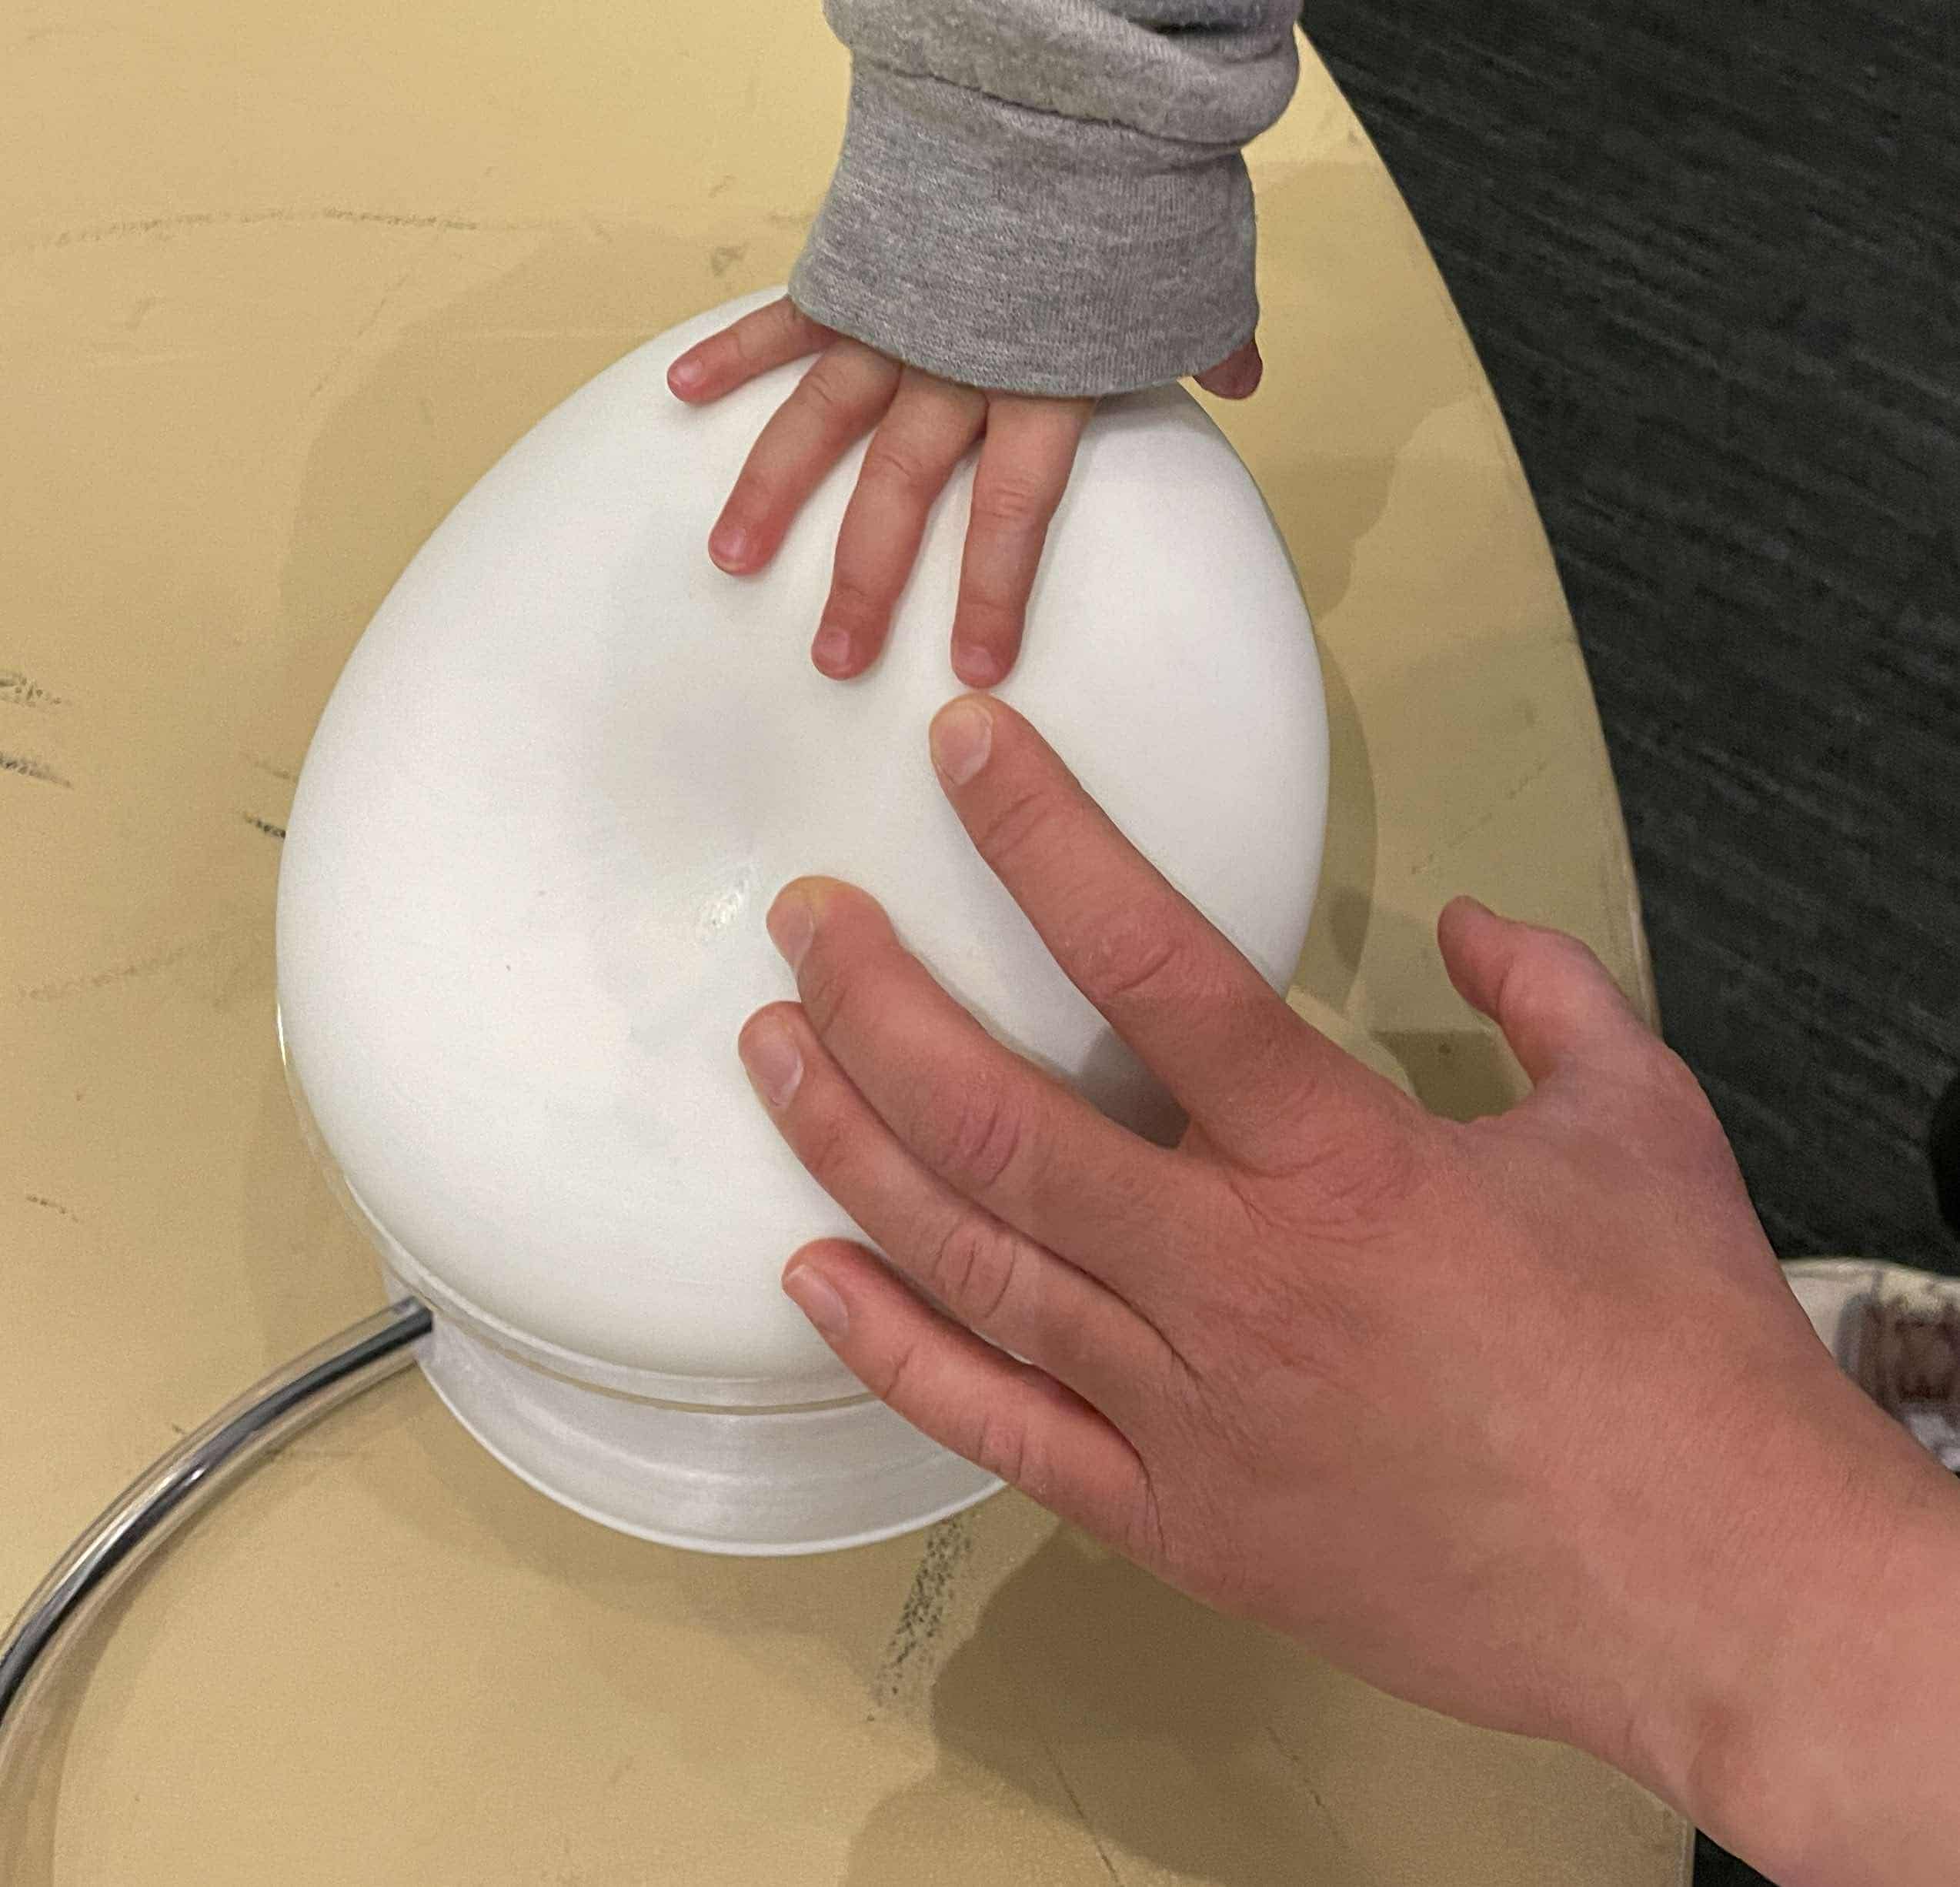
I was able to get some clay from Blick and started testing out shapes that felt comfortable to my hands. Friends came over to test the forms, and the feedbacks were:
1. shallow depth were uncomfortable since it was designed for my finger - bigger forms might be better
2. the gesture of the hand when touching matters (ex) squeezing or hugging)
I quite enjoyed the snug feeling of objects that were designed by my hand motion, but I realized it can't be the design for different hand sizes (figner length, fingernail length, etc.).
Because curved forms are hard to model in rhino, I liked the immediate proces sof physical modeling, but also not having access to good scanner made it difficult to be a good process for me at the moment.
December 5th, 2024
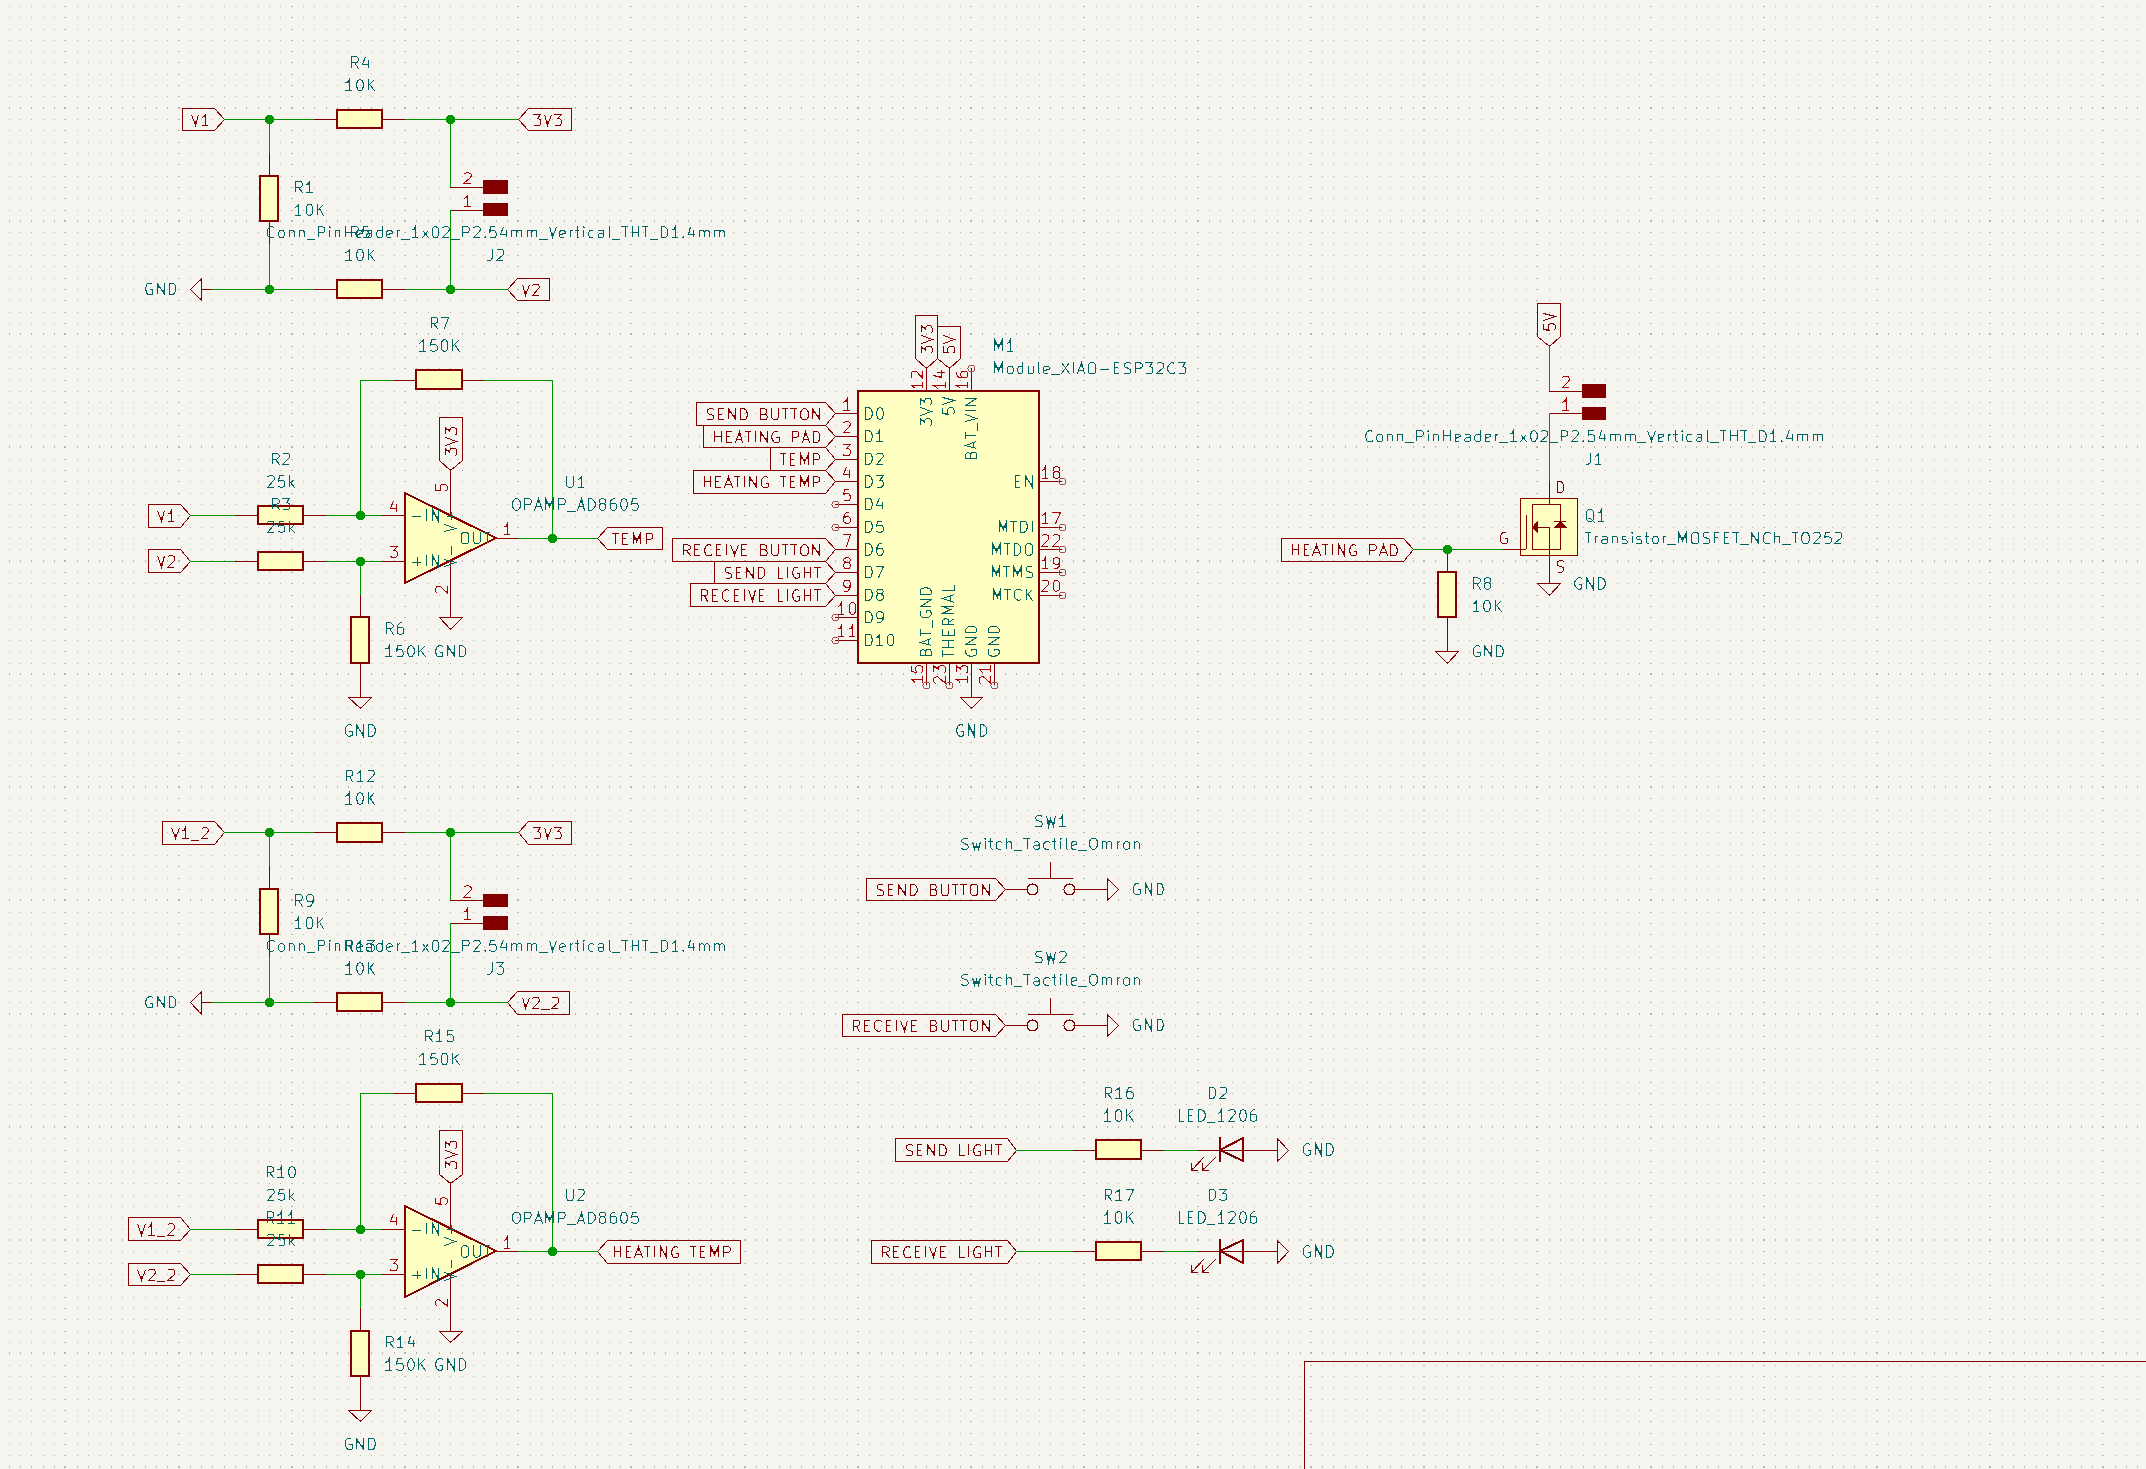
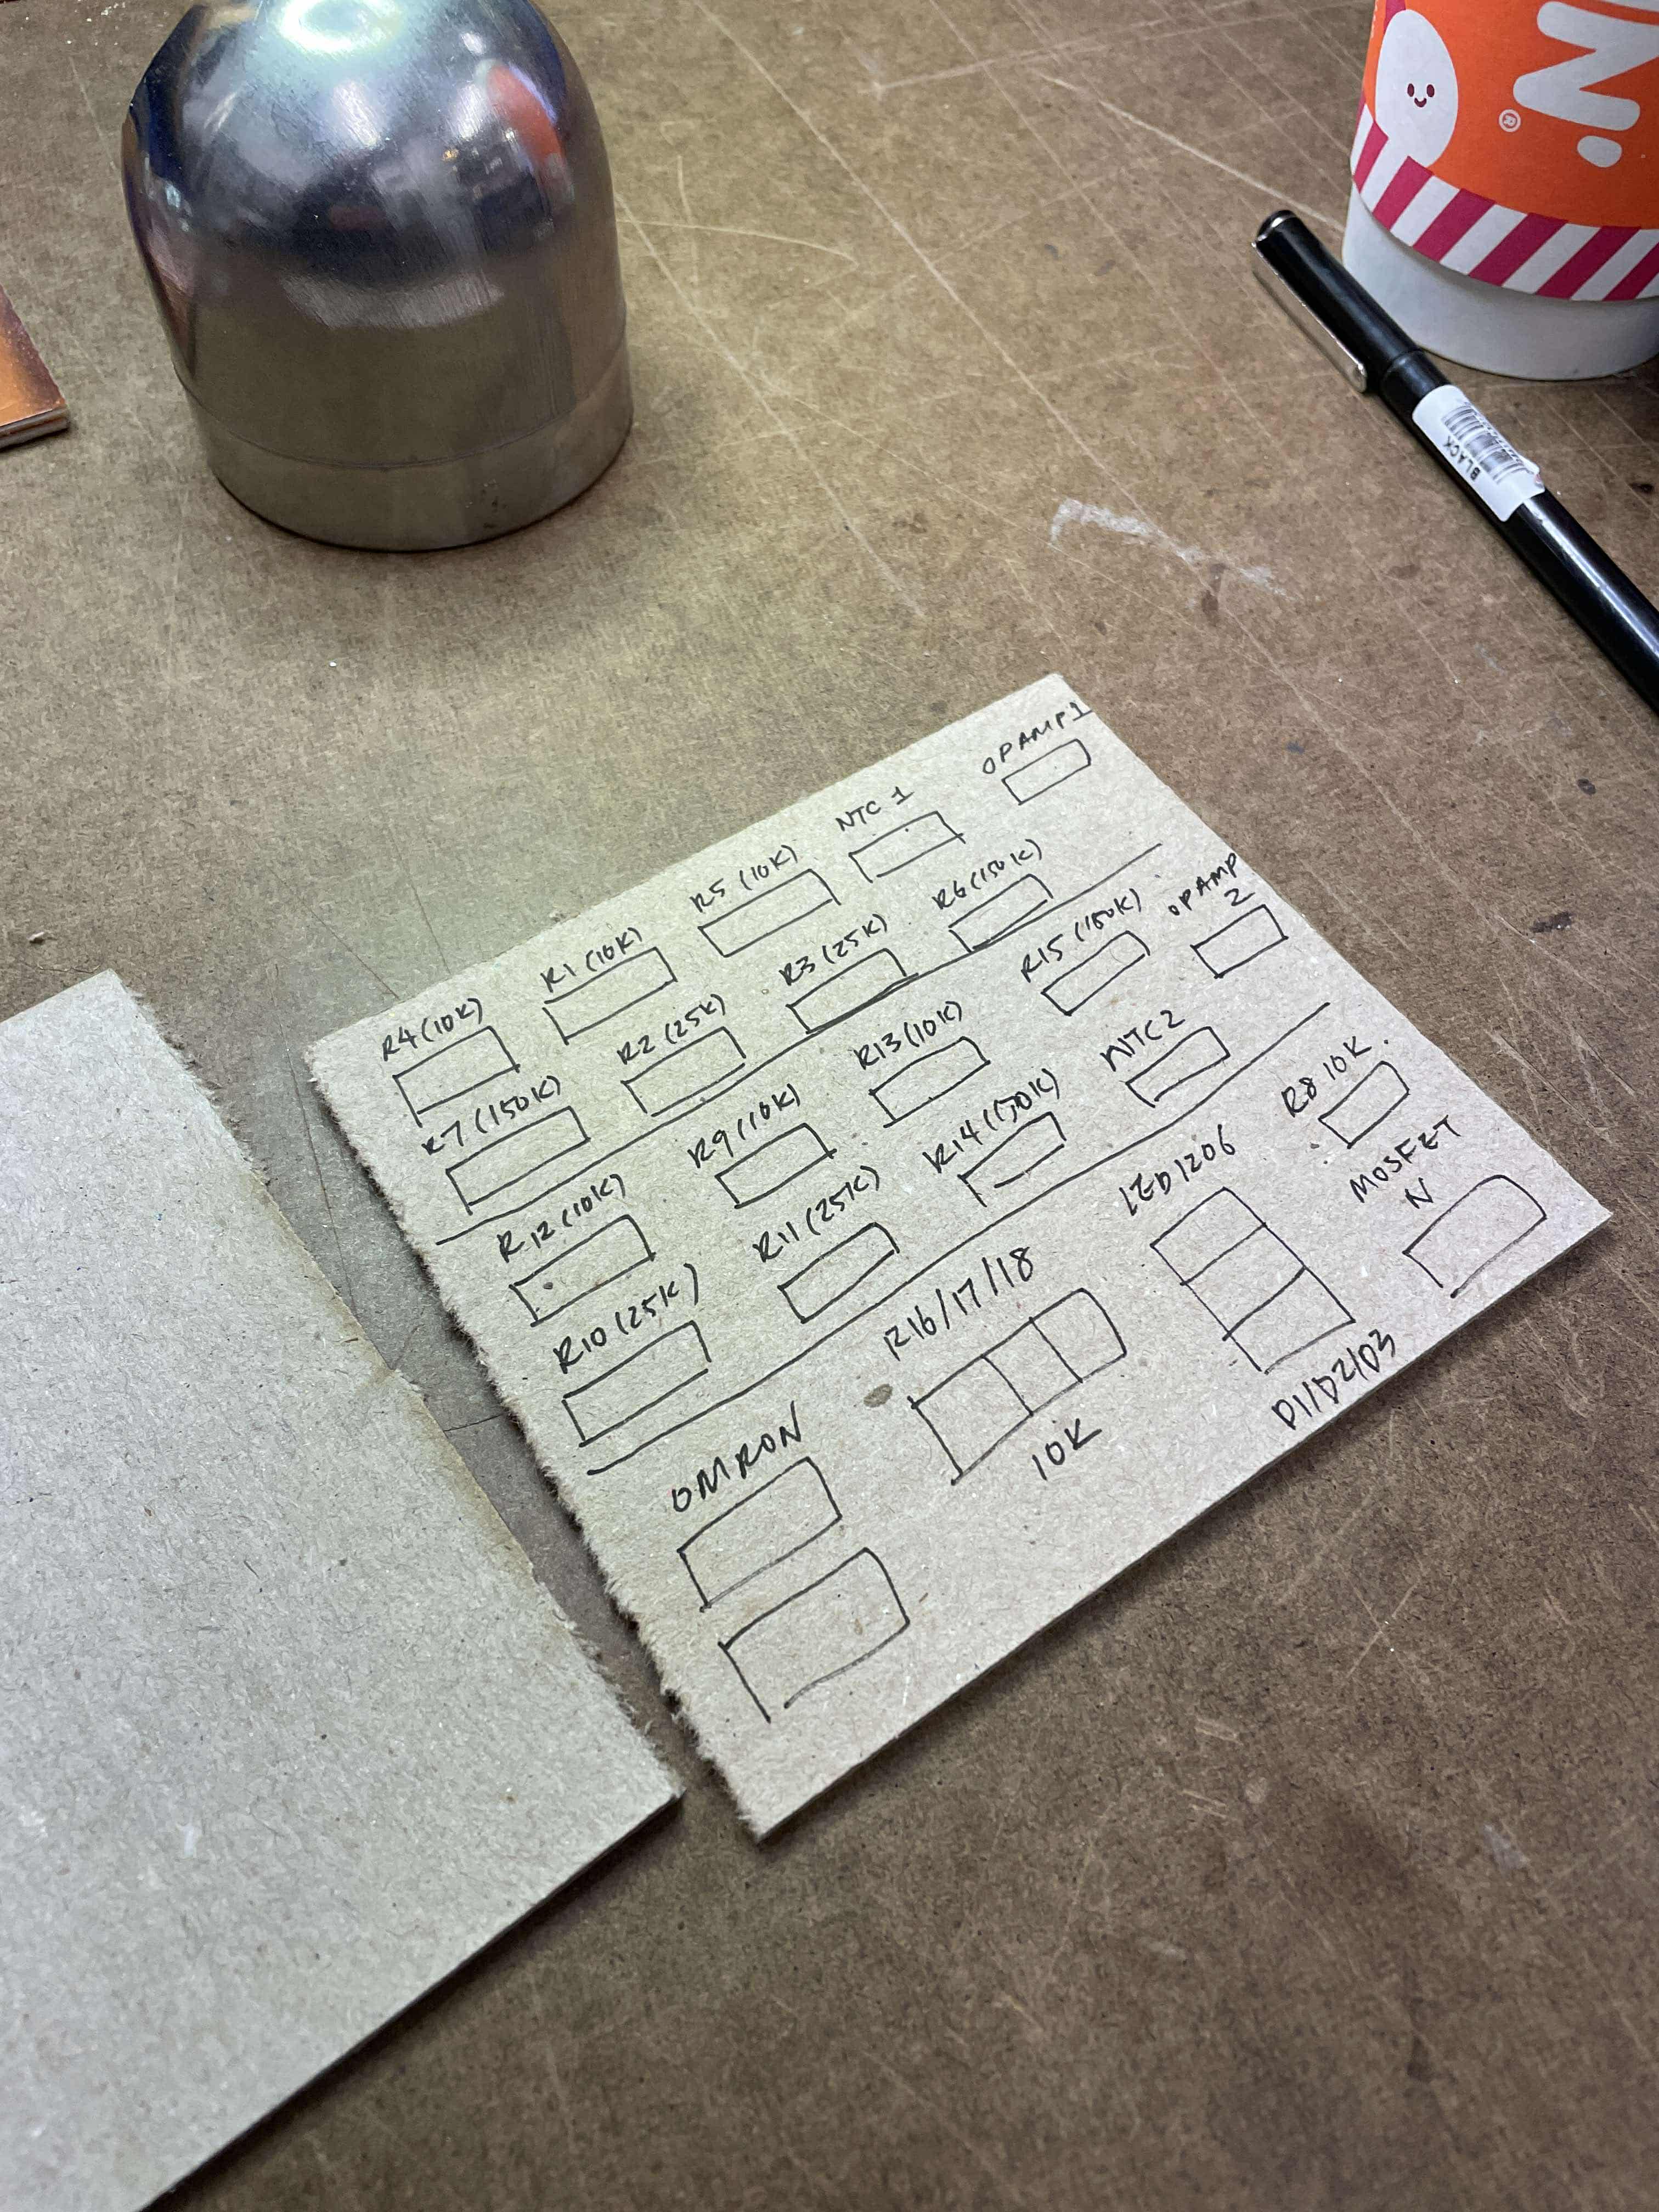
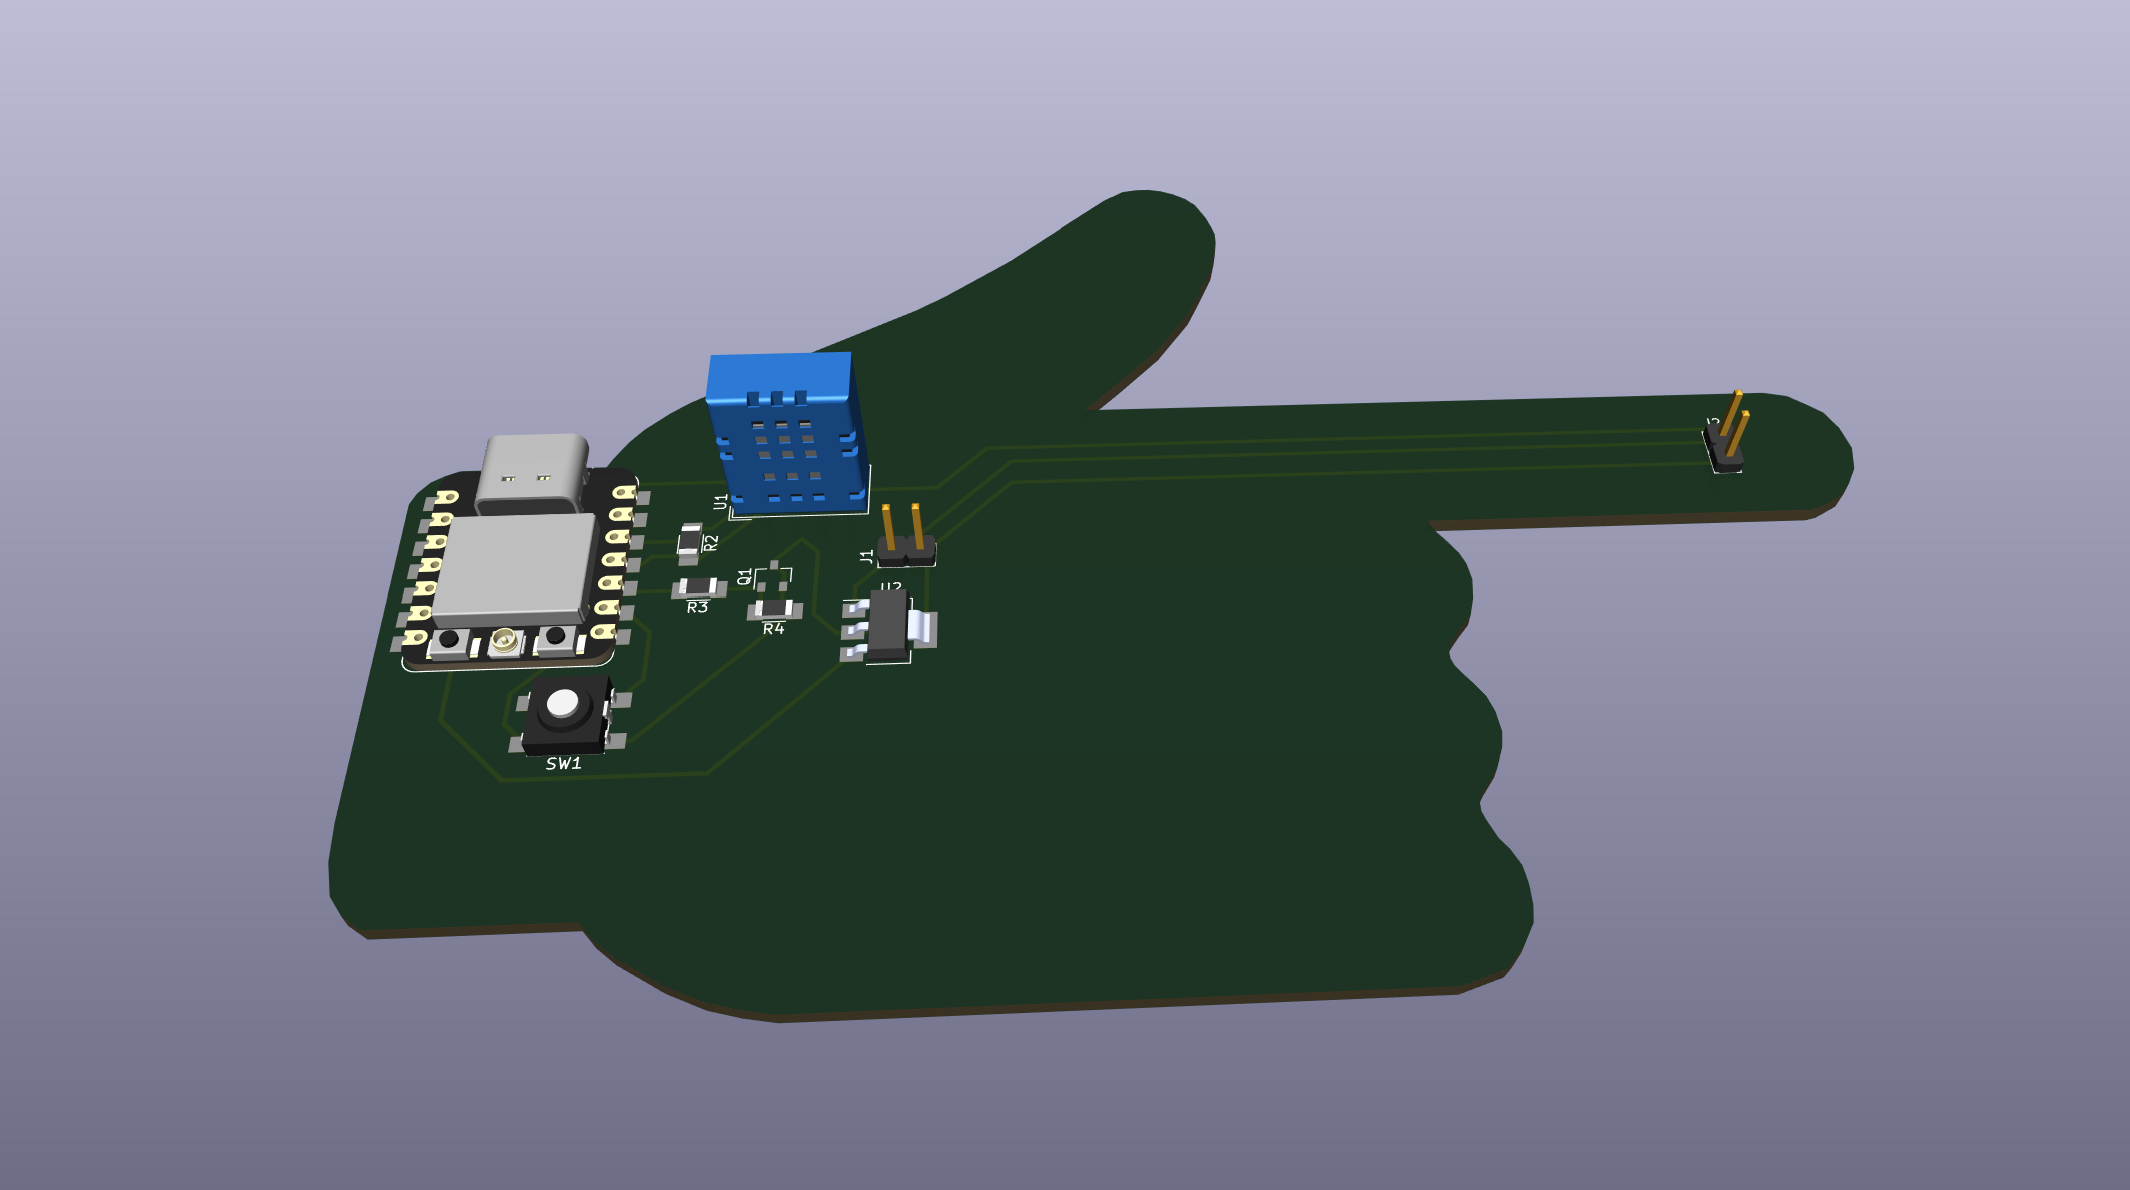
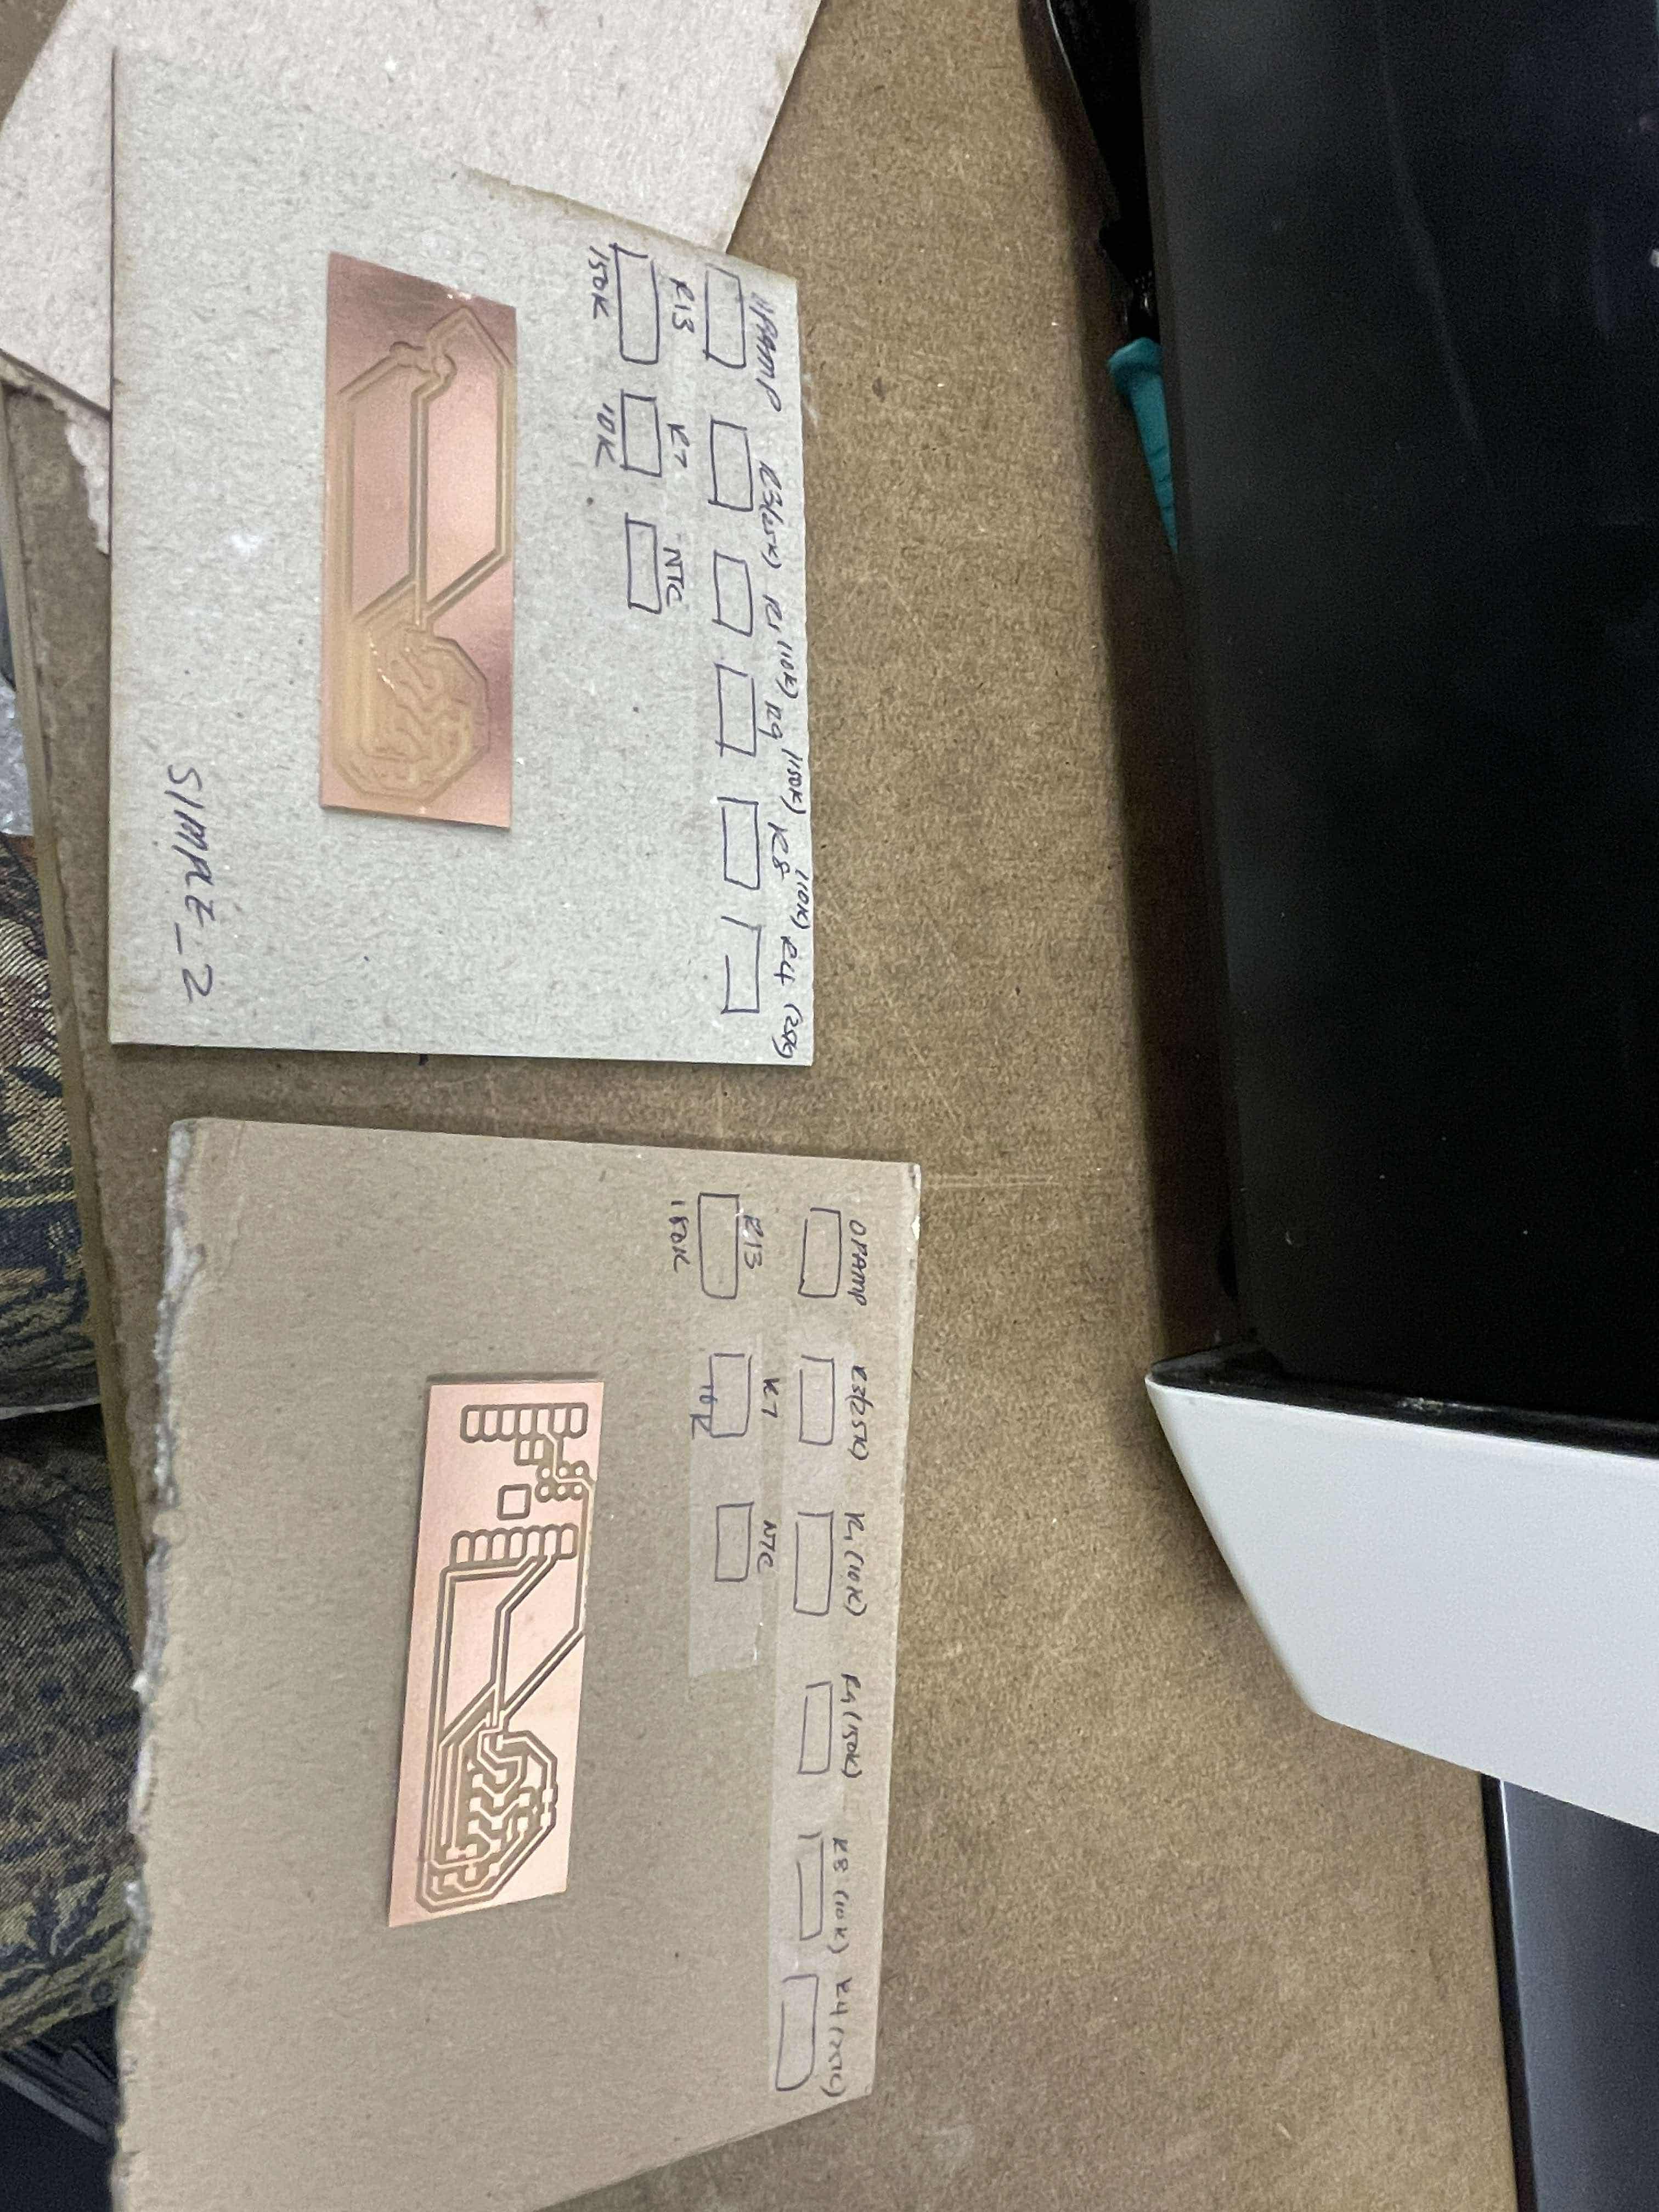
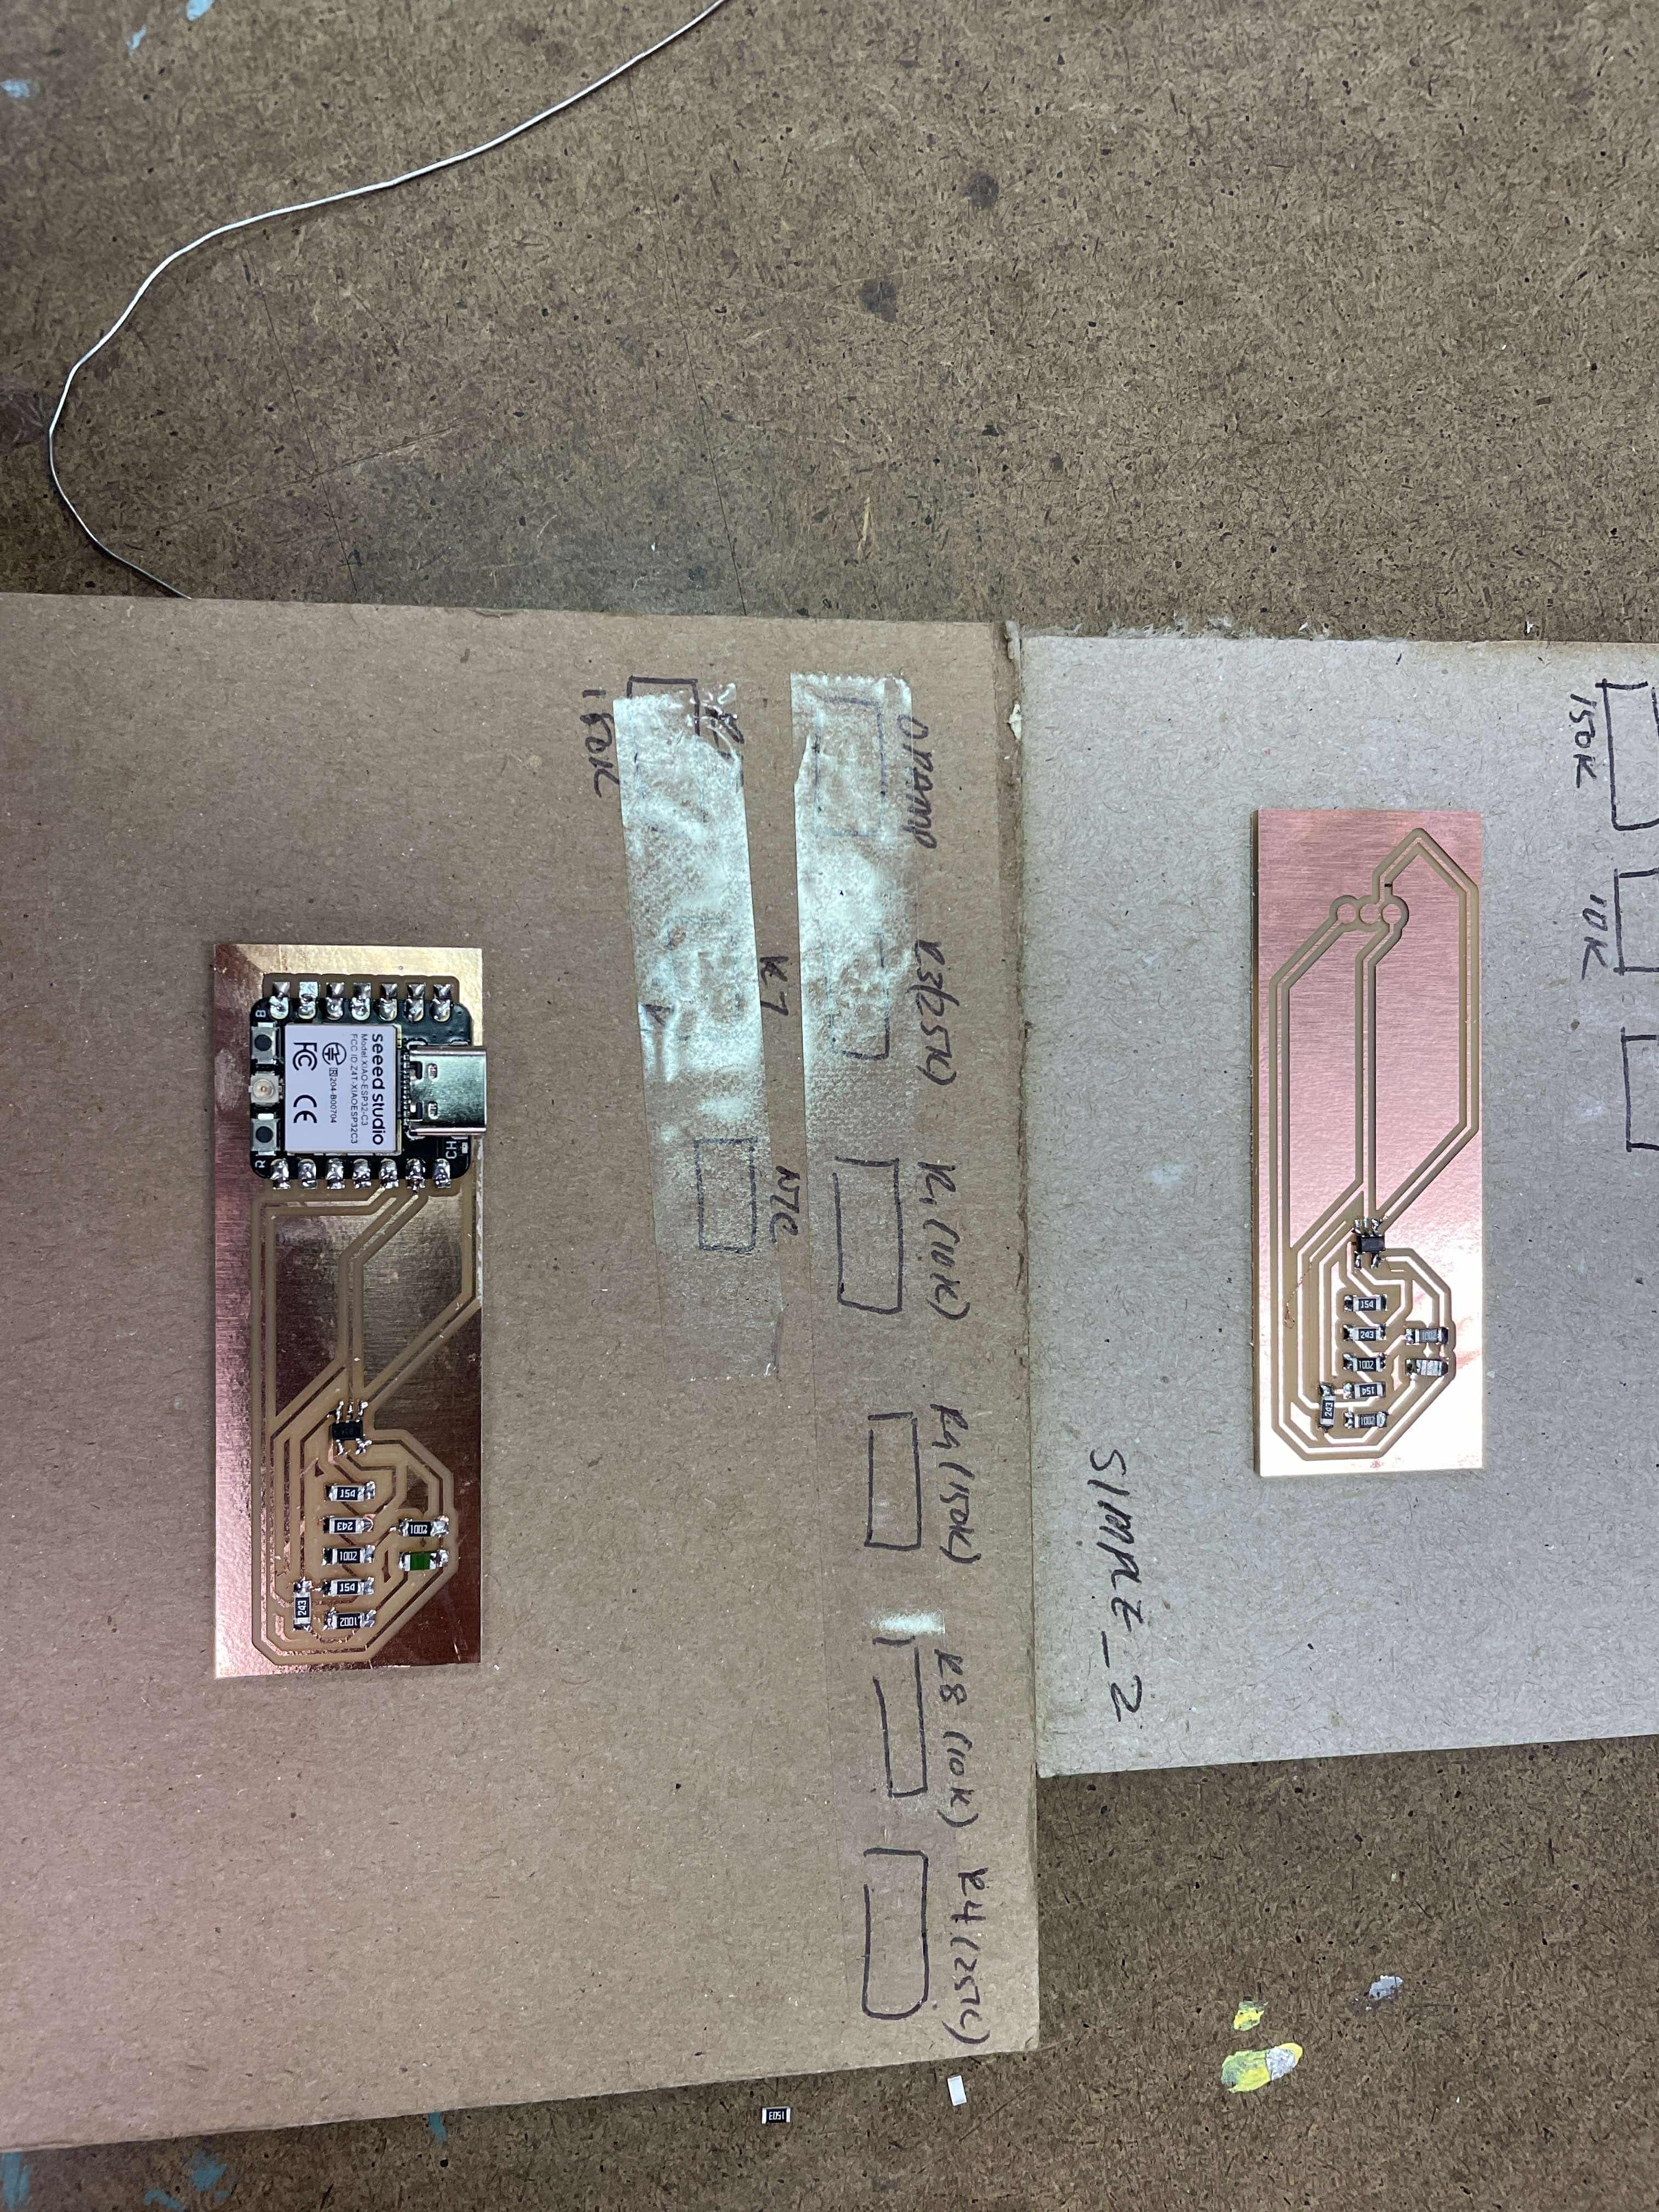
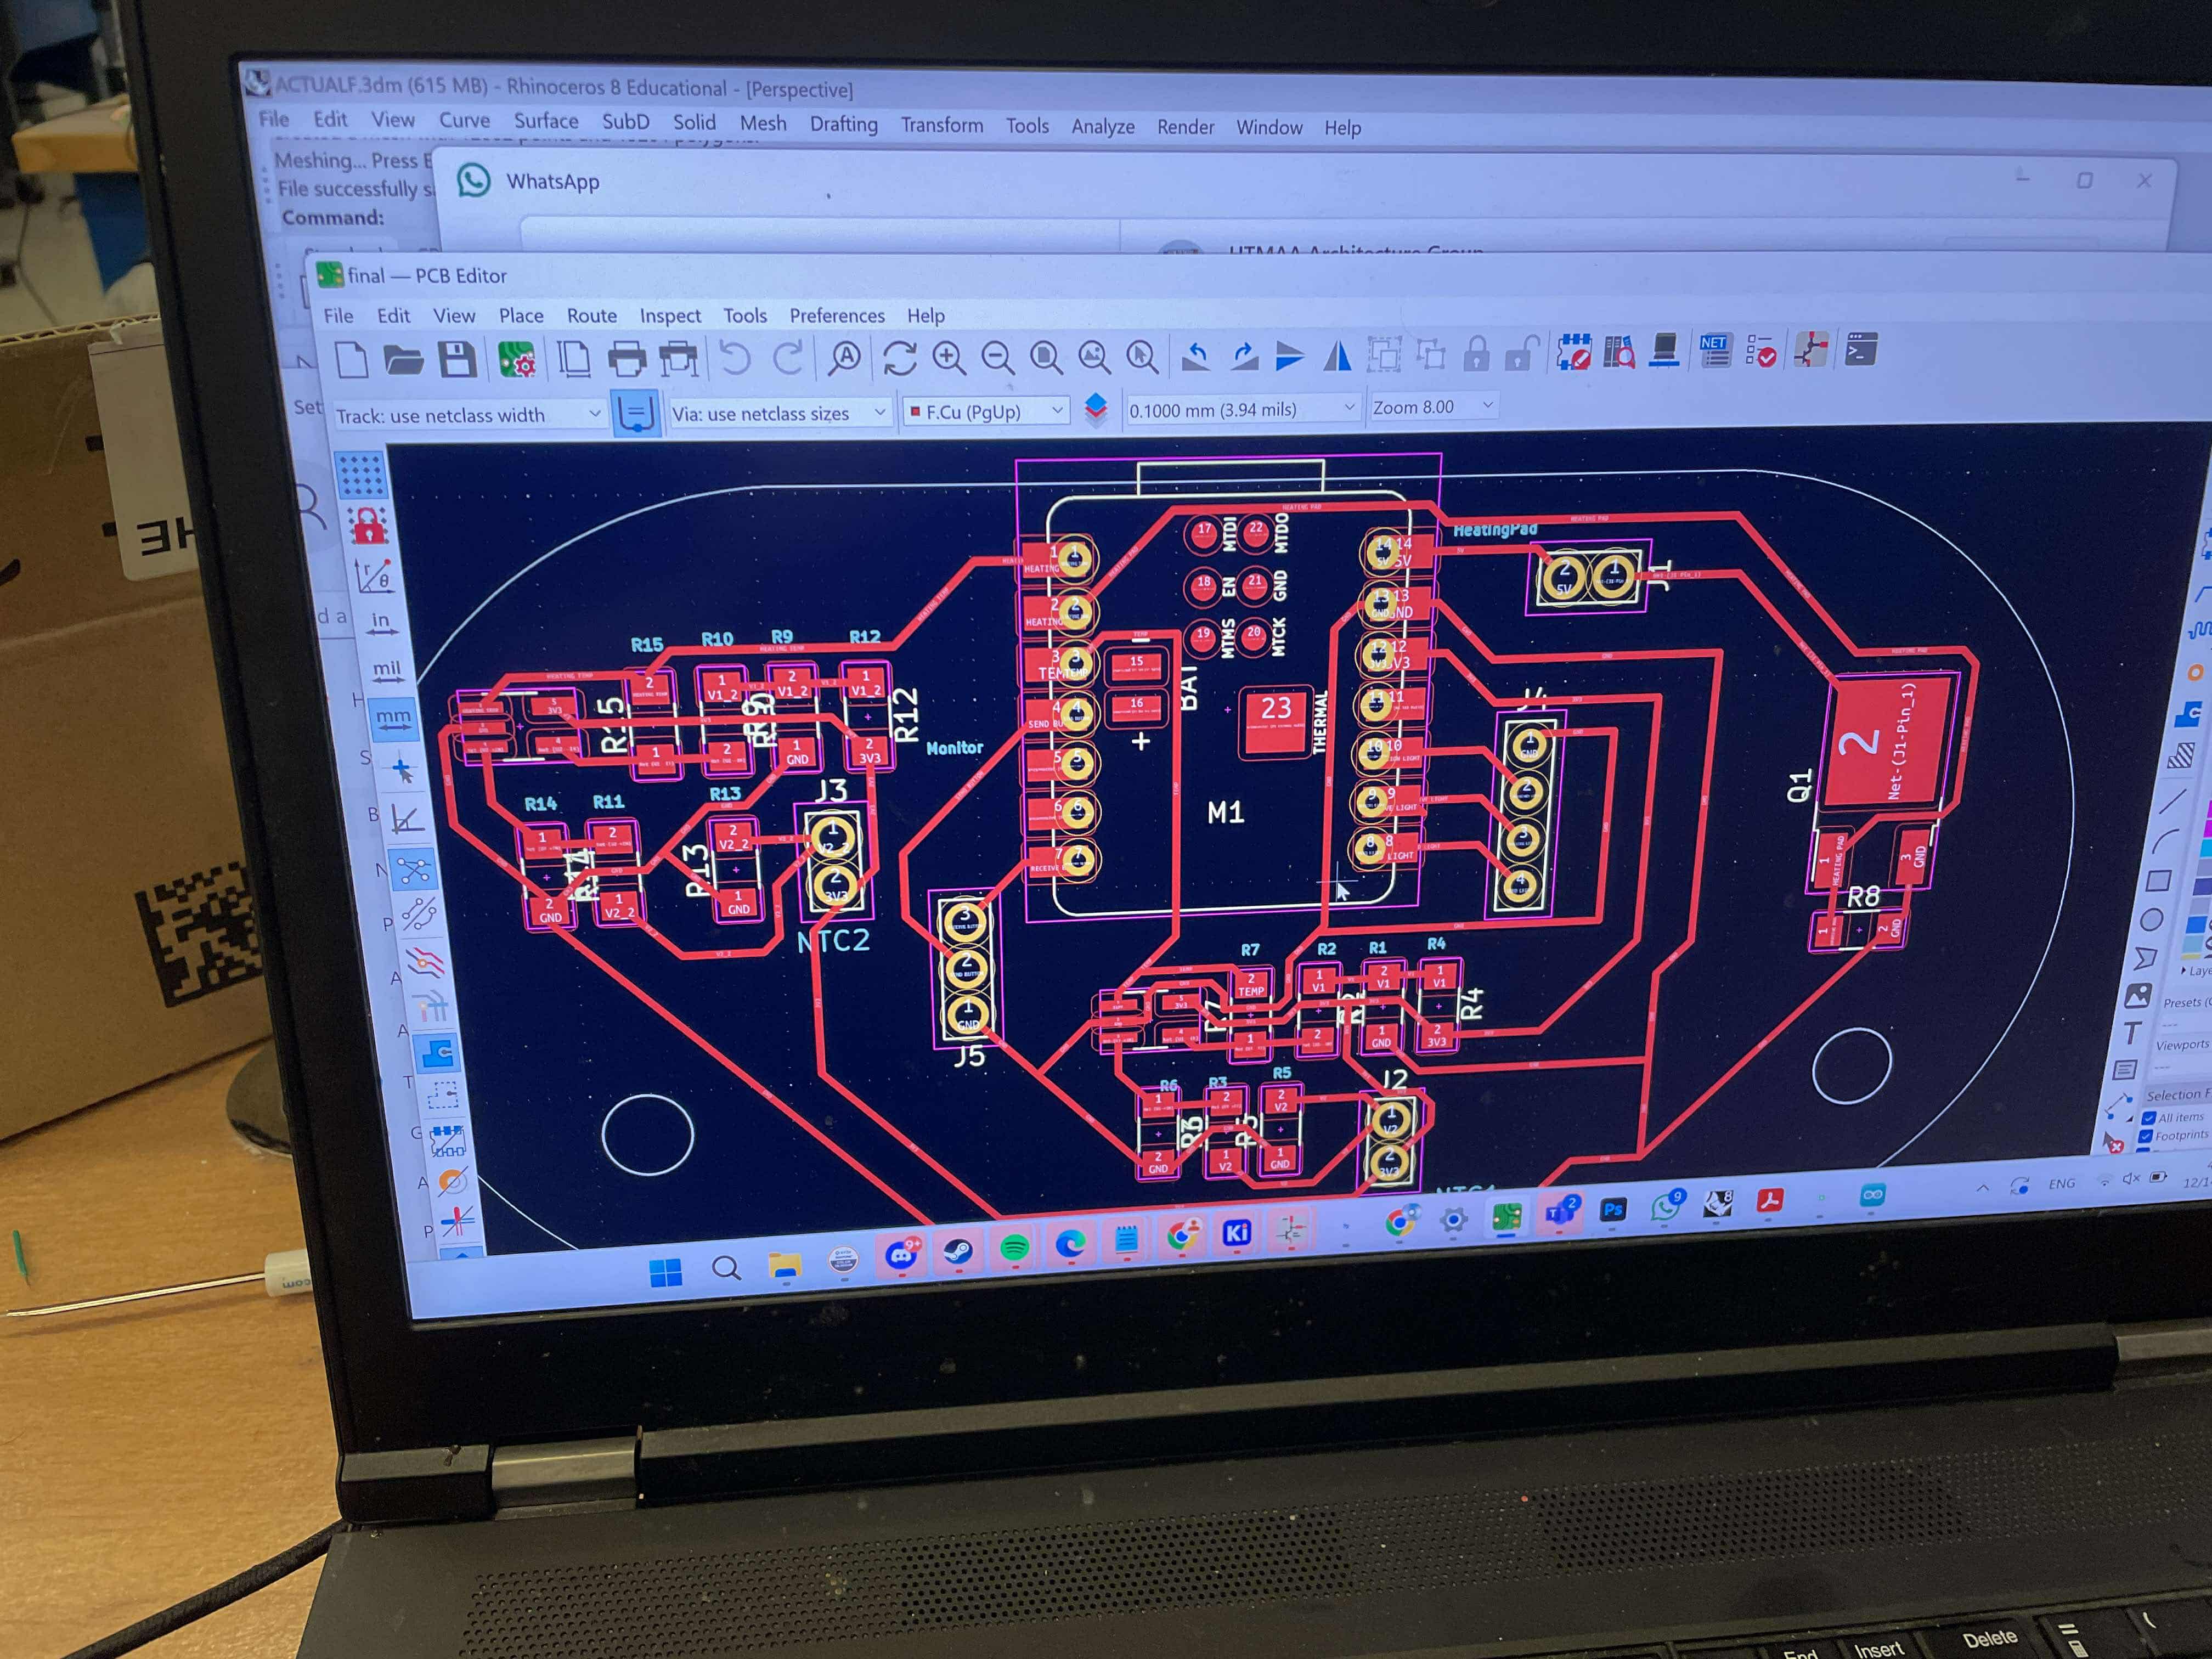
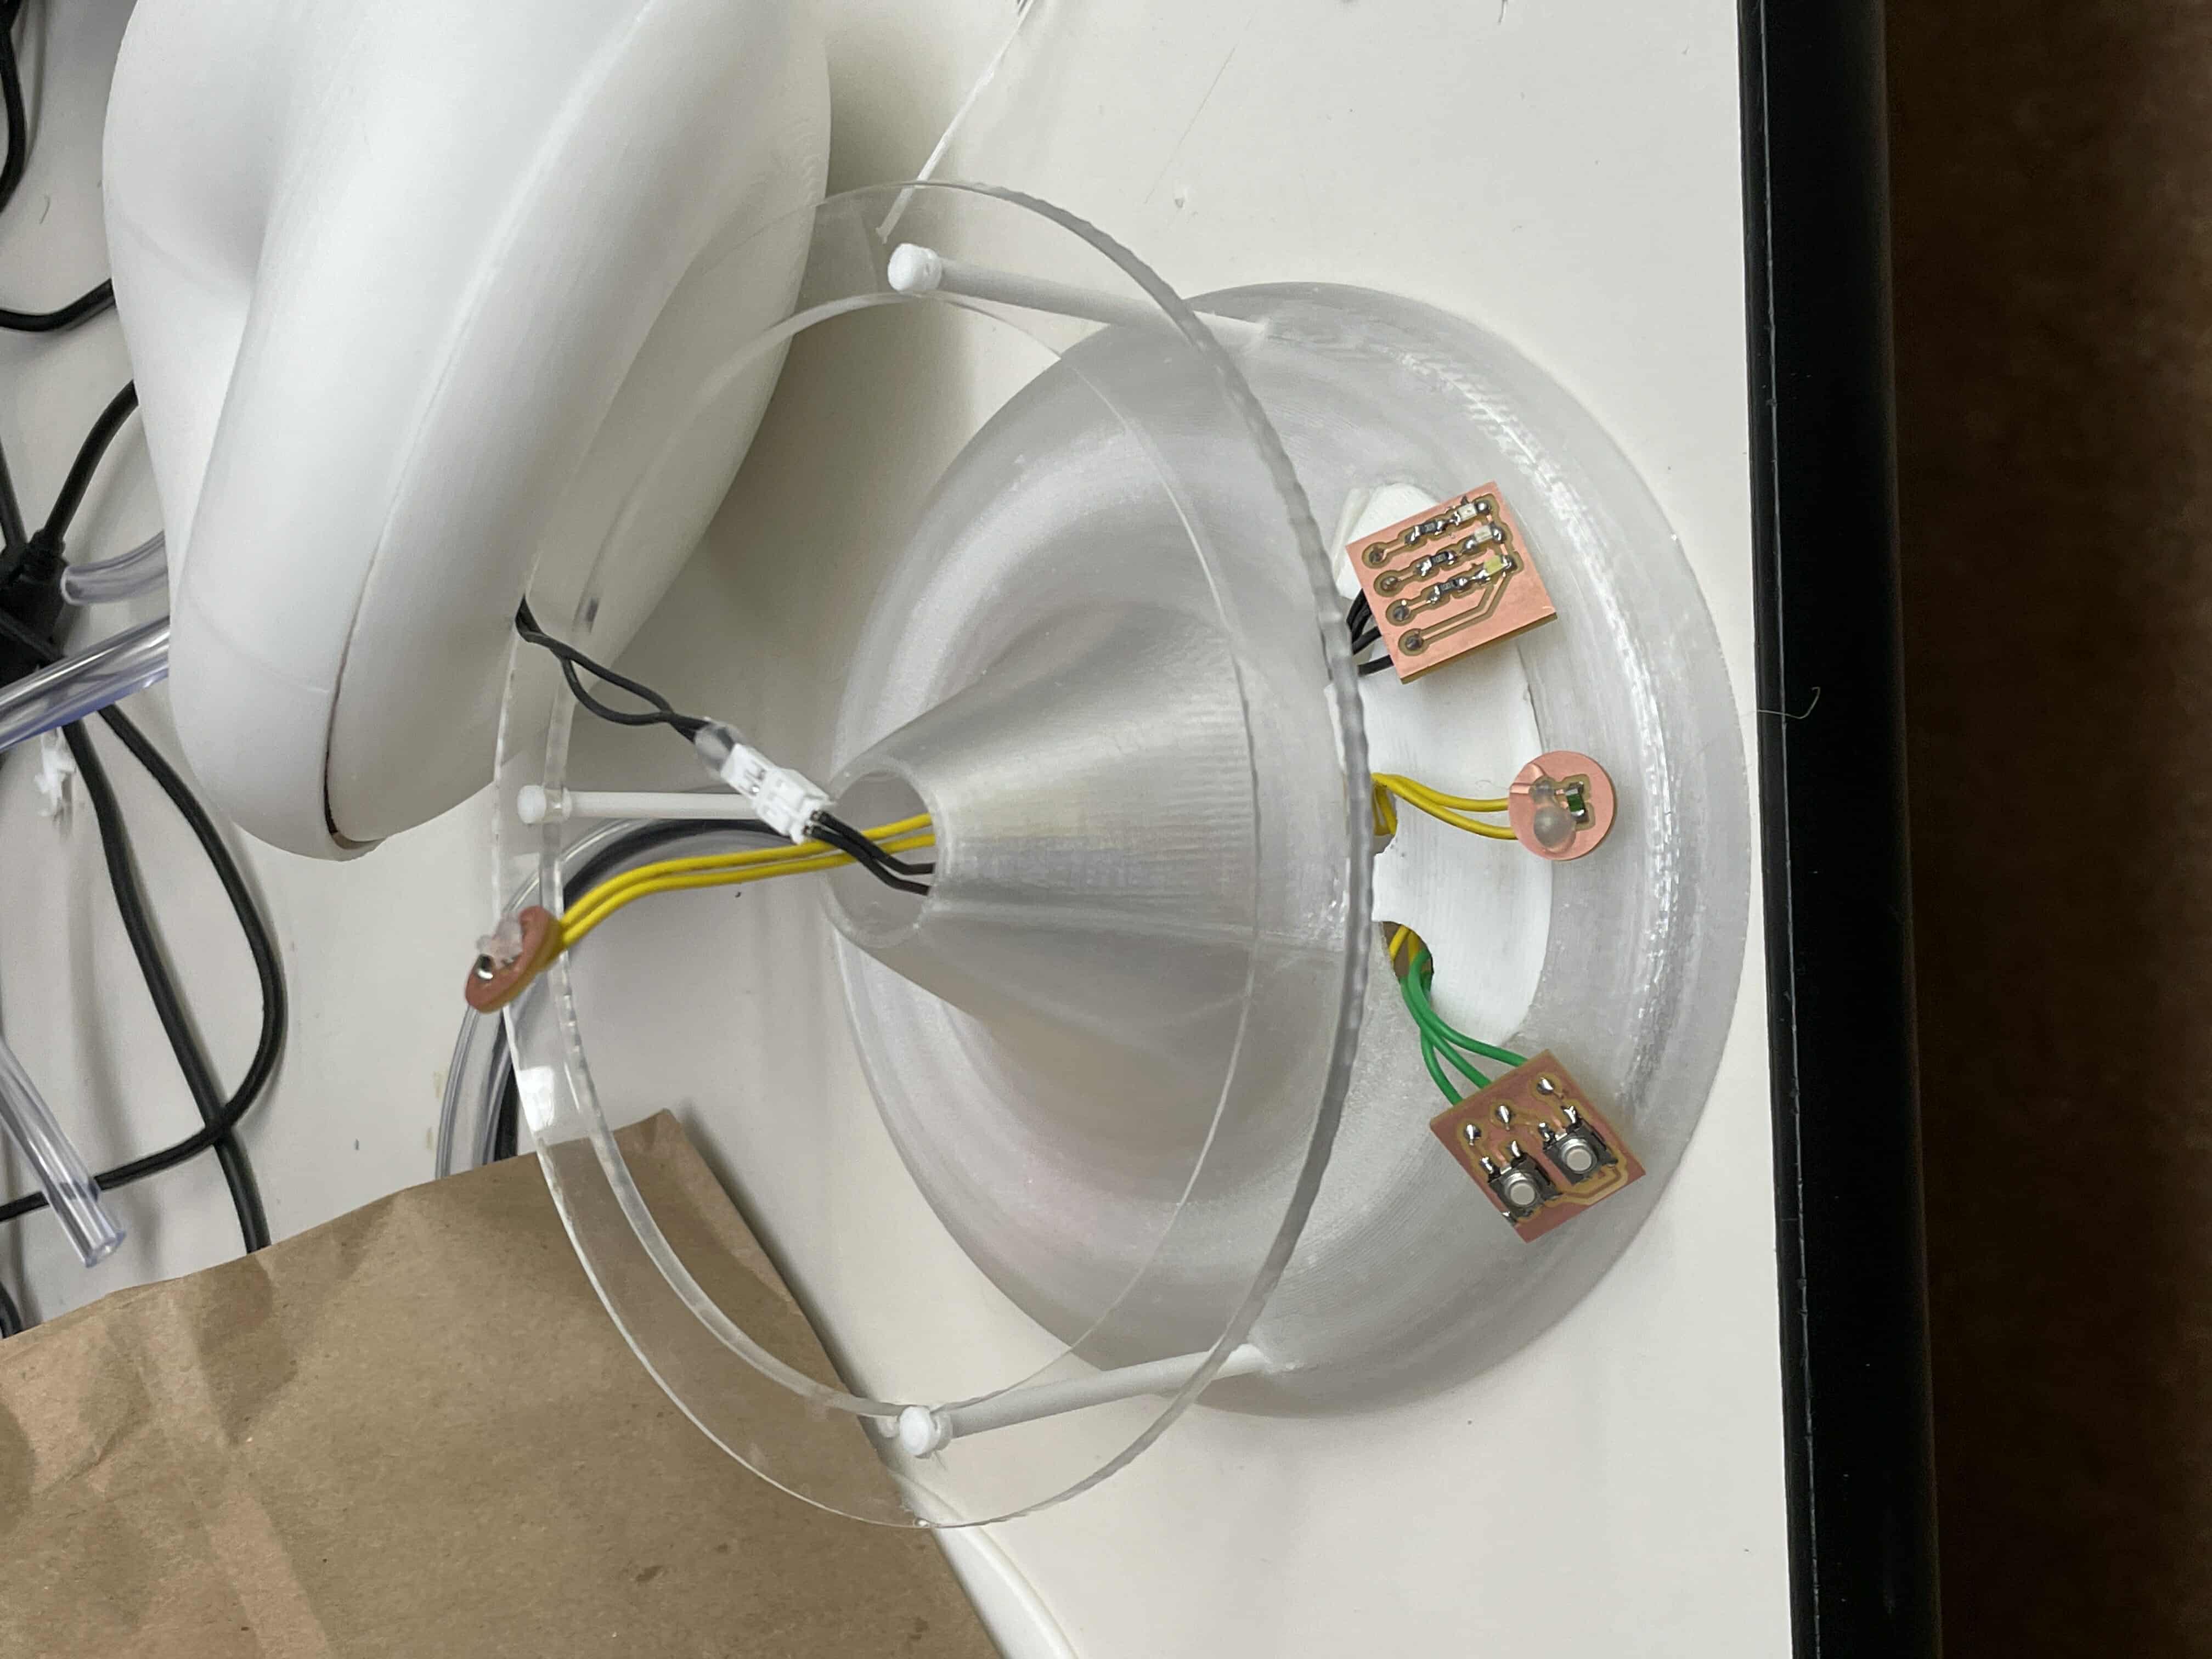
I tried designing another 2 ntc version of the board. It was not too difficult since it was just copy and pasting.
Quentin also recommended to take the ntc away from the board, so I designed a daughter board that can be accessed away from the mother board.
I soon realized one of the output was not being read, and was able to troubleshoot via helpful users of the internet. I connected the output to non-analog pin and it prevented the output from being read. I do not have a photo, but I was able to use jumpwire to connect the line to an analog pin of xiao esp32c3.
I soon realized one of the output was not being read, and was able to troubleshoot via helpful users of the internet. I connected the output to non-analog pin and it prevented the output from being read. I do not have a photo, but I was able to use jumpwire to connect the line to an analog pin of xiao esp32c3.
December 7th, 2024

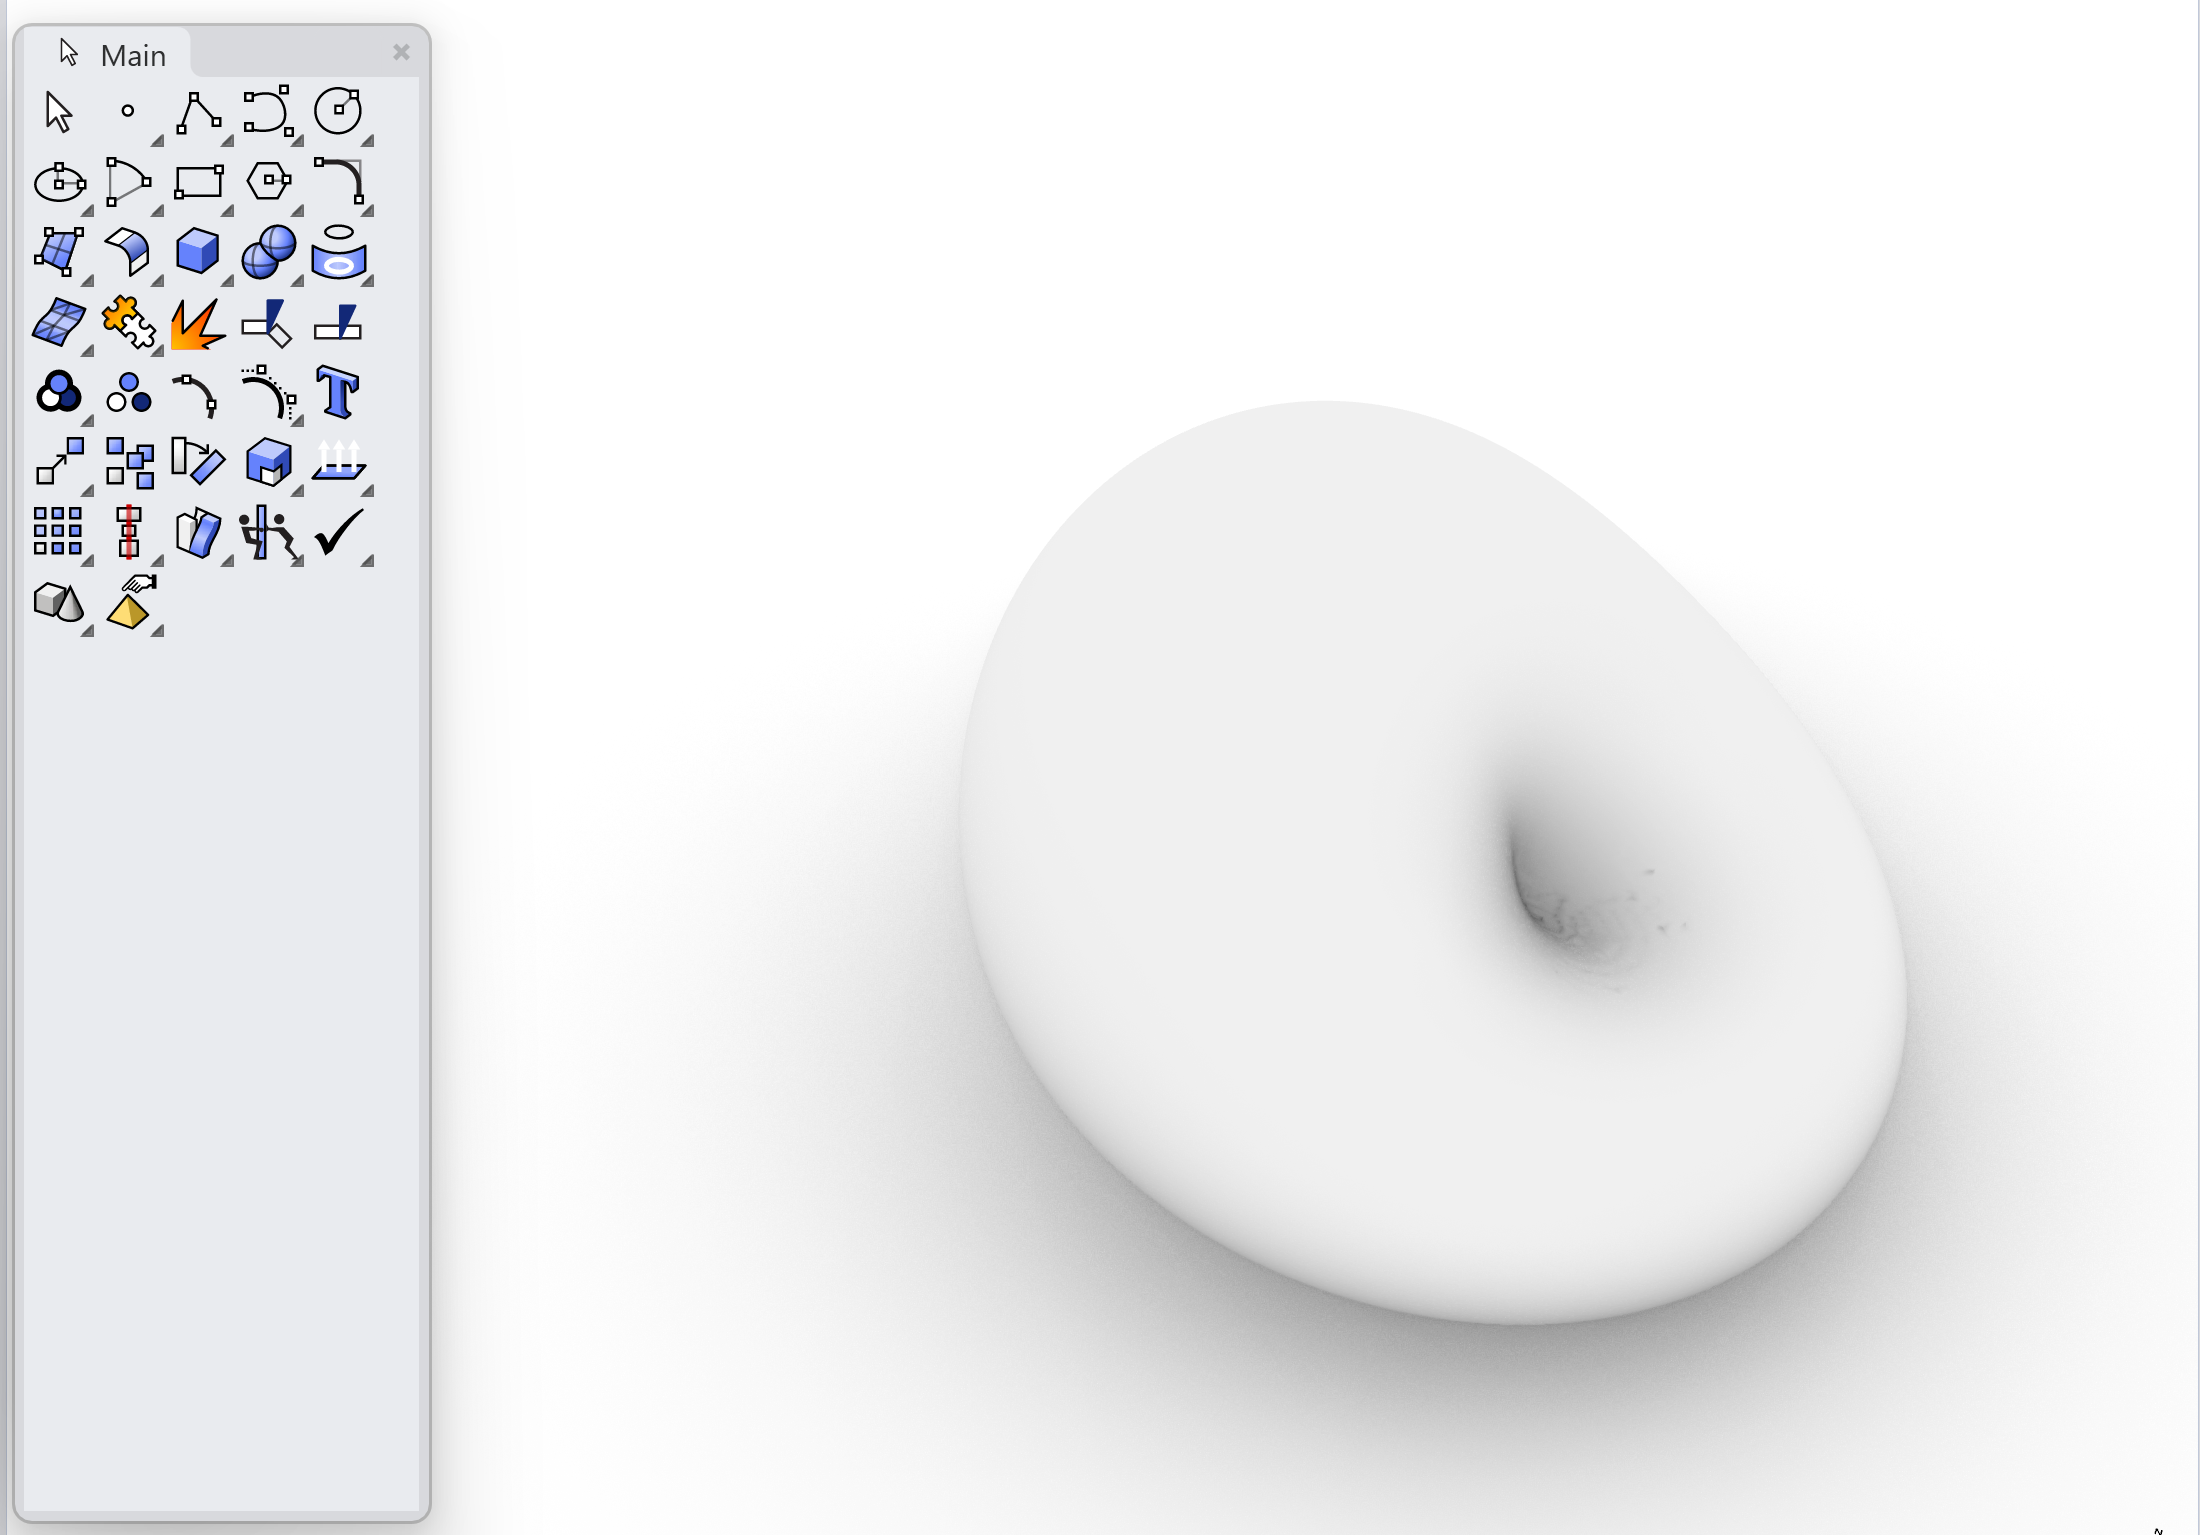
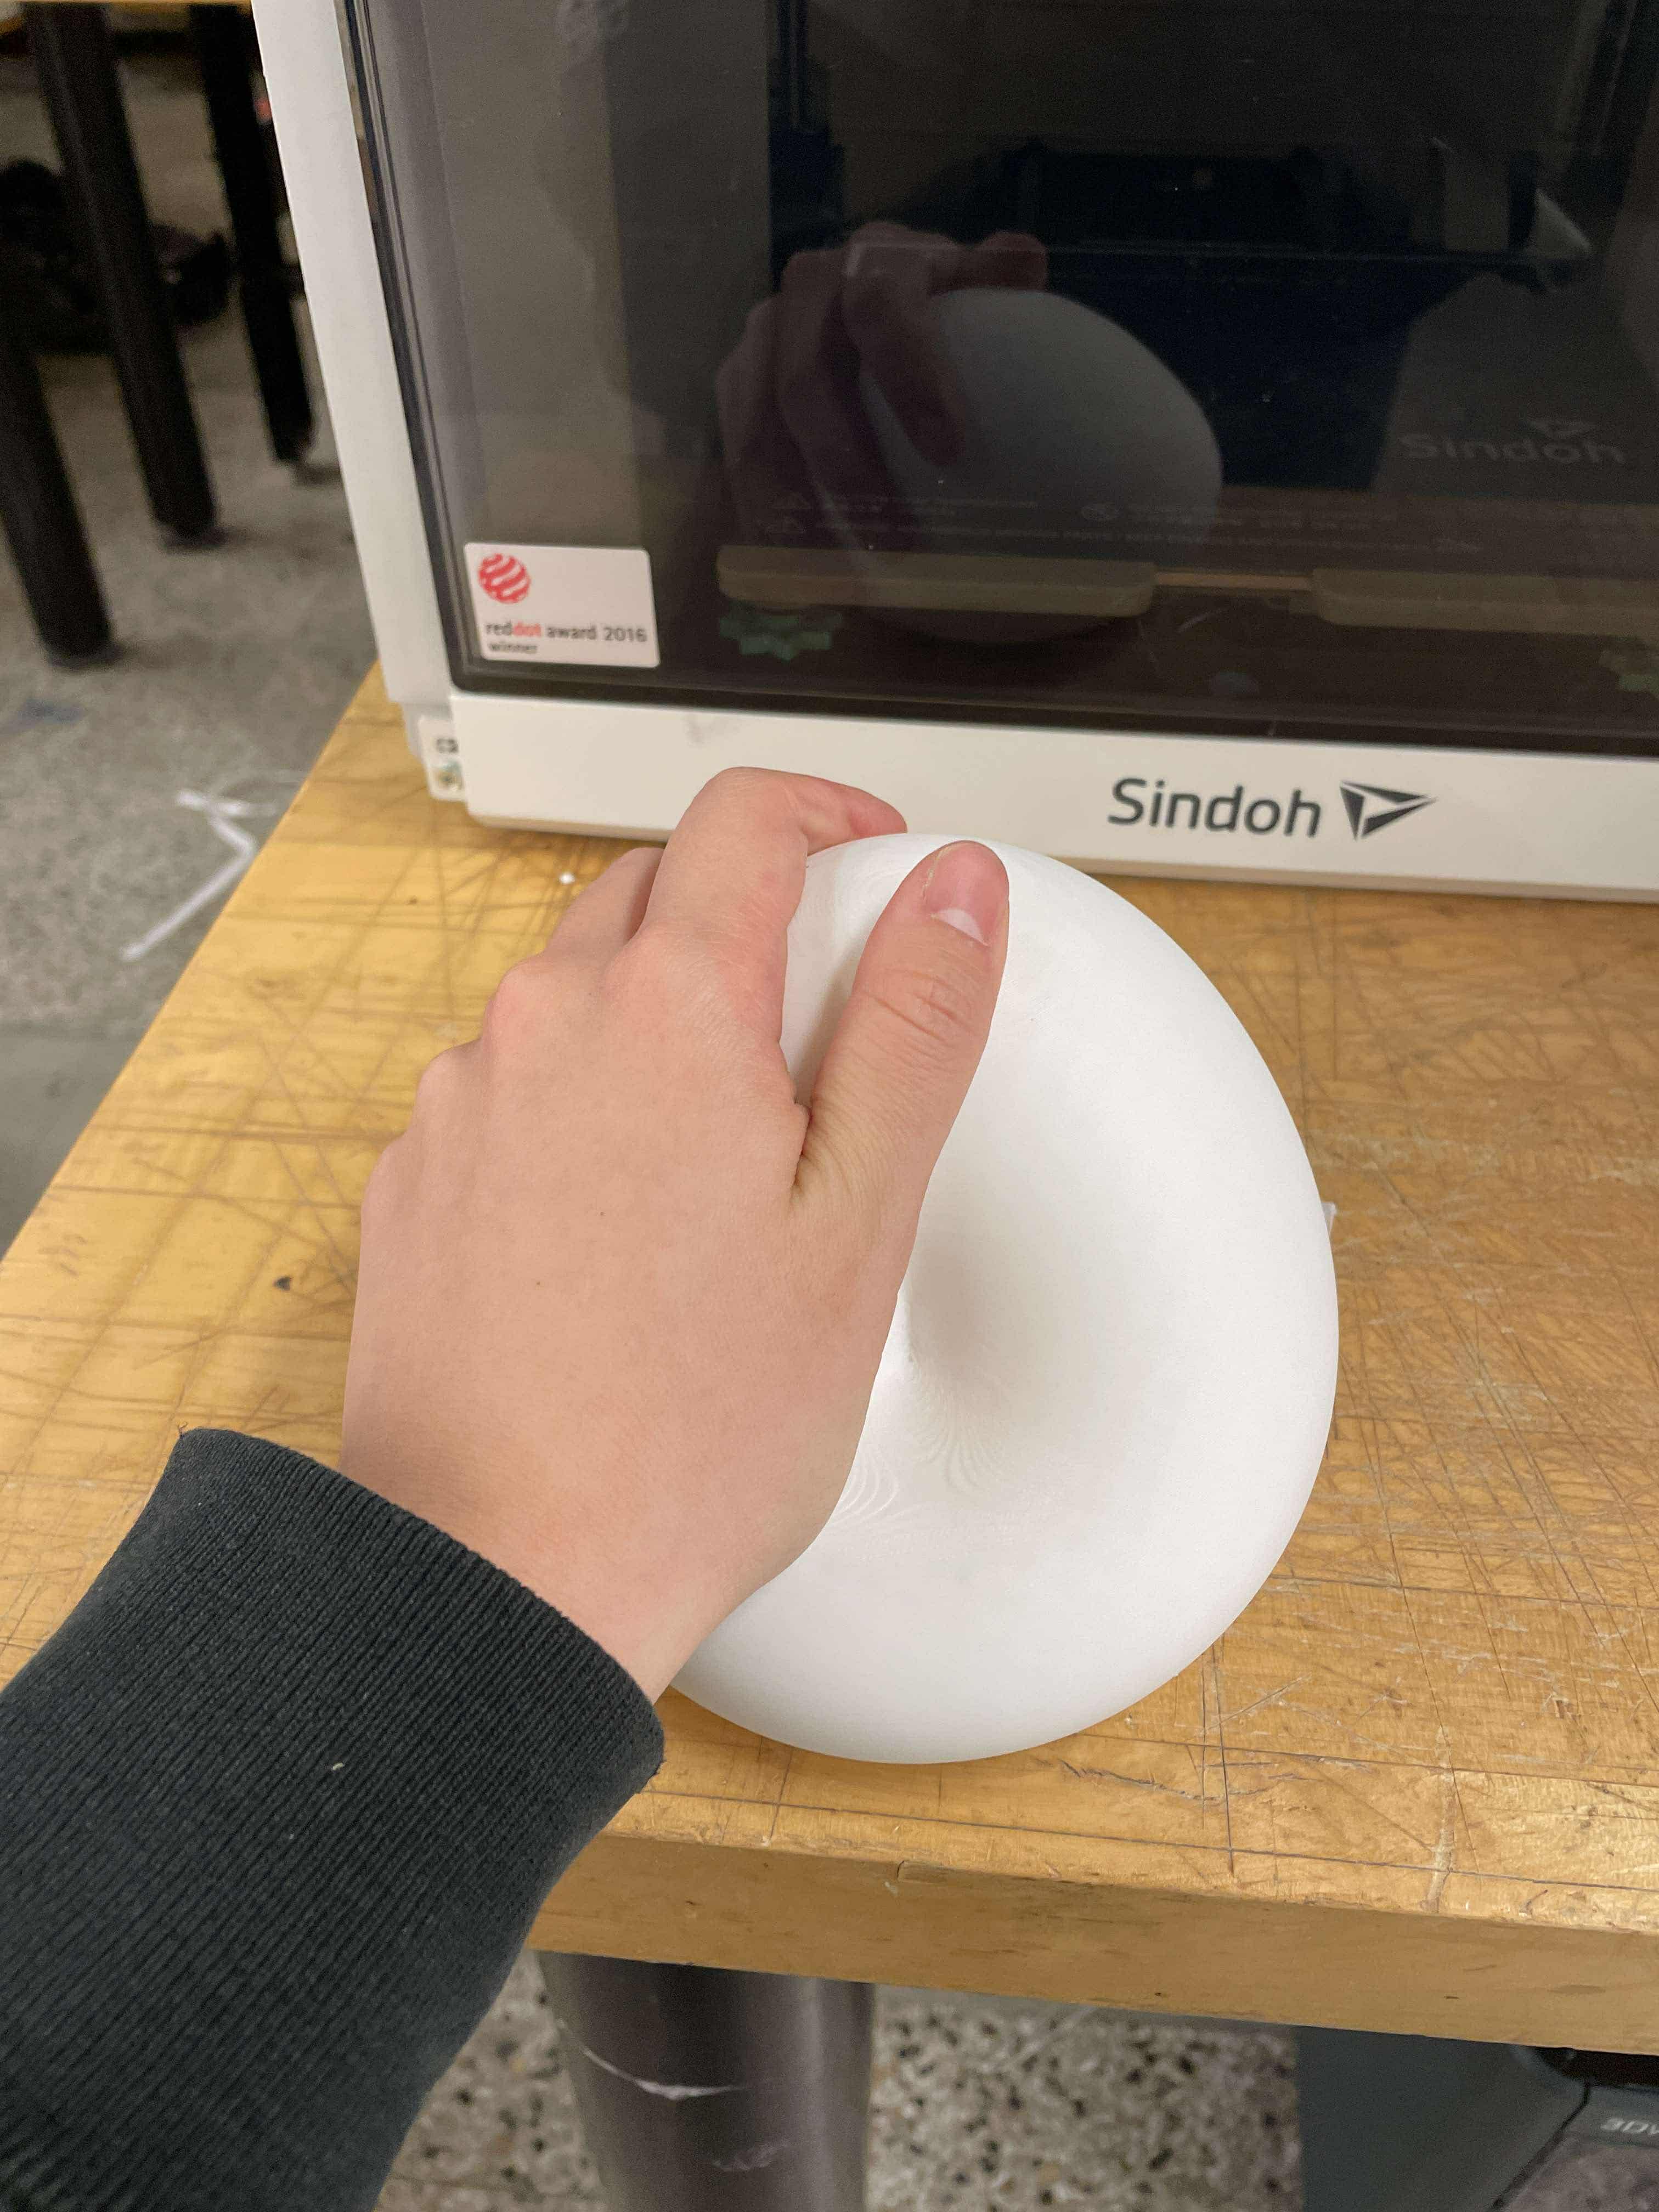
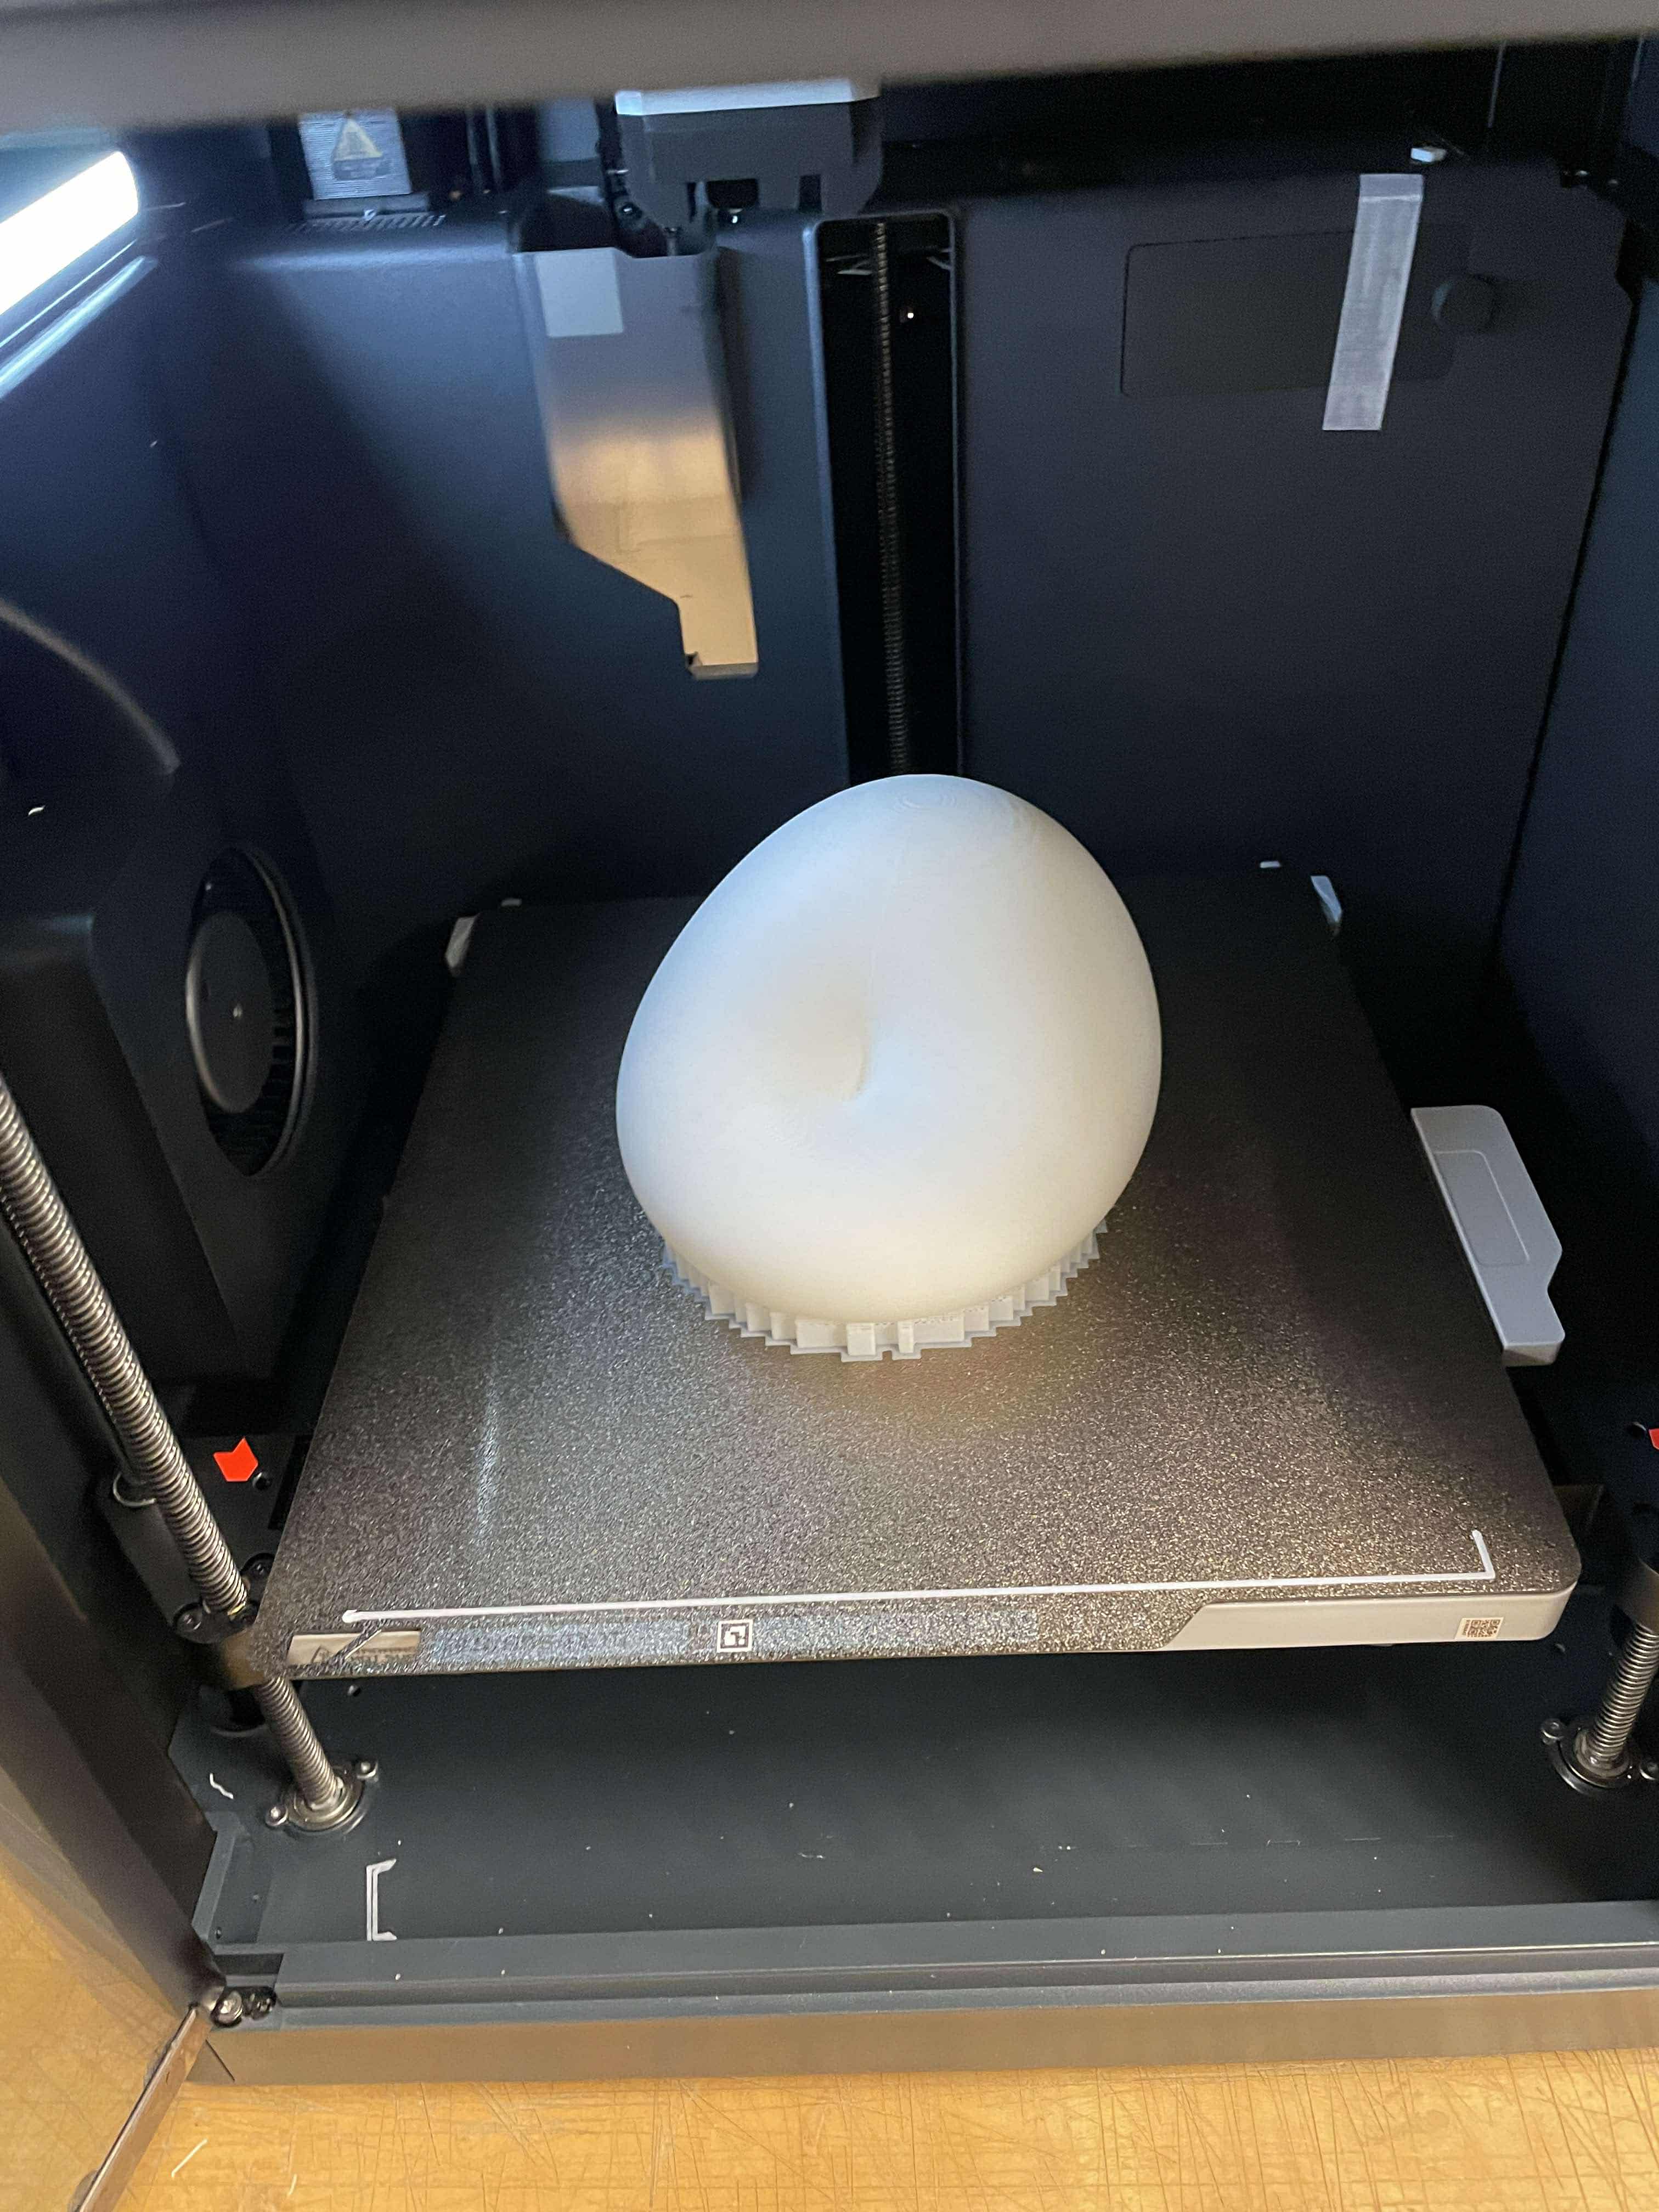
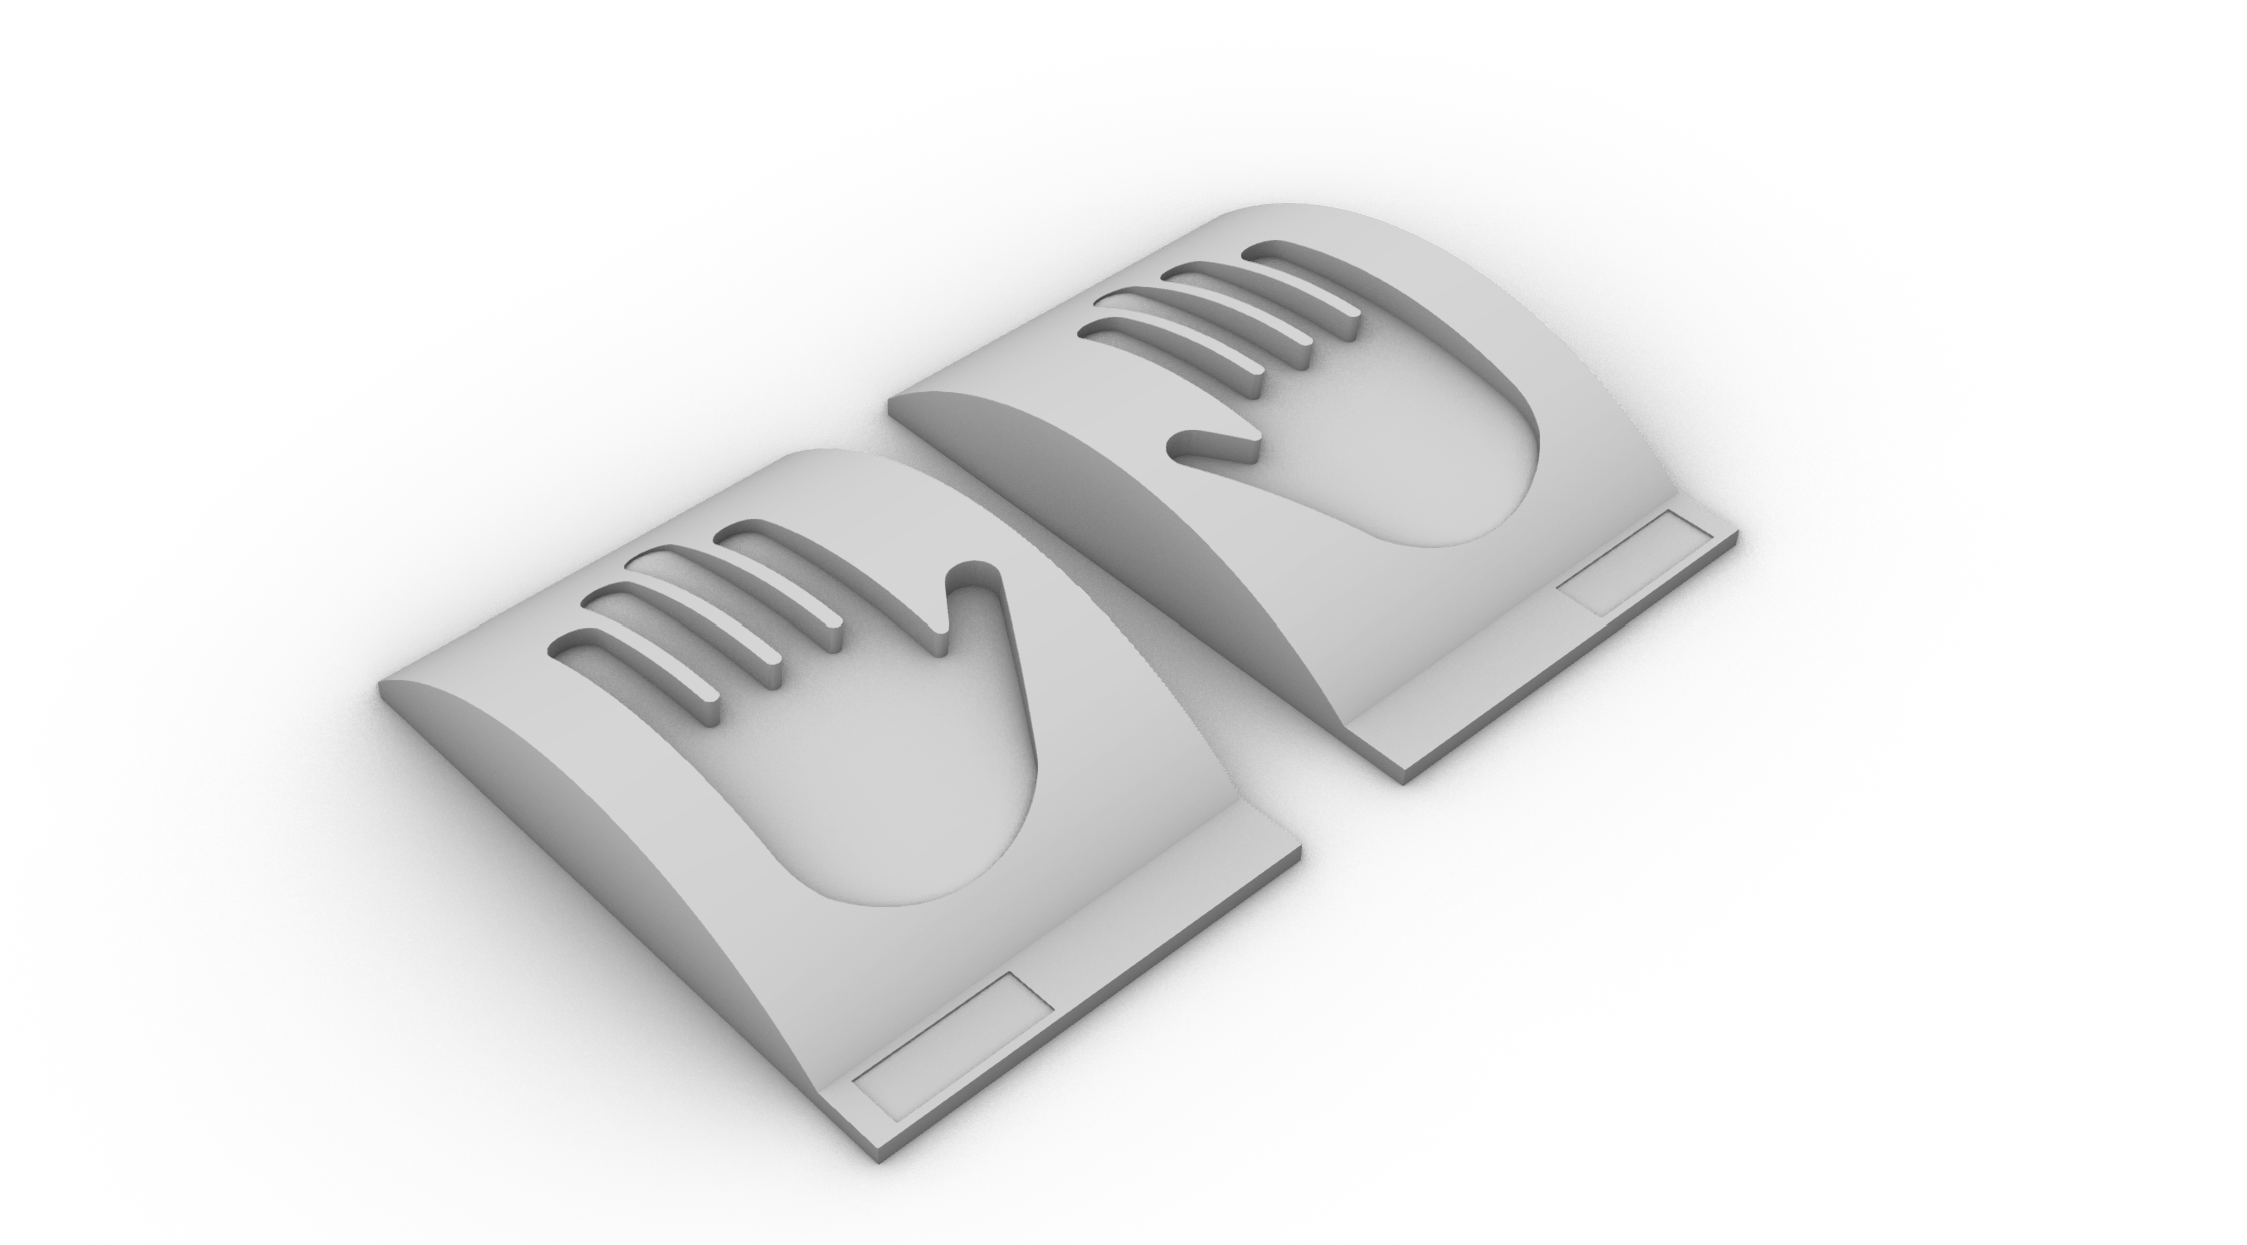
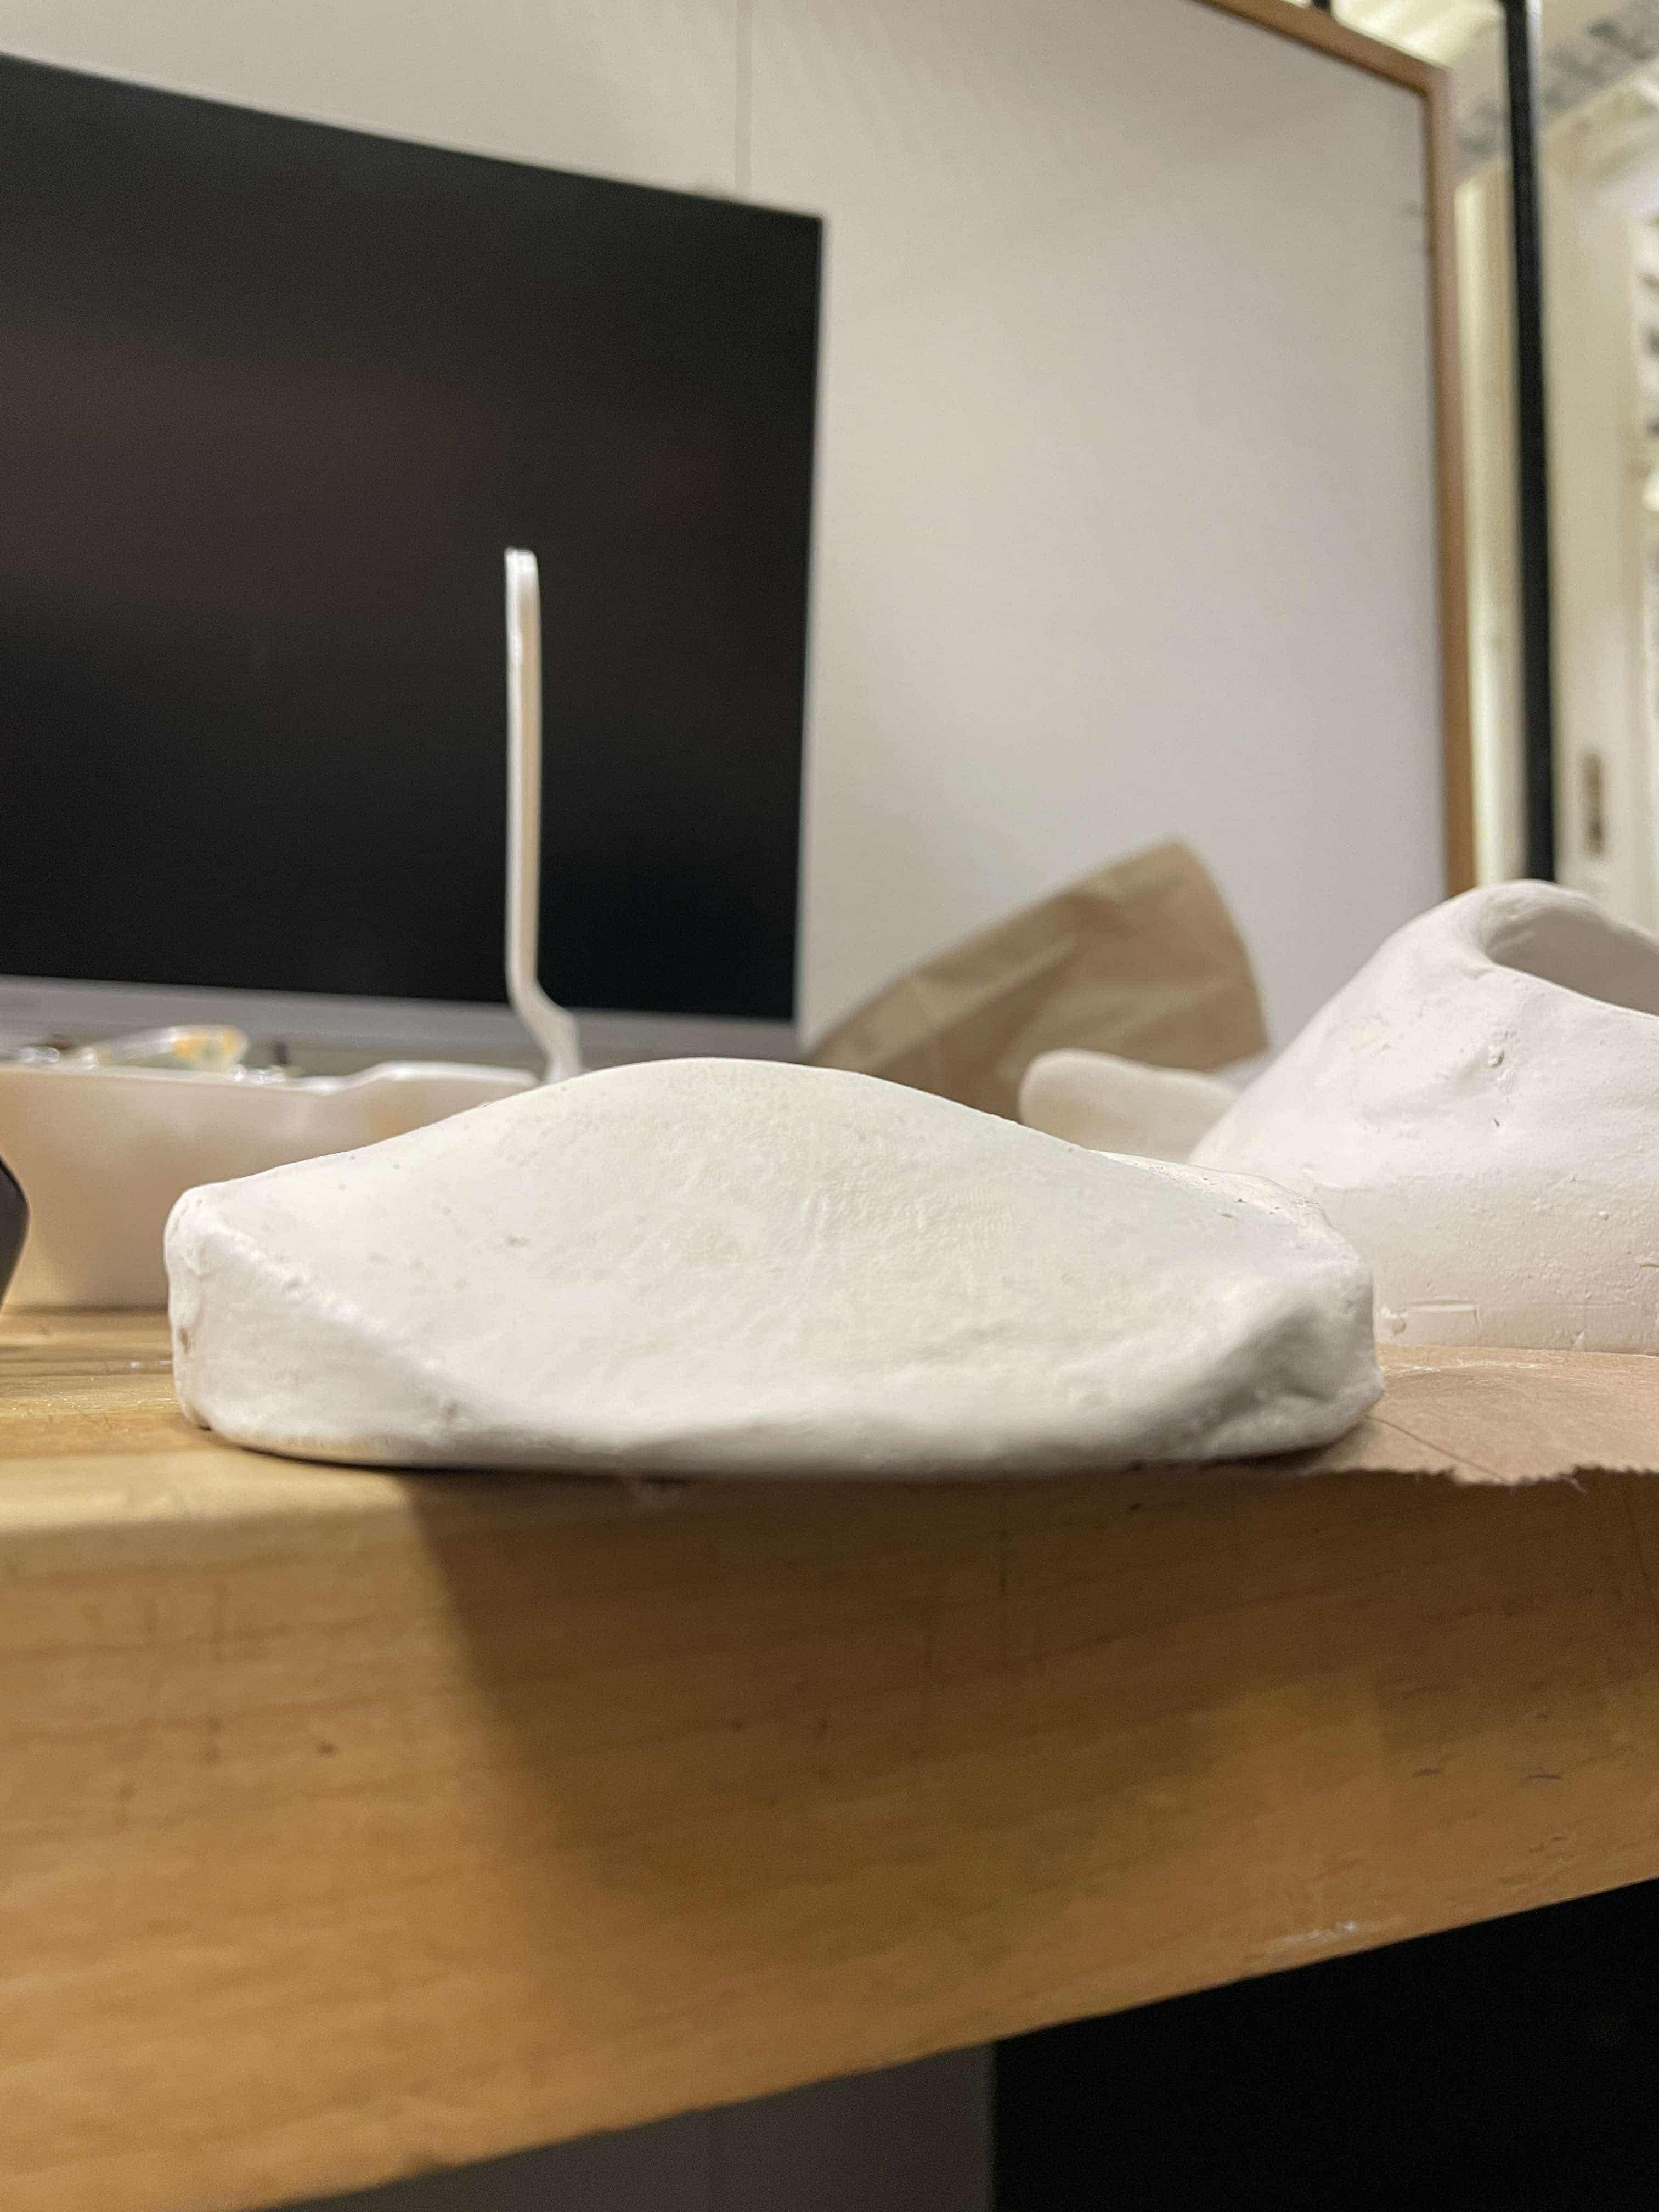
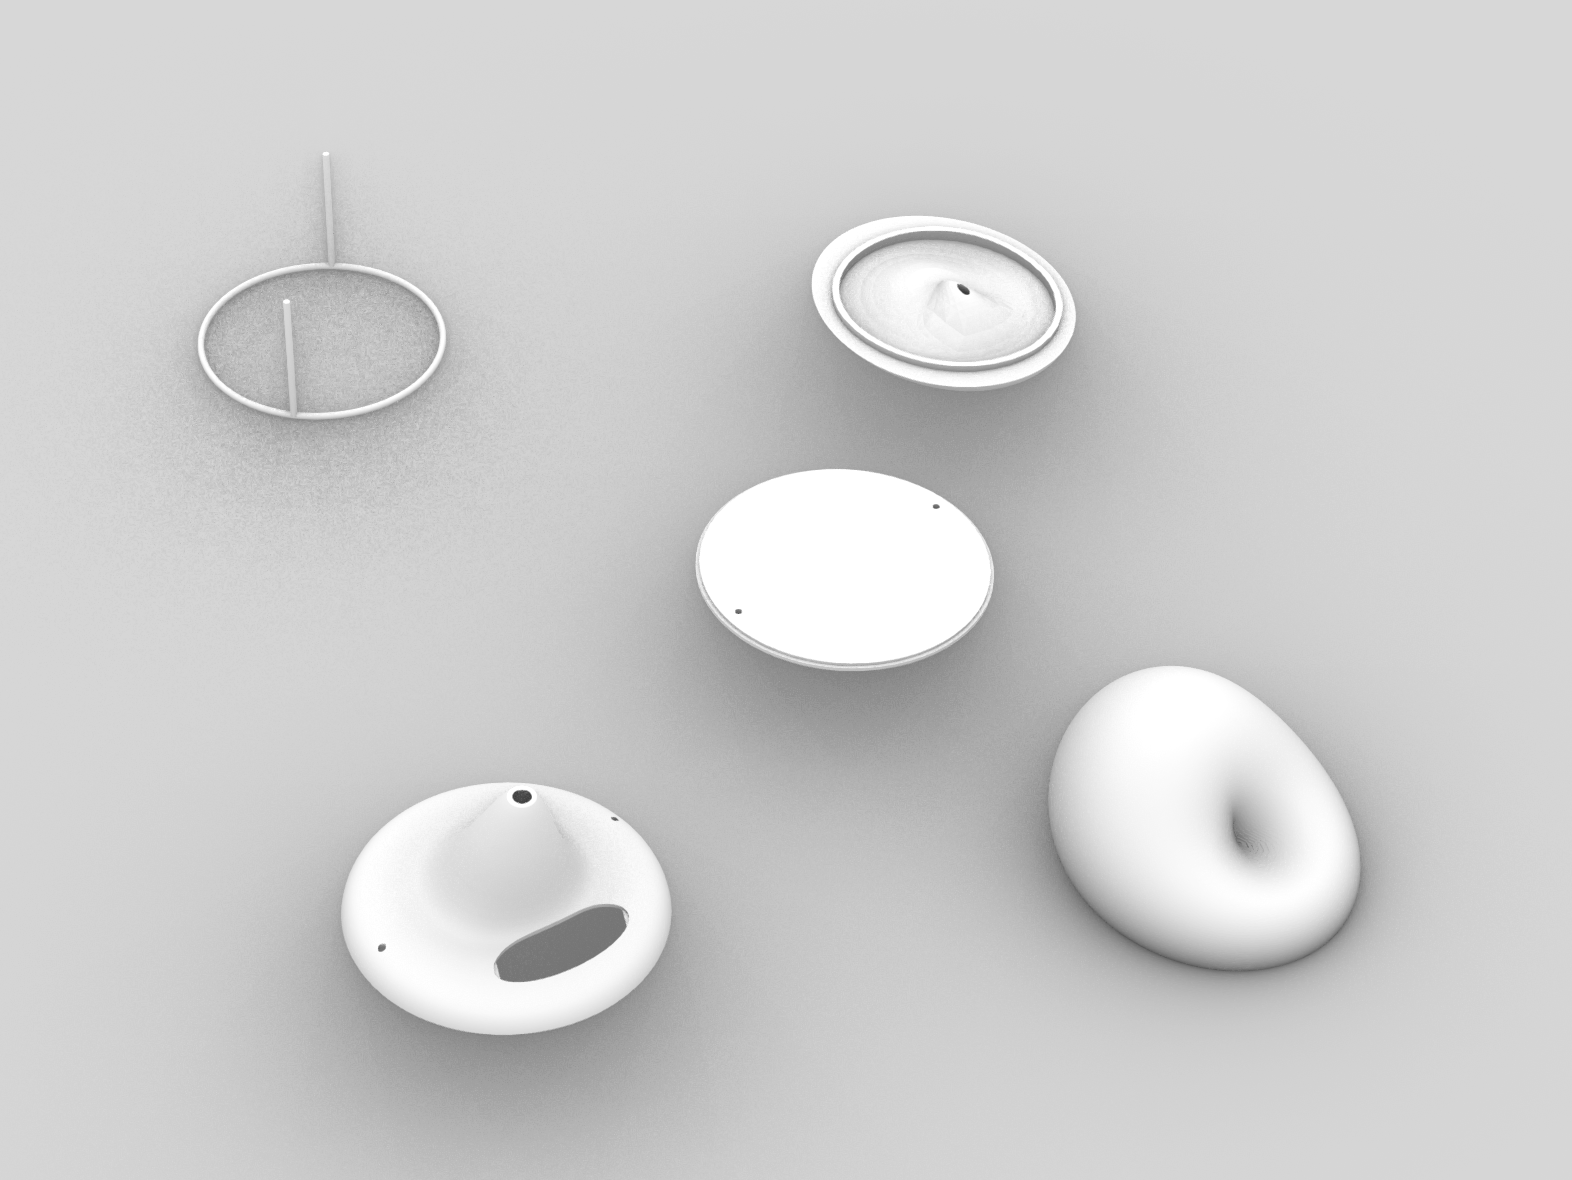
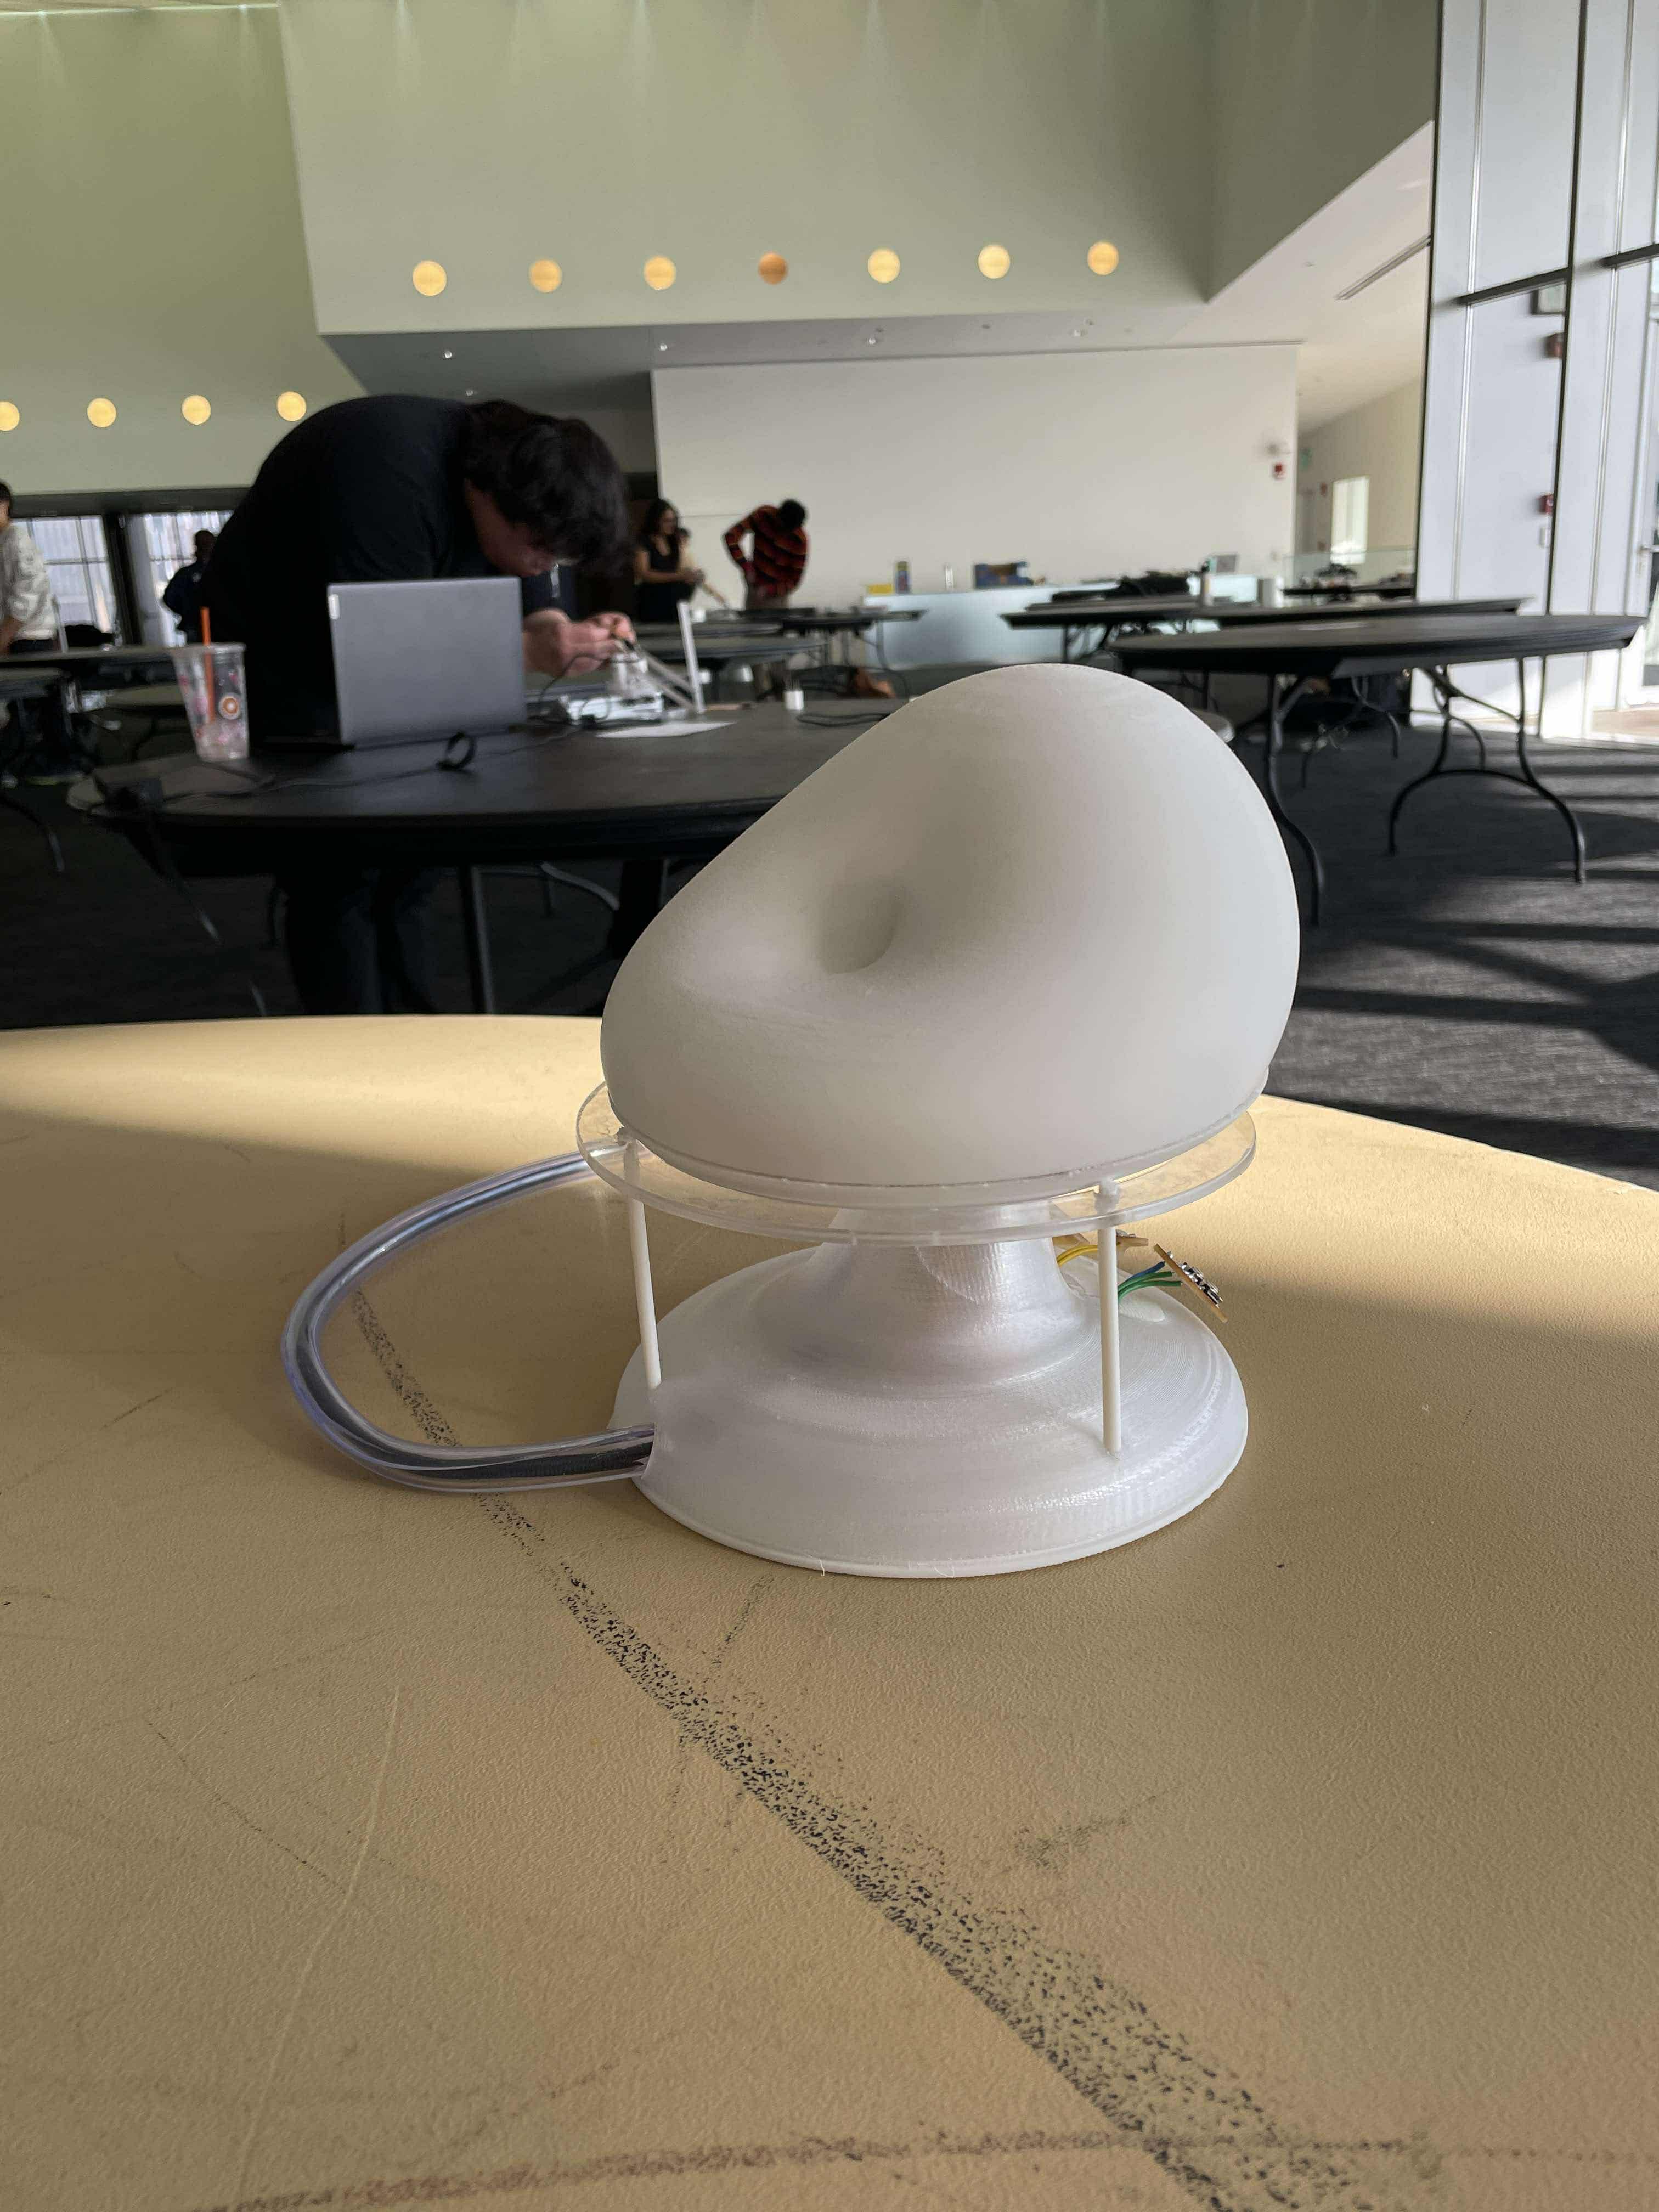
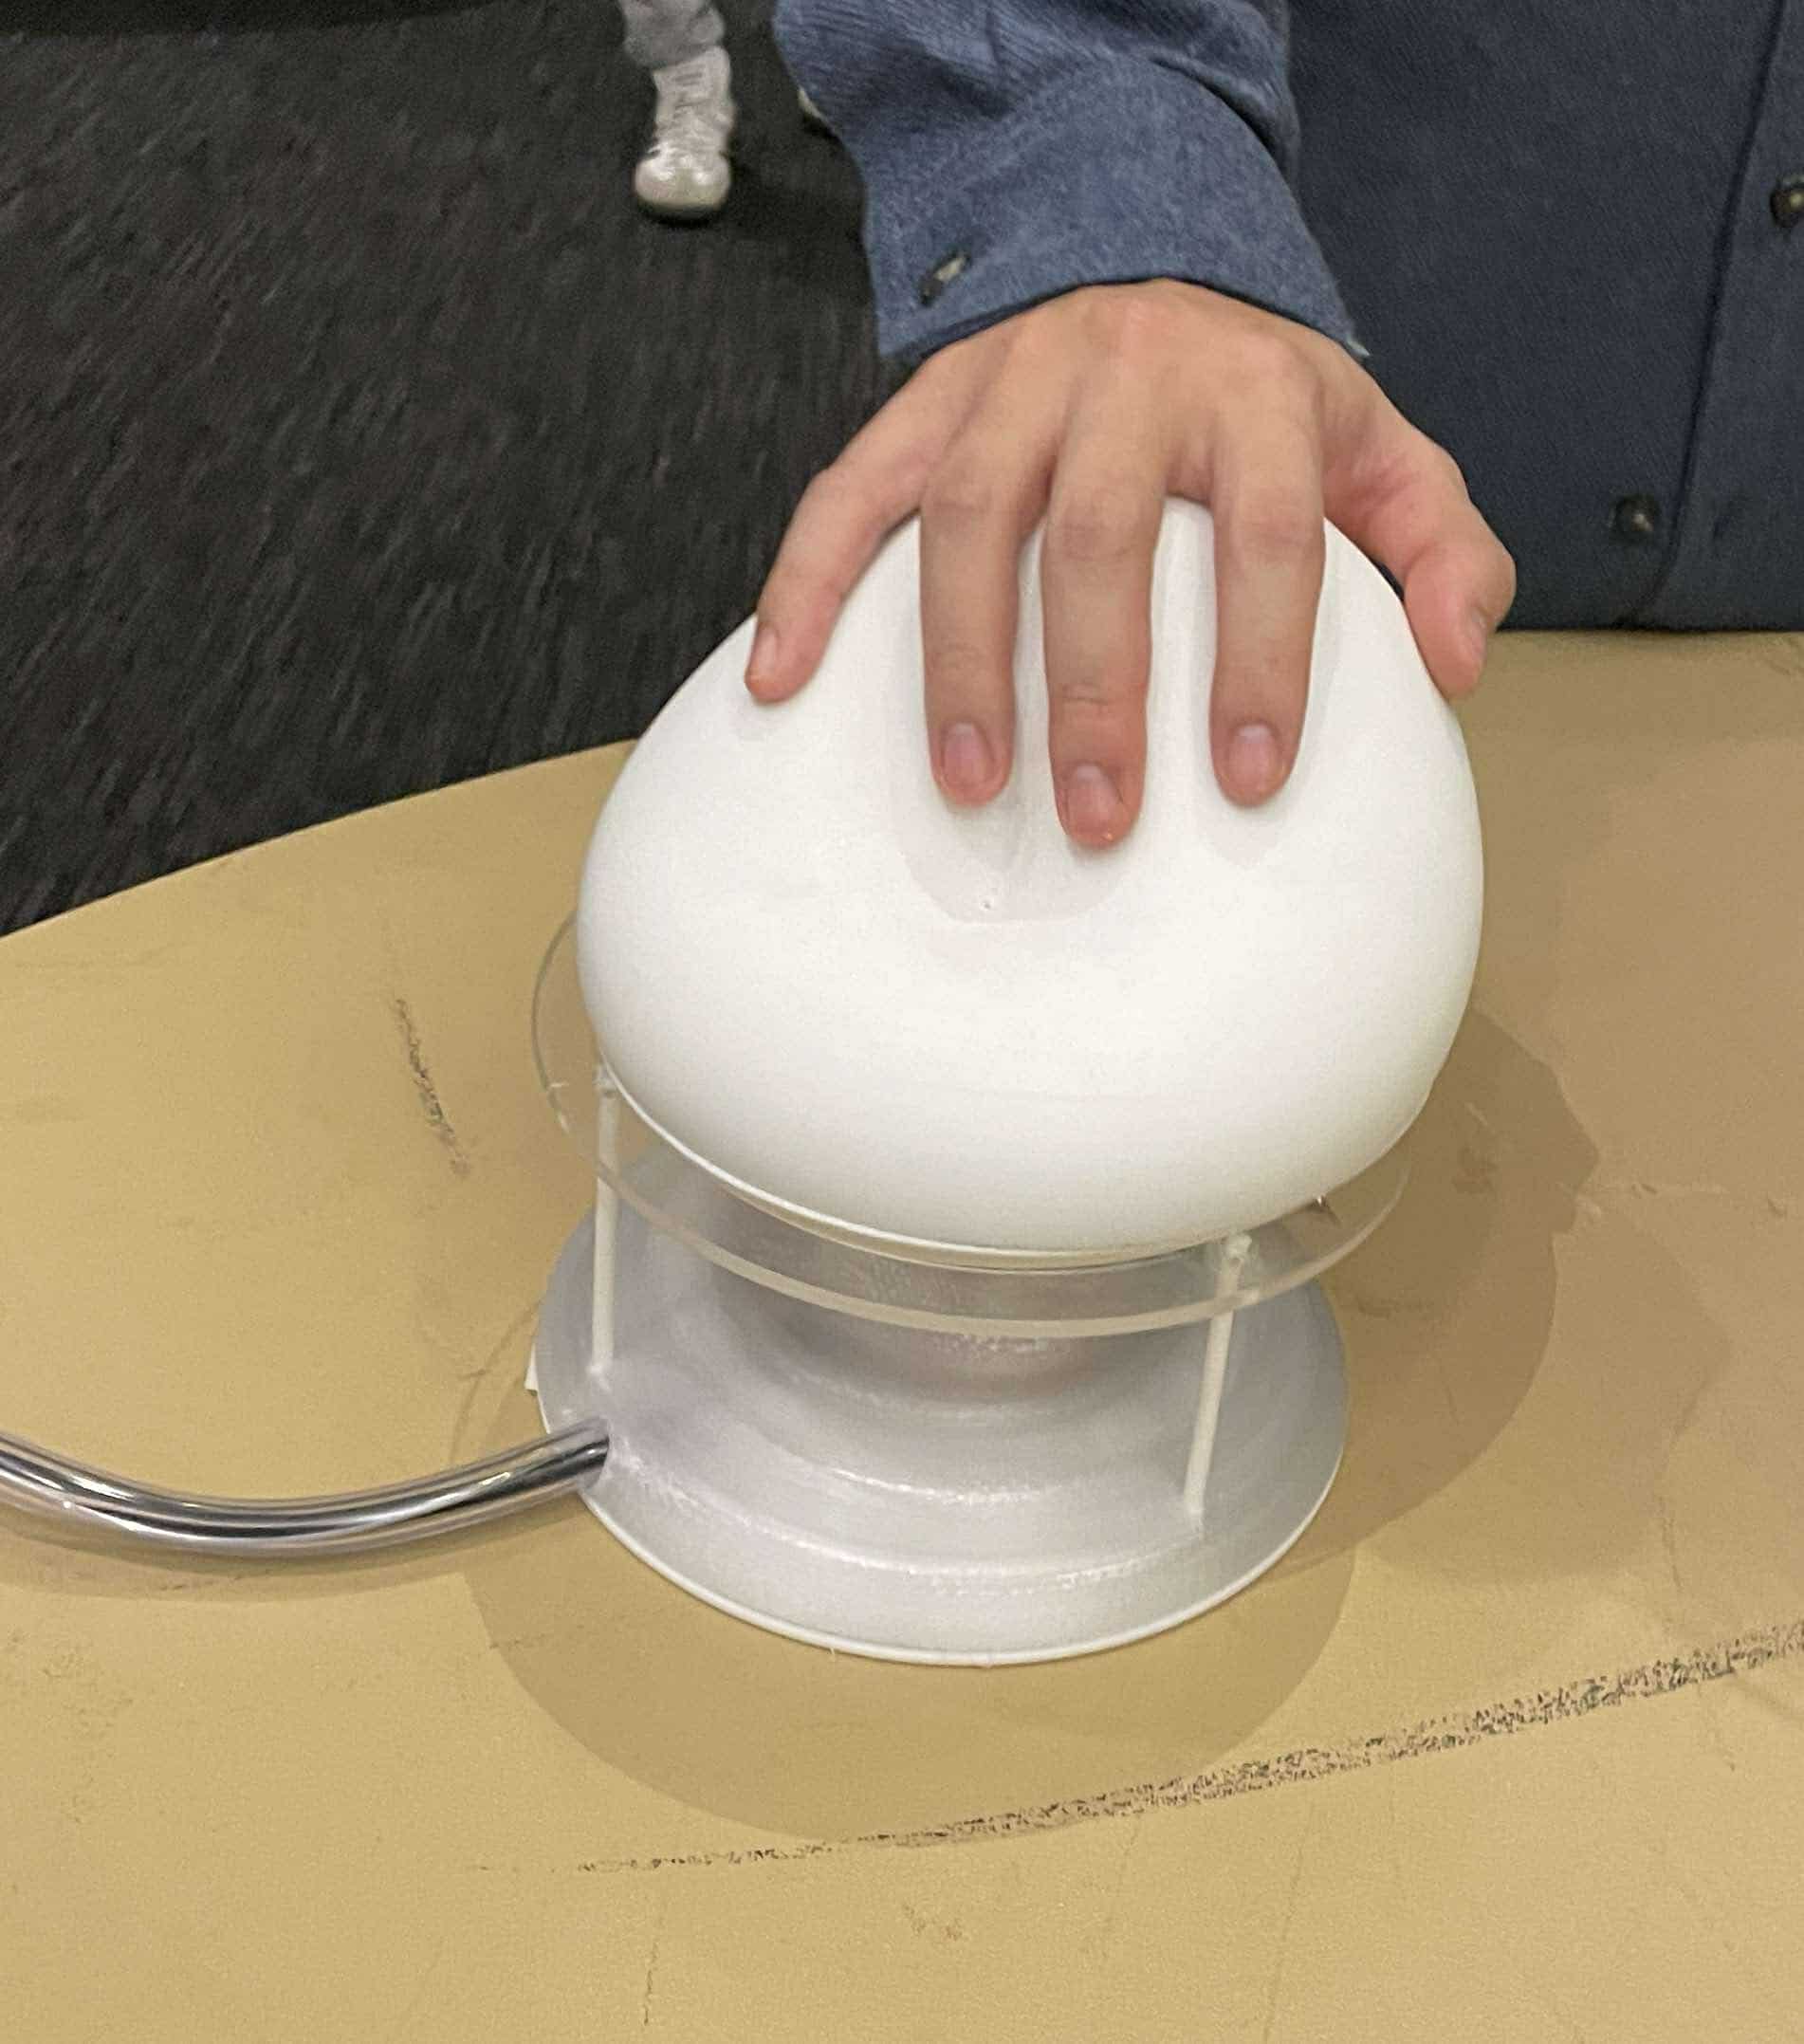
Using learnings from the clay models, I tried to mdoel things in rhino and arrived at the third option after playing around with geometries in Womp. I 3d printed the shape and was surprised by how comfortable it looked.
I decided to pursue the form.
December 9th, 2024
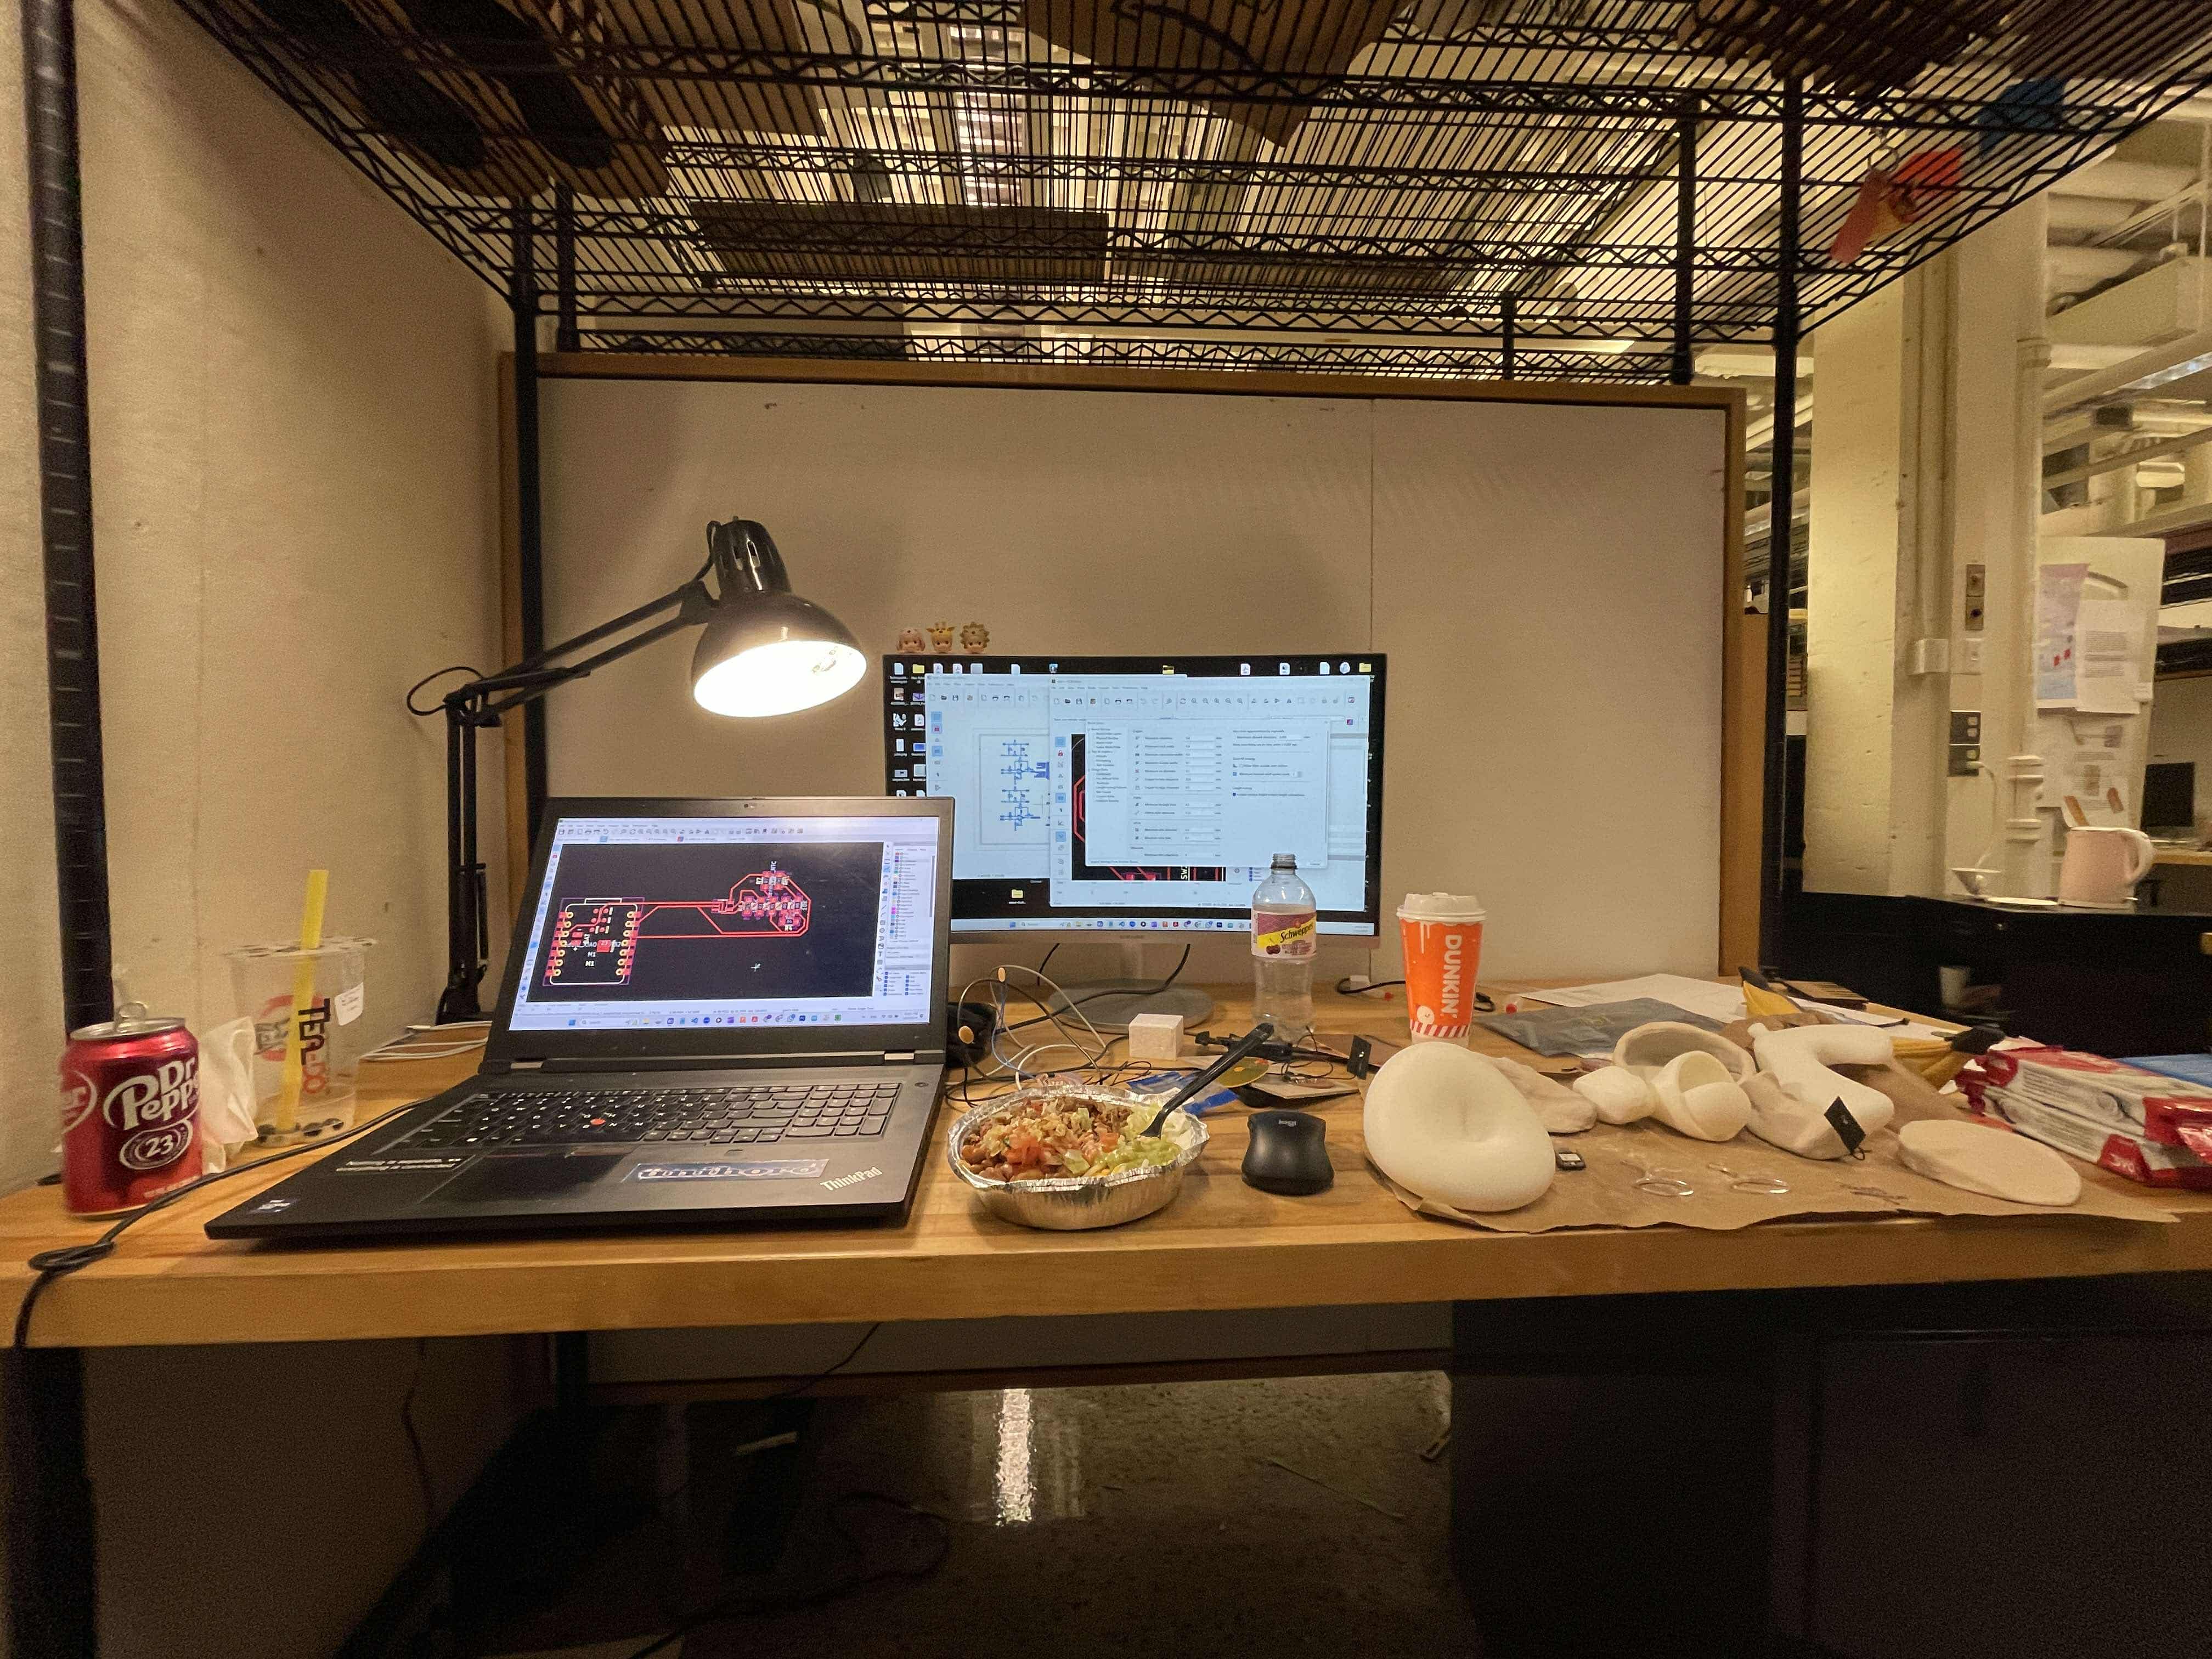
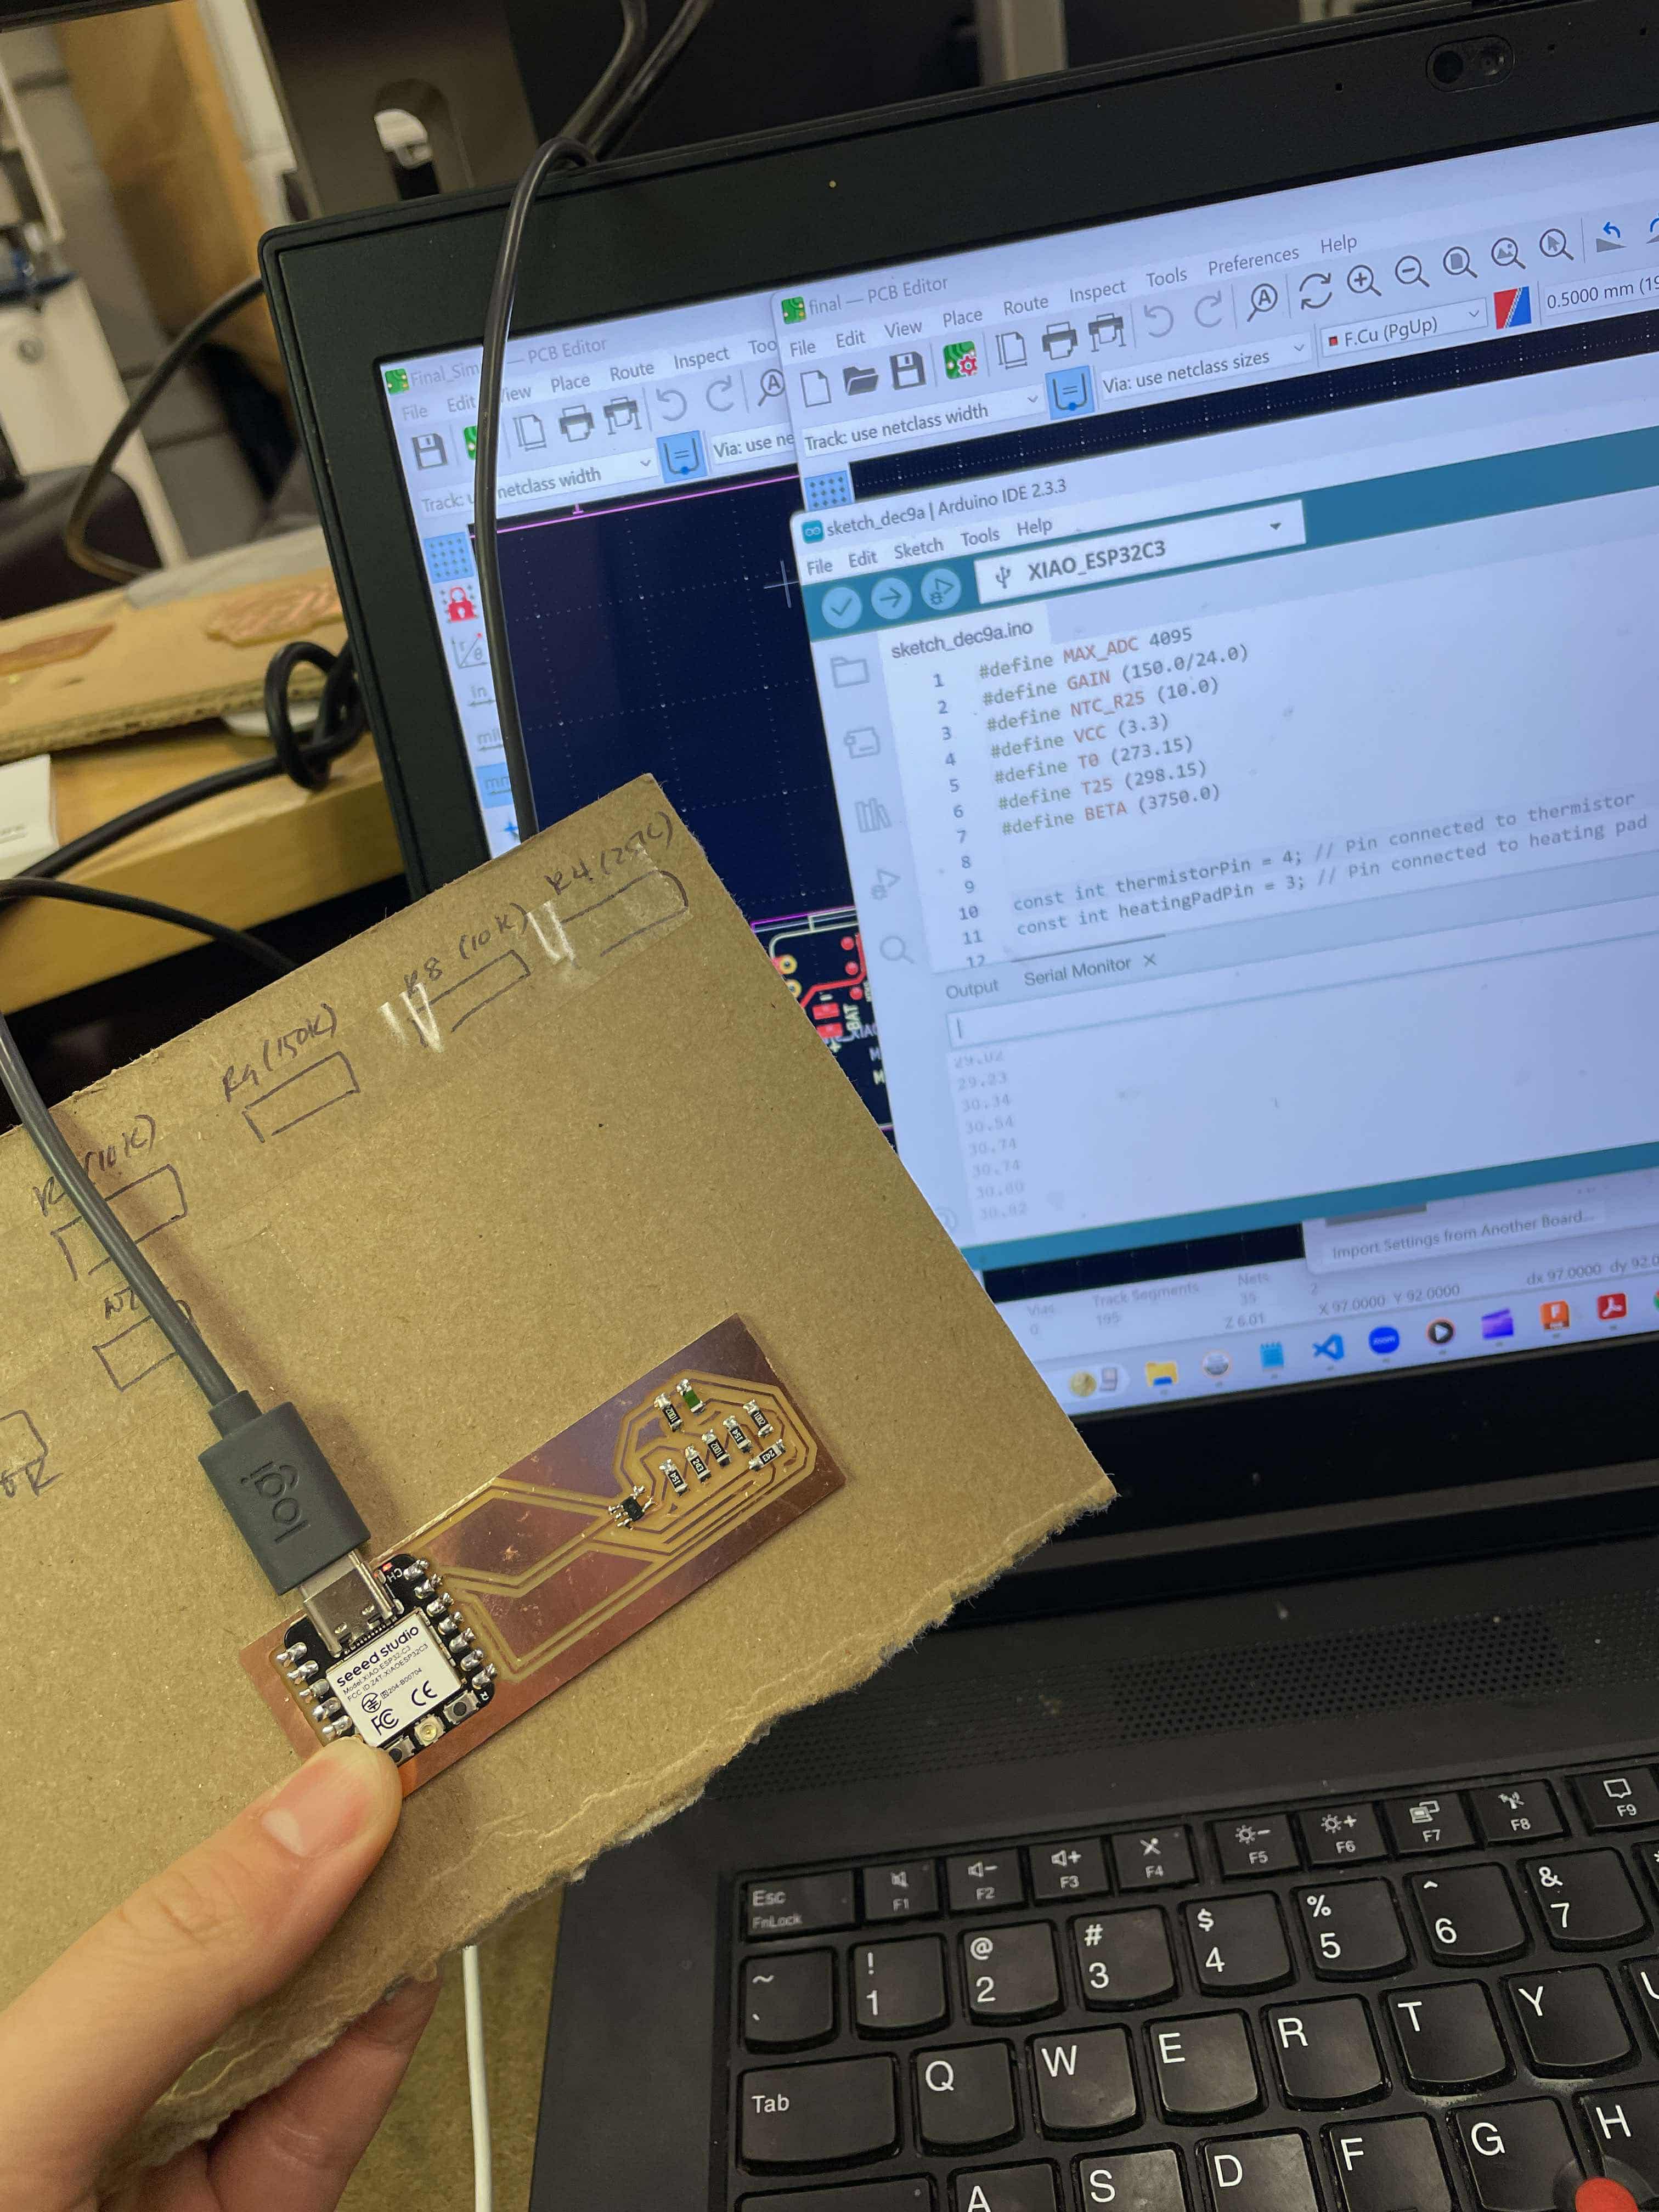
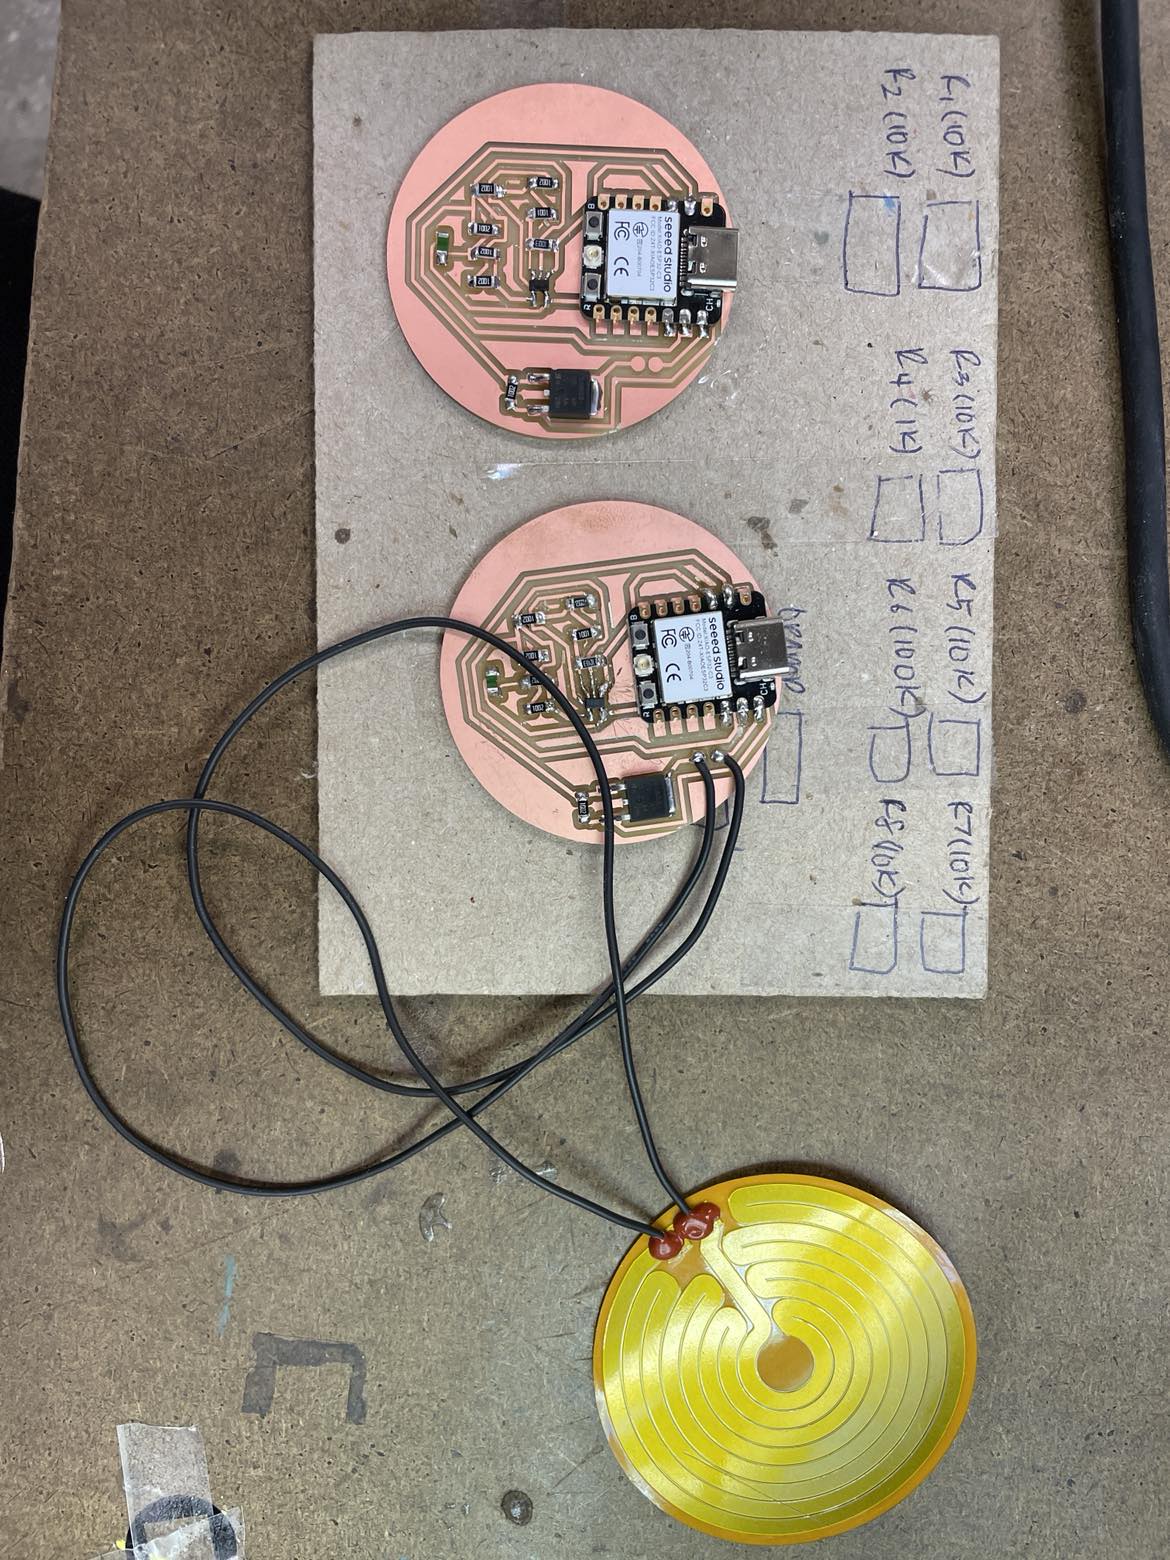
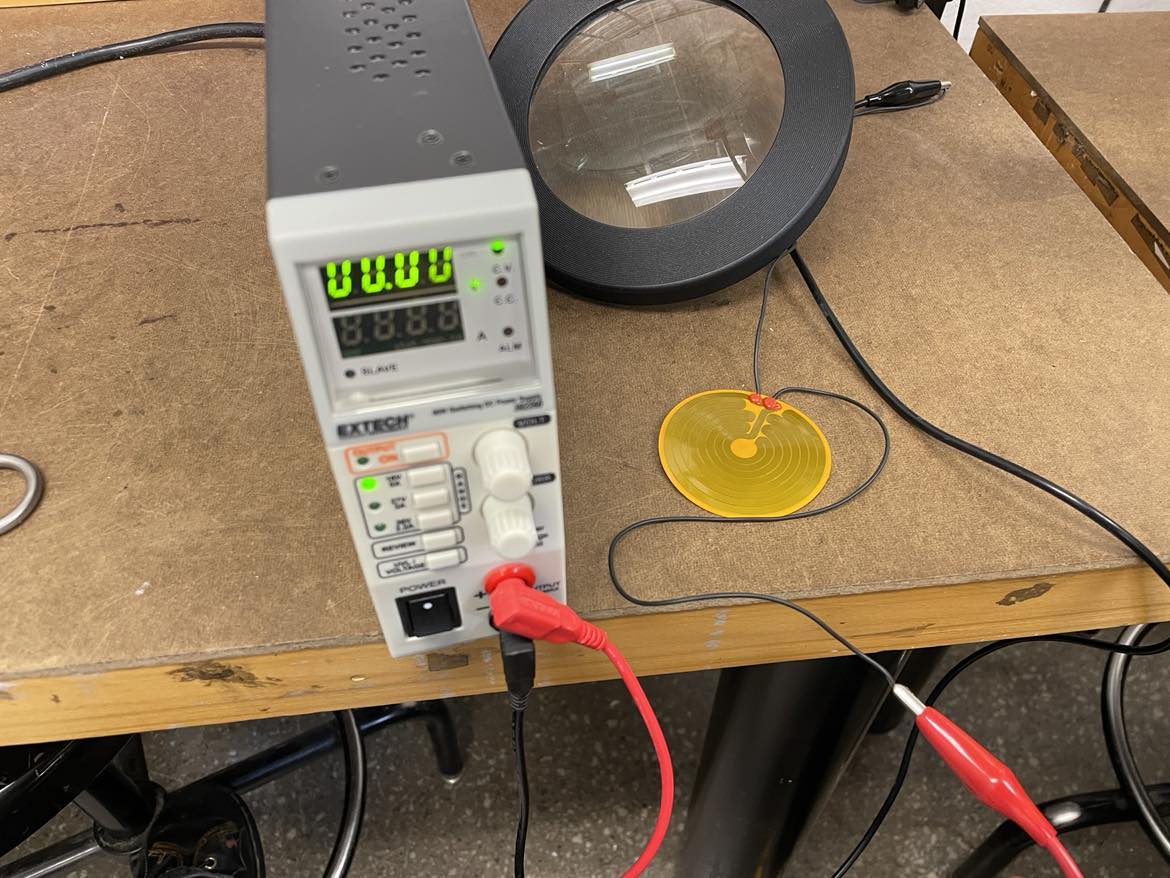
This was the state of the project, where electronics design and casing design were happening parallelly. The electronics board that I made before kept on giving inaccurate temperature,
so I wanted to test if the differential ADC was working properly in the board when there were two of them present at the same time. I was able to make two boards with just differential ADCs to test if they could be read togheter.
They worked separately and together, so I was convinced there was something that was wrong with the previous pcb design. After visiting anthony, I realized it was because the opamp was not soldered properly.
Once that was fixed, everything was being read again.
They worked separately and together, so I was convinced there was something that was wrong with the previous pcb design. After visiting anthony, I realized it was because the opamp was not soldered properly.
Once that was fixed, everything was being read again.
December 11, 2024
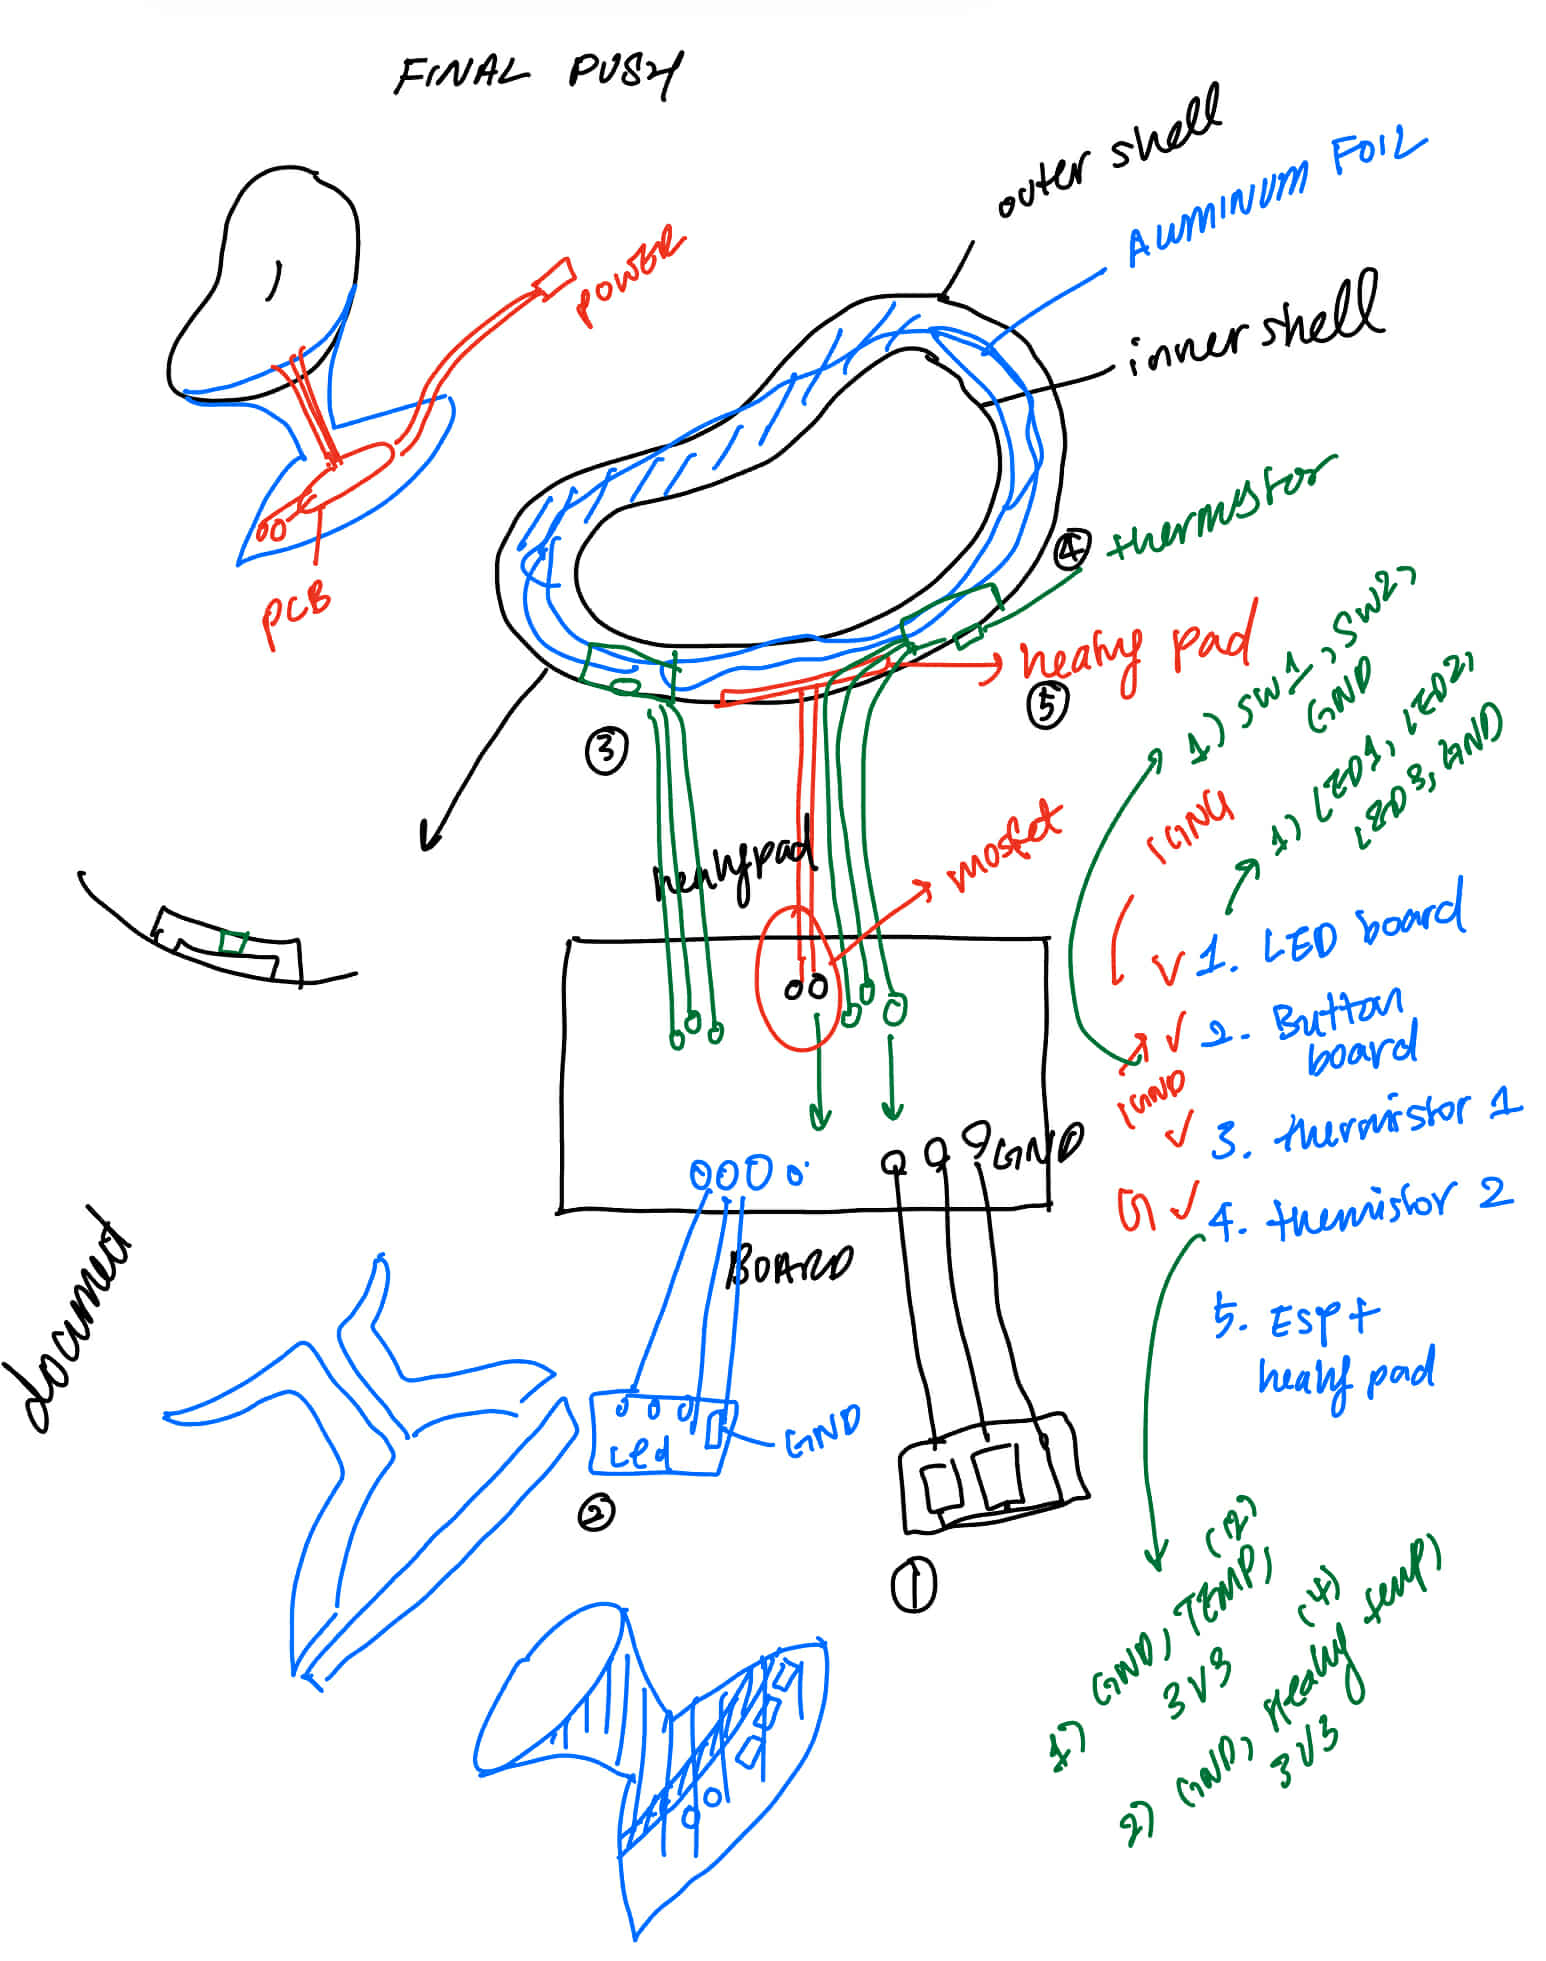
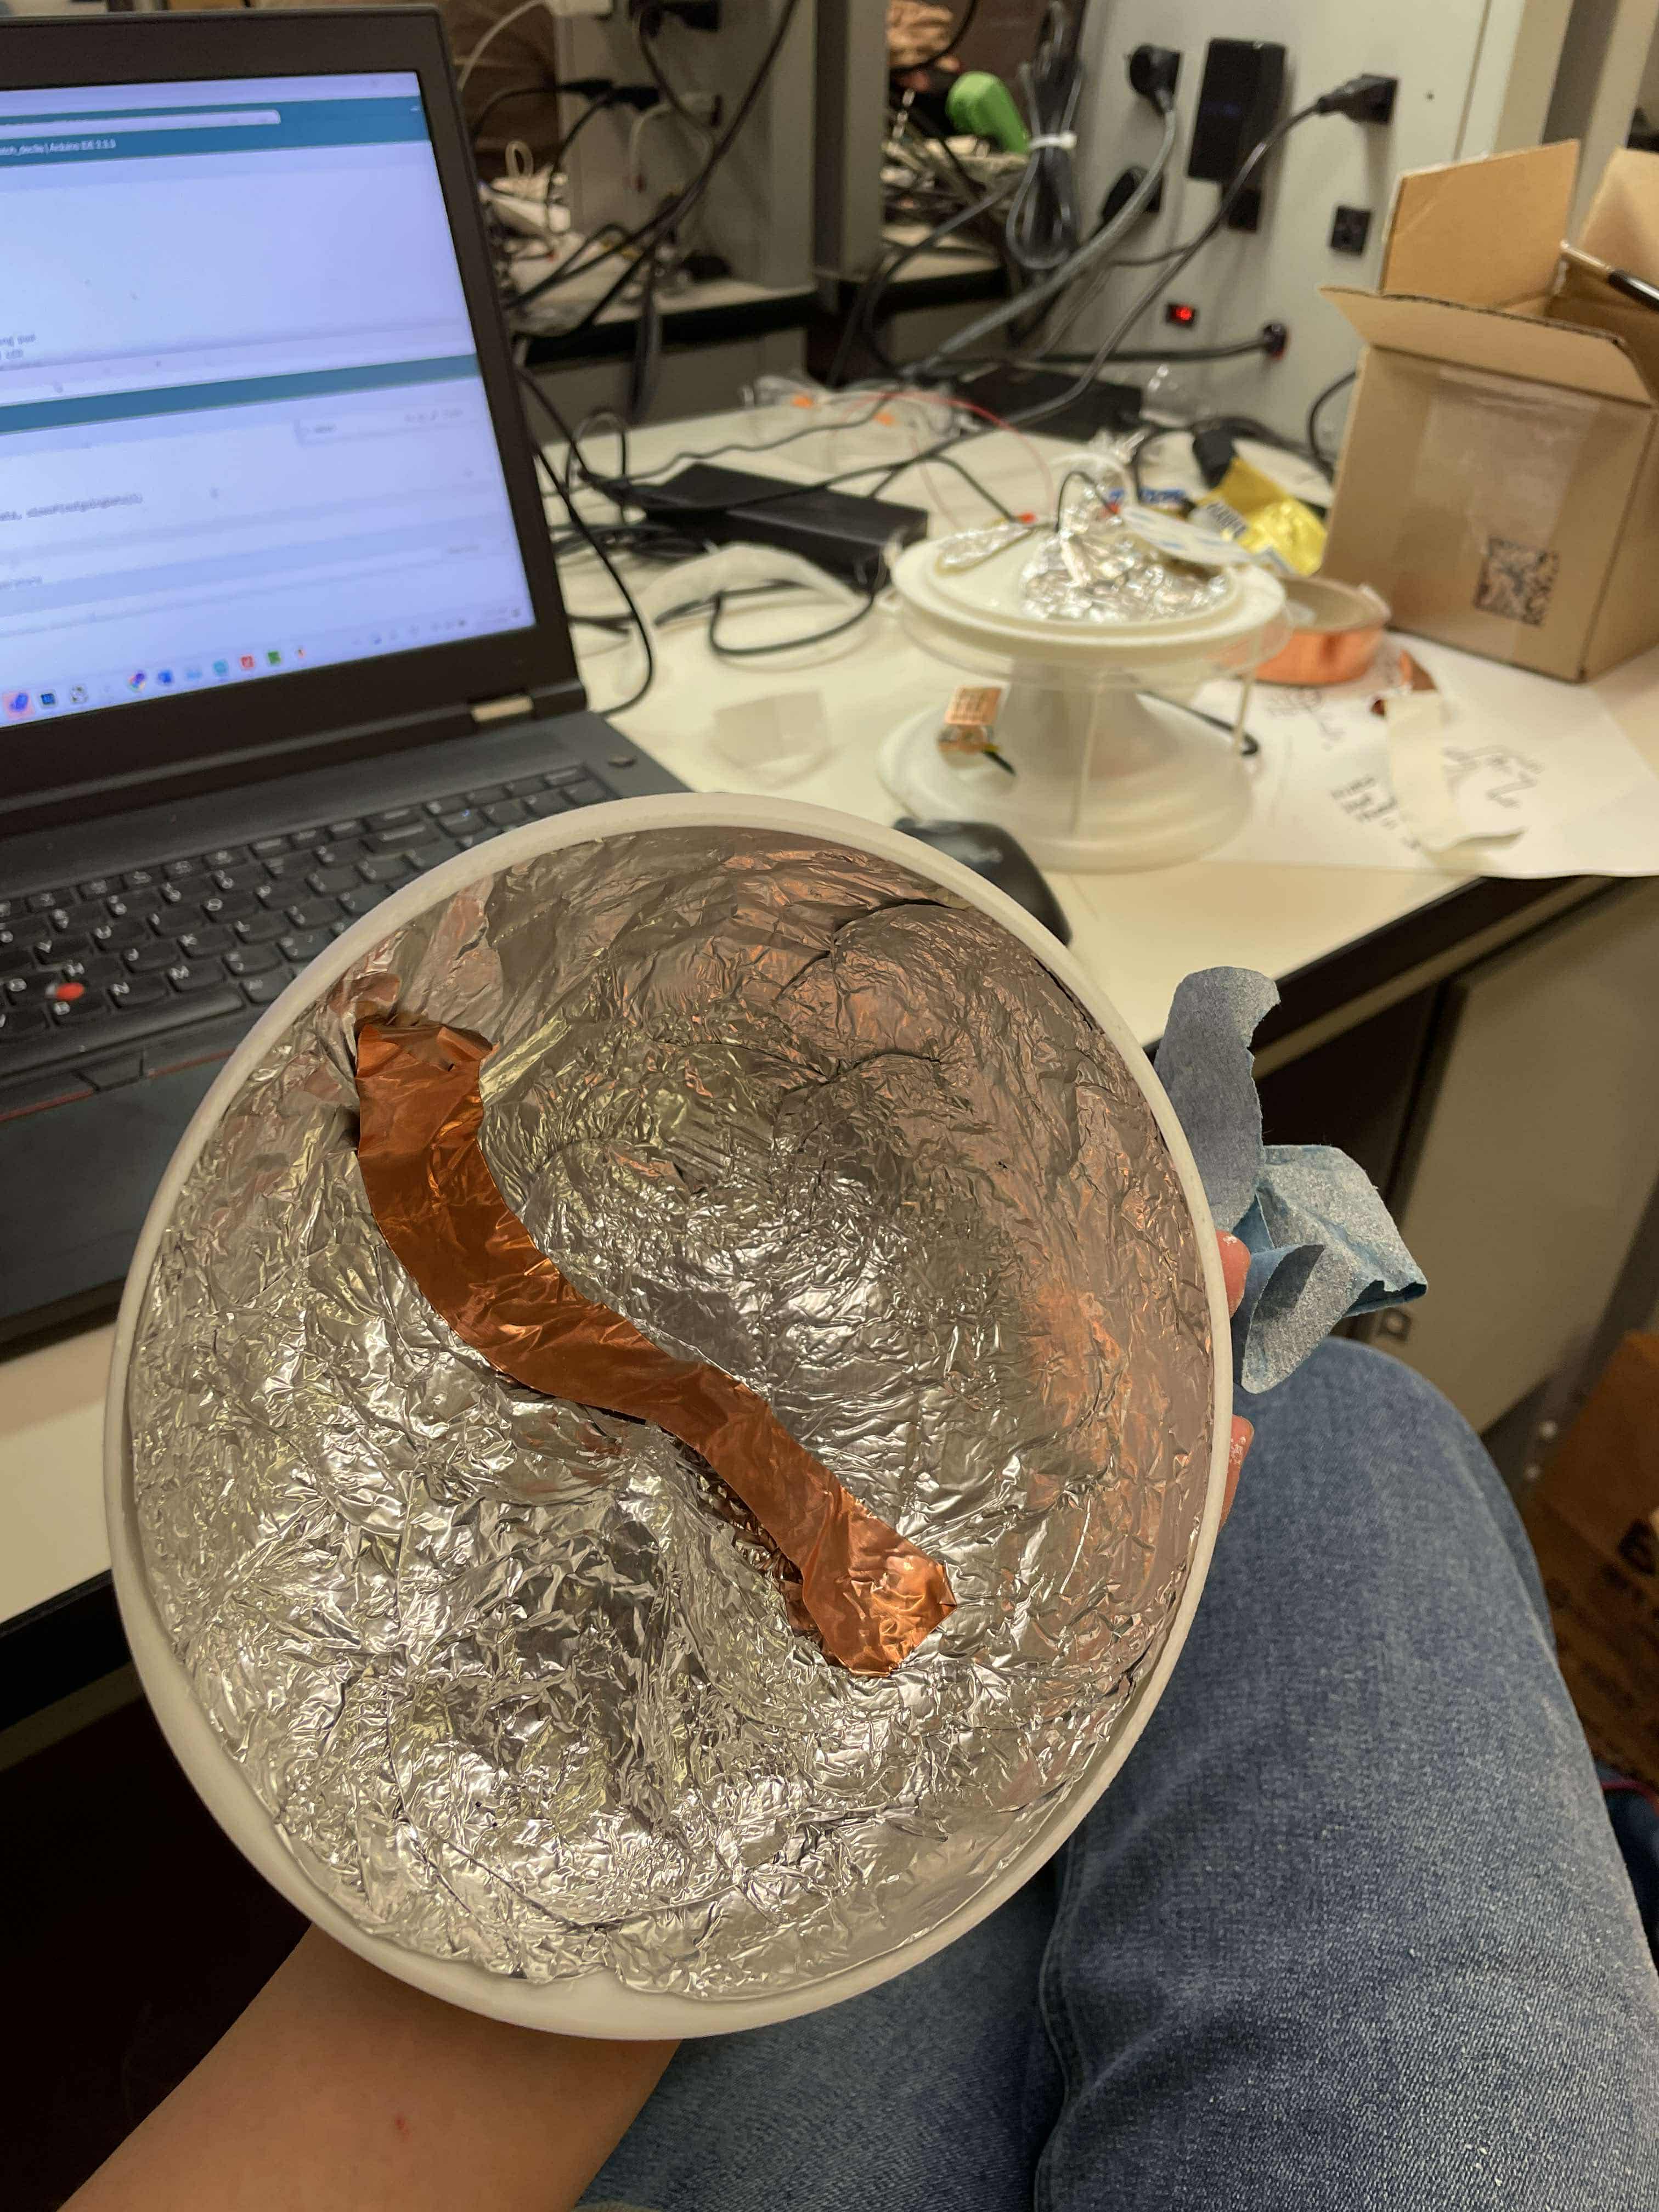
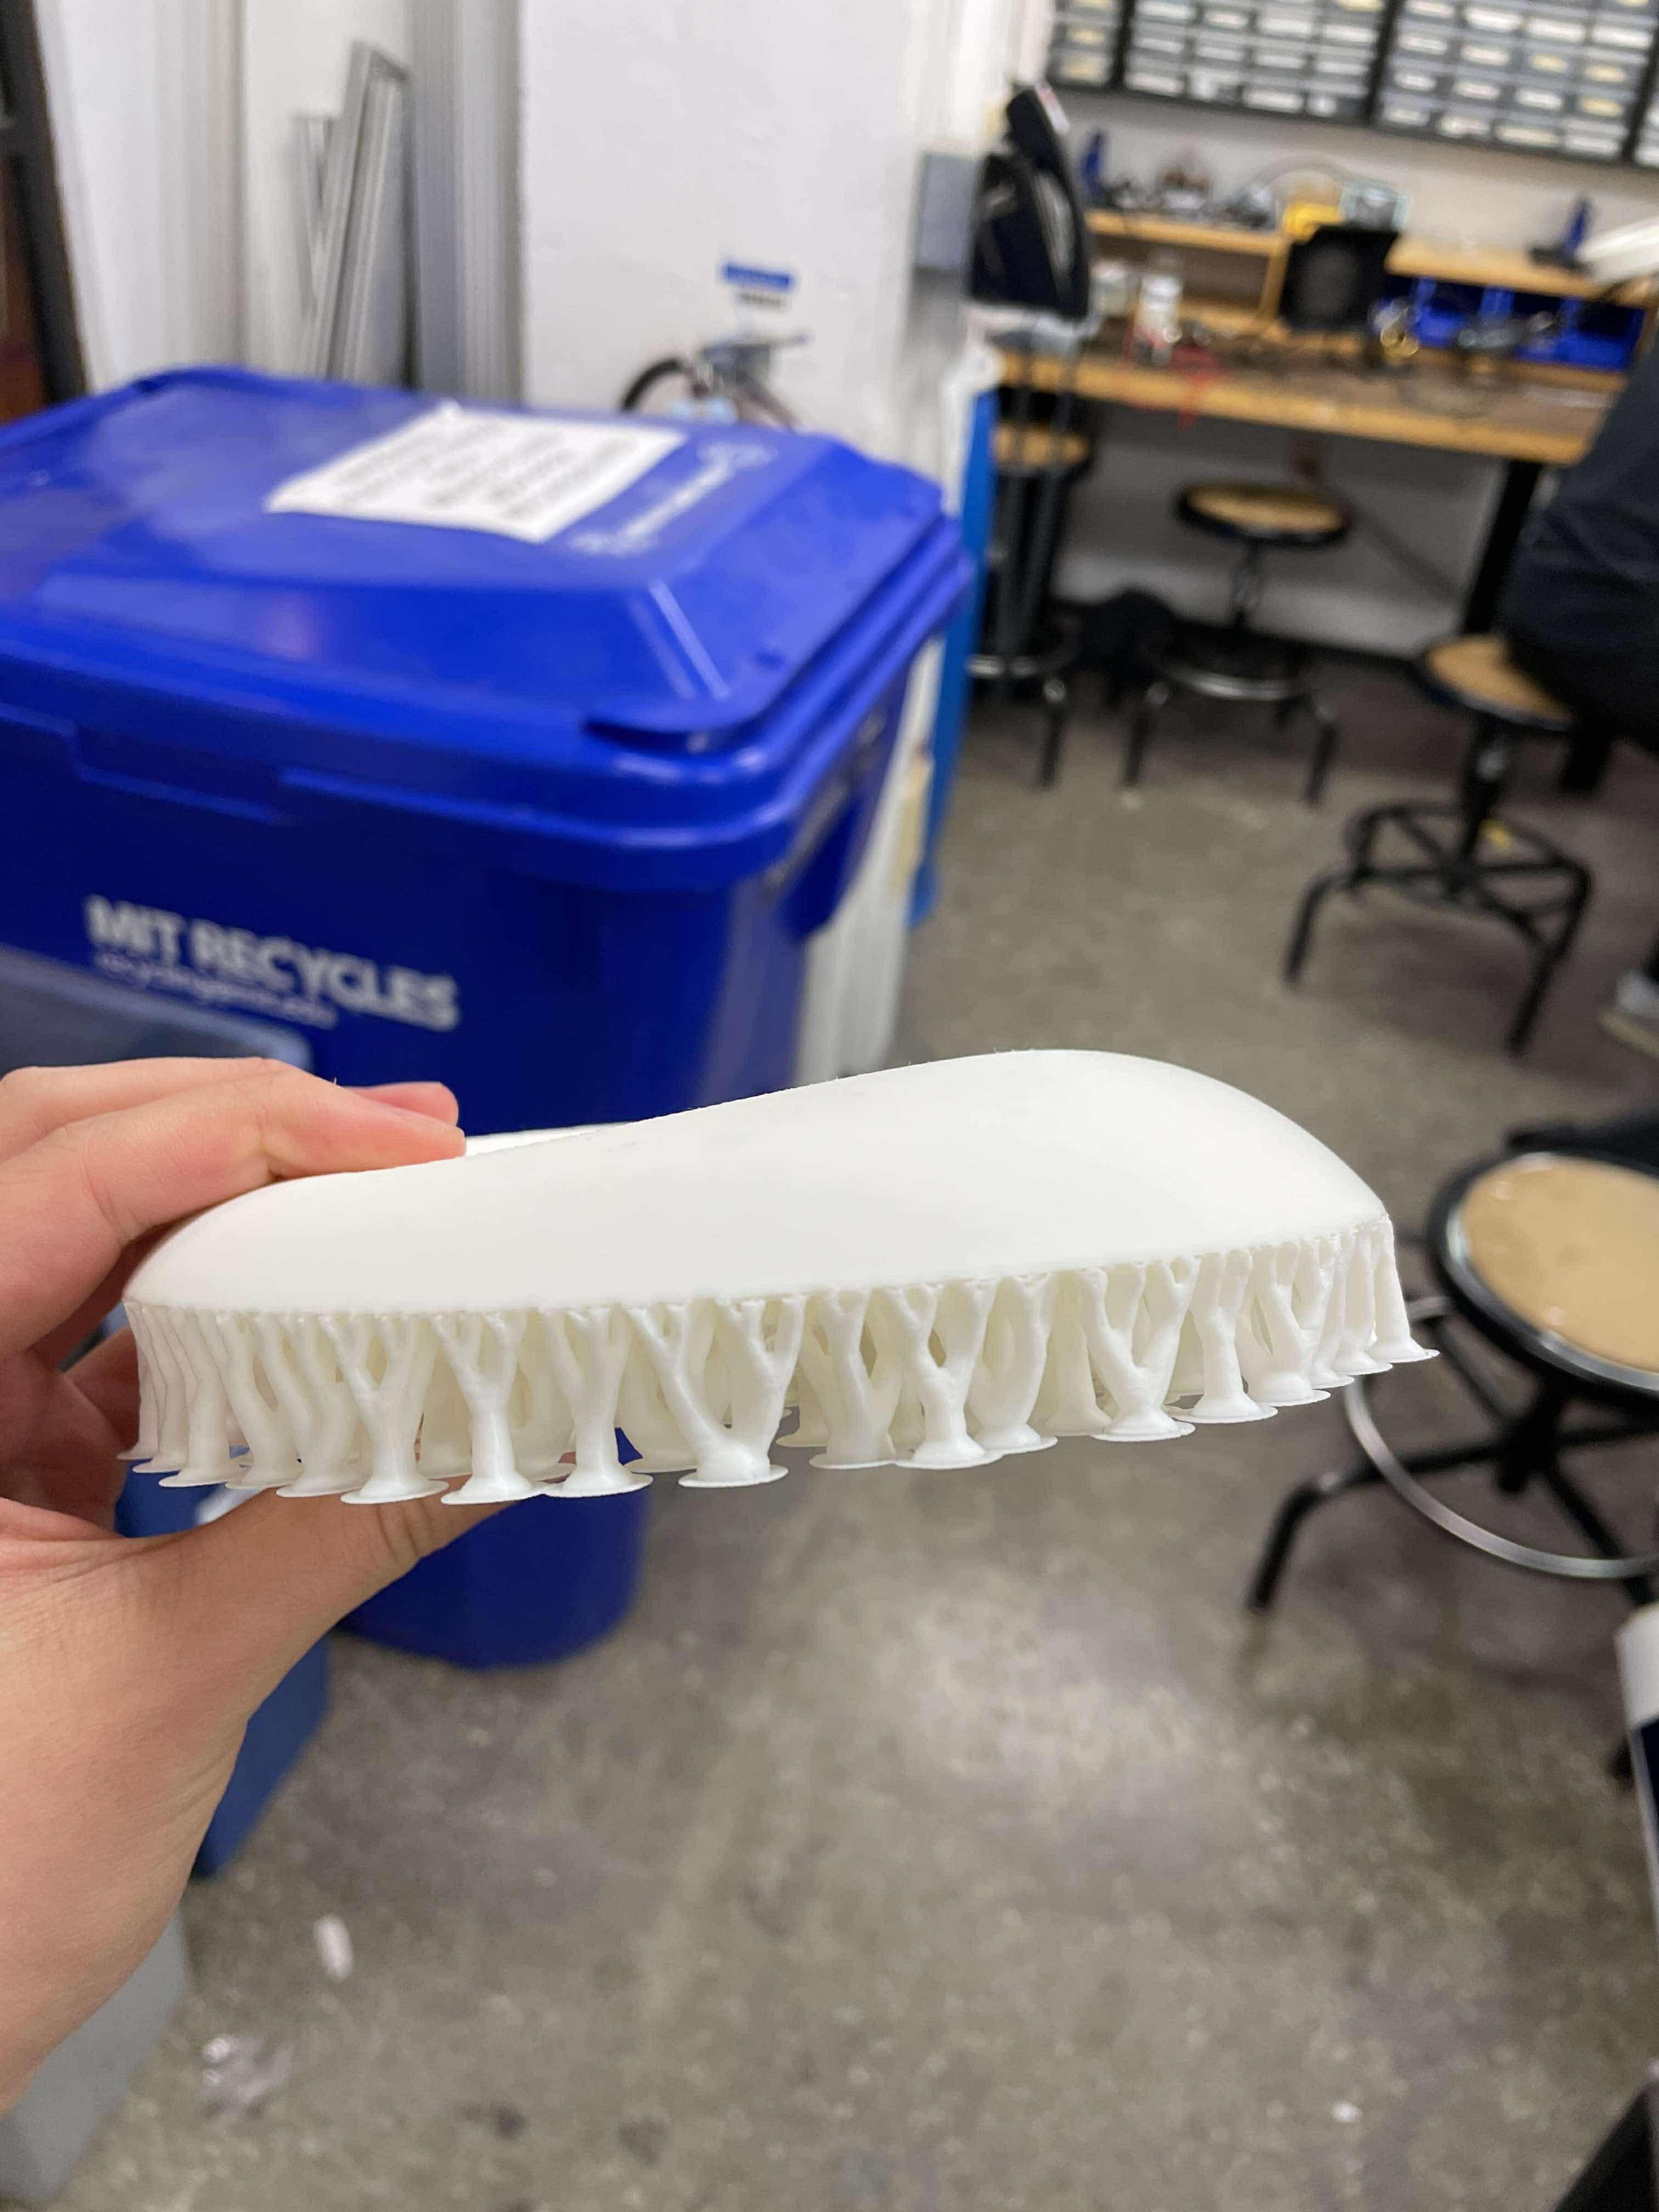

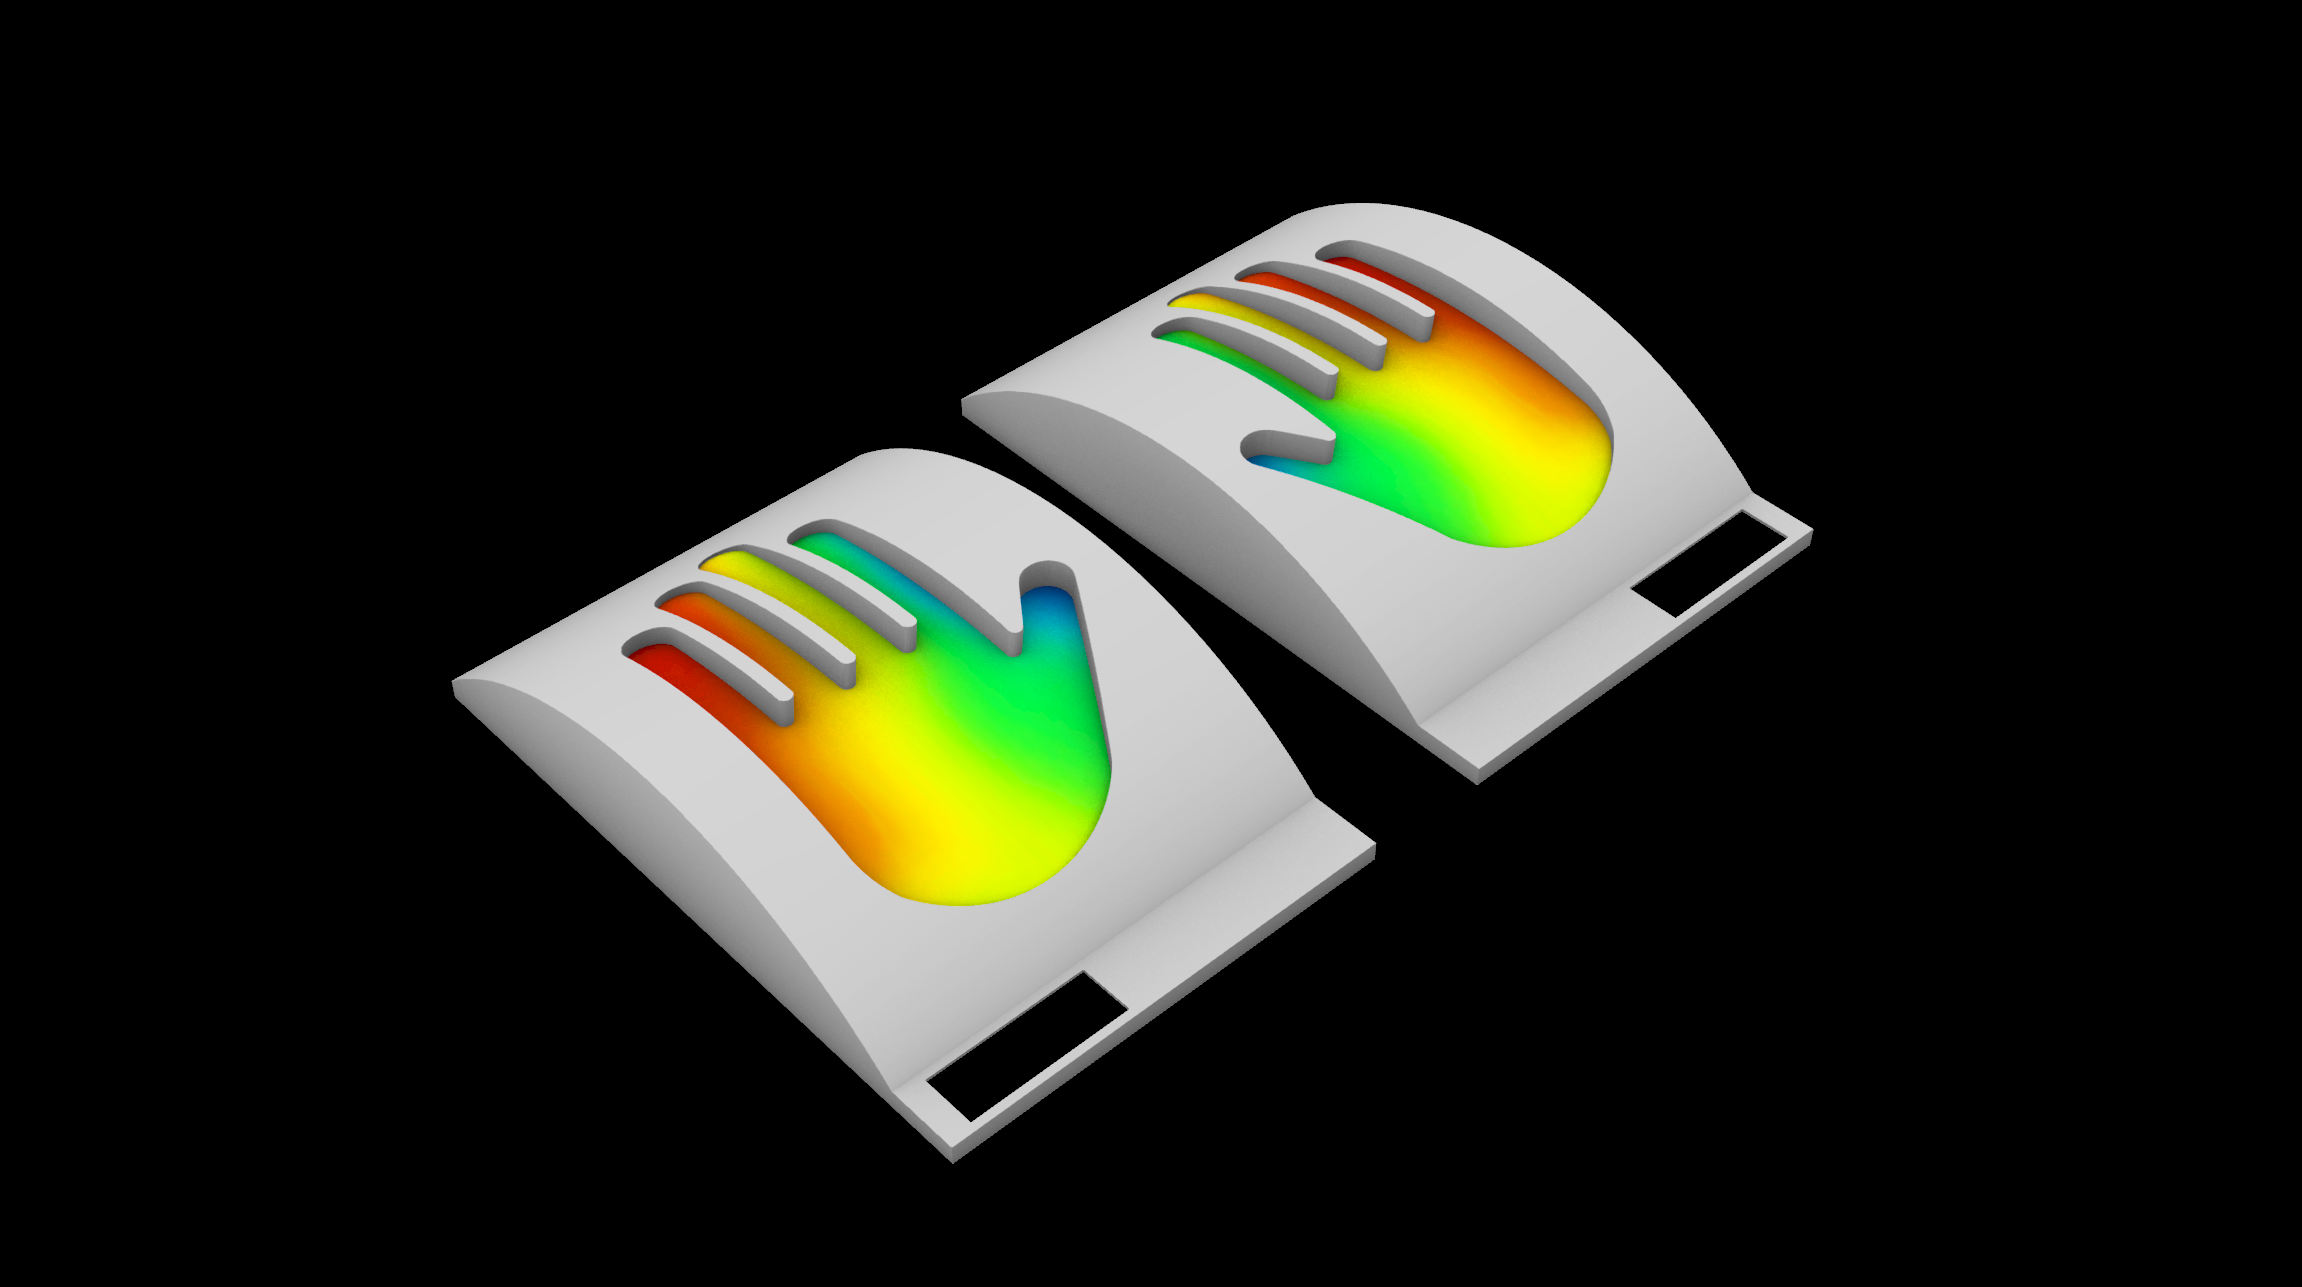
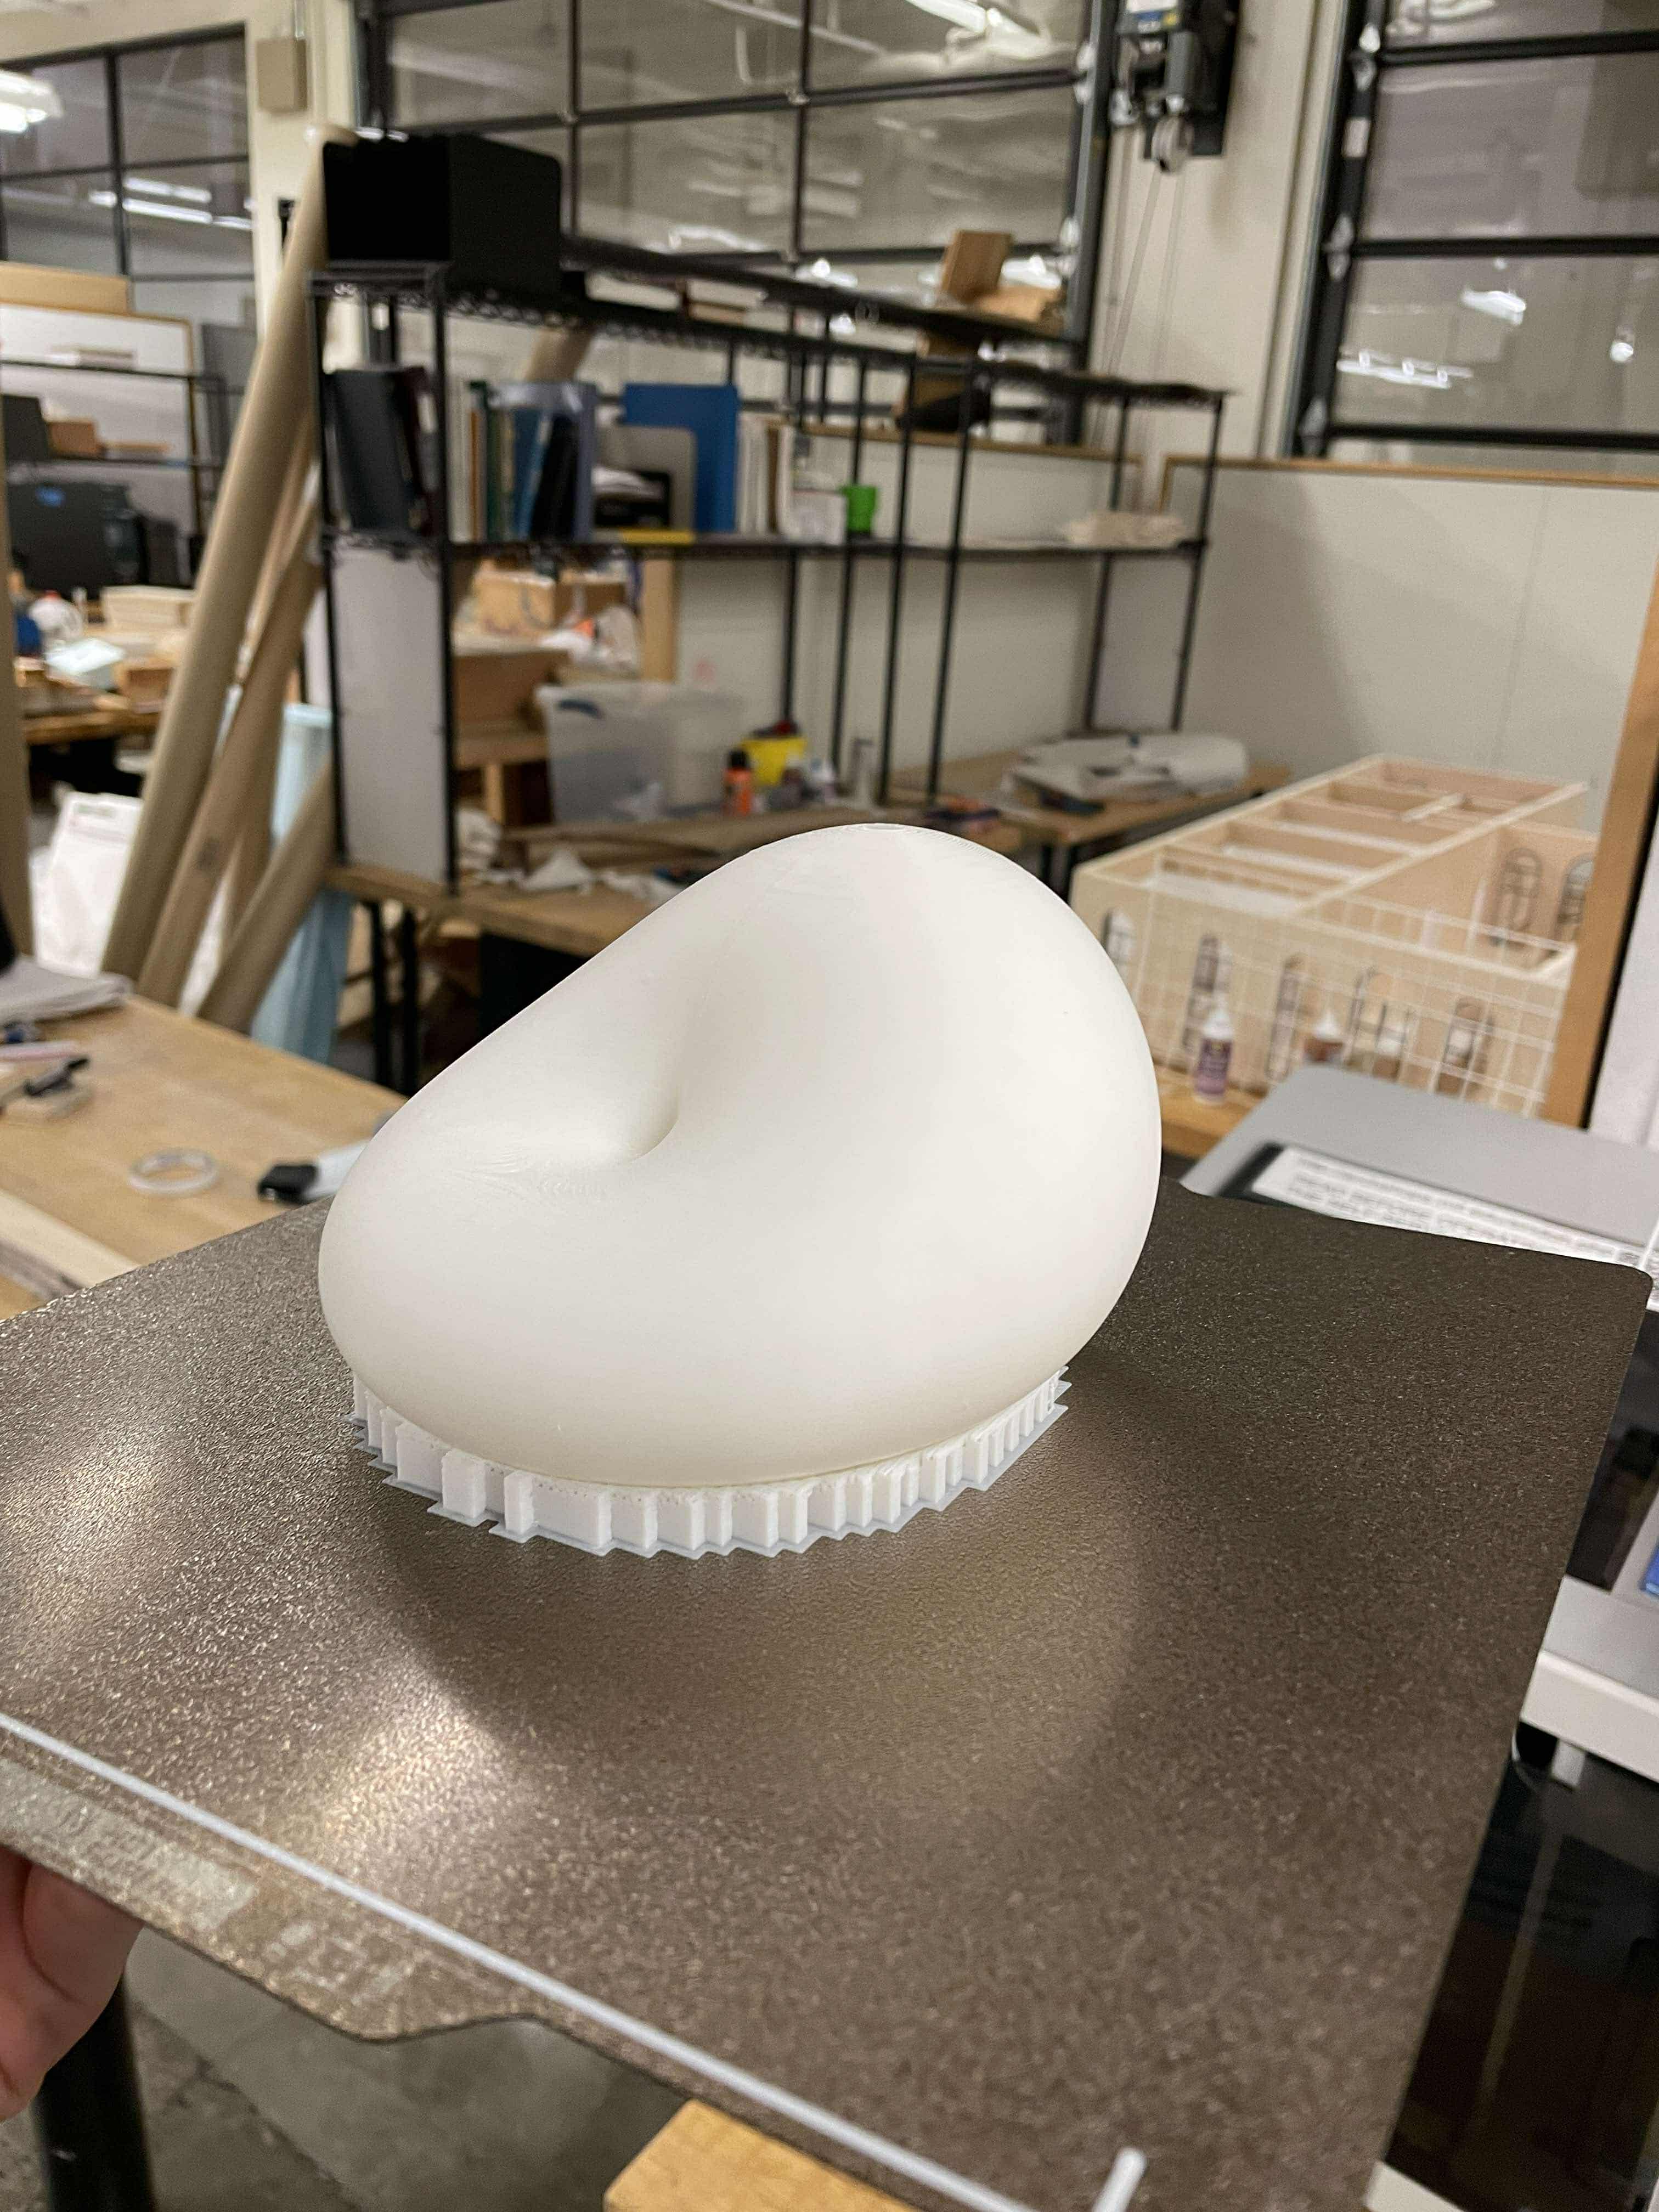
At this point, I had a better understanding of how the final integration should look like. This is a sketch of how things come together. The shell had to be hollowed out, and the first few iterations (will upload pictures soon) were too thick that heat would not transfer.
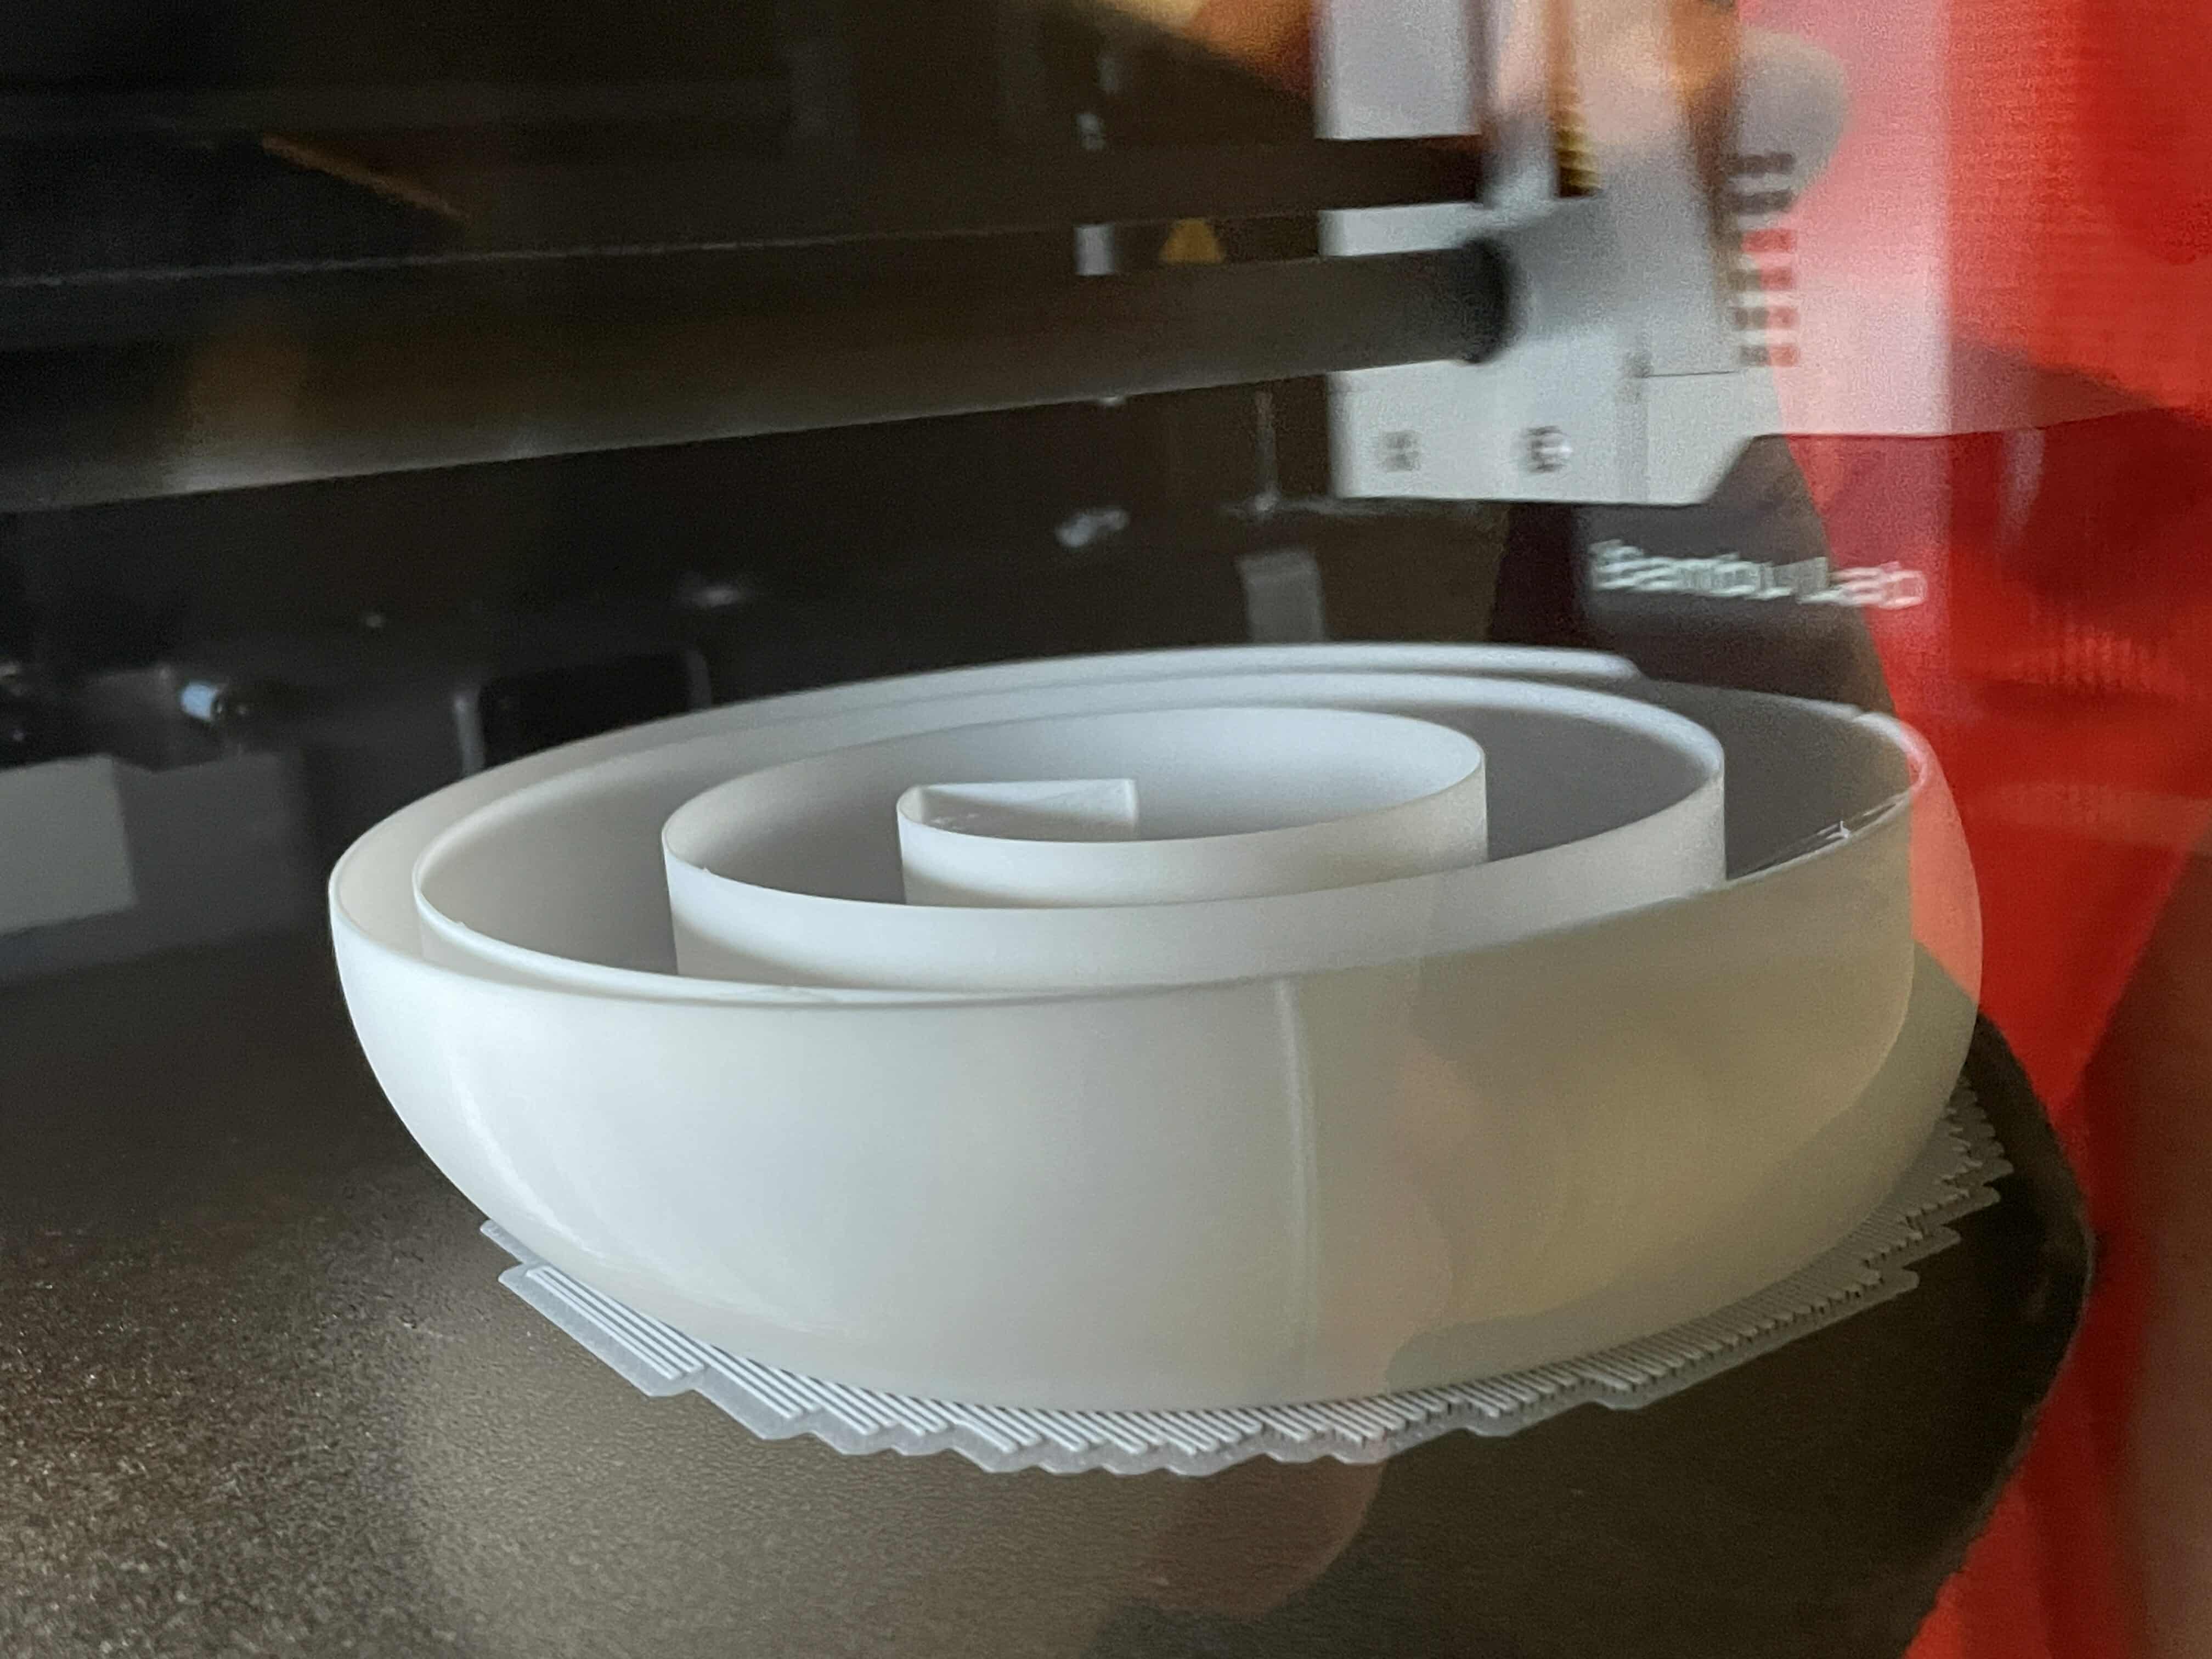
I was able to push the limit of slicer to only print the shell with 5 layers for walls with 2% infill that would allow concaved shapes to be printed but also be removed after.
December 14-16, 2024
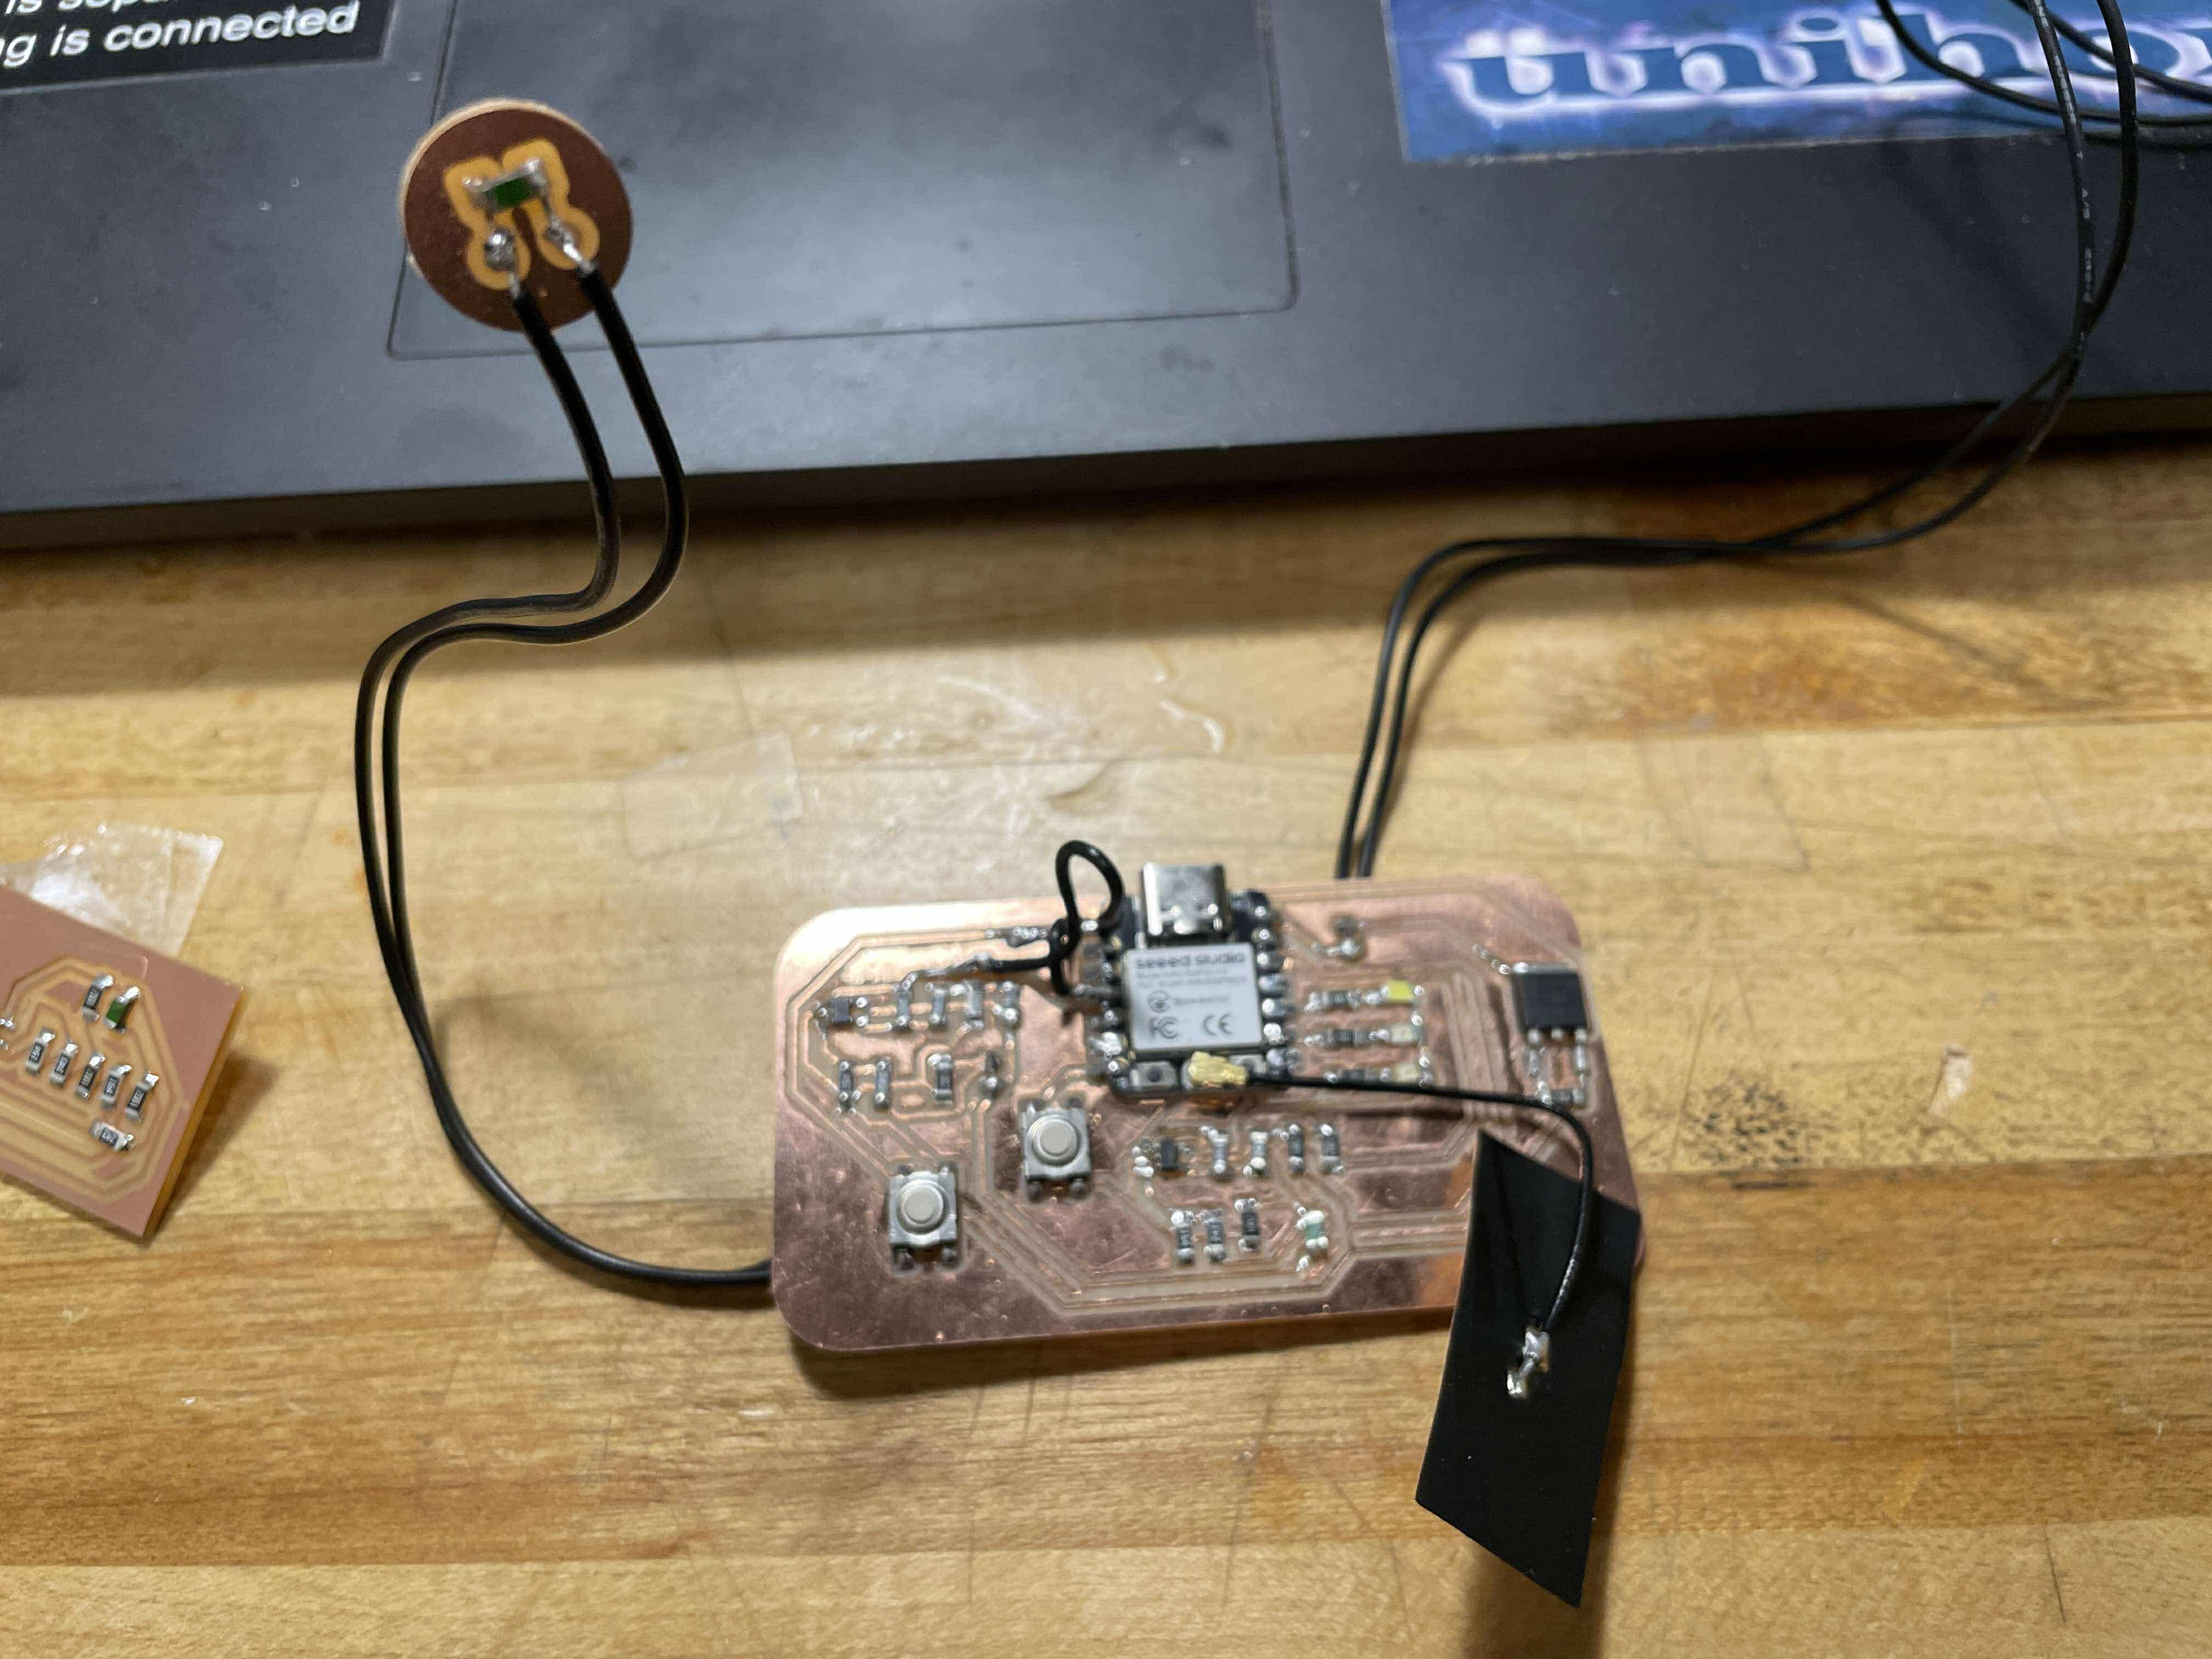

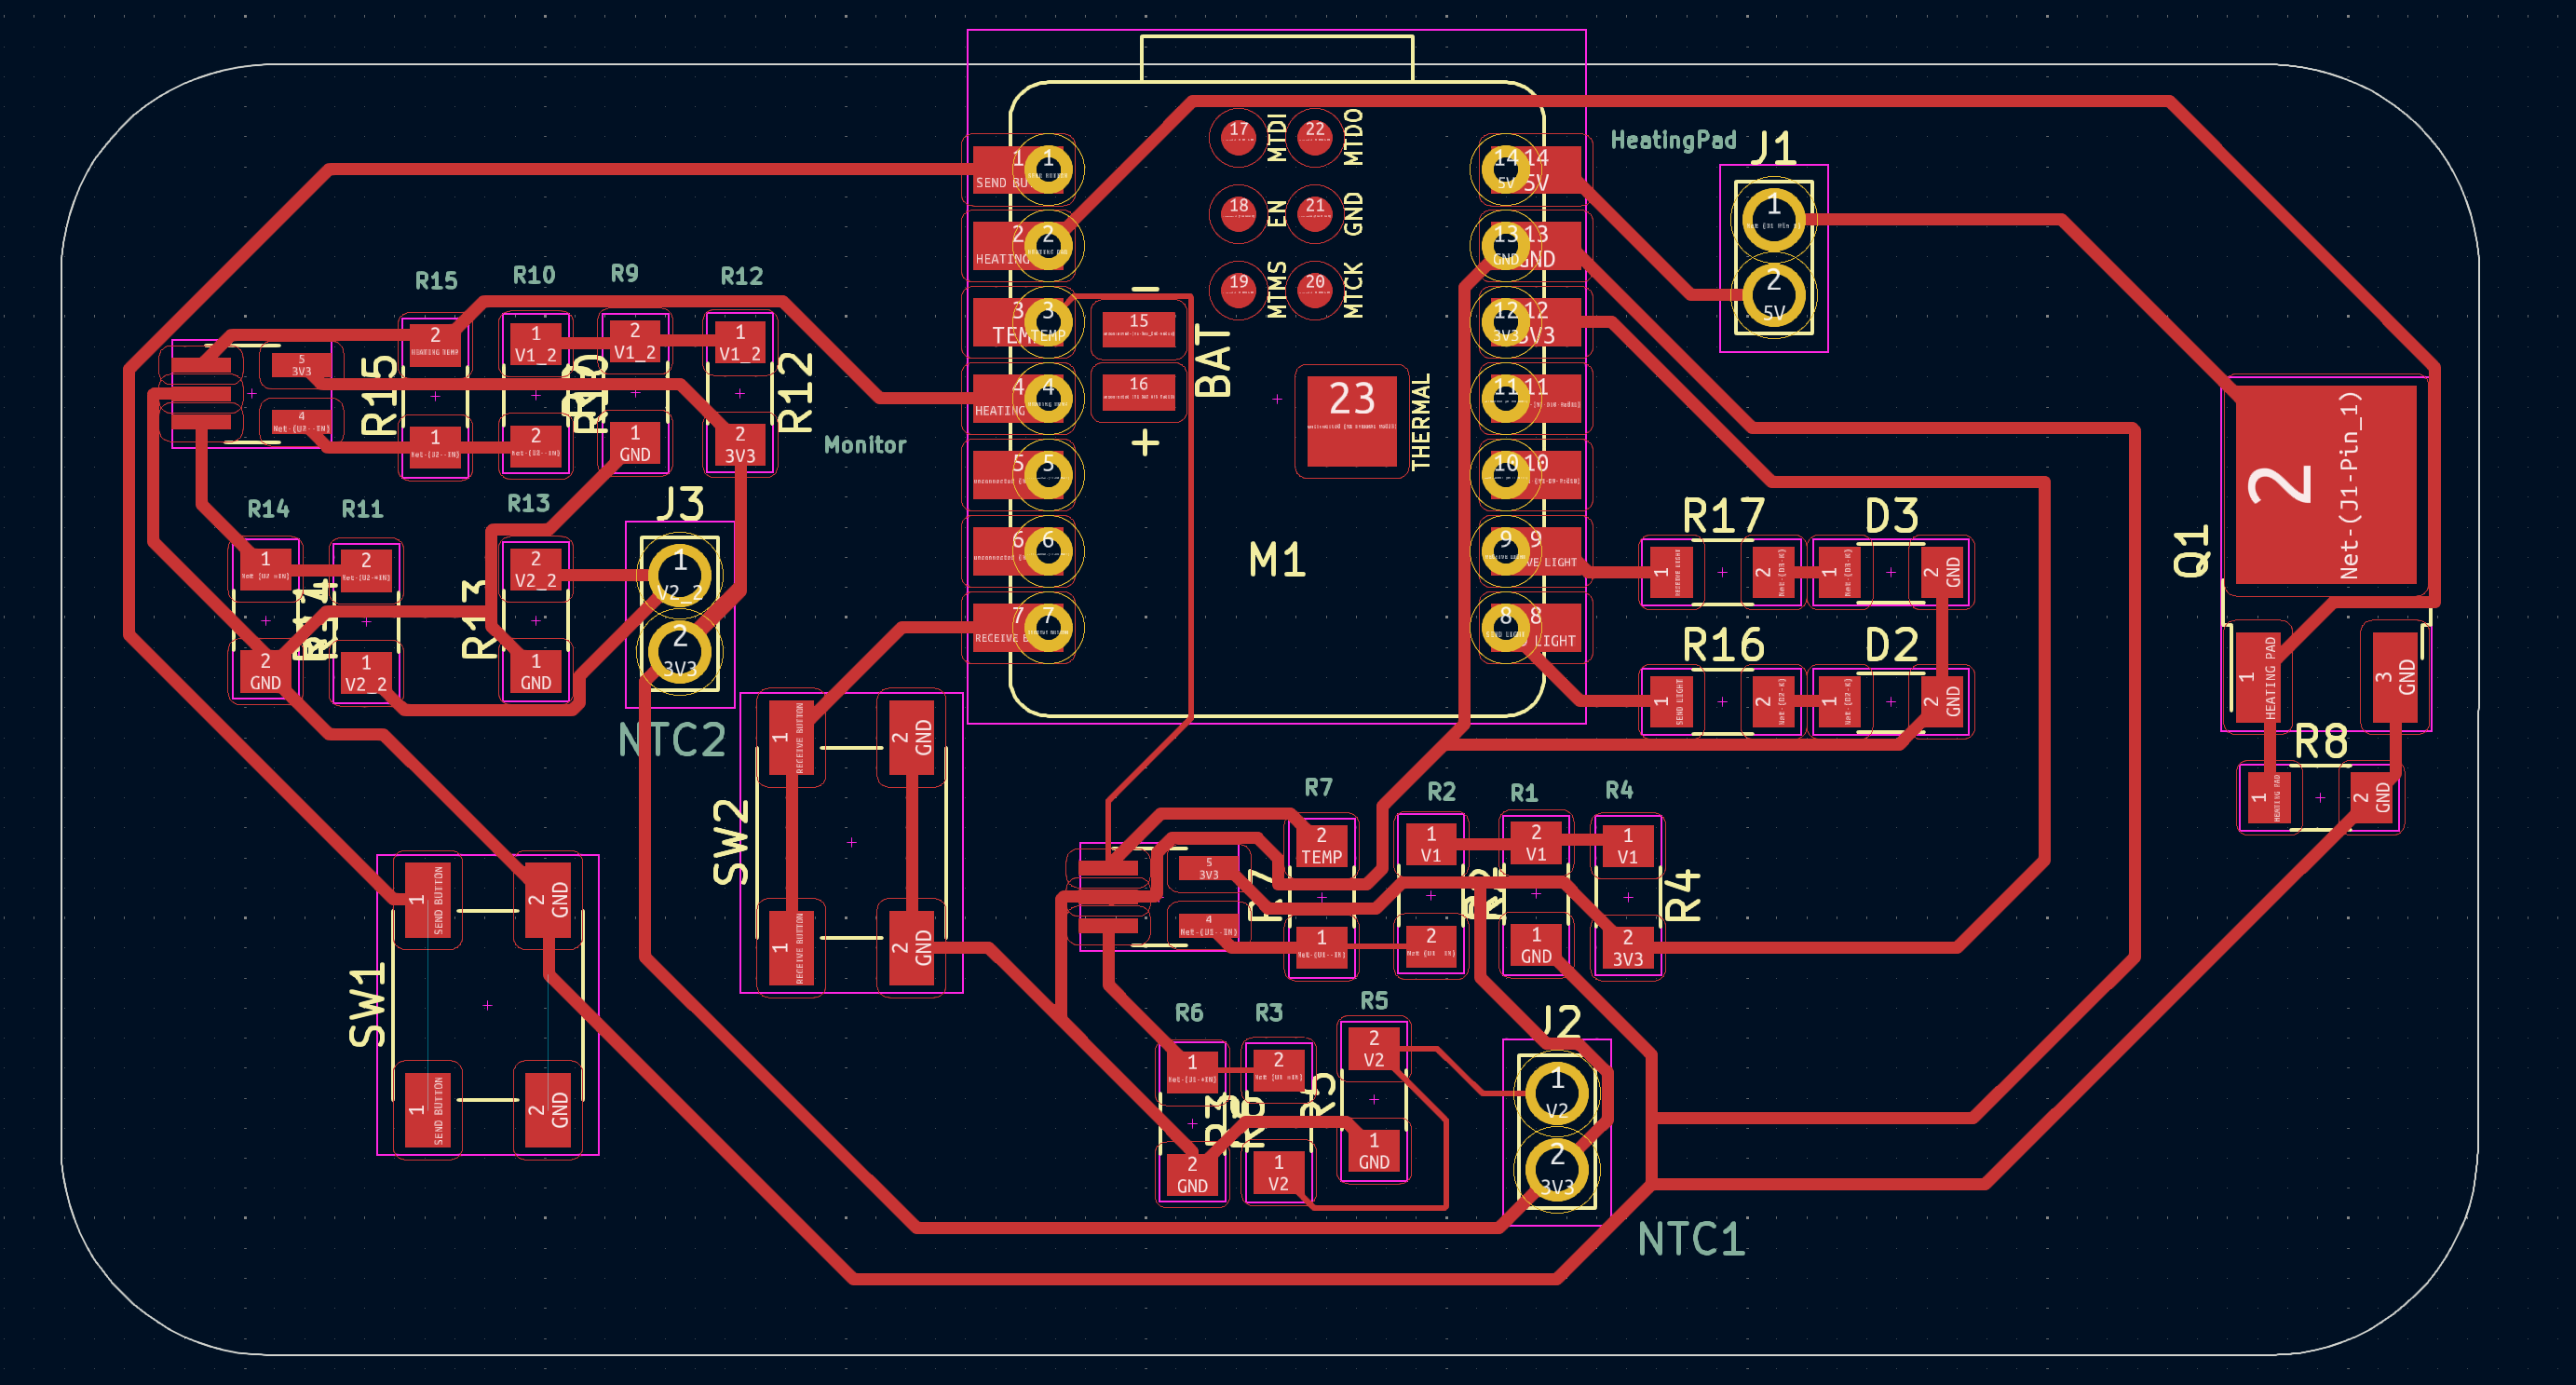
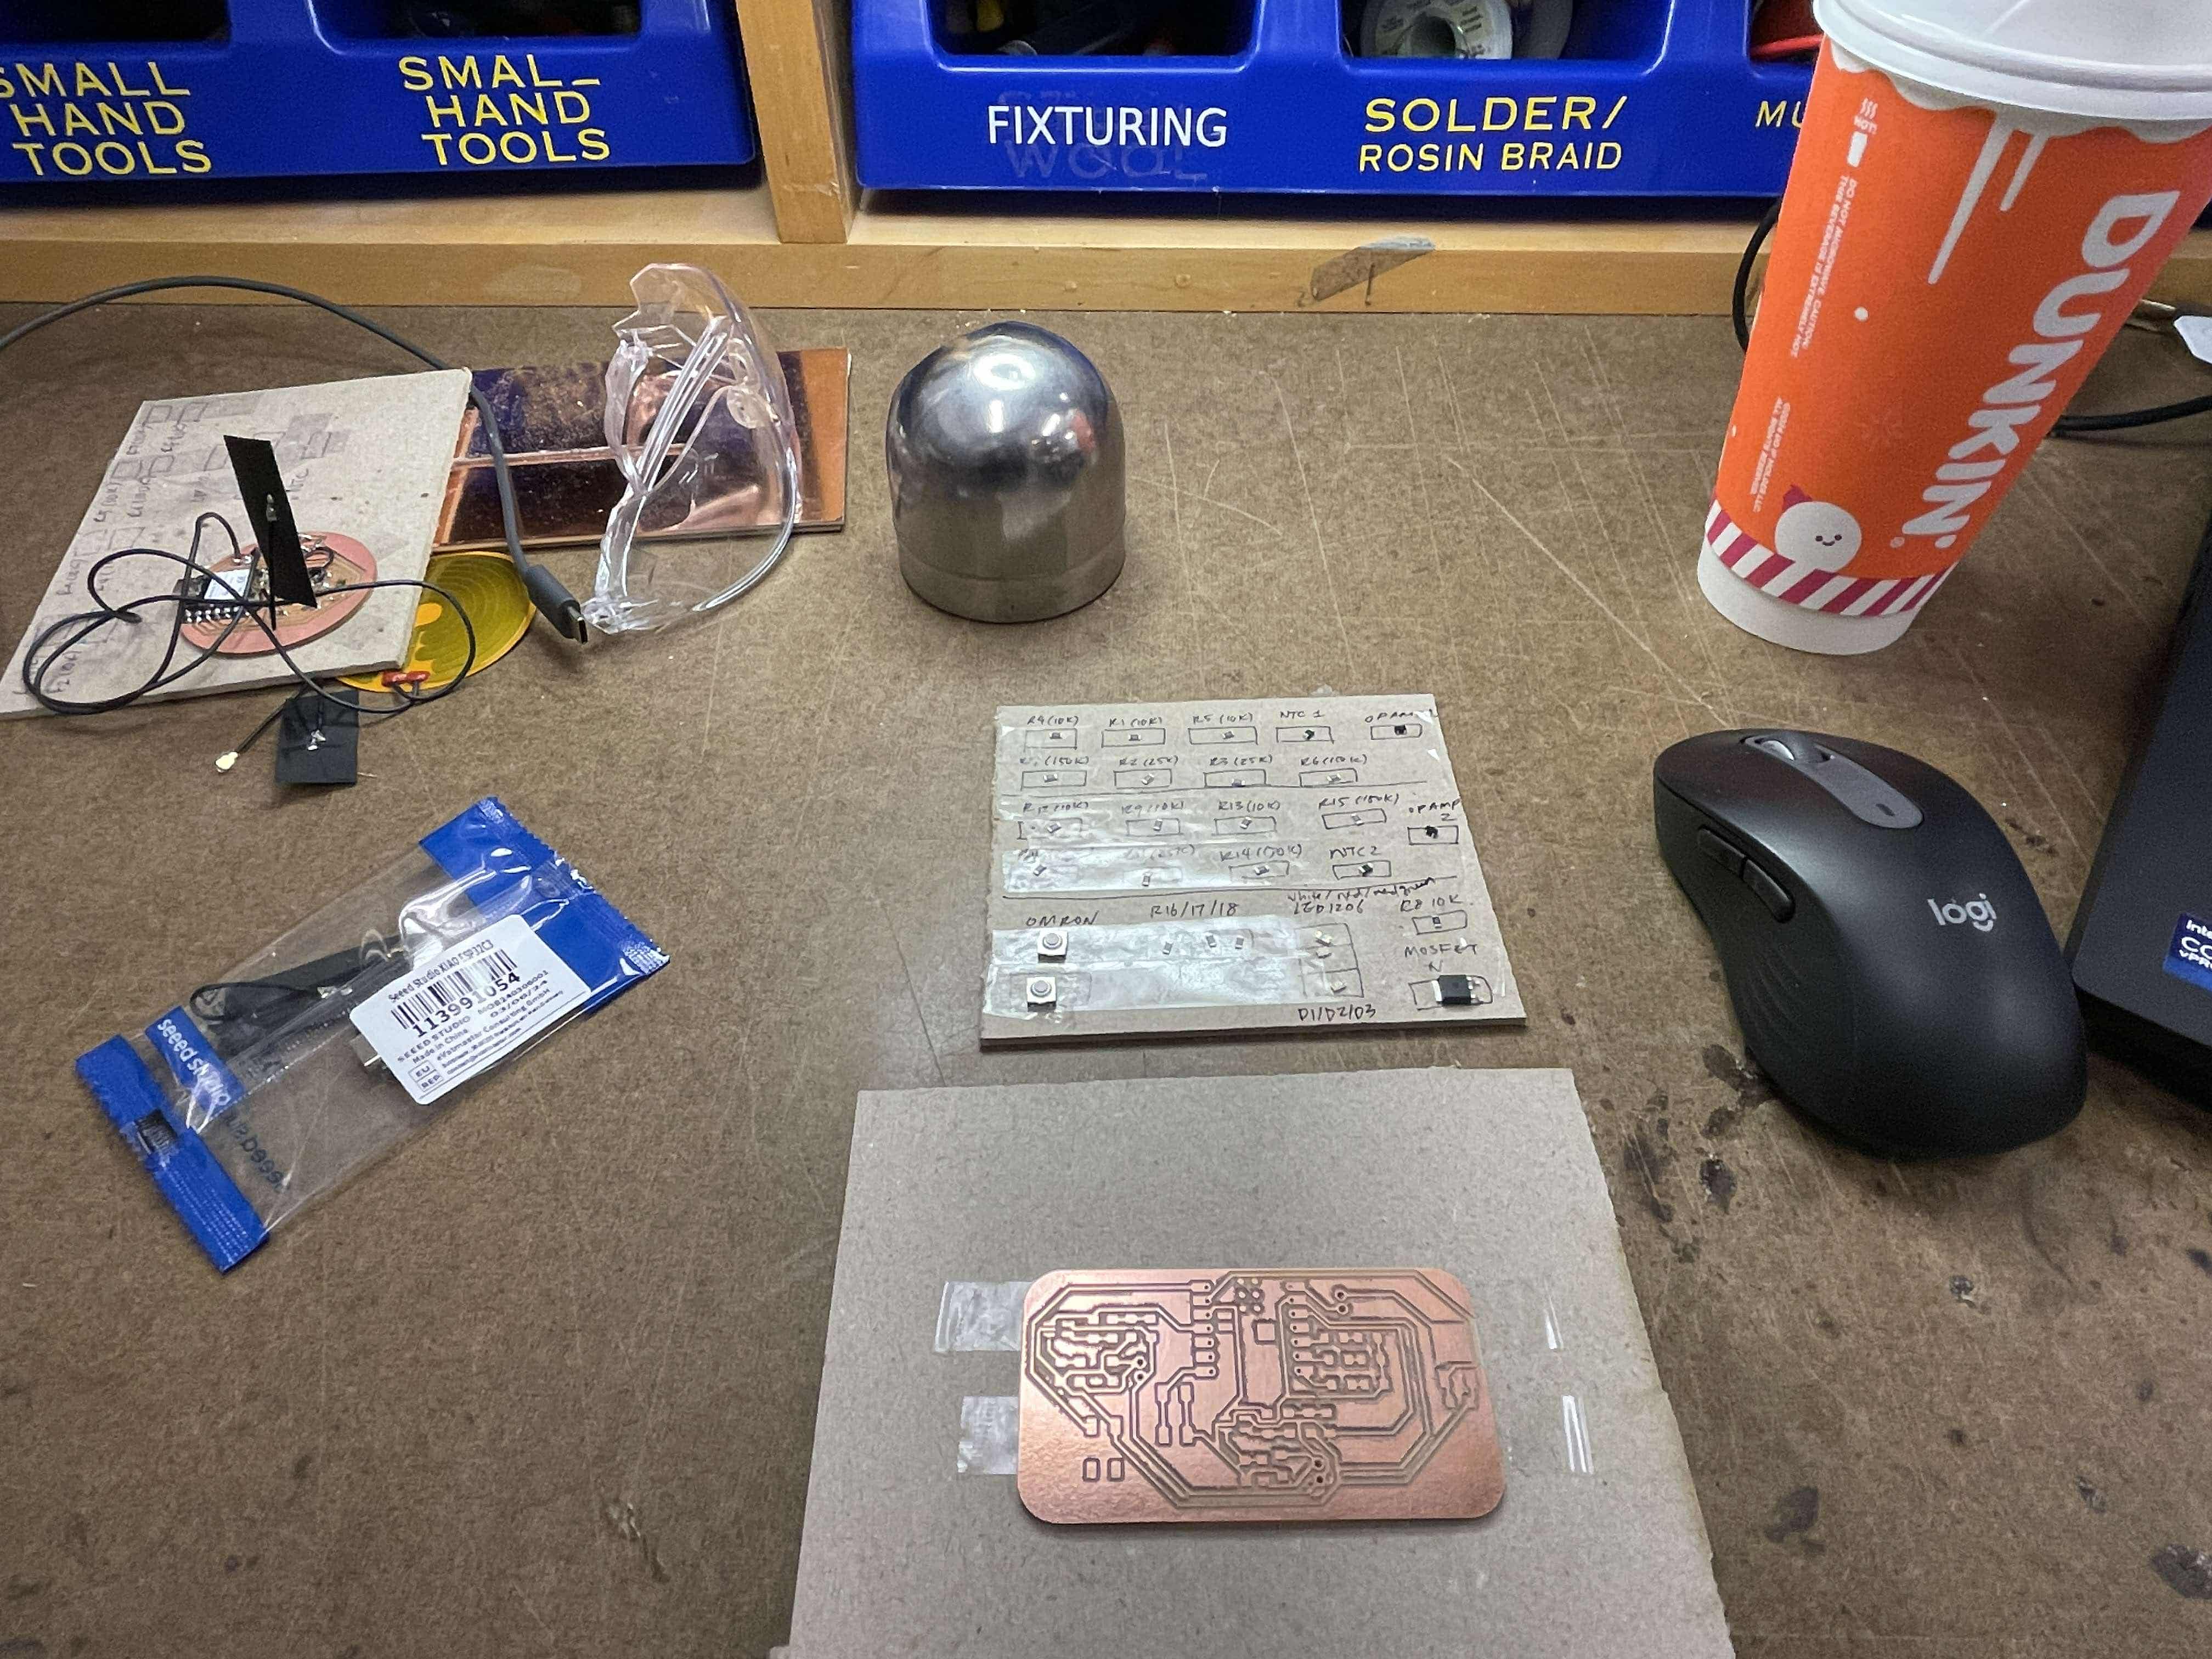
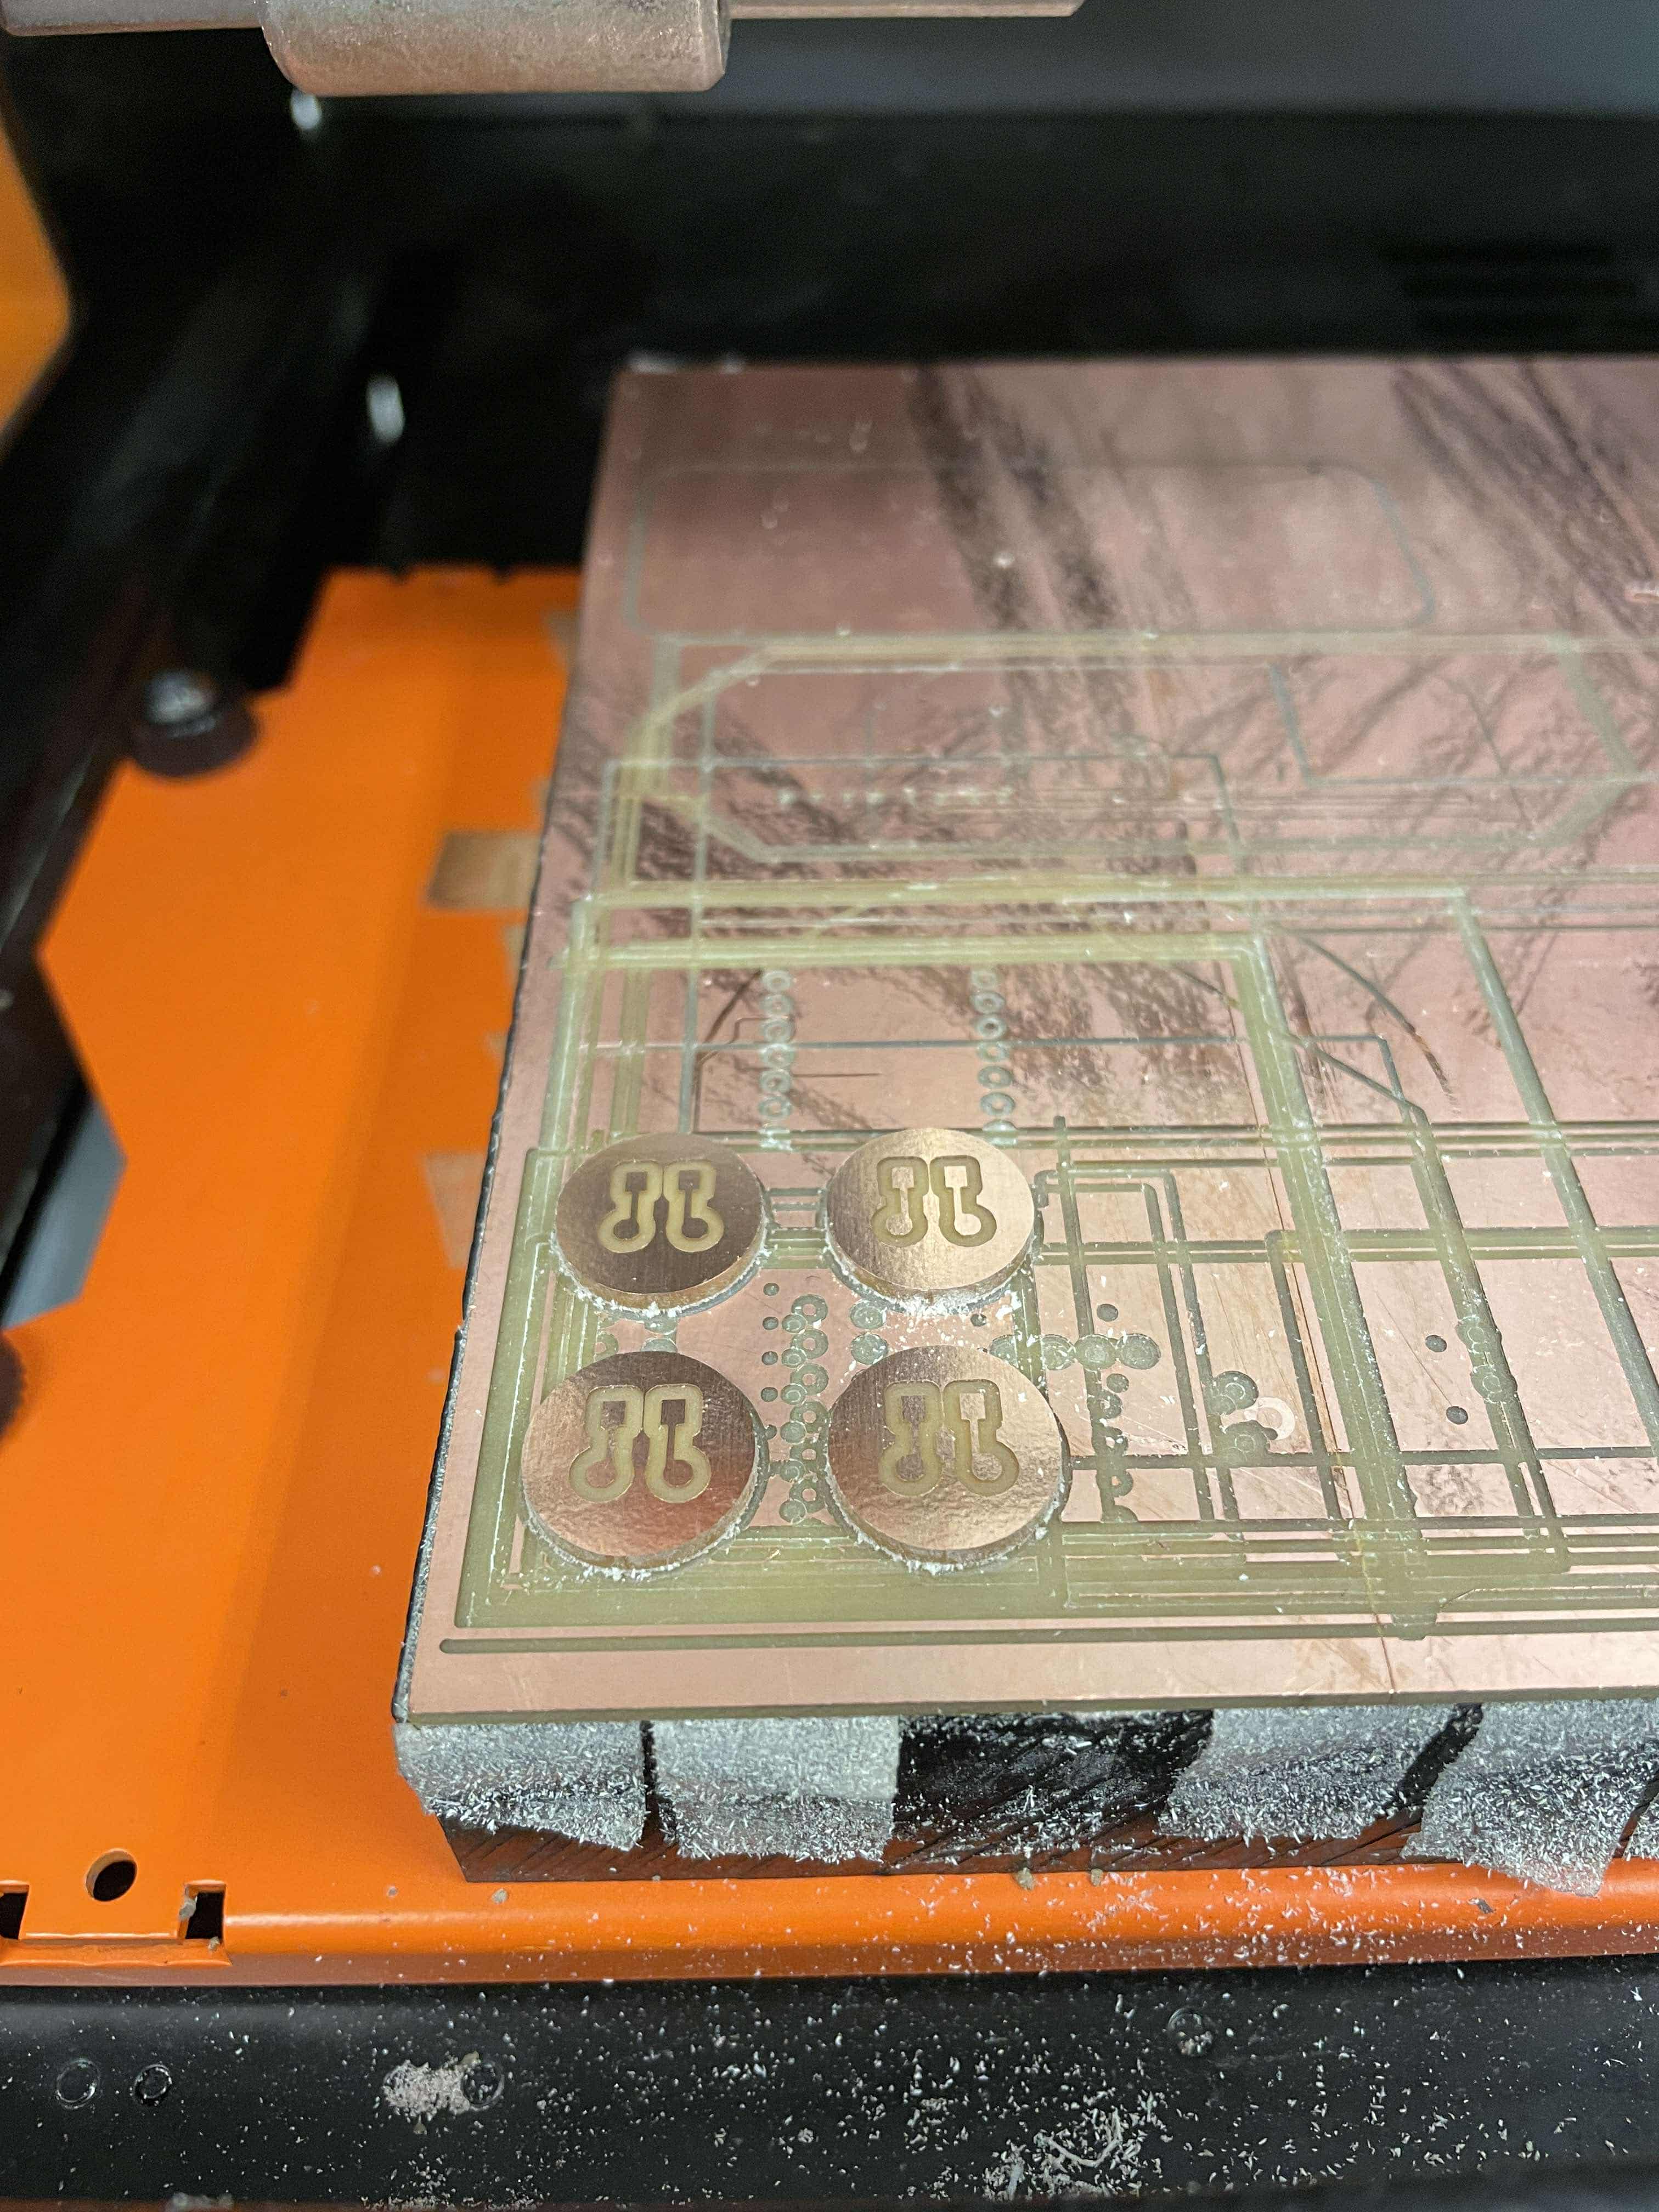
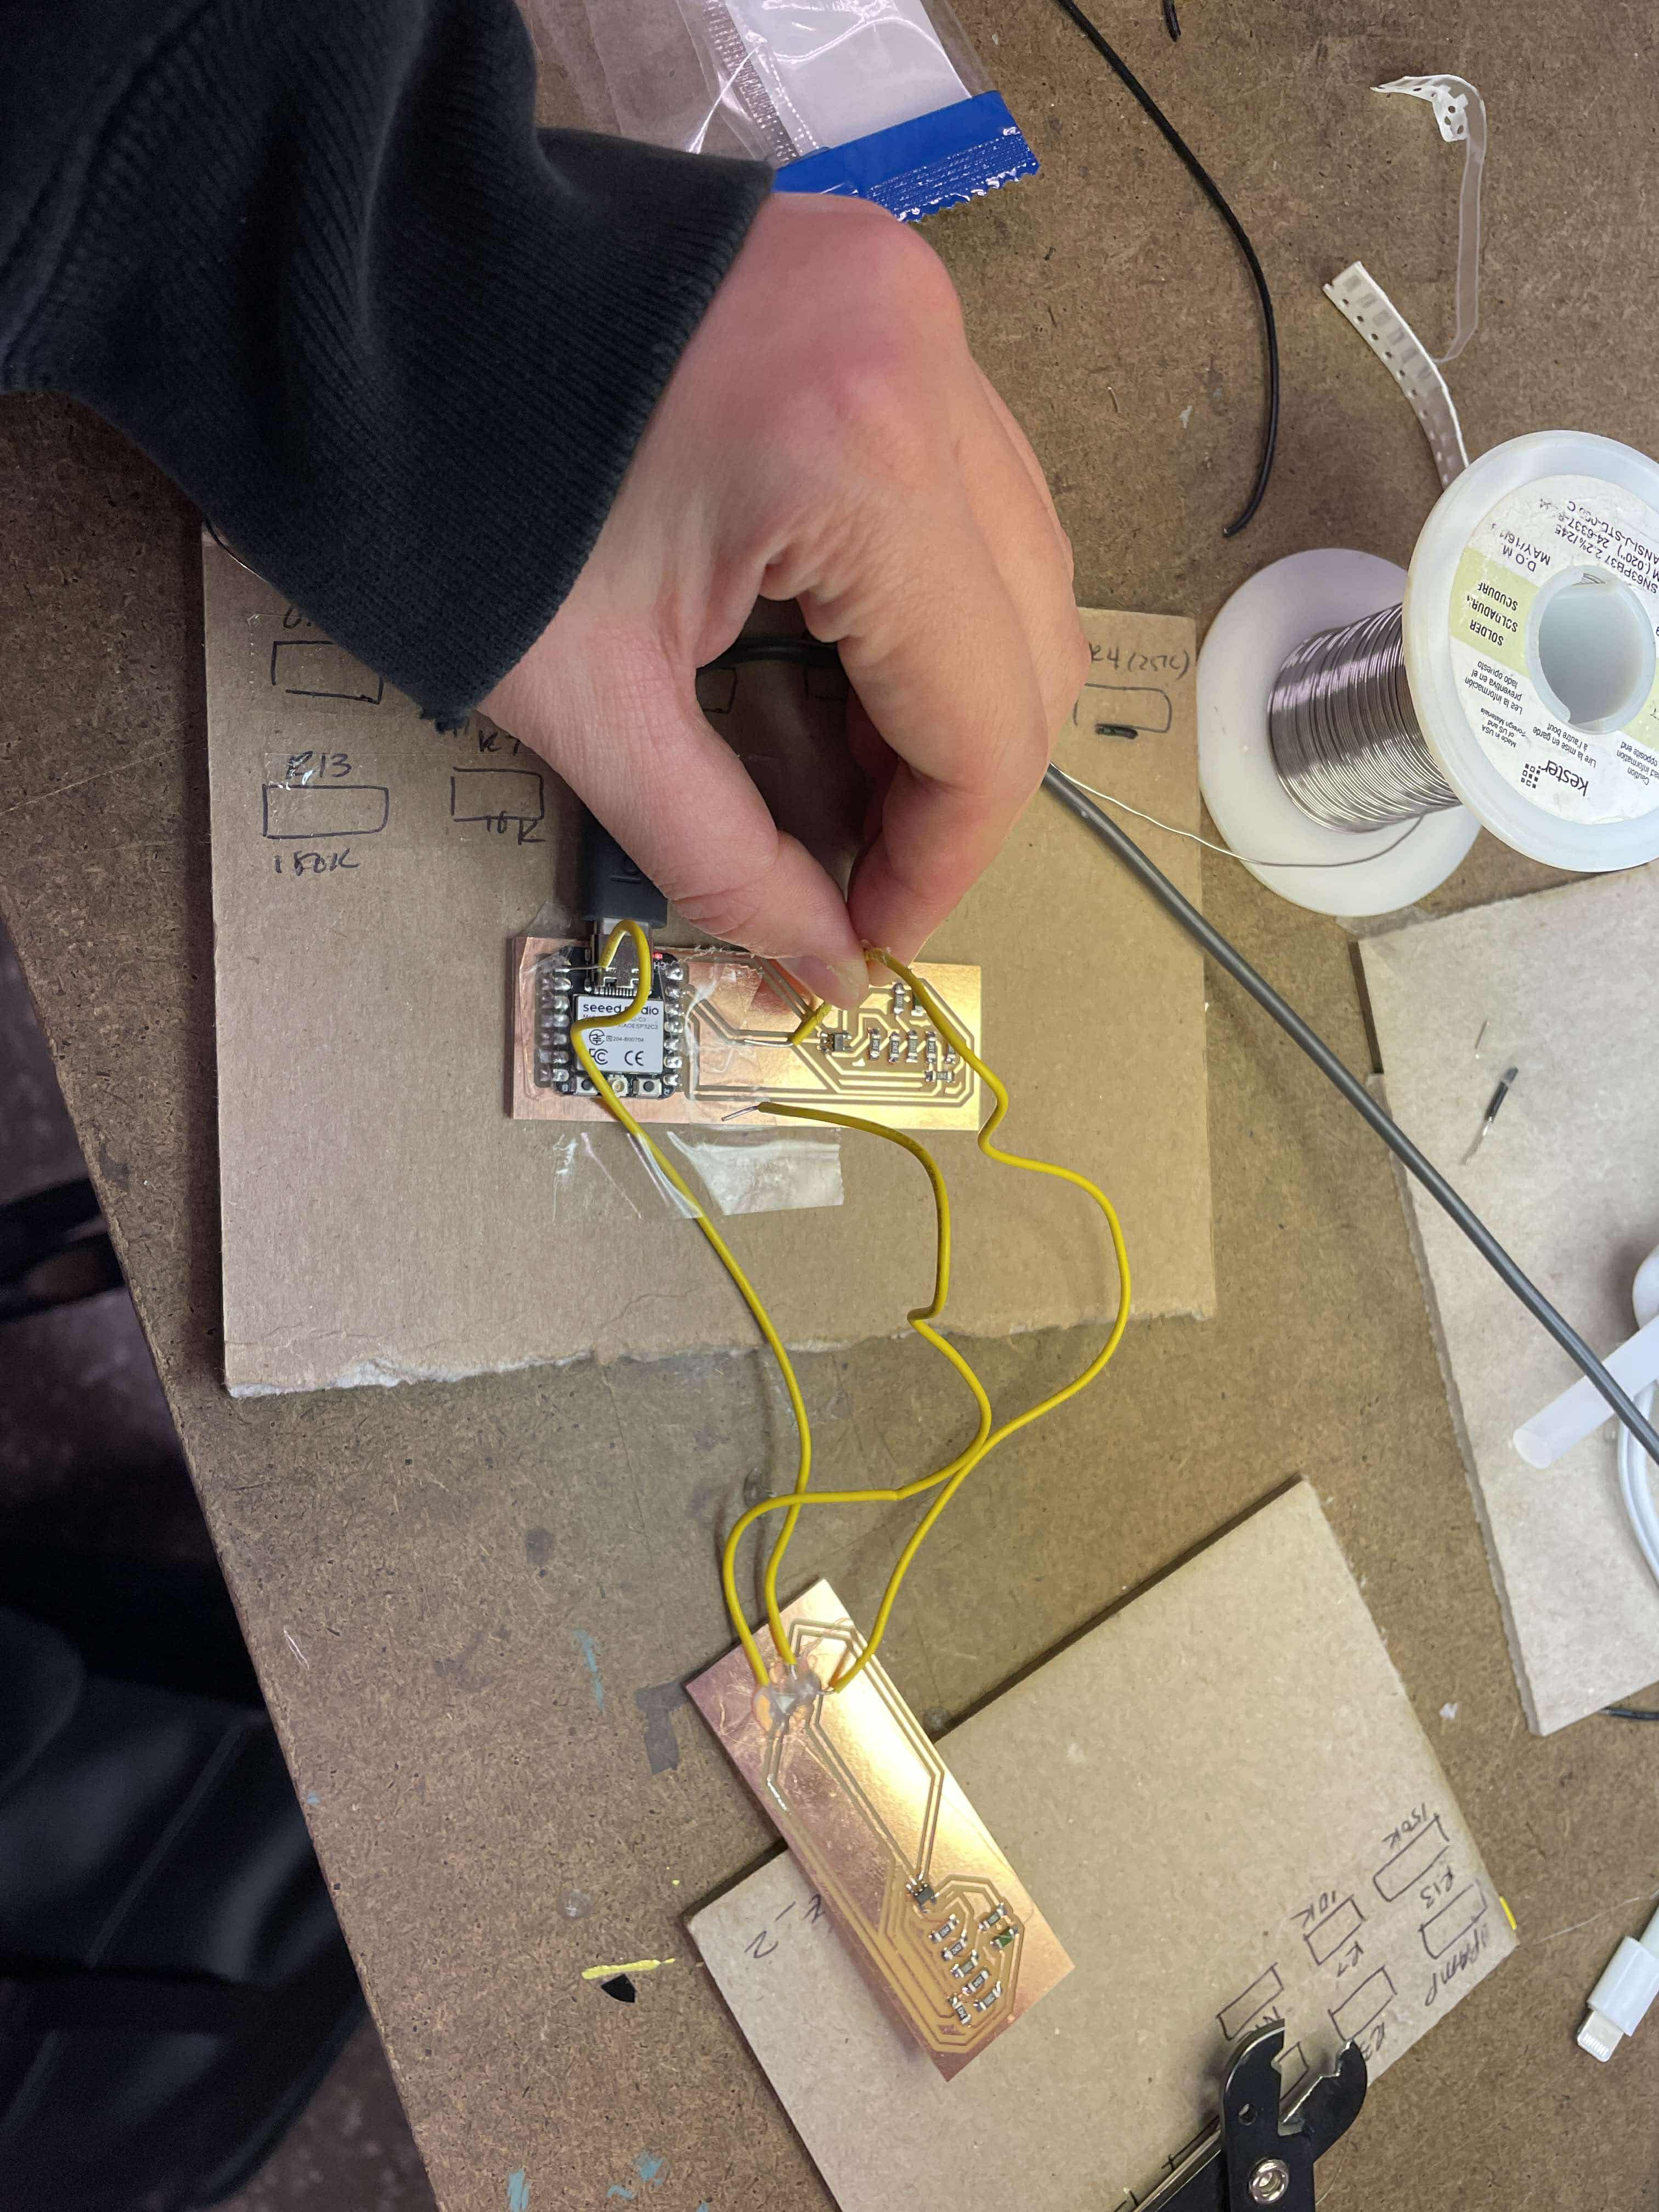
After fixing the pinouts, I milled two identical boards. I pulled out buttons and LEDs as well as daughter boards so they can be located anywher ein the device.
I had to remill it multiple times due to soldering and ripping cooper traces off, but I started to get the hang of how to solder small parts fast or using jumper wires and gluegun to hold pieces down when necessary.
This part took way longer than expected, and eventually put me in time crunch. As final board design was happening, I was able to write codes (for testing two ntcs, buttons, LED) and print the rest of hte pieces for the casing.
This part took way longer than expected, and eventually put me in time crunch. As final board design was happening, I was able to write codes (for testing two ntcs, buttons, LED) and print the rest of hte pieces for the casing.
December 15-16, 2024
Putting things together was not a huge trouble, but getting all the parts ready (via 3d printing / laser cutting) took a long time. Code development for sending and receiving data were also simutaneoously happening.
I used ESP NOW for boards to communicate. I realized I assembled things at a different order, so had to cut and restitch wires together. Quentin showed me a way to create connection so I can attach and dettach.
(ran out of time to document - 12/18 7am, but will upload the codes in three hours).
December 18, 2024
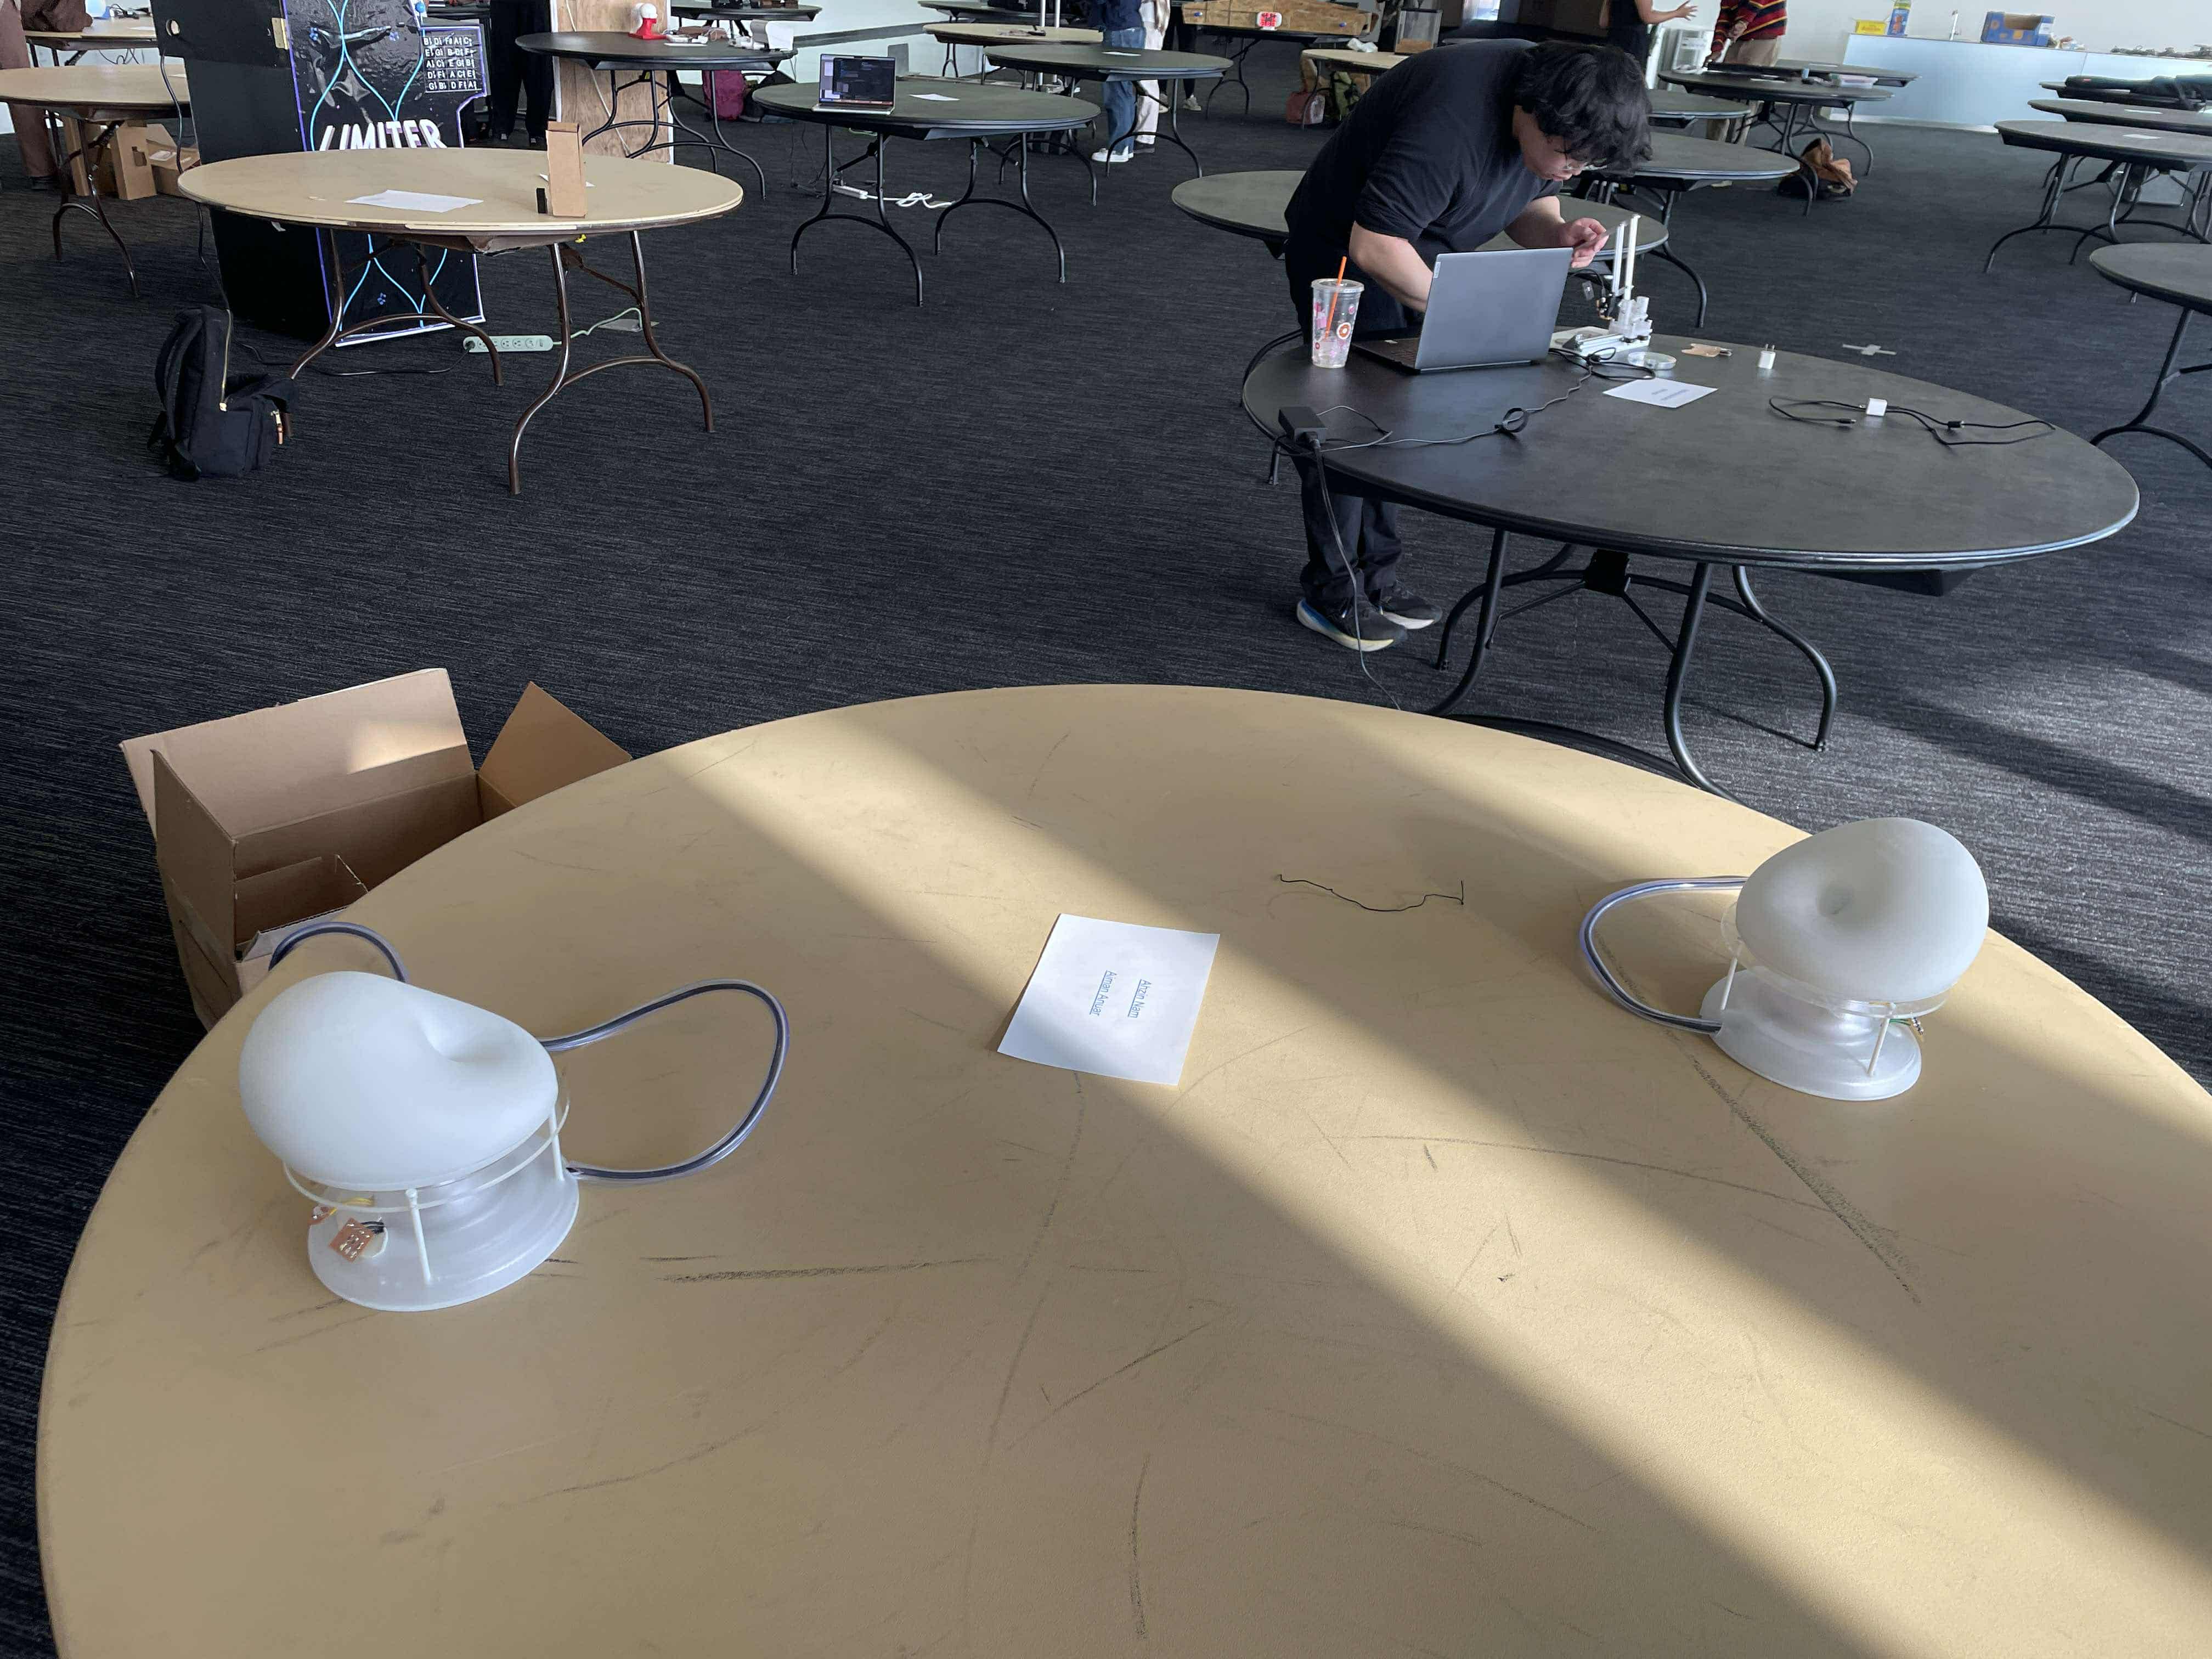
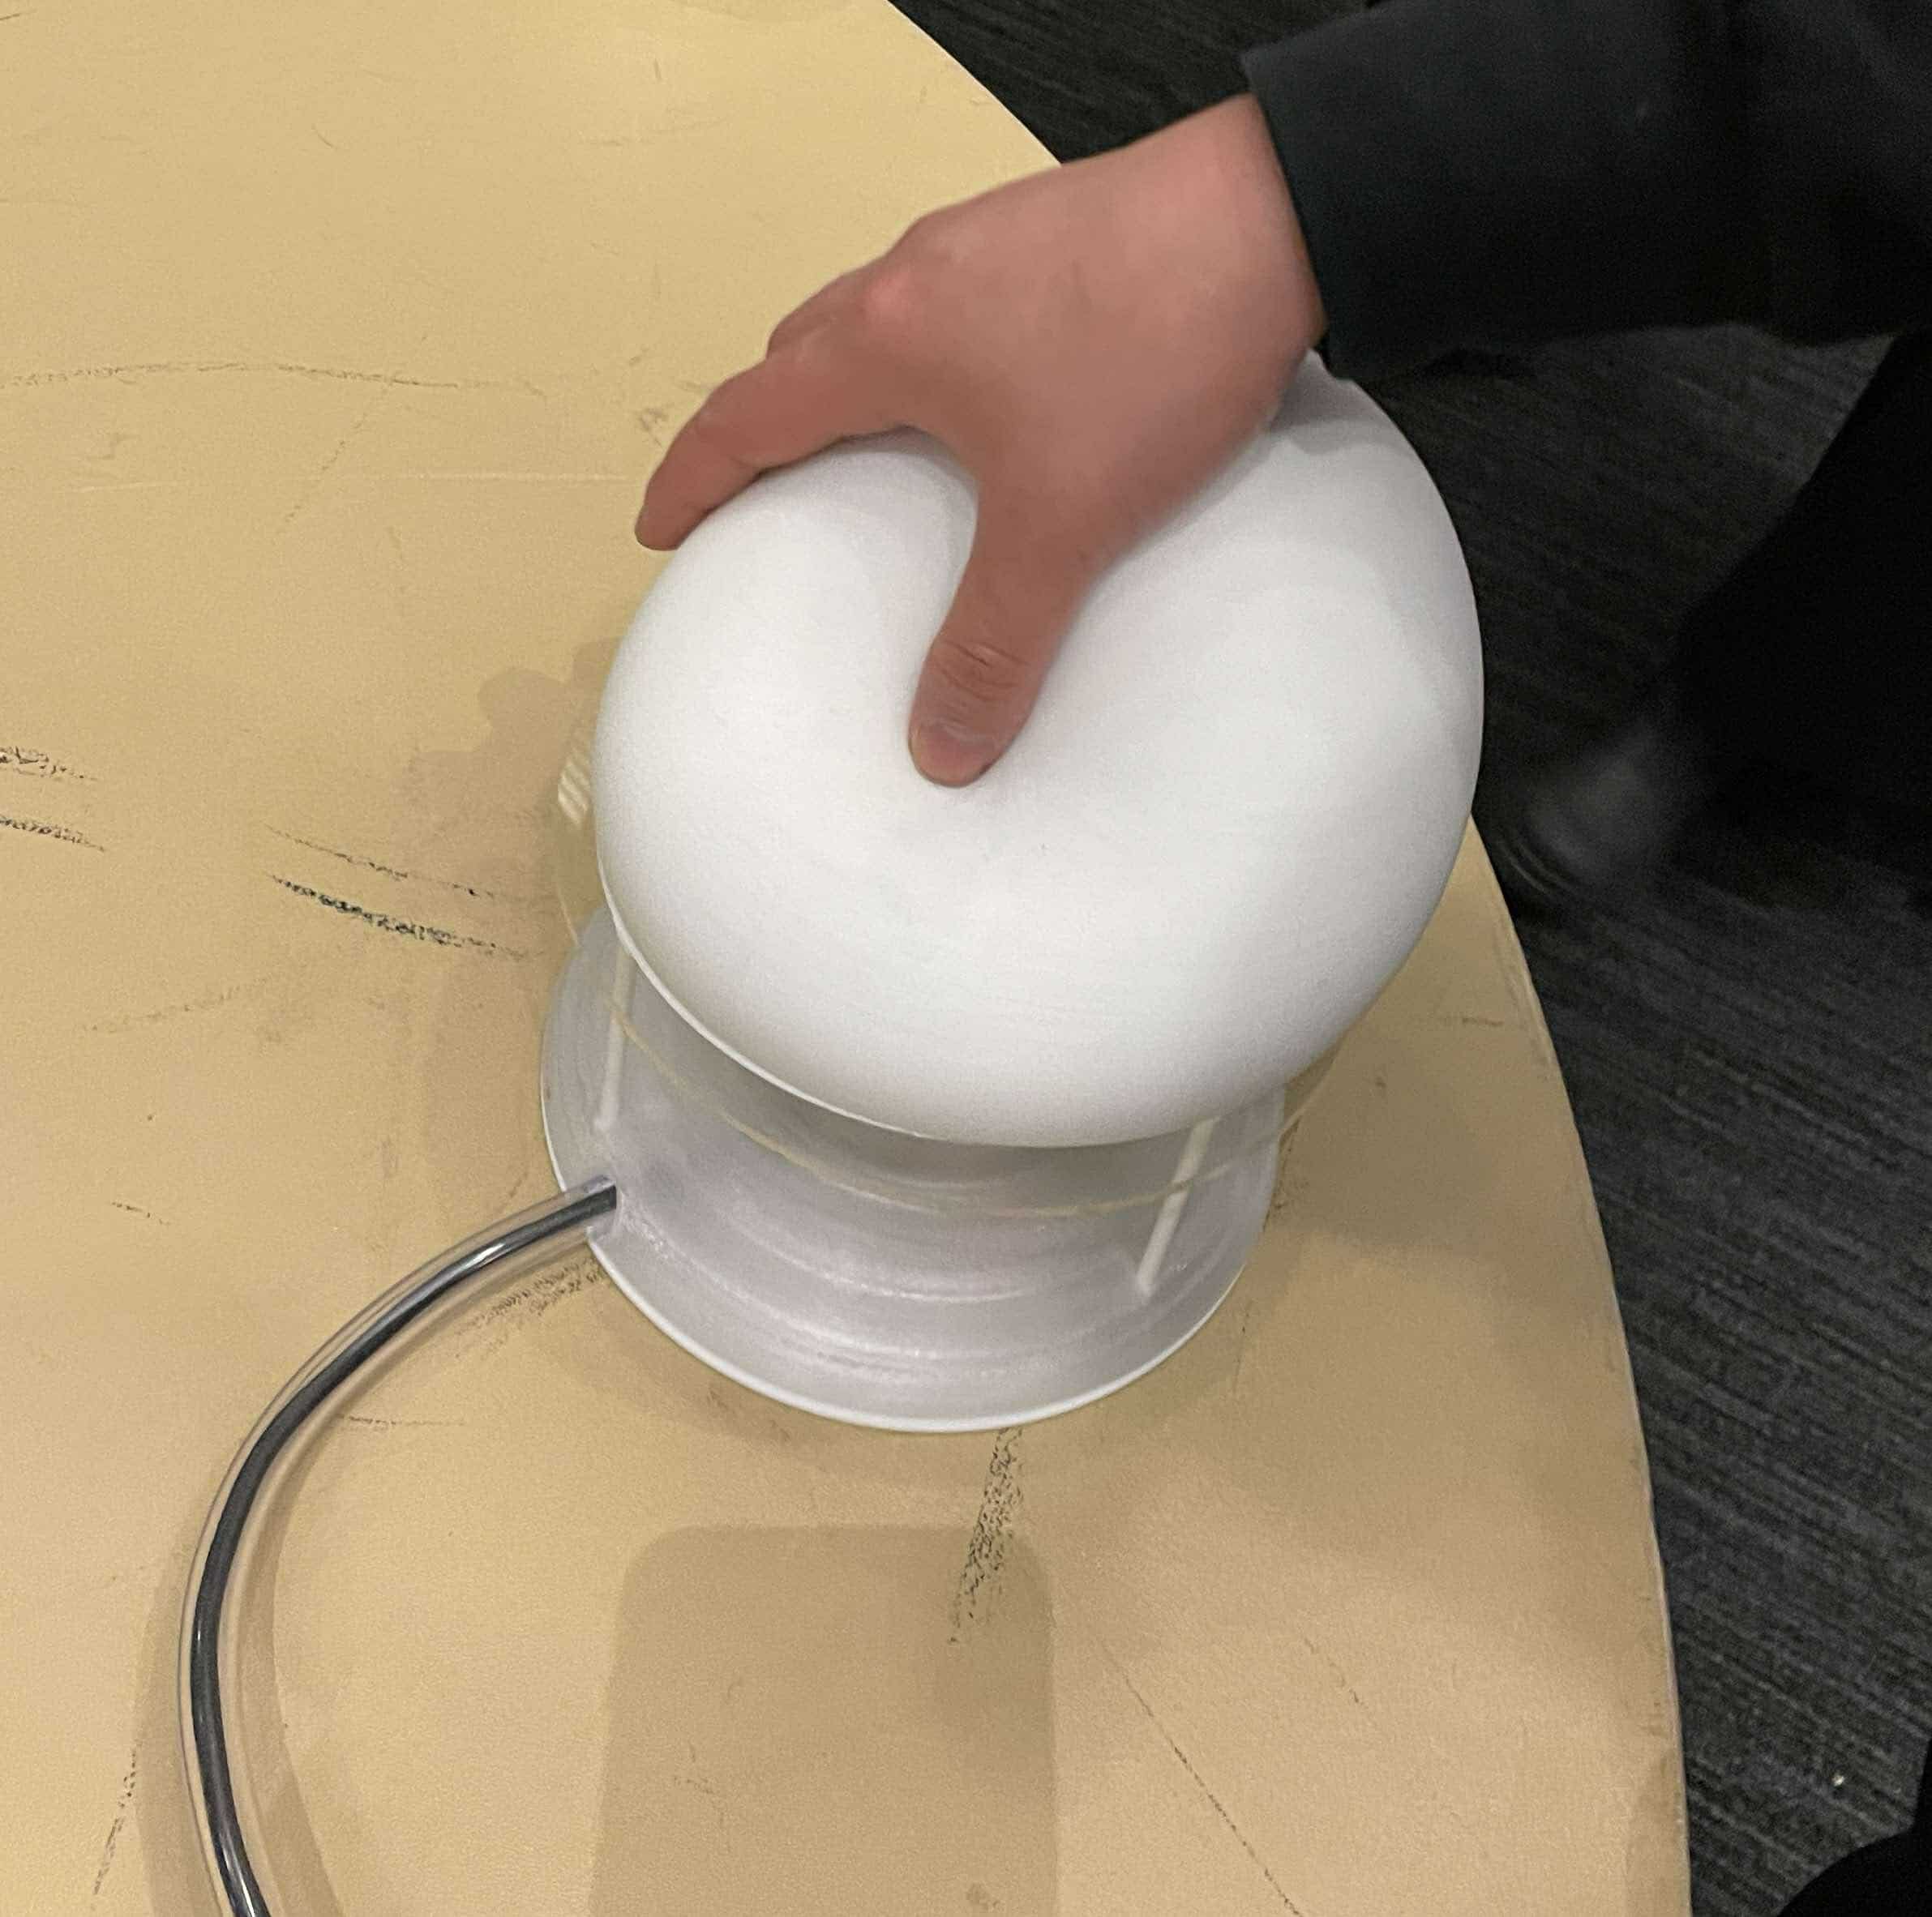
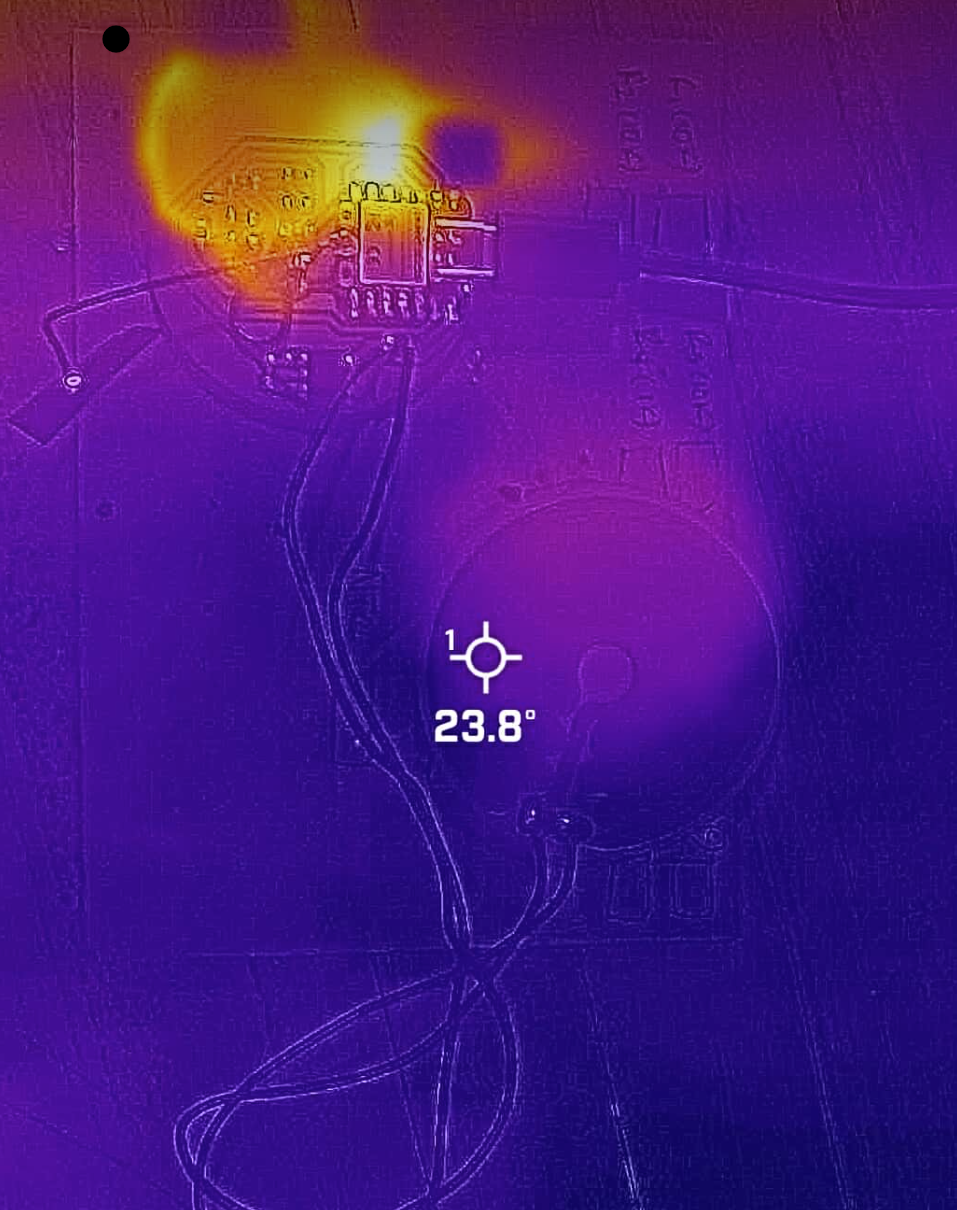
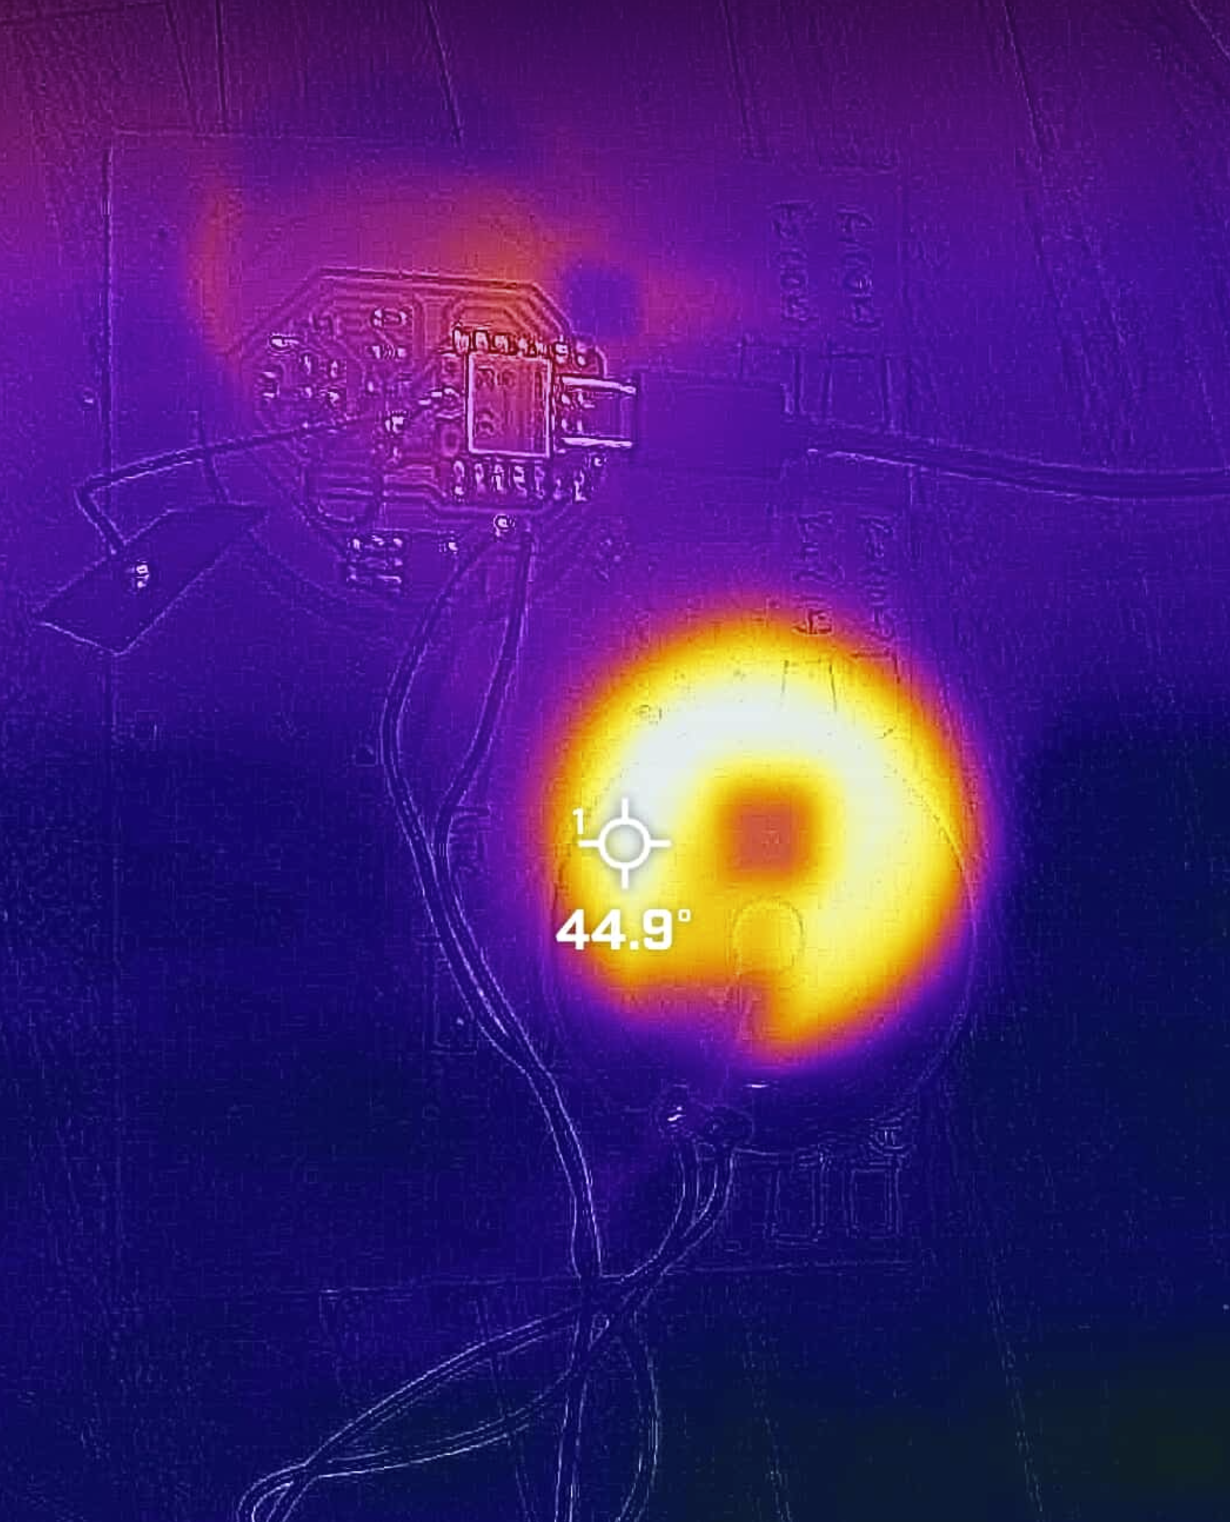
All the parts and coding were working by 16th night, and on 17th (the final) morning, I fixed all the pieces and brough it. People loved the forms, and although the heating happened slowly, people mentioned how surreal it feels to feel other people's presence through temperature.
I have thermalimaging and videos of the final project, but I will also upload them soon (probably by noon of 18th).
FINAL VIDEO